


This article features the new Meditlink 2.3 software which has some advanced functionality. One of the greatest achievements is he ability to tell the scanner to avoid imaging certain colors like green and blue. This greatly facilitates the imaging of full arches as you can let your gloves / fingers guide the camera and displace all the soft tissue that impedes image capturing. We also feature how easy it is to launch CAD software to design the restoration and mill it out of lithium disilicate material
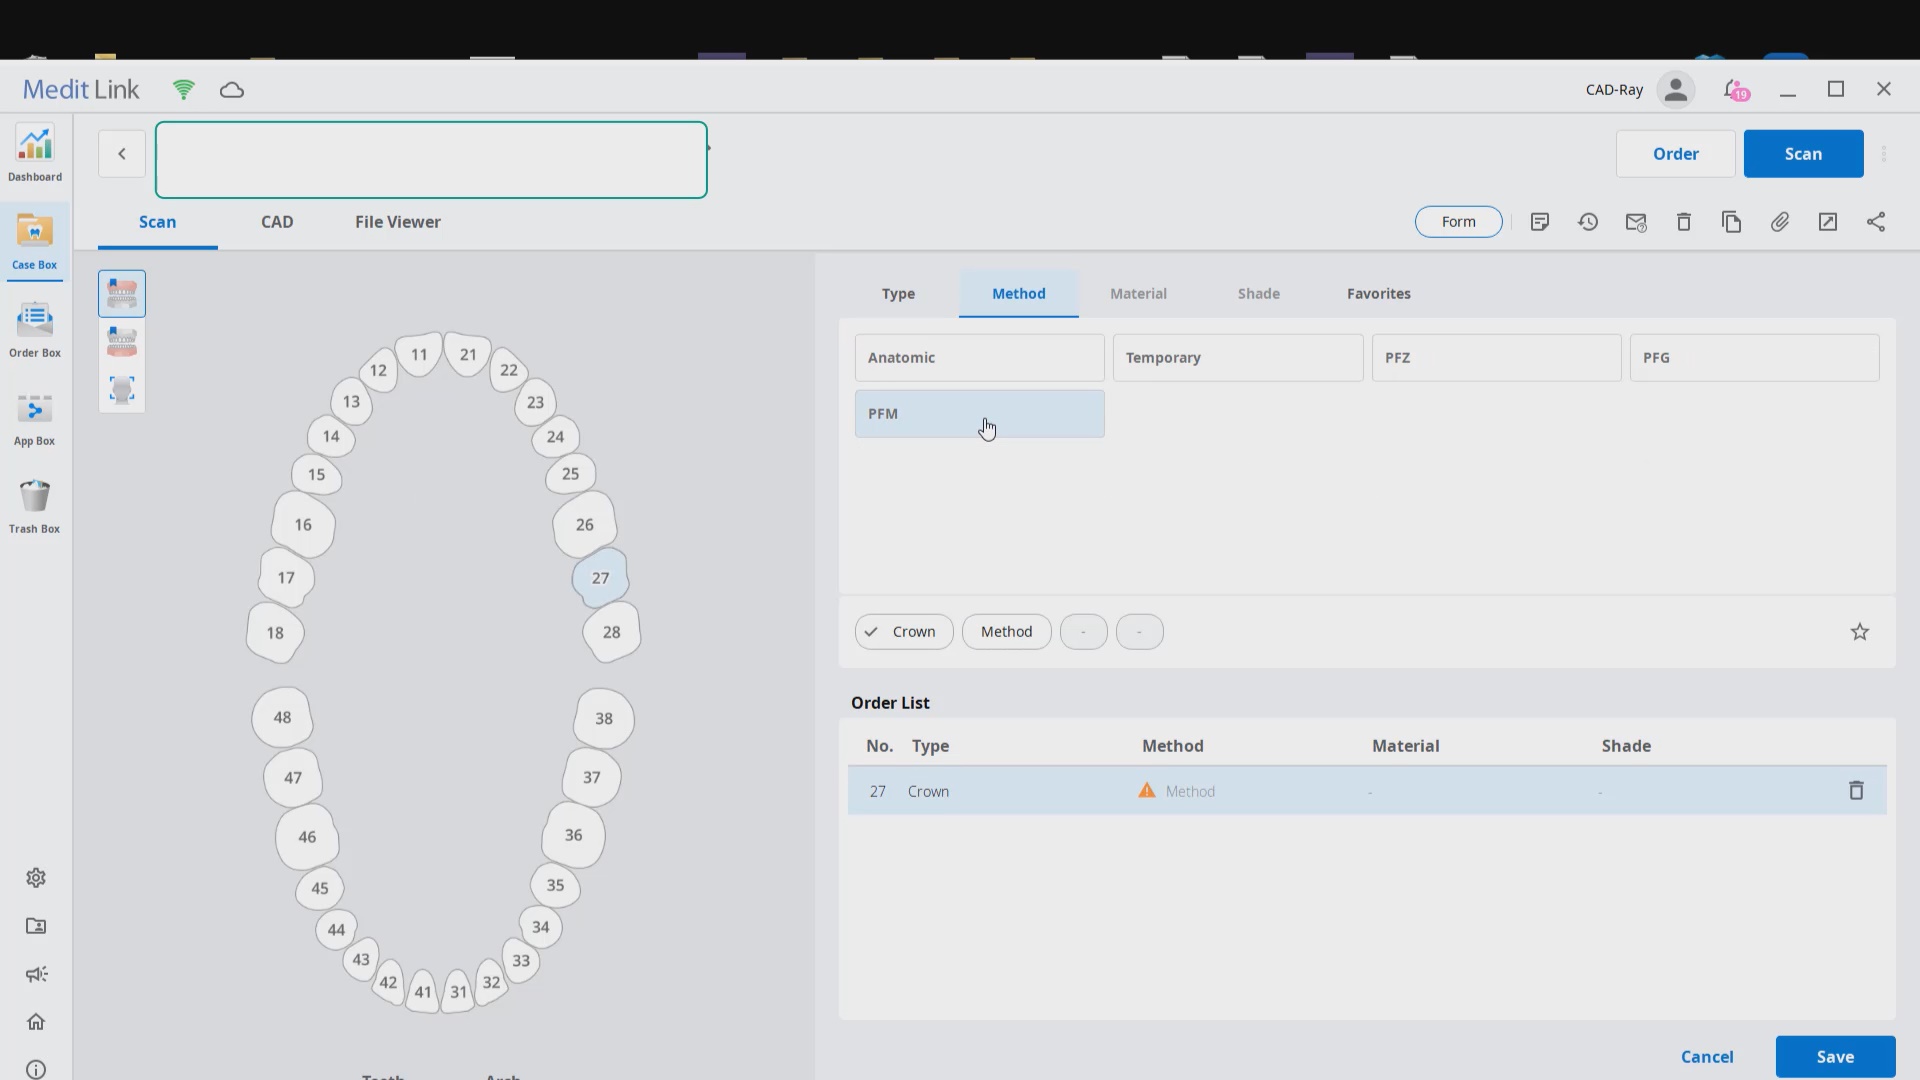
Case set up: here we enter the patients name and a simple tab appears where we chose the material and restoration tab. Once you image, you can place an order to the lab or you can advance to the CAD tab:
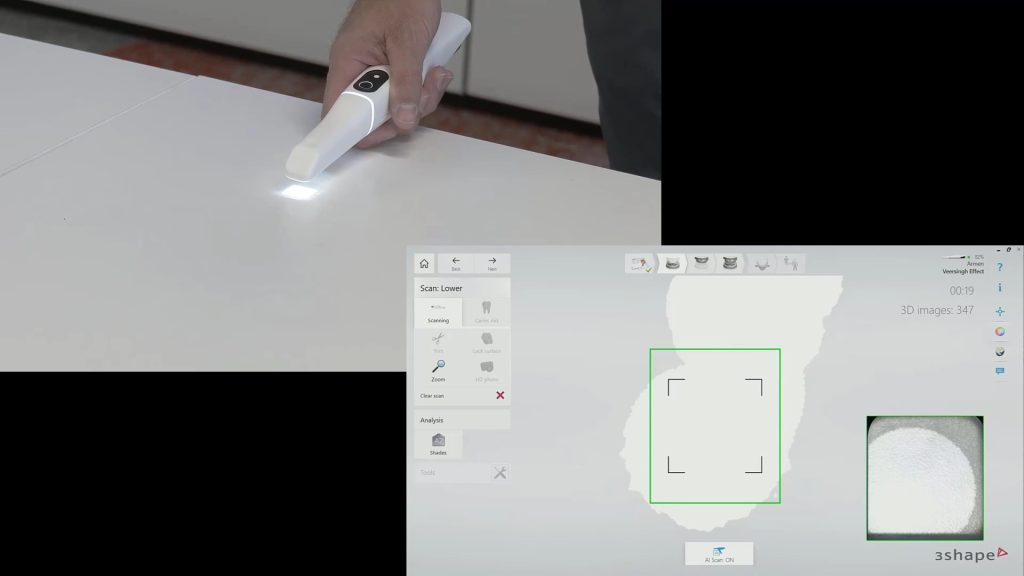
After the Rx has been filled out, you can launch the Medit Scan and image the upper and lower arches. Please note how we tell the camera to avoid the color blue and it ignores the clinicians fingers during imaging. The upper jaw and lower jaw were captured, then the bite registration even before the preparation was finished. This allows the verification of proper reduction and space for the ceramic material
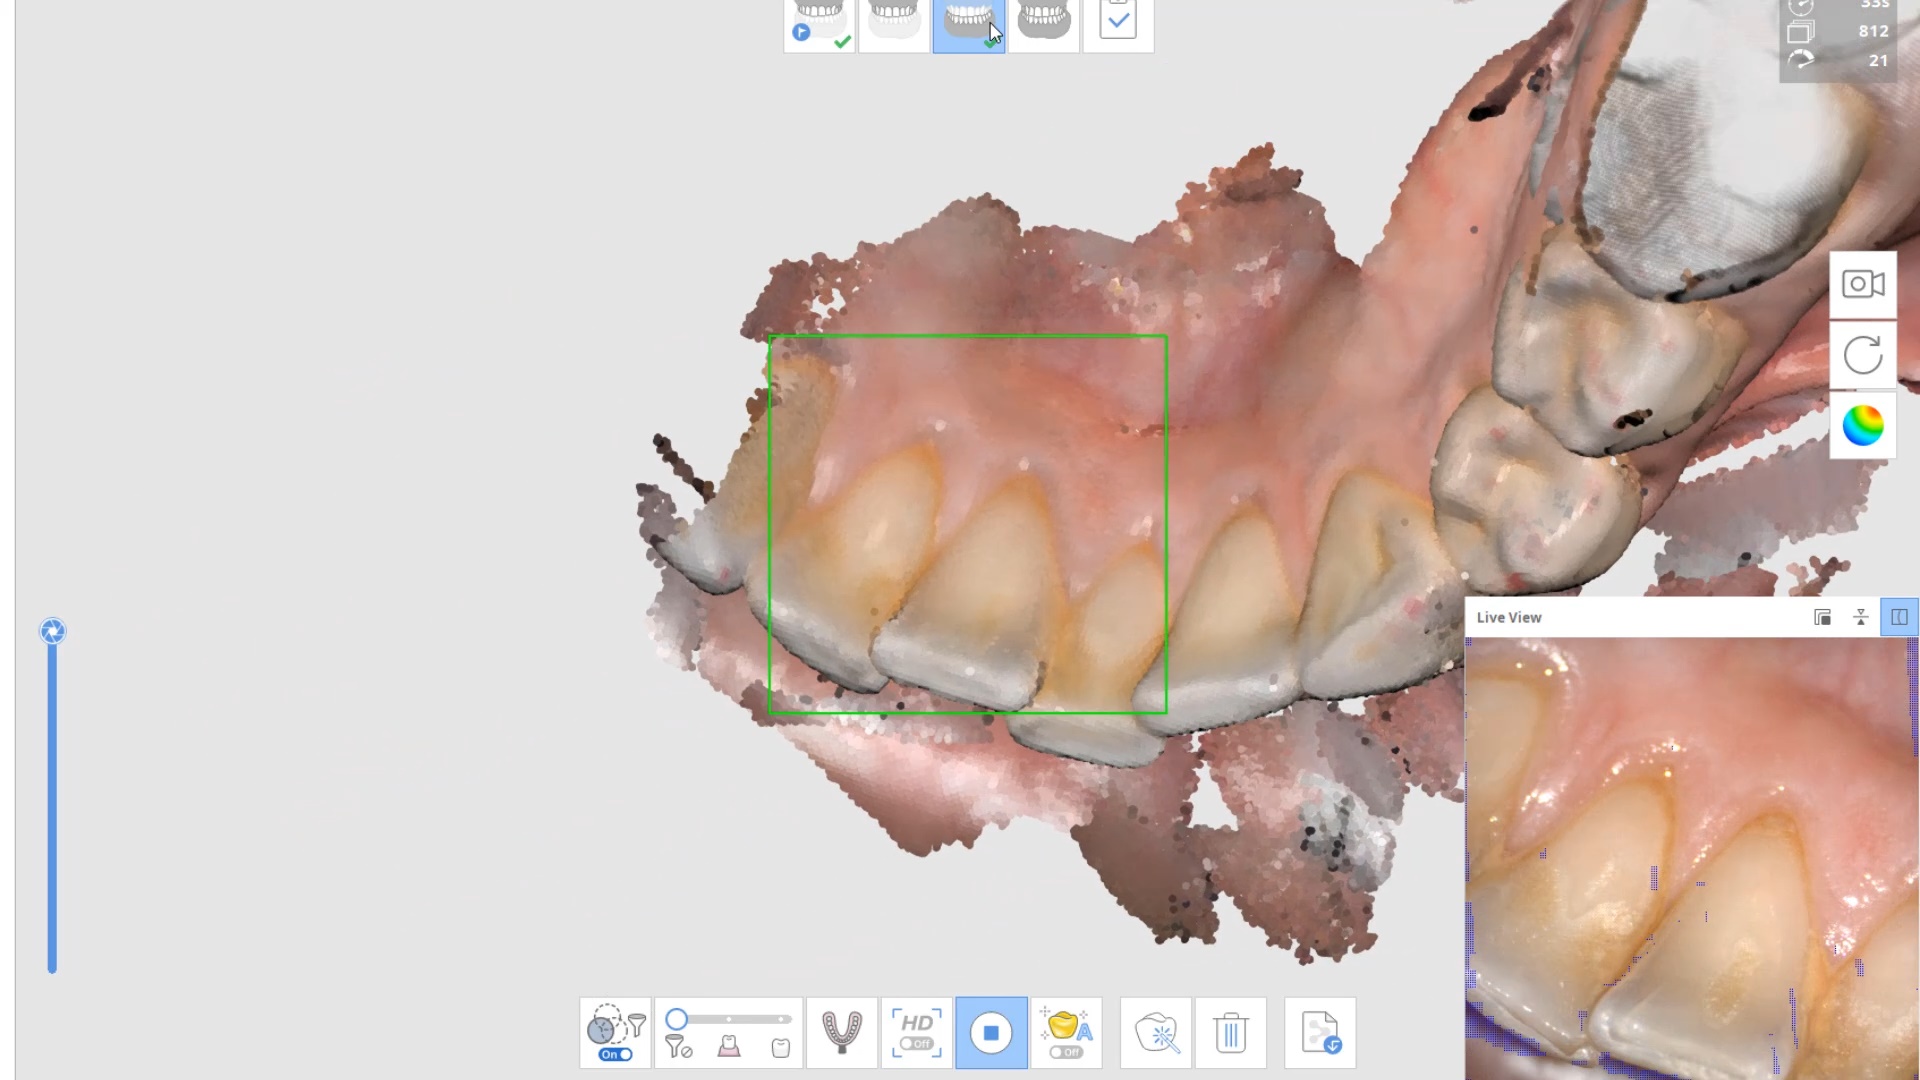
Lower Arch Scan
The lower arch is the most difficult area to scan as you frequently have to battle the tongue, saliva, and the lips. The optragate can be of great help but notice how we use the color filter to hide the blue gloves while we advance the camera. It is a great aid in facilitating the capture of the lower arch
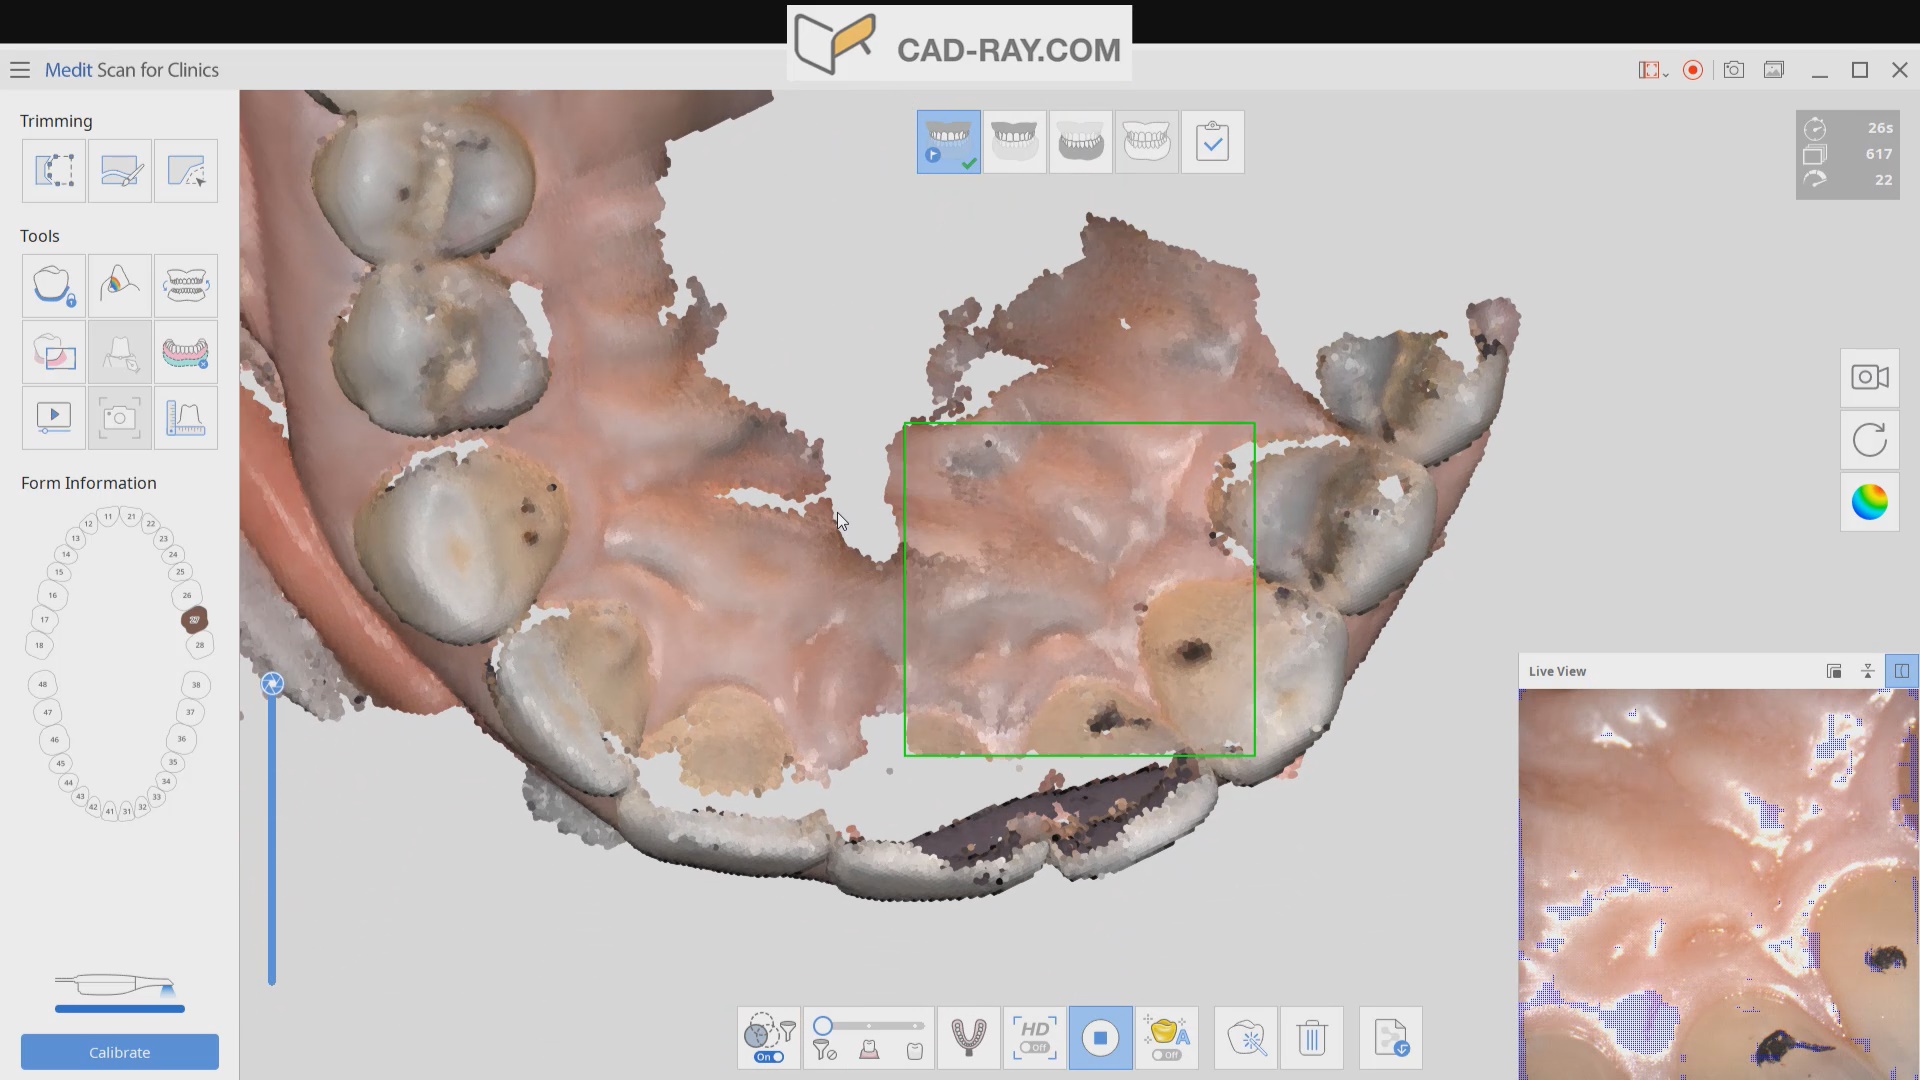
Upper Arch Scan
The same principle is applied to the upper arch. Notice that the software does not care if you start with the upper or lower arch. Here, you can visualize how the blue glove was used to displace the cheek and capture the pre-op condition of the upper second molar. The rest of the arch was easily imaged. It is not necessary to capture full arch impressions and this was done just for demonstration purposes. For a single unit case, generally imaging distal from the canine is adequate.
Checkingthe reduction and aquiiring the bite registration
We recommend that you capture the bite before you finish imaging the preparation. This gives you one last chance to verify that you have reduced enough to accommodate material thickness. You can see how we just take regular photos to document the lack of clearance and we continue to adjust the height of the preparation until we achieve the required space. We then activate the imaging process and capture the occlusal relationship between the upper jaw and the lower jaw
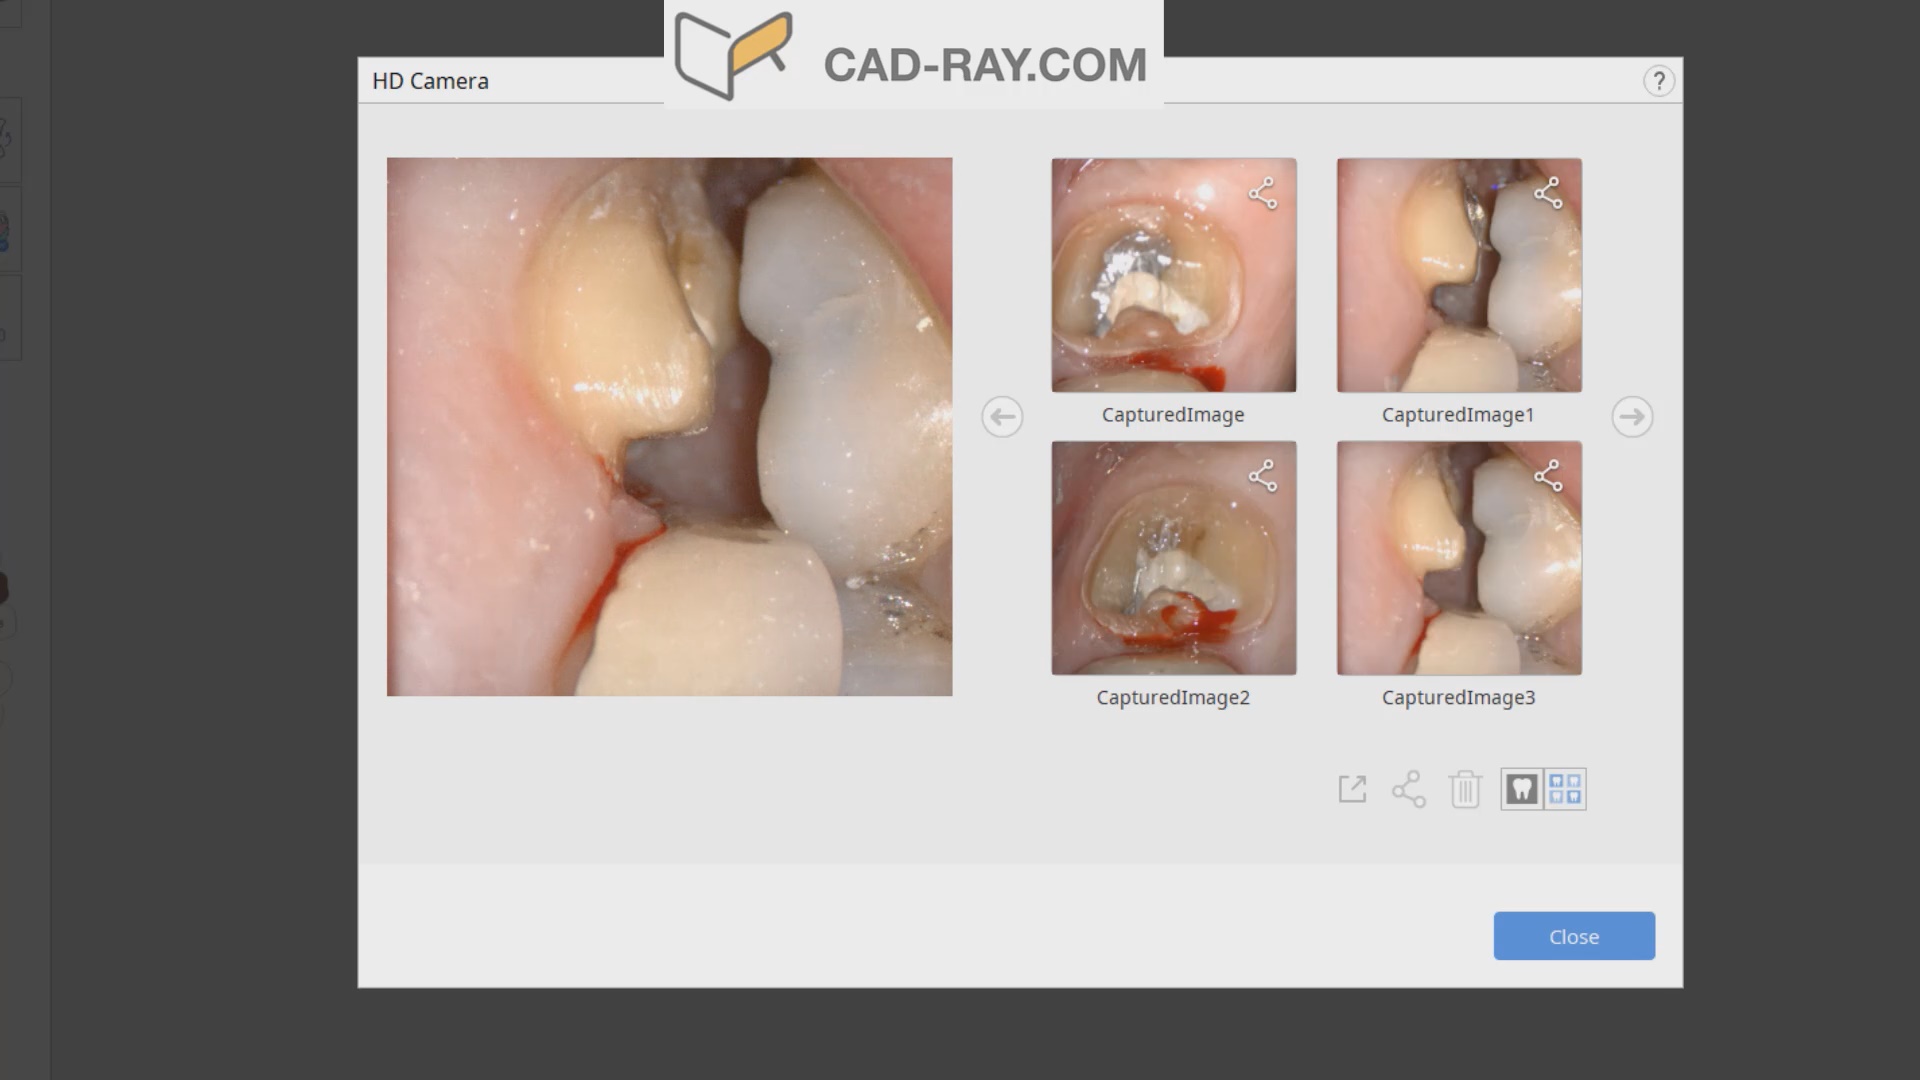
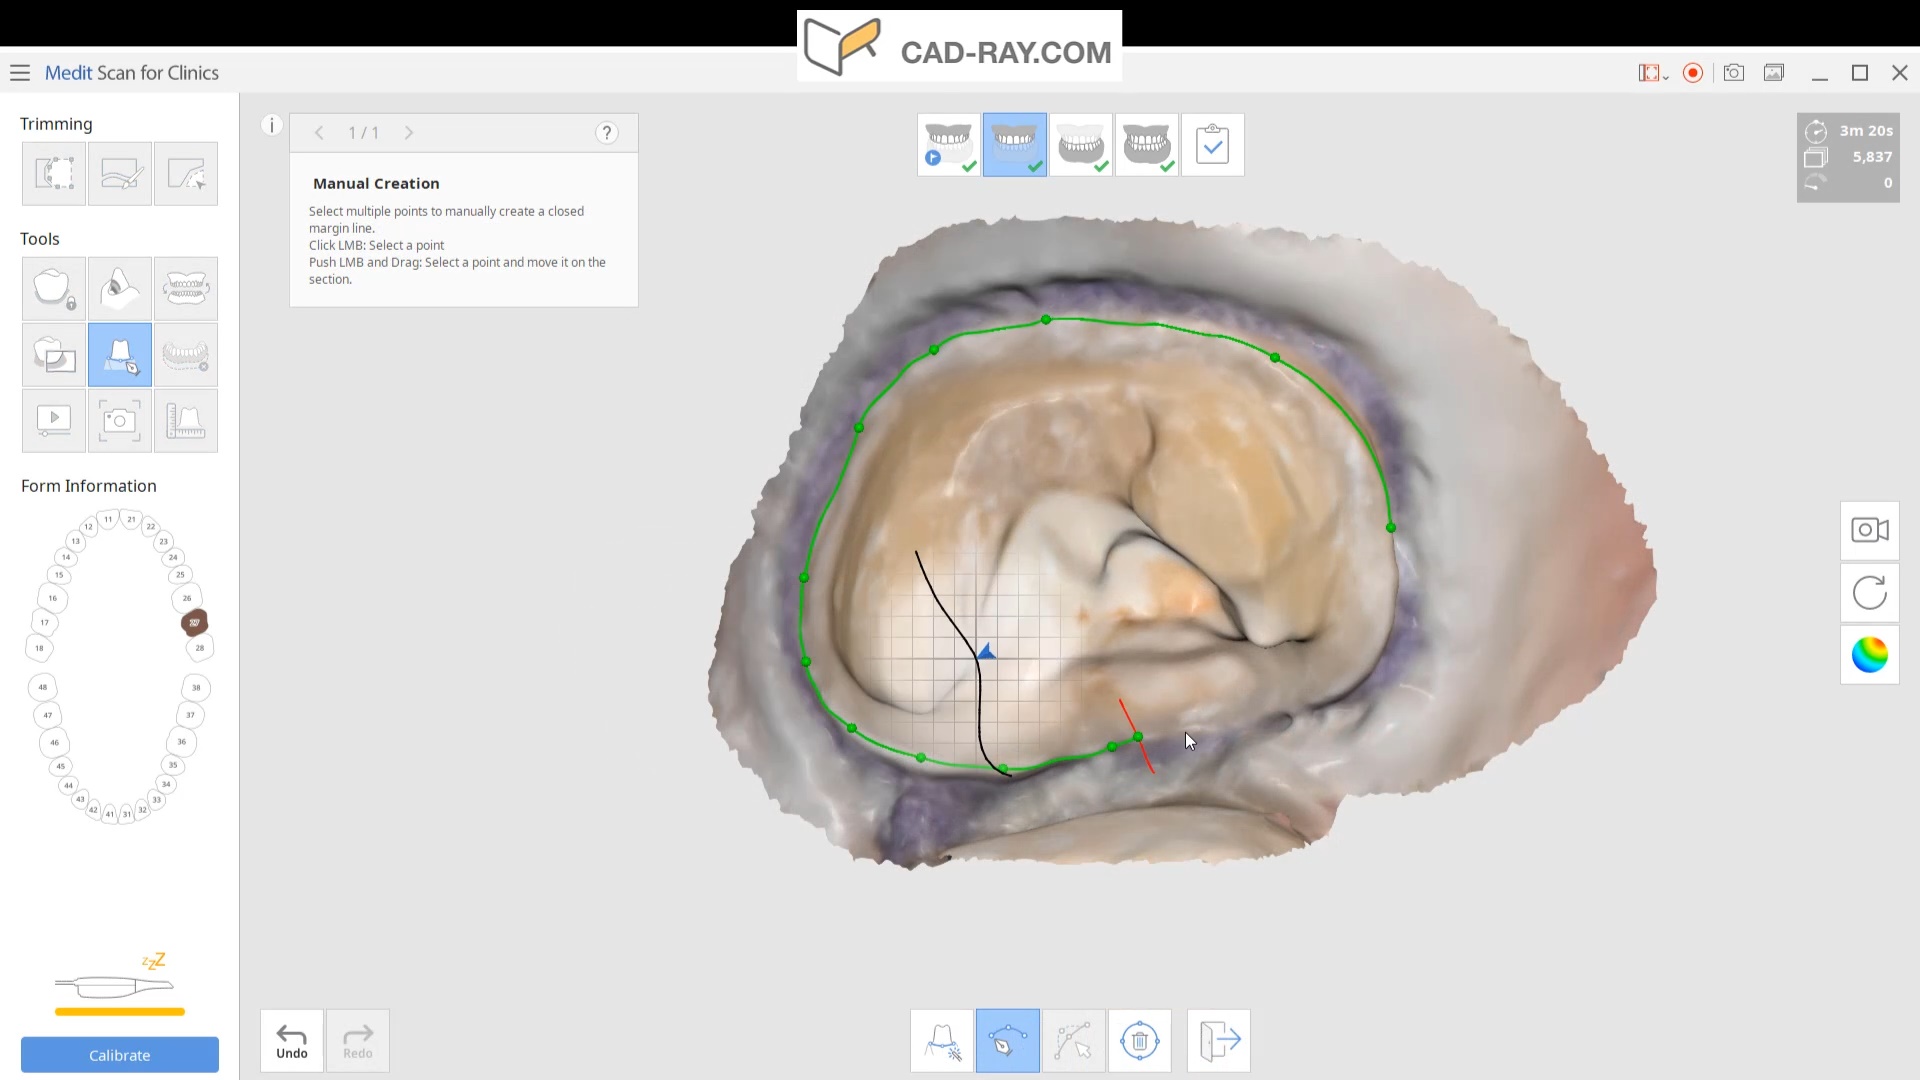
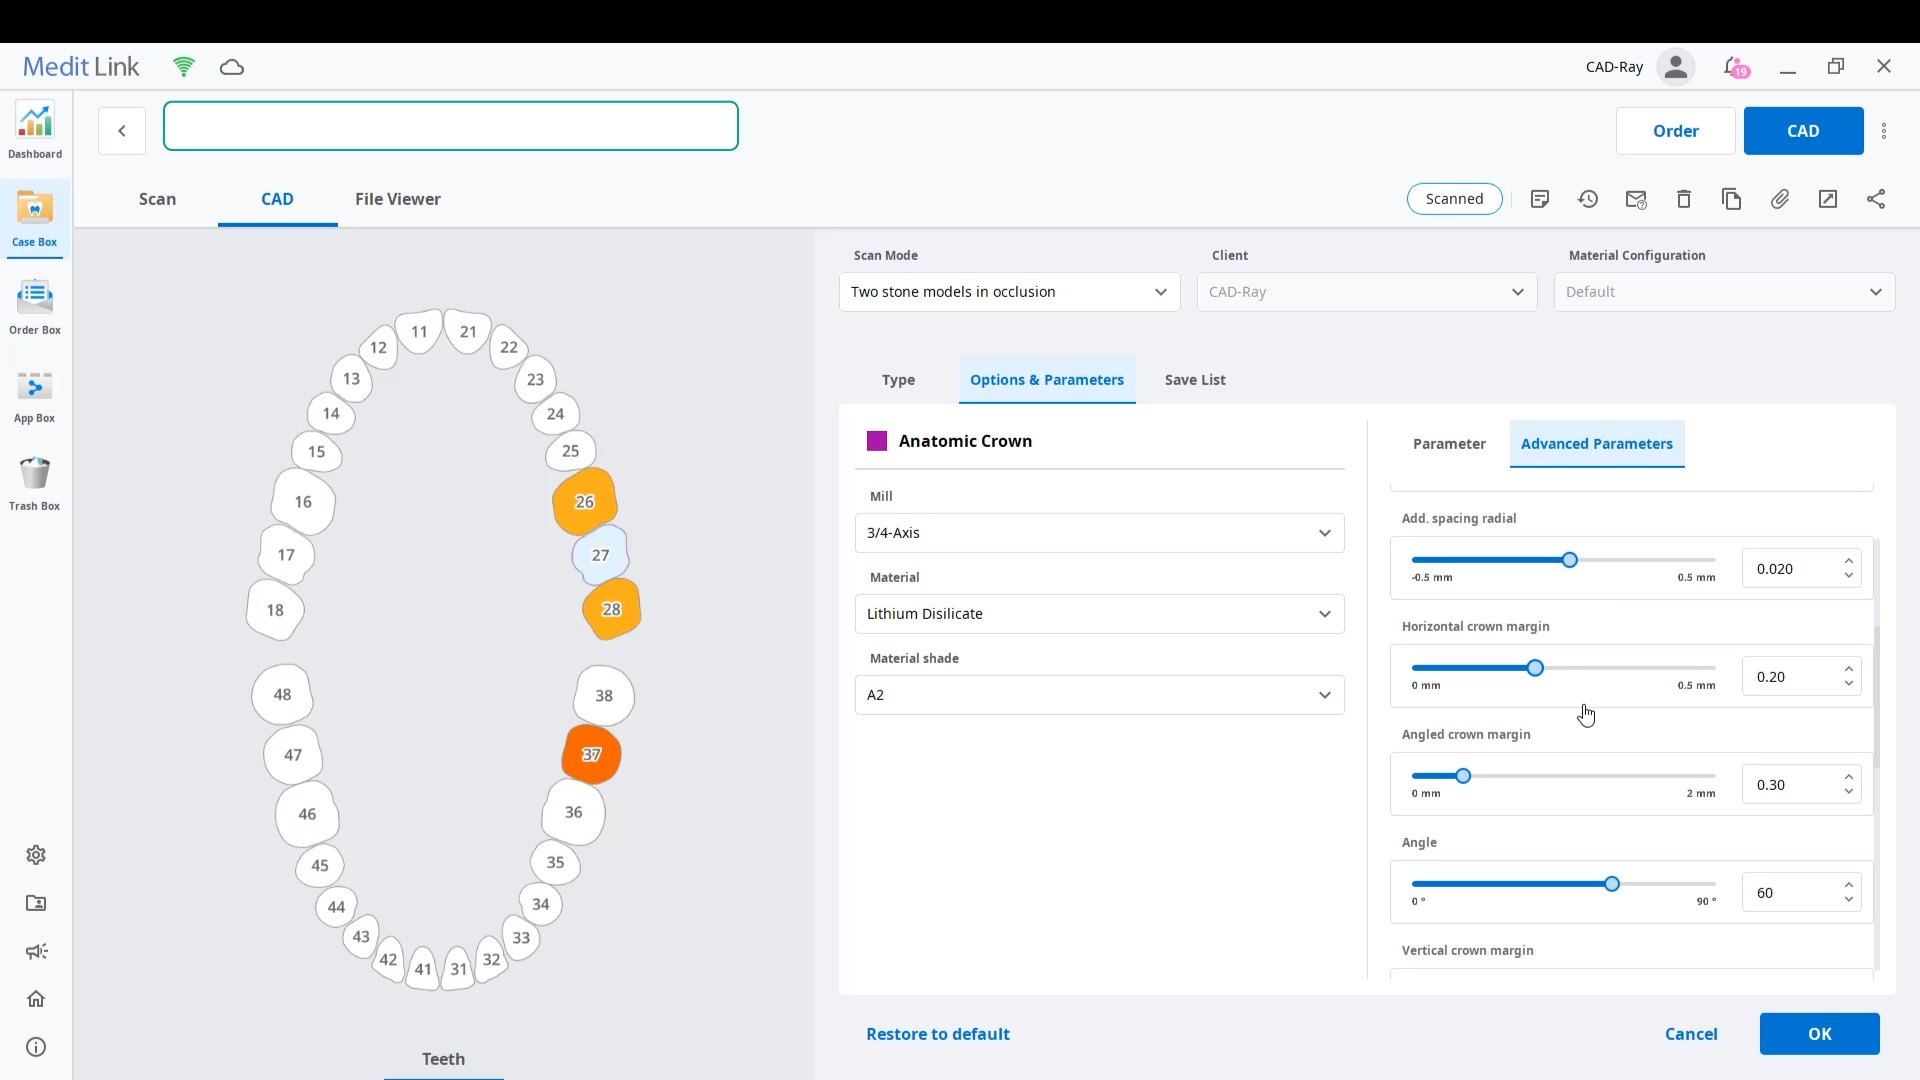
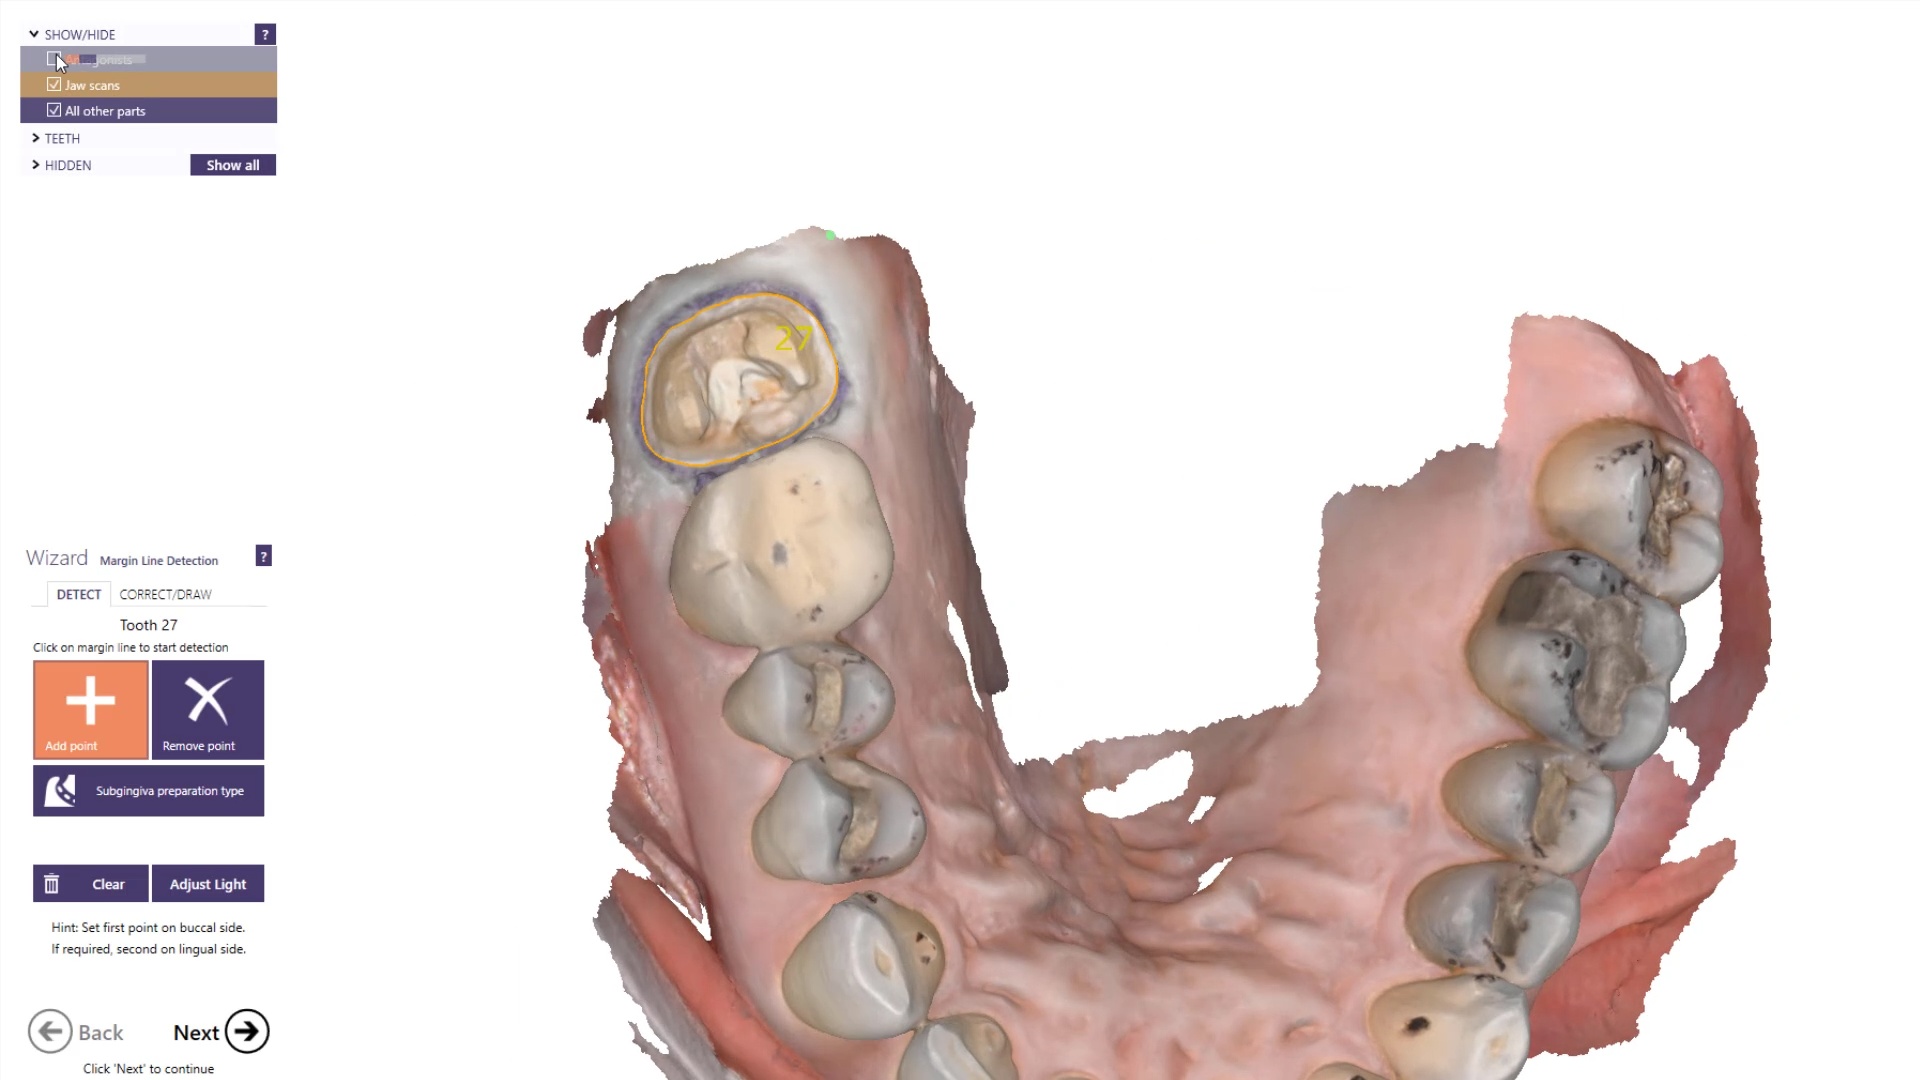
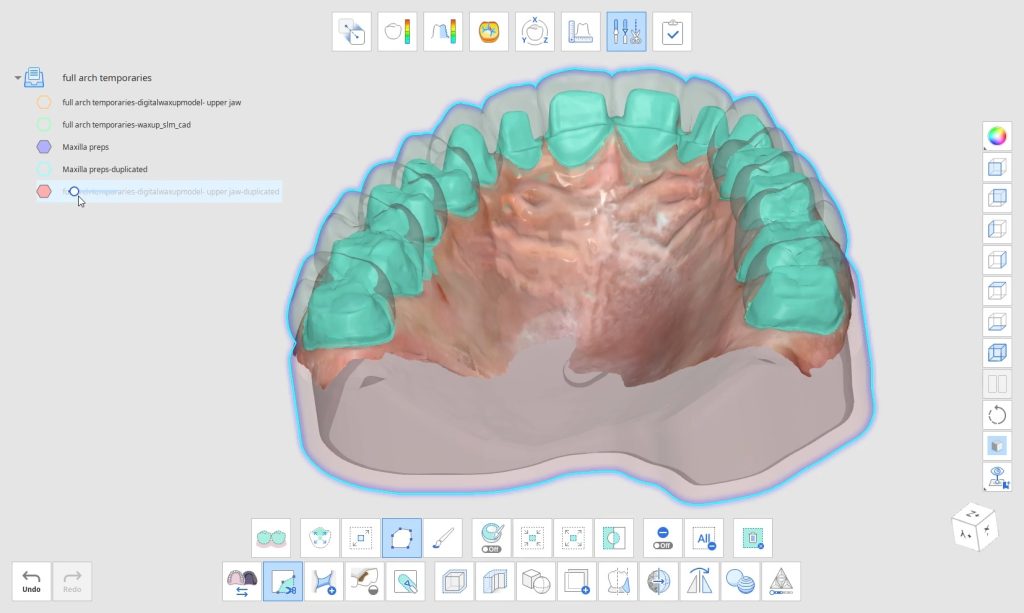
Image the preparation and place margin in native MeditScan Software that transfers to CAD Software
The preop condition is then transferred to the arch model and the tooth in question is cropped out. The rest of the arch is protected so no extra data is added unnecessarily to the equation. This protect feature is used for demonstration purposes and is subsequently removed. The prep in question is then highlighted and the local area is processed and the margins are placed. This margin line can be sent to the lab or it can be automatically carried to the design software
Launch CAD Software
The Meditlink software allow you to launch a variety of CAD programs that include 3shape, exocad, cerec, etc… Here we launch exocad which automatically imports and aligns the models and marks the margins. The restoration is then designed to completion.
Design of restoration
The CAD software allows you or the lab to alter the marked margins if necessary. The restoration is aligned in the arch for and the contacts are adapted to the adjacents and the oppising
You can take the designed restoration to ANY milling machine or printer
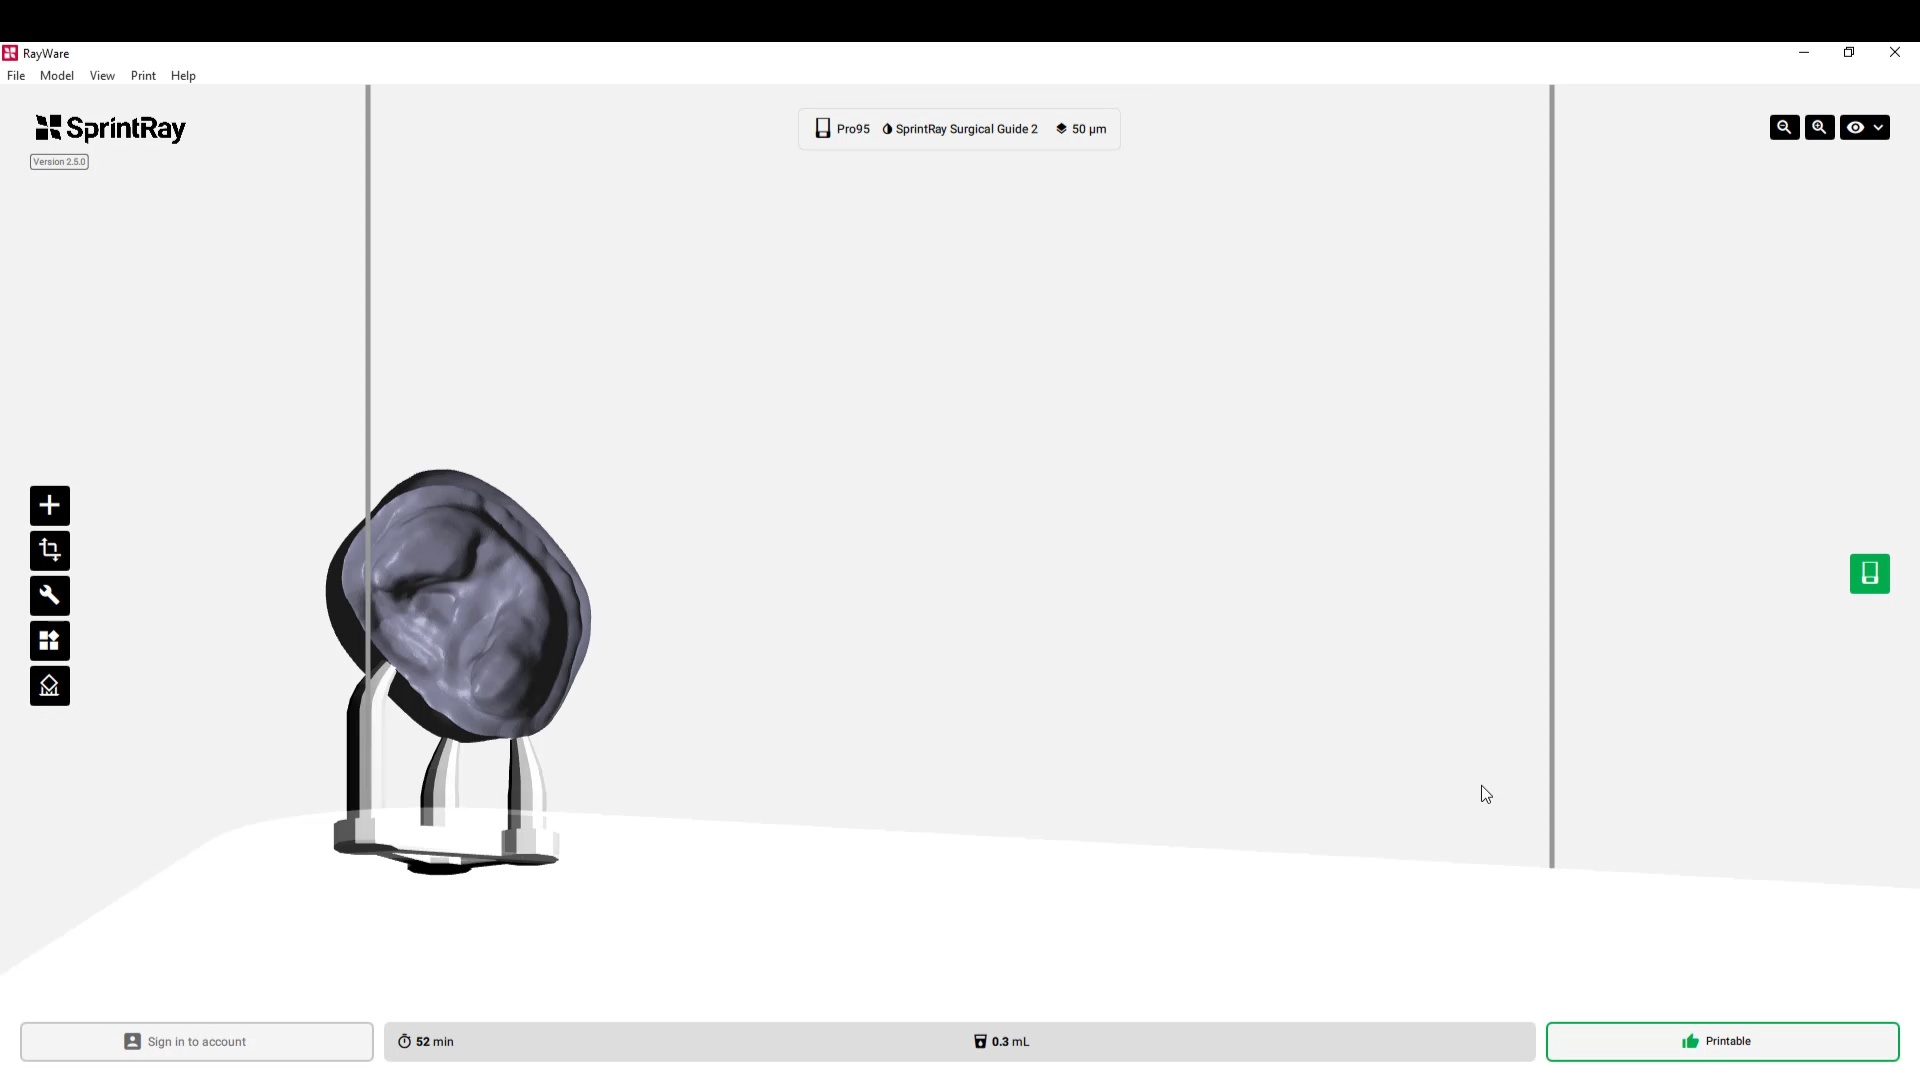
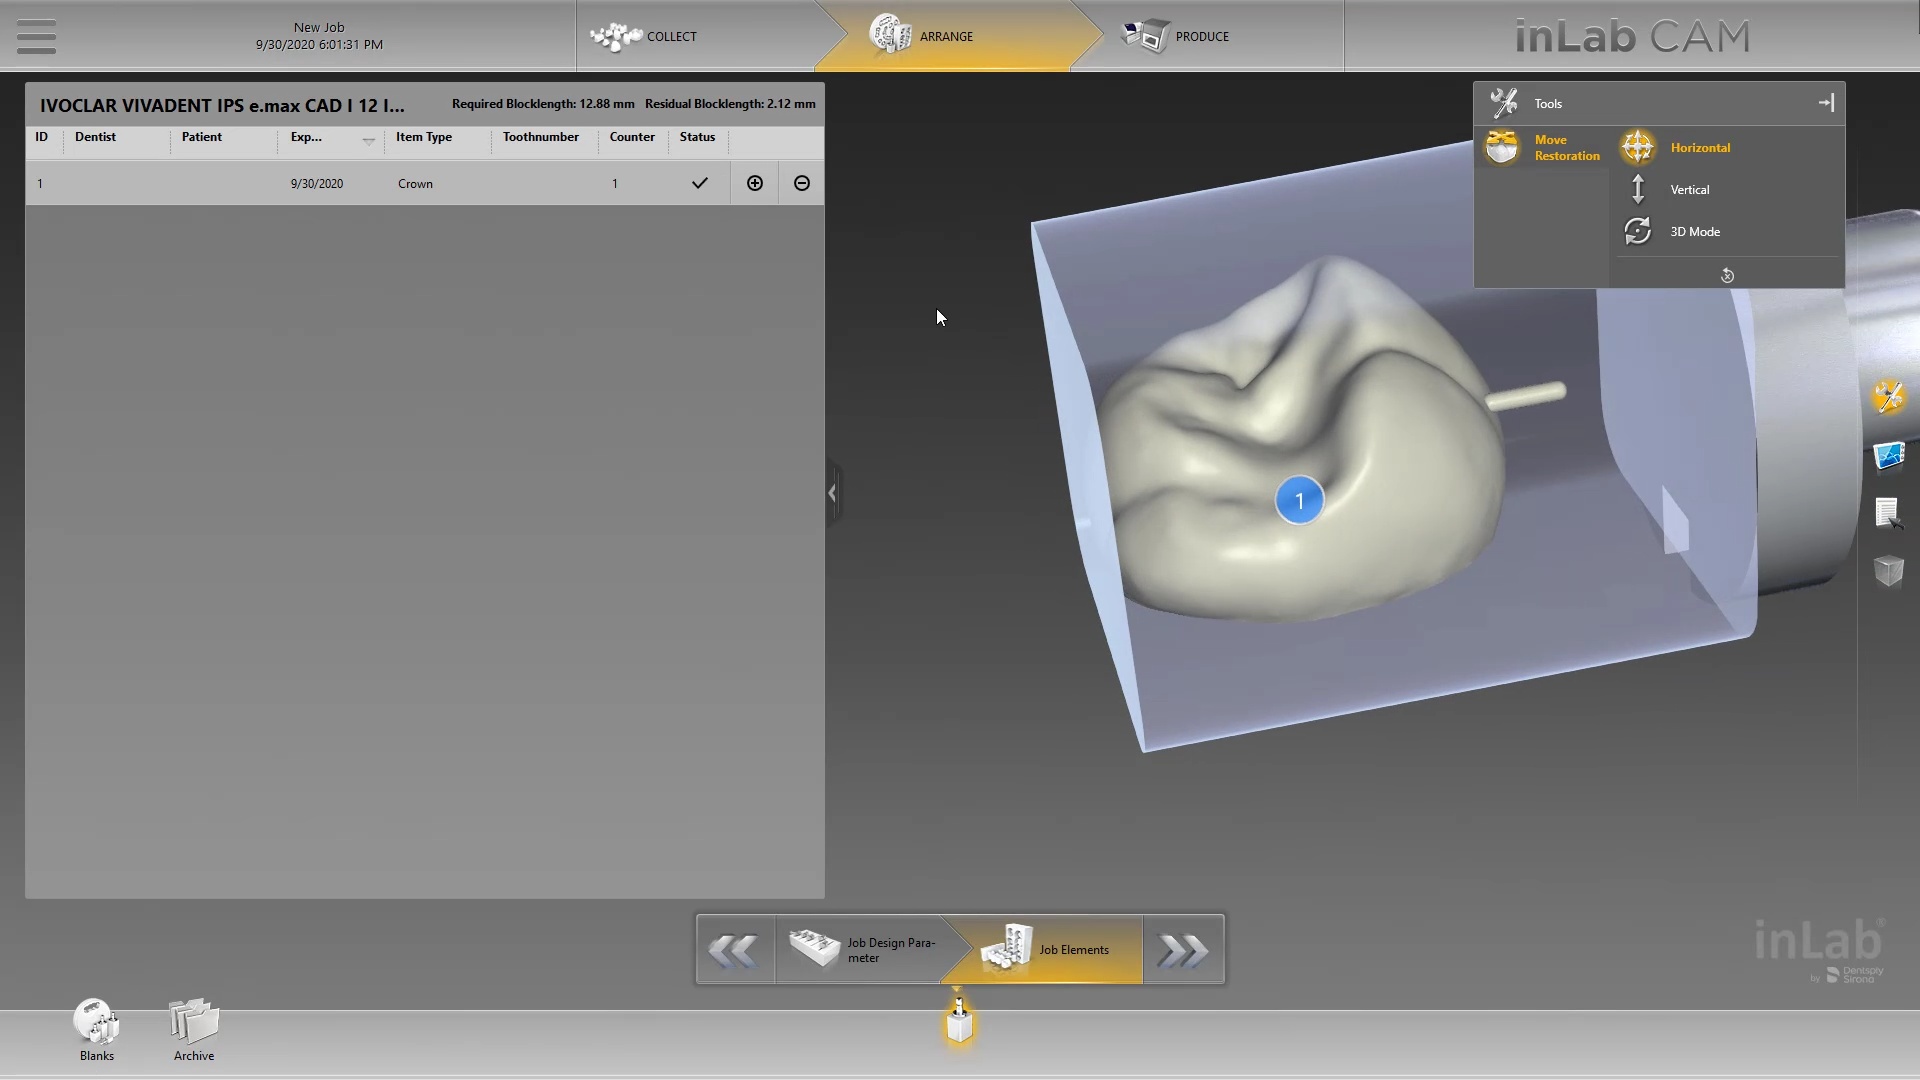
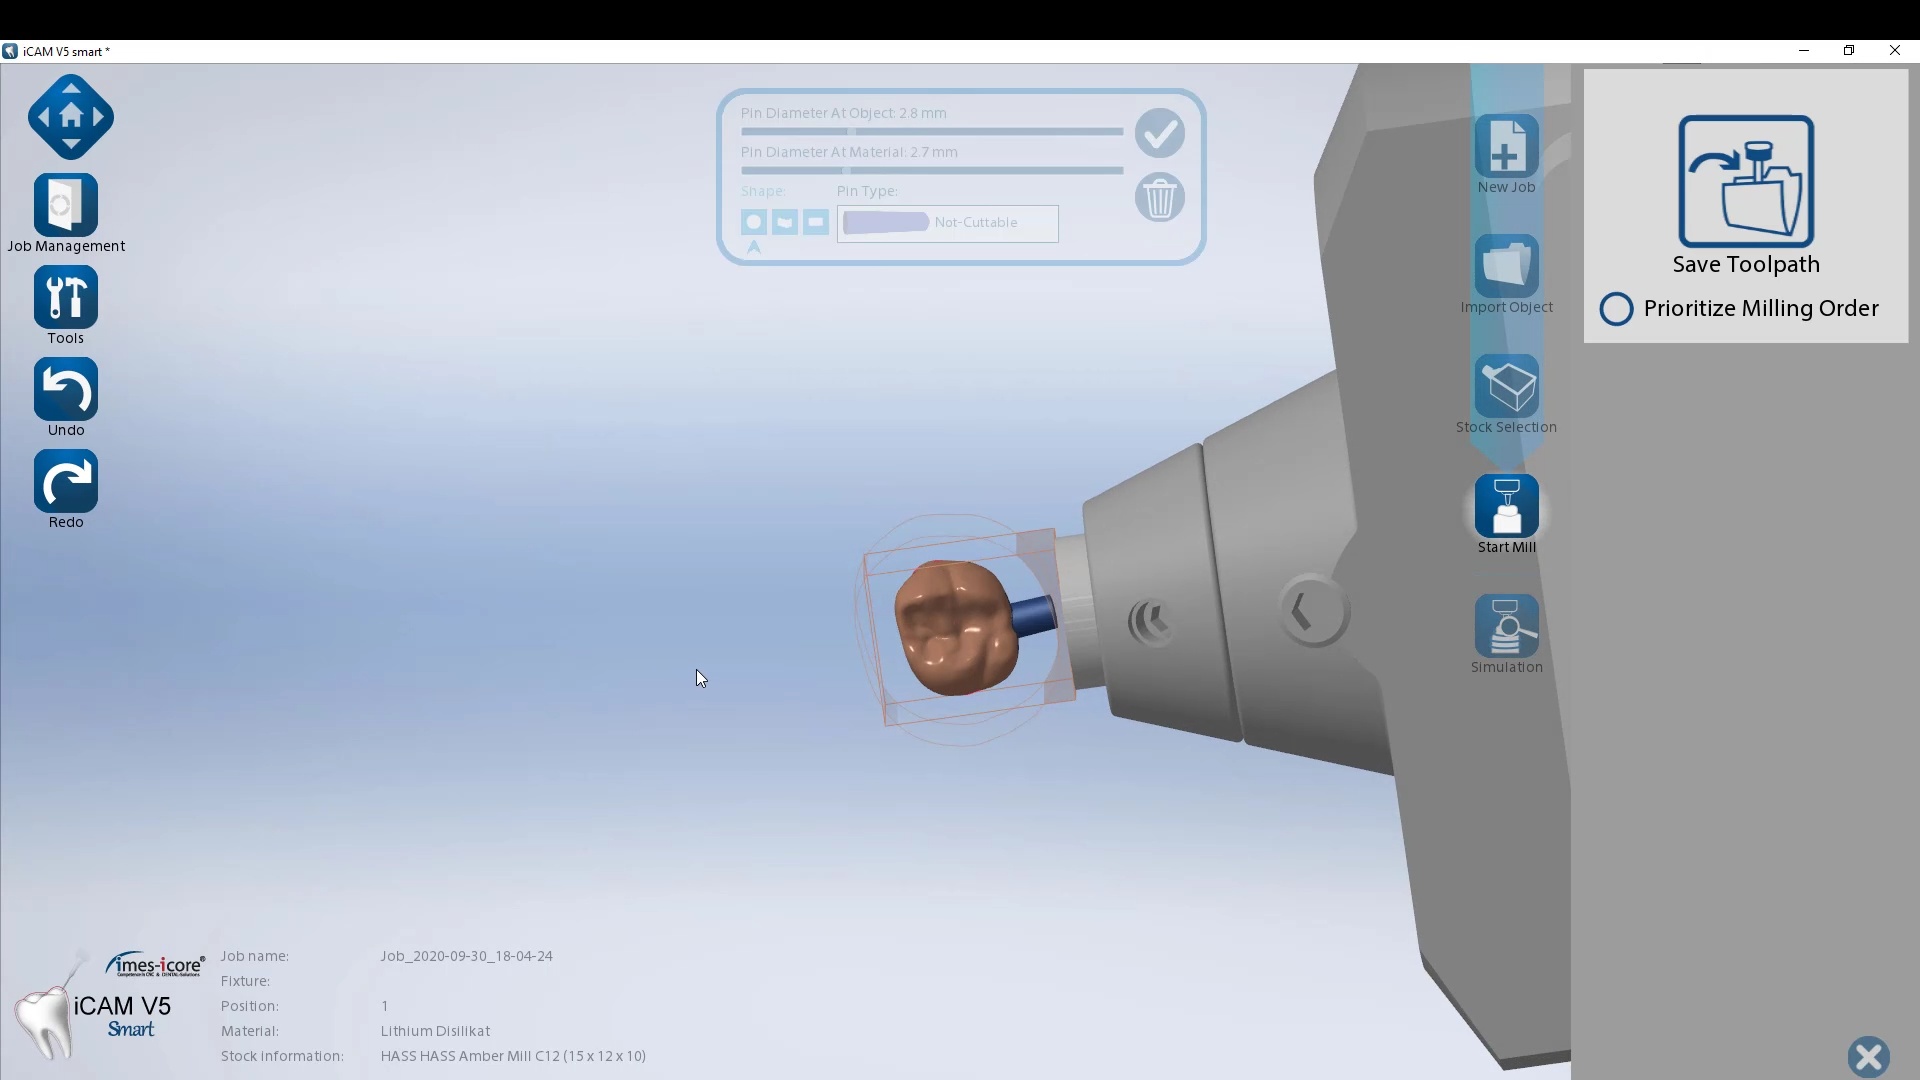
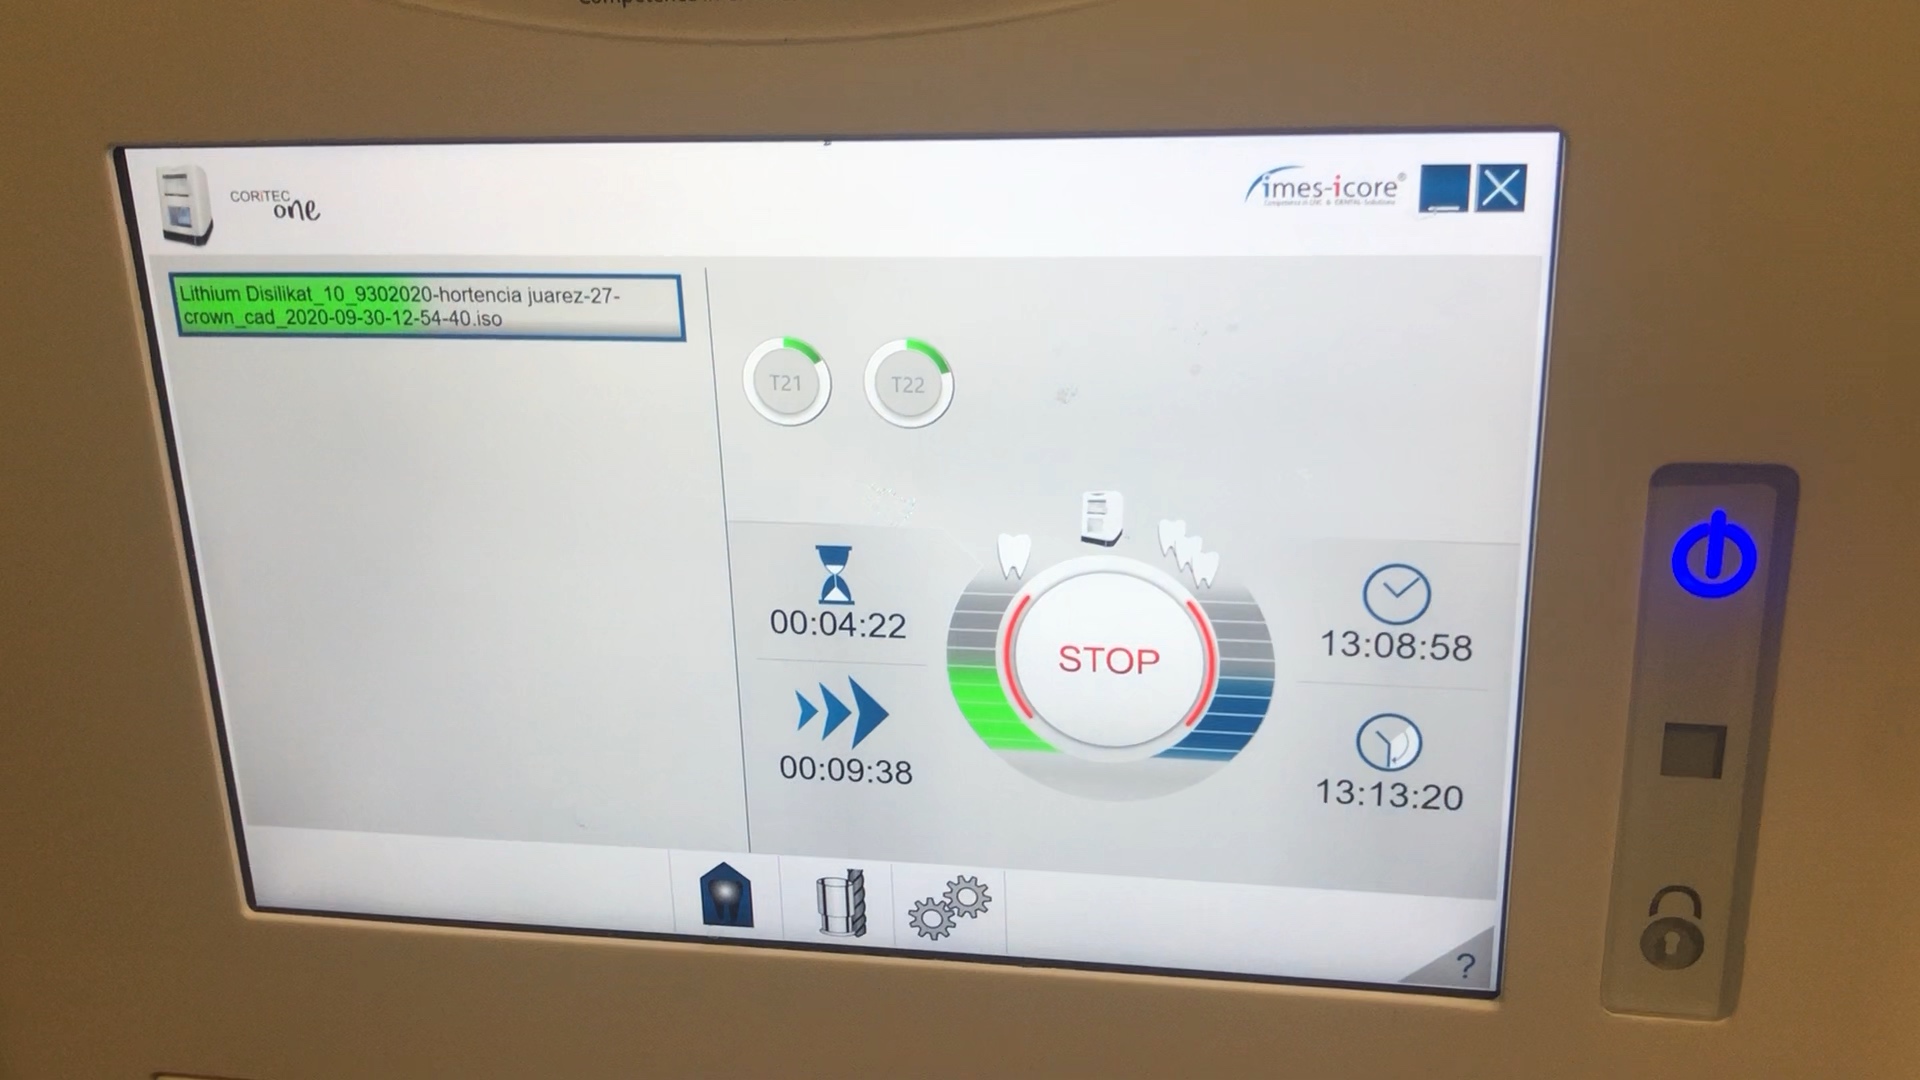
Milling of Lithium Disilicate with Imes Icore Coritec One
The final restoration design can be exported as an stl and taken to a variety of mills or printers. Here we designed it millbox and milled with the coritec One. The material used was Amber Mill and it was crystalized and seated
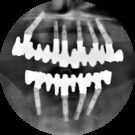
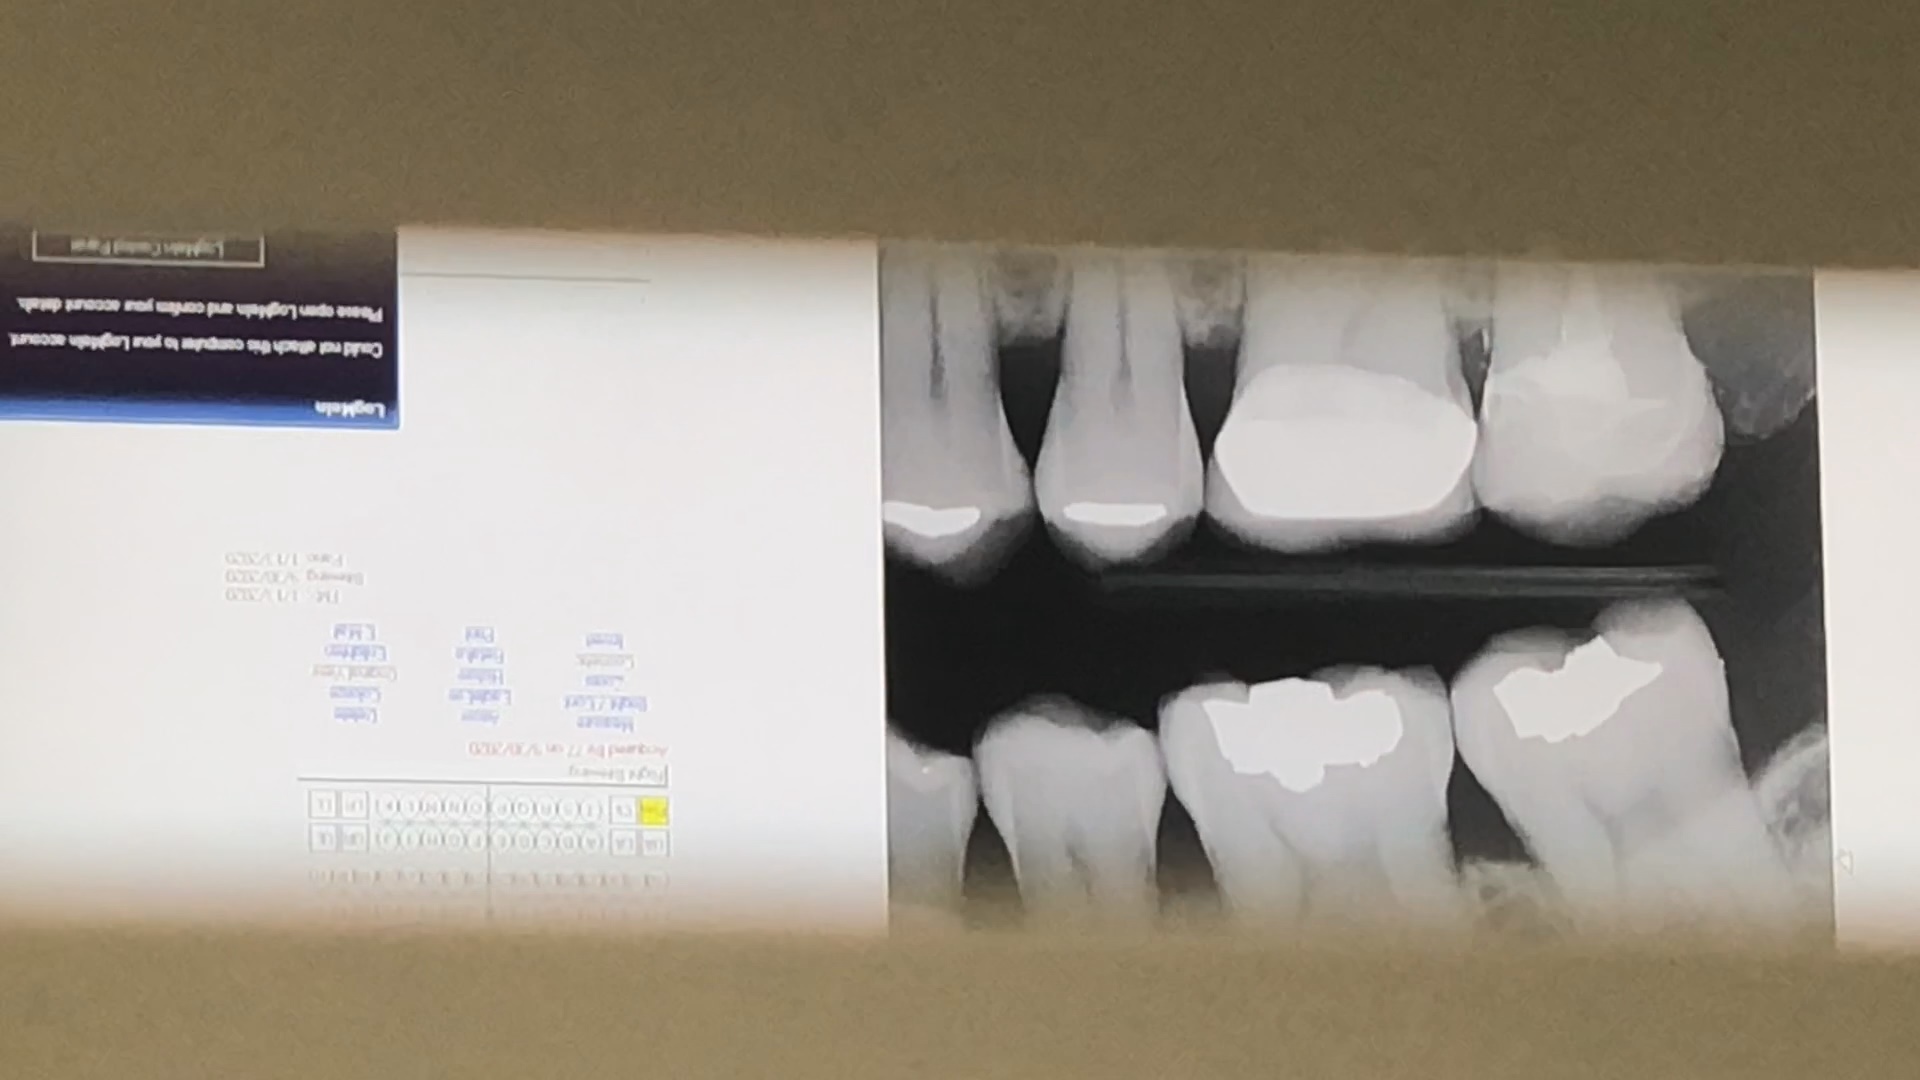
Post-op X-ray
Final X-ray was taken to verify the fit and to make sure no excess resin was left behind


You must log in to post a comment.