


This article is for advanced users, where we detail a quick and easy scan, design, and mill. While the patient is anesthetized, the preop images are scanned. Excess data is removed as all it does is slow down processing. The prep catalog box is clicked, and the same model appears there. This is a source of confusion for many new users. Therefore, we recommend that you immediately crop out the area to be prepared so you don’t get the catalog boxes confused.
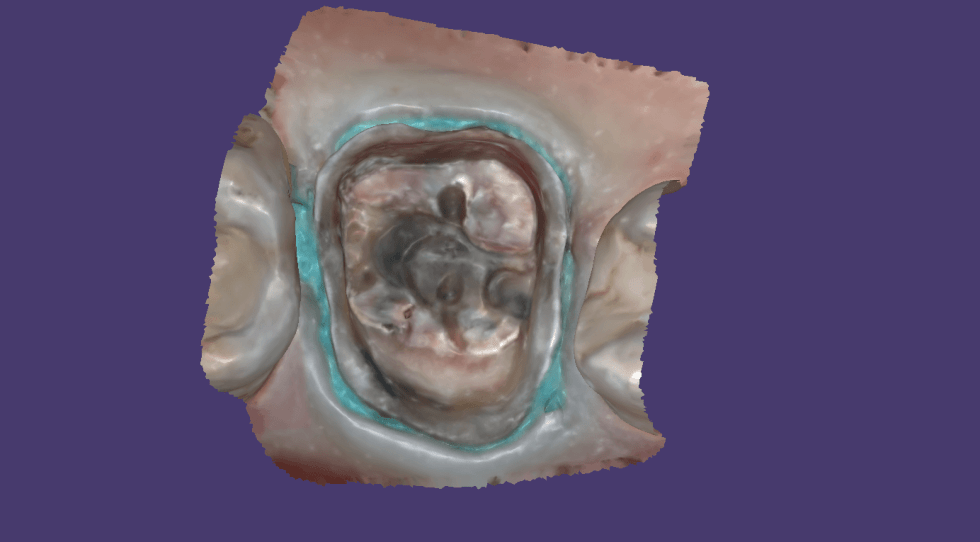
As an advanced user, you may be familiar with the reliability map. Here, we demonstrate how you can use the reliability map to capture your margins. Once the data turns green, this means you are done creating the model. This does NOT mean you captured your margins correctly. You could have just as easily captured tissue that is hiding your margins. The live view, in the bottom right corner, is where you can clearly asses if you have direct line of site to your margins!
Furthermore, as an advanced user, you may realize that it is NOT necessary to capture data below the height of contour of the adjacent teeth as you will not be making contact with that area! You can see in the try-in video at the end of the article how the restoration fits well to the contact area of the neighboring teeth even though the data was not captured.