Great experience with CAD-Ray, specifically Damien, with purchasing and customer service with servicing a scanner that needed replacing under warranty. All around excellent service and I will definitely come back for future technology we'll eventuall...read moreGreat experience with CAD-Ray, specifically Damien, with purchasing and customer service with servicing a scanner that needed replacing under warranty. All around excellent service and I will definitely come back for future technology we'll eventually be adding to our practice.read less - 10/23/2024
Cary Ganz
One of the best companies I've dealt with in decades of dental practice. Not only is the product excellent but the support both personally and online has been just wonderful. - 8/08/2021
Nick Boyd
Great people. Very helpful with anything you need. - 6/16/2020
Nolan Andrews
They all go absolutely above and beyond in all aspects. Whether it's tech support, products, CE, everything. Everyone I have dealt with has been wonderful. Love these guys! - 6/19/2020
Chirag Vaid
I ordered my Medit scanner from them in Feb 2020, so far no issues with support or the product. They are a great company with great support. Disclosure: they did promise me a scanner tip for this review, but in all honestly I was meaning to give it t...read moreI ordered my Medit scanner from them in Feb 2020, so far no issues with support or the product. They are a great company with great support. Disclosure: they did promise me a scanner tip for this review, but in all honestly I was meaning to give it to them anyway.... if you are looking to buy, this is a great way to go about it.read less - 7/19/2020
Matt McReynolds
Great scanner (medit i500) and mill (coritec one). They were great for an open system that allows me to do just about anything. - 6/16/2020
Carter Weber
I had a great experience with CAD RAY. I was lucky enough to have Frank DeLuca come down to my office to demo the Medit I700. Needless to say, we were in love with the technology and the great hands on demo. CAD RAY overnighted me the scanner and we ...read moreI had a great experience with CAD RAY. I was lucky enough to have Frank DeLuca come down to my office to demo the Medit I700. Needless to say, we were in love with the technology and the great hands on demo. CAD RAY overnighted me the scanner and we were off to the races. Any time we have had a technical question, Frank has personal helped me or put me in touch with one of his colleagues if he wasn’t available. All around, it was as 5 star experience!read less - 12/16/2021
Michelle Duong
We are a new user of Medit i600. My rep Andy was very good with the training & very detailed & patient with the whole process. The online support is one of the best. Installation was also easy and straightforward. Our staff is really happy...read moreWe are a new user of Medit i600. My rep Andy was very good with the training & very detailed & patient with the whole process. The online support is one of the best. Installation was also easy and straightforward. Our staff is really happy with this new addition to our office. Thank youread less - 9/23/2022
Absolutely love dealing with this company. Purchased two intraoral scanners from them over the last 3 years and the support has been beyond exceptional. Frank patiently walked me through all the basics with many a phone call (to his personal cell p...read moreAbsolutely love dealing with this company. Purchased two intraoral scanners from them over the last 3 years and the support has been beyond exceptional. Frank patiently walked me through all the basics with many a phone call (to his personal cell phone, no less) on the first go round. Whenever we've even had a hint of technical difficulty there is ALWAYS a knowledgeable voice on the other end of the line. After 3 years of use a significant issue came up with the scanner and they went above and beyond to get it back up and running. Was so impressed (and I realized how dependent we've become on a scanner) that I purchased another one.Needed some assistance submitting a Valplast RPD design digitally this week. Damien worked me through it in literally 5 minutes and took the time to optimize my graphics card performance while he was there. Top shelf service.Certainly, the first place I go with any dental tech purchase.read less - 6/04/2022
Tommy Han
Awesome service. Bought a Medit and was able to learn how to use it simply by watching Cad-Ray's support and education videos. Three thumbs up! - 6/16/2020
Michael Pagano
I bought a Medit i500 from Cad-Ray. The service was fantastic. This group also does ongoing training to keep you up to date on how to use the technology.I had a minor issue with hardware and Cad-Ray resolved the issues no questions asked!They have a ...read moreI bought a Medit i500 from Cad-Ray. The service was fantastic. This group also does ongoing training to keep you up to date on how to use the technology.I had a minor issue with hardware and Cad-Ray resolved the issues no questions asked!They have a very active online forum that is supportive. I wouldn’t hesitate to purchase more equipment from them!read less - 10/13/2020
Dr. Steven E. Hollister
Had a training session for use of my Medit scanner this afternoon, and Heather G. was simply the best.....knowledgeable, patient and a great trainer. She had a wealth of knowledge regarding my scanner and she was so very patient with my computer glit...read moreHad a training session for use of my Medit scanner this afternoon, and Heather G. was simply the best.....knowledgeable, patient and a great trainer. She had a wealth of knowledge regarding my scanner and she was so very patient with my computer glitches! CAD-Ray is number one in my book! Thanks Heather, your time was much appreciated! Dr. Steve Hollisterread less - 5/14/2025
Spark Dental
Just had a new i700 scanner.Service so far is great.Andy did our training, he was great in answering all our questions .loving the scanner so far .😊 - 9/01/2022
Susan Latimer
Cad Ray has always provided me with the best customer support for my Medit scanner. Today, I worked with Destiny. She is quick to respond and identify problems and also great at explaining how to fix them! I highly recommend this company! - 5/01/2025
jeremiah choi
Never had customer care like Cad-Ray, you can't go wrong purchasing through them. Trios is a great scanner. All the reps at Cad-Ray are very knowledgeable and helpful and will make sure you are up and running smoothly. Above and beyond customer serv...read moreNever had customer care like Cad-Ray, you can't go wrong purchasing through them. Trios is a great scanner. All the reps at Cad-Ray are very knowledgeable and helpful and will make sure you are up and running smoothly. Above and beyond customer service.read less - 8/27/2022
Can not find a single negative thing to say about my transactions with CAD-Ray. Great people, absolutely unbelievable customer service, and the best products.They stand behind the products they sell as strongly as the manufacturers do. - 4/27/2022
Yen Tran
Jonathan and Nick have been a great tremendous help. They went out of their ways to help me upgrade my Medit i500 even though I didn’t purchase my Medit i500 scanner from them. They are the largest Medit scanner distributor and they have the custome...read moreJonathan and Nick have been a great tremendous help. They went out of their ways to help me upgrade my Medit i500 even though I didn’t purchase my Medit i500 scanner from them. They are the largest Medit scanner distributor and they have the customers’ interest at heart. They are super responsive to phone calls, emails, and Facebook messages. I highly recommend their servicesread less - 9/01/2021
Al Villalobos
Great scanner at a good price...Excellent customer service . I never want to take a conventional impression again! Best upgrade to my office in years. - 11/16/2021
Evan Bedell
Laura has always been so helpful with the medit when we needed assistance or resources. The training she provided the office was invaluable! She is quick to respond whenever we reach out. 13/10 - would recommend her to anyone looking to get a medit ...read moreLaura has always been so helpful with the medit when we needed assistance or resources. The training she provided the office was invaluable! She is quick to respond whenever we reach out. 13/10 - would recommend her to anyone looking to get a medit scanner.read less - 12/16/2021
Emerson Gower
Nothing but great things to say about Cad-Ray! Excellent customer support from Laura after the purchase of our Medit i500 and the cart from Damien. I’ve been very impressed with the Medit in restoring crown and bridge, as well as fixed hybrids, and...read moreNothing but great things to say about Cad-Ray! Excellent customer support from Laura after the purchase of our Medit i500 and the cart from Damien. I’ve been very impressed with the Medit in restoring crown and bridge, as well as fixed hybrids, and learning more of its capabilities each day. We have intentions to buy a second Medit shortly and will definitely be using Cad-ray again.read less - 12/13/2021
Gregory Camfield
These guys are 1st in class service every time! - 7/08/2022
Francois Dillinger
These guys are the best. They provide so much help and insight with the Medit. I can't say enough great things about them and their continued support. I truly appreciate everything!! - 6/16/2020
Mike Holt
We purchased the Medit i700. With the help of CAD-Ray and their amazing support team the transition to digital scanning was simple. Laura Geney walked us through the purchase and guided us during our training with the help of Andy Nova. Laura has bee...read moreWe purchased the Medit i700. With the help of CAD-Ray and their amazing support team the transition to digital scanning was simple. Laura Geney walked us through the purchase and guided us during our training with the help of Andy Nova. Laura has been there every step of the way checking in weekly answering all of our questions. We highly recommend CAD-Ray and look forward to doing business with them in the future.read less - 7/24/2022
Aaron Sipos
CAD-RAY has the best customer service. They go above and beyond to make sure you have a good experience with your medit scanner. With most tech companies, the person that answers the phone has to put you on hold for who knows how long before getting ...read moreCAD-RAY has the best customer service. They go above and beyond to make sure you have a good experience with your medit scanner. With most tech companies, the person that answers the phone has to put you on hold for who knows how long before getting you in touch with someone to fix the issue. With CAD-RAY, I called and Heather answered the phone. Heather was able to remotely fix my issue within 30 minutes and have me back up and running. No holds, no waiting!!! I highly recommend.read less - 9/01/2022
Robin Thoman
Instant support, nice people at Cad-Ray but LOTS of trouble getting CIT 12m same-as-cash approval as offered. CIT fumbled around for 7d in finding credit report. Eventually fed up with inactivity or support after lifting Equifax credit freeze and d...read moreInstant support, nice people at Cad-Ray but LOTS of trouble getting CIT 12m same-as-cash approval as offered. CIT fumbled around for 7d in finding credit report. Eventually fed up with inactivity or support after lifting Equifax credit freeze and directed to Experian quagmire of automated phone calling tree.read less - 1/09/2021
Iggy “Iggy” Deleon
There’s a reason why all cardray reviews are 5 stars only. They have the best people on their team. Jesse is the best trainer and provides above and beyond support. I can’t count the number of times that he’s saved me in the clinic with his designs. ...read moreThere’s a reason why all cardray reviews are 5 stars only. They have the best people on their team. Jesse is the best trainer and provides above and beyond support. I can’t count the number of times that he’s saved me in the clinic with his designs. He’s truly a master at his craft and one of the best assets to the cad ray team!read less - 2/02/2023
Daniel Thrall
I have owned this scanner for six months now. I have experience with other scanners including Trios and Carestream. The Medit scanner can stand with the big names. The scanned images are good. The ease of communication through the software with the l...read moreI have owned this scanner for six months now. I have experience with other scanners including Trios and Carestream. The Medit scanner can stand with the big names. The scanned images are good. The ease of communication through the software with the lab is probably my favorite part. Another thing I like is that the company is very open to improvements and listens to what its customers are wanting.
Cad Ray has a great team working alongside this product and continually updates all of the users on new features or new ways to use existing features. They are extremely responsive to questions and provide fast and competent support to the product that they sell.
I would recommend both the scanner and the company to anyone looking to get into the digital scanning world.read less - 10/09/2019
Everyone at CAD Ray has been amazing. Glad I chose them for my Medit and Sprint Ray purchase. Our training with Kaila was awesome. Thank you - 1/04/2023
Bracy Haynie
I have had the wonderful experience of working with Ryan at Cad-Ray for the last several weeks and he has been very professional and informative on how to properly use the Medit I700 scanner with regard to the software. I would highly recommend using...read moreI have had the wonderful experience of working with Ryan at Cad-Ray for the last several weeks and he has been very professional and informative on how to properly use the Medit I700 scanner with regard to the software. I would highly recommend using Cad-Ray and contacting Ryan for any of your Medit needs.read less - 1/27/2023
Iseoluwa Adedeji
Just got this scanner a few weeks ago. Has changed my workflow. Easy scanner to use. What's truly great is the support behind the product. Whether by call or fb messenger, I have never not been able to reach someone who solved the issue! Very pleas...read moreJust got this scanner a few weeks ago. Has changed my workflow. Easy scanner to use. What's truly great is the support behind the product. Whether by call or fb messenger, I have never not been able to reach someone who solved the issue! Very pleased so far.read less - 6/19/2020
Kirk Arritt (fldnstrm)
Whatever digital workflow addition you want to add to your dental practice look no further than Cad-Ray. Top notch support and training. - 1/29/2023
Shant Aharonian
Cad-ray has to be the best company to work with when it comes to digital dentistry solutions. Here are the reasons why: 1. Experience. Everyone in the company has extensive experience in dentistry. They have used all digital platforms and offer custo...read moreCad-ray has to be the best company to work with when it comes to digital dentistry solutions. Here are the reasons why: 1. Experience. Everyone in the company has extensive experience in dentistry. They have used all digital platforms and offer customers first hand experience. 2. Honesty. Based on their experience they share all the good/bad of different systems. They work with you to find a solution that works best for you. Not sell you the piece of the equipment that gives them the biggest commission. 3. Support. Cad-ray offers the missing piece of the dentist/digital manufacturer puzzle. Many other distributors sell you a piece of equipment but don’t have true day-to-day experience with that equipment. Cad-ray’s team openly share their expertise to help customers optimize their workflows with great technology. 4. Passionate. The Cad-ray team is extremely passionate about their craft. They truly believe in what they have to offer. I took Armen Mirzayan’s course on intraoral scanning and it was truly mind blowing. Armen’s insights will help any dentist optimize their craft. I purchased the full sprintray 3d printing ecosystem the help of Frank. I plan to purchase more equipment from cad-ray. Also, Jesse is a genius in regards to all aspect of digital workflows. I’m truly grateful for this company and everyone who I’ve worked with so far.read less - 10/07/2022
Jeff Keh
I love my medit i-500. Cad-Ray has wonderful customer support, I can not imagine getting a scanner from anyone else. Armen and Frank are great! Thanks again. Will recommend cad-ray to all my friends. - 6/16/2020
lizette aguero
Highly recommended. Ericka help me through all the process when we were having some trouble with our scanner. The help was super fast and secure. She answered all our questions and made sure our scanner were working perfectly. - 4/29/2025
Hieu Pham
Been super happy with service from this company. Very responsive, really passionate about their work. - 7/16/2020
Jamal
I recently made a purchase from Cad-Ray and the experience was truly outstanding. From my initial enquiry, Nick was incredibly supportive and knowledgeable, answering all of my questions thoroughly and guiding me to the product that would best meet m...read moreI recently made a purchase from Cad-Ray and the experience was truly outstanding. From my initial enquiry, Nick was incredibly supportive and knowledgeable, answering all of my questions thoroughly and guiding me to the product that would best meet my needs. What really set this experience apart was his non-pushy approach. Nick showed genuine interest in understanding my specific requirements, ensuring that I would be fully satisfied with my choice. This type of customer service is rare and it made the whole process much more enjoyable. I can confidently recommend Cad-Ray to others not just for their high-quality products, but for their exceptional customer service. A big thank you to Nick and the entire Cad-Ray team for their professionalism and dedication.read less - 5/17/2023
George W
Frank DeLuca has been my rep for almost a year and has provided excellent, caring, professional service and with a great attitude. - 1/25/2023
Farshad Rouhani
I do not know if it is okay to use the F word on this page. But I F@#KING LOVE MY MEDIT with the new filters now.
Scan the teeth with the middle filter, then go to the first 1 and get the palate in less than 1 minute. AMAZING
I have since s...read moreI do not know if it is okay to use the F word on this page. But I F@#KING LOVE MY MEDIT with the new filters now.
Scan the teeth with the middle filter, then go to the first 1 and get the palate in less than 1 minute. AMAZING
I have since sold my ITERO and JUST HATE my OMNICAM EVERYDAY.read less - 3/01/2020
I've been fortunate to have had the opportunity to work with Frank DeLuca this past year. He is always pleasant, willing to help, responsive to my questions and extremely knowledgeable. I highly recommend Frank!! - 12/16/2021
Joshua Mathis
Fantastic support. Bought a Medit Intraoral scanner and it has been a game changer in my practice. Can’t wait to pair a mill with the help of cadets in the future! - 6/19/2020
Inna Vinnikov
Frank was fantastic in helping me obtain my medit scanner. He answered all of my questions in detail. After the purchase of the scanner, he continued to follow up with me and presently remains a tremendous support with any concerns that may arise. Wa...read moreFrank was fantastic in helping me obtain my medit scanner. He answered all of my questions in detail. After the purchase of the scanner, he continued to follow up with me and presently remains a tremendous support with any concerns that may arise. Was a great experience overall from transitioning my practice into a digital world!read less - 1/25/2023
Mostafa Koperly
I love my medit scanner. I purchase many dental equipments each year and by far it’s the best thing I got for the bucks I spent ( beating my 6 digits equipments ).
We have omnicam and I hated it, multiple crushes, expensive monthly service fee, hor...read moreI love my medit scanner. I purchase many dental equipments each year and by far it’s the best thing I got for the bucks I spent ( beating my 6 digits equipments ).
We have omnicam and I hated it, multiple crushes, expensive monthly service fee, horrible support, etc. I was so frustrated and had to look for an alternative. Many mentioned itero to me and I was about to purchase it and suck another monthly fee until I came by Armen’s video about medit on one of the Facebook group in 2018. I was surprised with the image and the speed and started digging more and contacted Frank to explain the scanner more. Ended purchasing it late 2018 and I’m a happy user Since after. The support is excellent, Frank is there when you need any help plus the Facebook community is there to answer anything. Recently, I attended Armen’s course to learn how to mill from the medit and I got shocked by the AI and the options that the software has. This machine is a beast and you won’t regret it getting it from Armen and Frank. They go beyond and not like other salesman or equipments where you are left behind after they sale you and finish their training. We are in 2020 and I still get the same support as I bought it in 2018.read less - 1/09/2020
Best support ever. They are super responsive when a problem occurred, and immediately set up a support ticket with the vendor who contacted me within the hour to help me to solve the problem. - 7/27/2023
Ryan Crain
I love my Medit and Cad-Ray has been so easy to work with, both from a sales and support standpoint. - 7/16/2020
Had a good experience when purchasing my scanner, it was very easy, and to date after three months of using the scanner no support is a plus, anytime I call me I will answer and troubleshoot - 7/10/2022
David Wheeler
I have had excellent , prompt , customer service and support from the entire team . Especially from Frank DeLuca as I move along the learning curve. His patients and expertise is much appreciated - 1/24/2023
Kallen Wheeler
I always have enjoyed working with Cad-ray. Customer service is always on-point! - 5/25/2022
Jay Arnold DMD
Loving my Medit i700. My crowns have never fit better, and scanning is SOO easy. I started with cad-ray with the i500. The training and support have been second to none. I upgraded to the i700 shortly after it came out, and recently had a warranty is...read moreLoving my Medit i700. My crowns have never fit better, and scanning is SOO easy. I started with cad-ray with the i500. The training and support have been second to none. I upgraded to the i700 shortly after it came out, and recently had a warranty issue with the new scanner. immediately after calling them with my problem. A new scanner was overnighted to my office, I was very pleased, and had minimal down time.read less - 4/05/2022
Sean Landgraf
Truly Great Service. Glad I purchased my scanner here. - 8/03/2023
Scott Chong
The i500 has been a game-changer for our orthodontic practice. Patients love not having to do alginate impressions. Records appointments and debands take much less time plus there's significantly less clean-up. And it's fast/easy enough to use tha...read moreThe i500 has been a game-changer for our orthodontic practice. Patients love not having to do alginate impressions. Records appointments and debands take much less time plus there's significantly less clean-up. And it's fast/easy enough to use that we've even been able to train summer interns to scans with zero prior dental experience. Our retainers, nightguards, and sleep apnea appliances all showed improved fit with less chair-side delivery time due to accuracy of the scans. Customer support is top-notch. Whenever we've had issues, we get someone immediately and they either talk us through a fix or login via screenshare to help us directly. They have a great loyalty program which gives significant discounts to upgrade to newer units. We recently took advantage and are excited to try out the new i700, especially since they're now Mac-compatible. Simple version: Great intra-oral scanner, easy to use/operate, intuitive software interface, fantastic support.read less - 8/16/2023
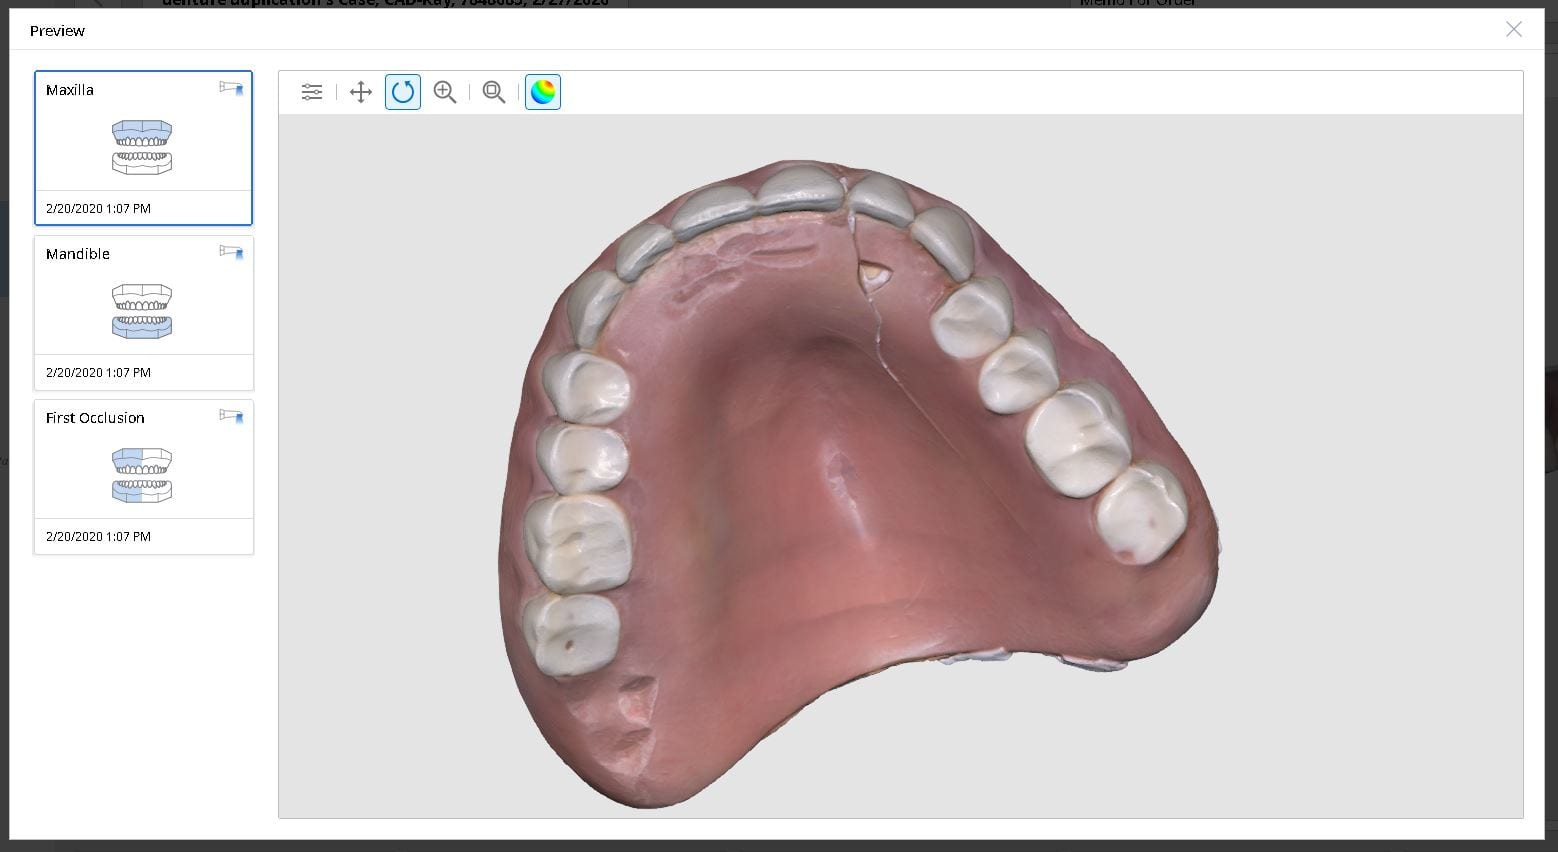
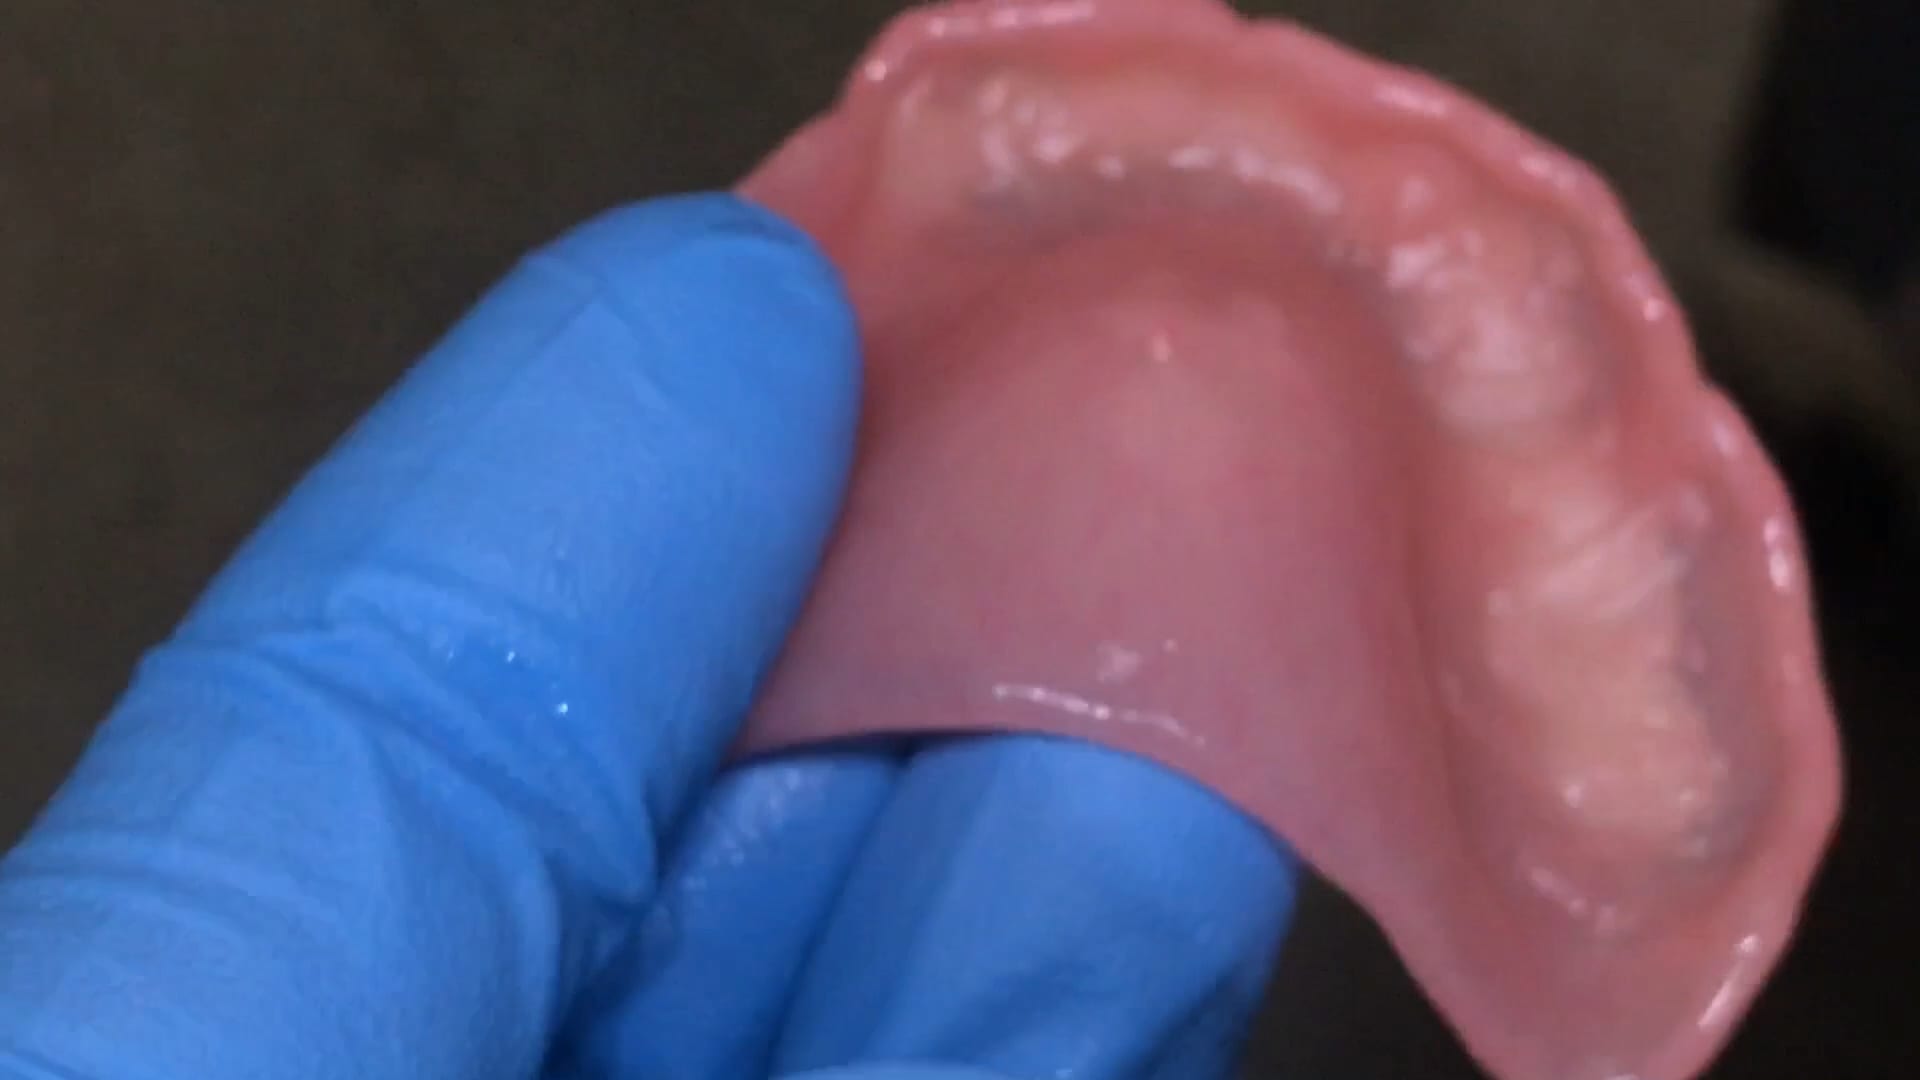
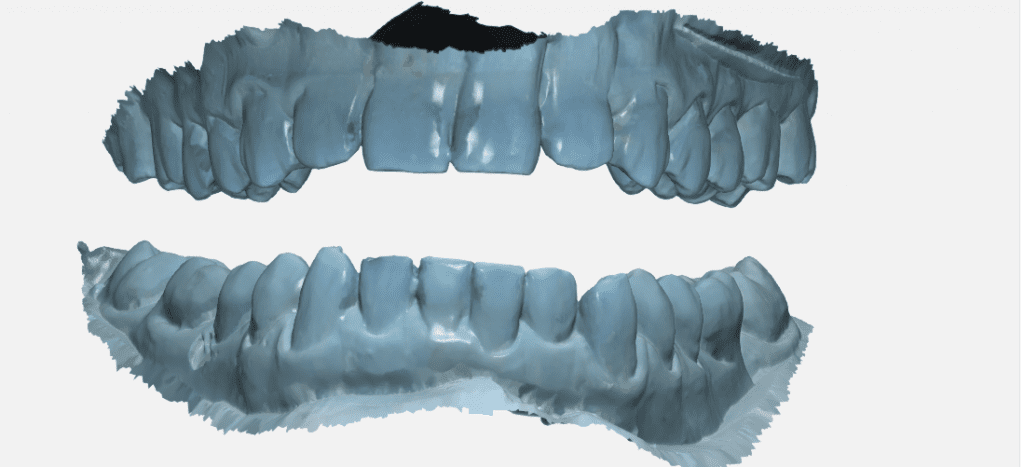
Medit i500 was used to scan and duplicated a fractured denture. It was originally scanned in the patient’s mouth to capture the opposing and the bite and then submitted to the lab for fabrication
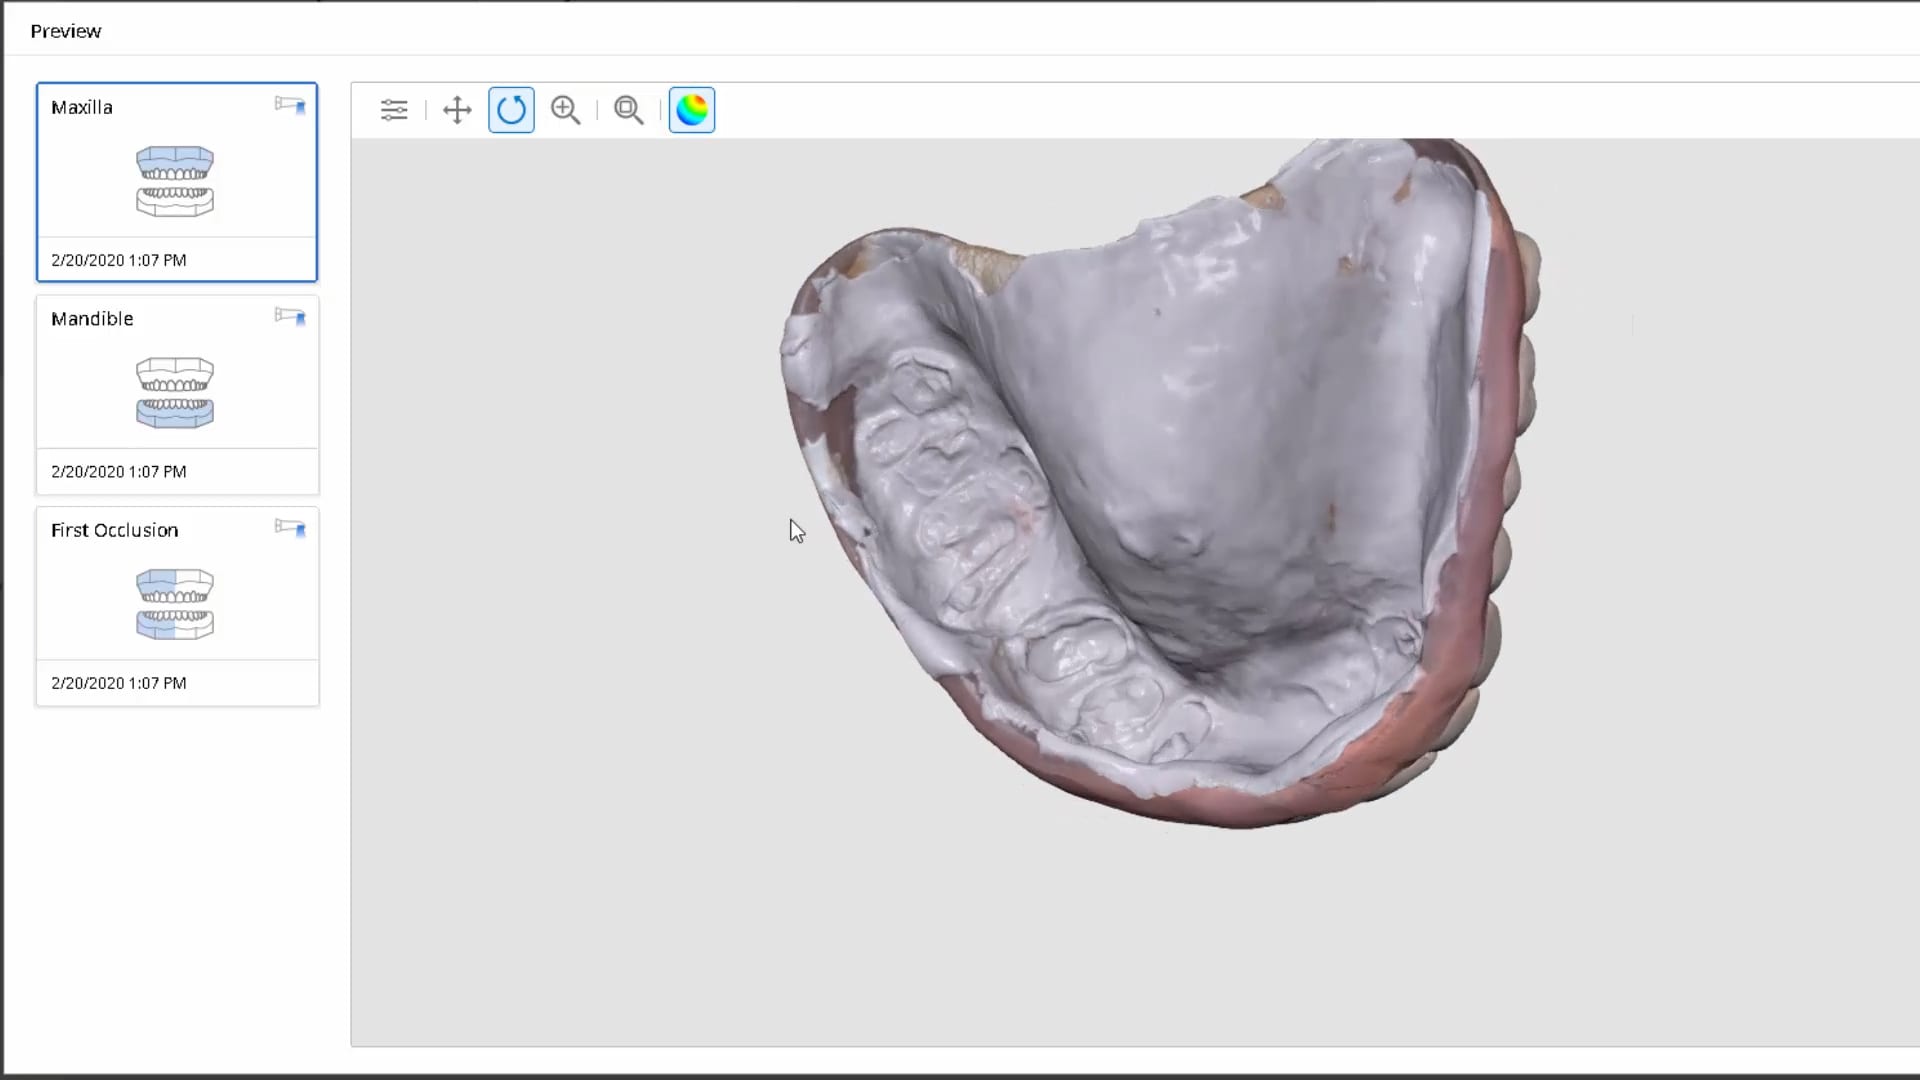
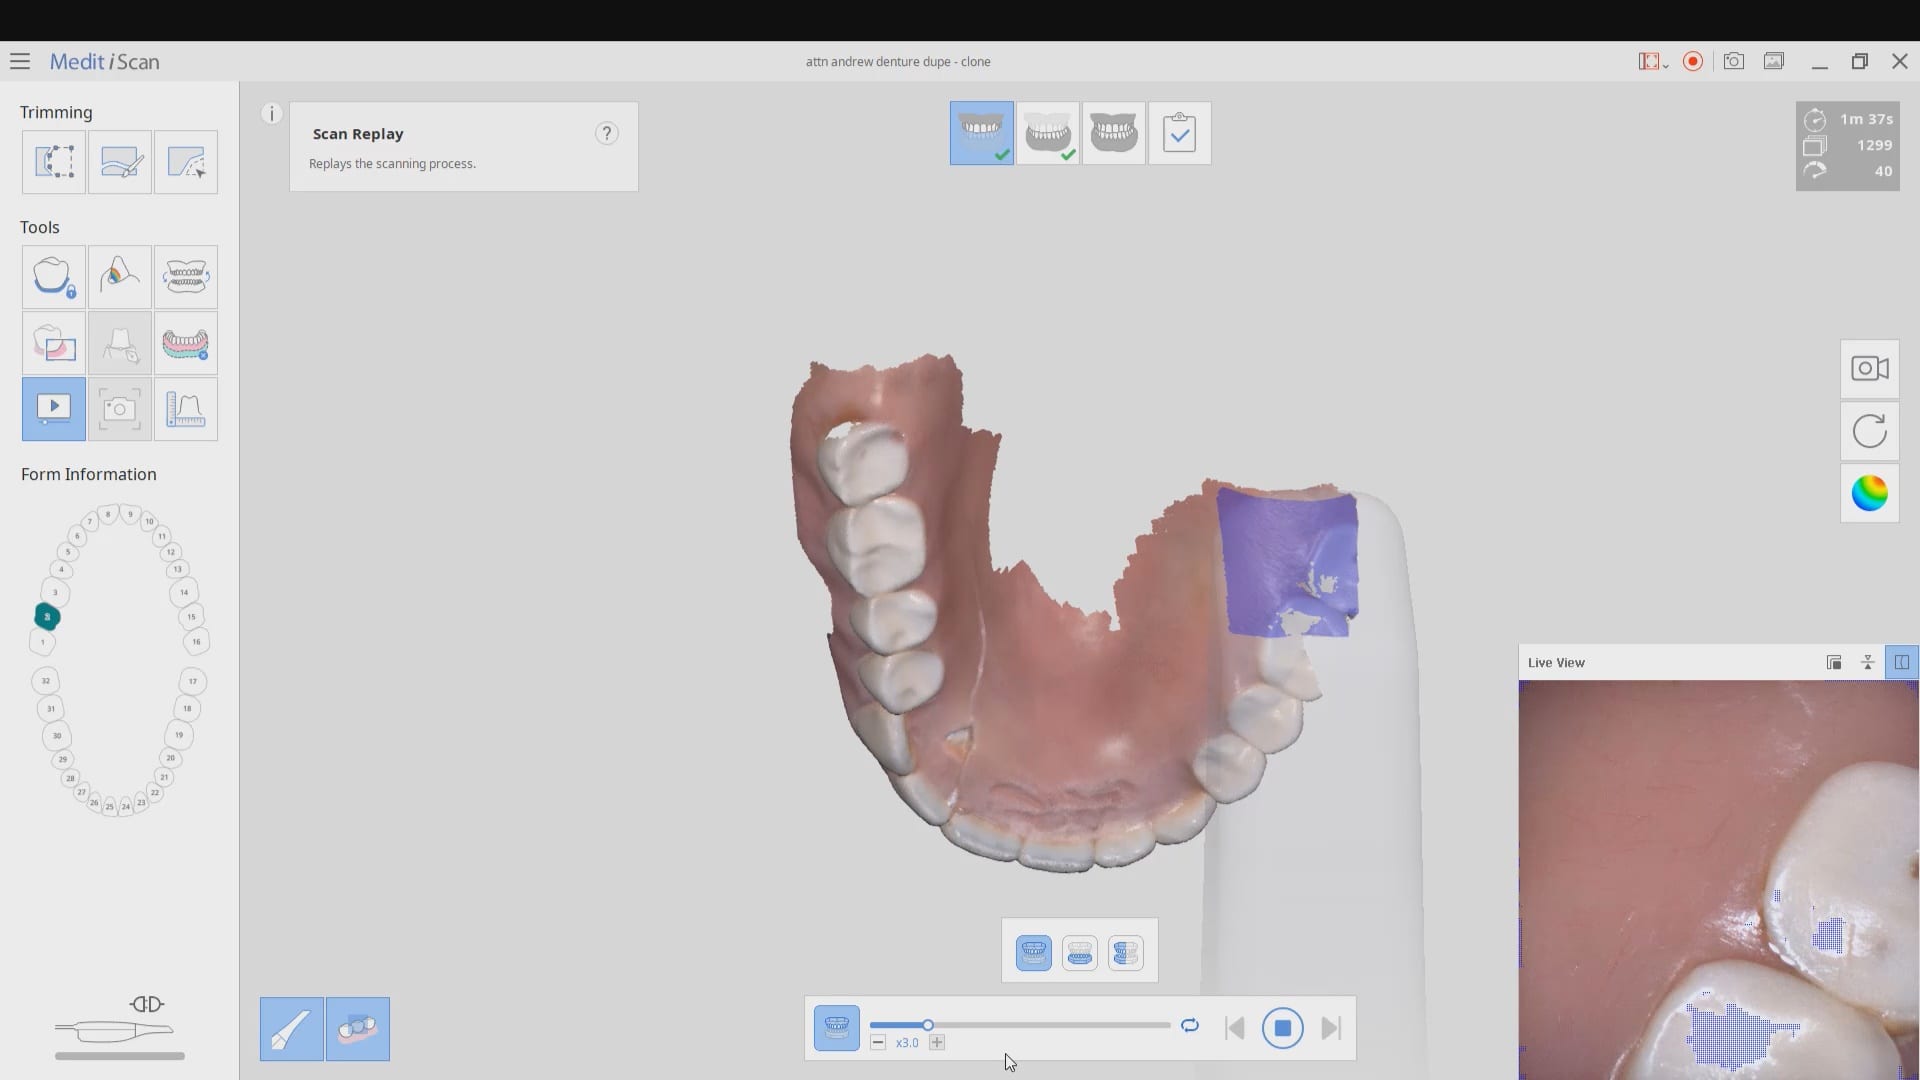
In this video we review with the instant replay feature of the medit i500 on how to scan a denture and not introduce double images or errors in the model. We first scan the occlusale surfaces of the denture intra-orally (this does not really matter as the software doesn’t know any differently), we then image the opposing, and then bite. We then remove the relined upper broken denture and continue the imaging to capture the intaglio
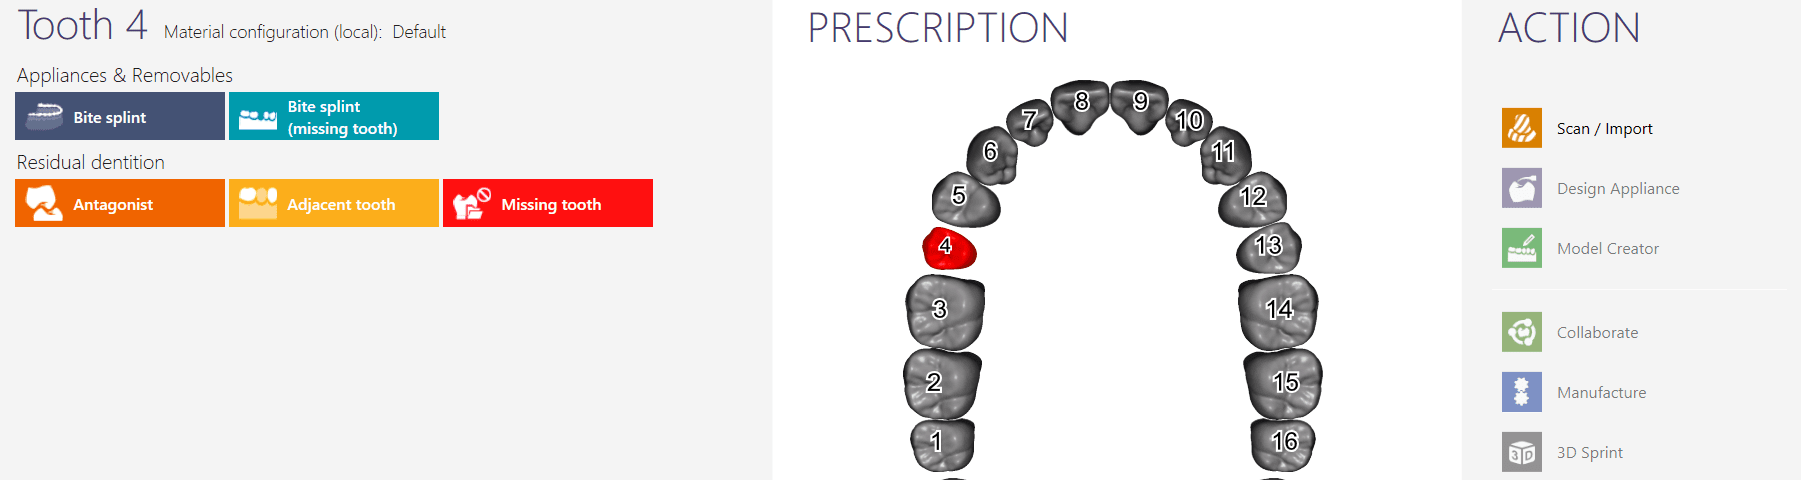
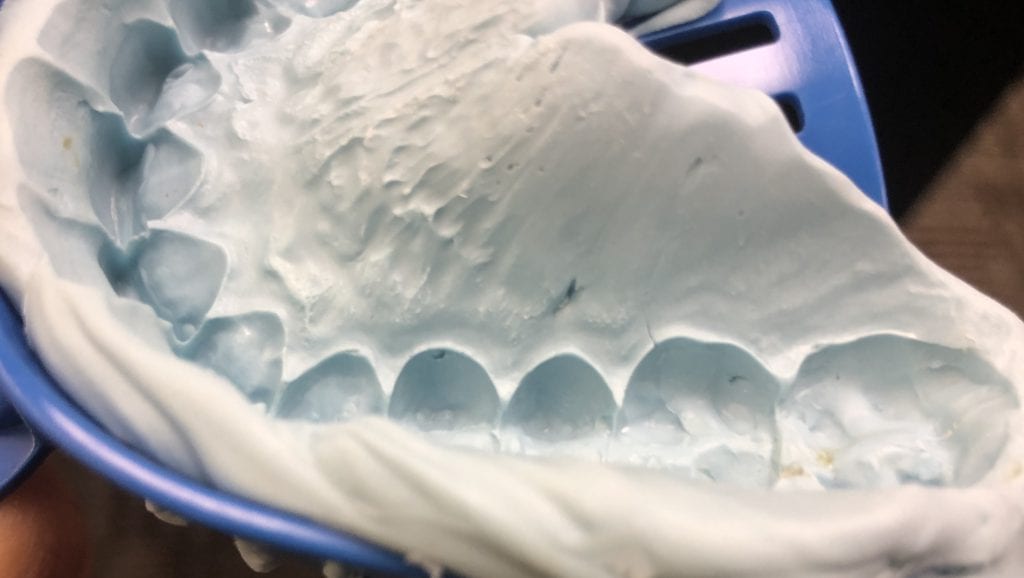
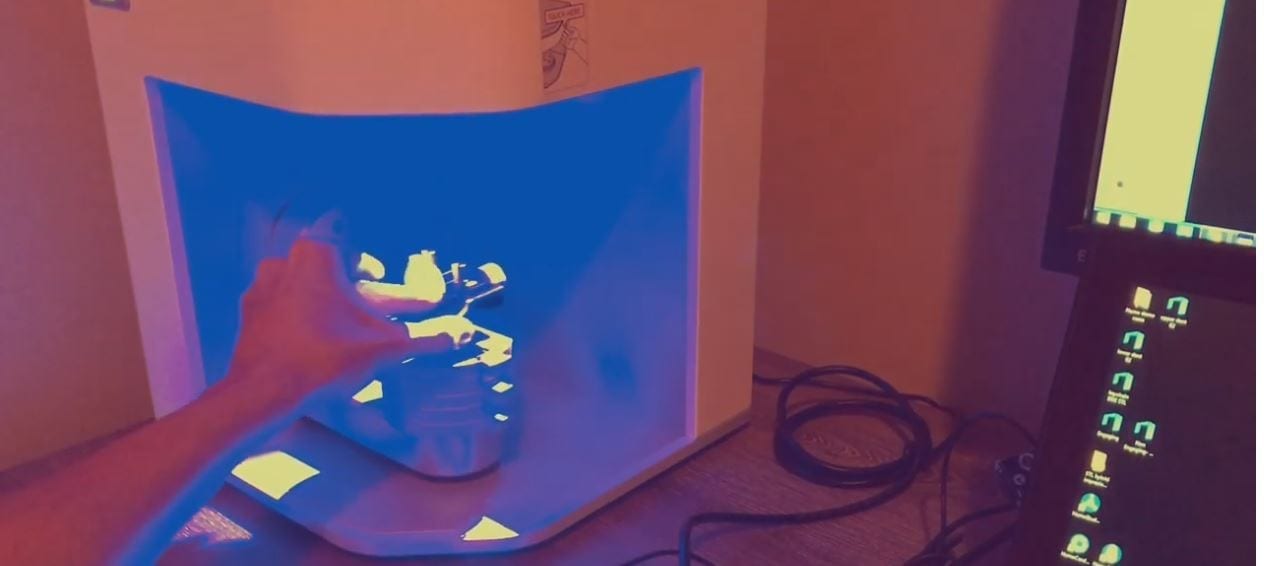
There are many ways to capture the upper and lower jaw digitally and mount them correctly in a protrusive and open bite for obstructive sleep apnea devices. In this videos, we feature how to digitize conventional impressions with the Medit i500 and mount them with a model creator so that that you order printed models and/or oral appliances.
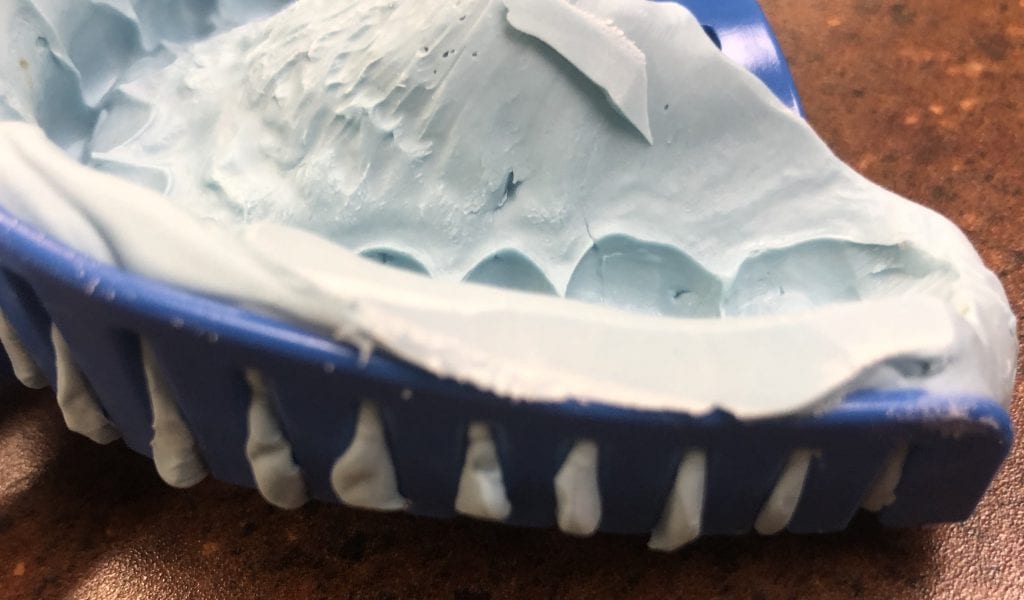
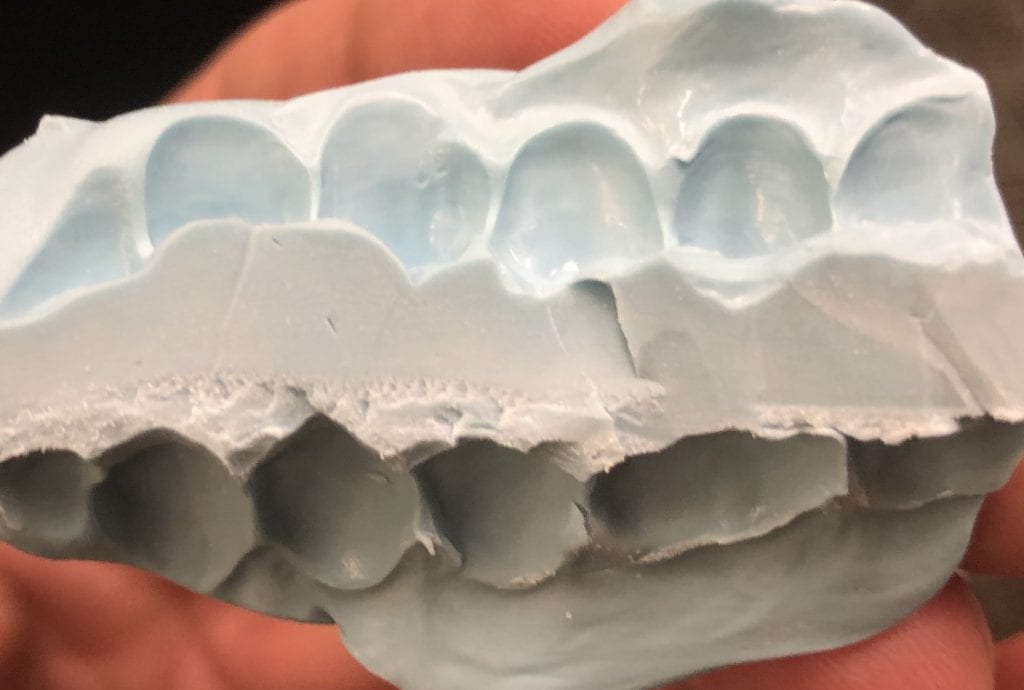
Desktop scanners accomplish this much more readily, but it is a snap with intra-oral scanners. The key is to know how to pick up hidden and deep areas, which you can often correct by trimming away excess flash of impression material with a scalpel
A recent study published in the Journal of Advanced Prosthodotics compared many Intra-oral scanners and used the Medit desktop scanner as the reference frame and benchmark for accuracy. Unfortunately the Medit Intra-Oral Scanner was not commercially available at the time of the study.
Our position at CAD-Ray is that any scanner can be accurate and inaccurate based on how it is utilized. Furthermore, once you capture accurate data, by the time you design a restoration and send it to production, the printing or milling machine has no idea where the scan came from and generally can produce restorations to the level of accuracy the resolution the scanners provide.
Keep in mind, there are dozens of ways an operator can introduce errors in imaging.
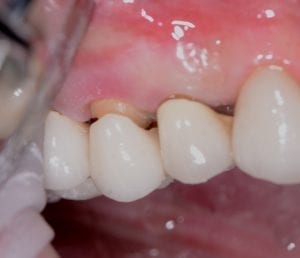
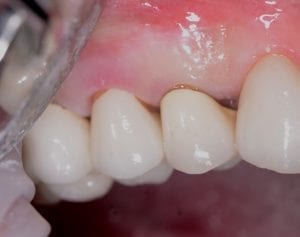
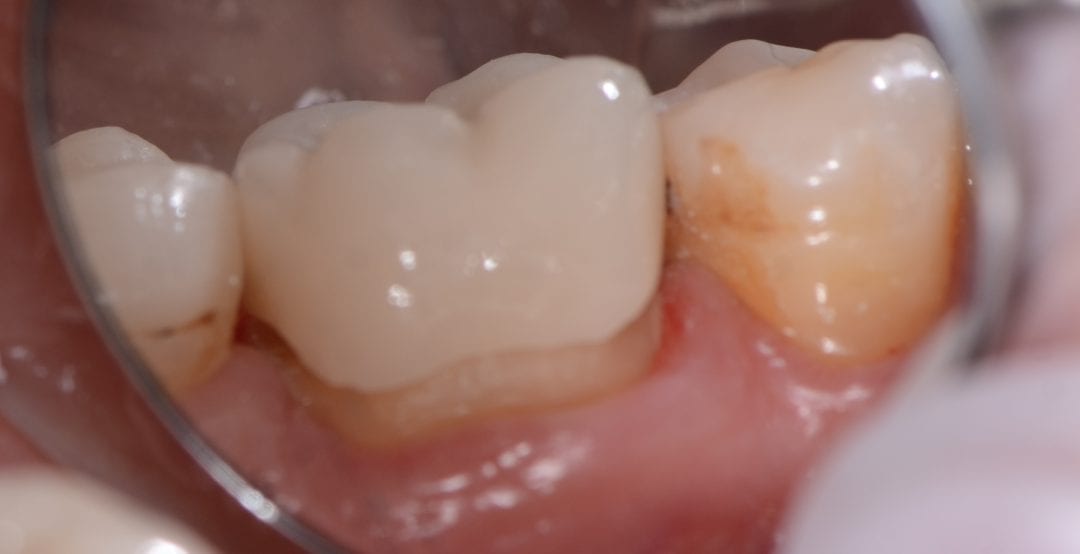
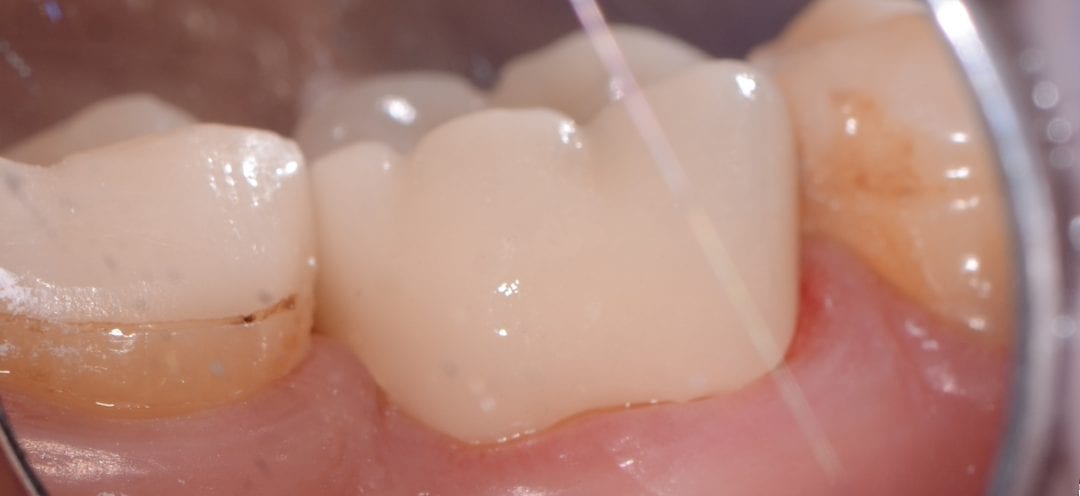
Another case delivered with the triple tray technique and the MeditT500 desktop scanner. The H&H technique was used to capture the margins and bite and there were no adjustments made to the contacts or the occlusion after delivery of the crown.
The scan, design, and fabrication was done by Burbank Dental Lab
This is the triple tray technique used to image the prep, the opposing, and the bite with the Medit Desktop Scanner by Burbank Dental Lab. Not a single contact was adjusted and crown fit perfectly!
[videopress QRPhcJb9]
Fit perfectly. Not a single adjustment to the contact area or the occlusion
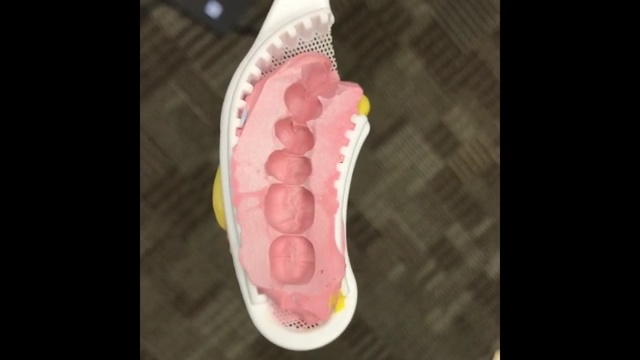
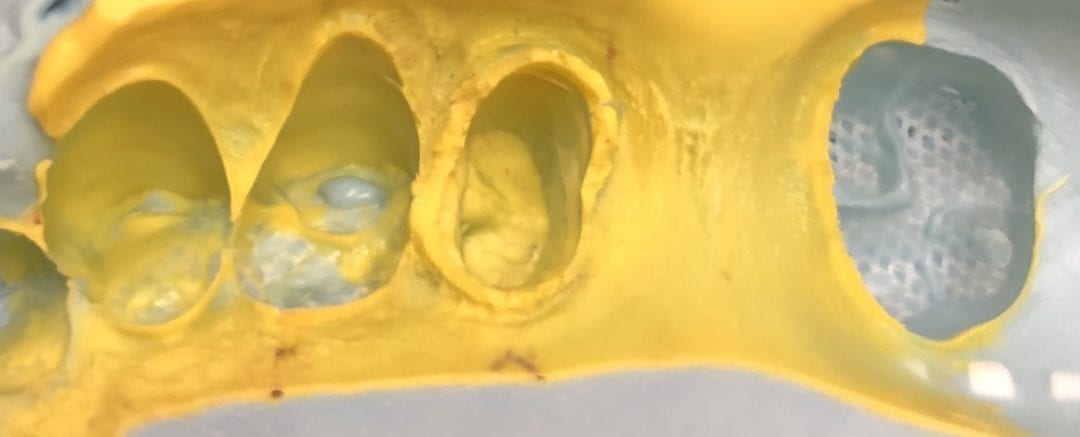
If you are risk averse and want to take your first step into digital dentistry without altering a single thing you do in your practice, consider a desktop scanner, like the Medit T500. Combine the traditional H&H technique in a triple tray and then place the material on the scanner. In minutes you can capture the prep, the opposing, and the proper occlusion. It is incredibly accurate because you don’t pour up the impression with stone where you can introduce errors.
Here’s a video of how to take an H&H impression from YouTube by Dr. Marty Jablow:
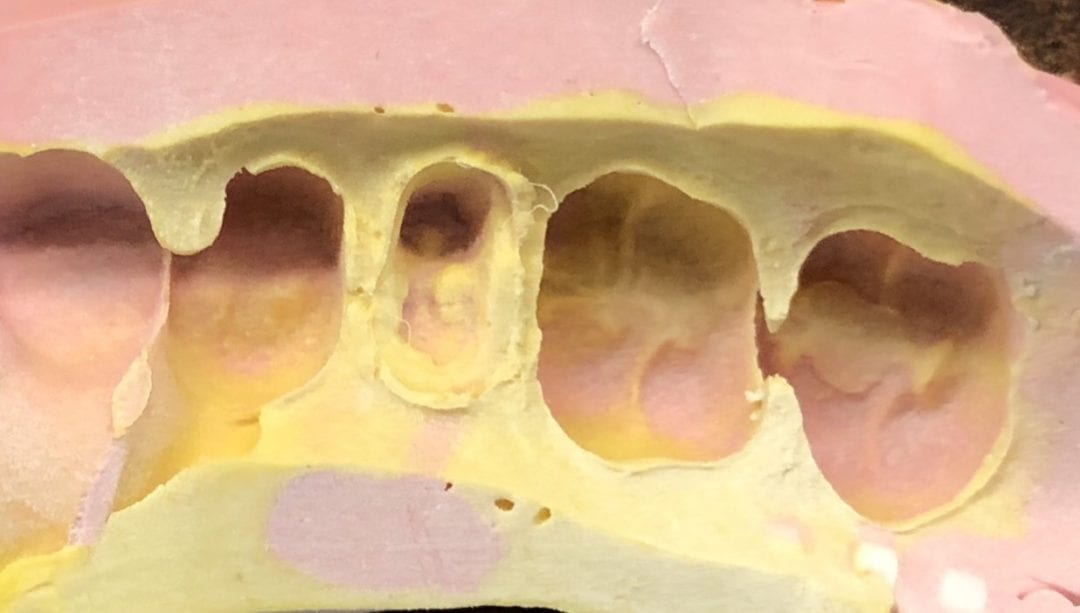
In this video you can see the set up to scan a triple tray H&H impression. Just mount the tray on the table and insert into the imaging box. With a couple of clicks, the software automatically rotates the table so it can image everything captured by the PVS material:
[videopress jhycrnD0]
Watch hour you can see how the table move so that the camera can pick up images well beyond the flash left by the PVS material
[videopress jCGbOZNz]
Once the impression taking is finished, the models are rendered and you can proceed with the design. You can see in this video how readily visible the margins are and how properly the models are articulated together. The fact that you don’t have to pour up the impression material with stone, you are not likely to introduce errors in topography of the models.
[videopress LKxe6UtC]
This is a very simple way to digitize alginate impressions and triple trays in your office and not waste time pouring them up. With a click of a button you can send the data to a lab or design and fabricate the restoration in your office.
Here’s is the stl from the scan that was imported into a software called meshmixer to visualize the three dimensional model and the the detail
[videopress TYse603p]
click on this image to download the stl and see for yourself!
How to Choose the Right SHINING 3D Denture Workflow One of the most important decisions in the SHINING 3D denture workflow happens before design even begins: choosing the right case...
At CAD-Ray, our mission has always been clear: to provide dental professionals with the most innovative technologies and the best possible value. Today, we’re proud to announce an exclusive partnership...
Here is a quick introductory video of how the process works and the subsequent cases provide a lot more detail and information Case 1 In this video we detail how...
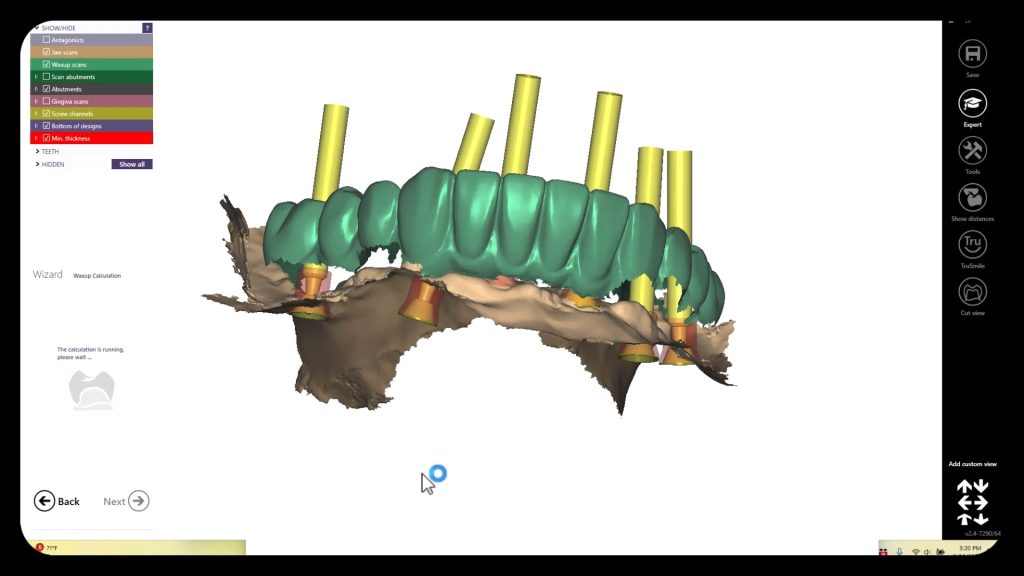
In this article we detail everything you need to capture to design and all on x type of restoration so you can quickly print a prosthesis and deliver it to...
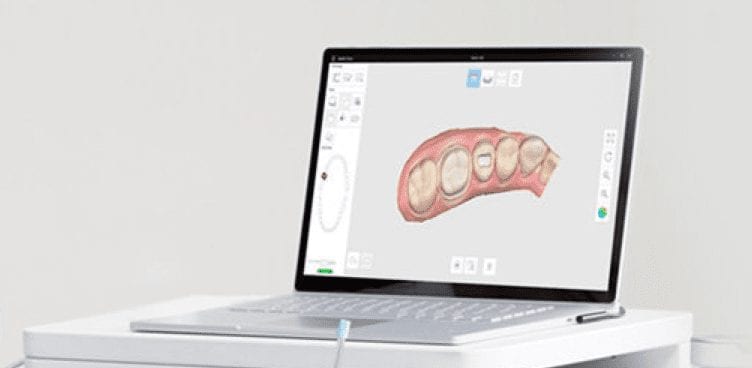
If you use trios, and you have been thinking about adding a 3D printer or milling setup to your office, but have been nervous about designs or CAD – time...


You must be logged in to post a comment.