


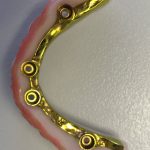
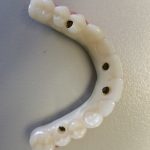
This webinar hosted by CAD-Ray is an information program detailing the specific screw called the Powerball for Full Arch Hybrid Restorations
This webinar hosted by CAD-Ray is an information program detailing the specific screw called the Powerball for Full Arch Hybrid Restorations

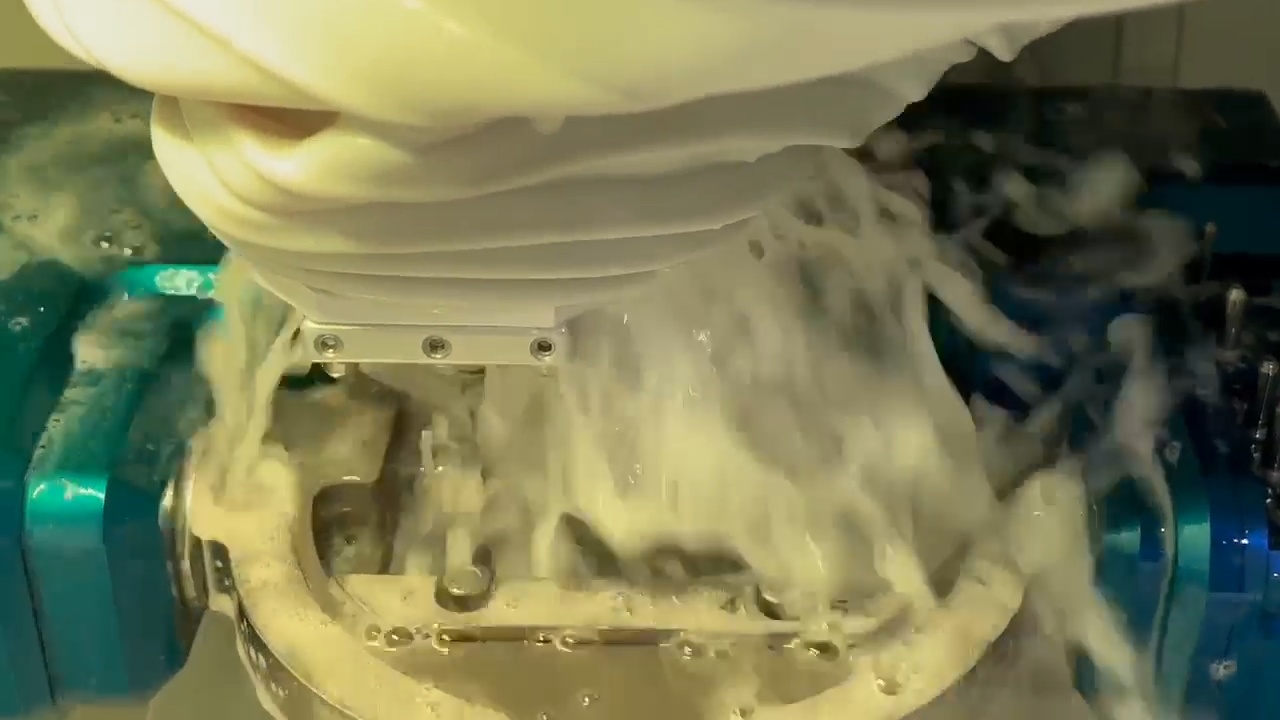
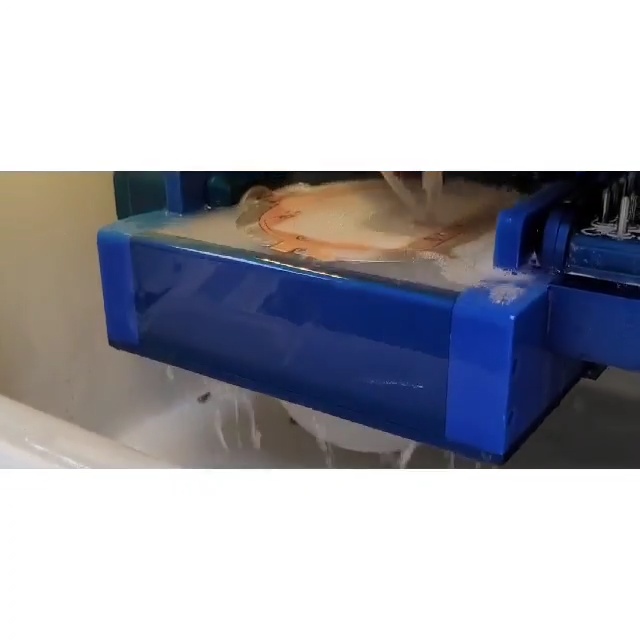
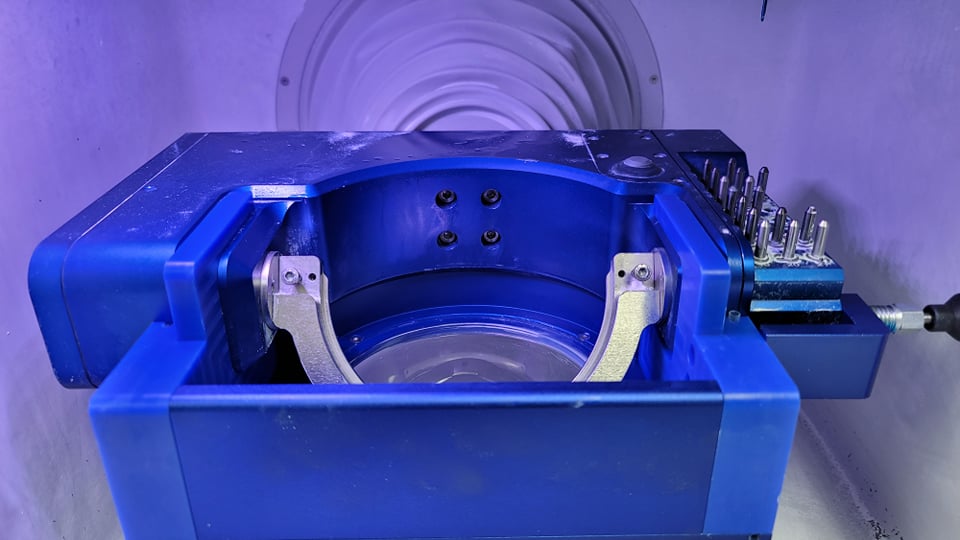
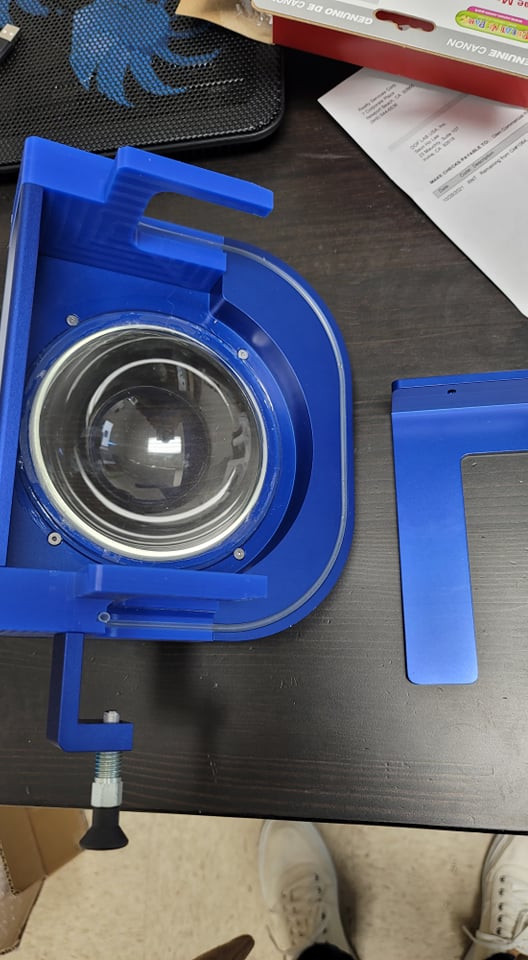
Most if not all milling machines do not adequately cool the tools or restoration while milling. At CAD-Ray we have developed augmenting tools that reduce or eliminate any dry milling of glass ceramic restorations. We can either run tubing from the holding tank or we can submerge the block for soaked milling


The CAD-Ray team is happy to announce that CAD design software has experienced a breakthrough. One of the hurdles of using design software has always been that it was created with lab technicians in mind; the rationale being that technical staff would be using it more than clinicians. It is no wonder that many still send off their scans to labs to be designed “by the experts.”
With the boom in digital and CAD/CAM dentistry, many offices are finally making the leap to bringing some or all of that workflow in-house to be done chairside (as they should). While there are many solutions available to incorporate one or more aspects of the digital dentistry workflow into your practice, it’s safe to say that the innovative design of Clinux is a turning point for design software.
Clinux is the result of collaboration by a team of experts from the most reputable and recognizable brands in the dental industry, all previously involved with advanced technology and equipment. It is made by those who have seen the pain points of the best programs in the dental world. They came up with a plan to eliminate the confusing barriers to simple plug and play design. Clinux is made for dentists in mind, not lab technicians. Less time spent onboarding, less clicks to your finished designs, and clear, reasonable fees all result in the first dentist-friendly CAD design software. Best of all, storage is not required. It is the first CAD design software that operates in the cloud.
Clinux; it’s completely independent, and curiously intuitive. It’s reasonably (and transparently) priced and very accommodating to workflow integration. Combined with the power of Medit, it is easily the most portable and efficient digital solution you’ll find anywhere. As always, the CAD-Ray team, the leader at post-sale technology support will be in your corner with its White Glove service. We encourage you to check it out and see for yourself…

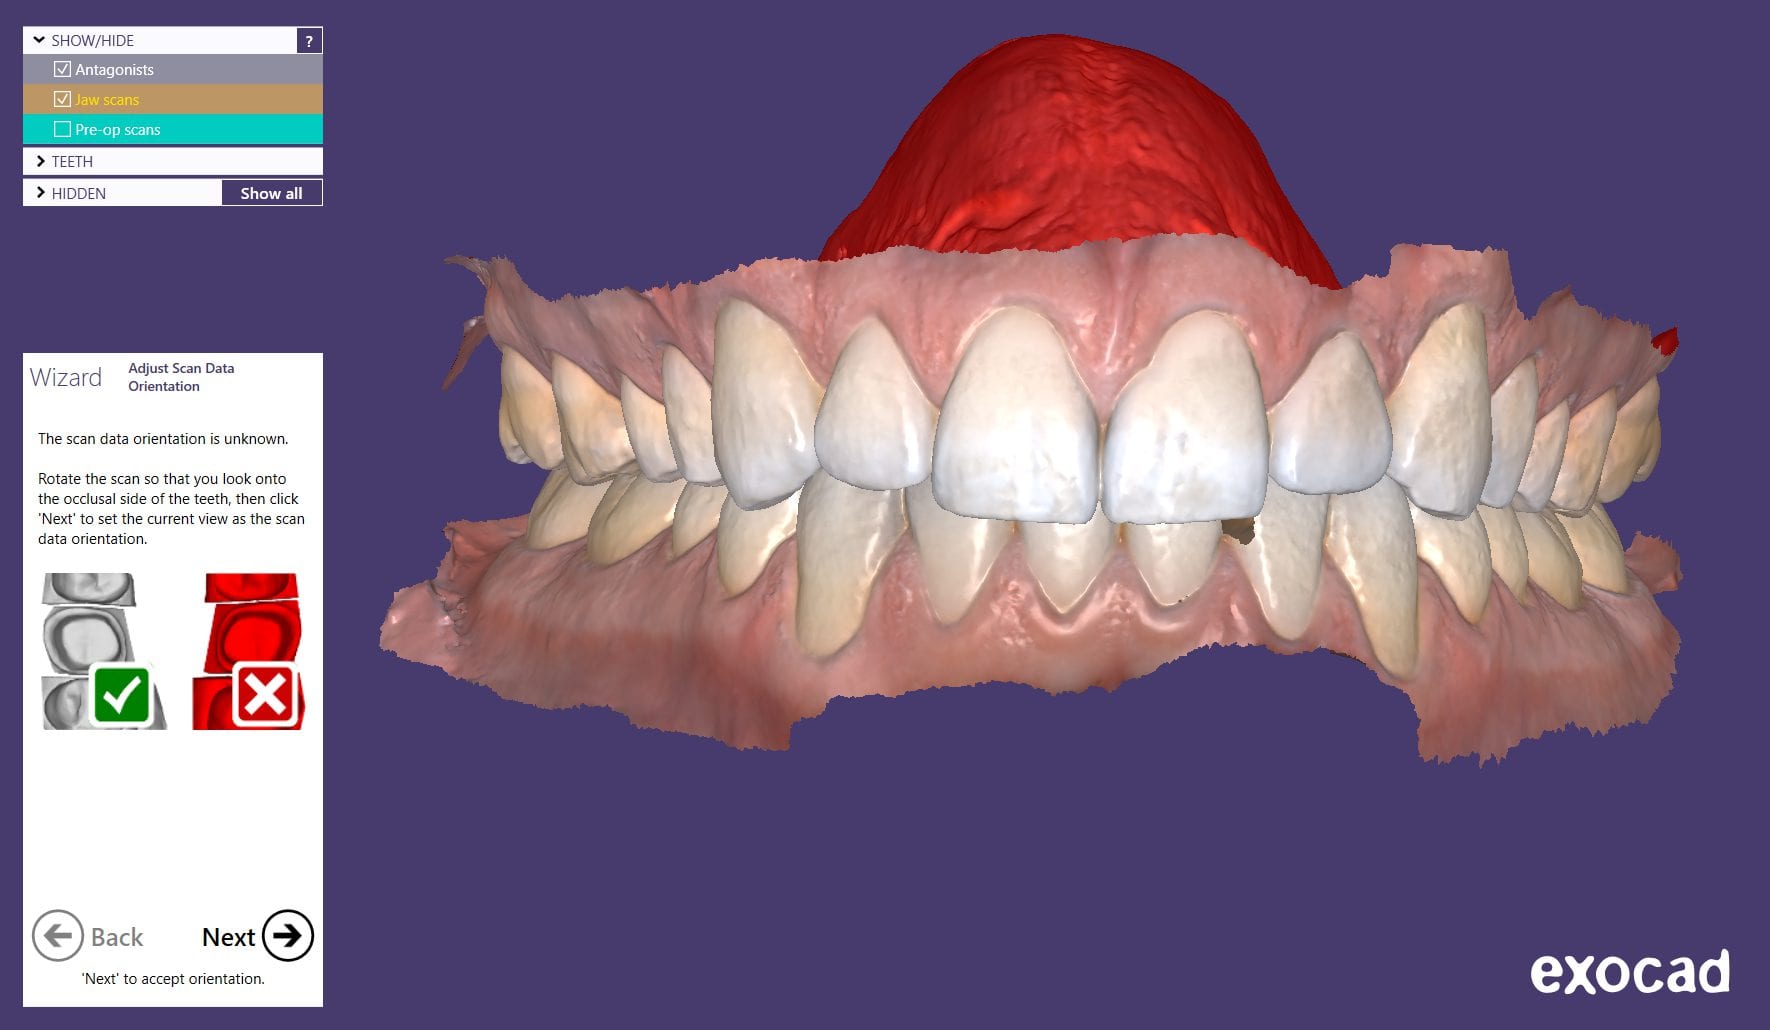
For advanced users of meditlink software, you can skip filling out the Rx form and go straight into scanning. But make sure to properly fill out the CAD Rx form so that all the necessary models are imported into the design software. If you don’t designate the opposing or the Pre-op / Wax-Up in the form, they will not be part of the design equation. Also, this video shows how to select multiple restorations at once.

here is a list of why the Medit Artificial Intelligent Implant Suprastructure Identification System is significantly more advantageous over all other cadcam systems.
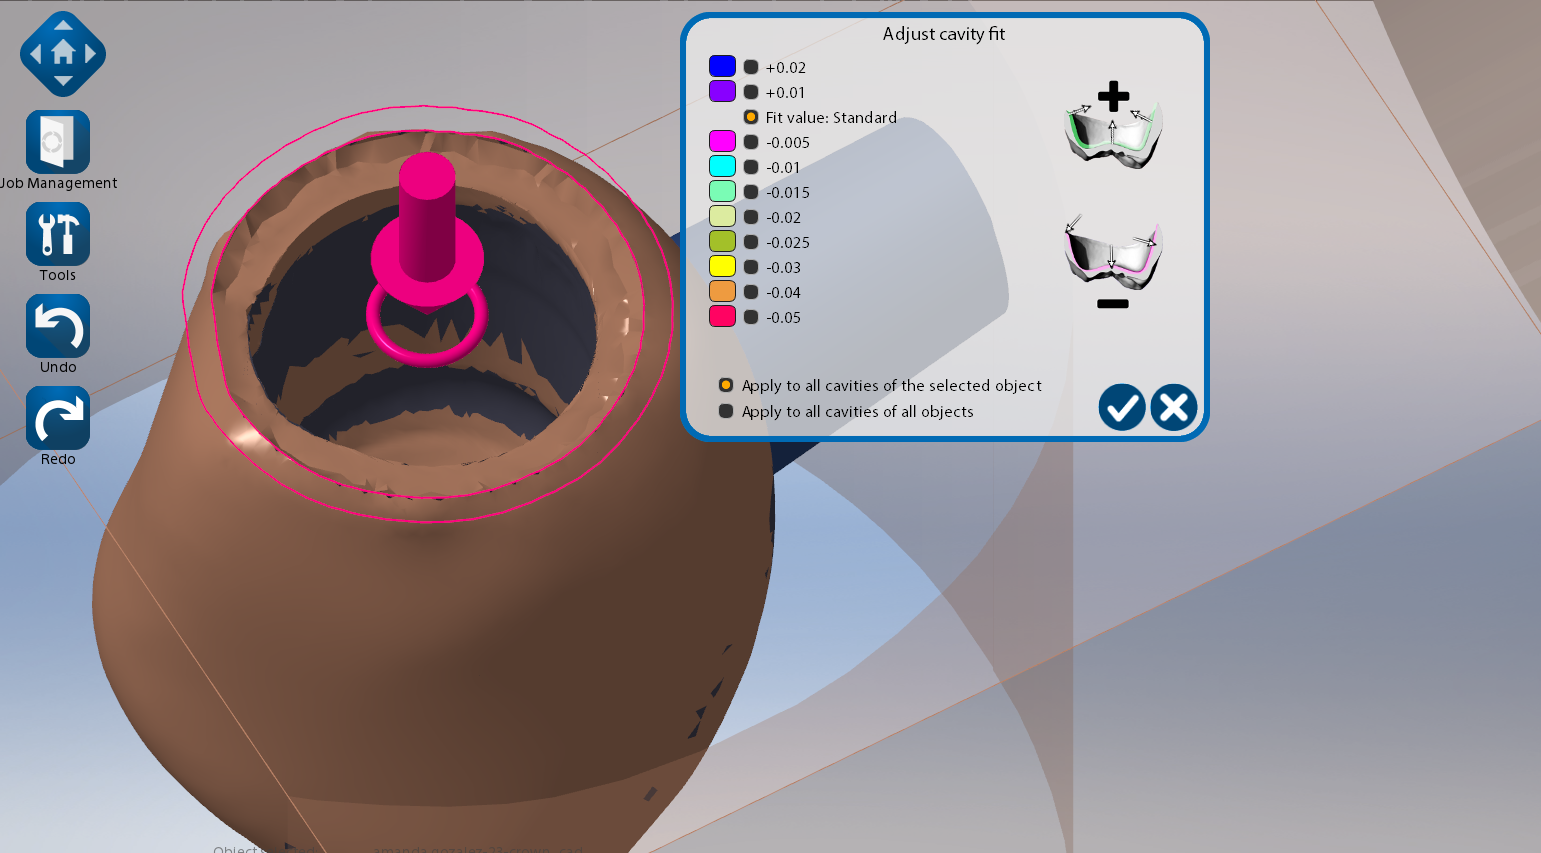

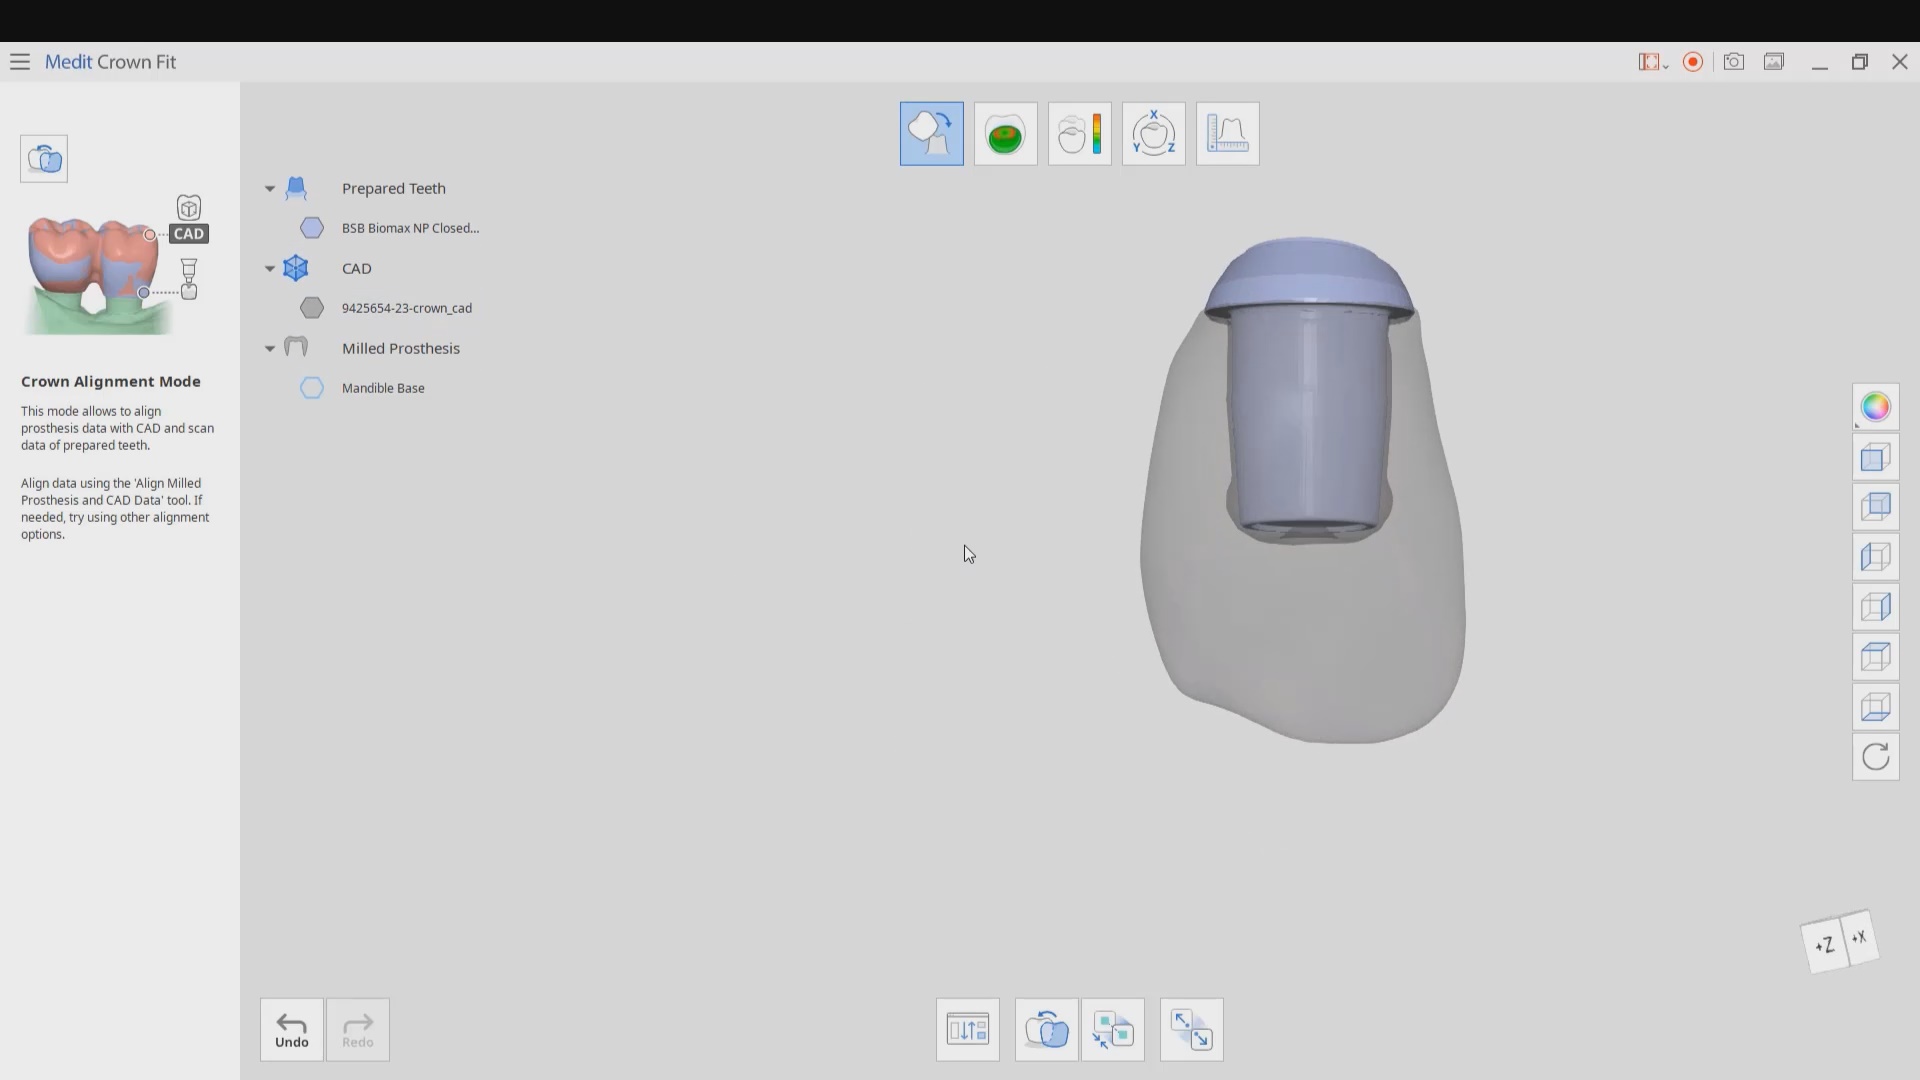
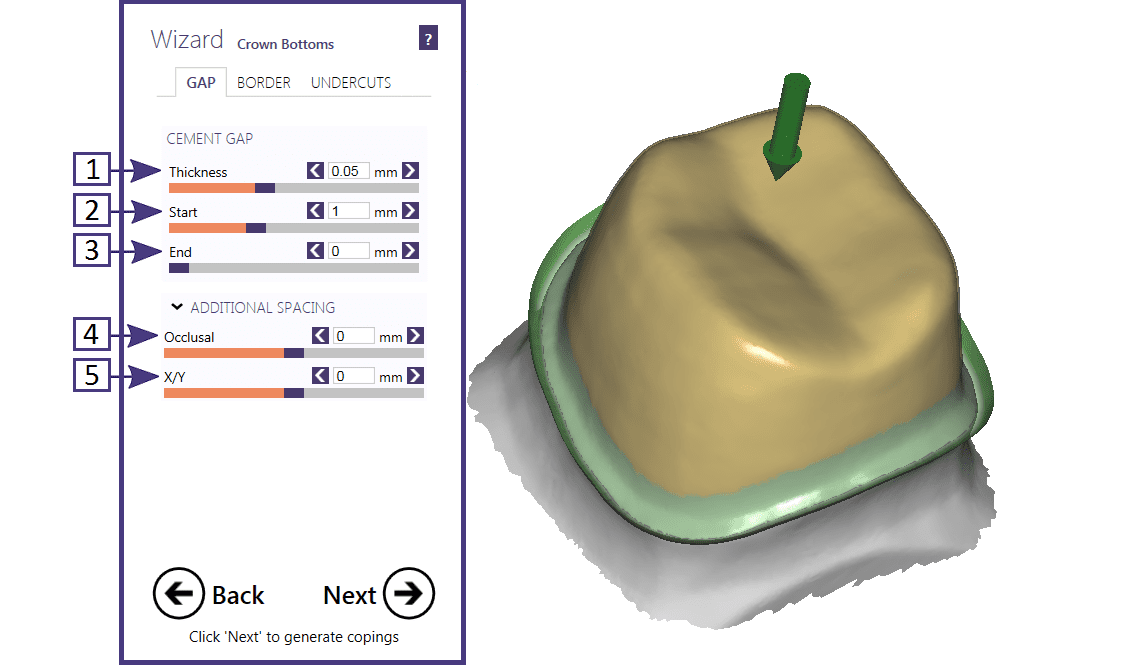
With Medit’s Crown Fit function, you can see exactly how much cement is required to seat the restoration and how well it is adapted to the tibase.


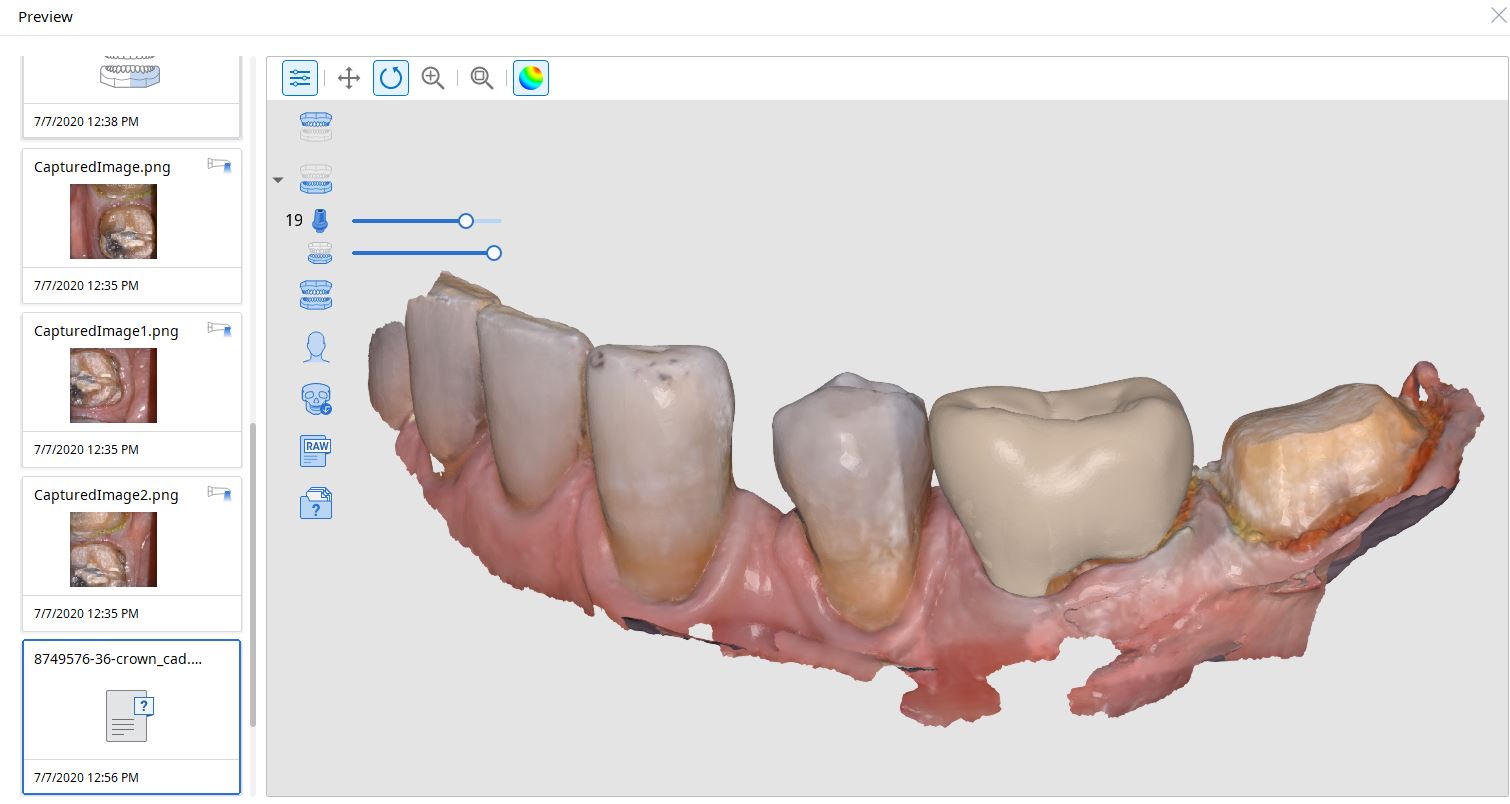
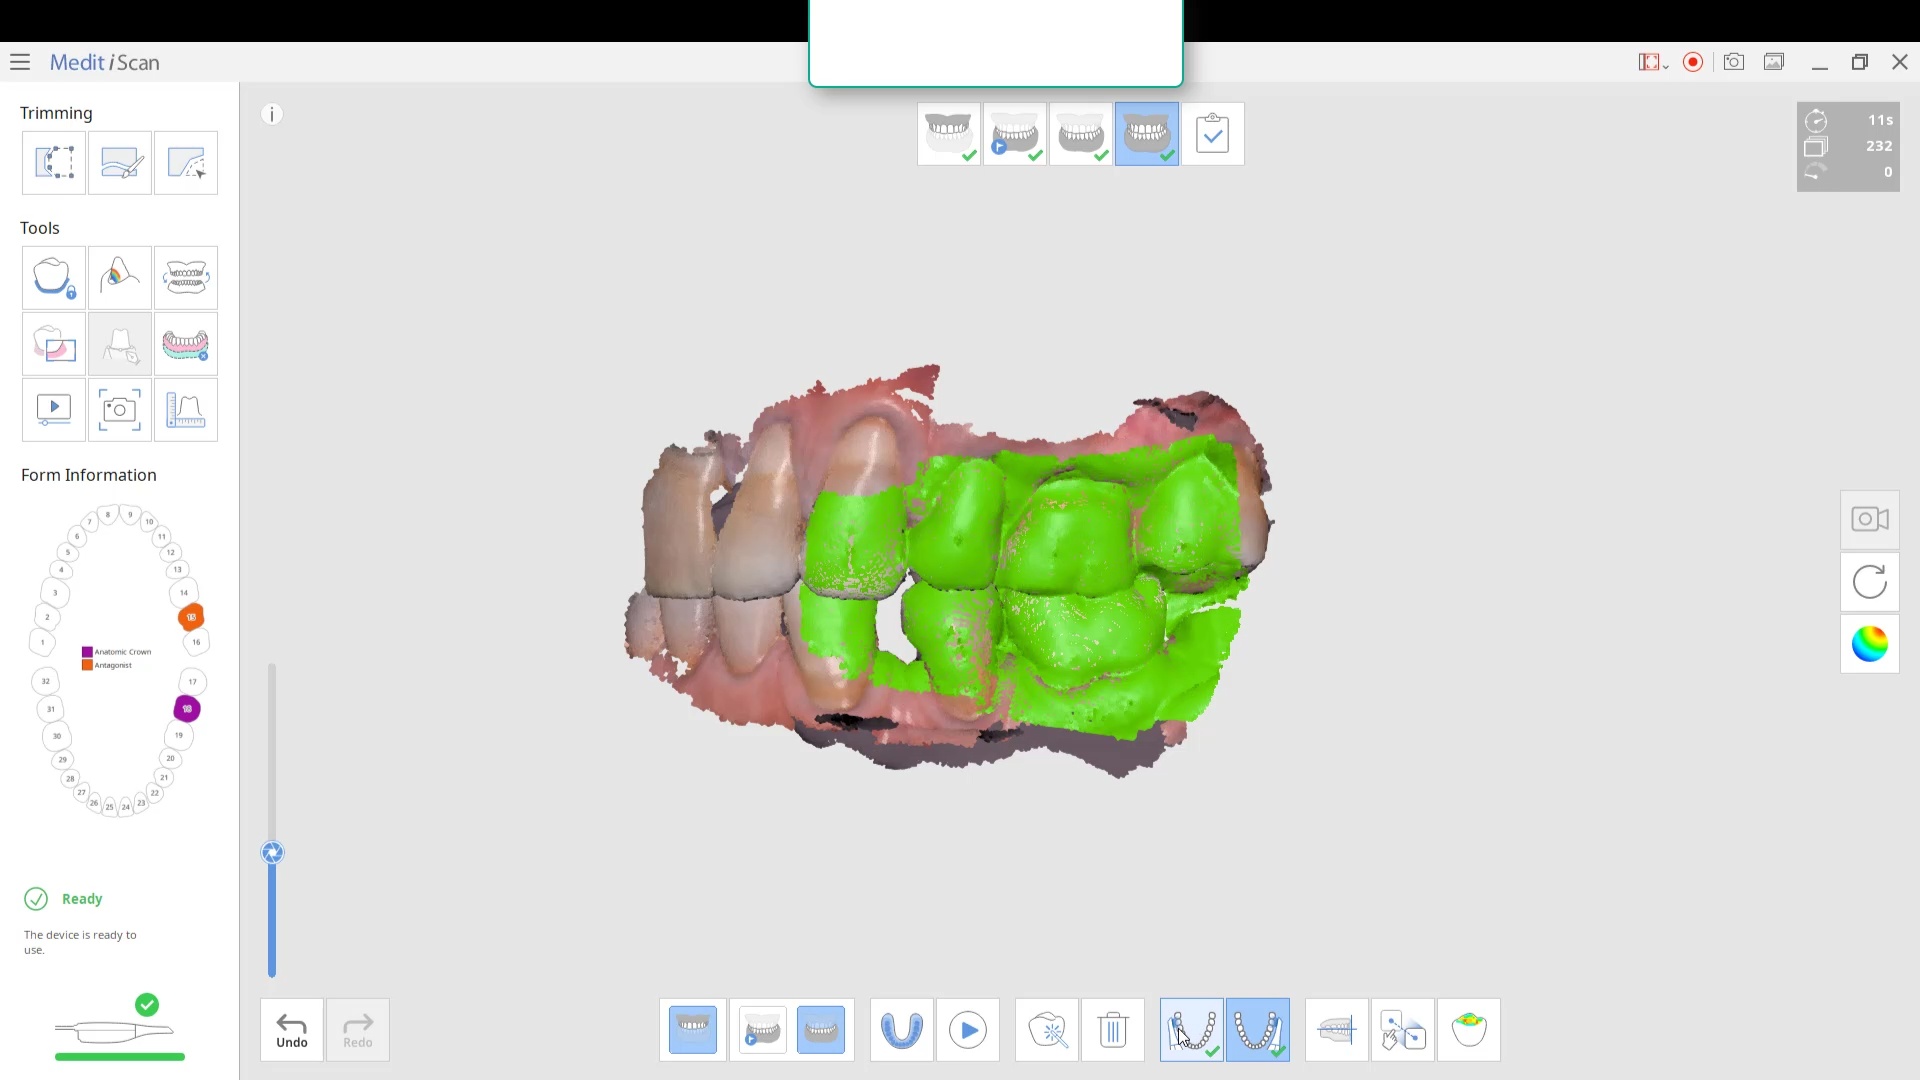
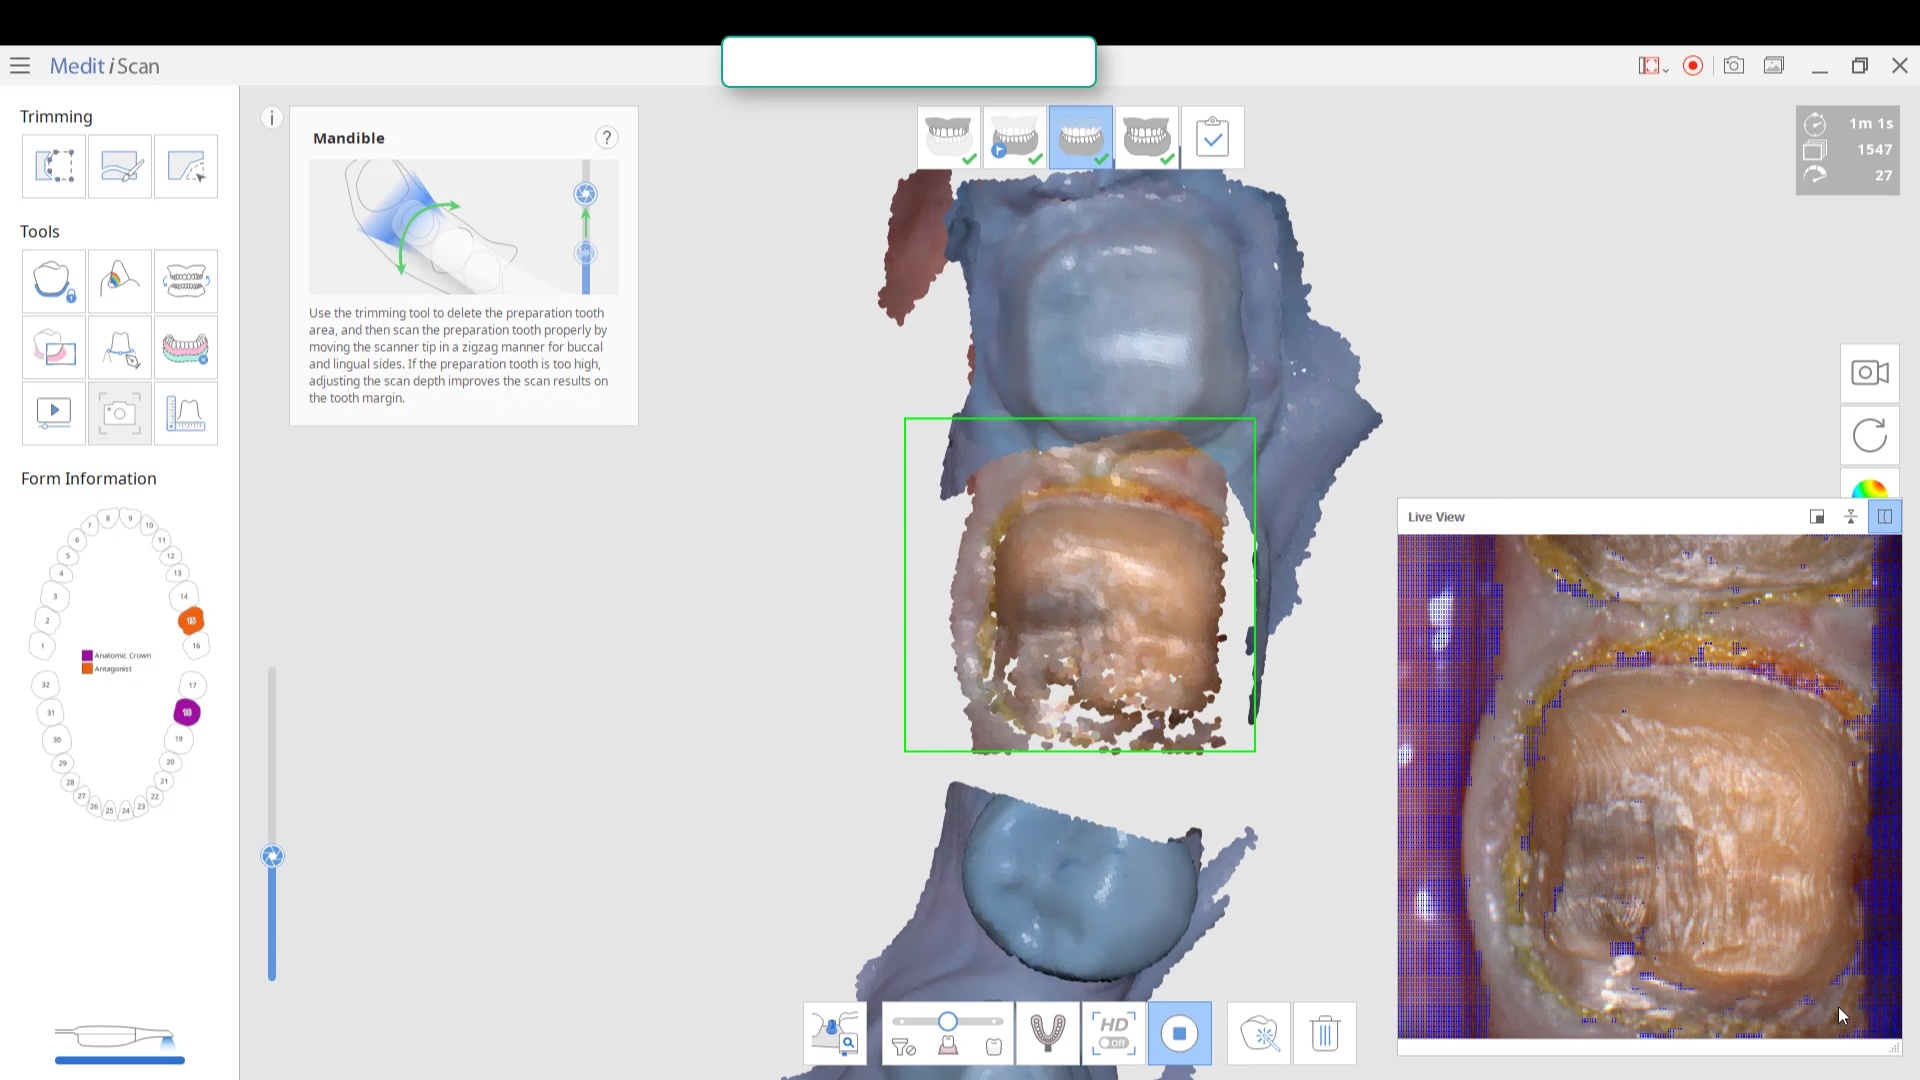
This article features the new Meditlink 2.3 software which has some advanced functionality. One of the greatest achievements is he ability to tell the scanner to avoid imaging certain colors like green and blue. This greatly facilitates the imaging of full arches as you can let your gloves / fingers guide the camera and displace all the soft tissue that impedes image capturing. We also feature how easy it is to launch CAD software to design the restoration and mill it out of lithium disilicate material
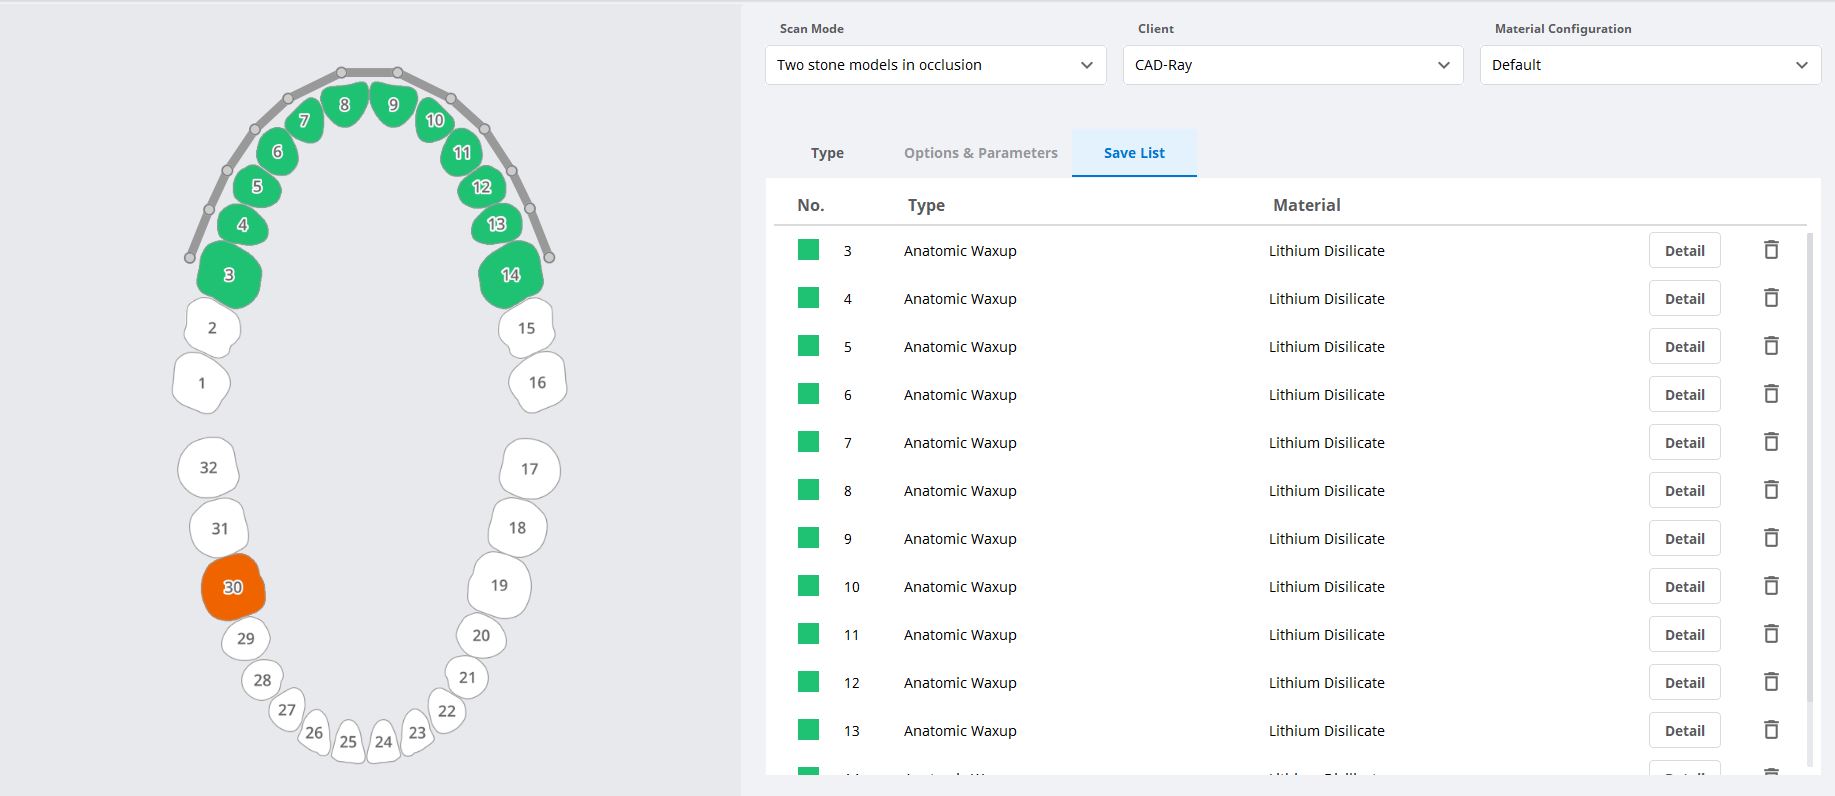
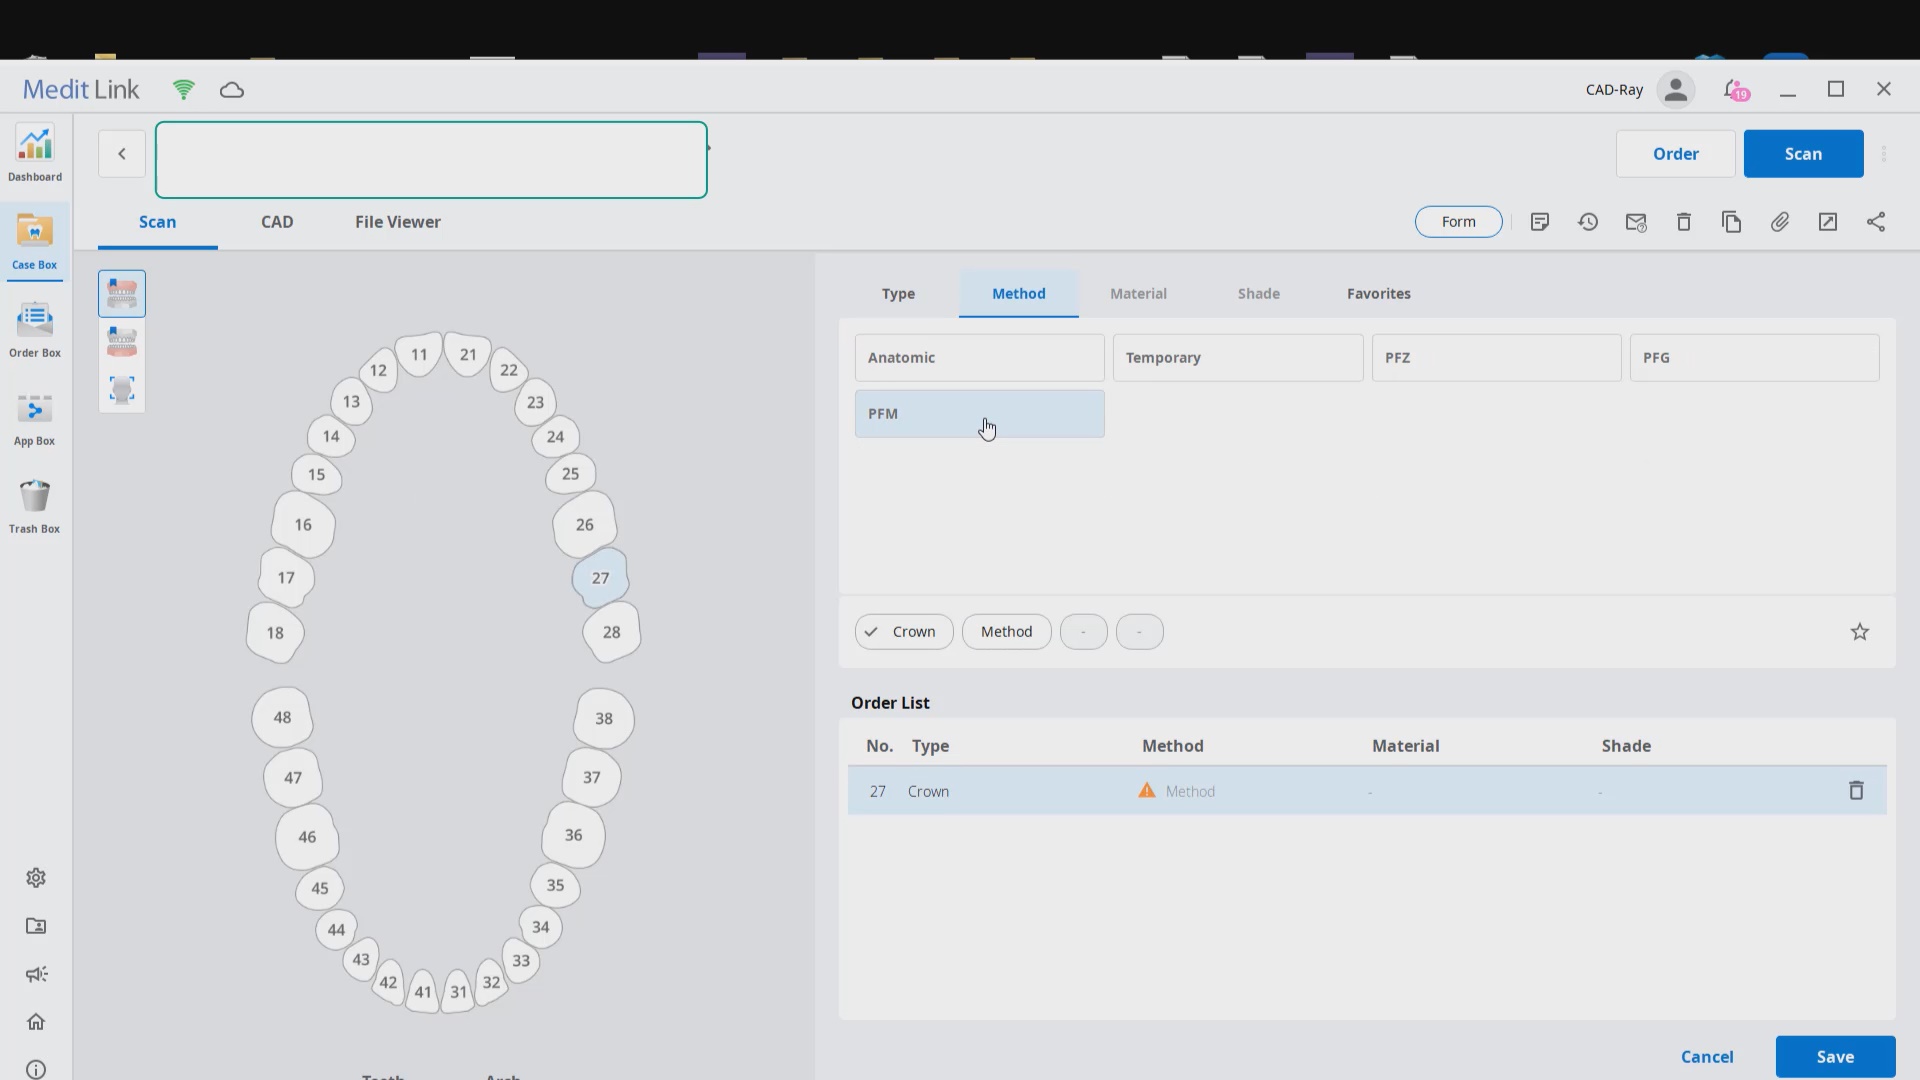
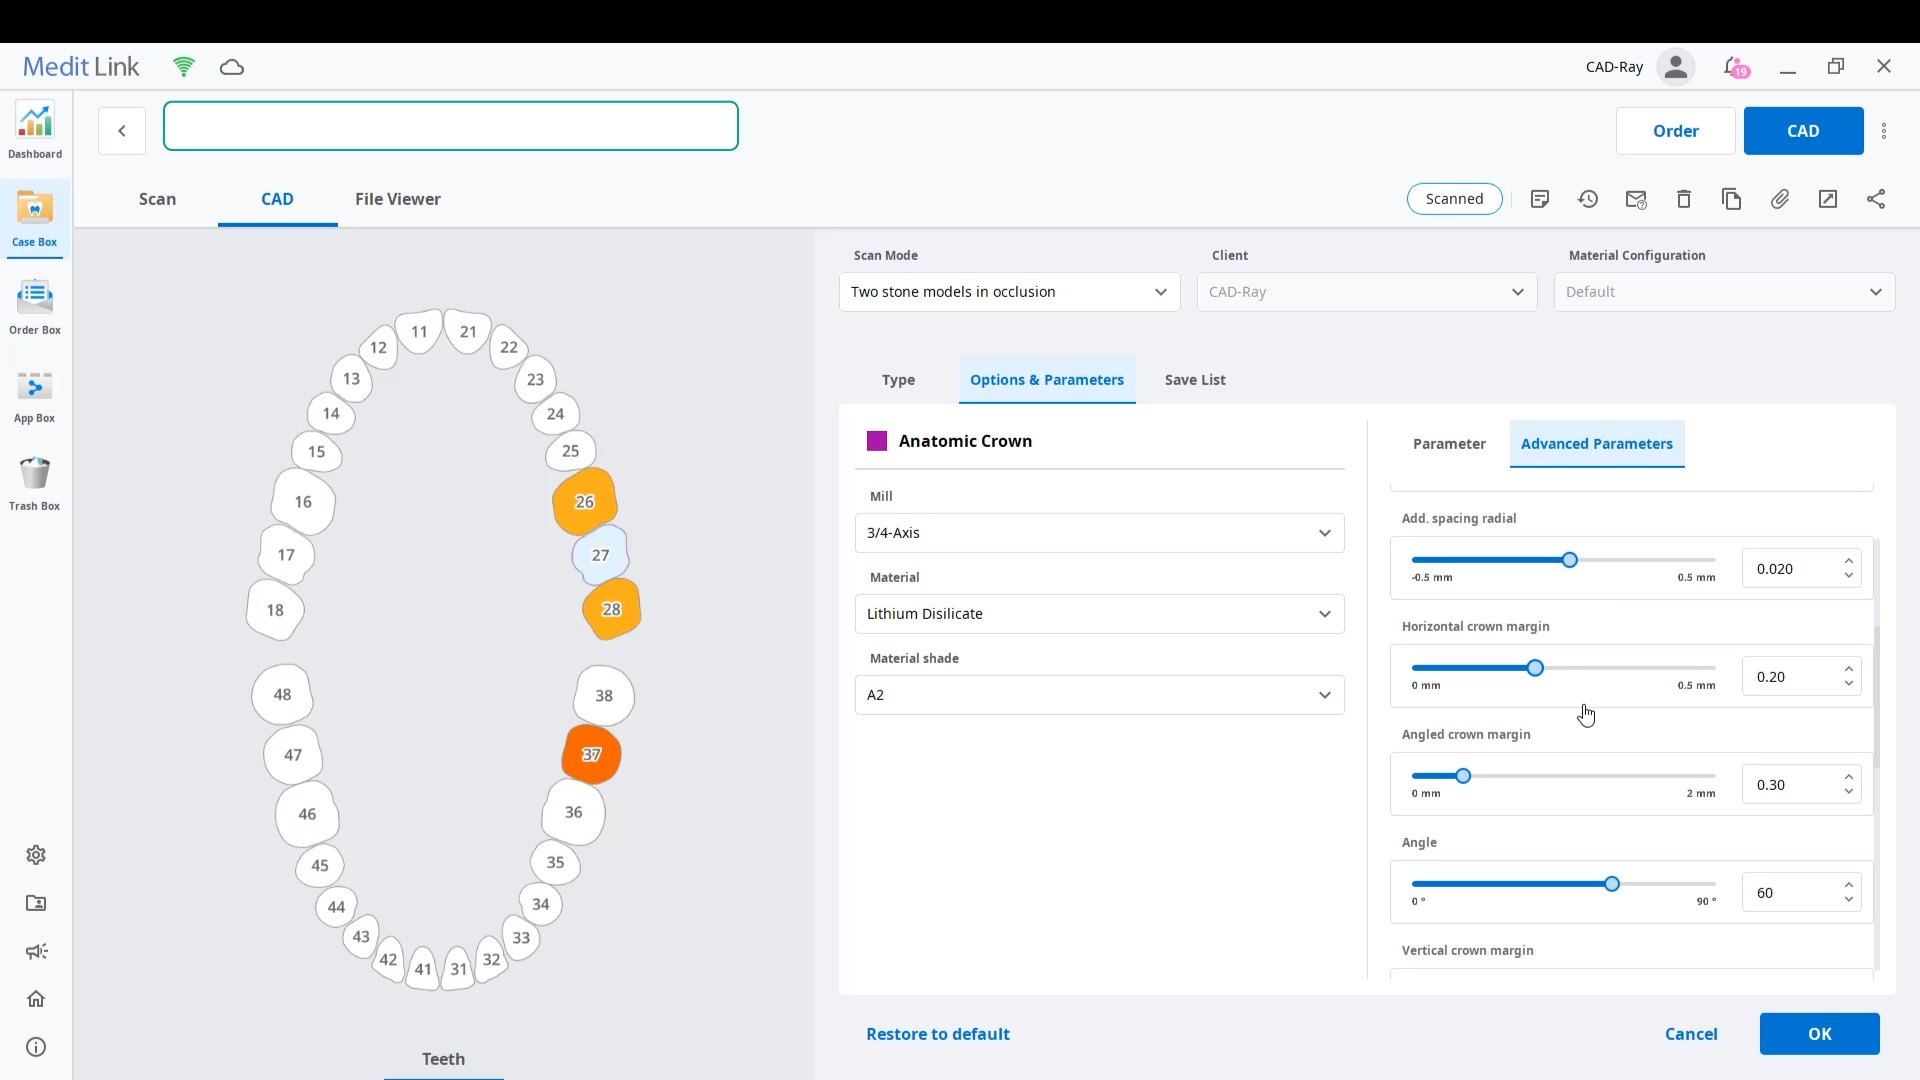
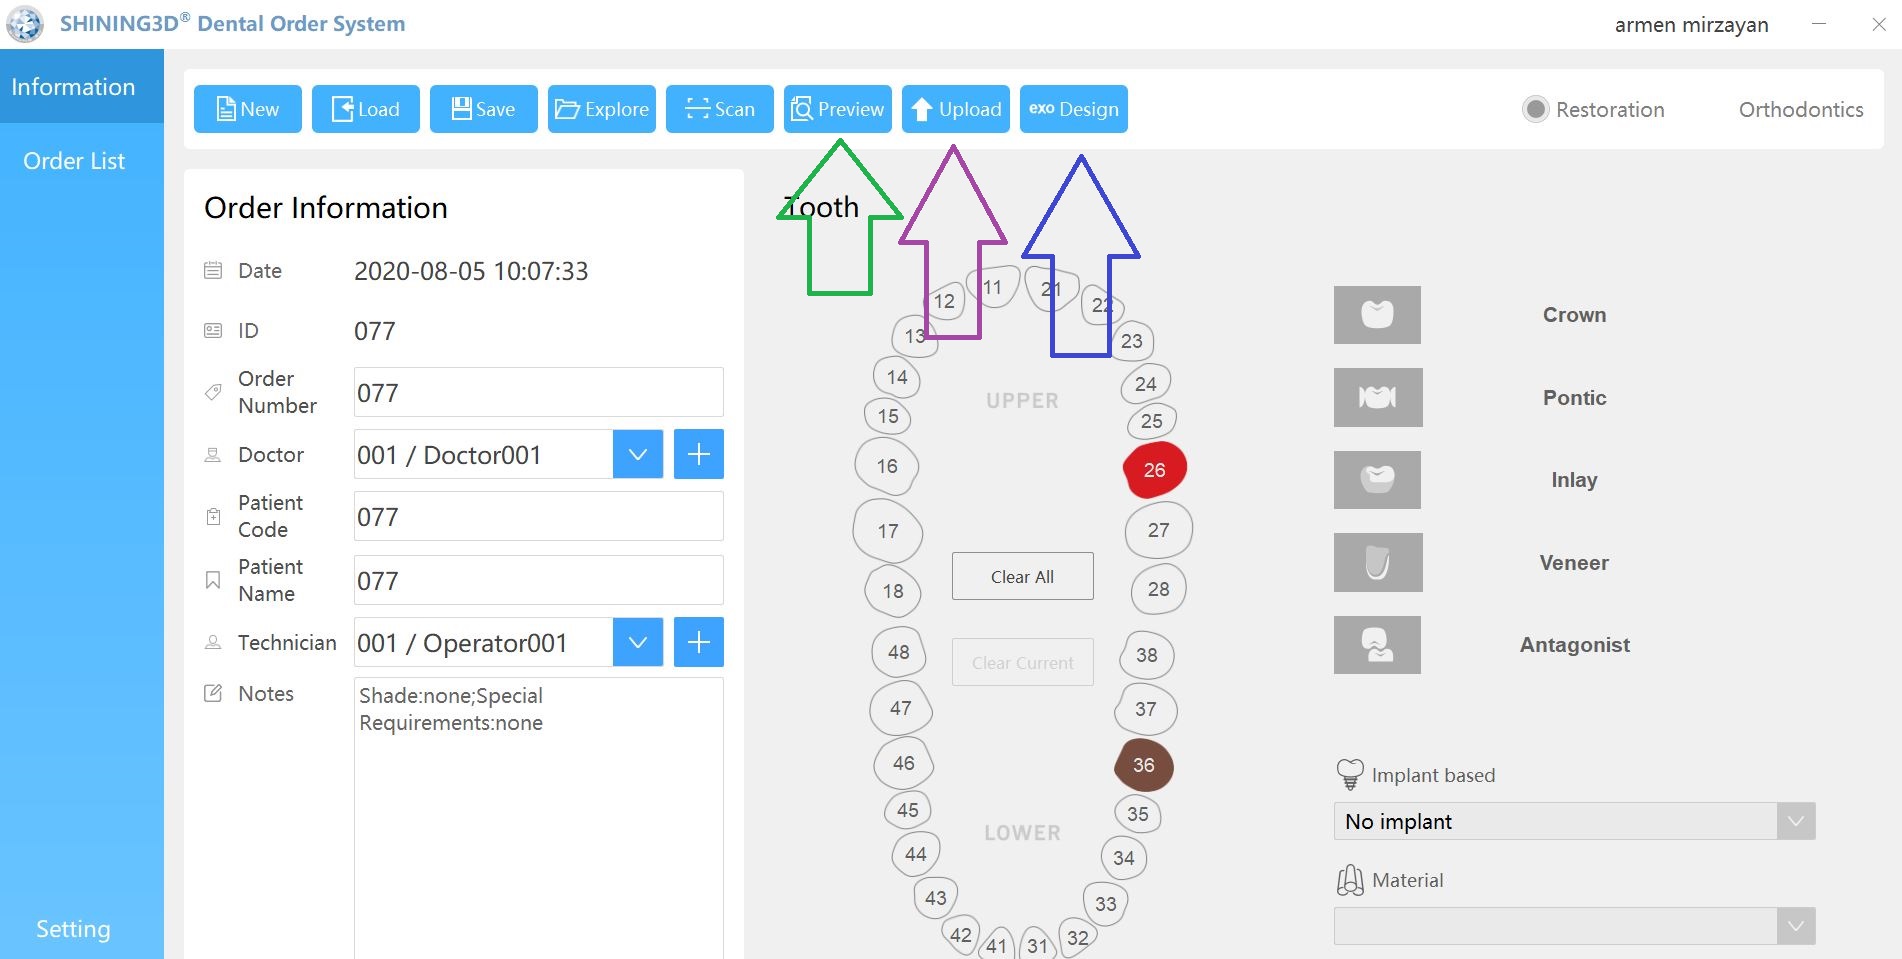
Case set up: here we enter the patients name and a simple tab appears where we chose the material and restoration tab. Once you image, you can place an order to the lab or you can advance to the CAD tab:
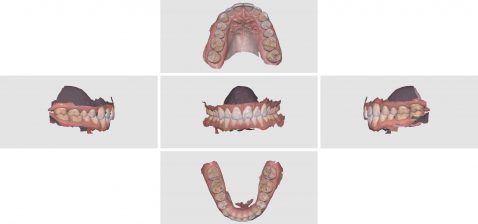
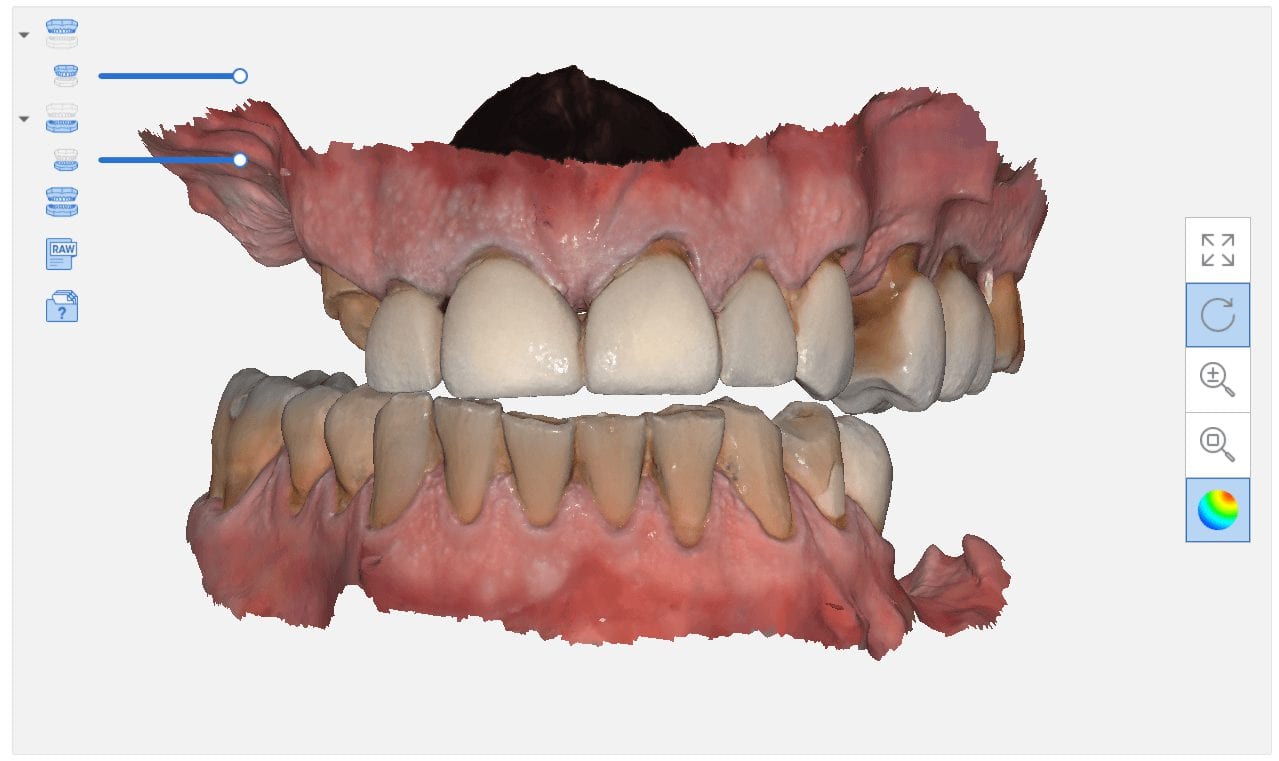
After the Rx has been filled out, you can launch the Medit Scan and image the upper and lower arches. Please note how we tell the camera to avoid the color blue and it ignores the clinicians fingers during imaging. The upper jaw and lower jaw were captured, then the bite registration even before the preparation was finished. This allows the verification of proper reduction and space for the ceramic material
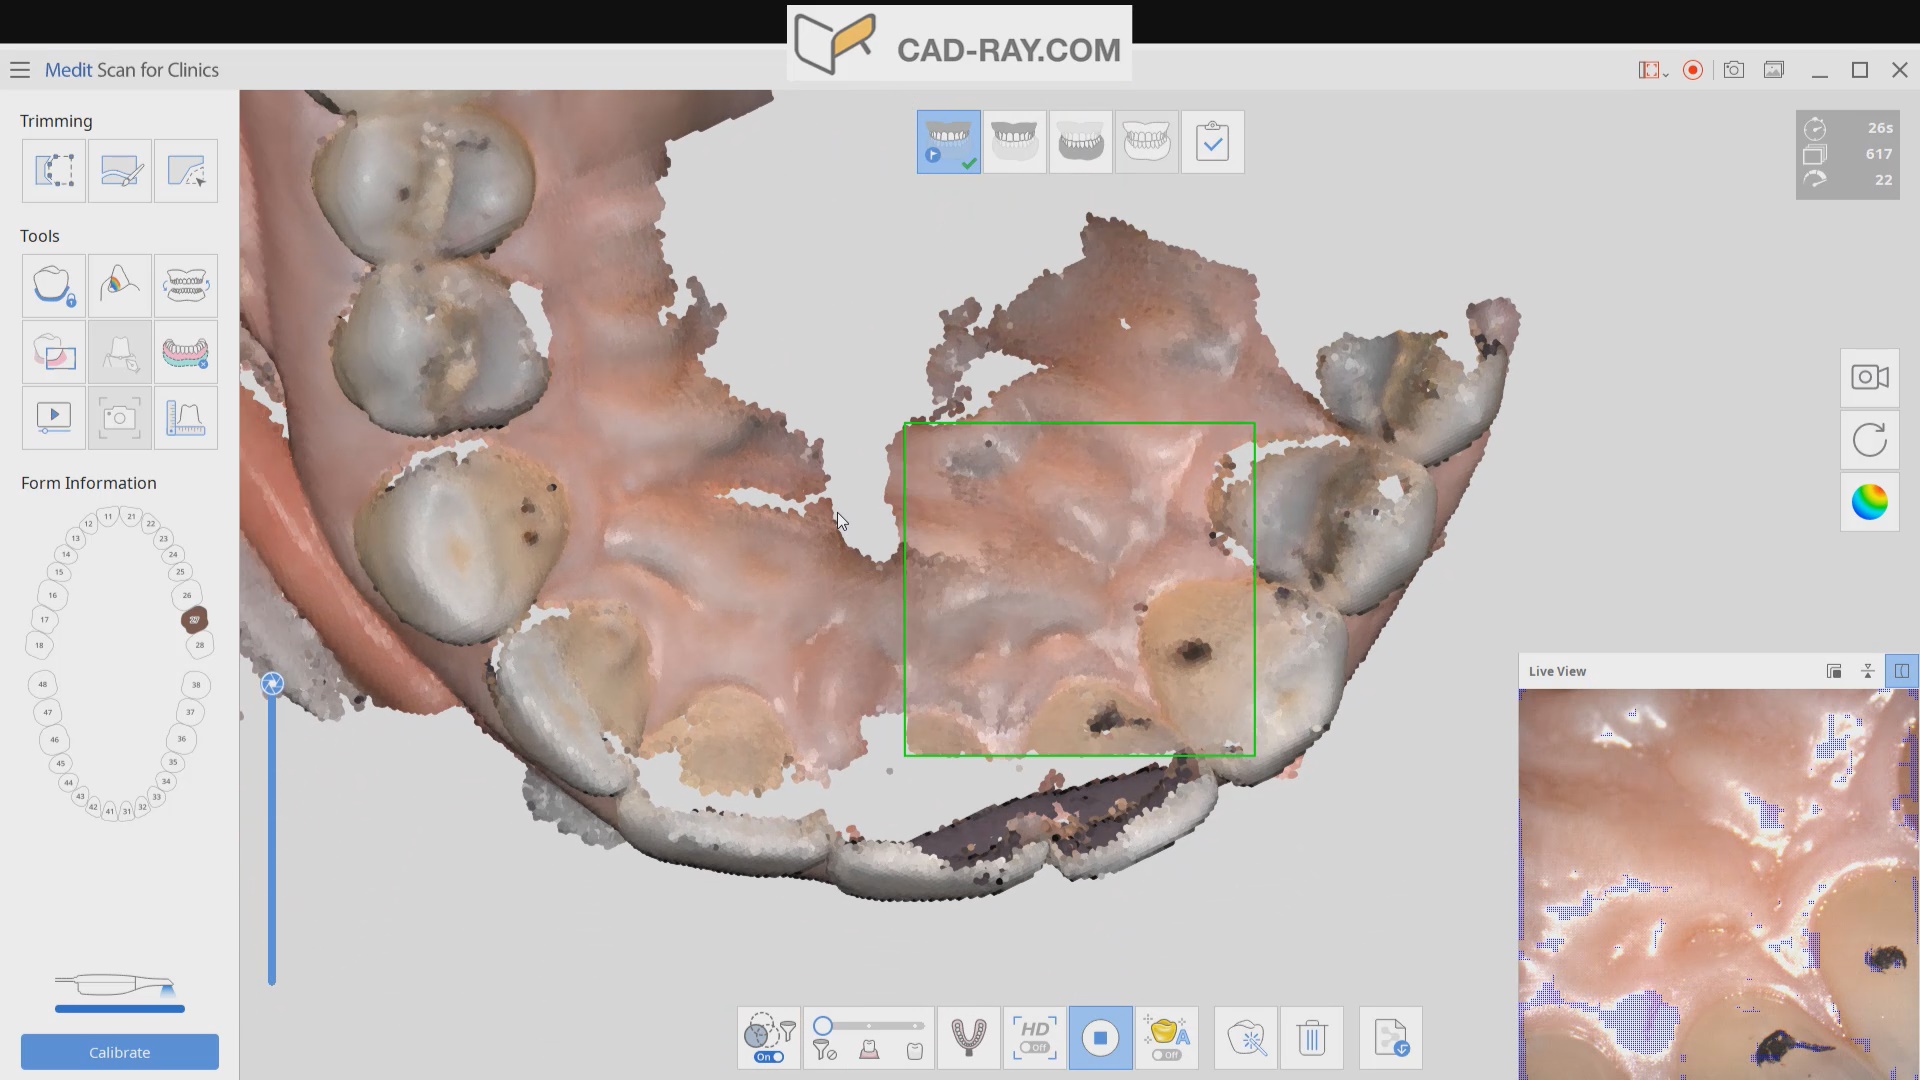
Lower Arch Scan
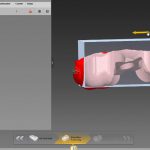
The lower arch is the most difficult area to scan as you frequently have to battle the tongue, saliva, and the lips. The optragate can be of great help but notice how we use the color filter to hide the blue gloves while we advance the camera. It is a great aid in facilitating the capture of the lower arch
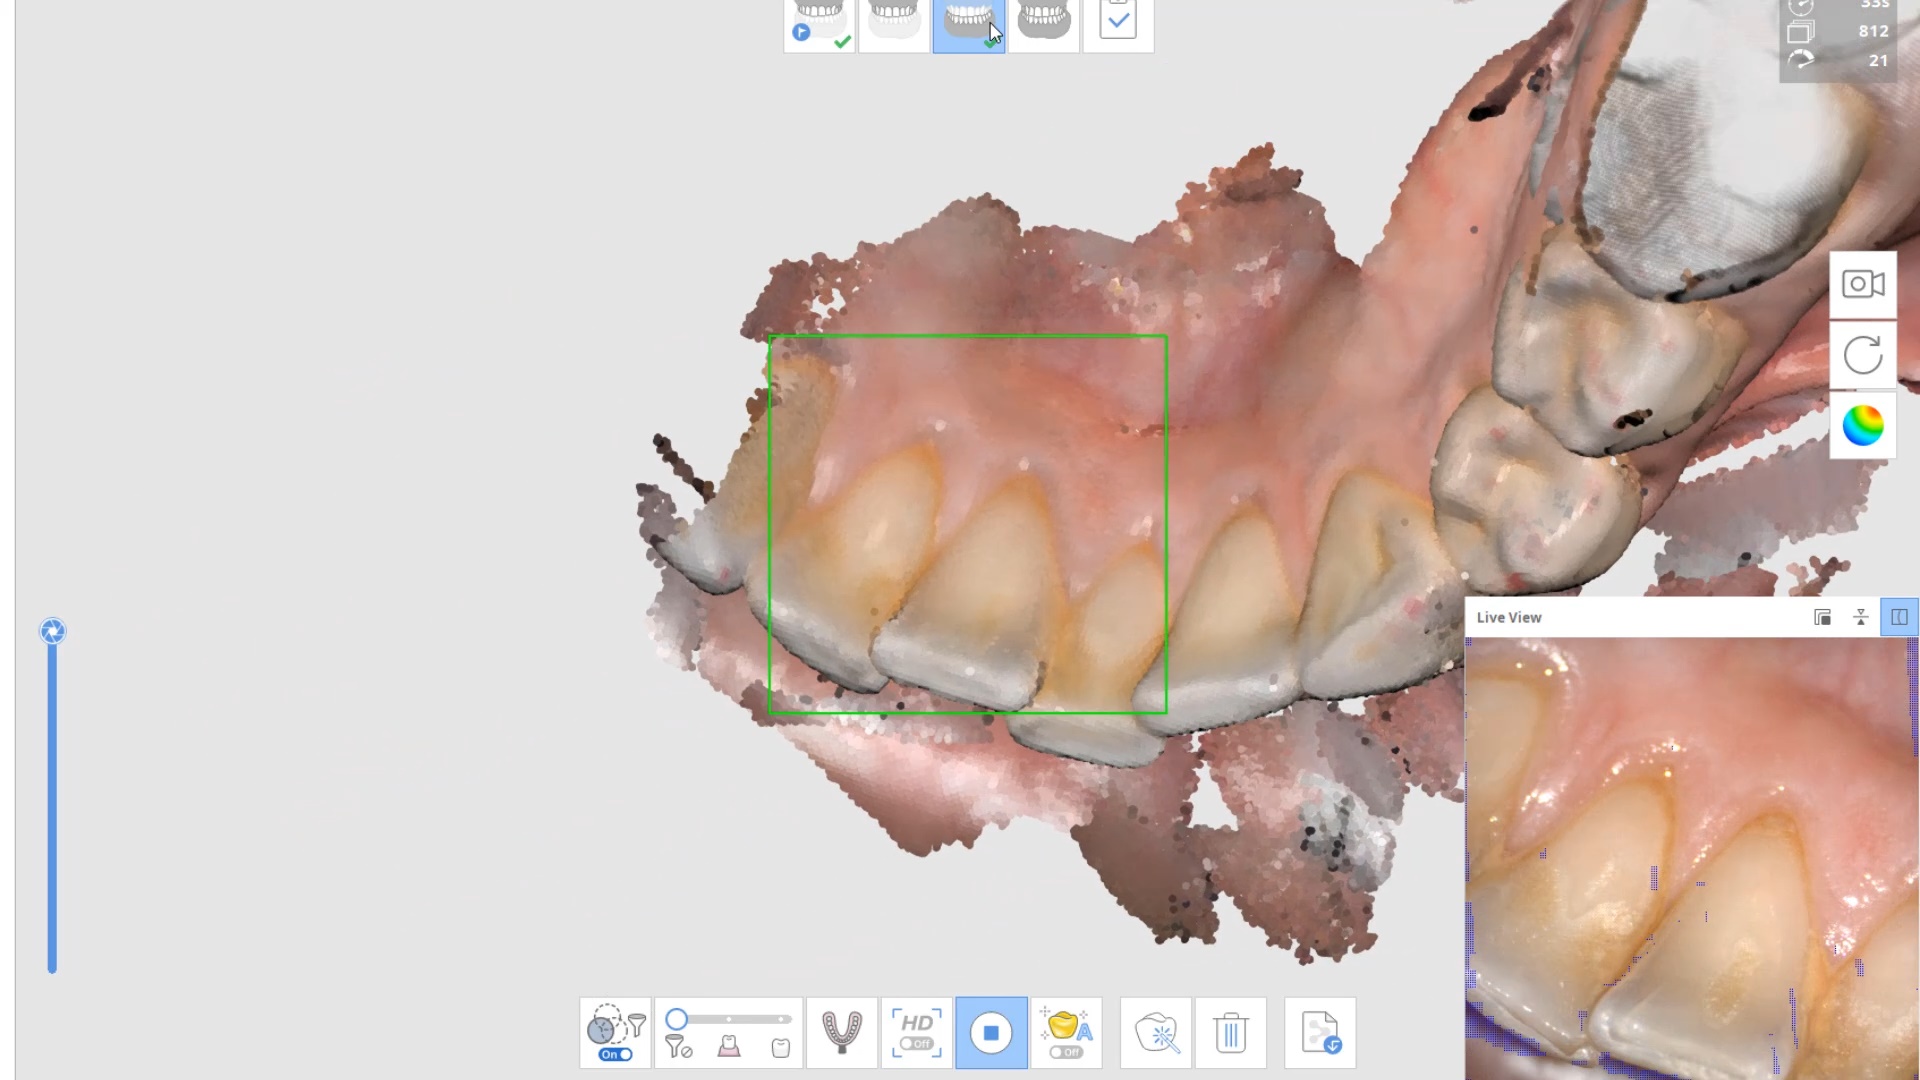
Upper Arch Scan
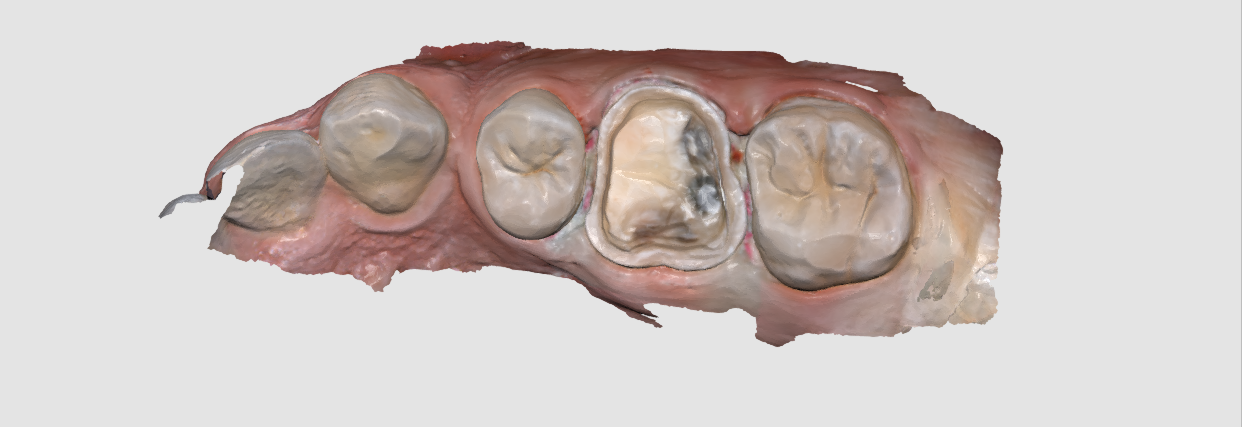
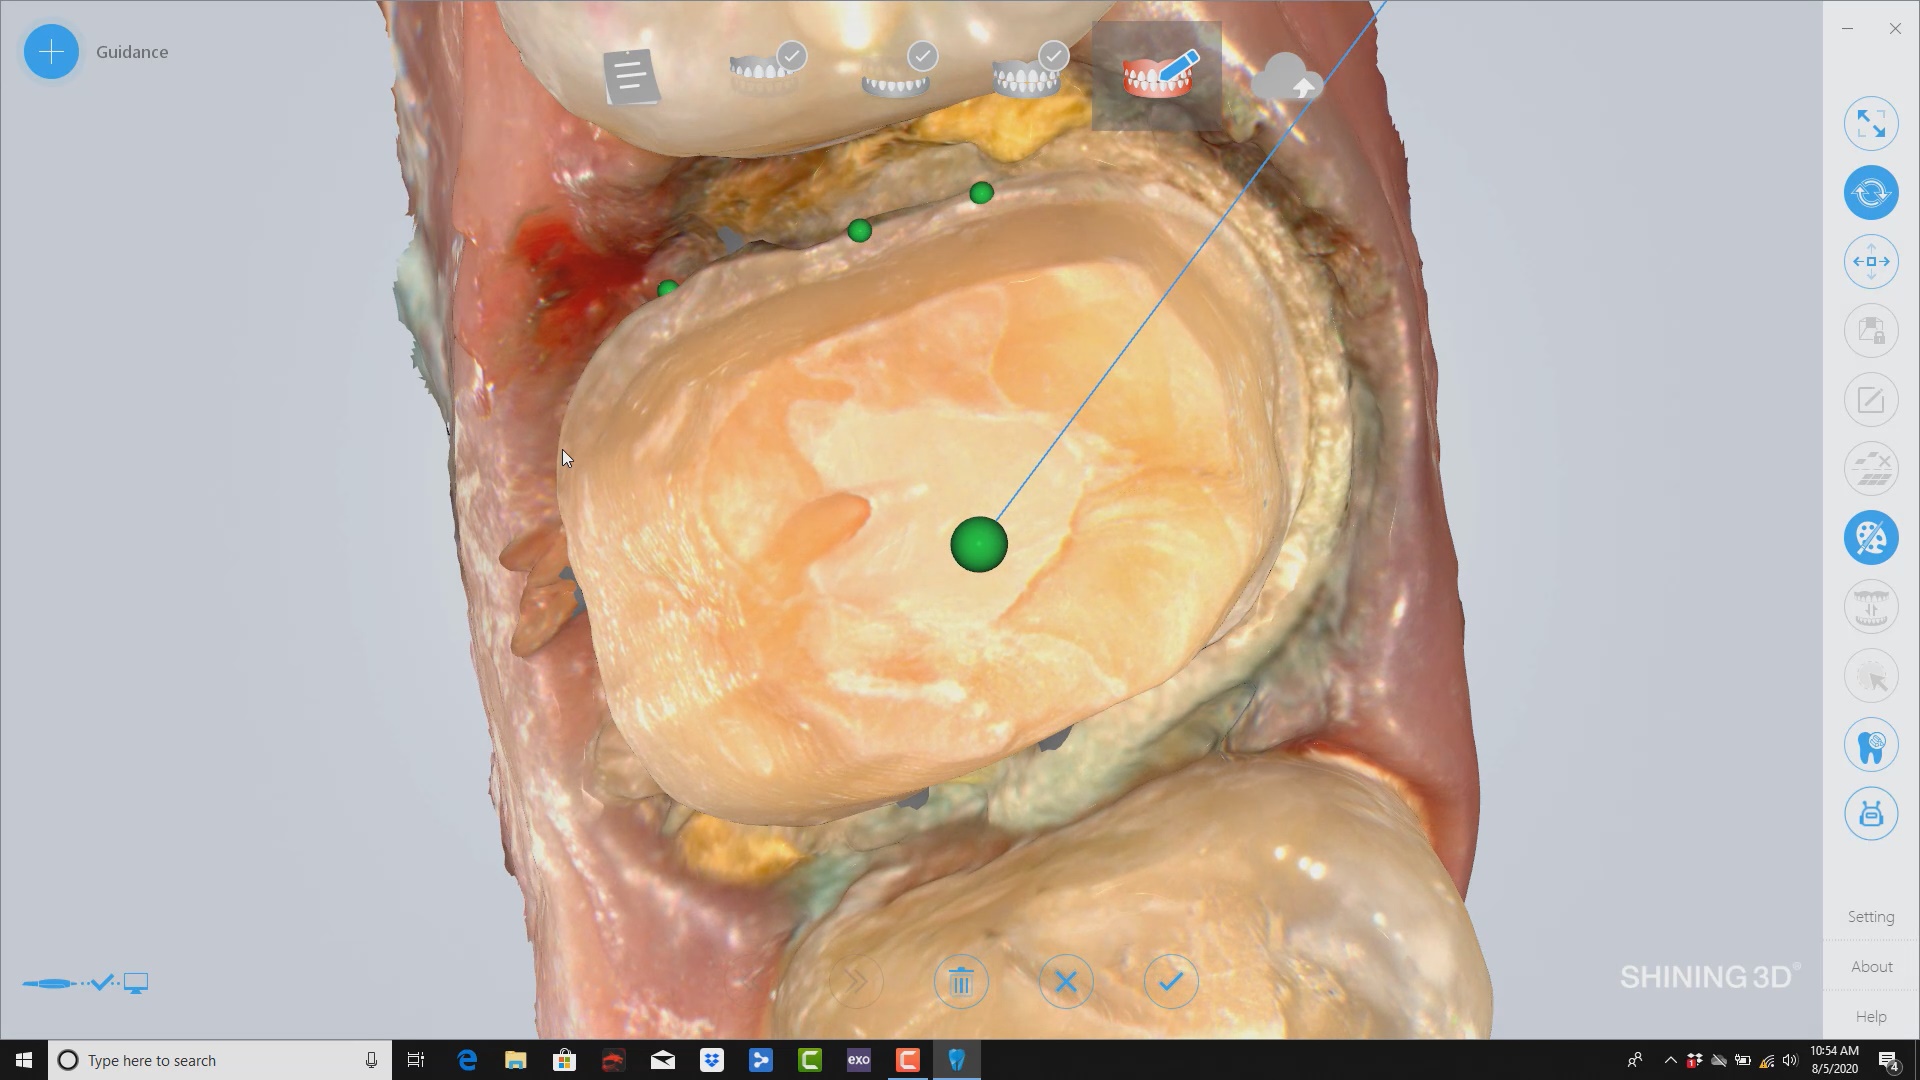
The same principle is applied to the upper arch. Notice that the software does not care if you start with the upper or lower arch. Here, you can visualize how the blue glove was used to displace the cheek and capture the pre-op condition of the upper second molar. The rest of the arch was easily imaged. It is not necessary to capture full arch impressions and this was done just for demonstration purposes. For a single unit case, generally imaging distal from the canine is adequate.
Checkingthe reduction and aquiiring the bite registration
We recommend that you capture the bite before you finish imaging the preparation. This gives you one last chance to verify that you have reduced enough to accommodate material thickness. You can see how we just take regular photos to document the lack of clearance and we continue to adjust the height of the preparation until we achieve the required space. We then activate the imaging process and capture the occlusal relationship between the upper jaw and the lower jaw
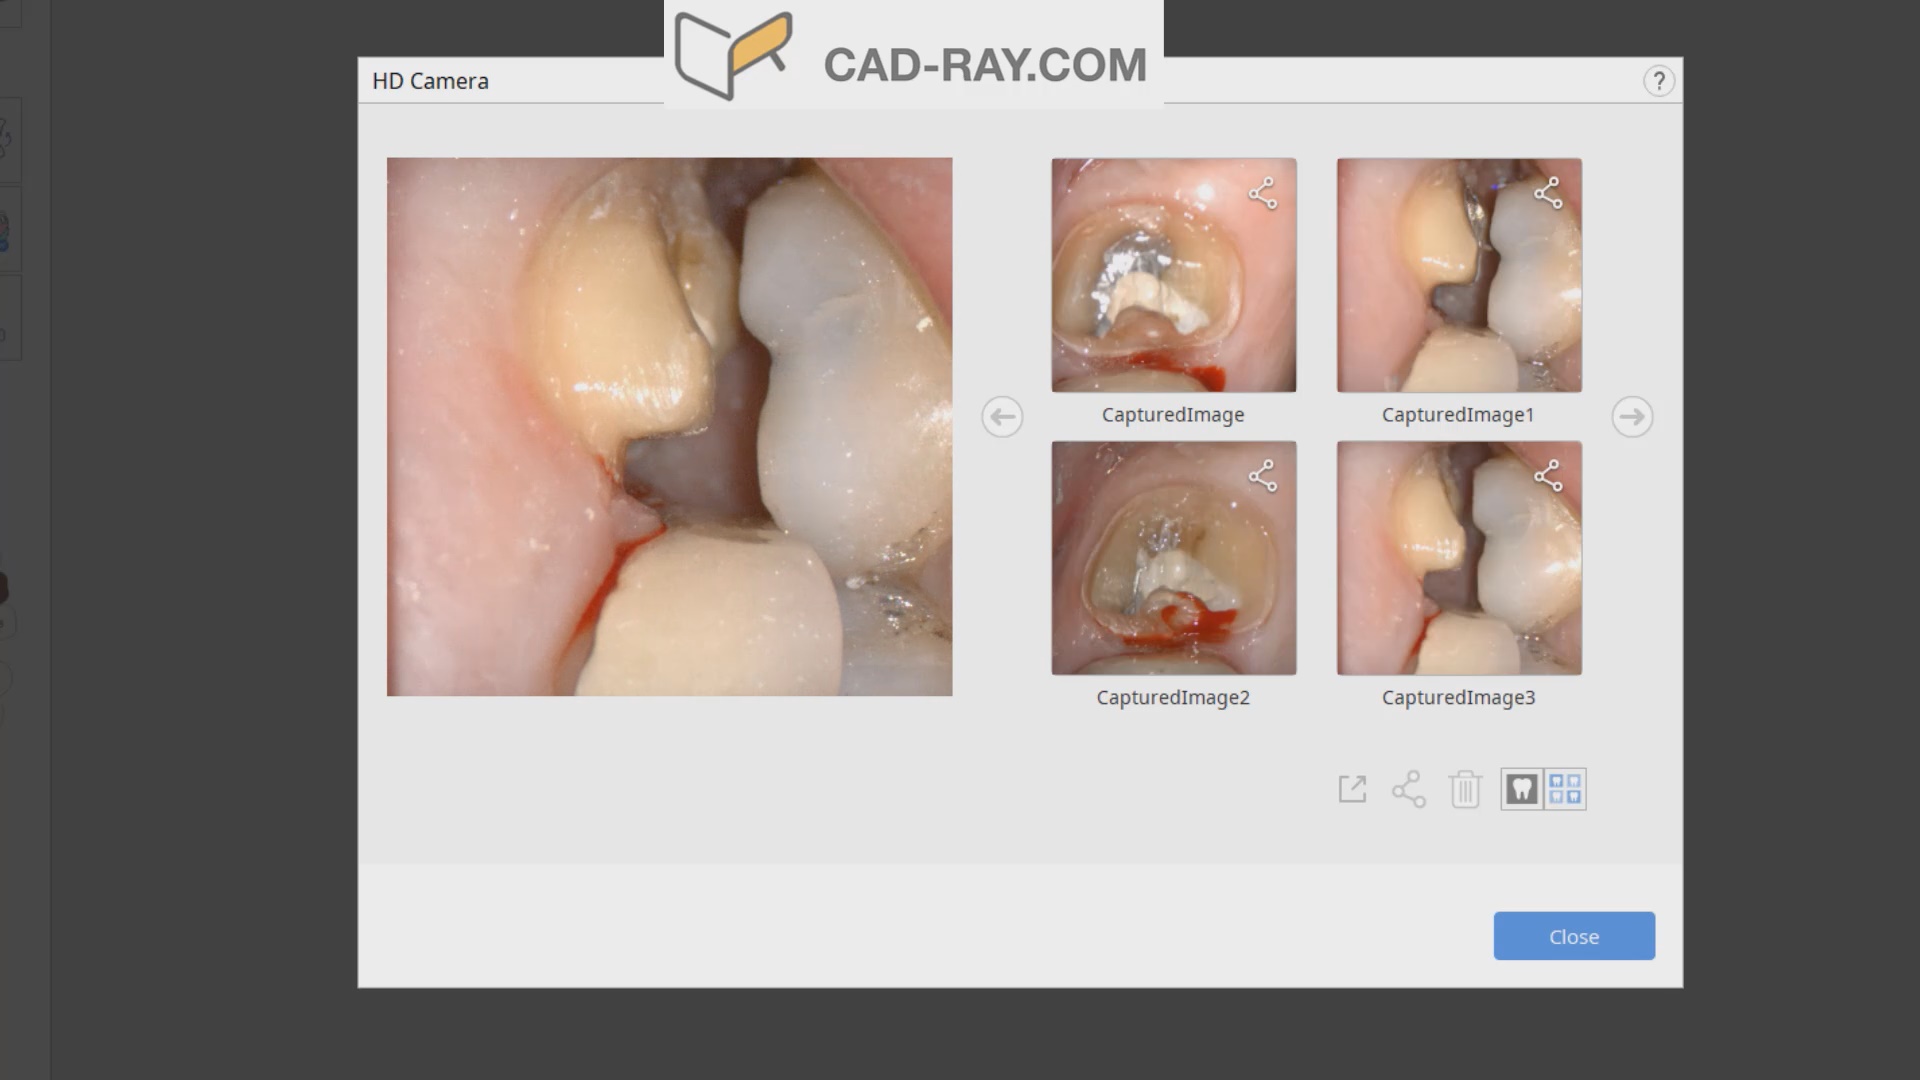
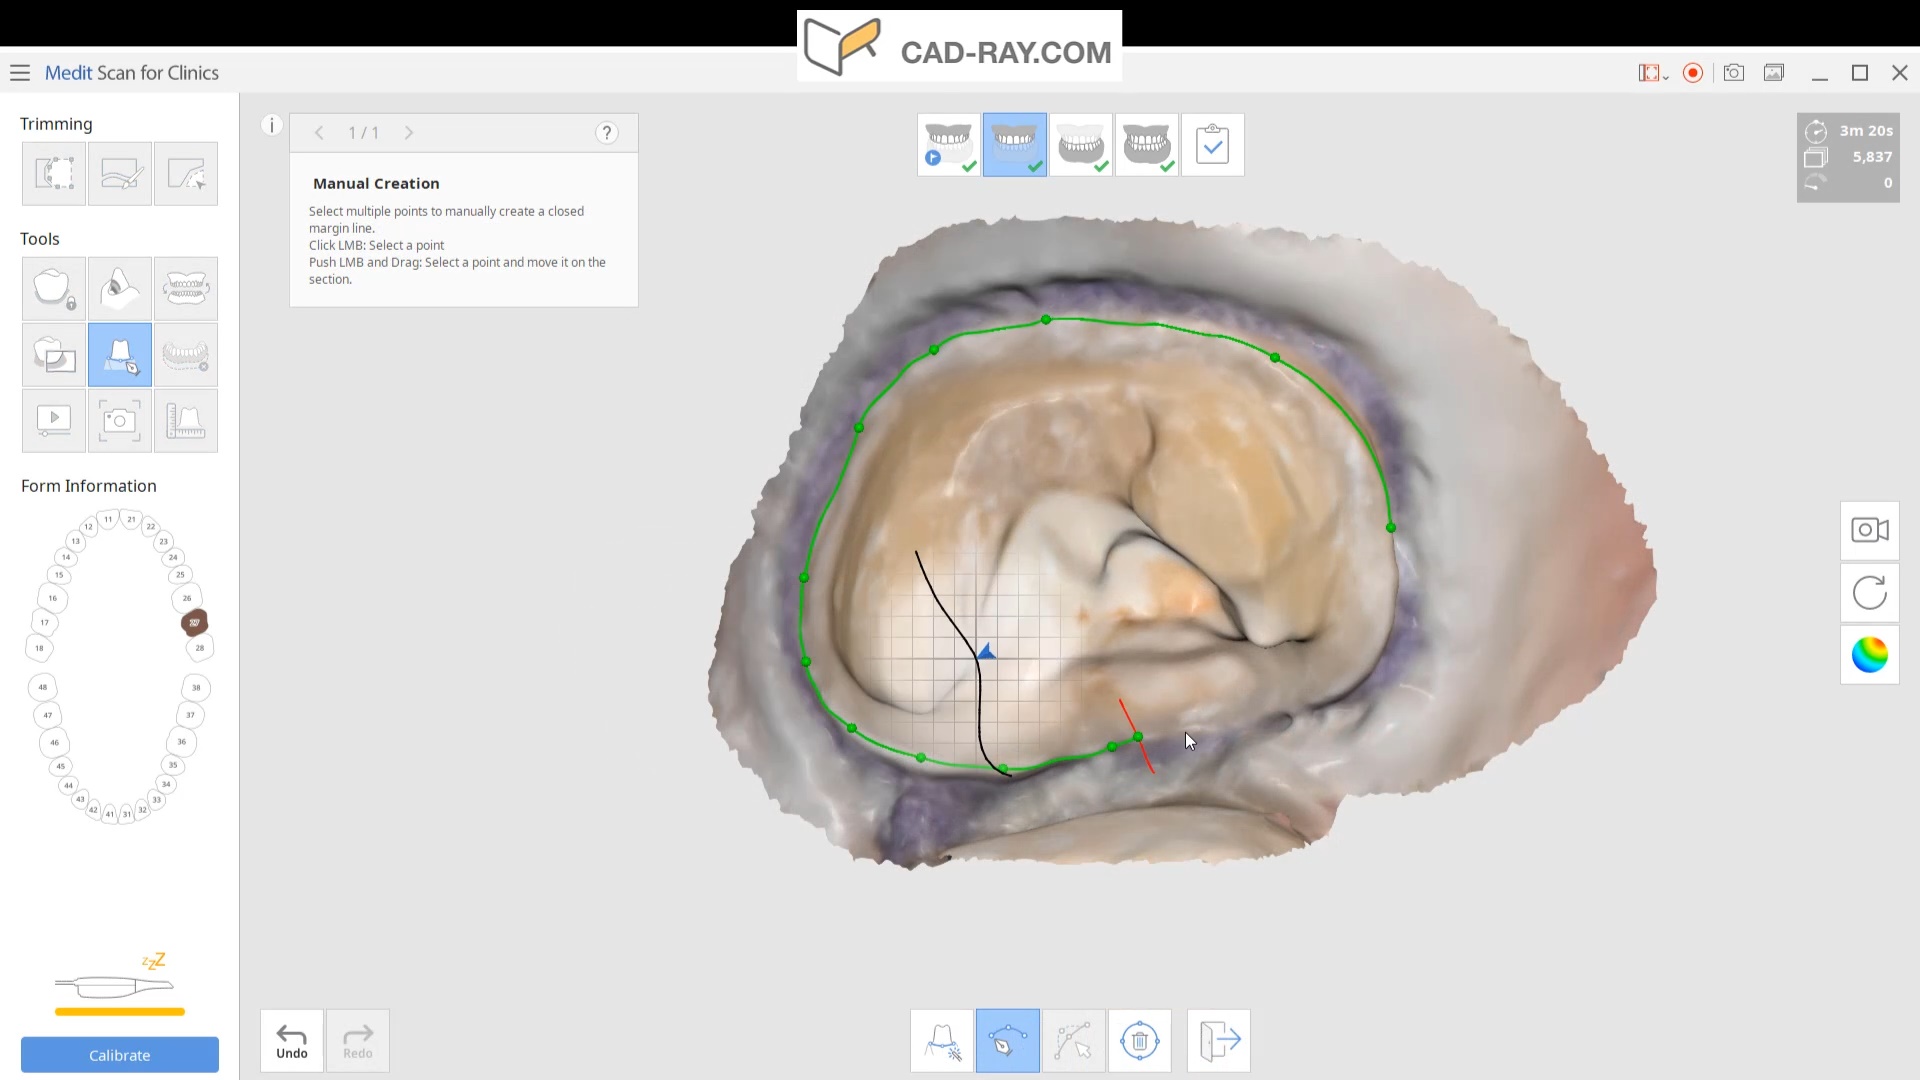
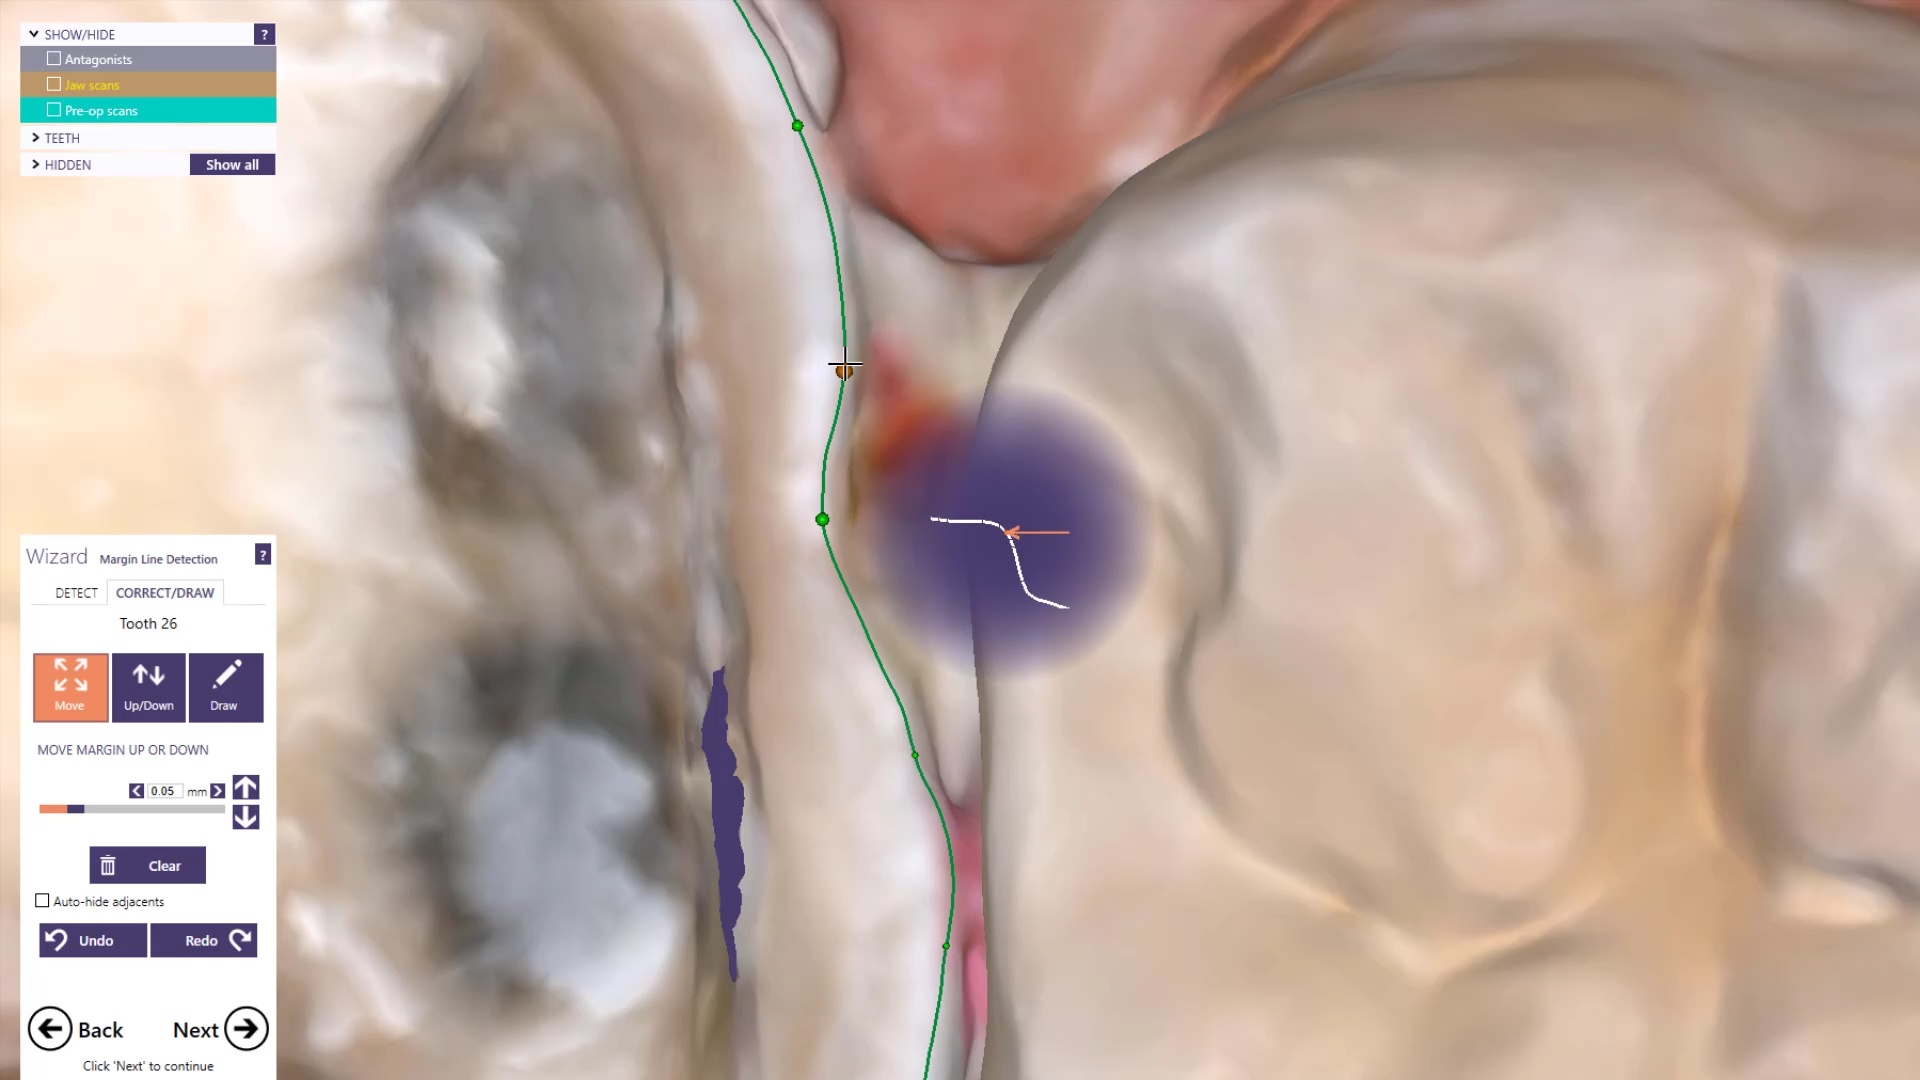
Image the preparation and place margin in native MeditScan Software that transfers to CAD Software
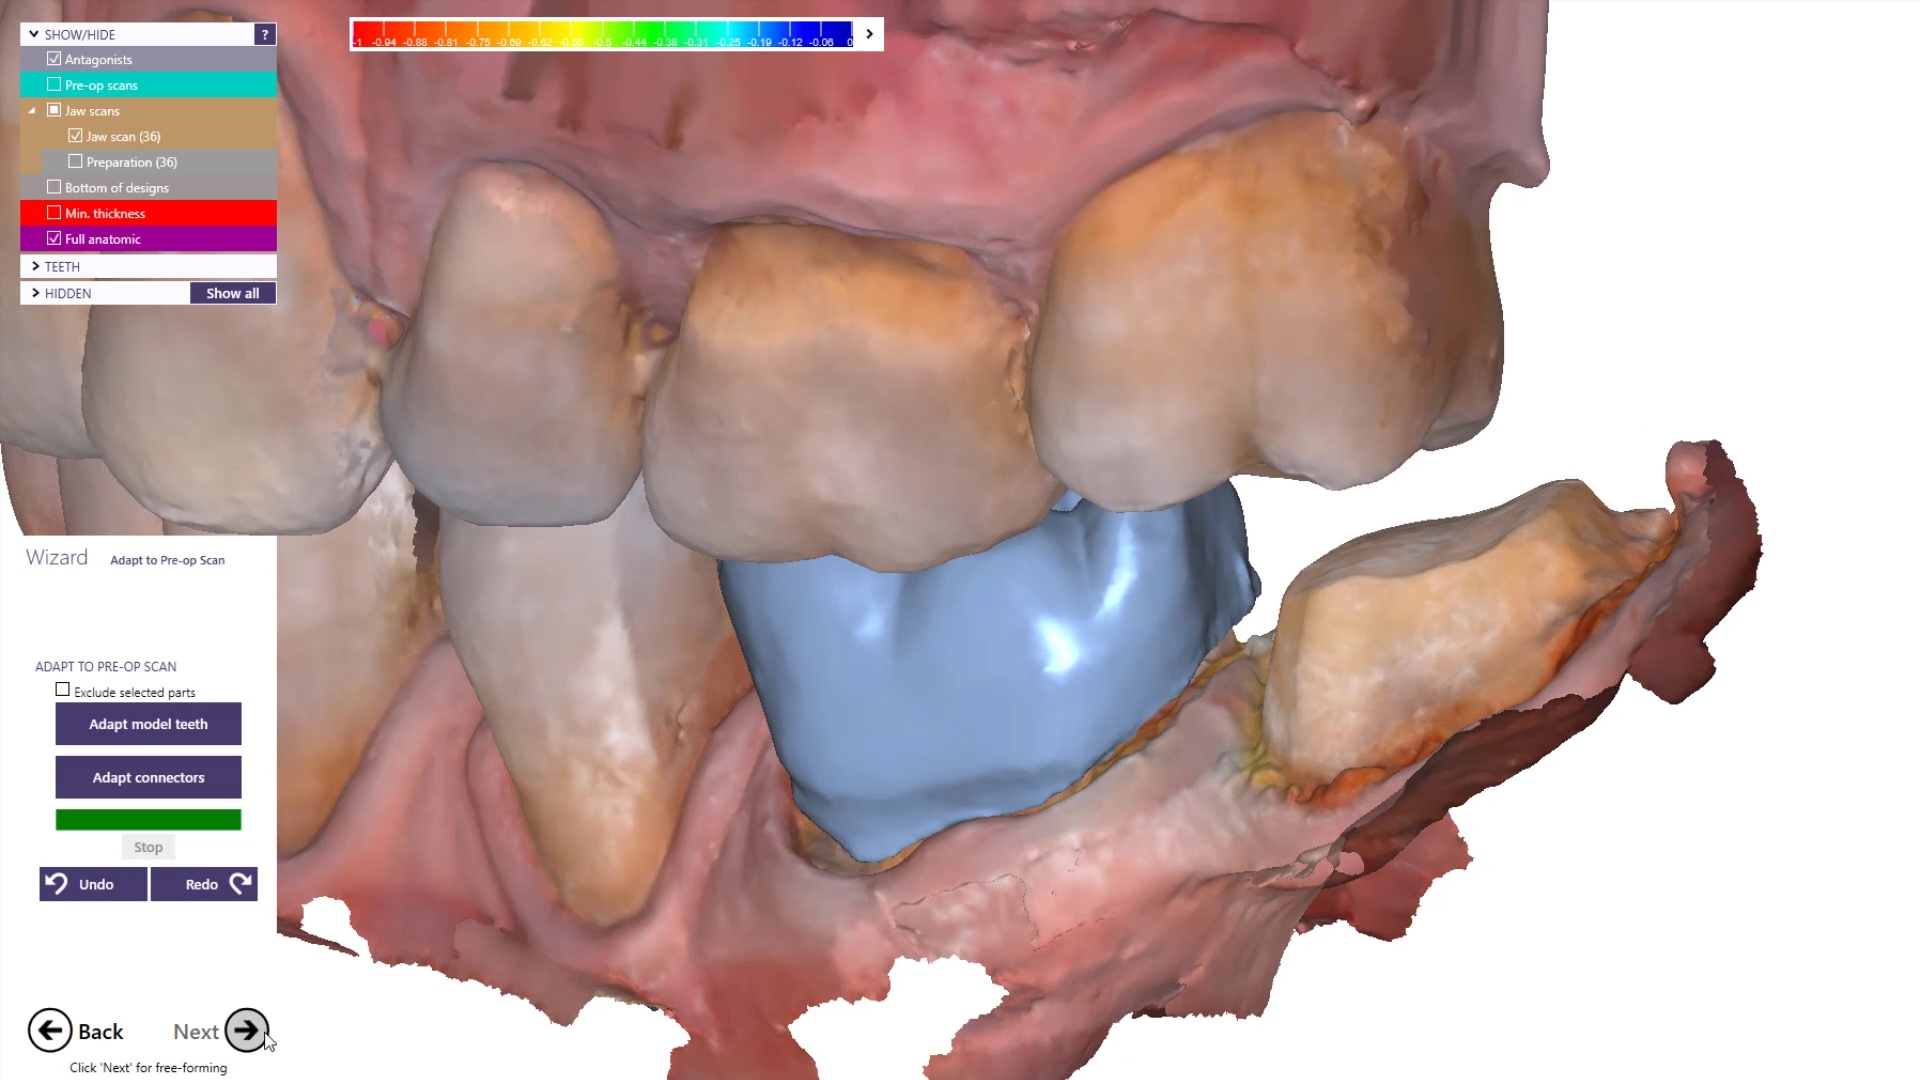
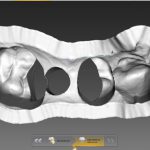
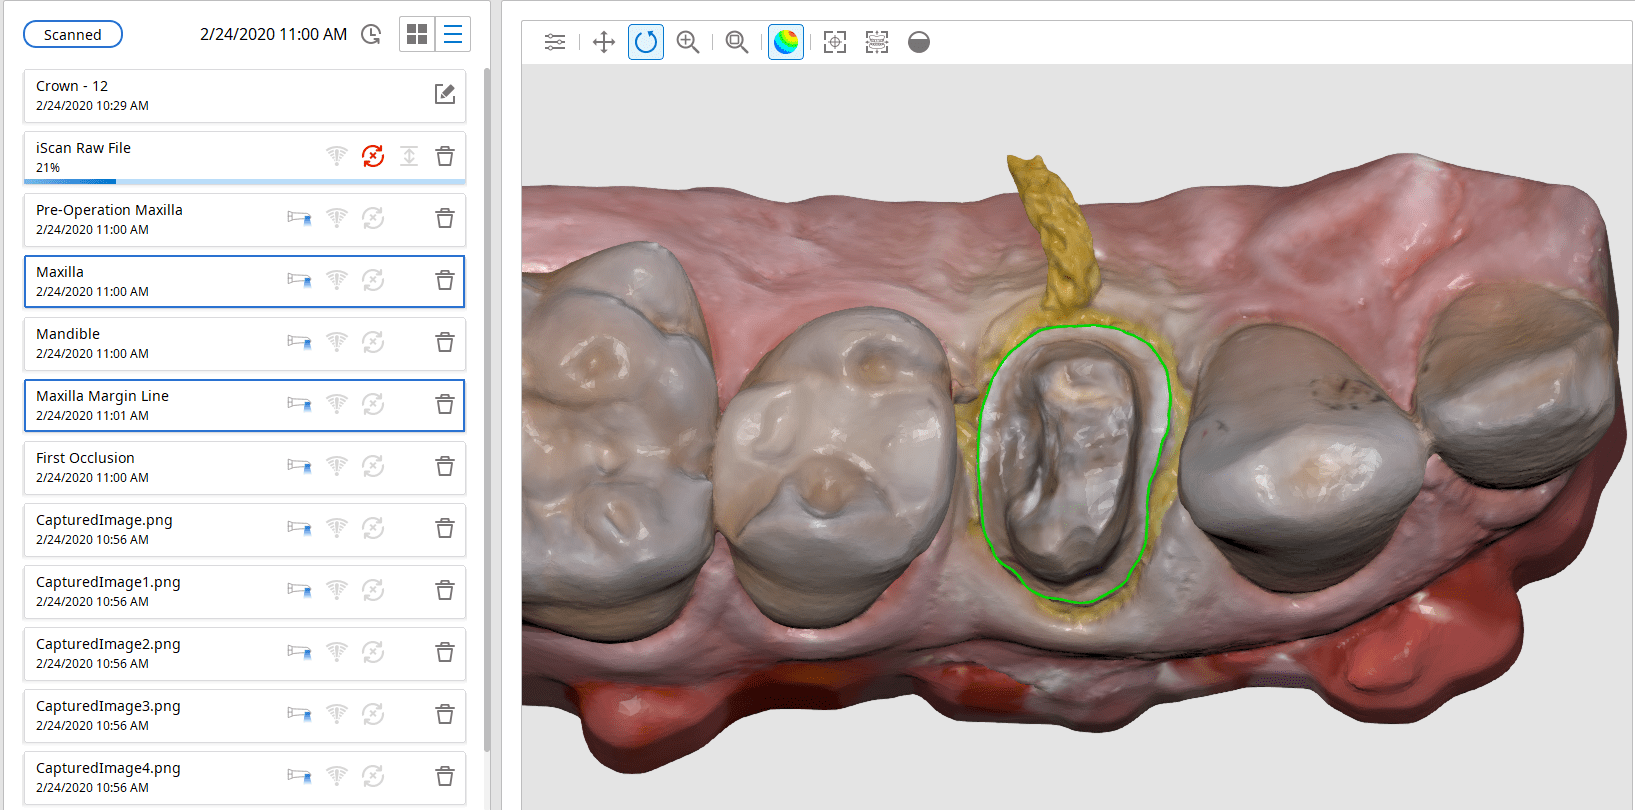
The preop condition is then transferred to the arch model and the tooth in question is cropped out. The rest of the arch is protected so no extra data is added unnecessarily to the equation. This protect feature is used for demonstration purposes and is subsequently removed. The prep in question is then highlighted and the local area is processed and the margins are placed. This margin line can be sent to the lab or it can be automatically carried to the design software
Launch CAD Software
The Meditlink software allow you to launch a variety of CAD programs that include 3shape, exocad, cerec, etc… Here we launch exocad which automatically imports and aligns the models and marks the margins. The restoration is then designed to completion.
Design of restoration
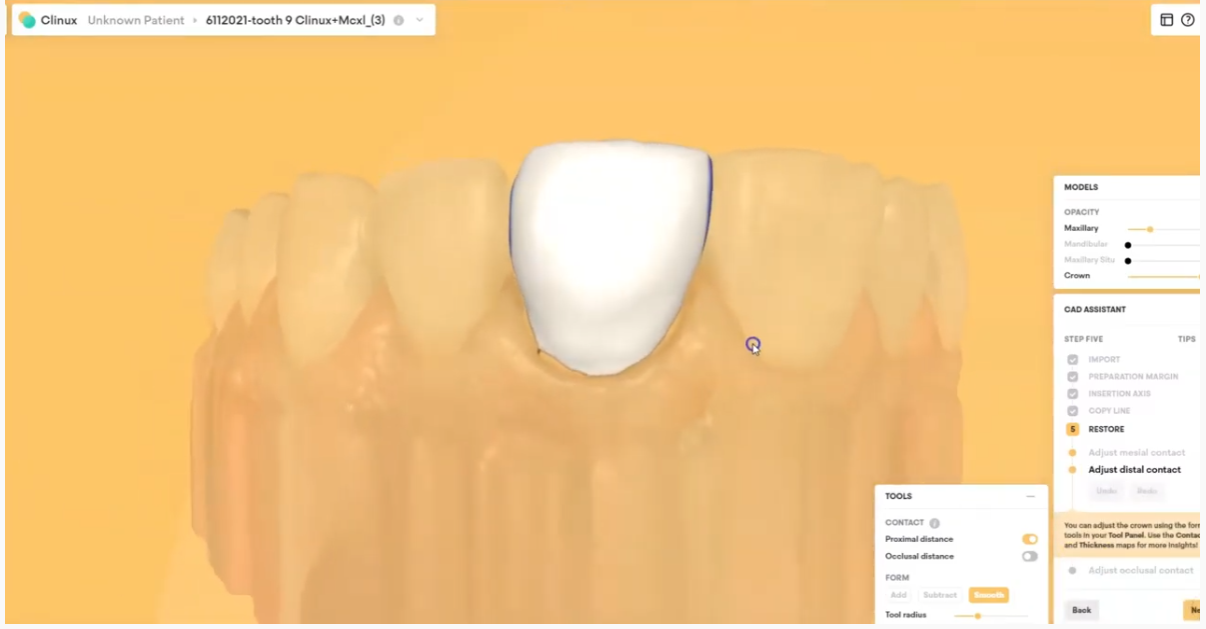
The CAD software allows you or the lab to alter the marked margins if necessary. The restoration is aligned in the arch for and the contacts are adapted to the adjacents and the oppising
You can take the designed restoration to ANY milling machine or printer
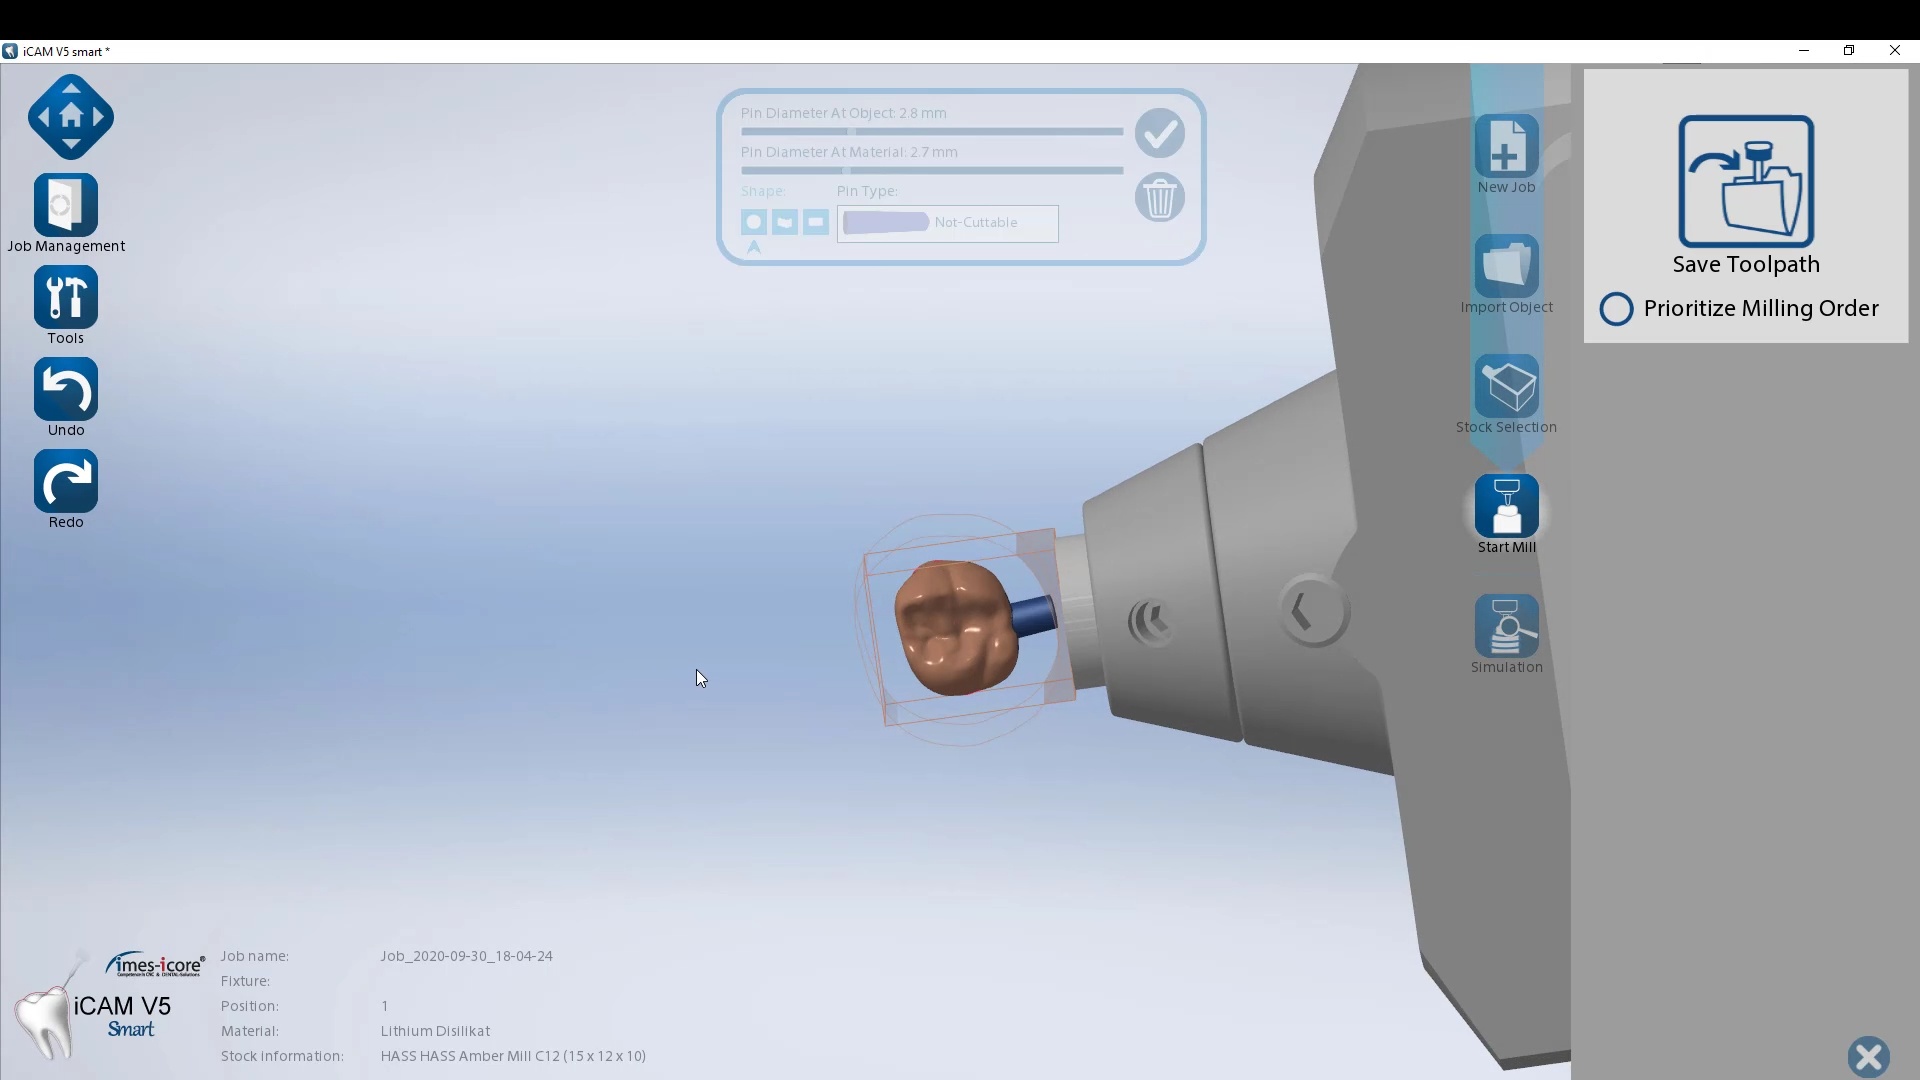
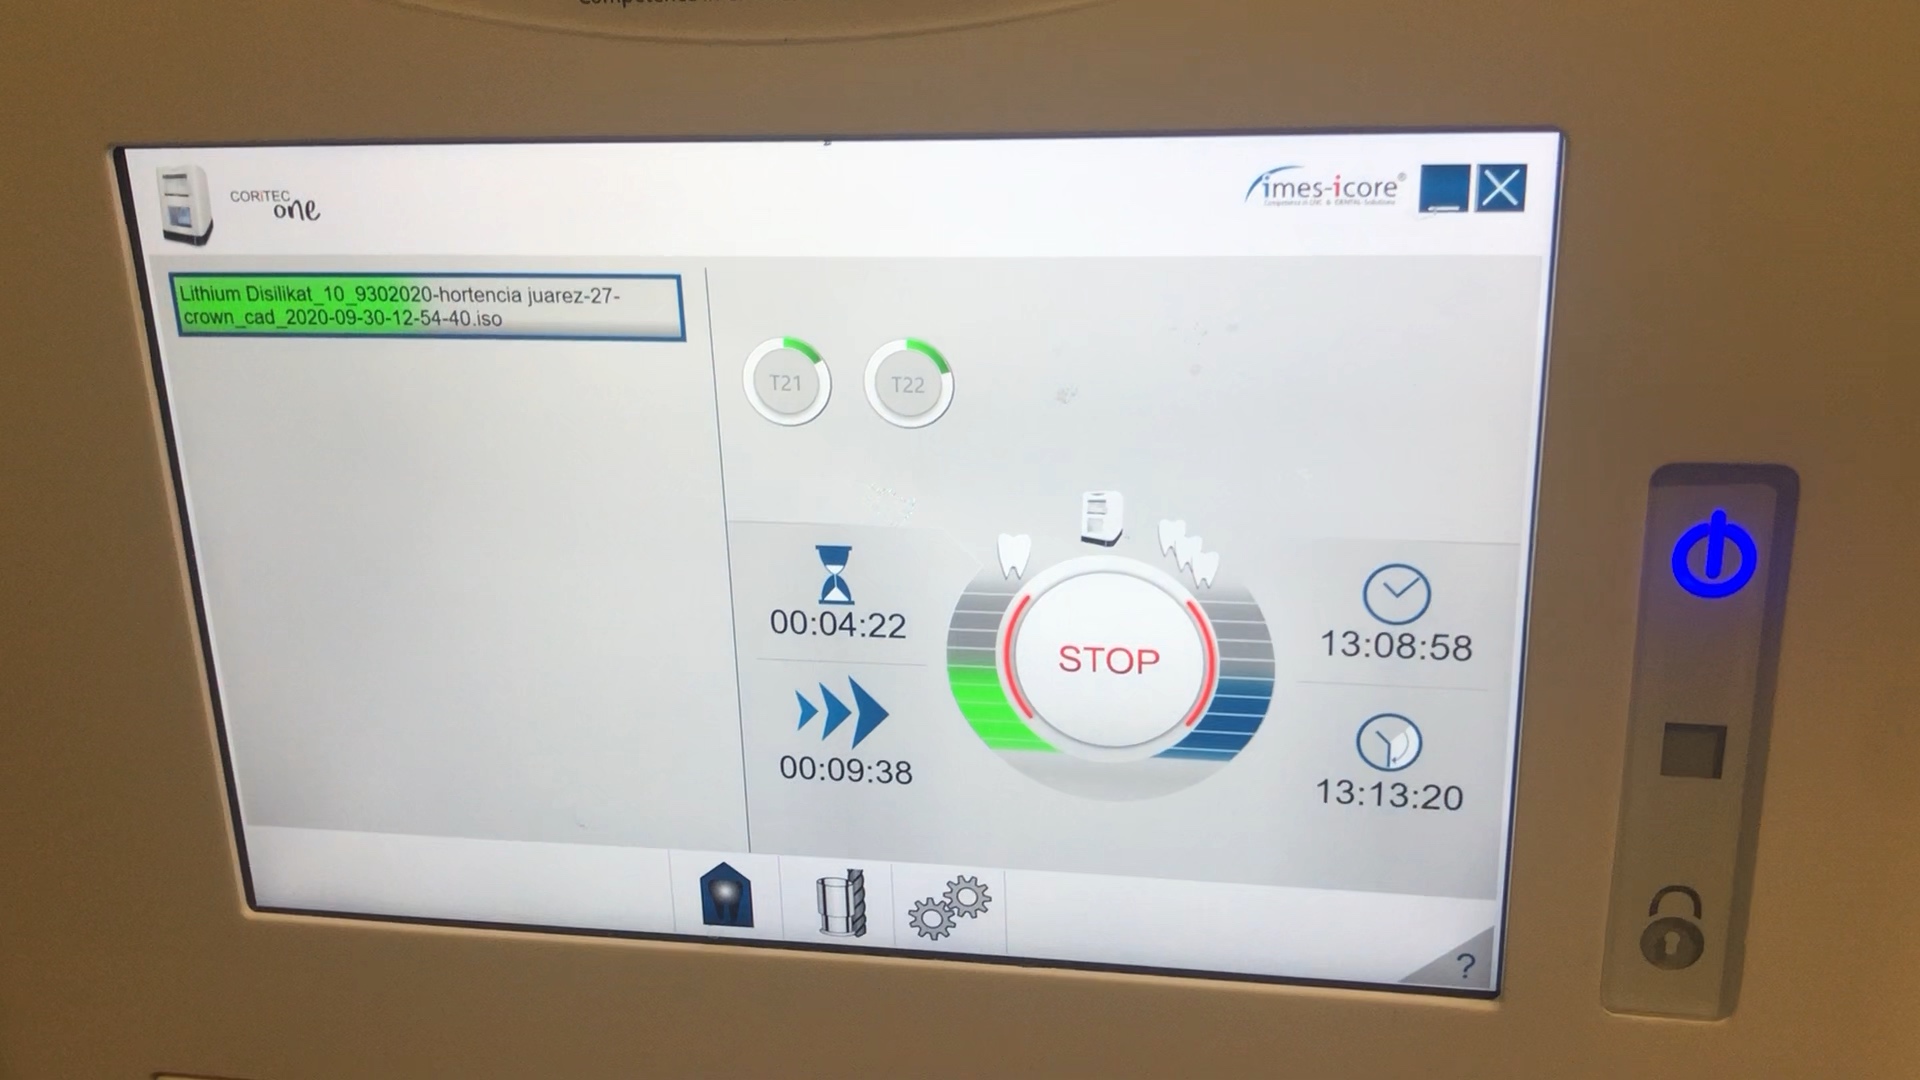
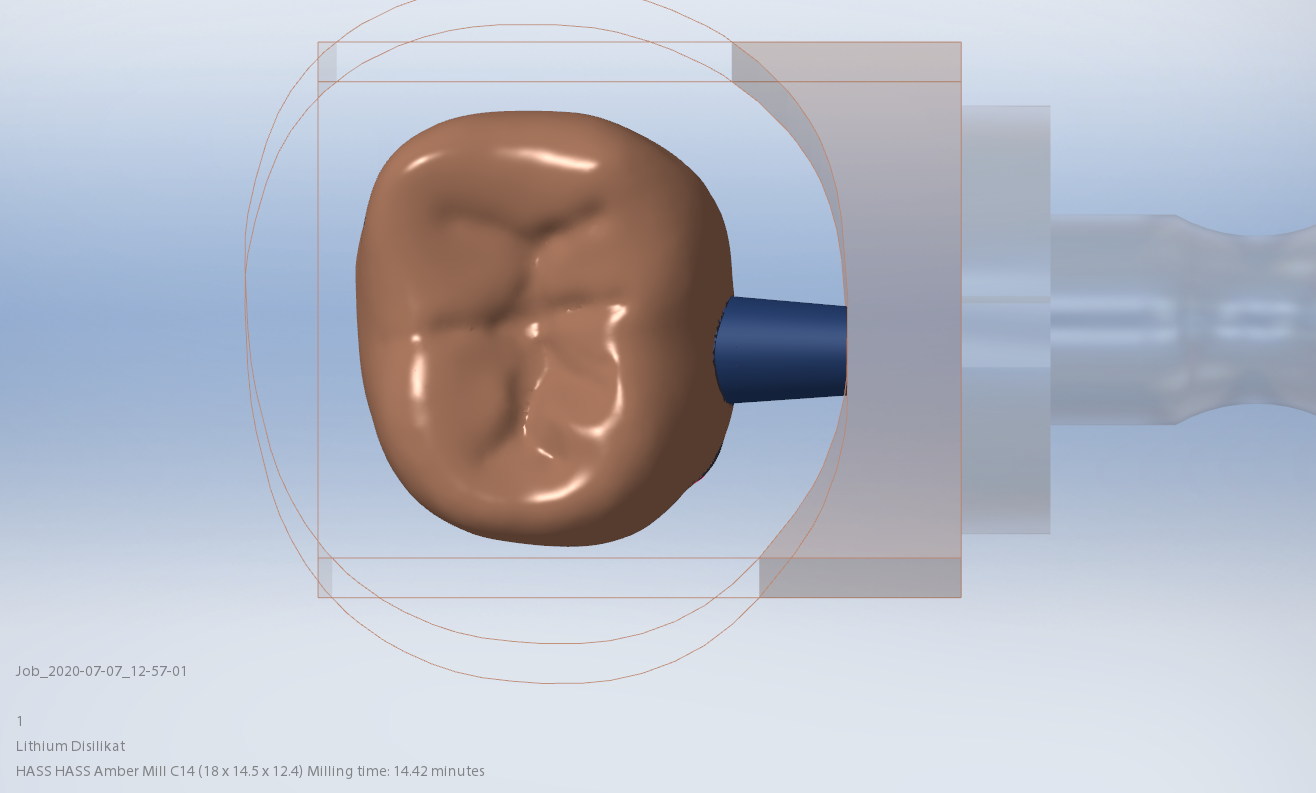
Milling of Lithium Disilicate with Imes Icore Coritec One
The final restoration design can be exported as an stl and taken to a variety of mills or printers. Here we designed it millbox and milled with the coritec One. The material used was Amber Mill and it was crystalized and seated
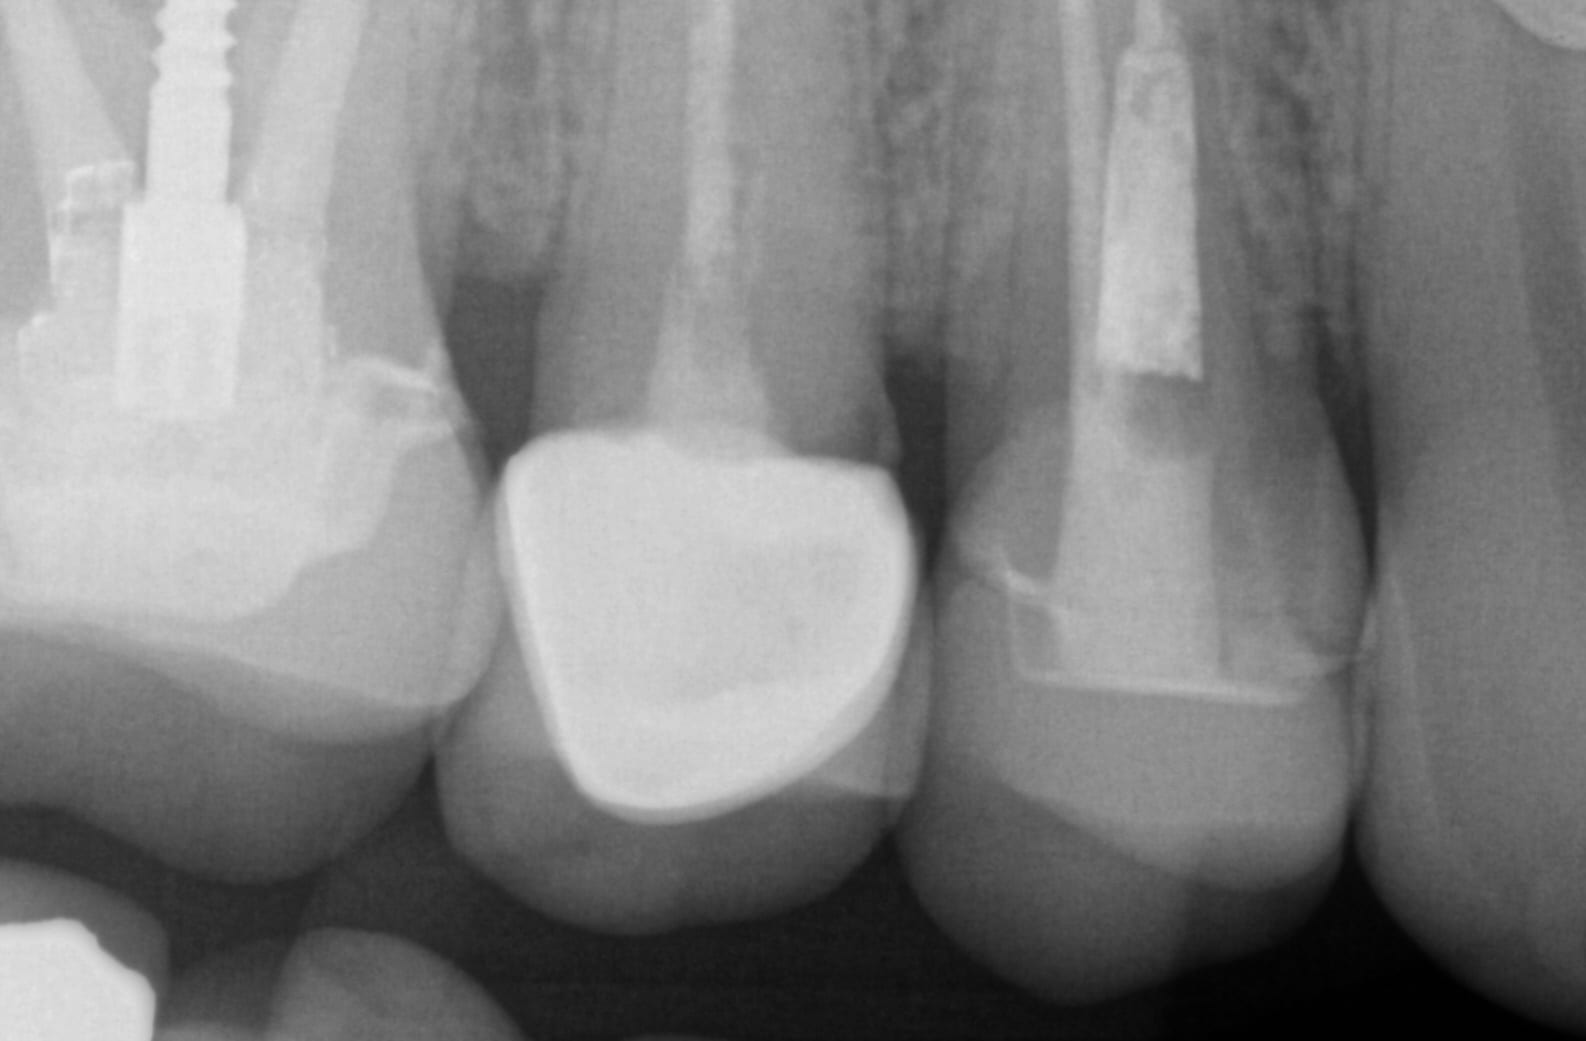
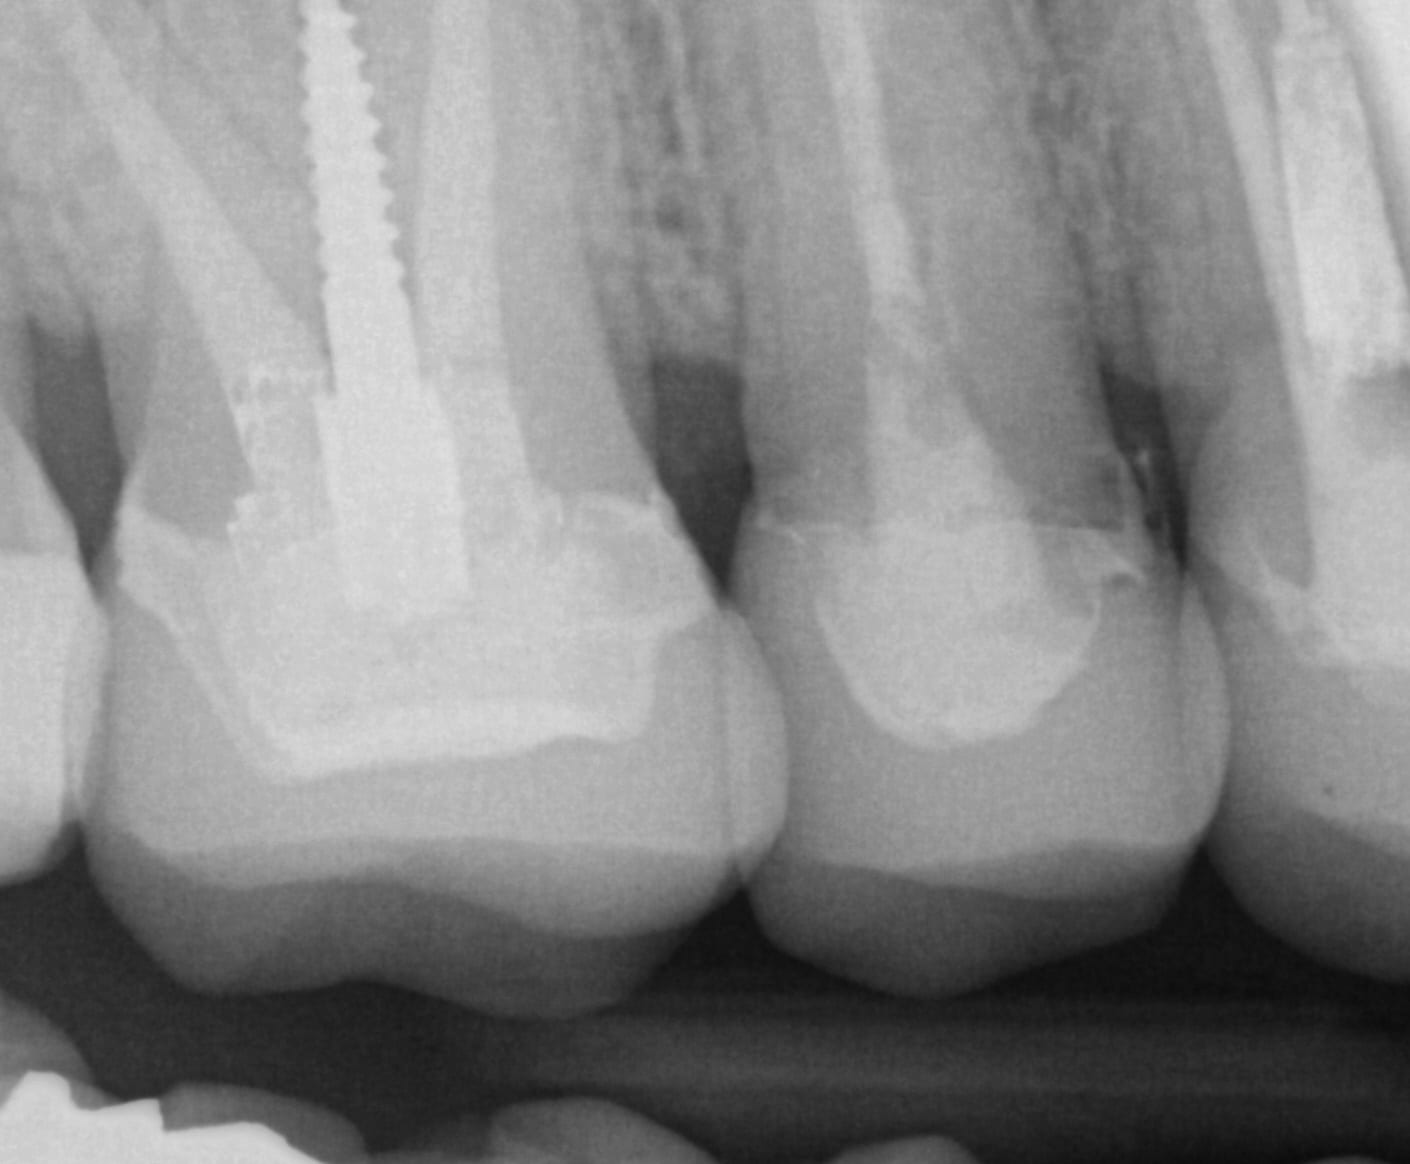
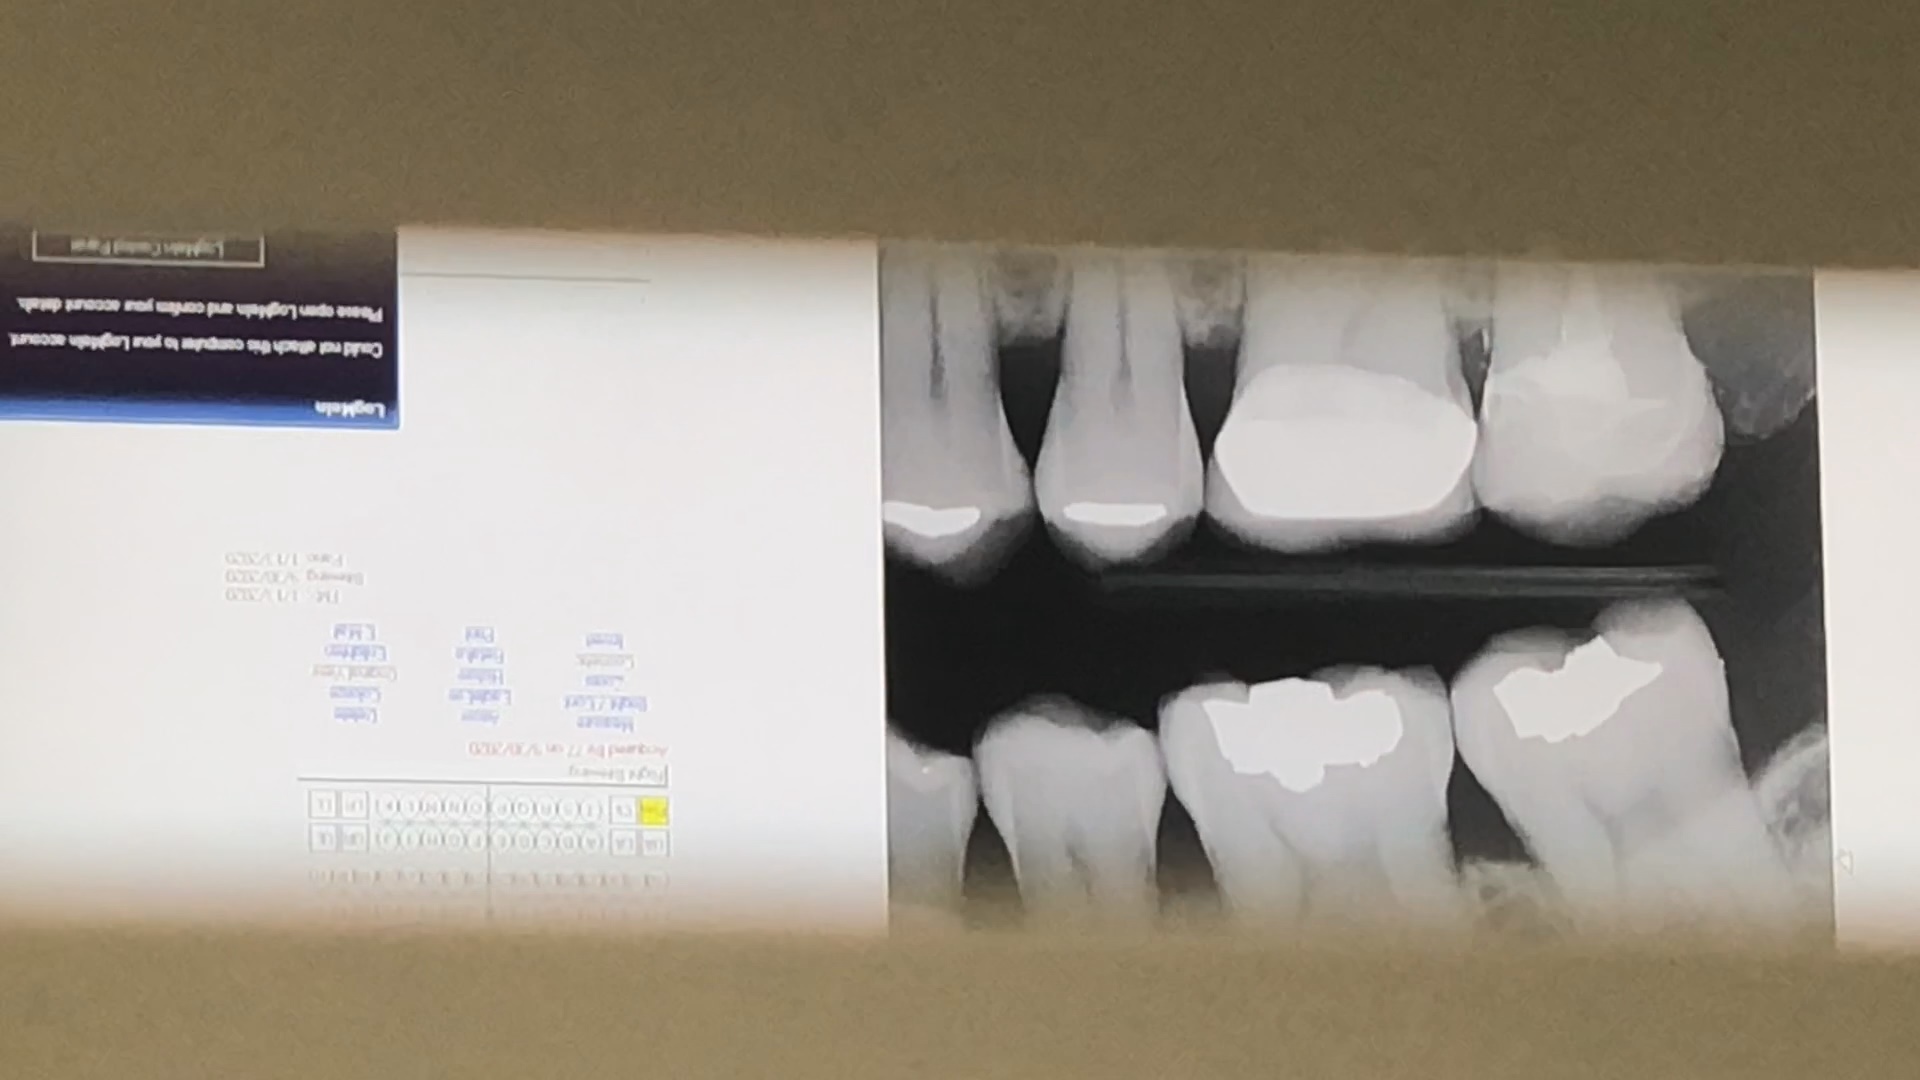
Post-op X-ray
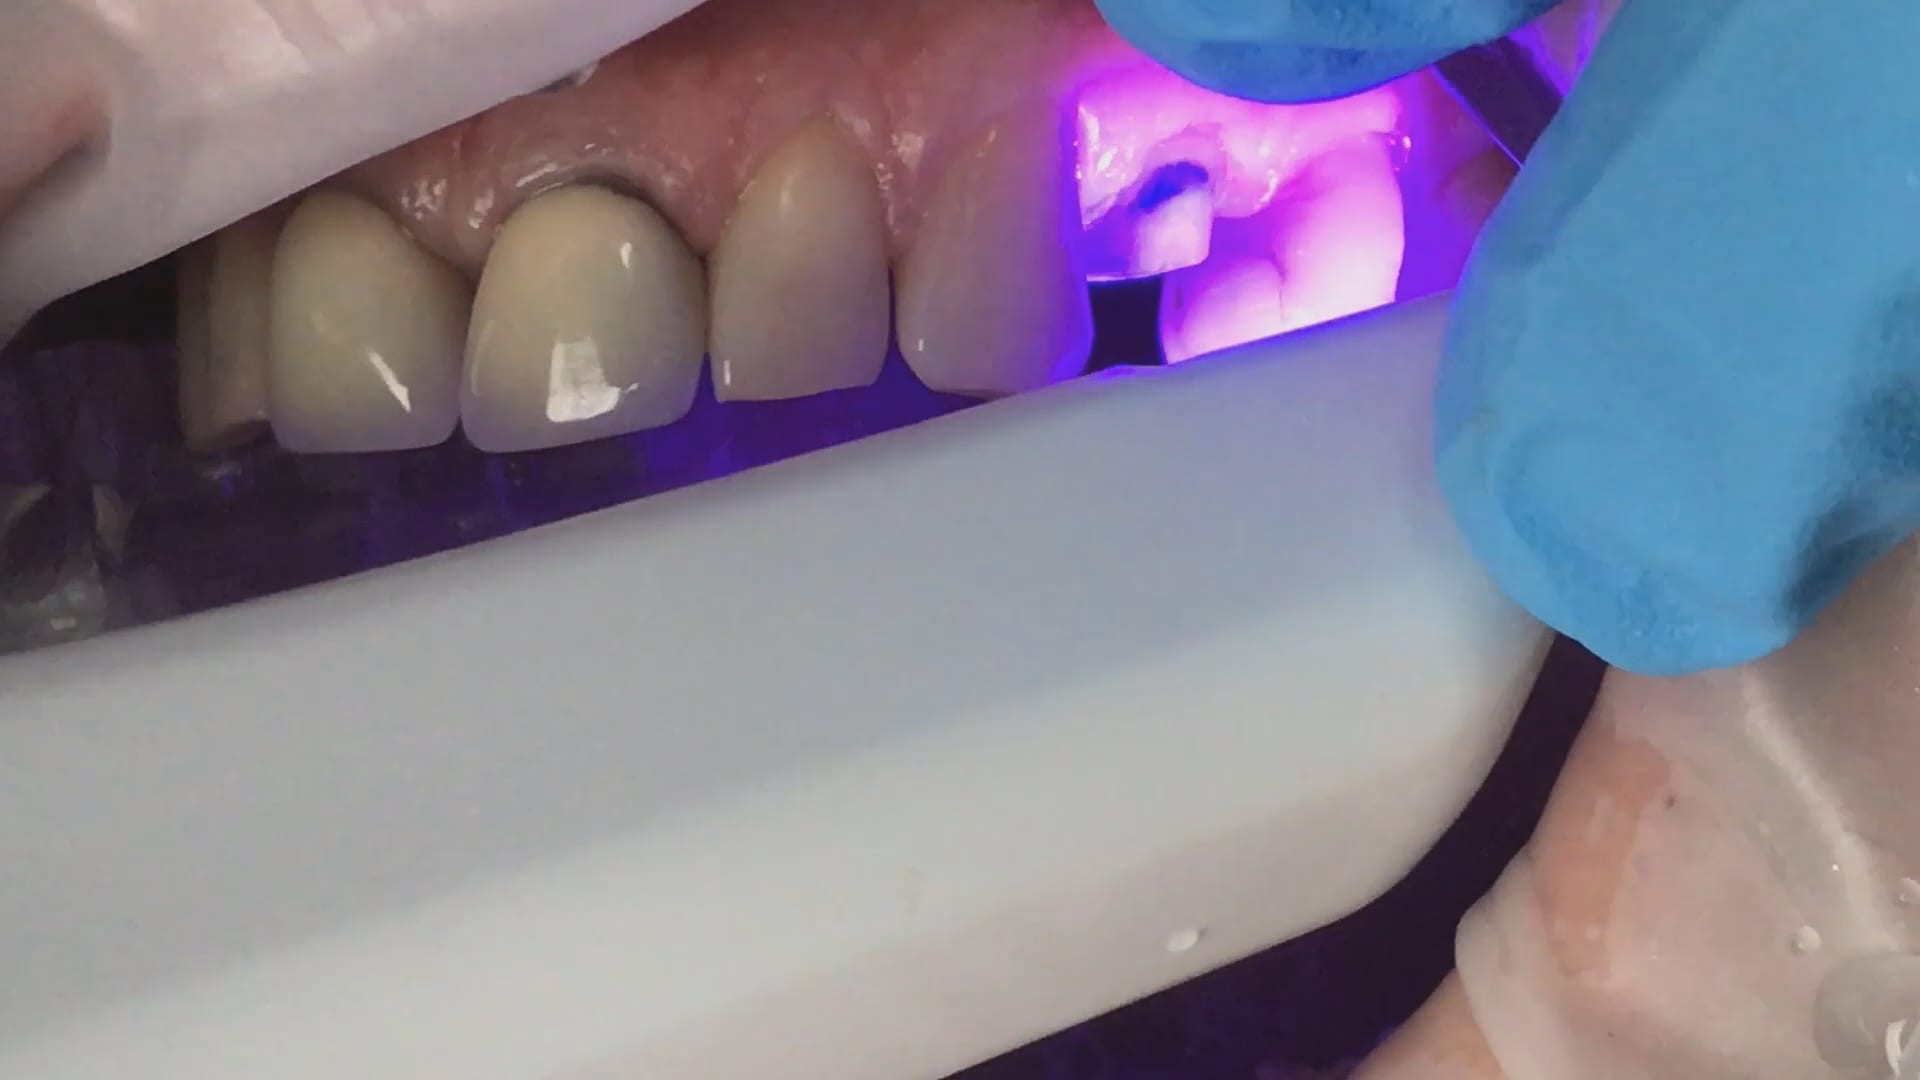
Final X-ray was taken to verify the fit and to make sure no excess resin was left behind

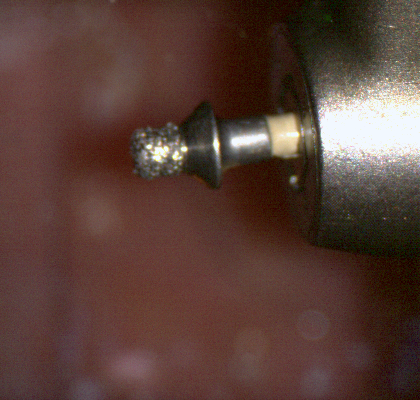
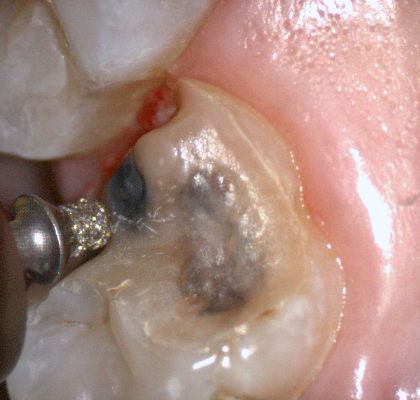
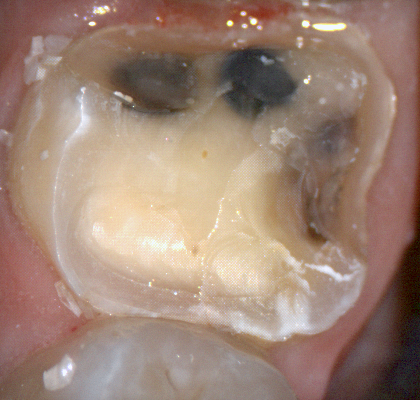
The following pictures depict the sequence of burs we recommend that you use to finish a preparation quickly. While patient is getting numb, take a quick look at the clearance you will need to reach proper material thickness. Once the quadrant is isolated with isolite and optragate, take an occlusal router bur and create a trough to gain the proper depth. Follow that with a flat disk, and you can quickly reduce the occlusal height.
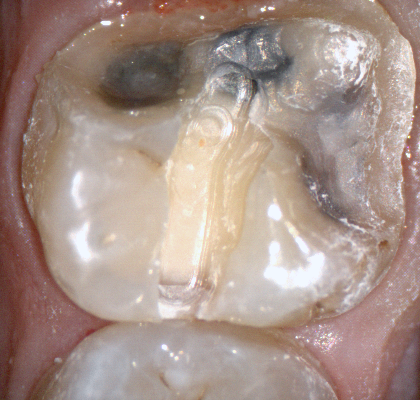
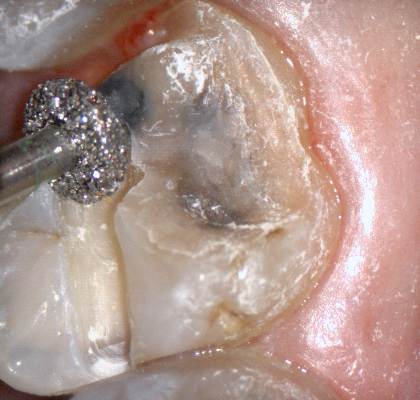
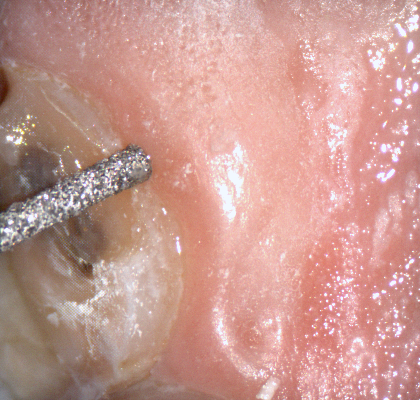
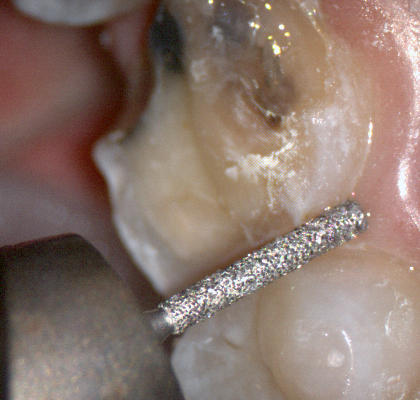
A shoulder bur of .8 mm thickness can help you reduce the interproximal areas as well as the buccal and lingual margin lines. Before finishing the prep, place hemostatic agent like expasyl in the sulcus and place retraction cord. while it is setting, check your reduction. If you need more space, now is the time to reduce some more.
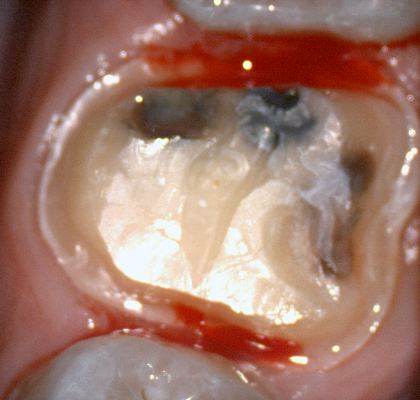
Once you have adequate clearance, retraction, and hemostatis, you can readily image and find your margins in the CAD software


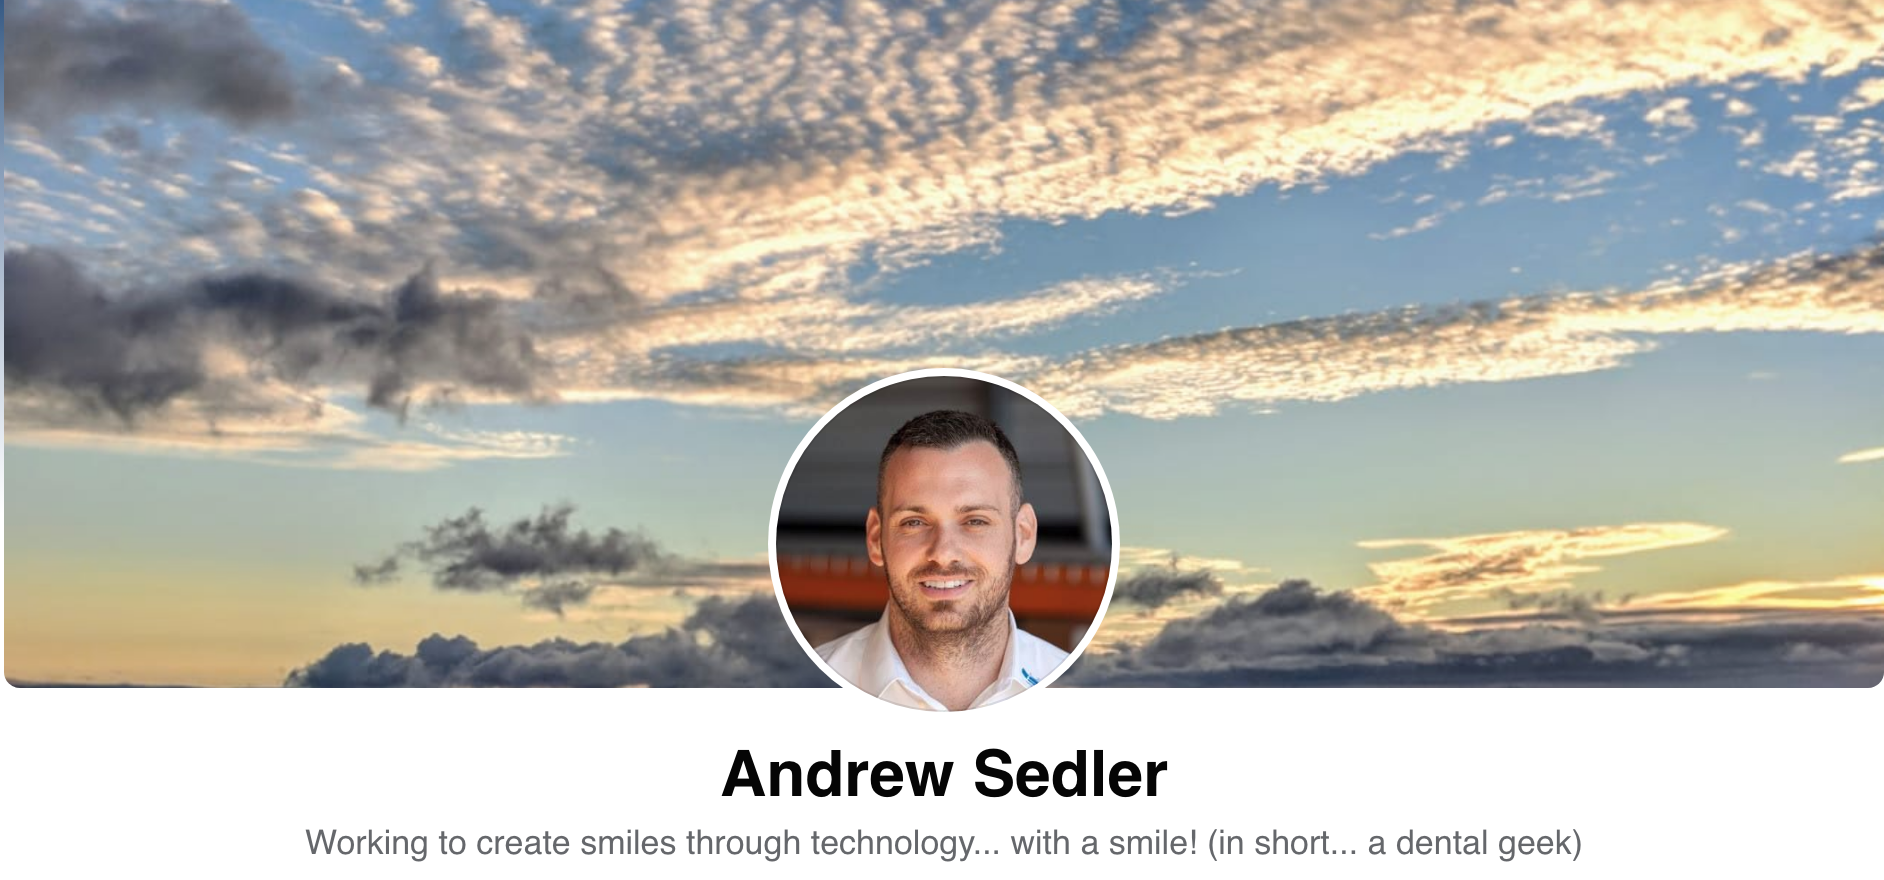
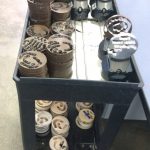
I am not one to place much faith in published articles from academicians. I usually draw my information from trusted colleagues and also a very reliable source, Mr. Andrew Sedler, from Advanced Technology Centers in Burbank California. He is in charge of manufacturing thousands of full arch restorations for clinicians and many other labs that outsource their manufacturing.
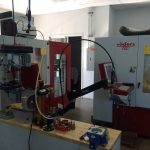
One of the things I always get a kick out of is whenever they do purchase technology or implement a process, they always have to do it with redundancy. What that means is that their machines can never go down for whatever reason, so they always purchase printers and mills by multiple sets. Interestingly, I was witness to them incorporating printers into the lab about 6-7 years ago and now they have a large wing dedicated to printing with over 20 machines for many different purposes.
I trust his judgement and always follow his recommendation and tested methods. When he says “do not bypass verification jigs, no matter what scanner was used”, I don’t even question it. He sees all the cases many entities can’t manage and he can manufacture any screw, prosthetic, abutment, etc… with their high end milling machines. In fact, it was on his word alone we decided to distribute the ICam4d by imetric.
I thought it would be a good idea to revisit full arch implant restorations with him and see what the state of the industry is like today and what he would recommend for the end users and patients. A very good perspective for a clinician to keep is how a simple mistake or misunderstanding can wipe away all the profit margins for a lab and even for the clinician. A simple example is if you have to correct an angulation issue on an abutment which can dramatically impact the costs of the lab work.
Here is the Q/A session:
“Hi Andrew, I am writing an article on full arches and would appreciate some info”
Answers:
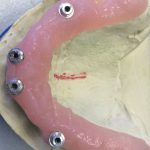
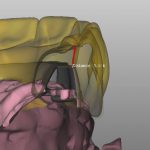
The damage caused by adjusting the zirconia could be very considerable, especially around the access hole since those areas are thinner than the full teeth . For myself i would restore zirconia over metal frame if my choice is hybrid, while removable bar overdenture will be a more predictable and more hygienic choice .


Shining3d has a projector and a single camera that takes photos of the surfaces it is scanning. at first, you may think this is a shortcoming, but in many ways, it dramatically reduces errors a new user can introduce.
in the early days of cerec, all you needed to do was capture the margins and the area above the height of contours of the adjacent teeth. This made the try-in and the contacts really easy as the design software just dropped straight a straight wall down to make contacts to. same concept here!
also, after you image and place margins, A SINGLE CLICK takes you to design software where you can finish the case and mill it right away.

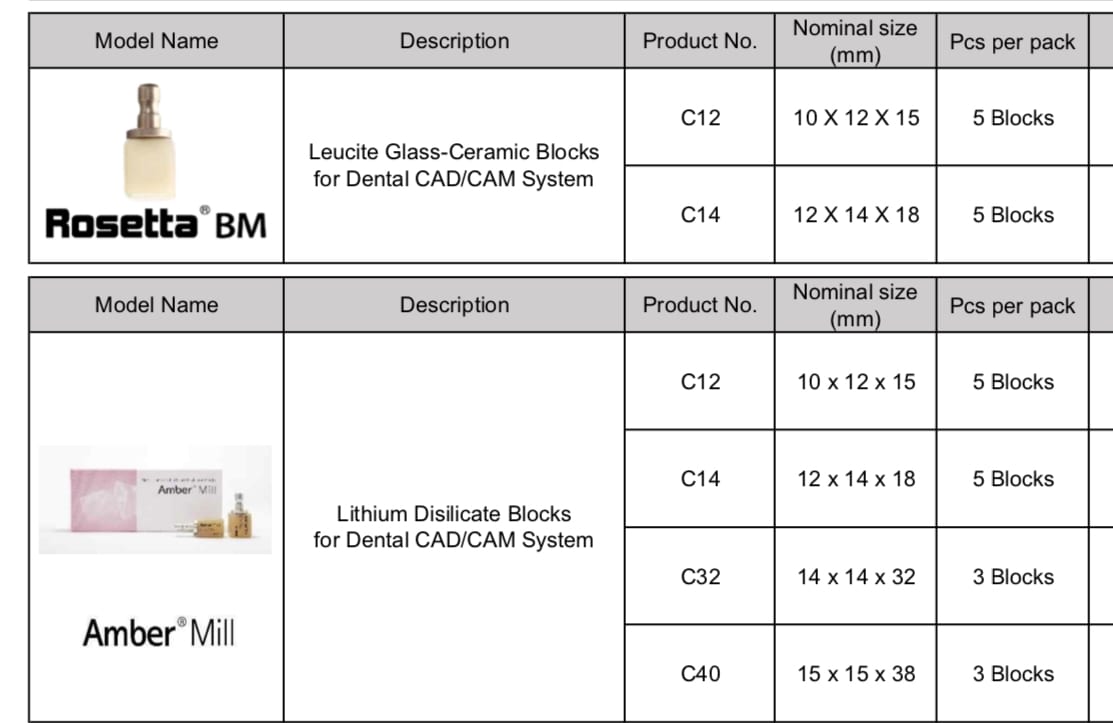
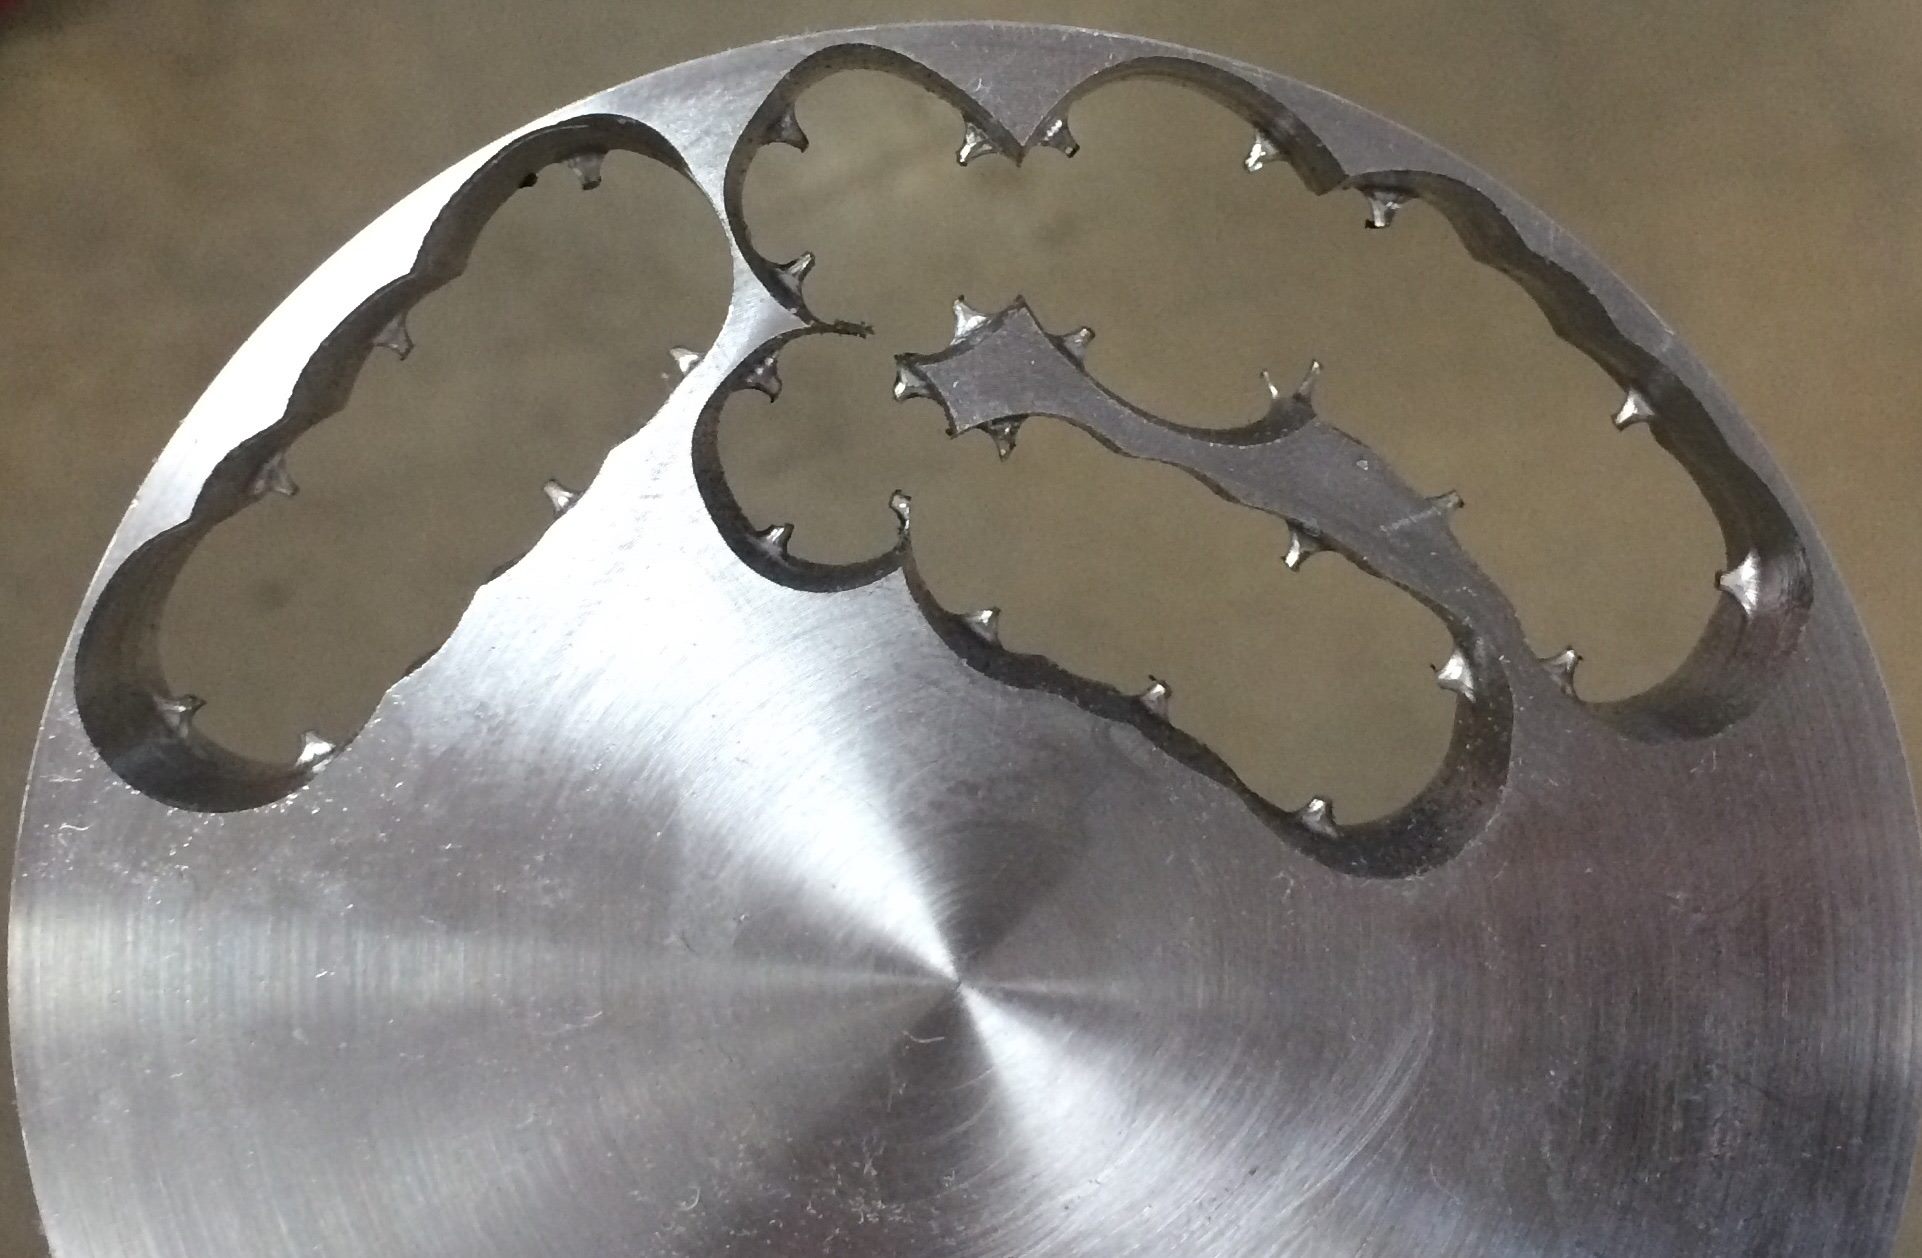
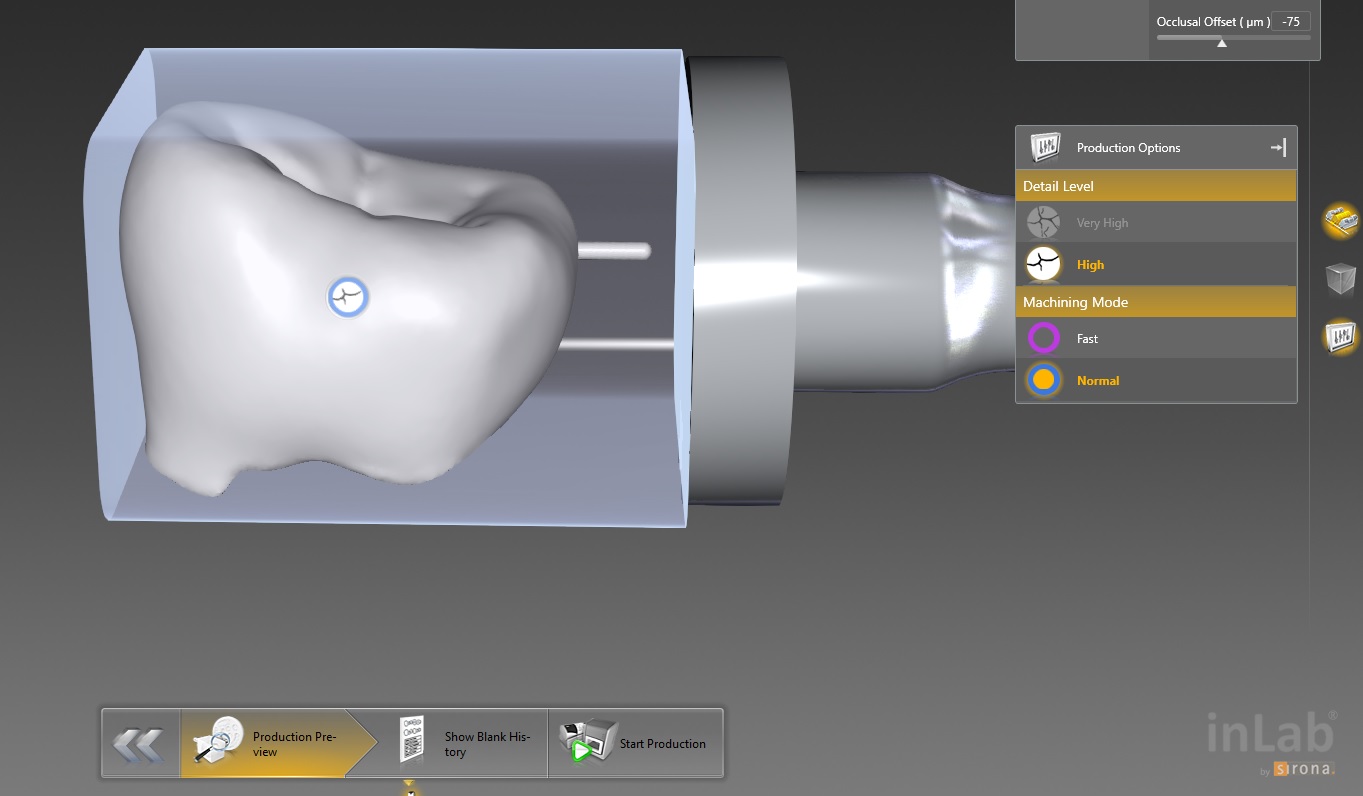
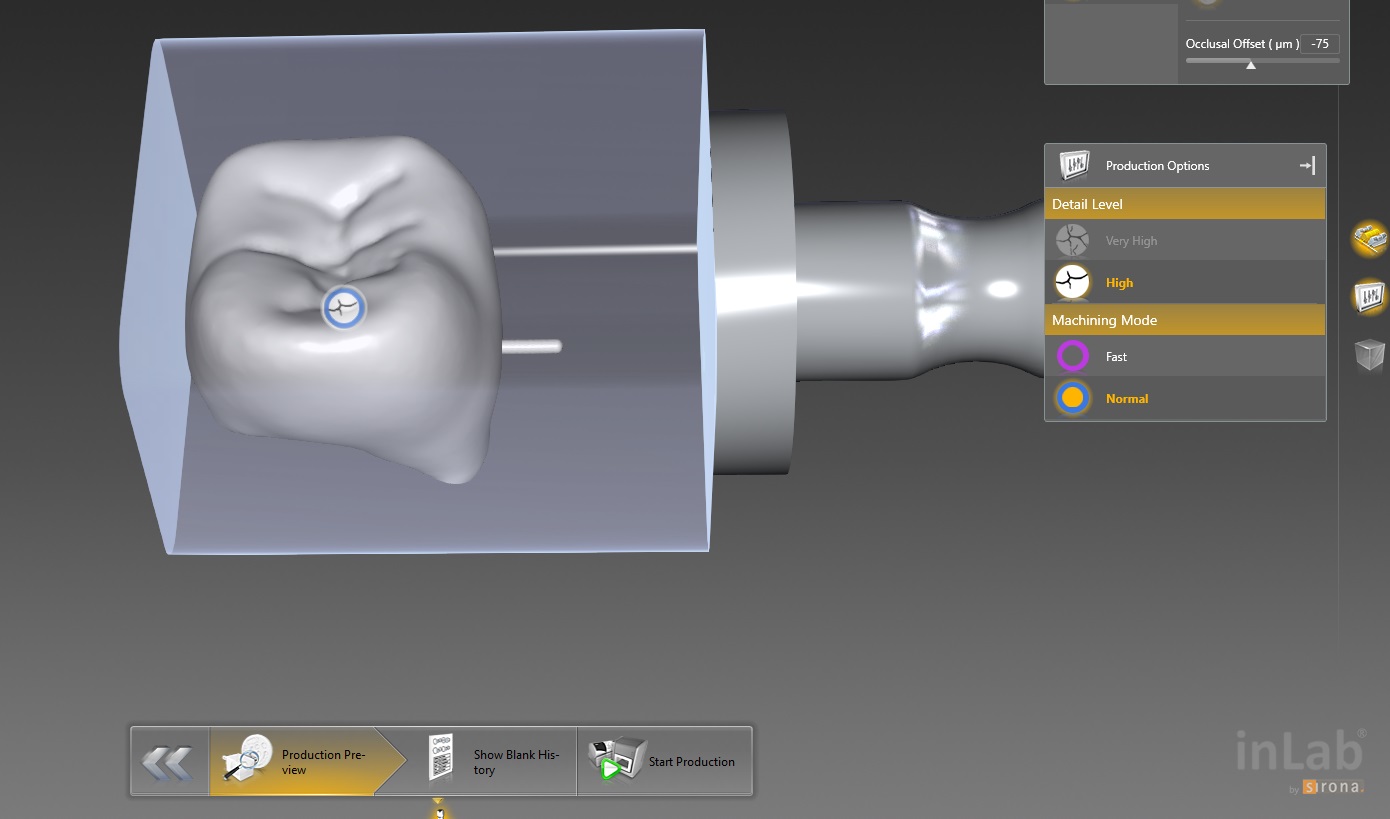
This molar’s suggested mill times with the MCXL are for either Size 12 or 14 blocks:
Sprue on distal in normal speed mode is 14:05 minutes, fast speed at 7:54
Sprue on buccal in normal speed is 13:48 minutes, fast speed at 7:46
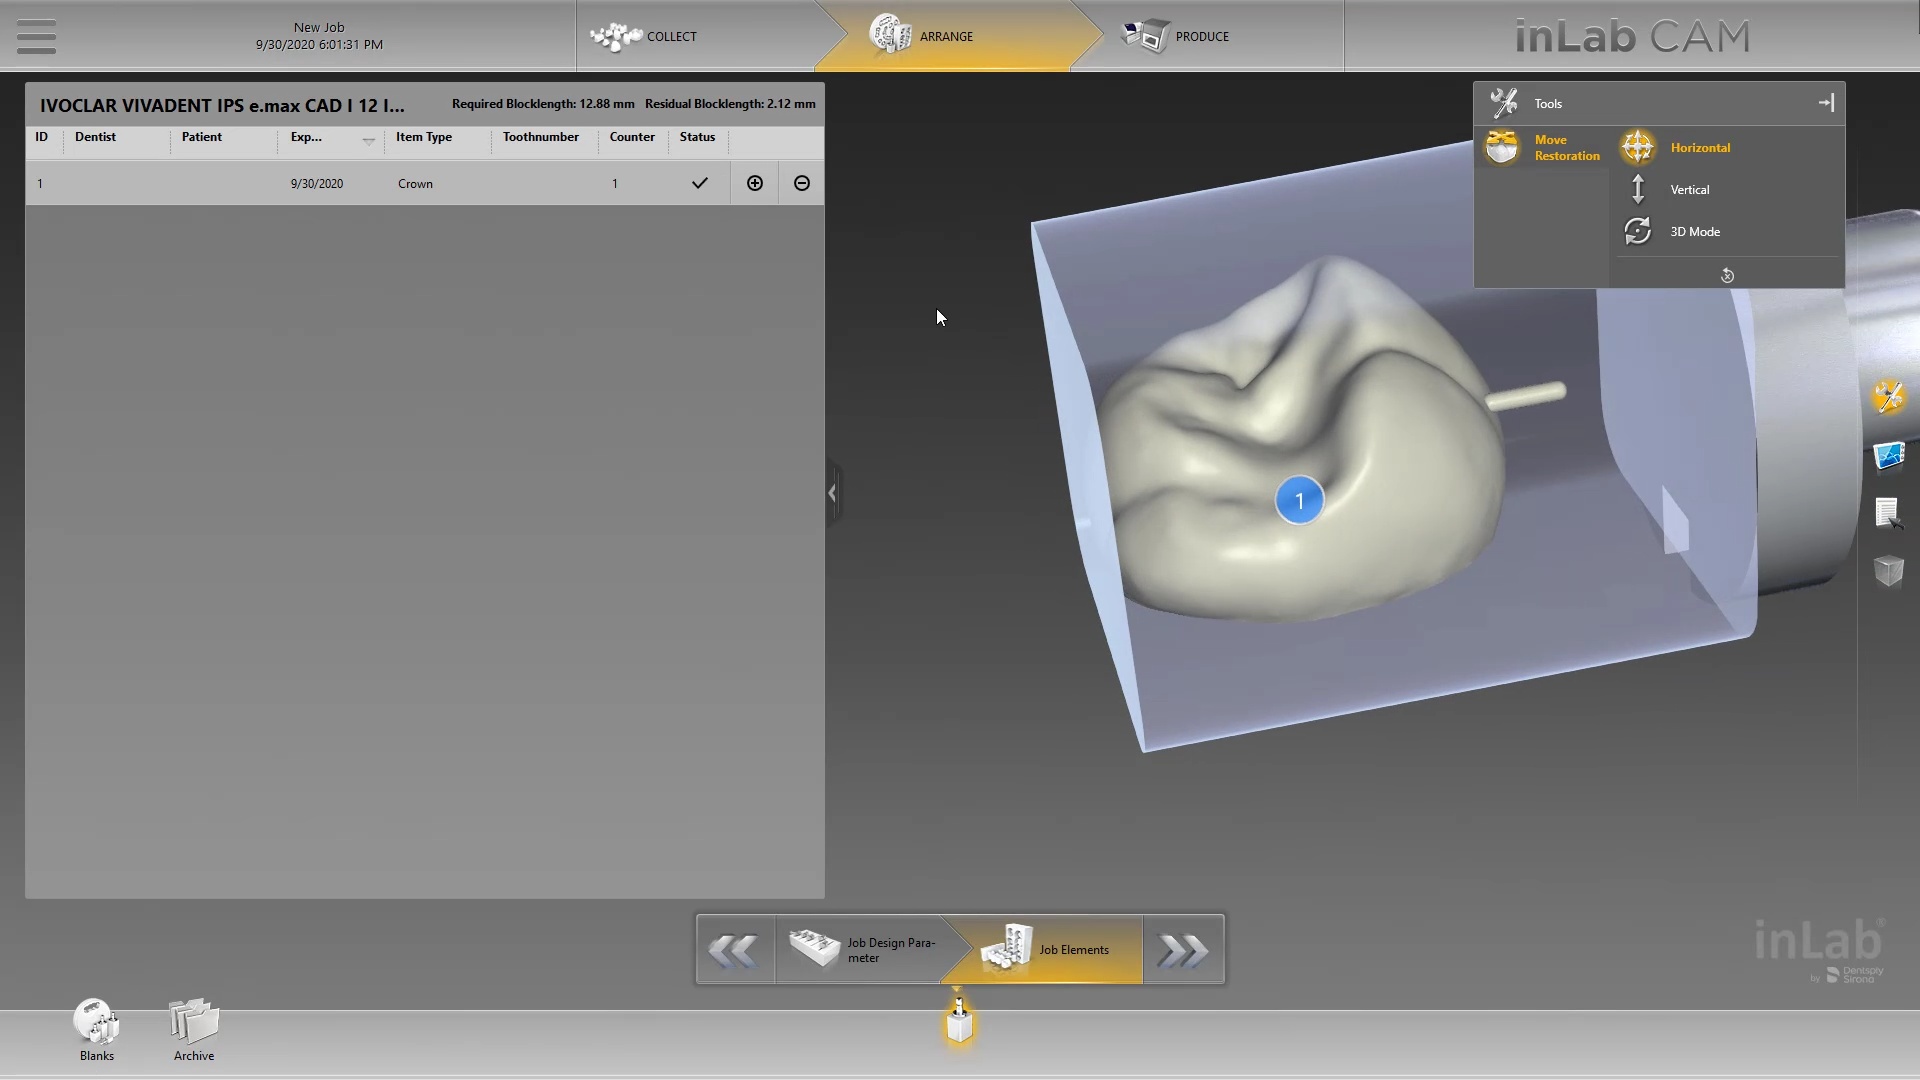
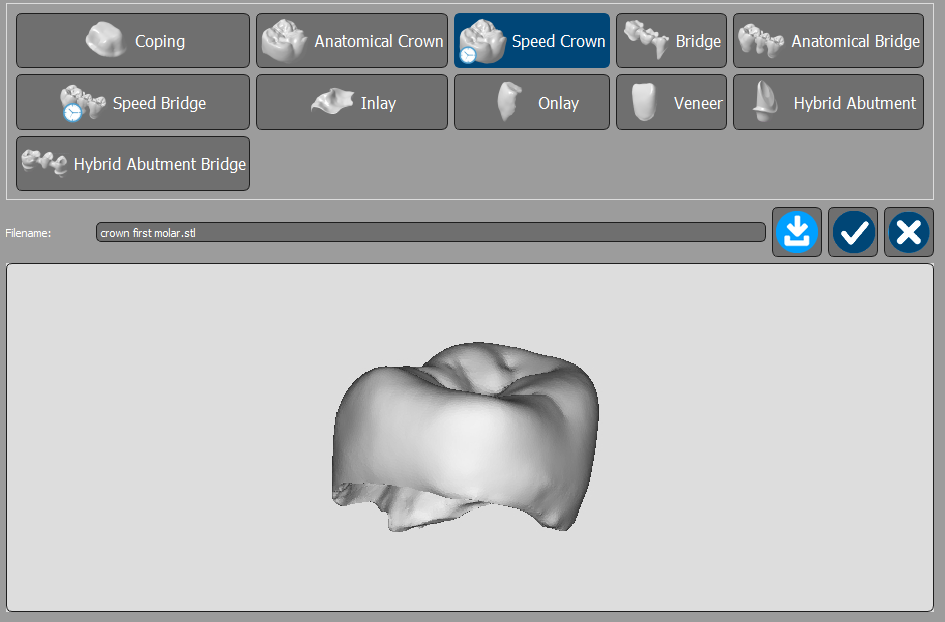
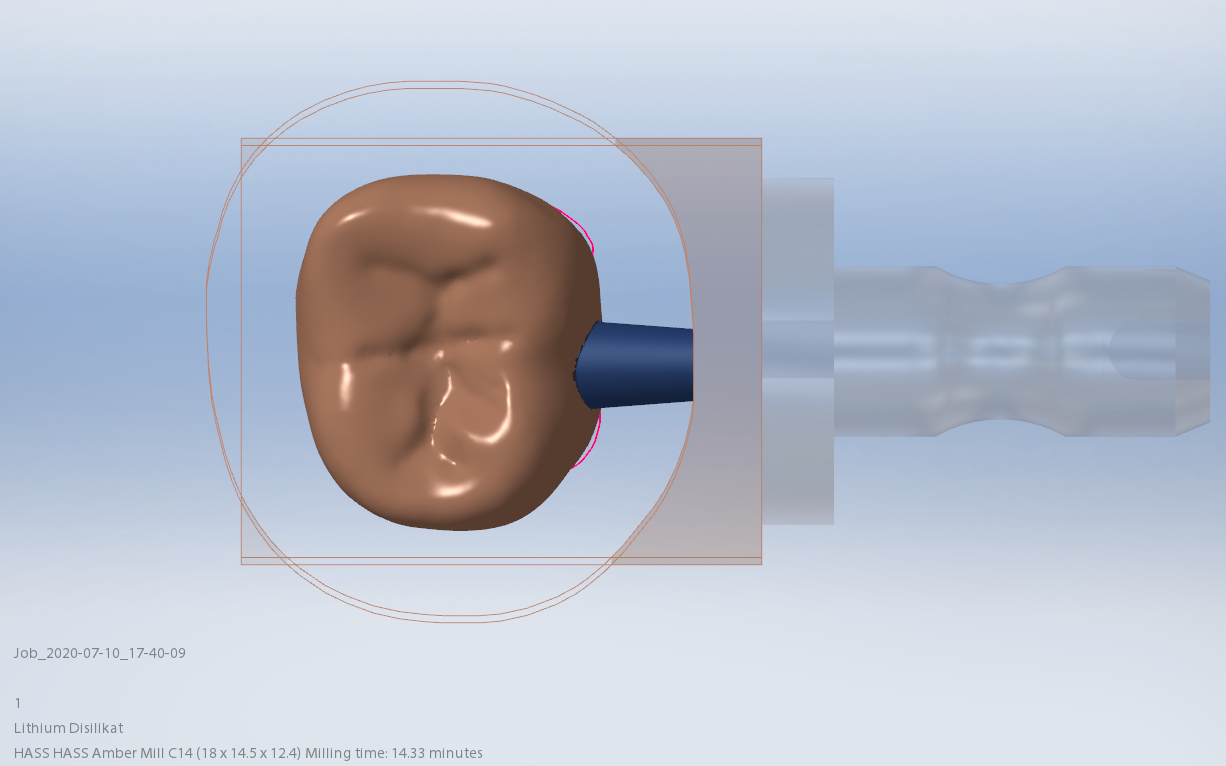
This molar would only fit in a size 14 block of Amber Mill in Imes Icore Coritec
Sprue on distal in normal speed mode is 14:15 minutes, sprue on buccal in normal speed is 14:42 and speed crown is proosed at 13:23

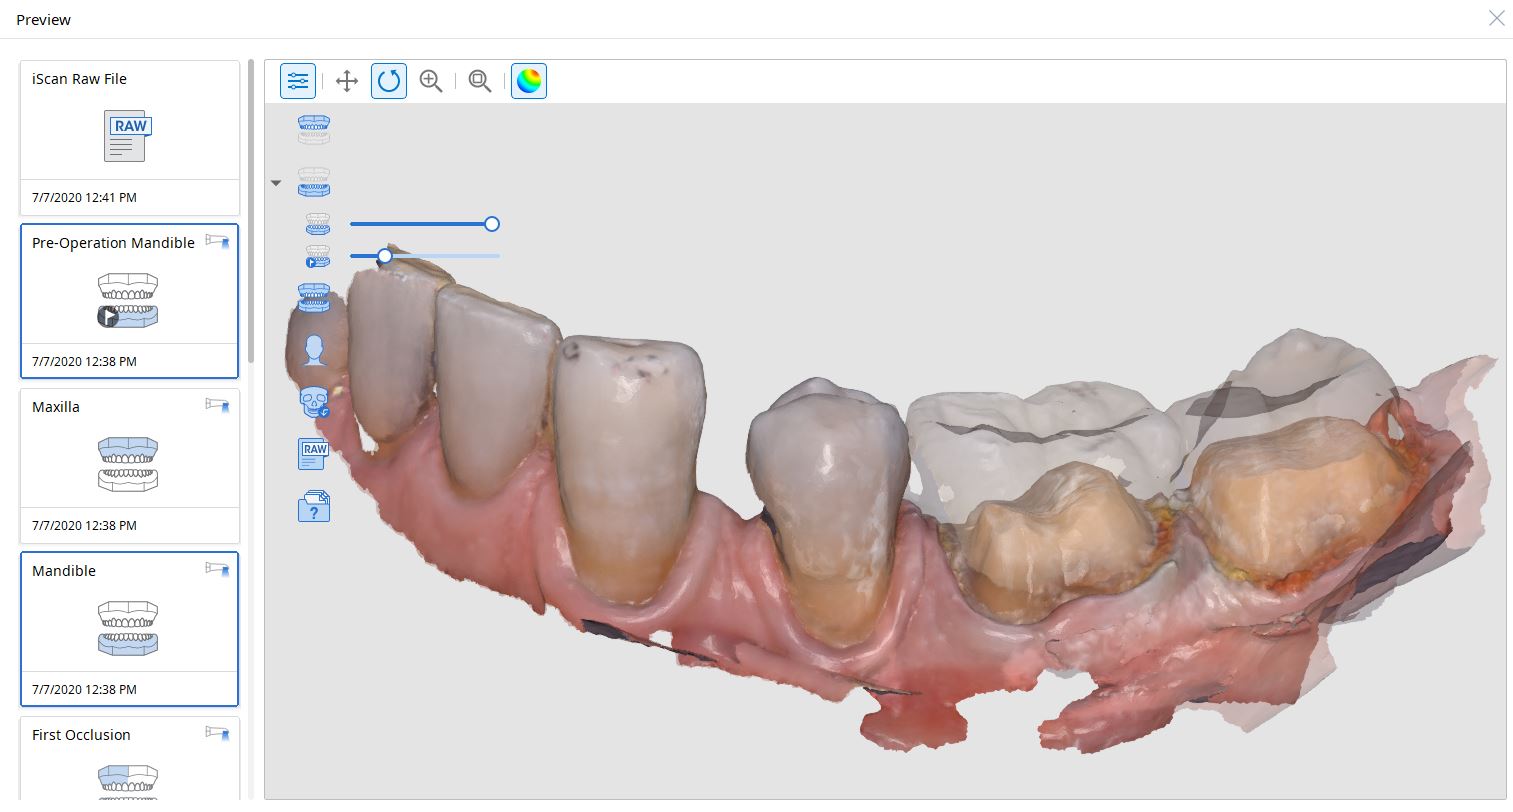
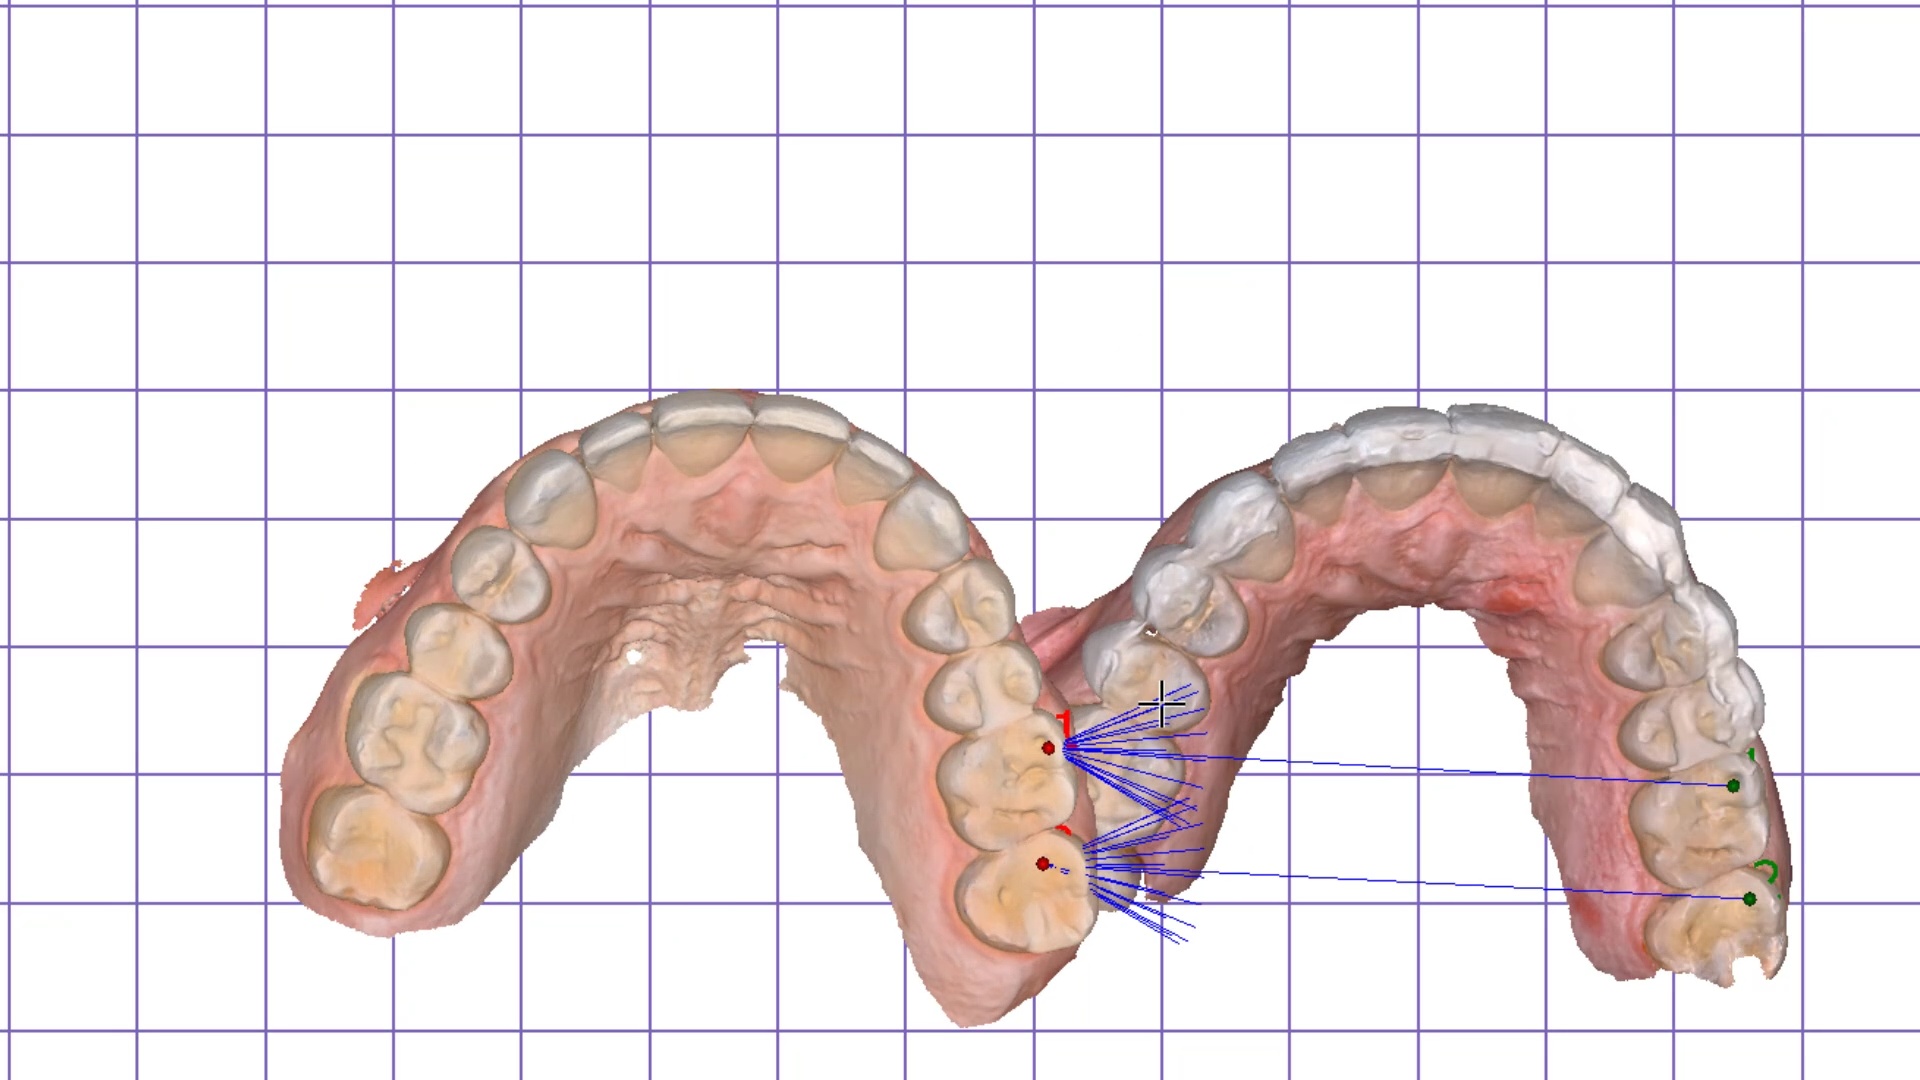
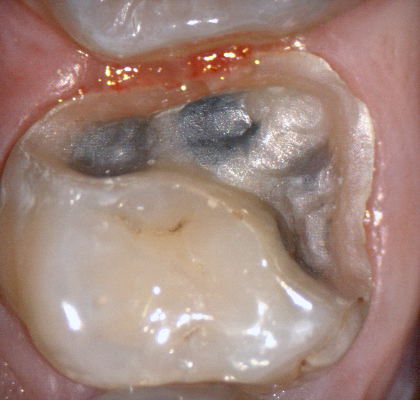
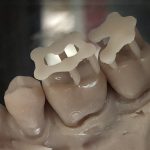
For our advanced users who mill in house or what to speed up their digital impressions we advocate taking advantage of digital dentistry’s unique features that allow you to take impressions over a period of time and segments, building larger models over different sequences and time. In this particular case we have two molars in the lower left quadrant that warranted replacement. The traditional method would be to prep both, isolate both, retract both, and take your final impression, but we will approach this as if there are two separate patients involved
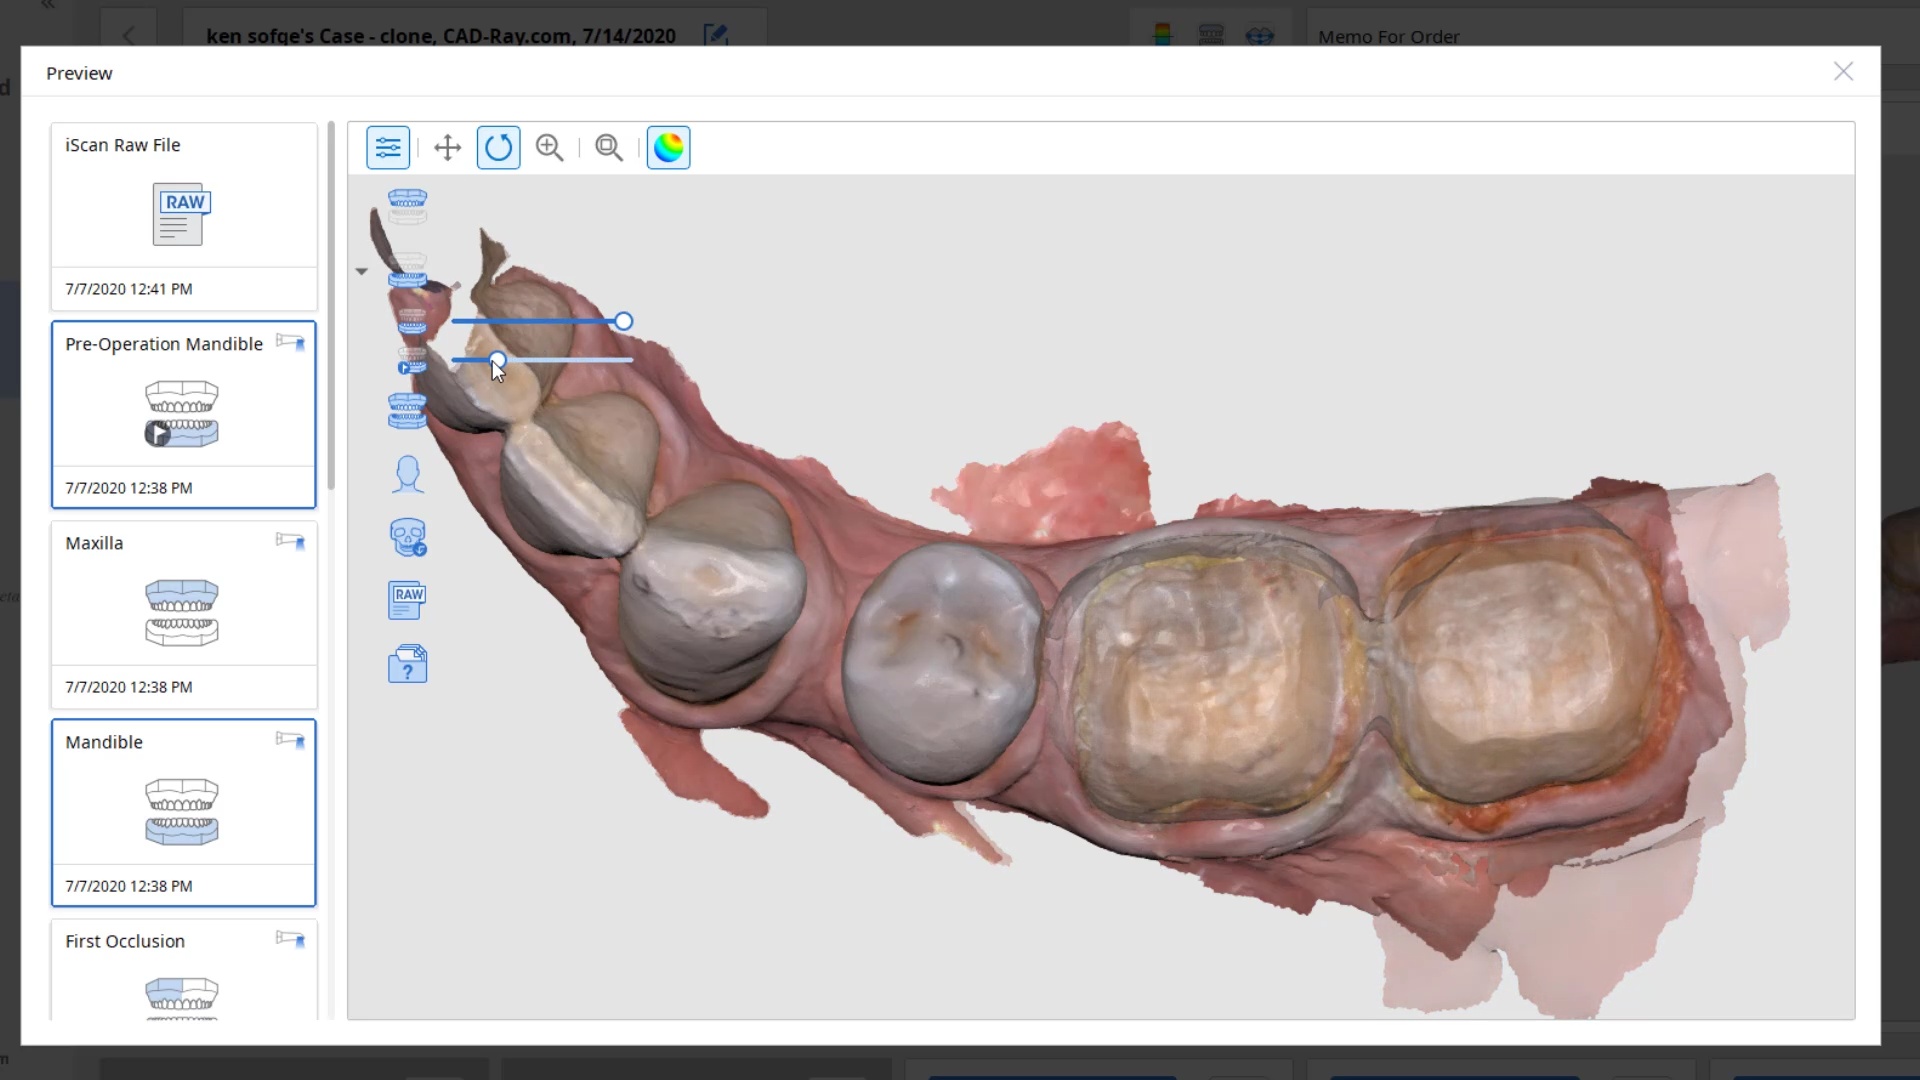
For the second molar, we will take advantage of the anesthesia time and capture the first bite, the opposing, the pre-existing situation and then crop out the preparation area digitally. Once the tooth is prepared, we will check for proper reduction. We will then take the second bite to verify the vertical dimension has not changed.
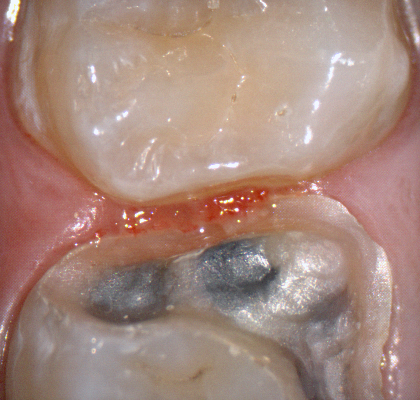
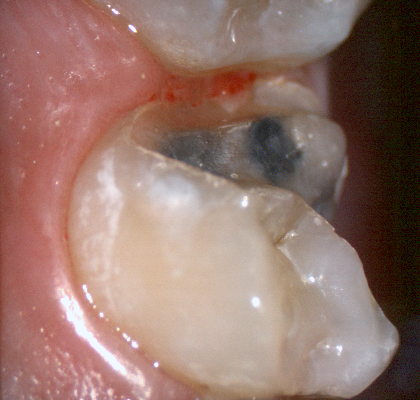
While the second molar is being designed and milled in the first case, we will launch a second window by cloning the first case. All the data remains the same and this time we crop out the first molar digitally and protect the rest of the arch. Once the first molar is isolated, it is digitally captured and then designed and milled.


To manage the contact between the two crowns, there are many advanced applications. Here is a simple explanation of how we use the prep model from case 1 as the pre-op model for case two. Since the second molar in case 1 made contact with the distal wall of the first molar, when we design the crown for the first molar in case 2, all we have to do is make sure the distal wall is flush to the pre-op. This guarantees us a contact between the two. There are lots of shortcuts to this puzzle once you get the basics of digital impressions under your belt.
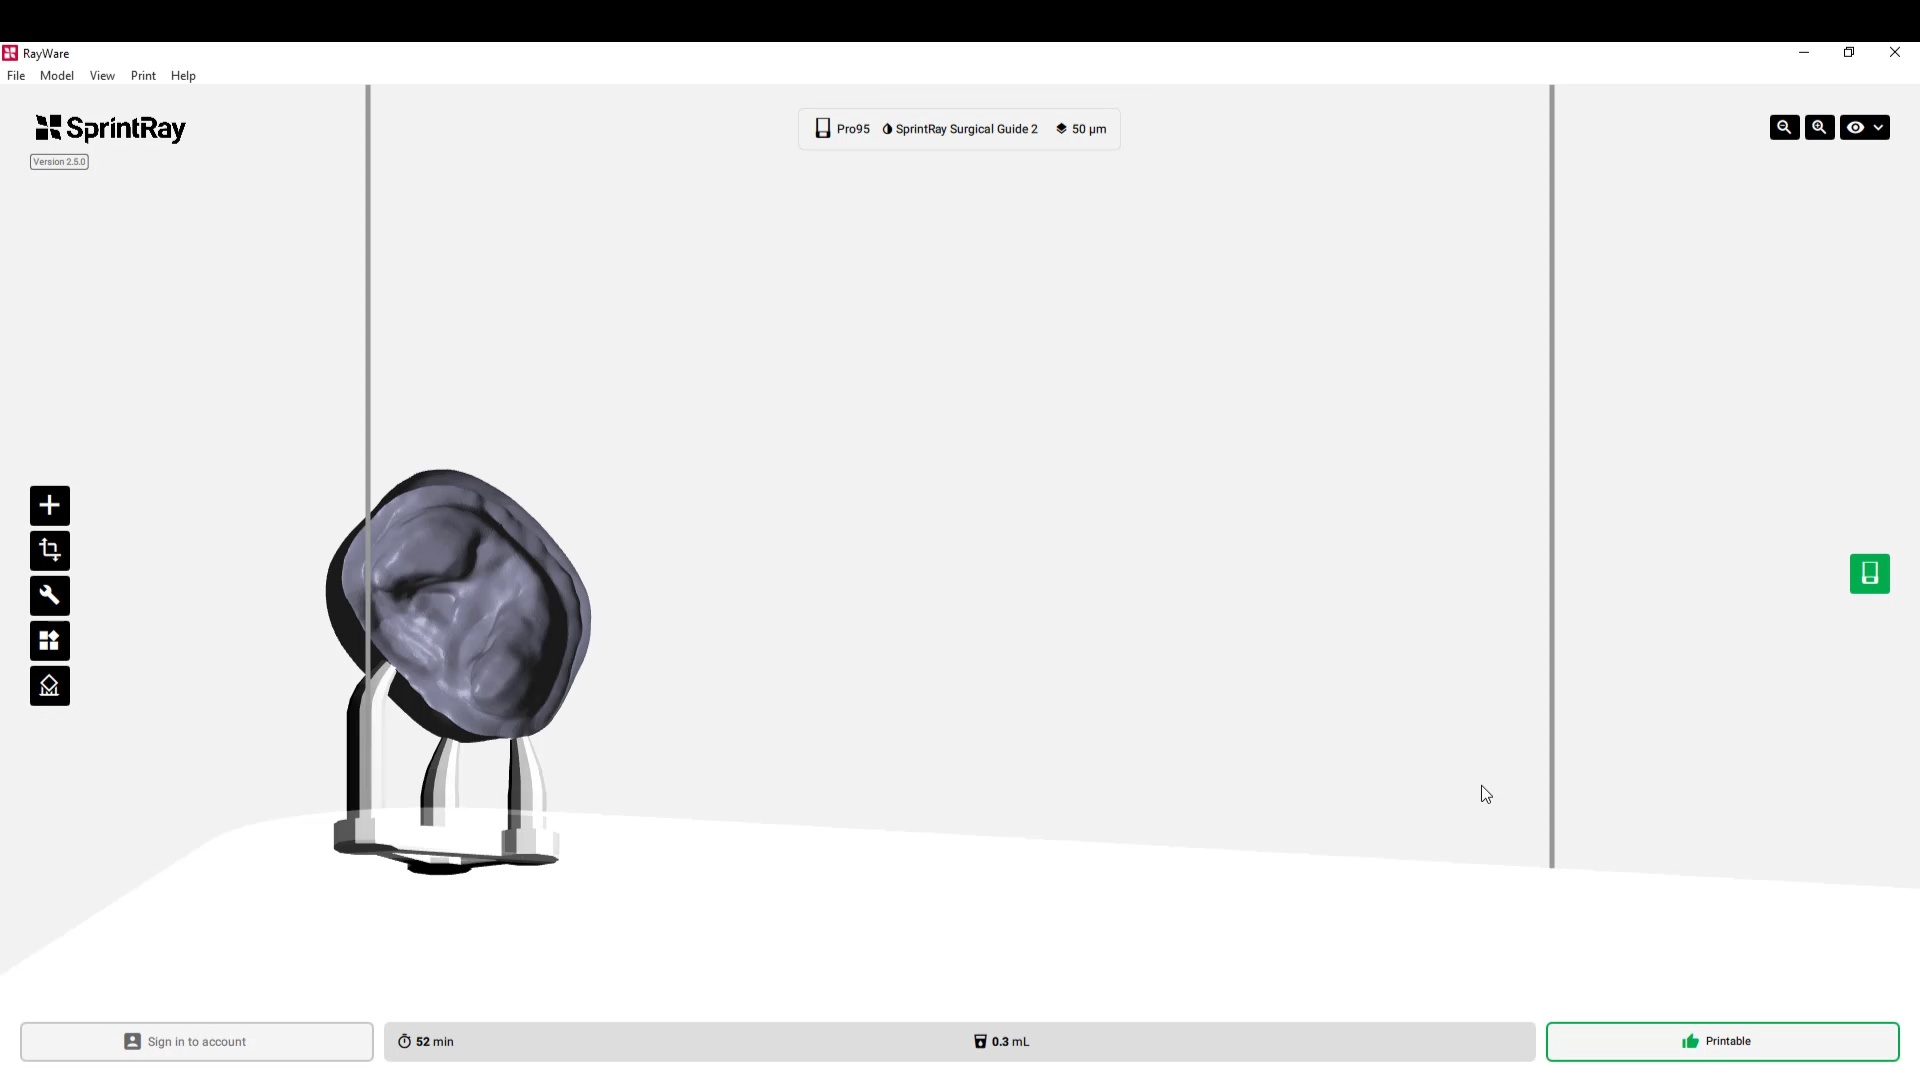
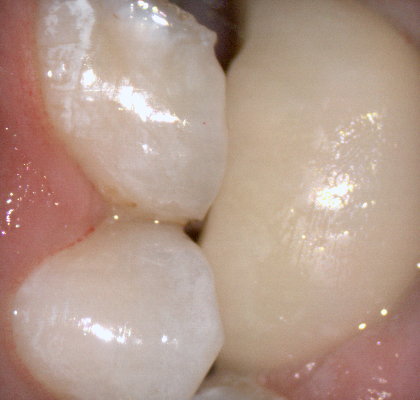
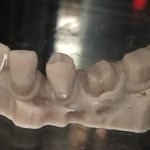
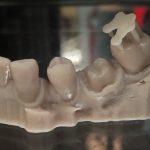
We quickly printed these same models and crowns just for demonstration purposes

One of the big limitations of CEREC (a registered trademark of denstply sirona) with tibases and implant crowns is that it is limited to very few implant lines and the antirotational notch can just ruin your day as it needs to go into a specific location. You also have to deal with making sure the tibase is seated all the way and the scanbody is properly indexed. The one benefit is that you are dealing with just crown and bridge and you do not need to know implant position or timing at all when doing the design.
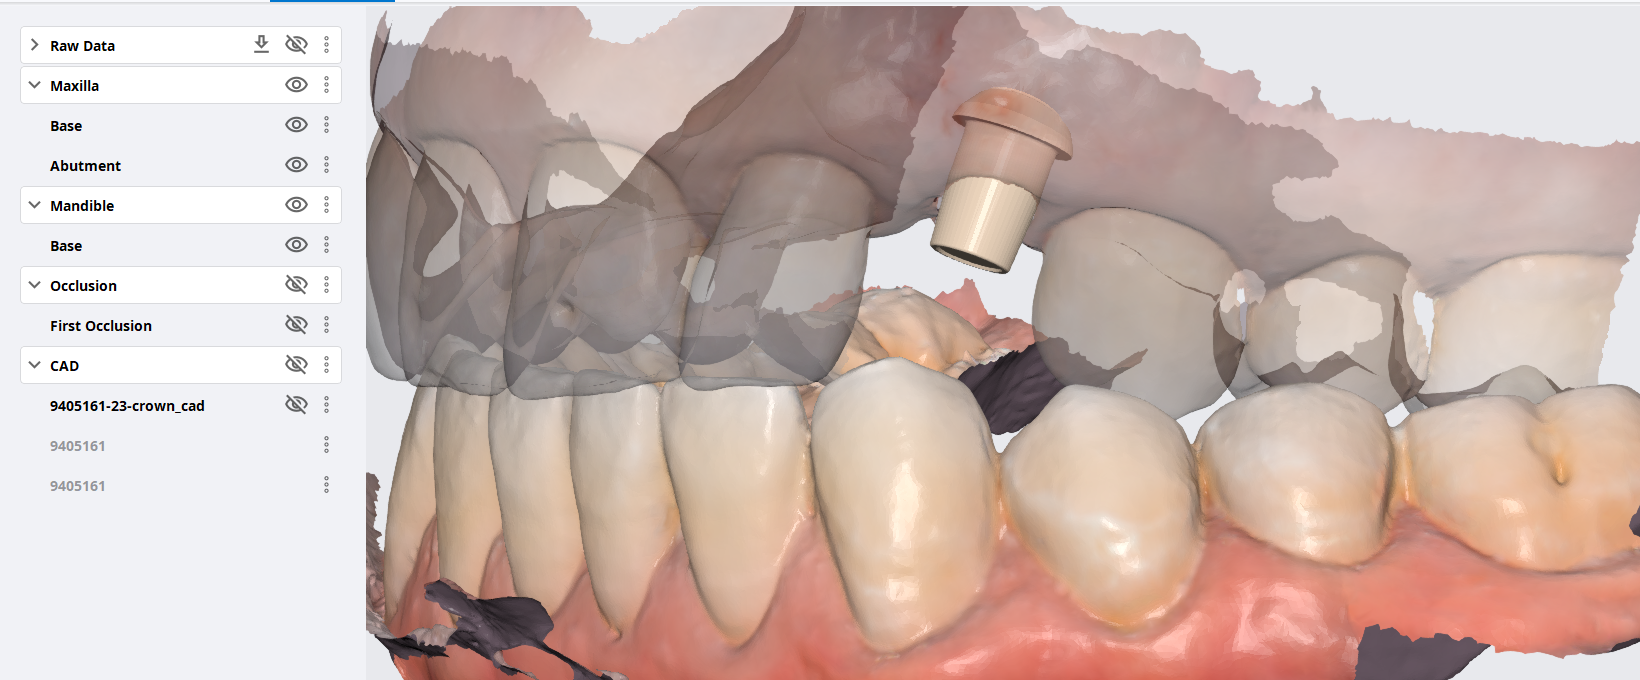
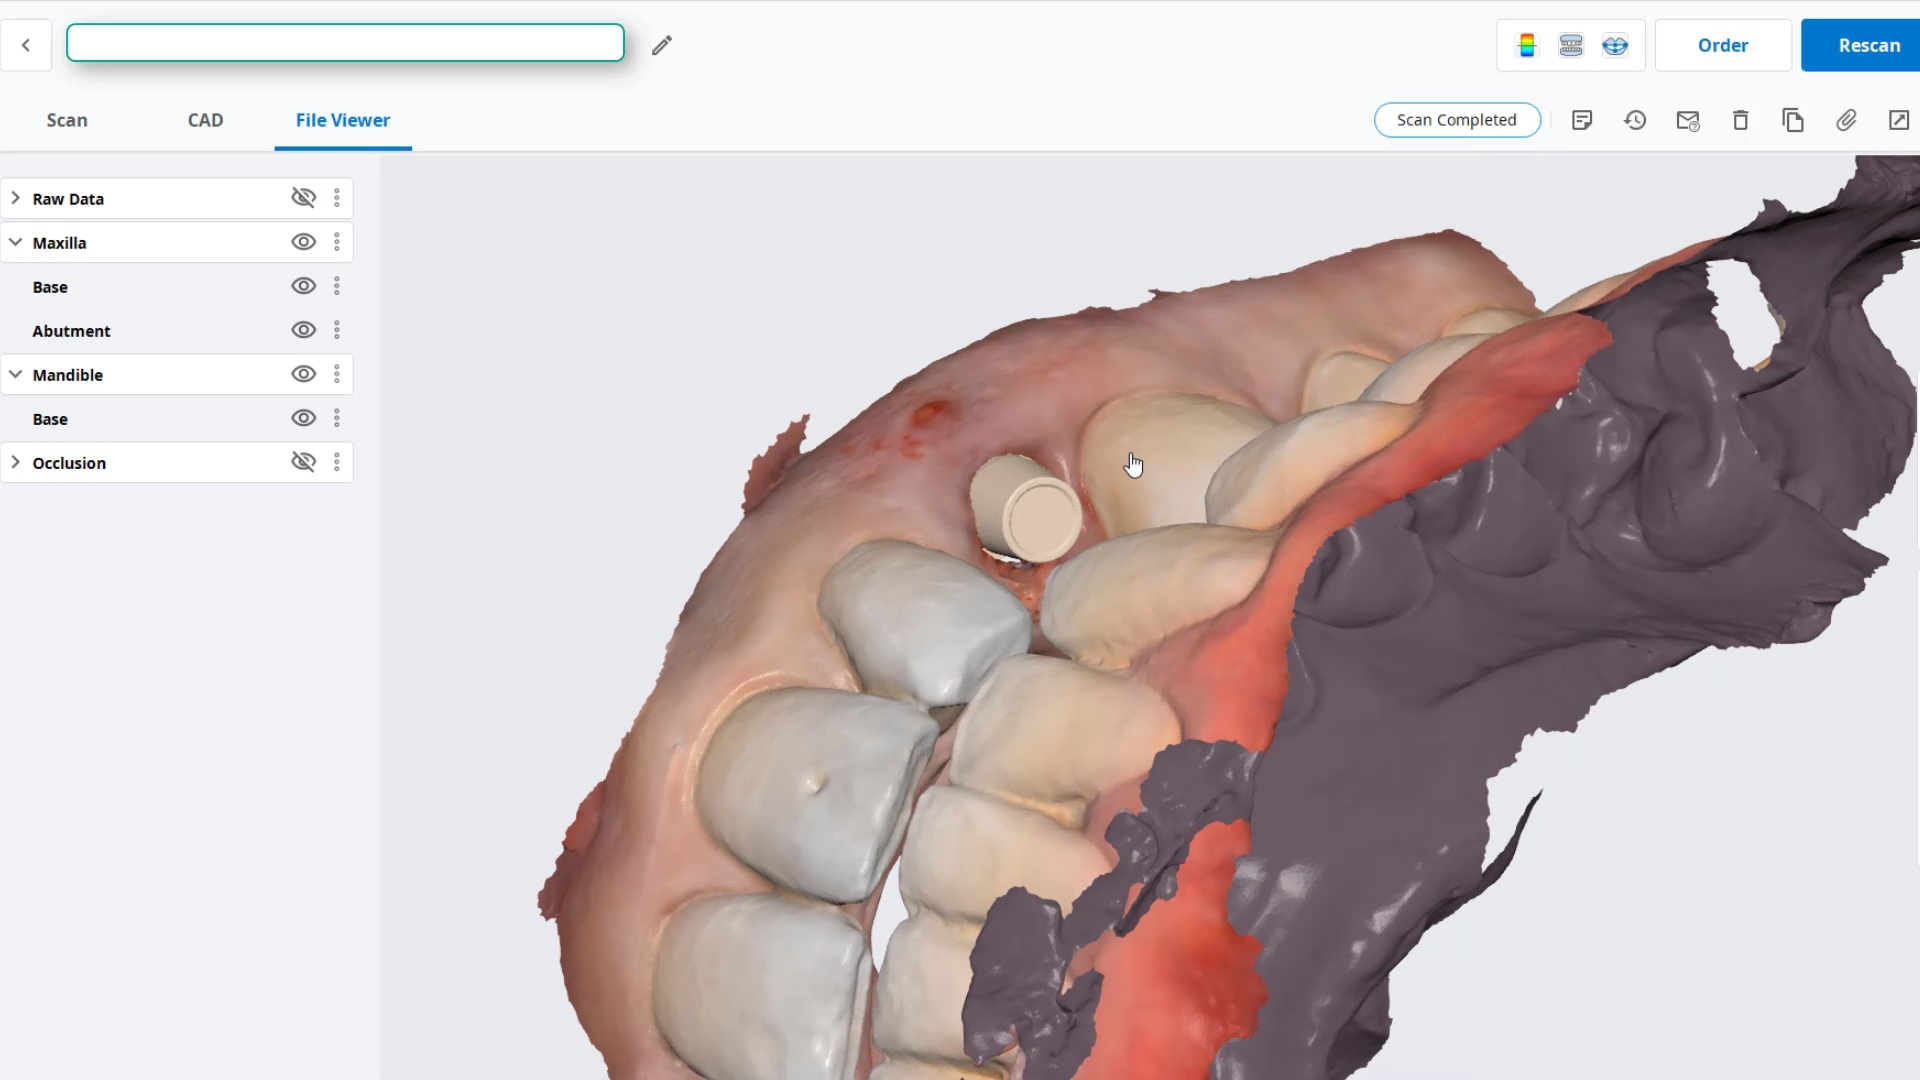
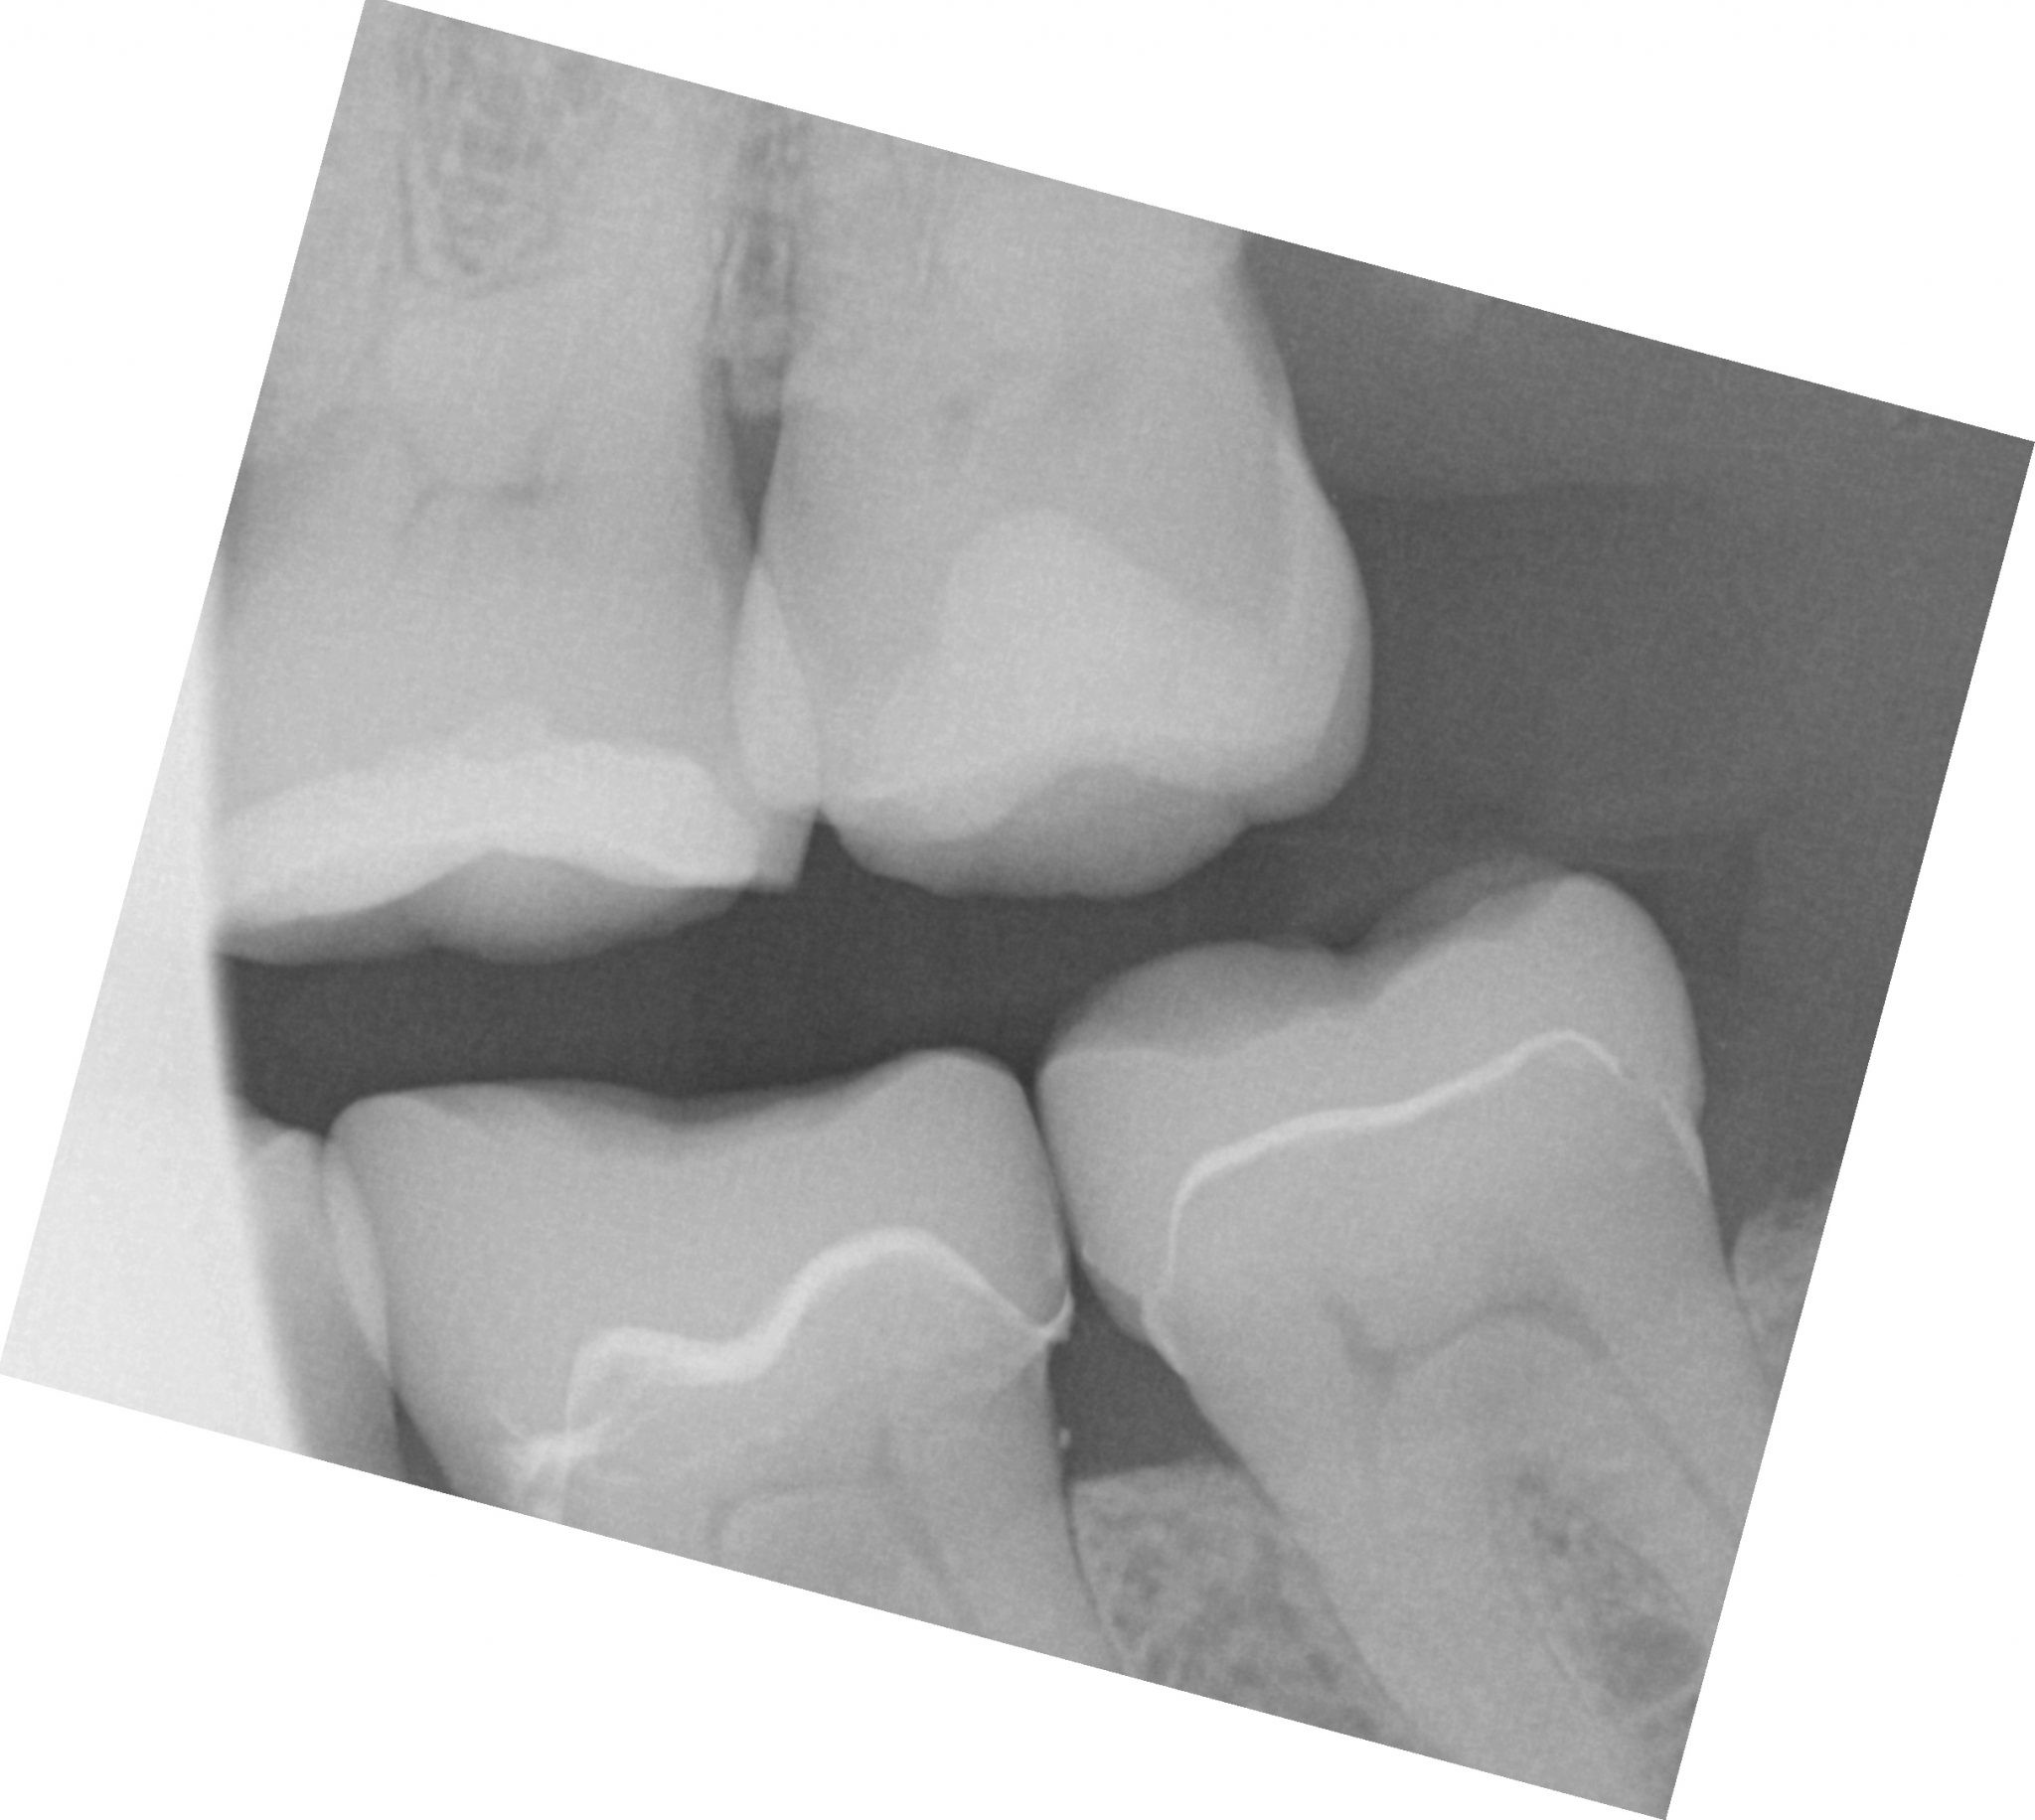
In this case, we demonstrate how we utilize the Medit i500 to capture a Tibase from Blueskybio, Biomax NP Conical Connection. Once the tibase is seated, we simply start scanning and then use the artificial intelligent implant suprastructure identification system to identify the location of the tibase. This in essence allows you to capture your margins OUTSIDE the mouth and you don’t have to bother with imaging the tibase, which is highly reflective in the patient’s mouth.
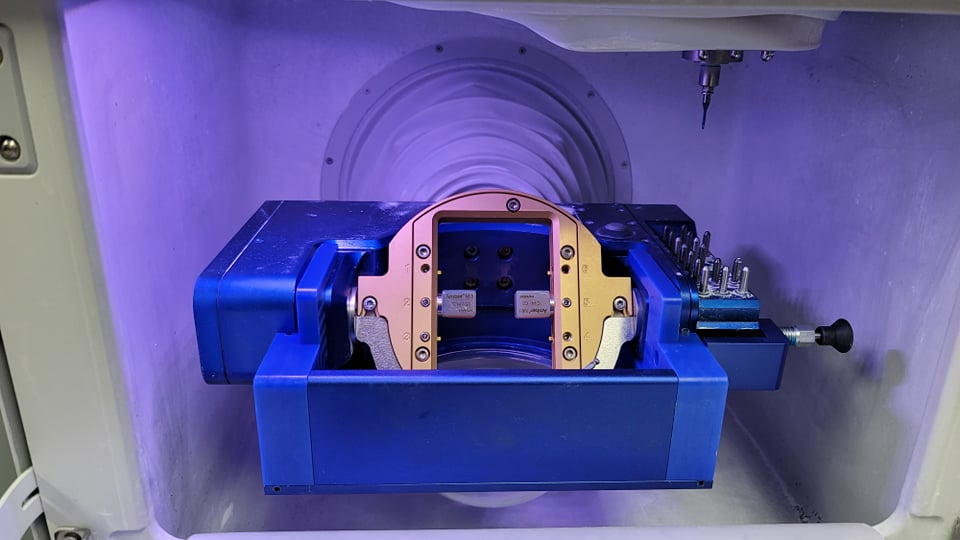
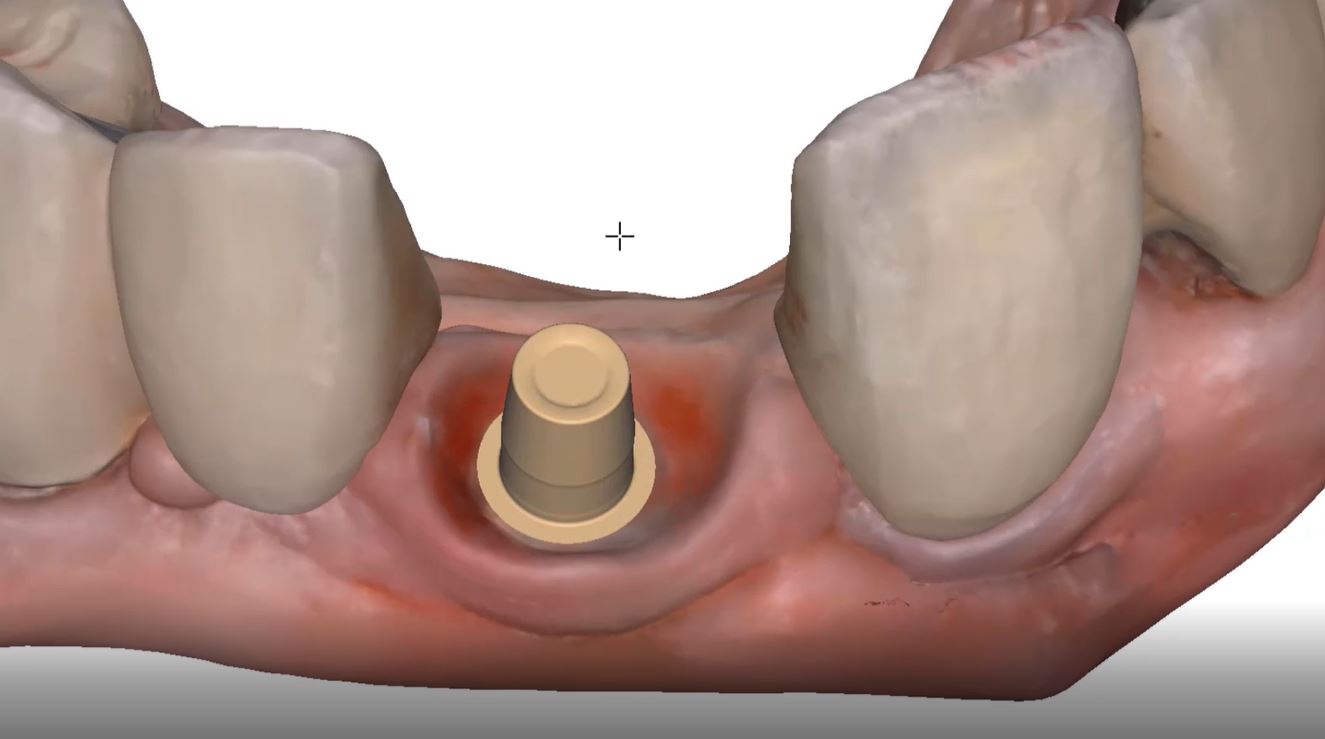
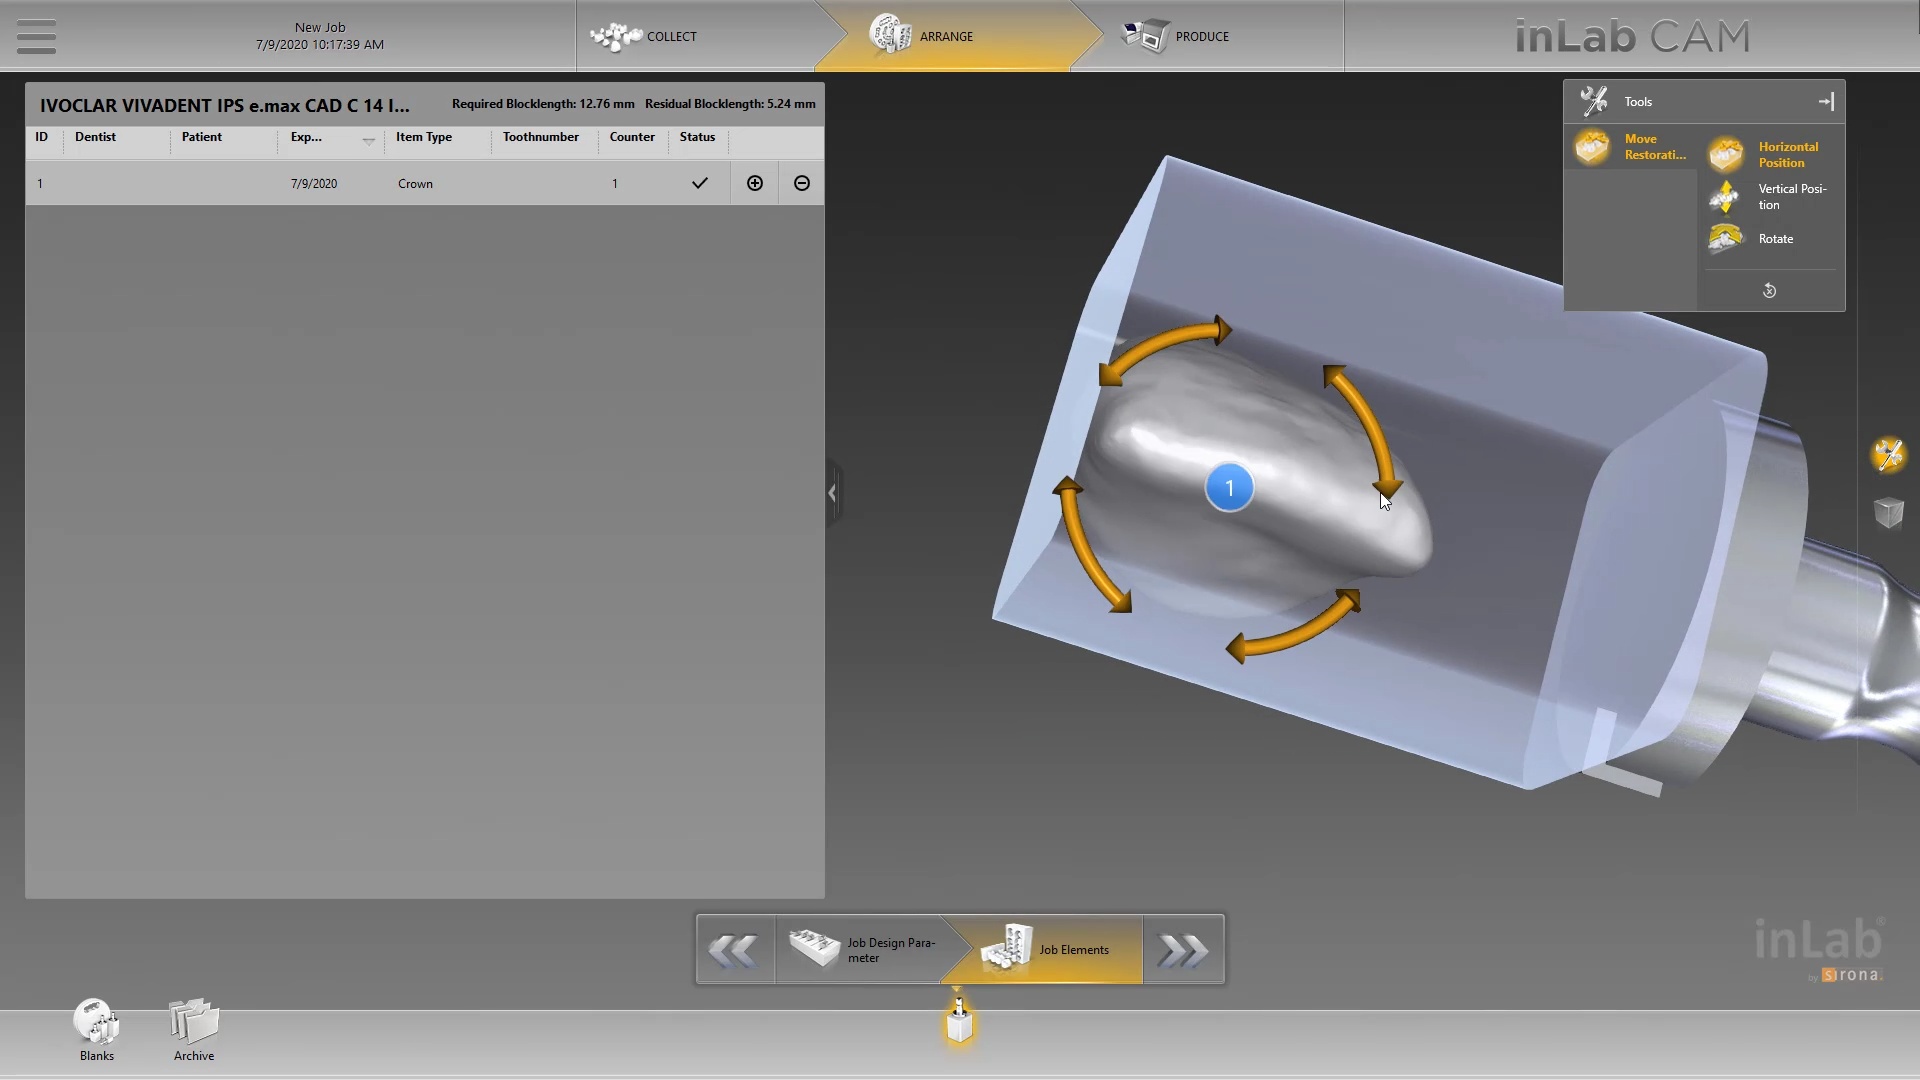
Once processed, you can then modify the tissue digitally and gain access to the tibase margins. You can print the model if you want and manufacture the restoration. In this particular case, we took the design to the CEREC mcxl inlab cam, nested it, and milled it out to demonstrate how we can image with one device from one manufacturer and fabricate a restoration by another company’s manufacturing machine. But the single greatest benefit is that you can place the sprue wherever you want.
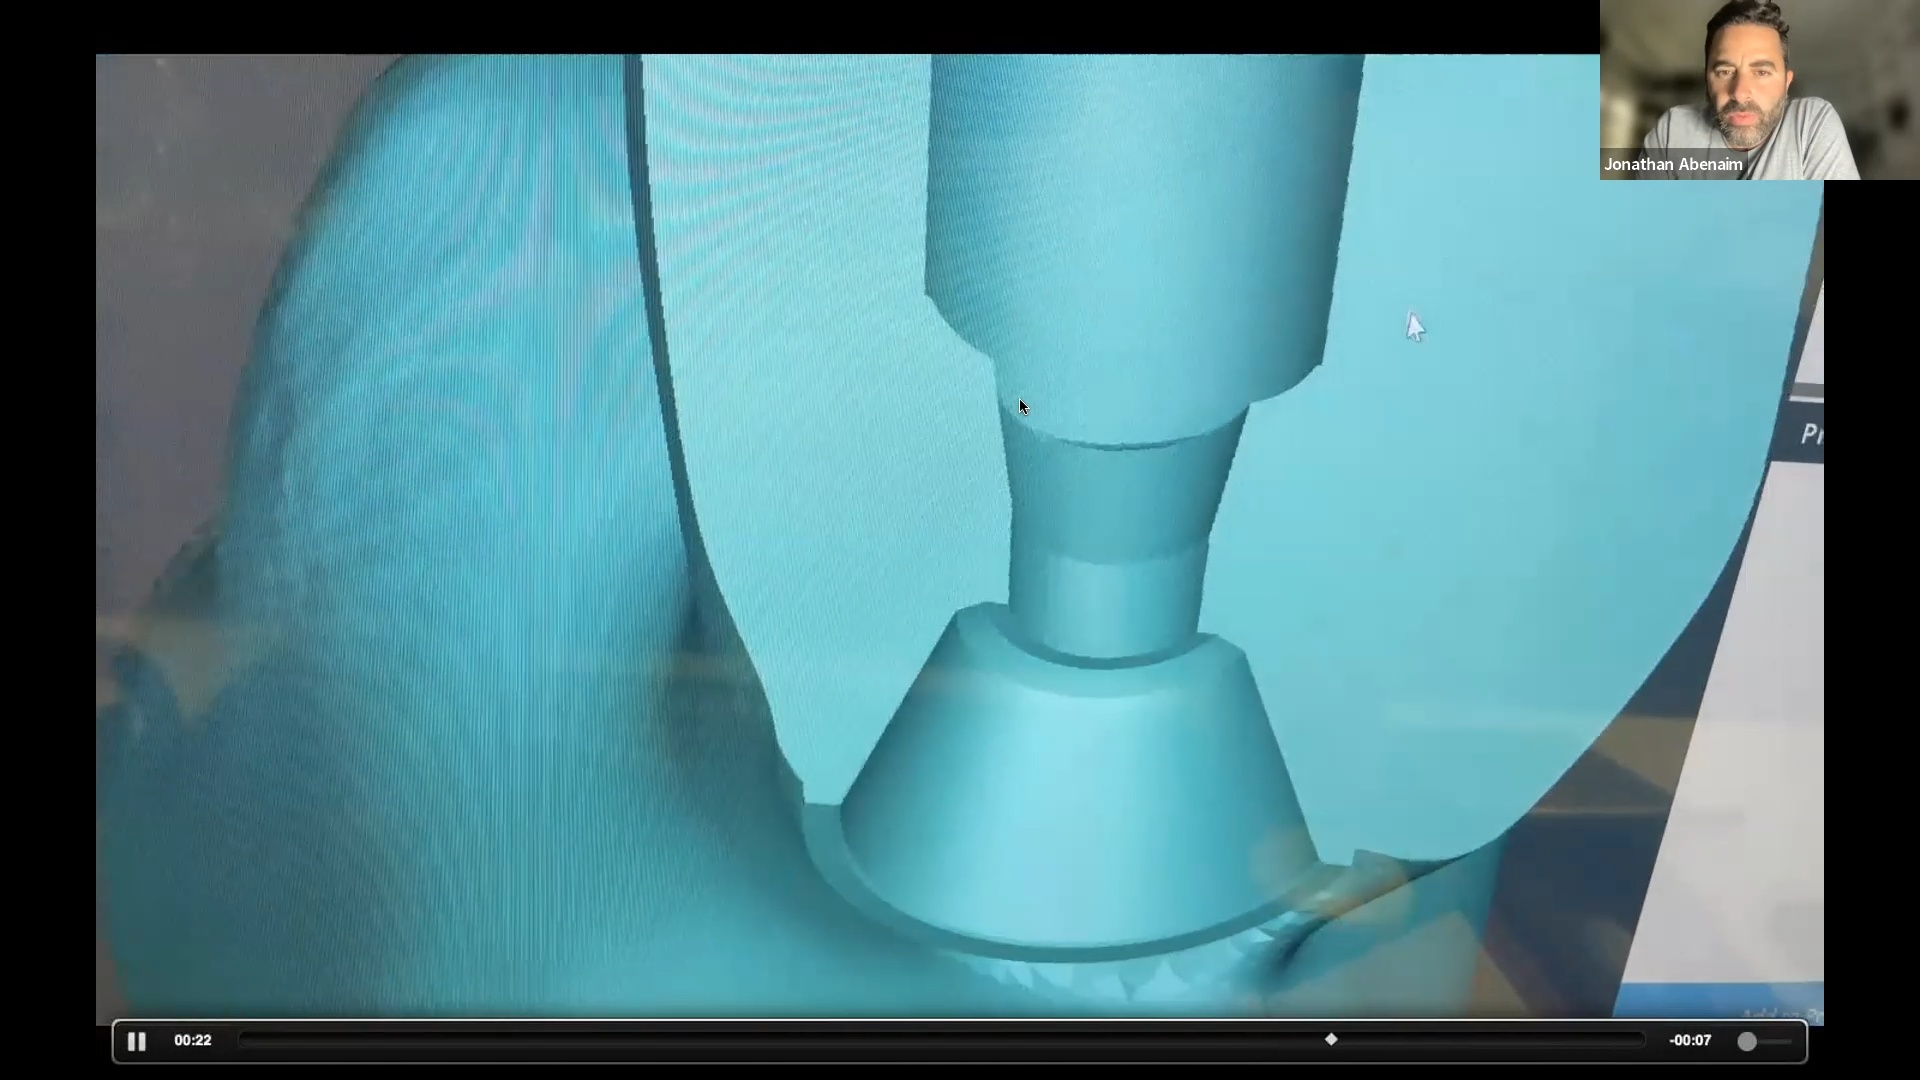
IMPORTANT NOTE: The Tibase that you use MUST be wider than the drill milling the intaglio and the sprue must be thick enough to handle the milling process.

Once you understand how the digital workflow goes, you can image with one device, design in another, and then either print or manufacture with yet another device. Here we mill a sectional stent with the cerec that was designed in Blueskybio plan, although printing makes more sense because it is less wear and tear on your drills
PRODUCTS USED IN THIS CASE:


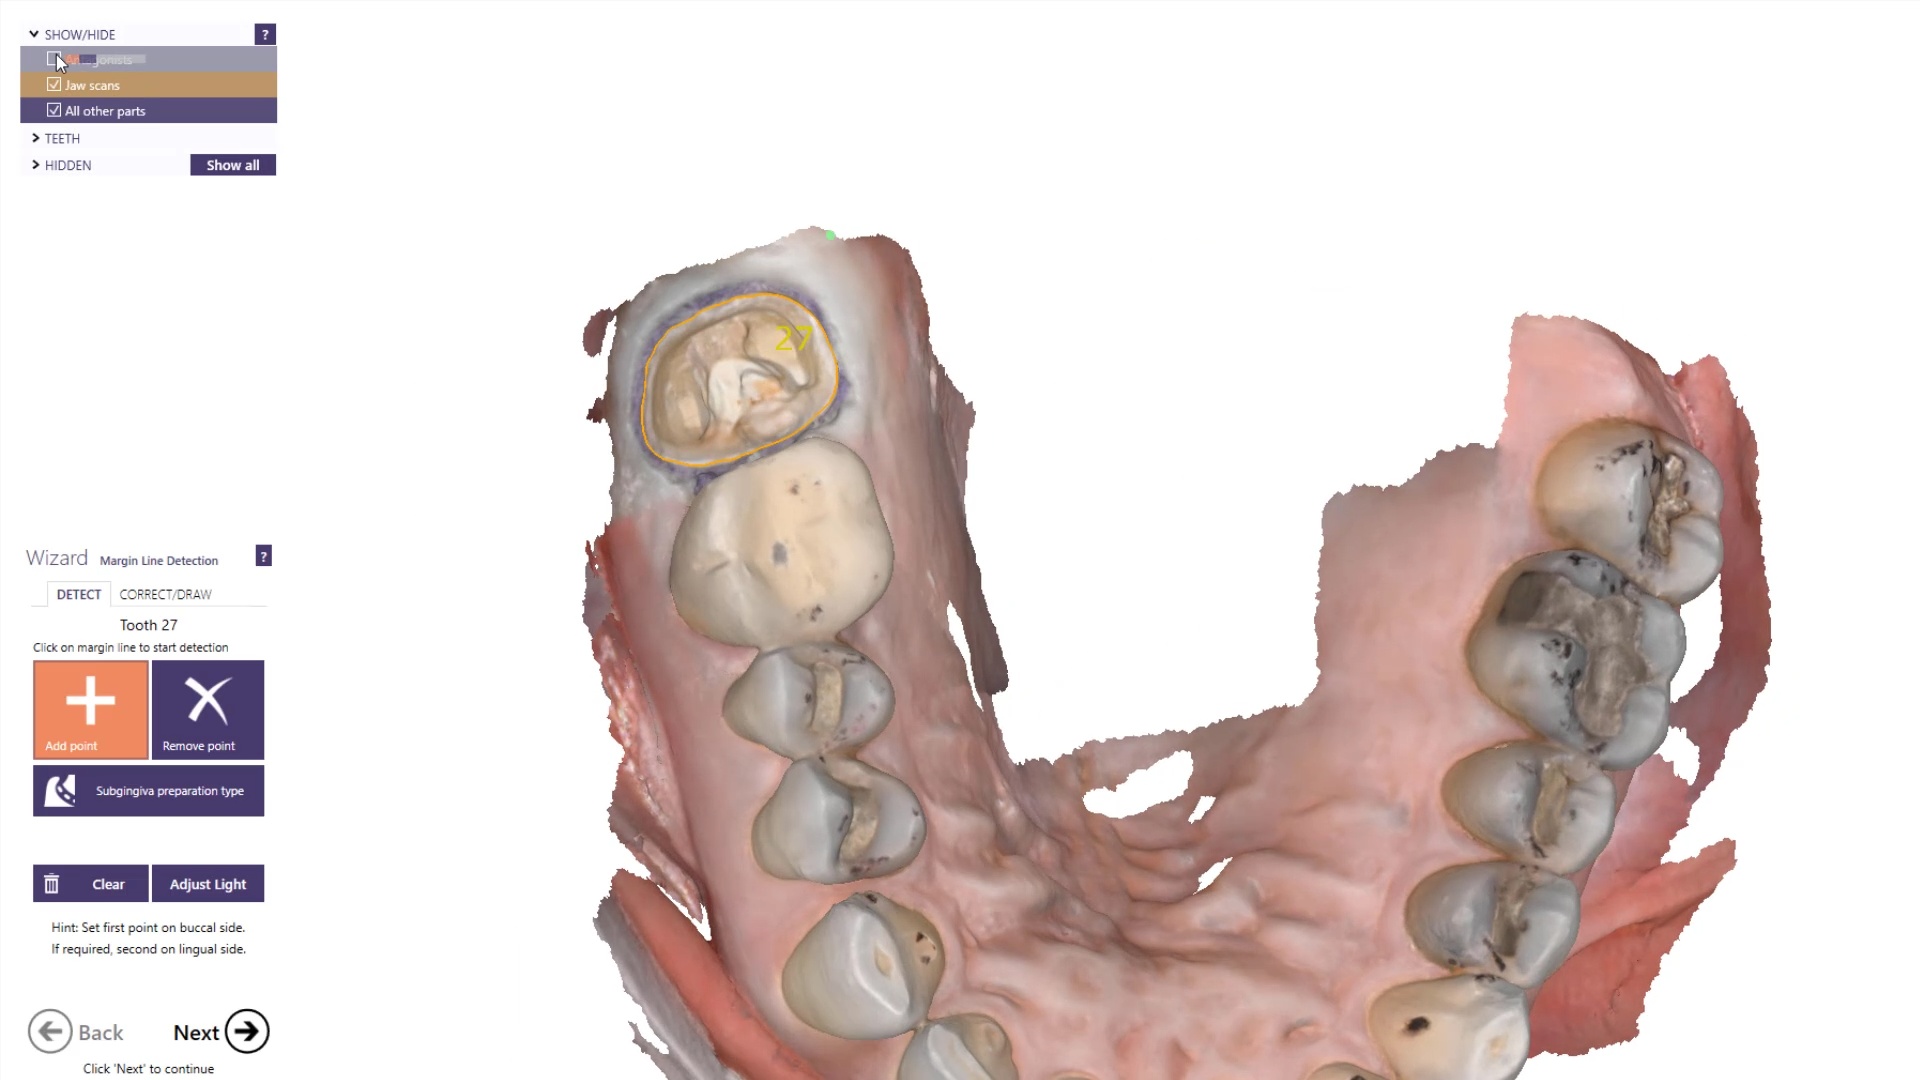
Marking margins on your model can occur in the native imaging software or the CAD software.
Visualizing your margin accomplishes 2 things.
In this video we use Exocad design software to quickly mark the perfect margin. We use the computer to manipulate models for best viewing purposes.


Today, clinicians and lab technicians are leveraging technologies to produce better results and run a better business now more than ever.
So how does this work? Why should you care?
First we need to define the differences. What is a digital workflow?
A digital workflow is the process of using advanced technology and 3D precision without analog materials or human error to deliver patient care.
The reason clinicians or technicians should commit to mastering digital workflows is because it will lean out their production helping them avoid slow and costly processes.
Take for example a basic full coverage crown procedure. During the conventional process the clinician will start by taking an impression of the patient using polyvinyl materials. After the materials set and it’s determined there are no errors chairside, they will ship the impression to the lab which can take a few days depending on location. When the impression finally reaches the lab, a technician will pour up the impression in stone to produce a model and determine accuracy. After this time consuming process is completed, the technicians enter the manufacturing phase.
For comparison, if the clinician and lab practiced with a digital workflow, they would have the ability to cut out each of these steps therefore delivering superior accuracy. The clinician could use a device such as an intraoral scanner to digitally capture a 3D model of the patient and instantly deliver the model to the lab using electronic file exchange. The lab would download the file and immediately begin digitally designing the proposal before milling or 3D printing final prosthesis. Practicing with this process eliminates the costs and headaches of analog materials that can introduce errors and delays.
Digital workflows are very simple to learn. They make life so much easier once you understand.
In summary, any practice owner or lab owner can keep their production lean by introducing digital workflows to eliminate costs, time, and errors.


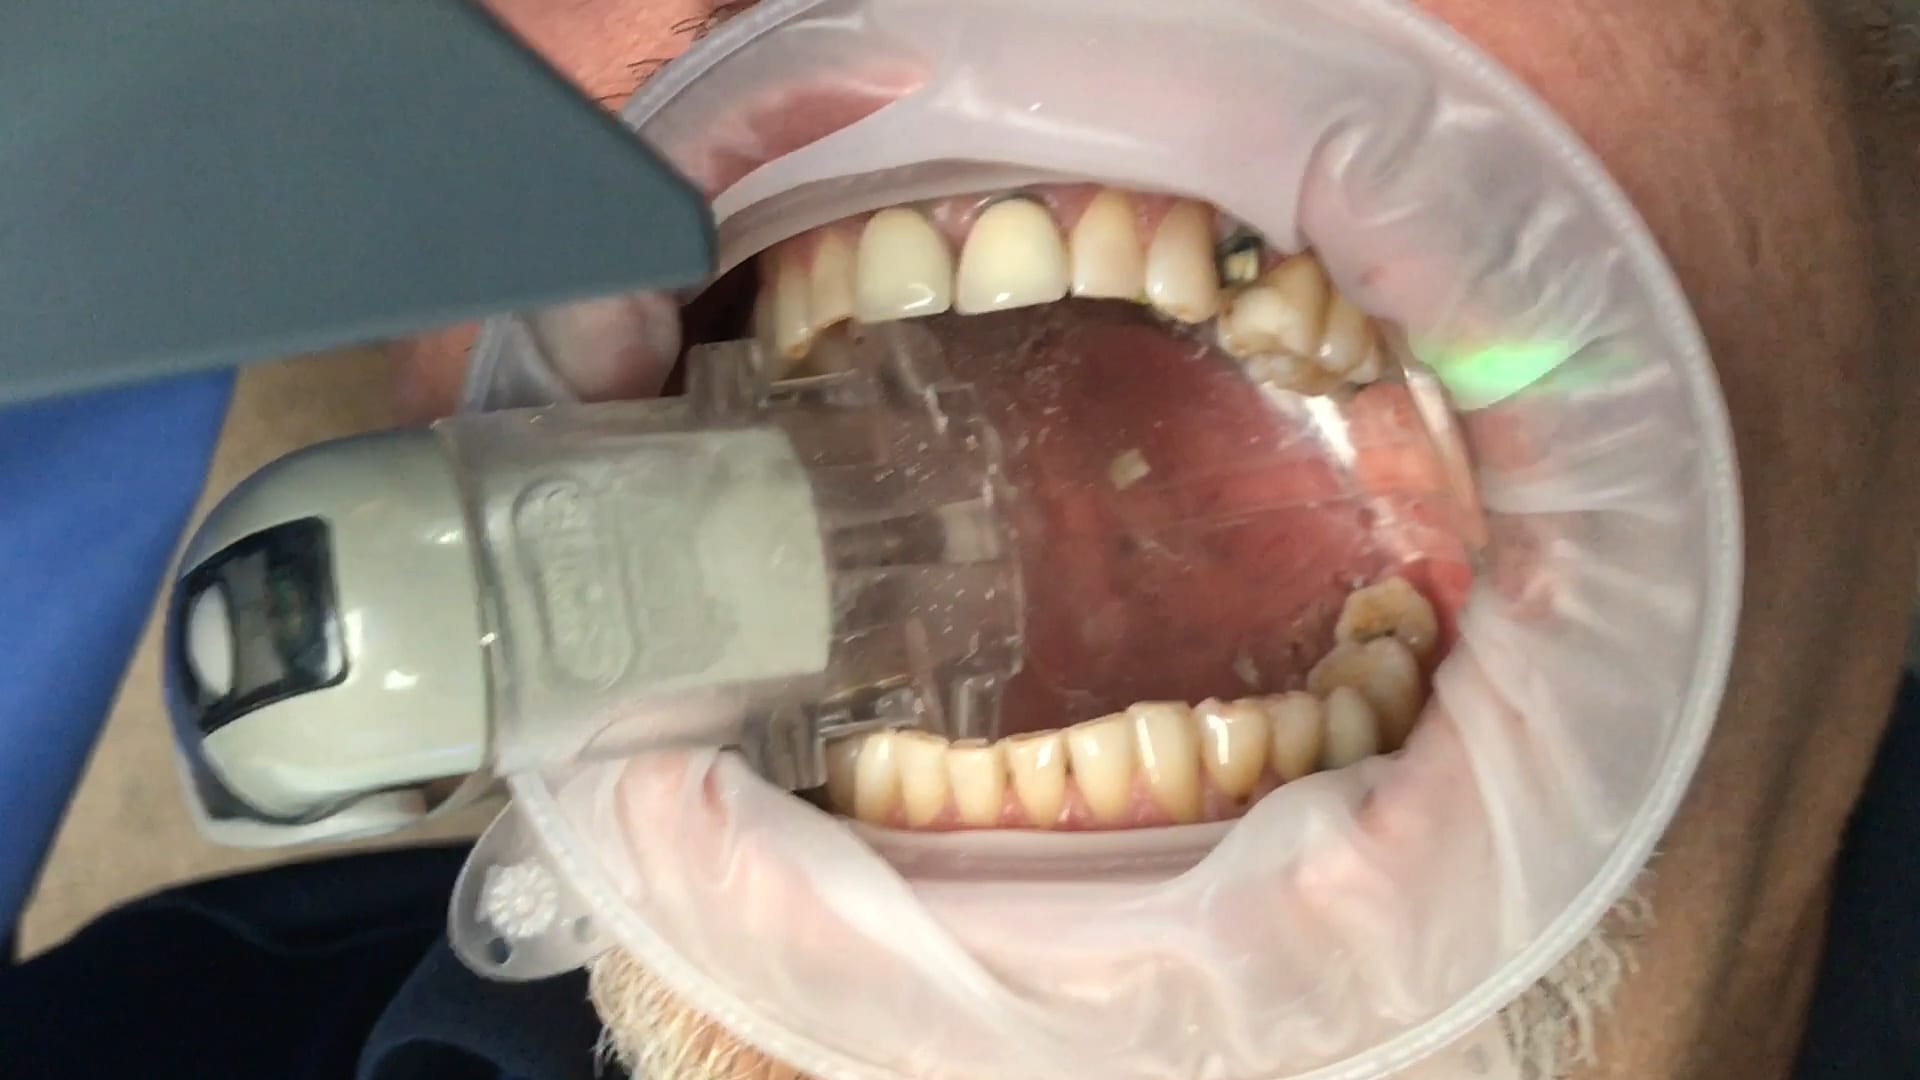
Proper isolation and retraction is key for all intra-oral scanners. In this video, you can appreciate how the upper and lower arches were isolated, the margins were exposed with retraction cord and imaged with the shining 3d aoralscan

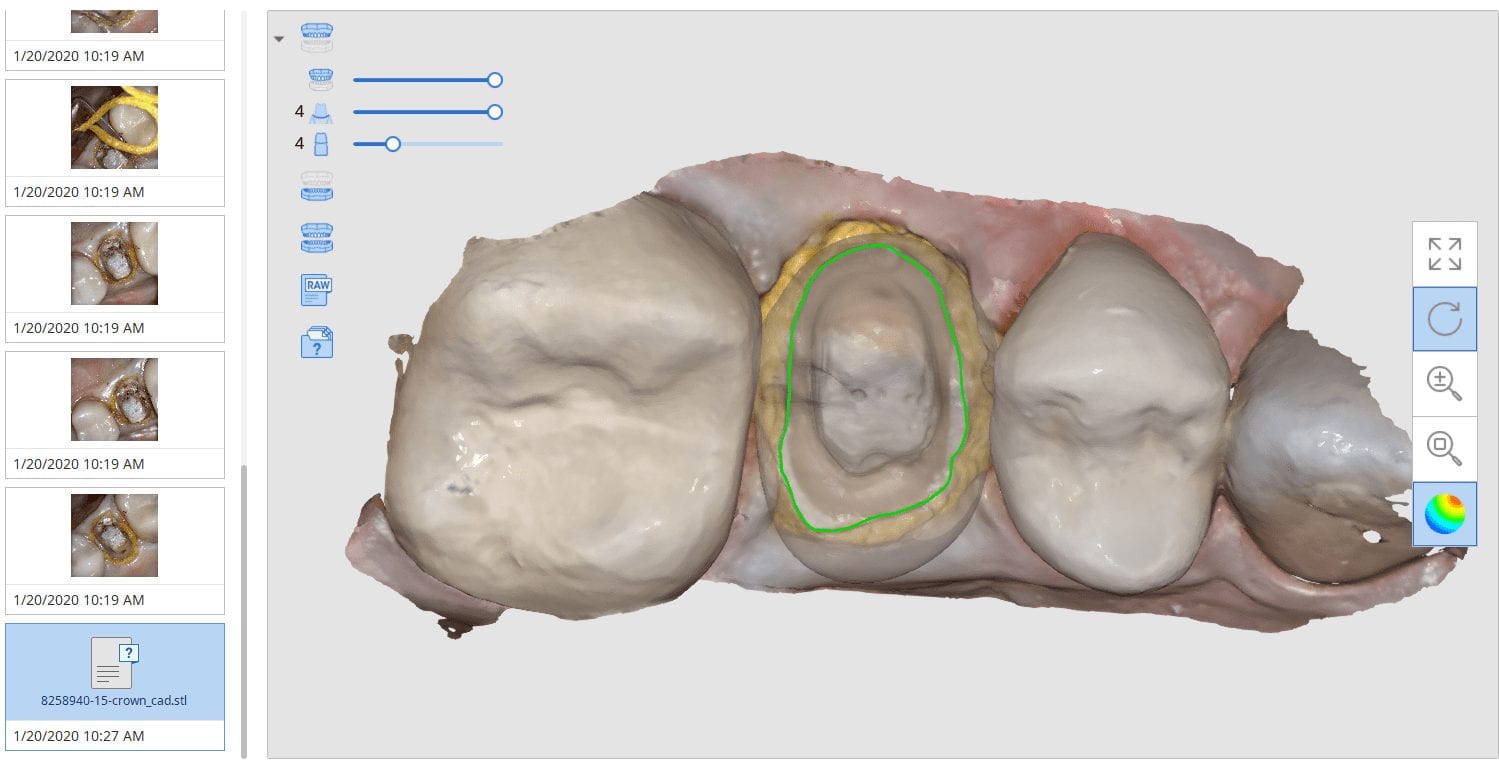
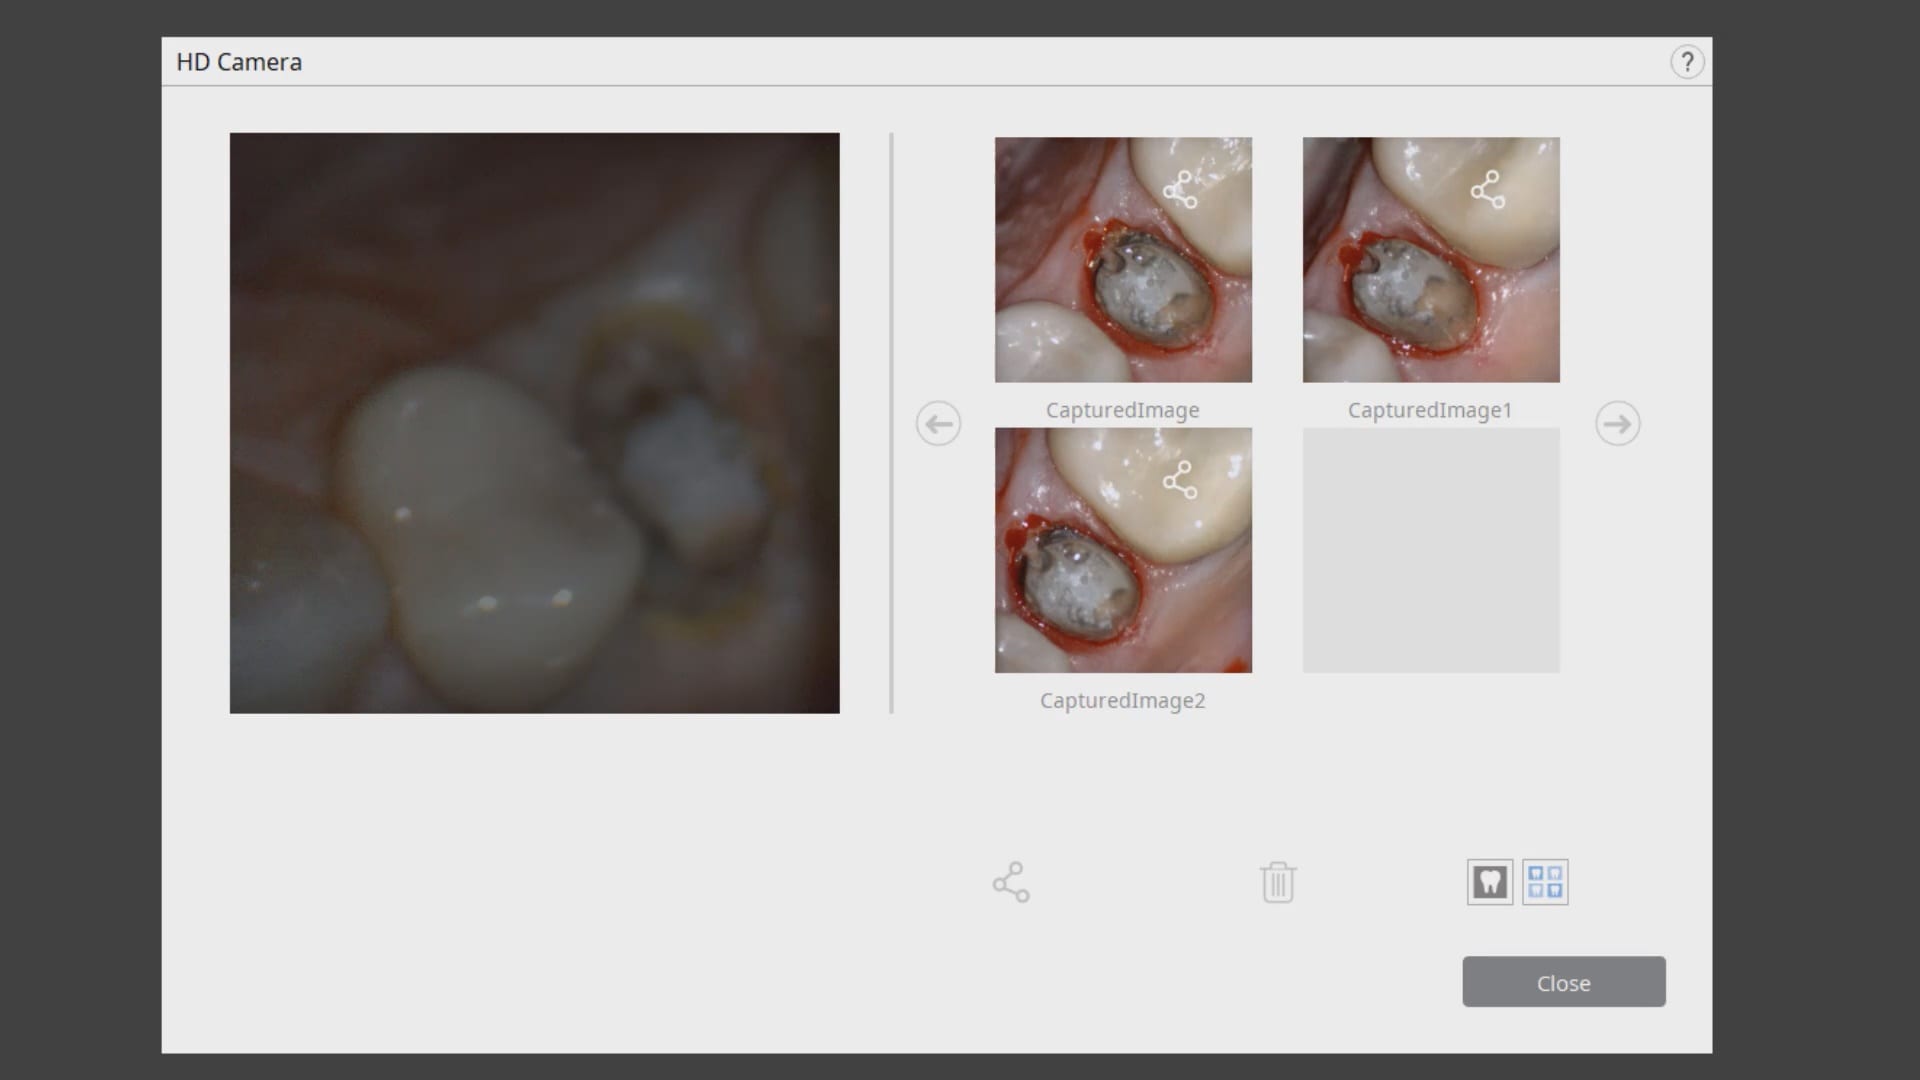
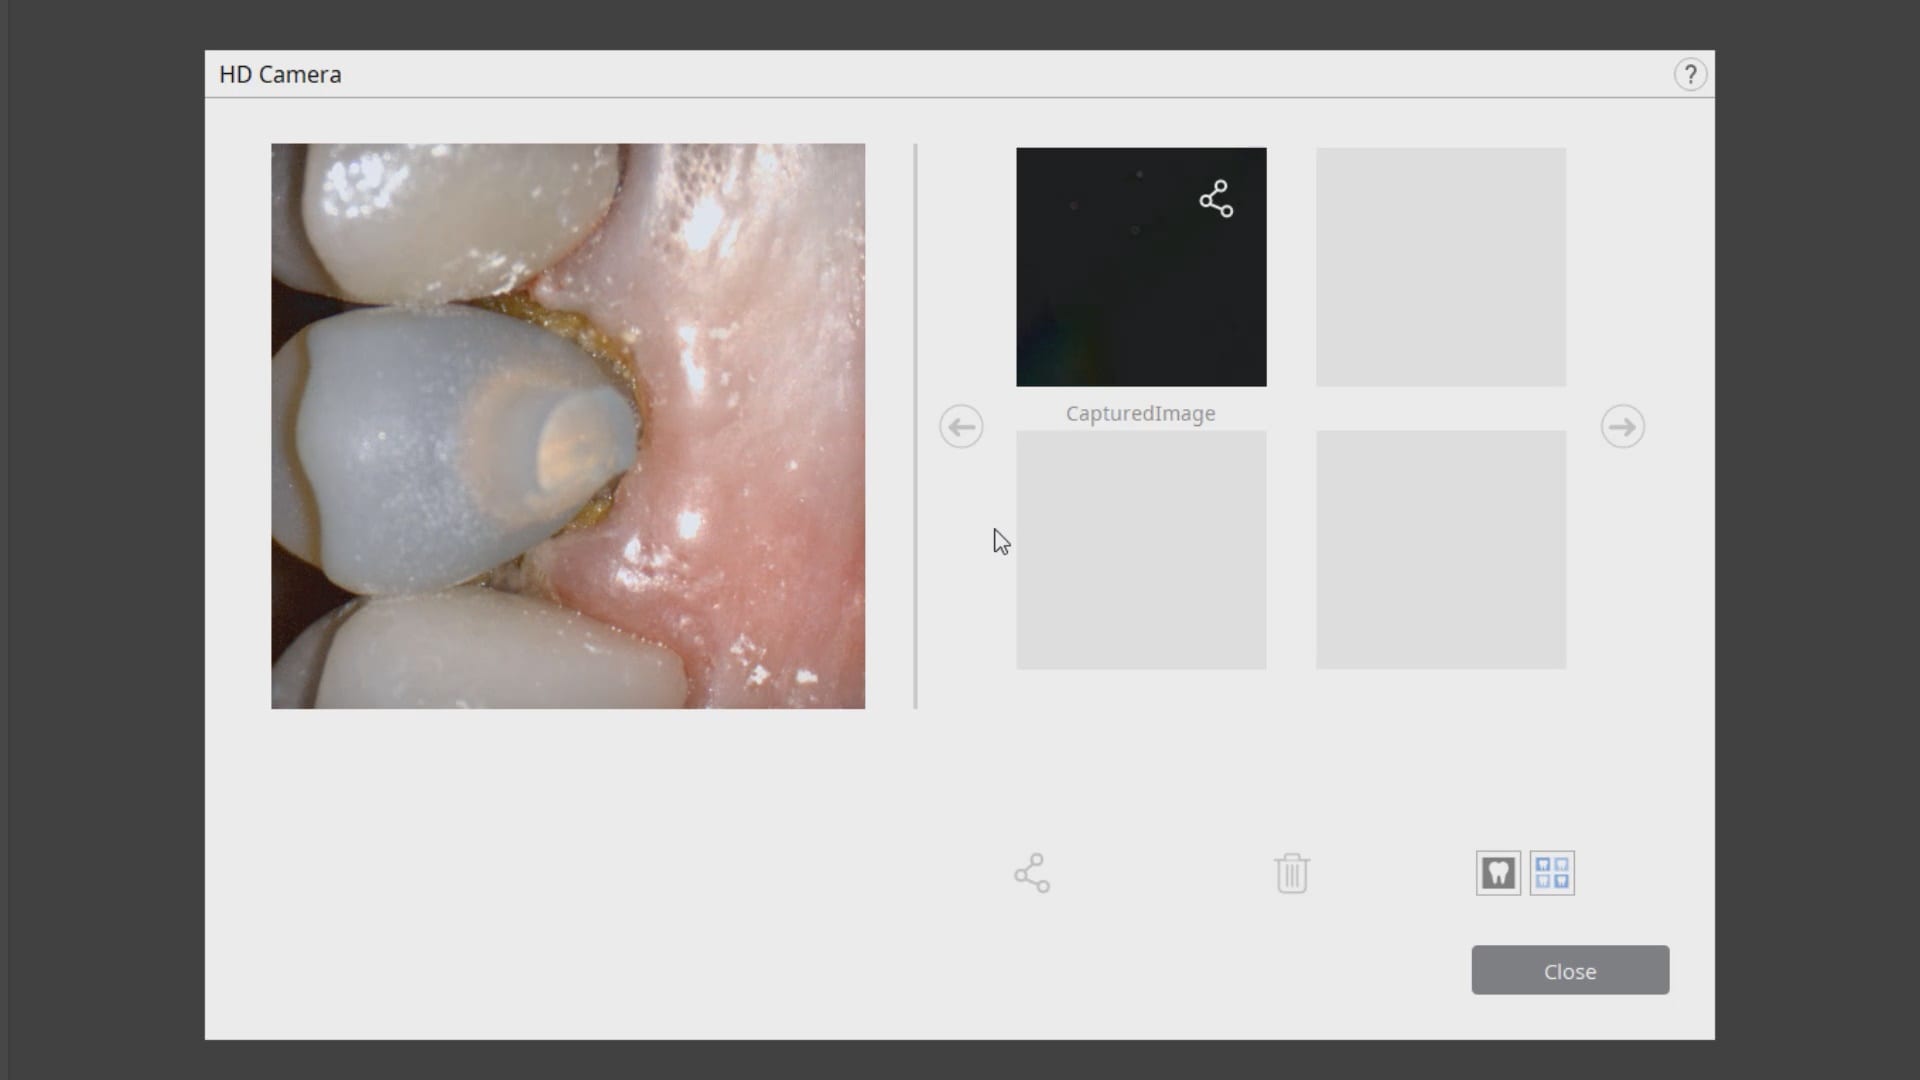
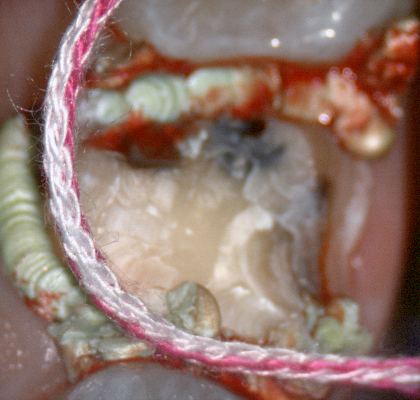
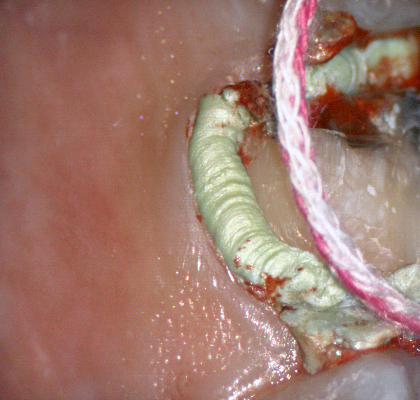
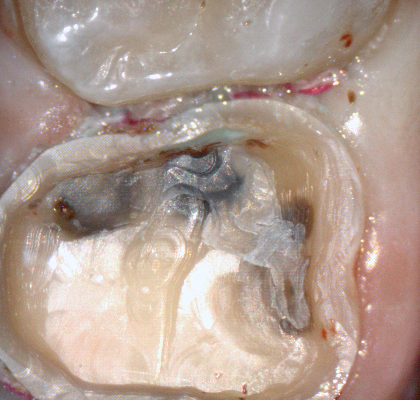
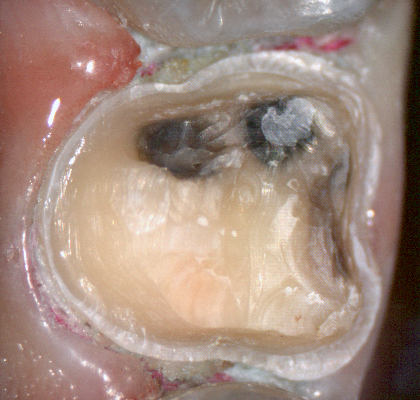
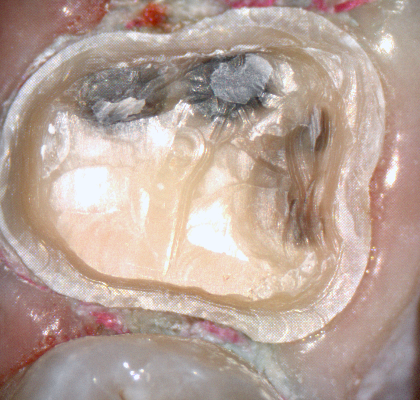
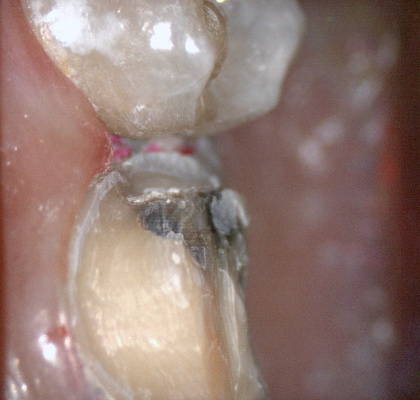
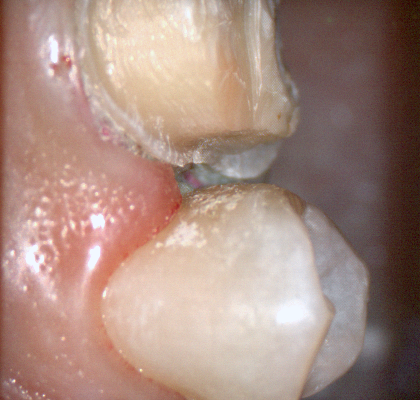
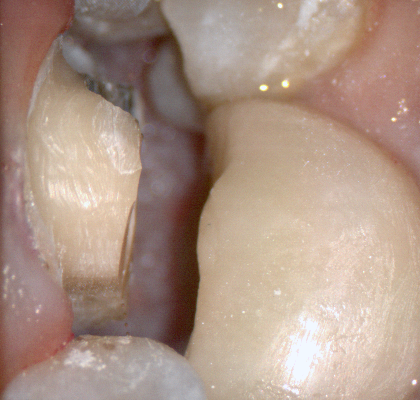
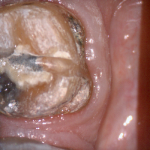
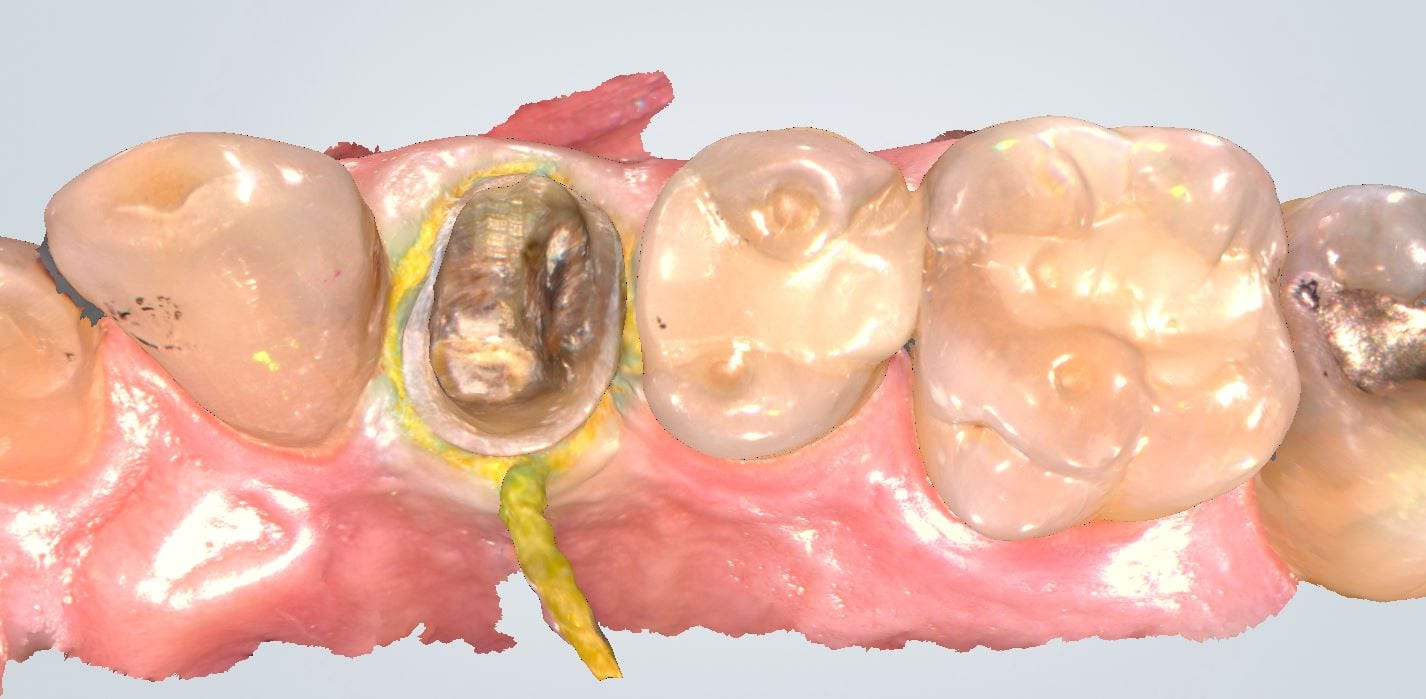
In this clinical presentation, we demonstrate the removal of a crown that has recurrent decay. The bleeding tissue was managed with a double cord technique and expasyl and the margin was captured with the medit i500. The margin was also defined in the native imaging software which allows the user to visualize the detail before designing it or send it off to the lab. Once the case is transferred to cad software, the designed margins carry through and there is an opportunity to modify it