Posted on Leave a comment

Milling Tibase Crowns to CEREC MCXL with a Medit Scan and exocad design software

One of the big limitations of CEREC (a registered trademark of denstply sirona) with tibases and implant crowns is that it is limited to very few implant lines and the antirotational notch can just ruin your day as it needs to go into a specific location. You also have to deal with making sure the tibase is seated all the way and the scanbody is properly indexed.   The one benefit is that you are dealing with just crown and bridge and you do not need to know implant position or timing at all when doing the design.

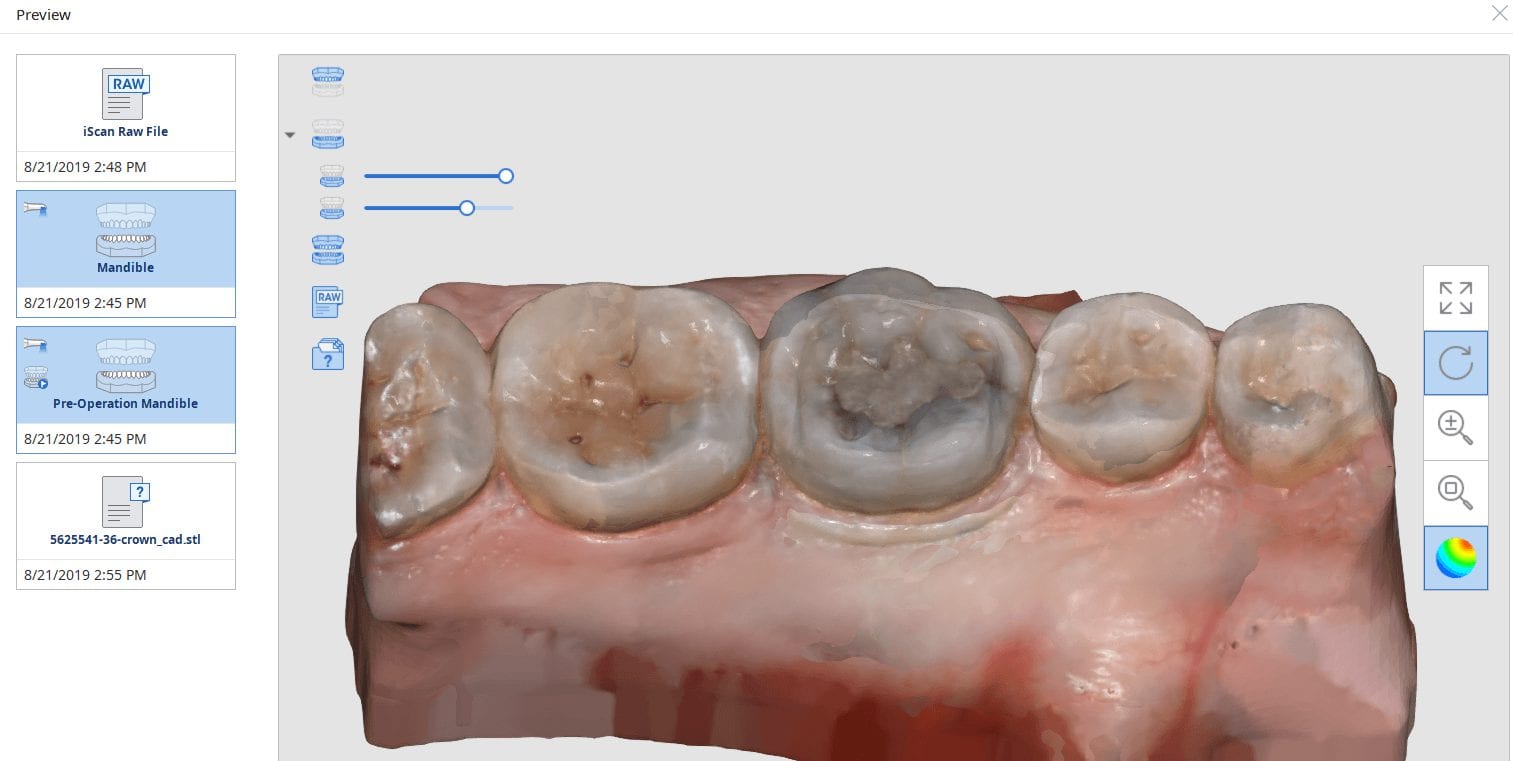
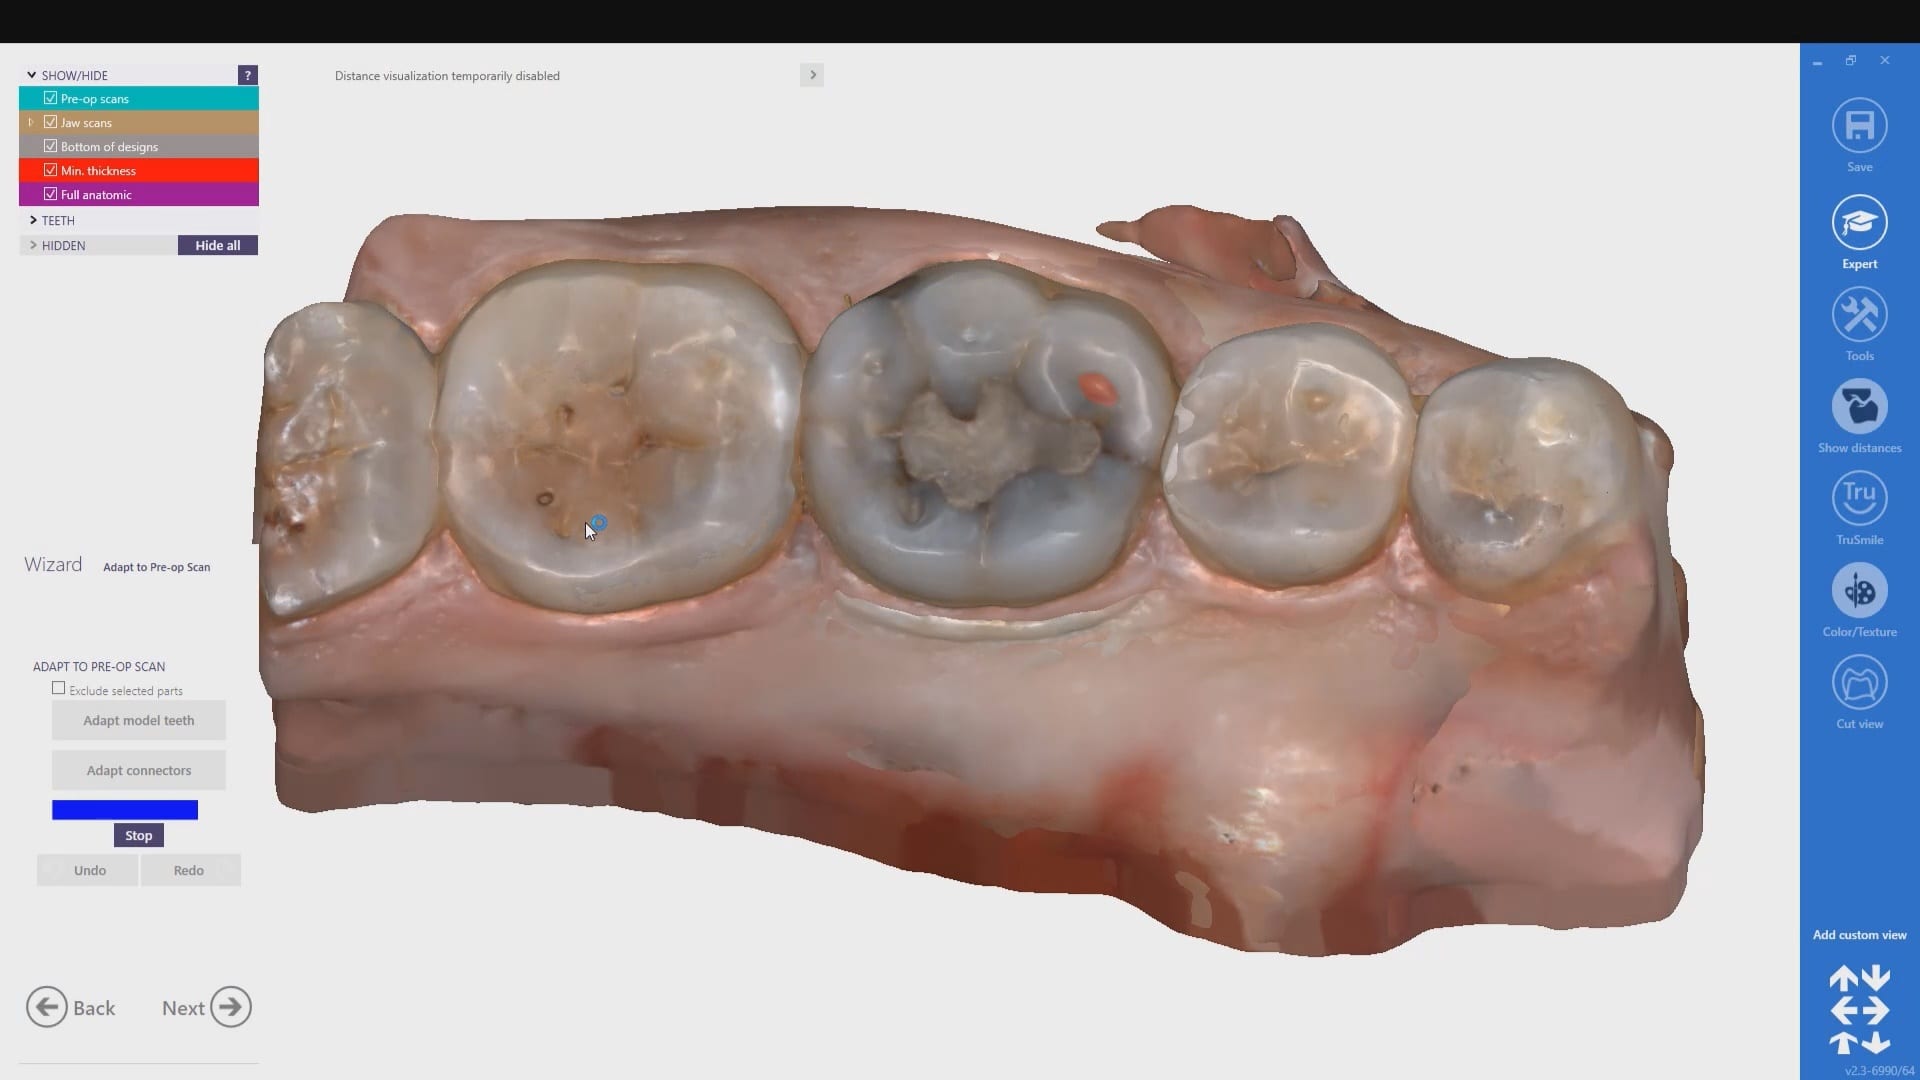
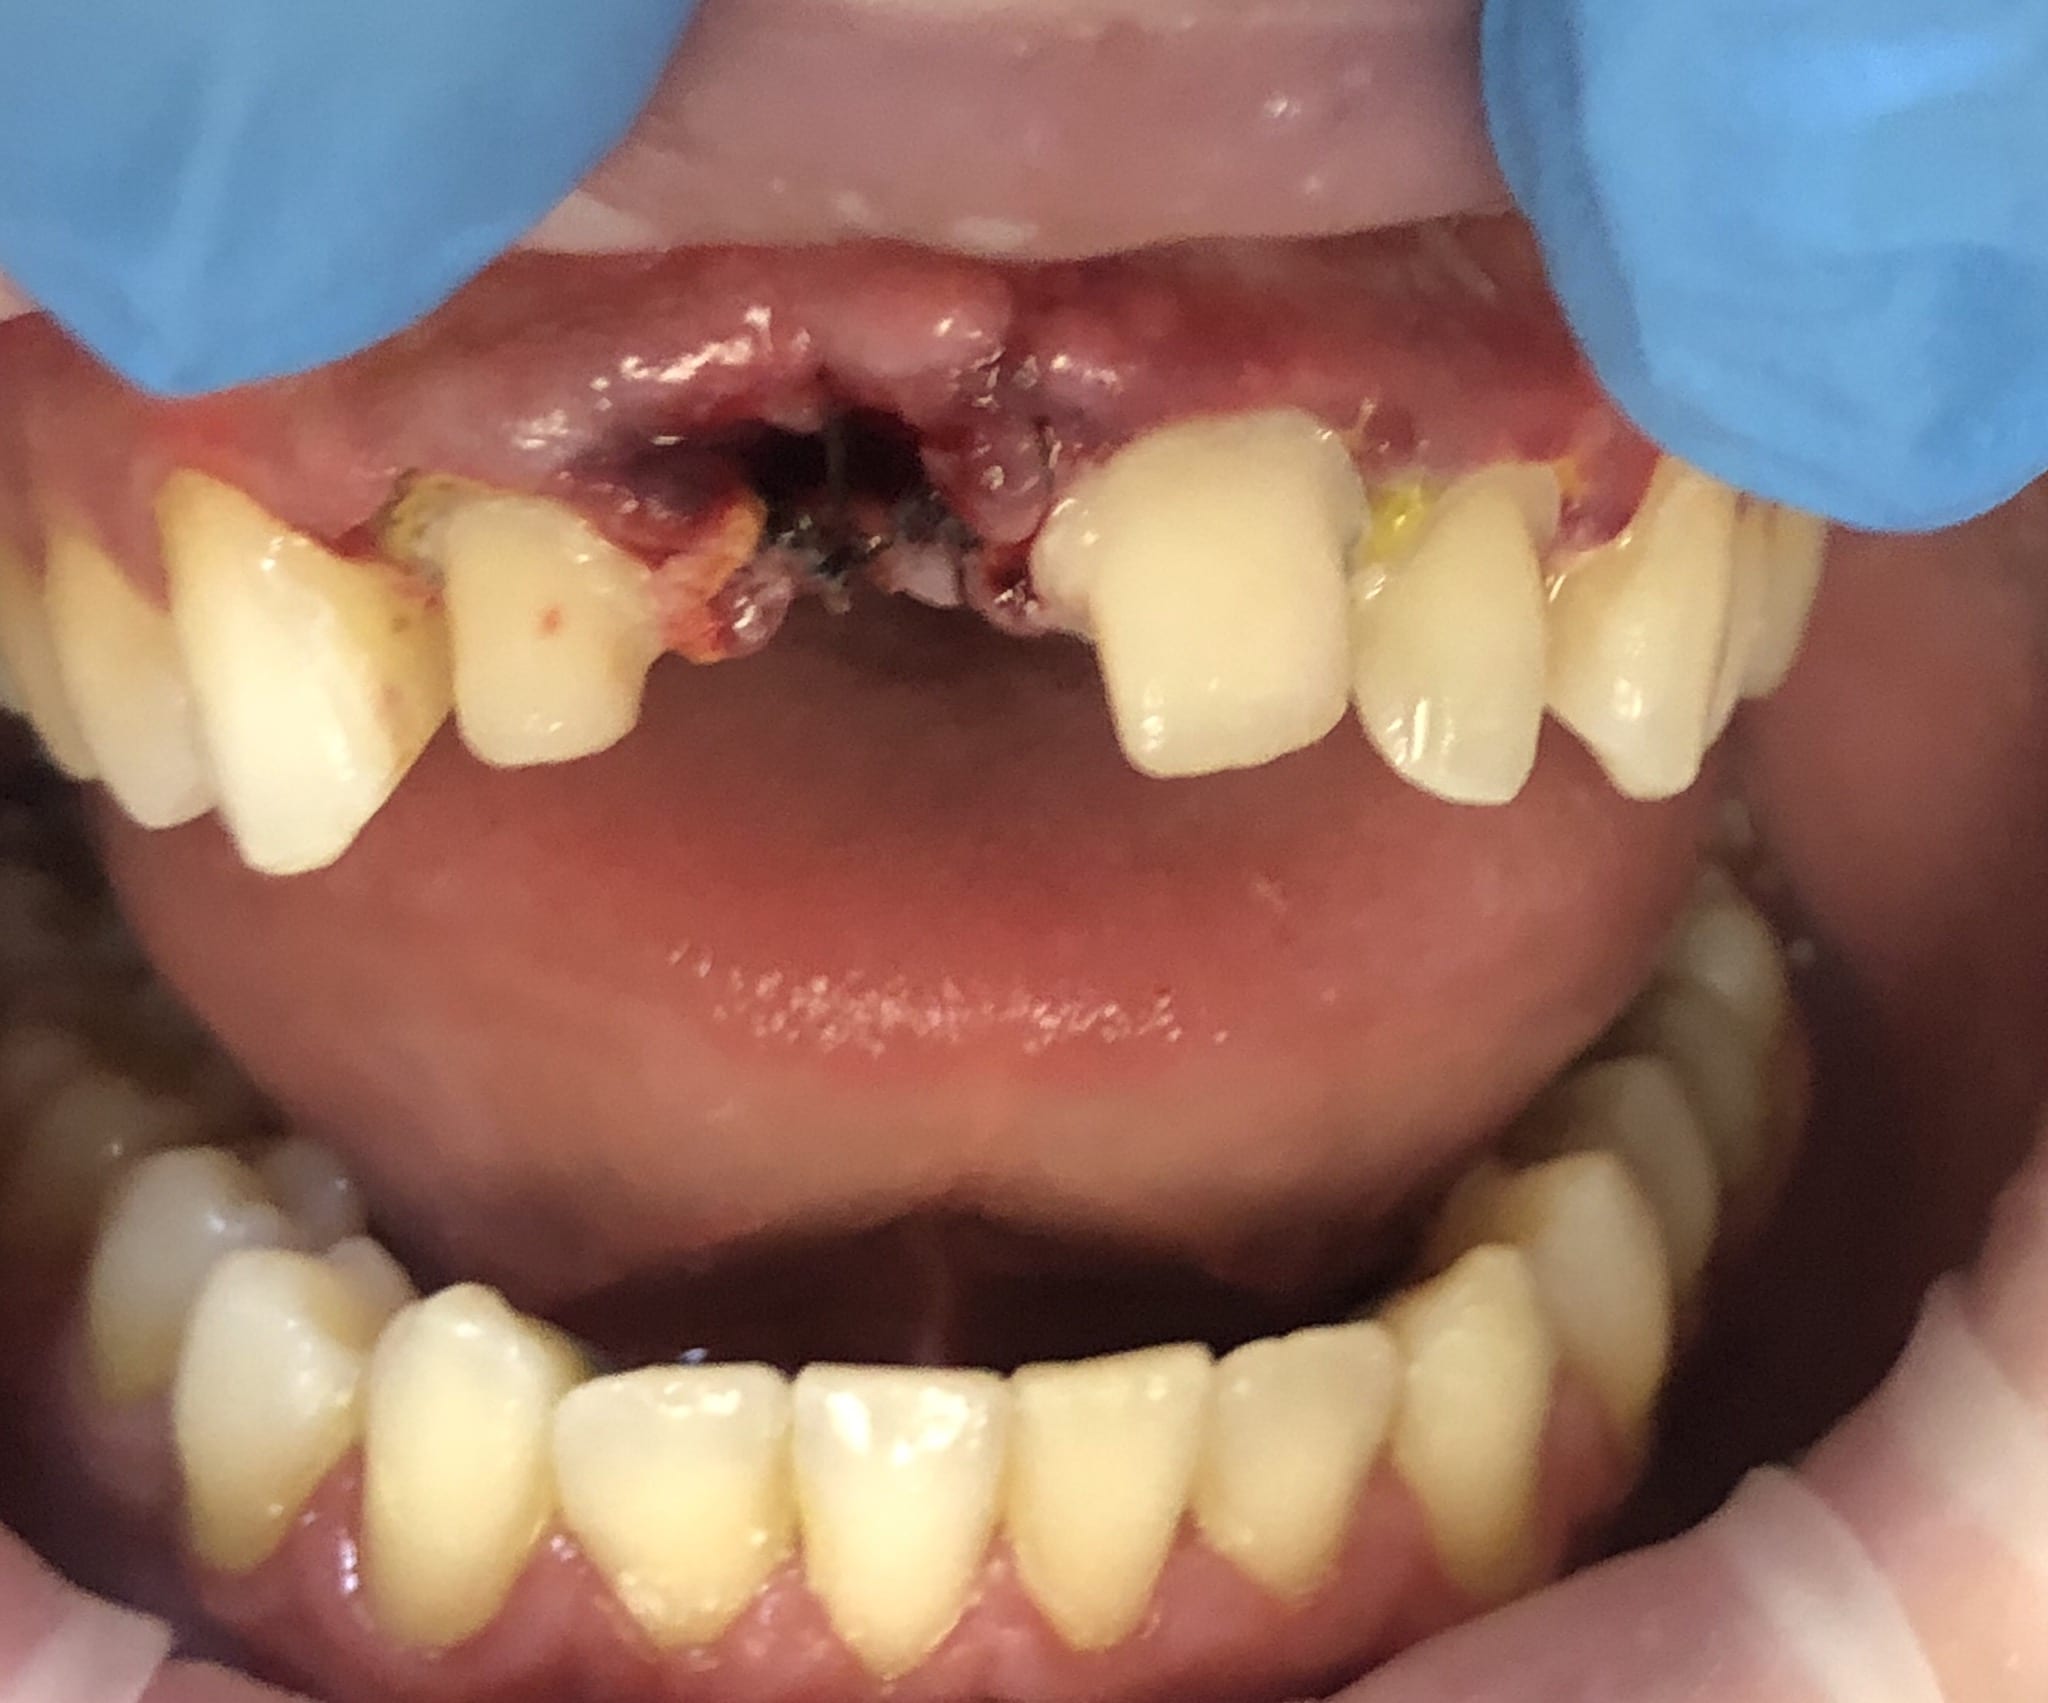
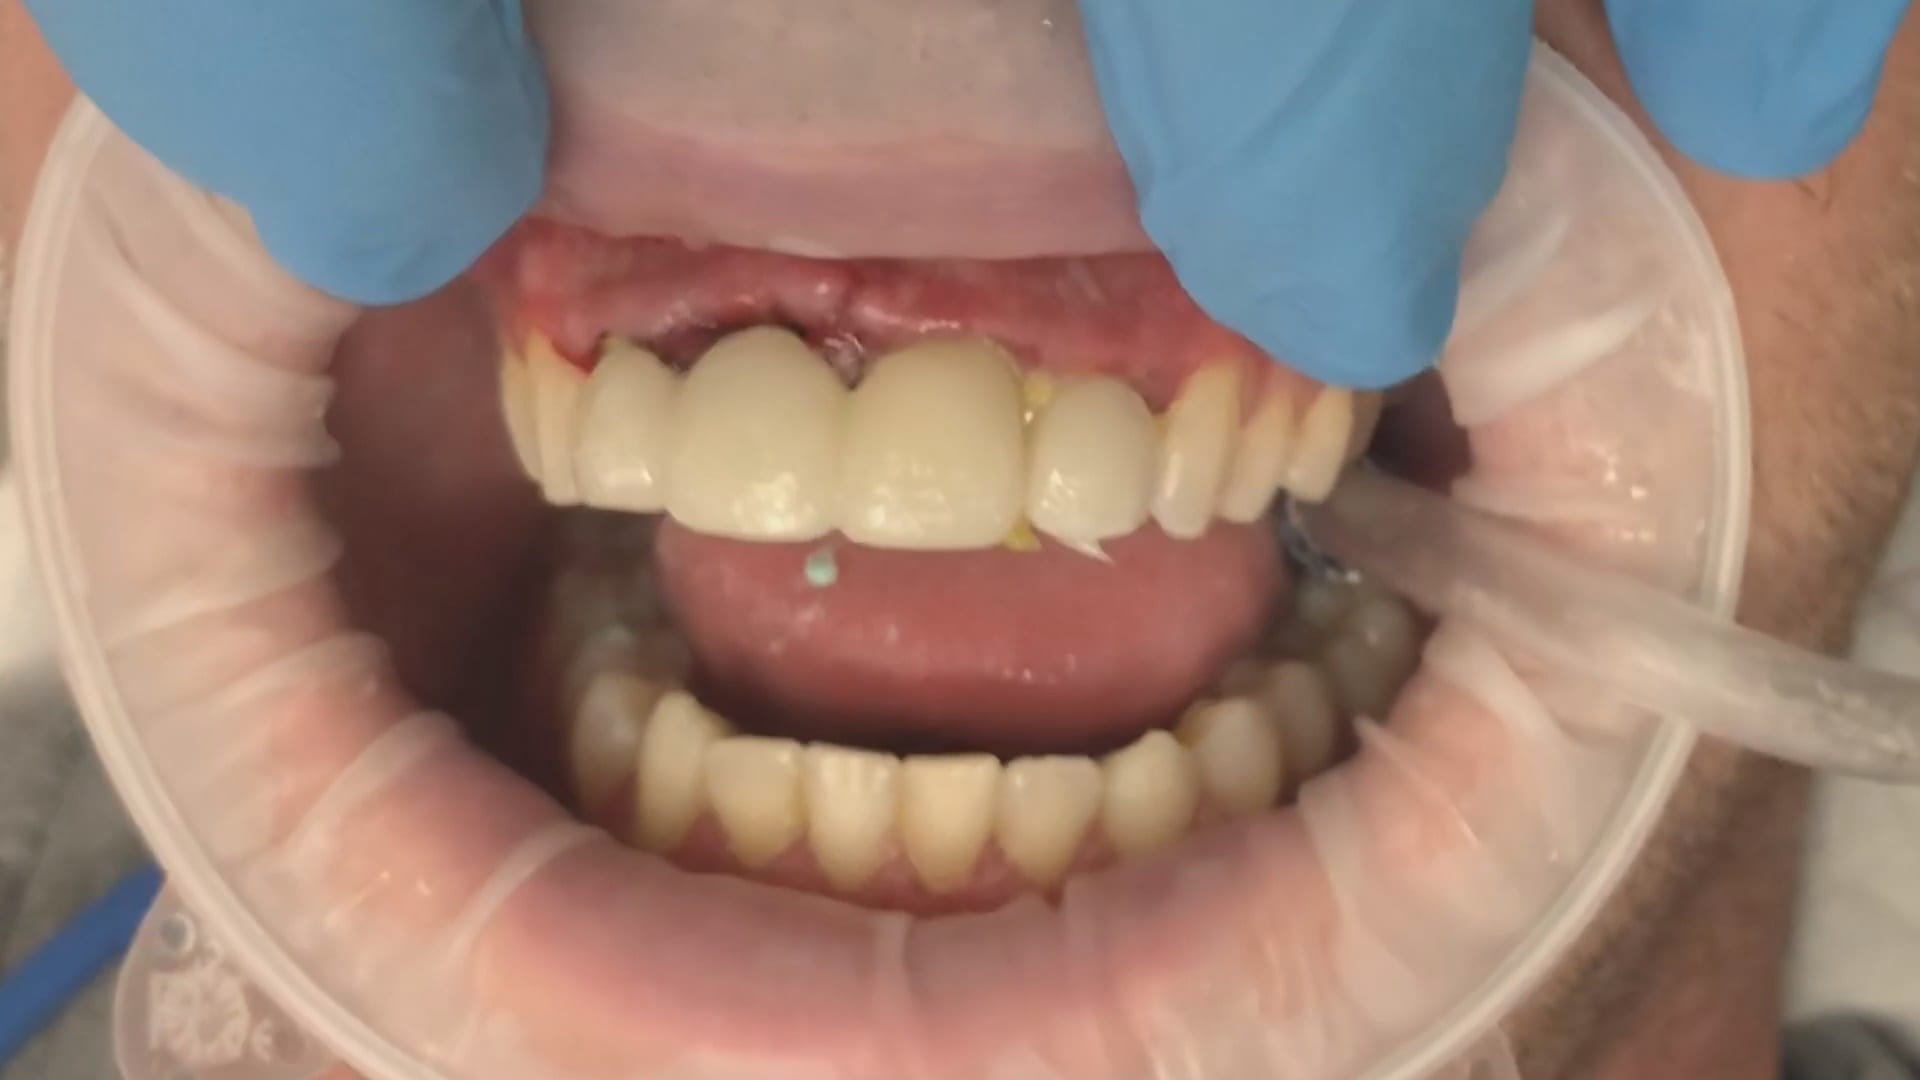
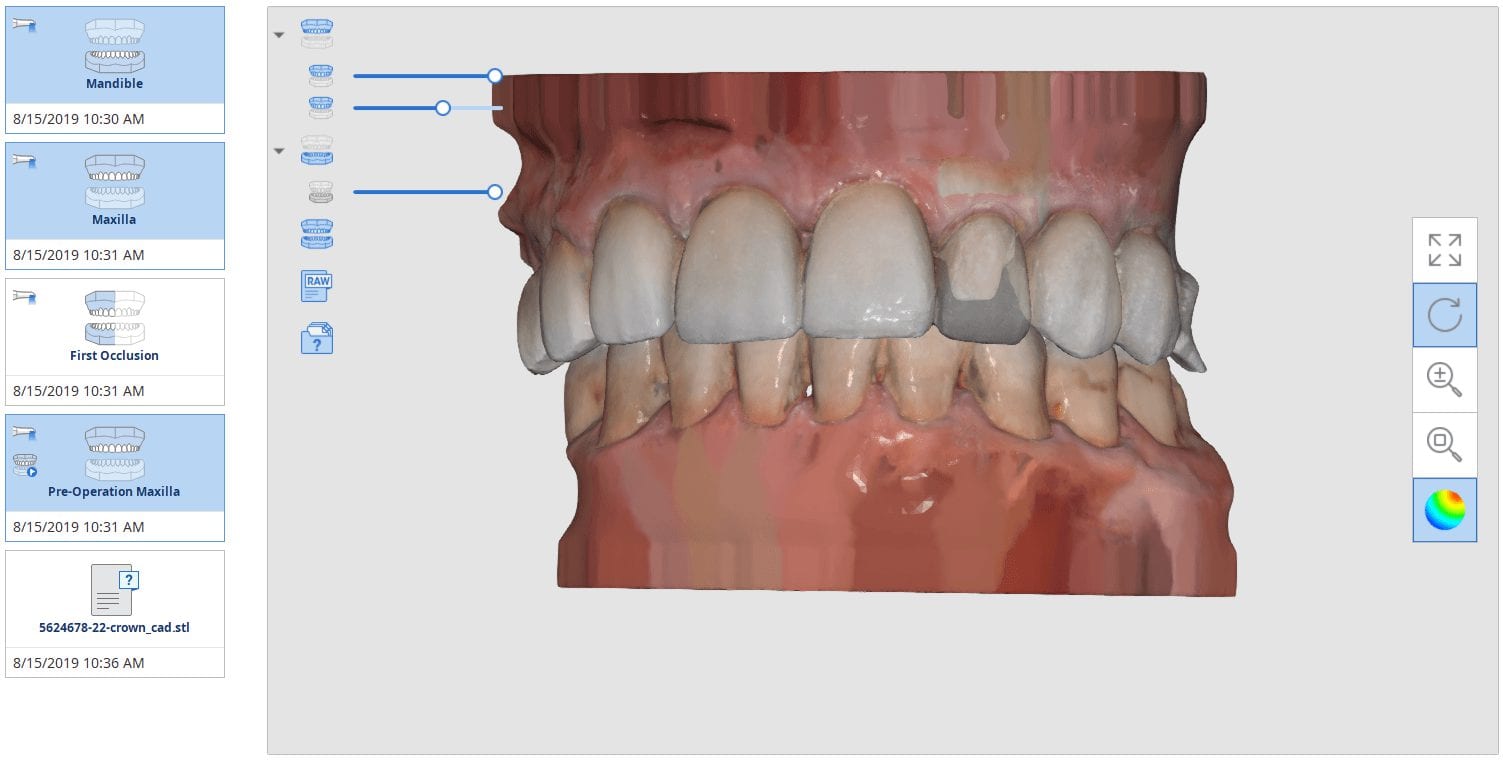
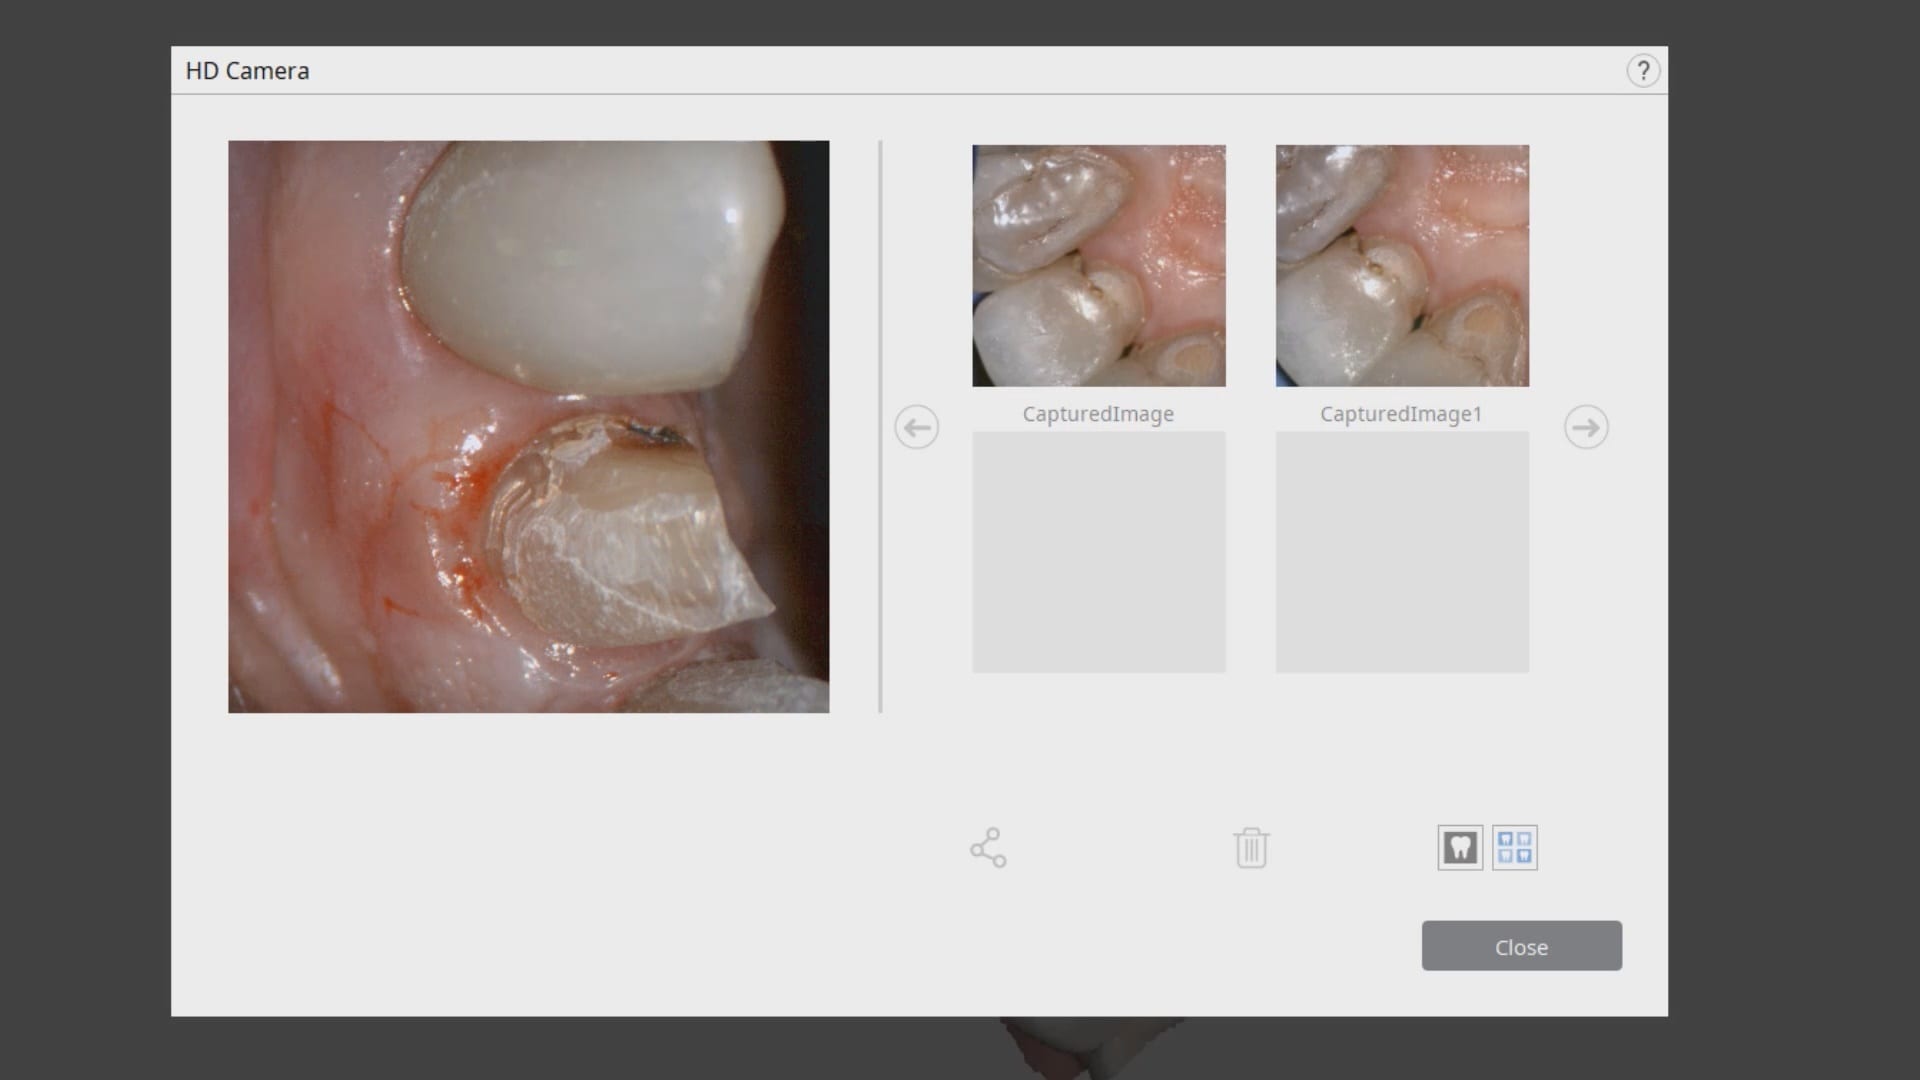
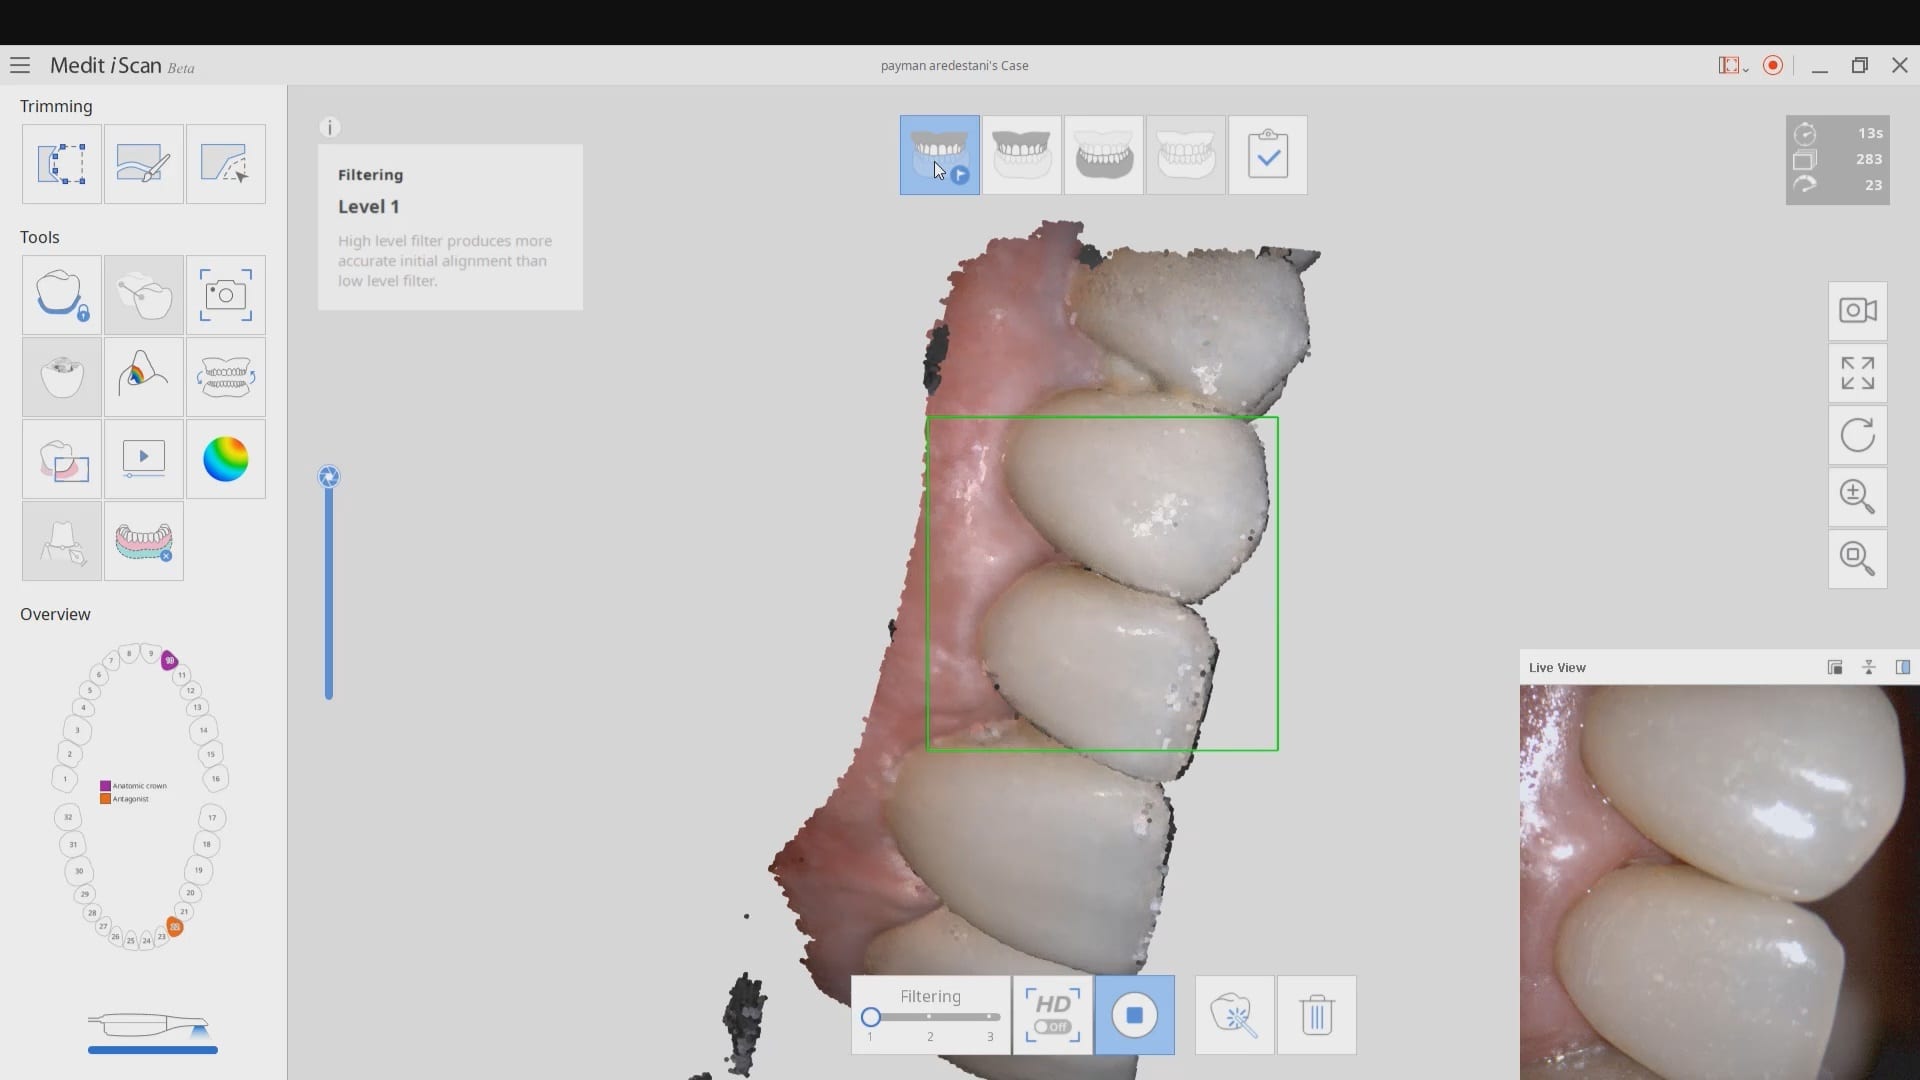
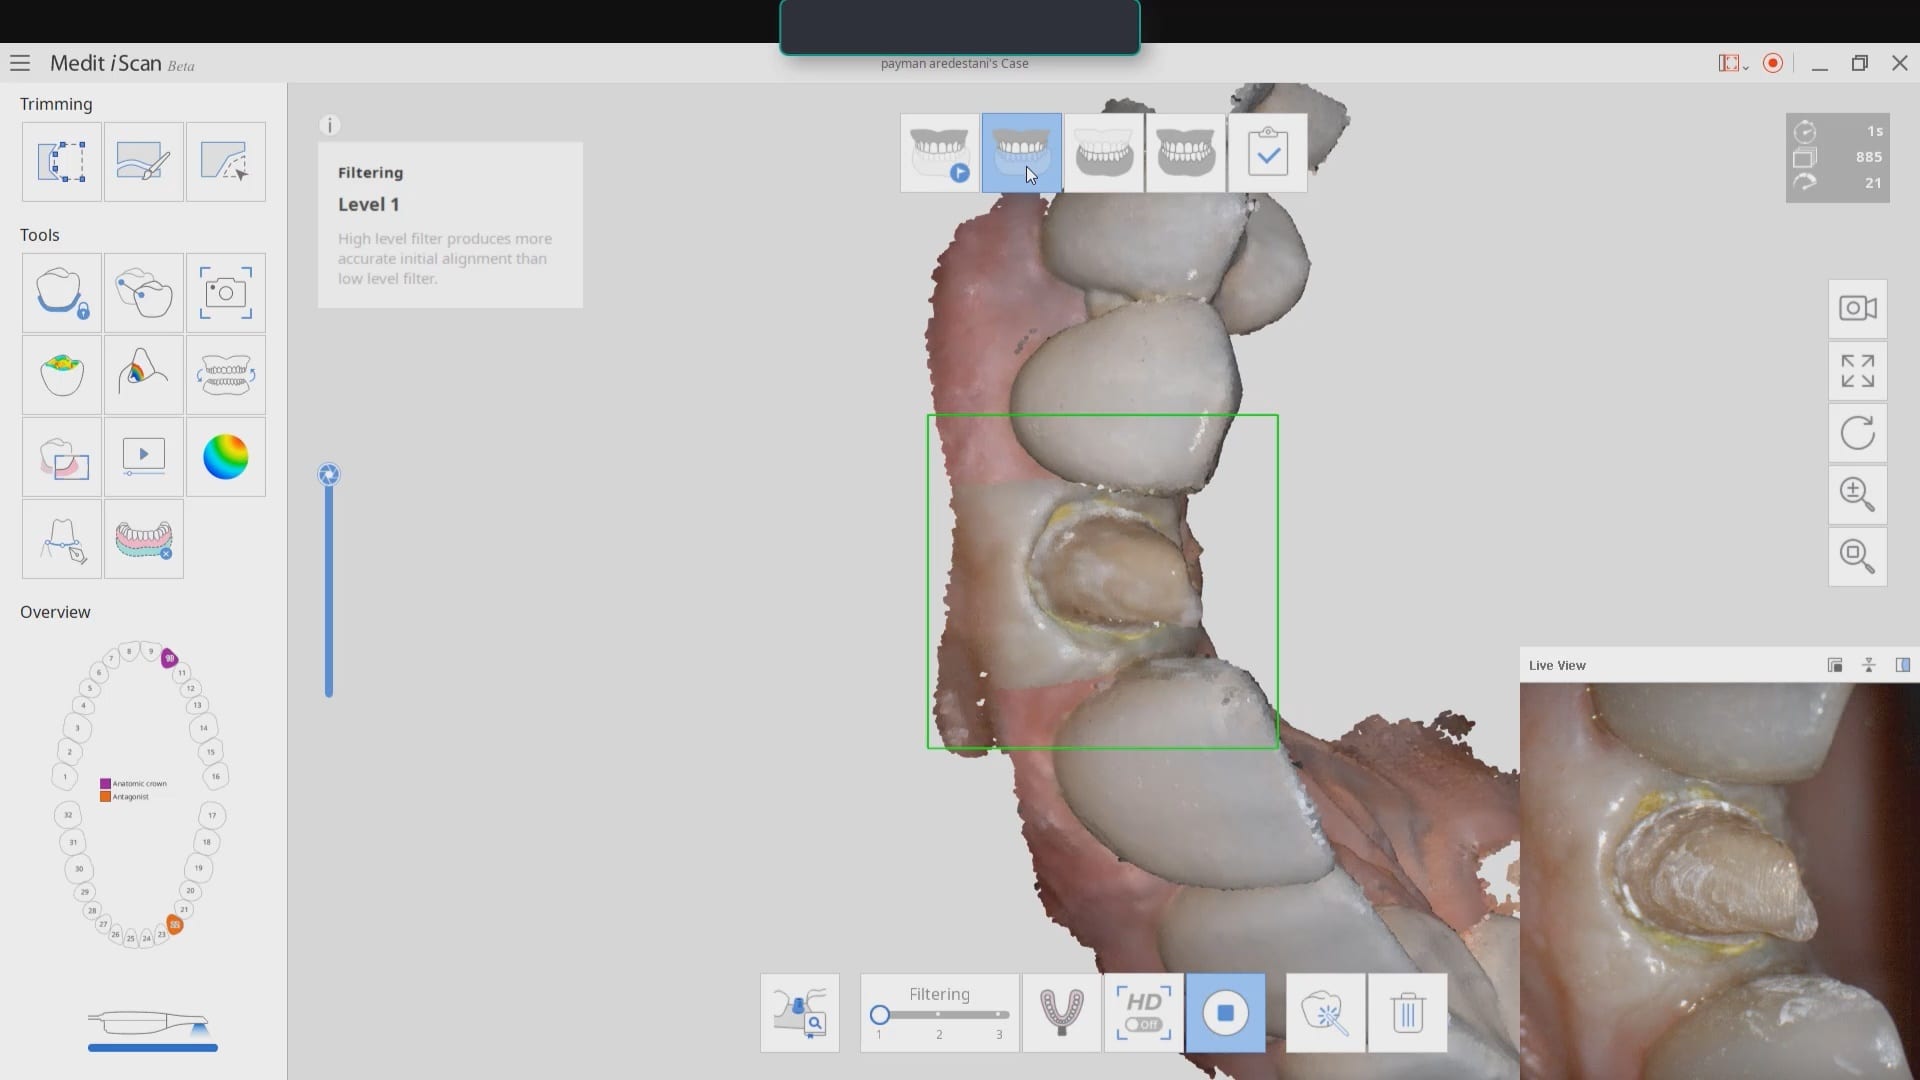
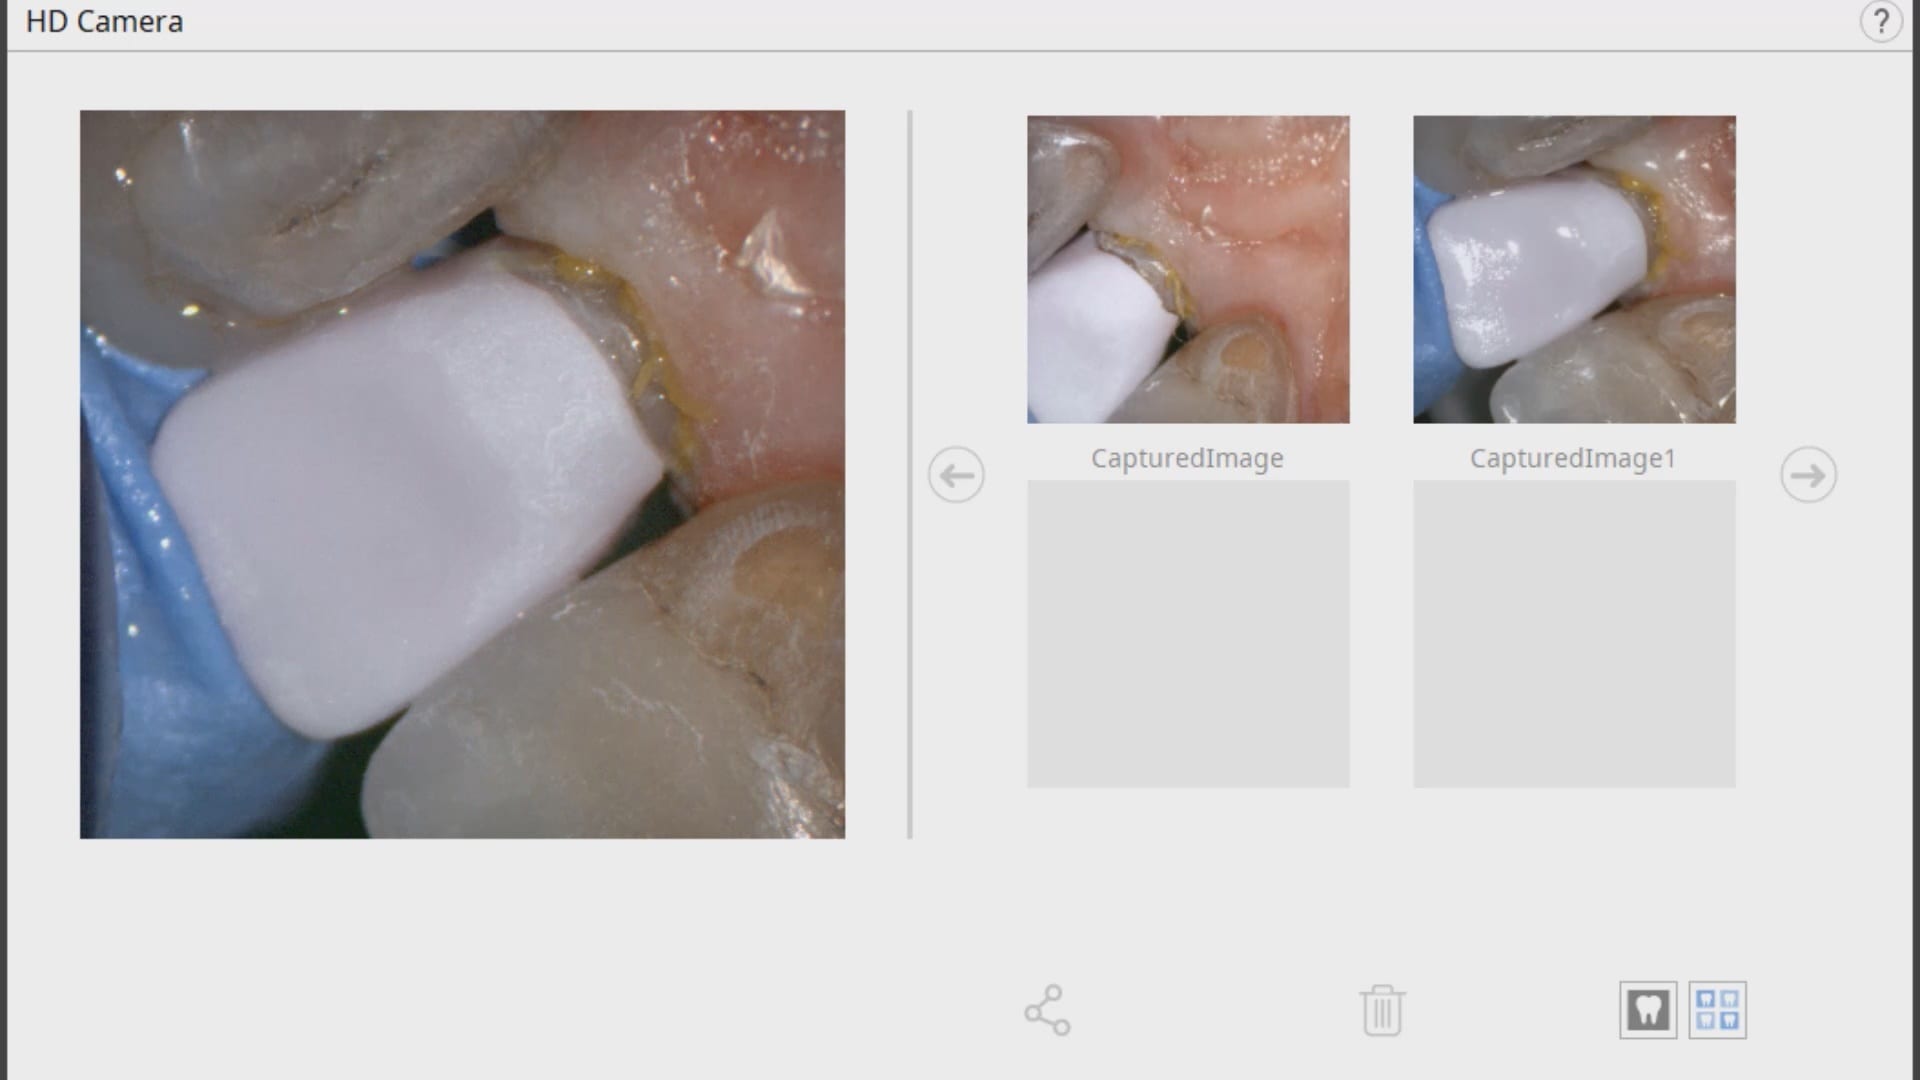
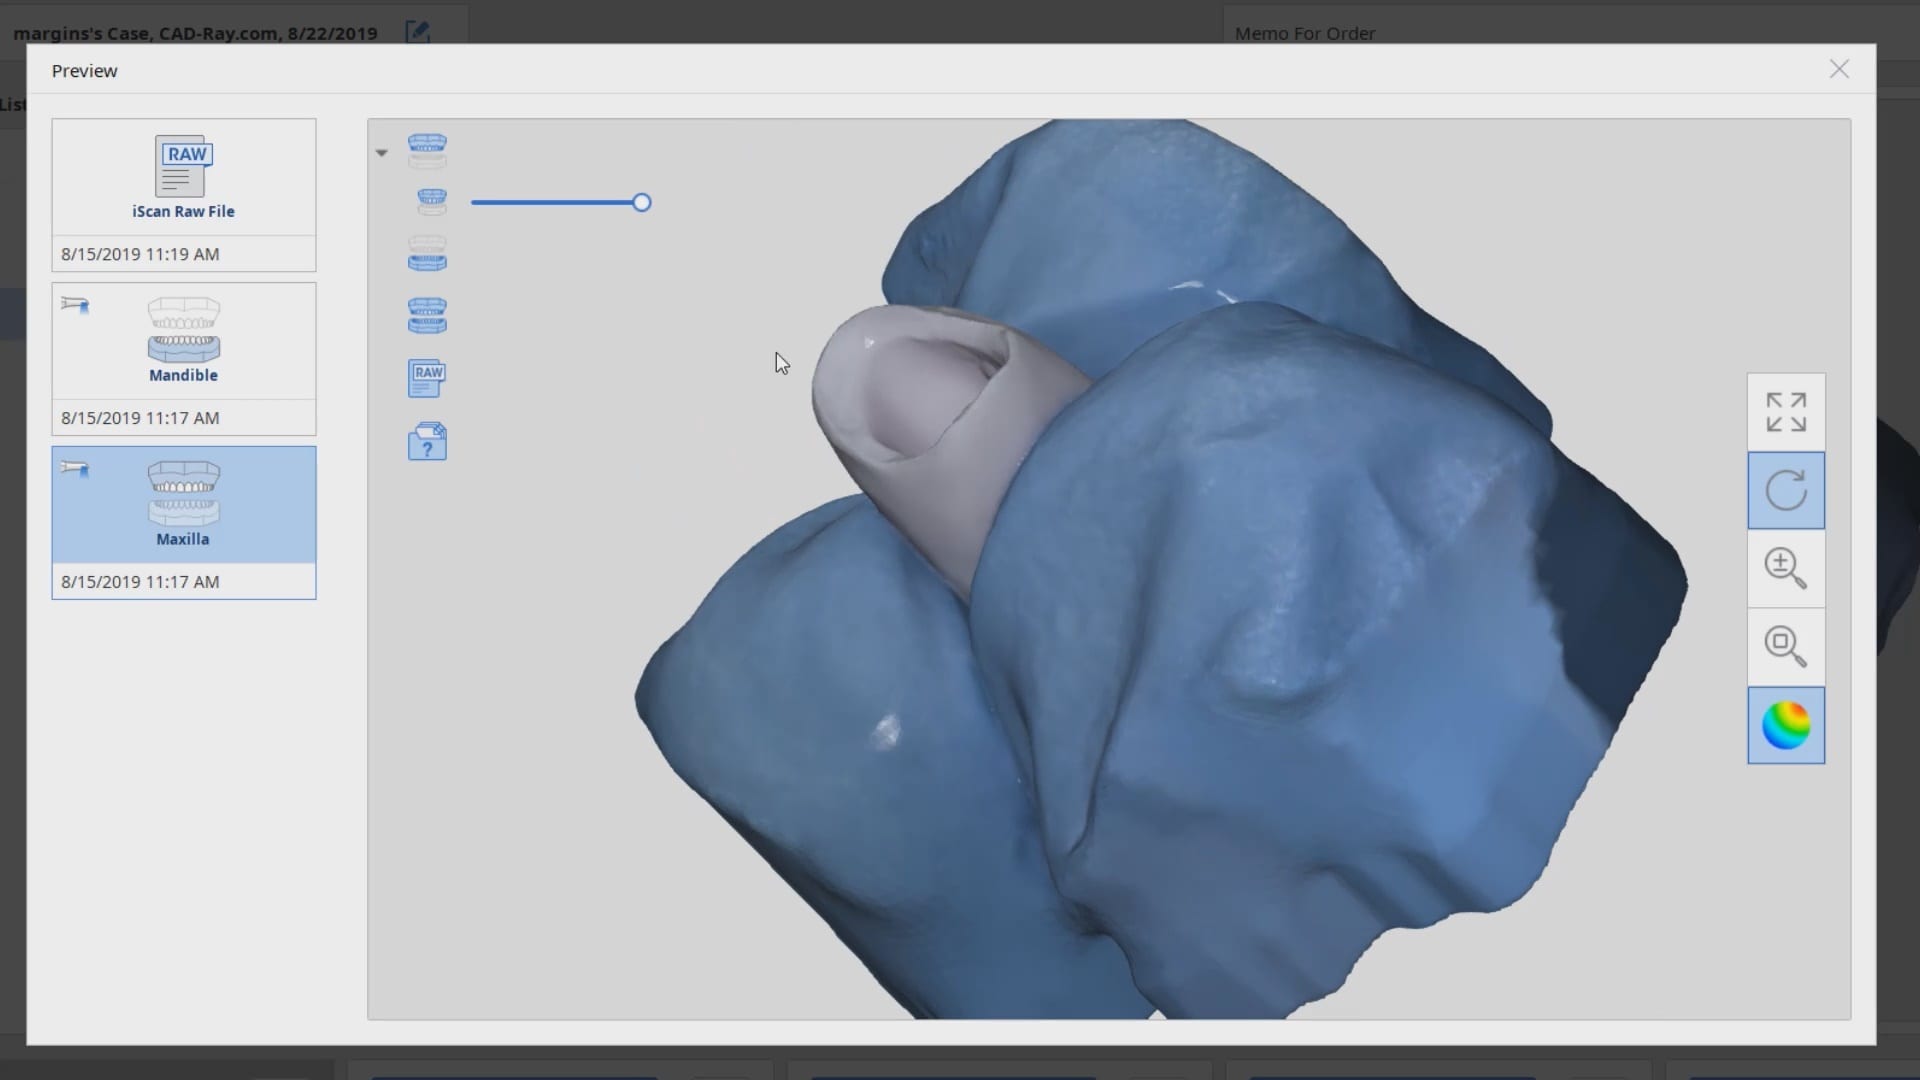
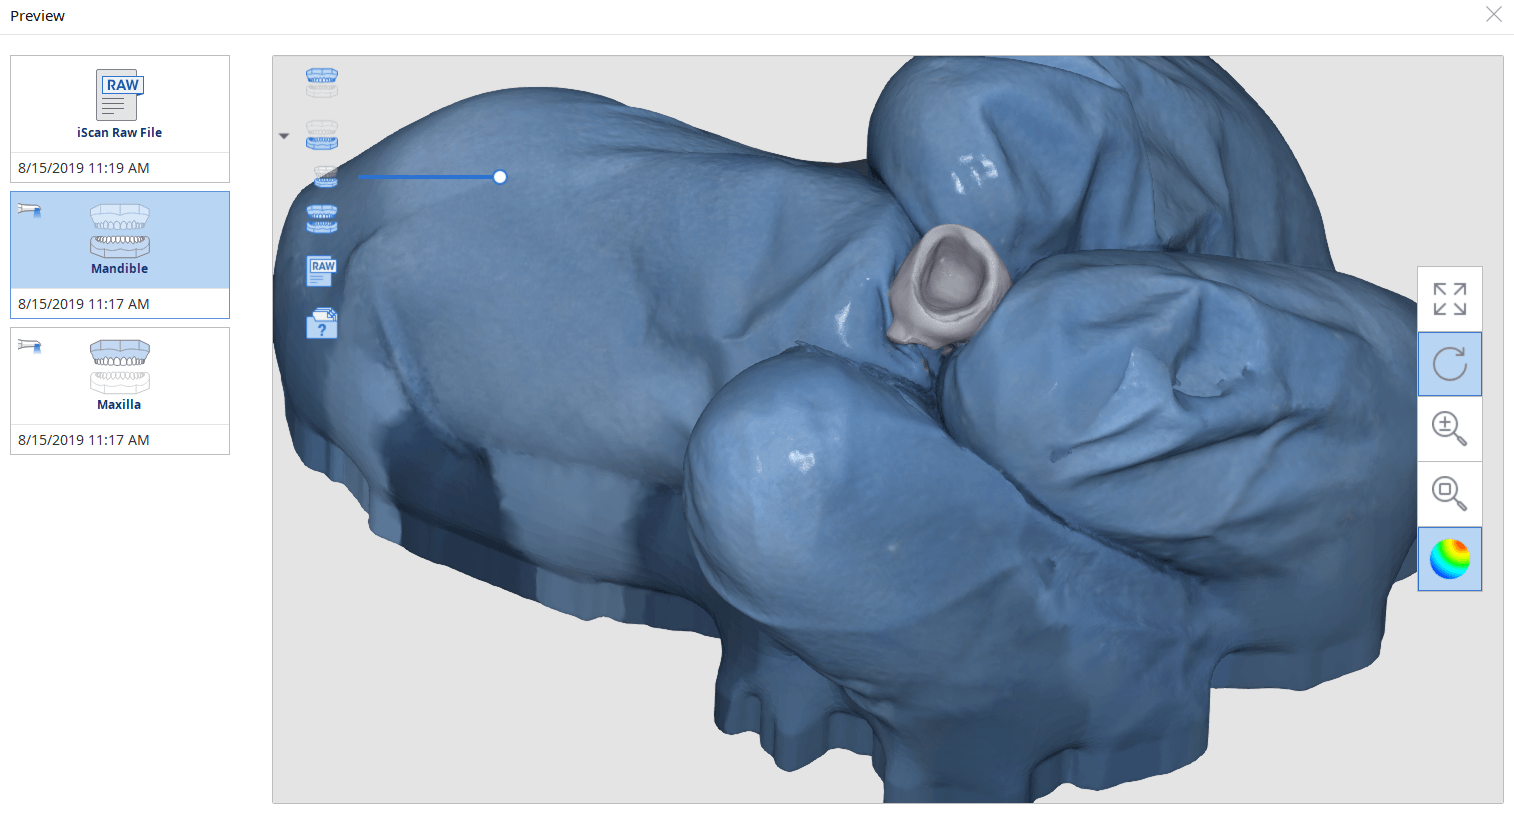
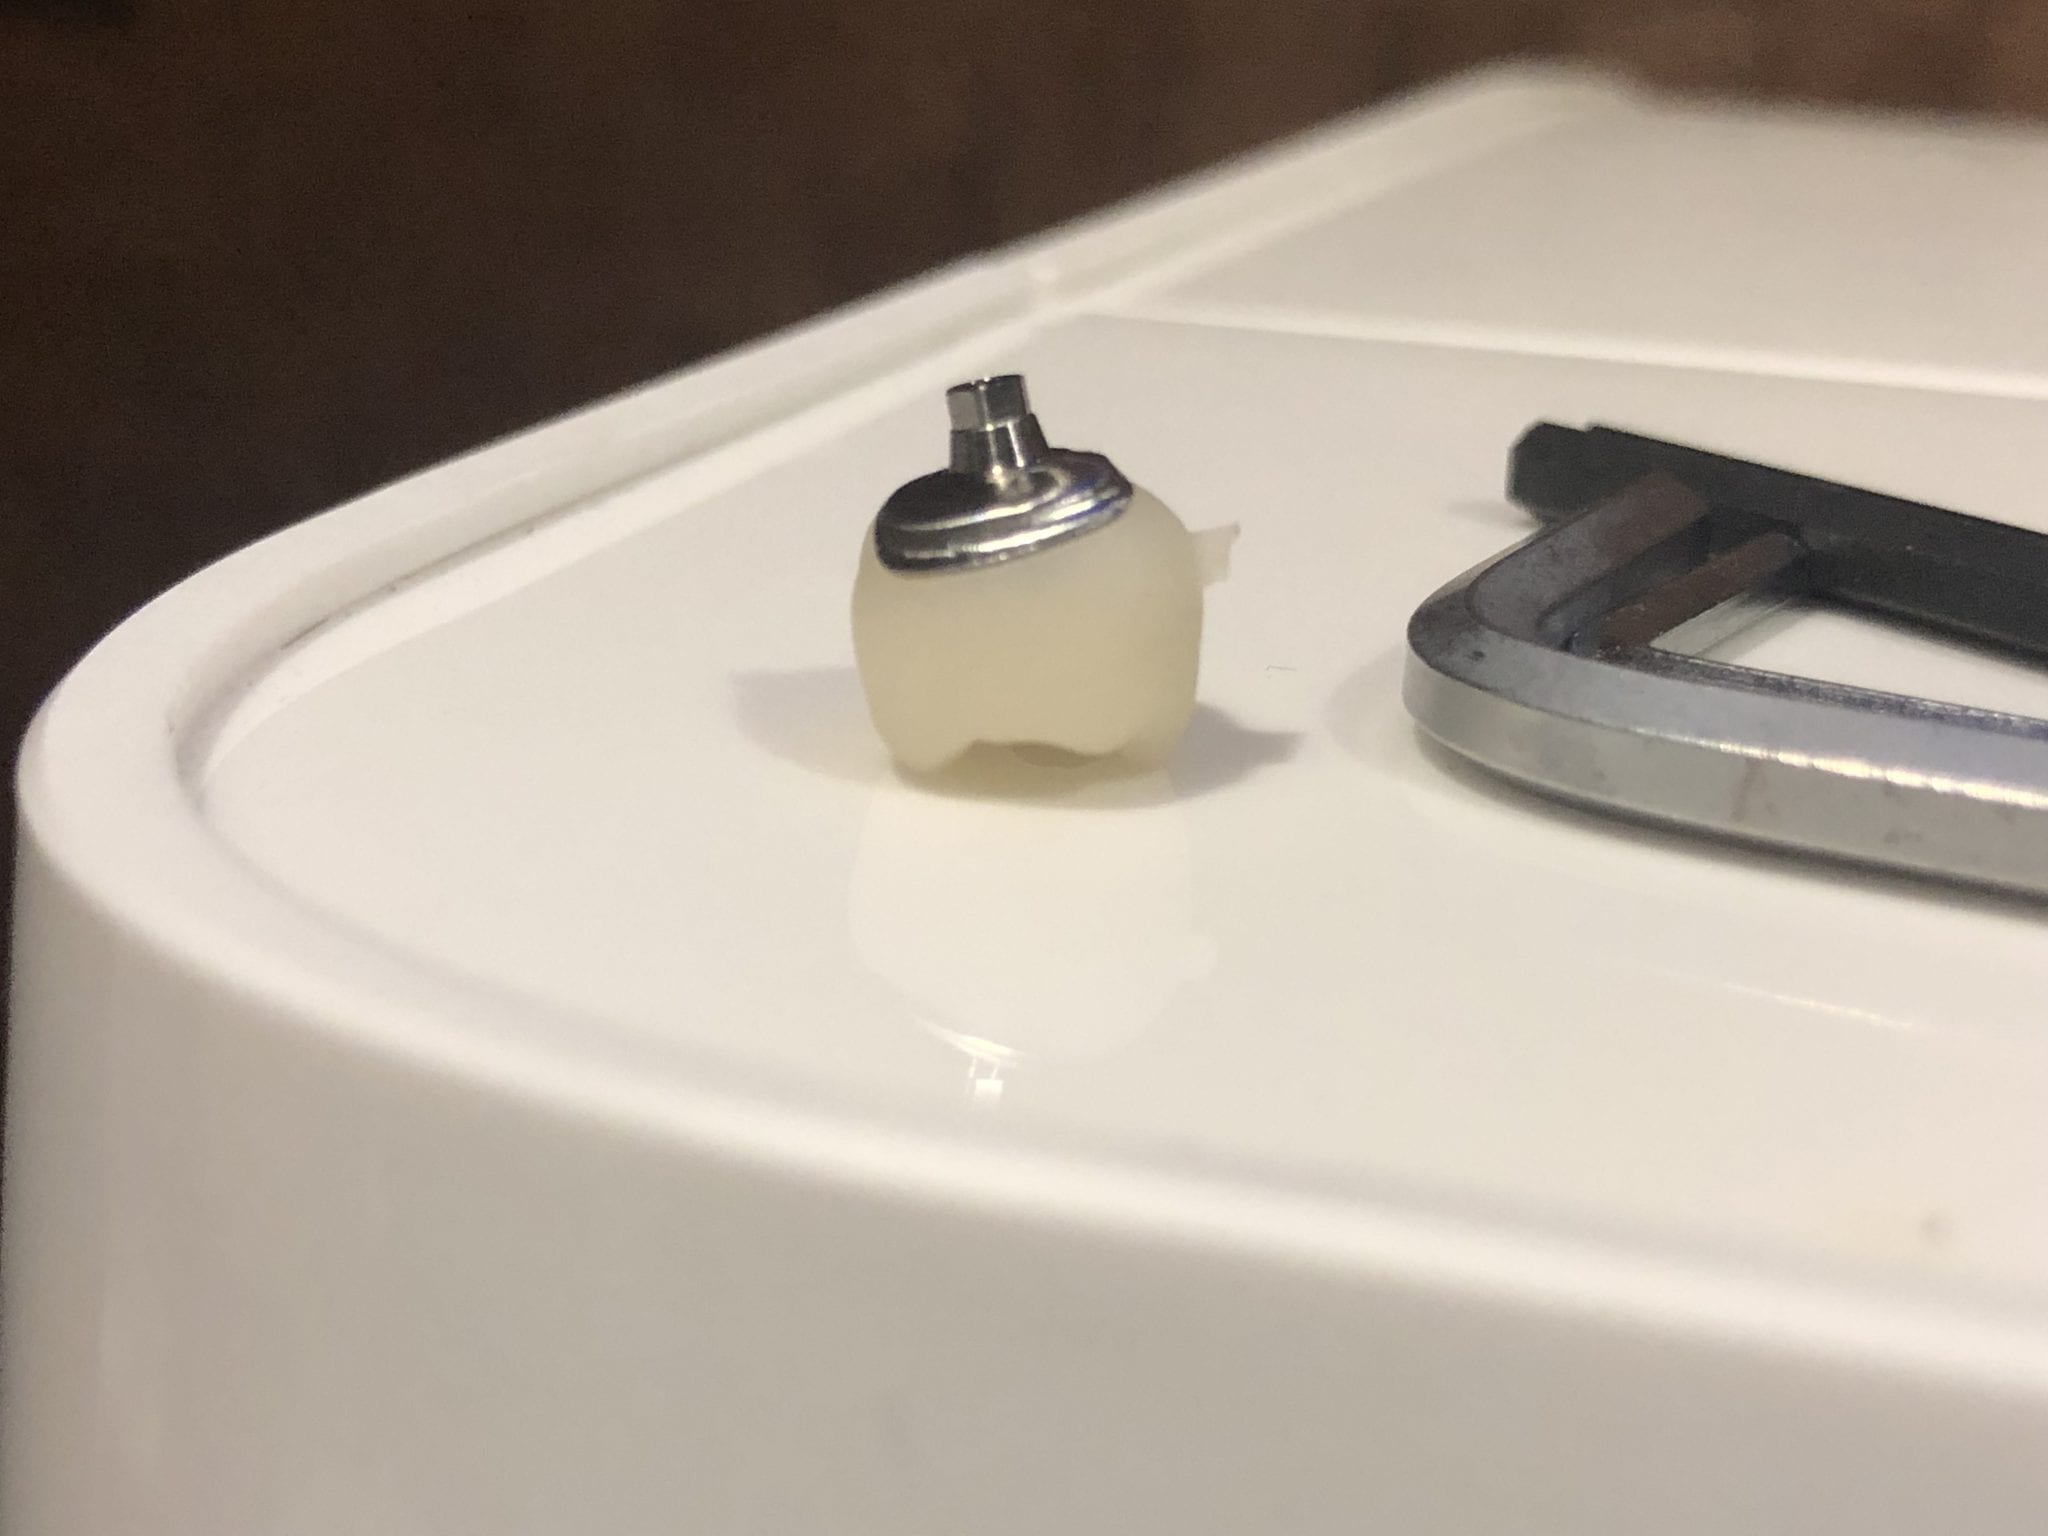
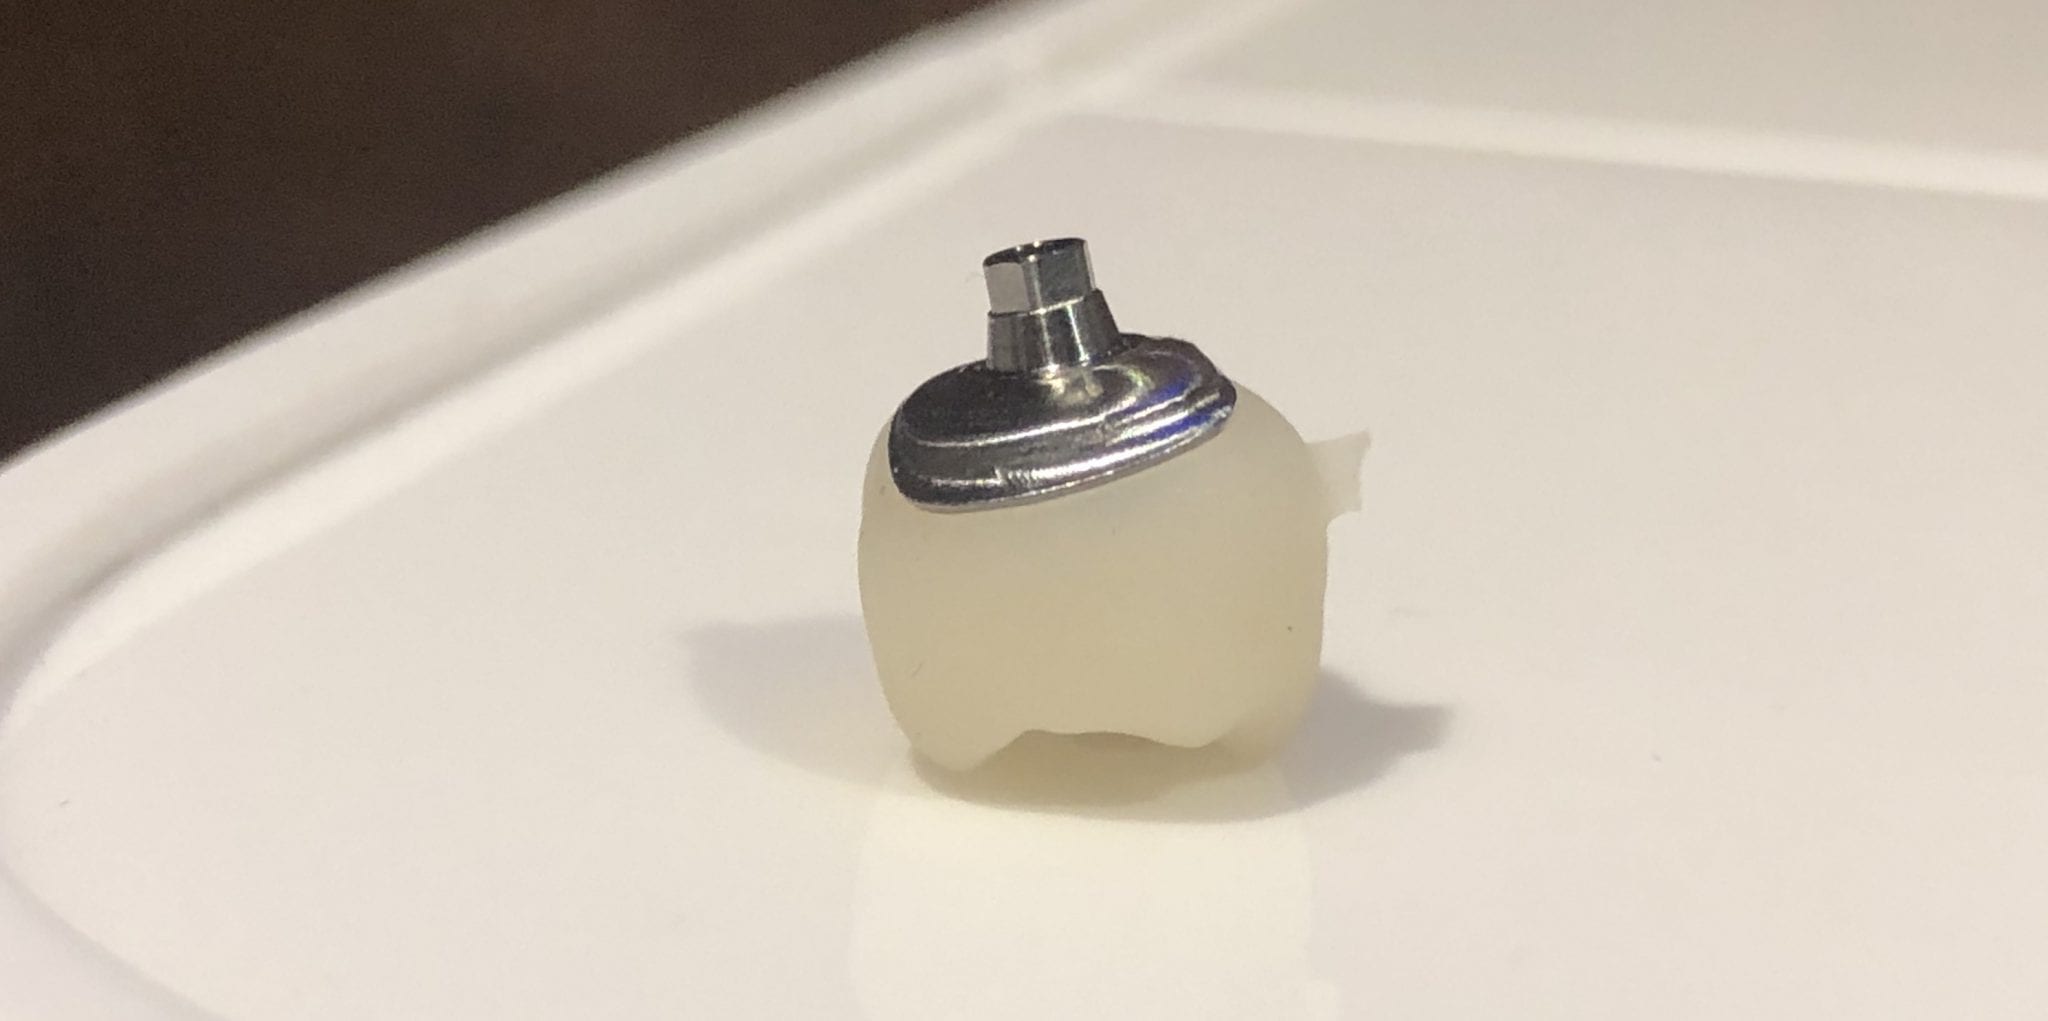
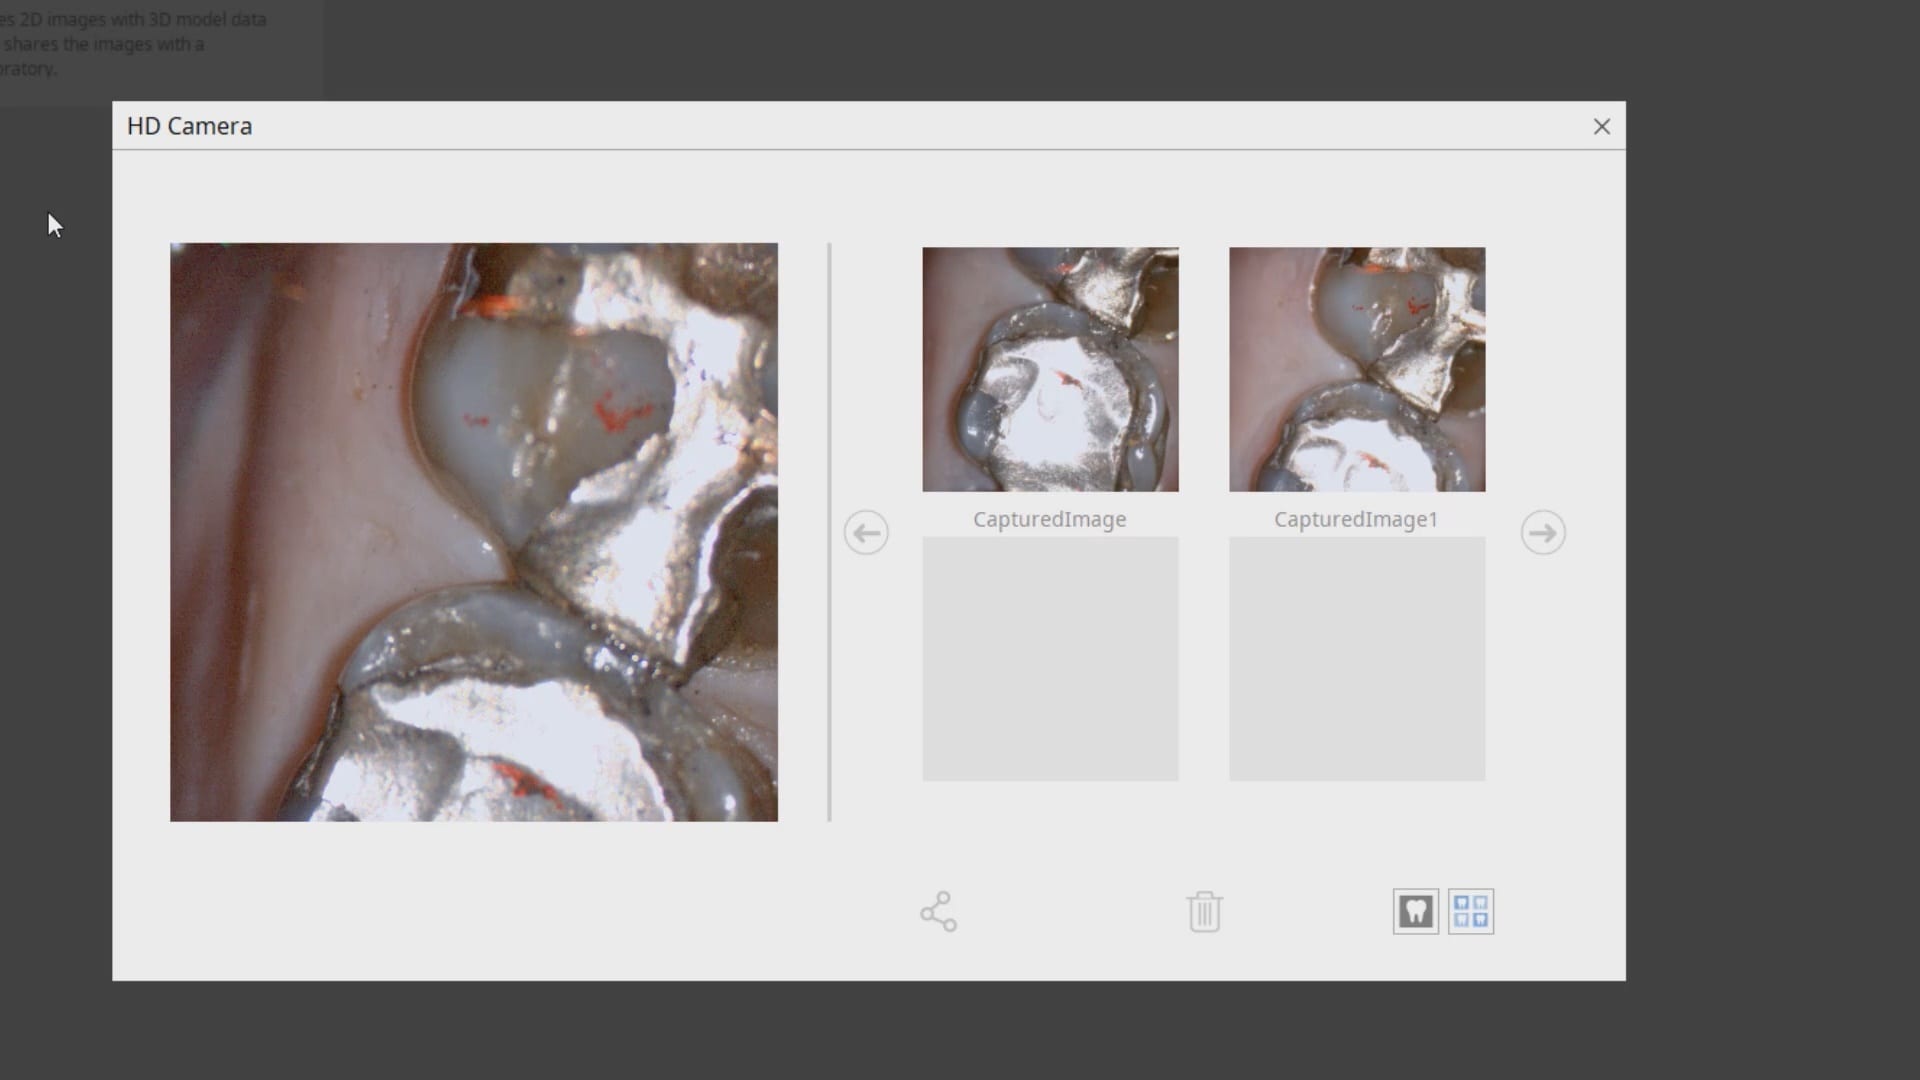
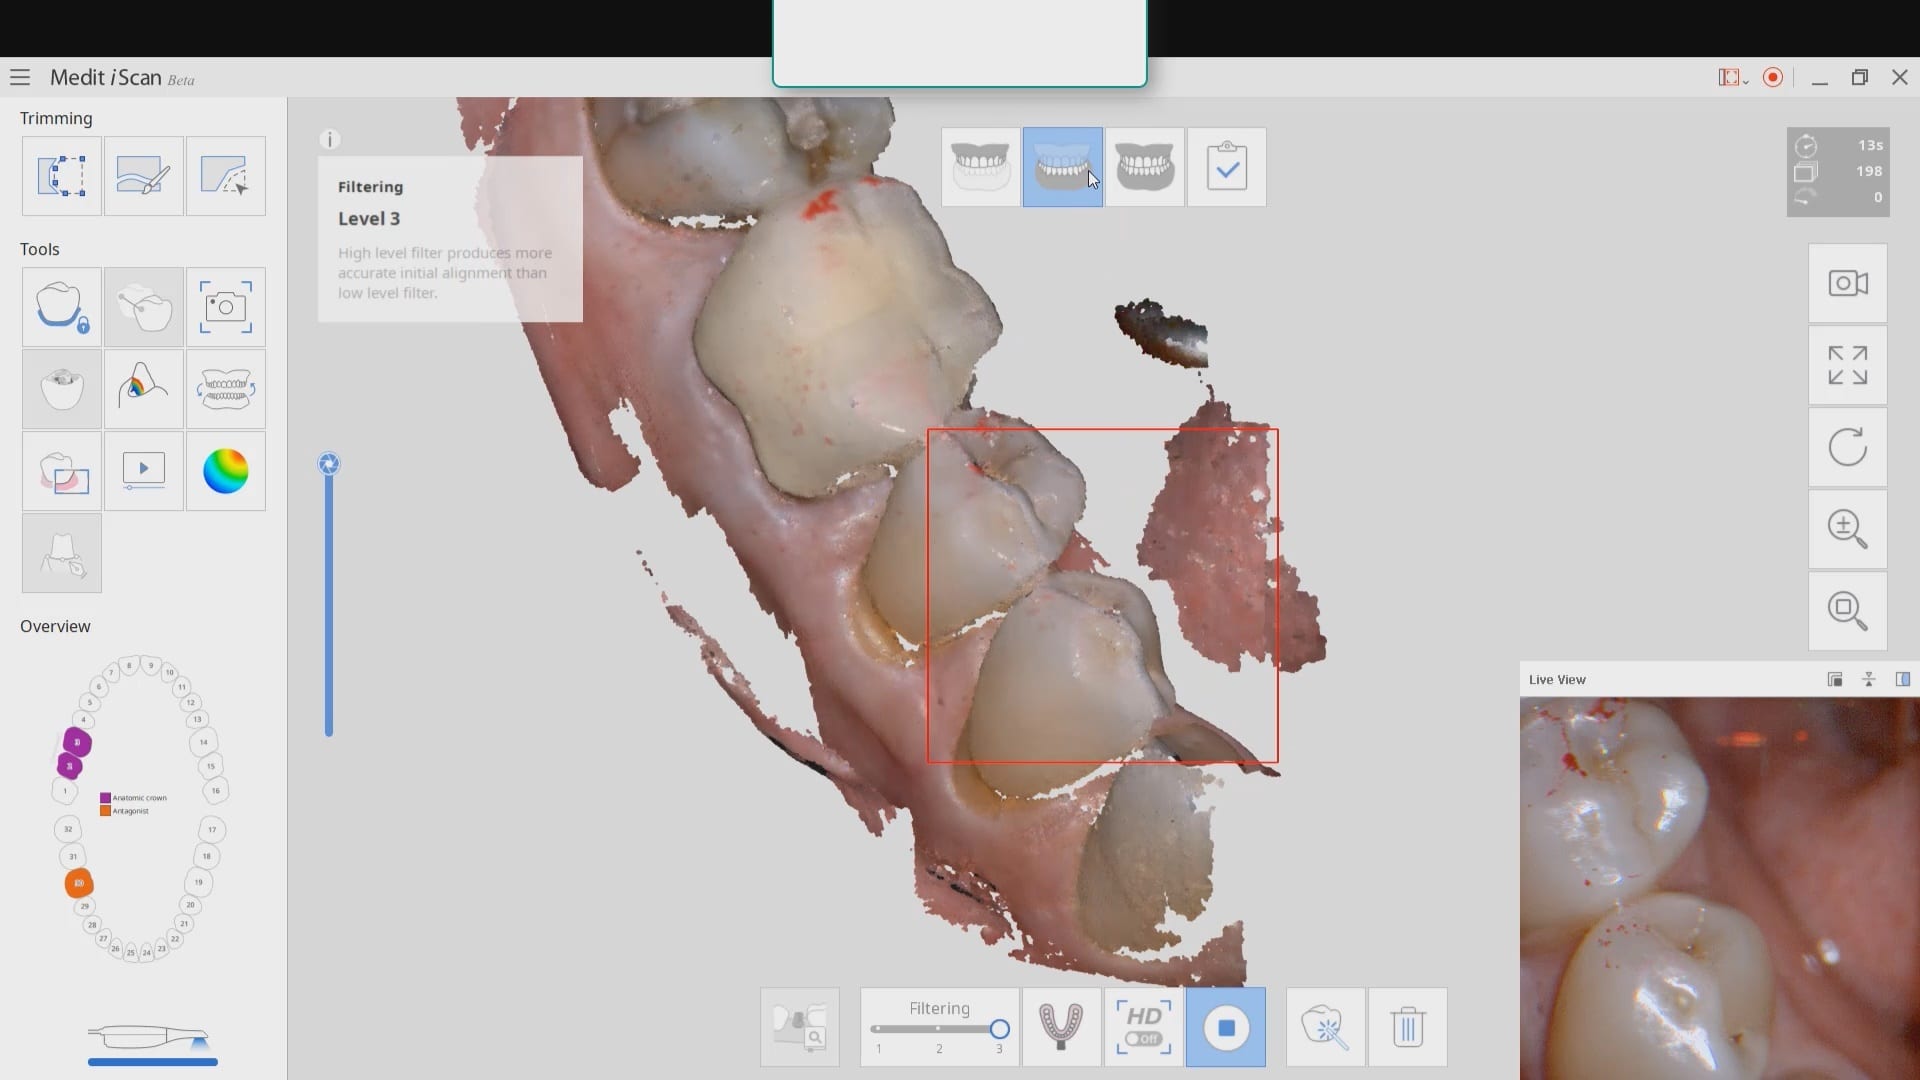
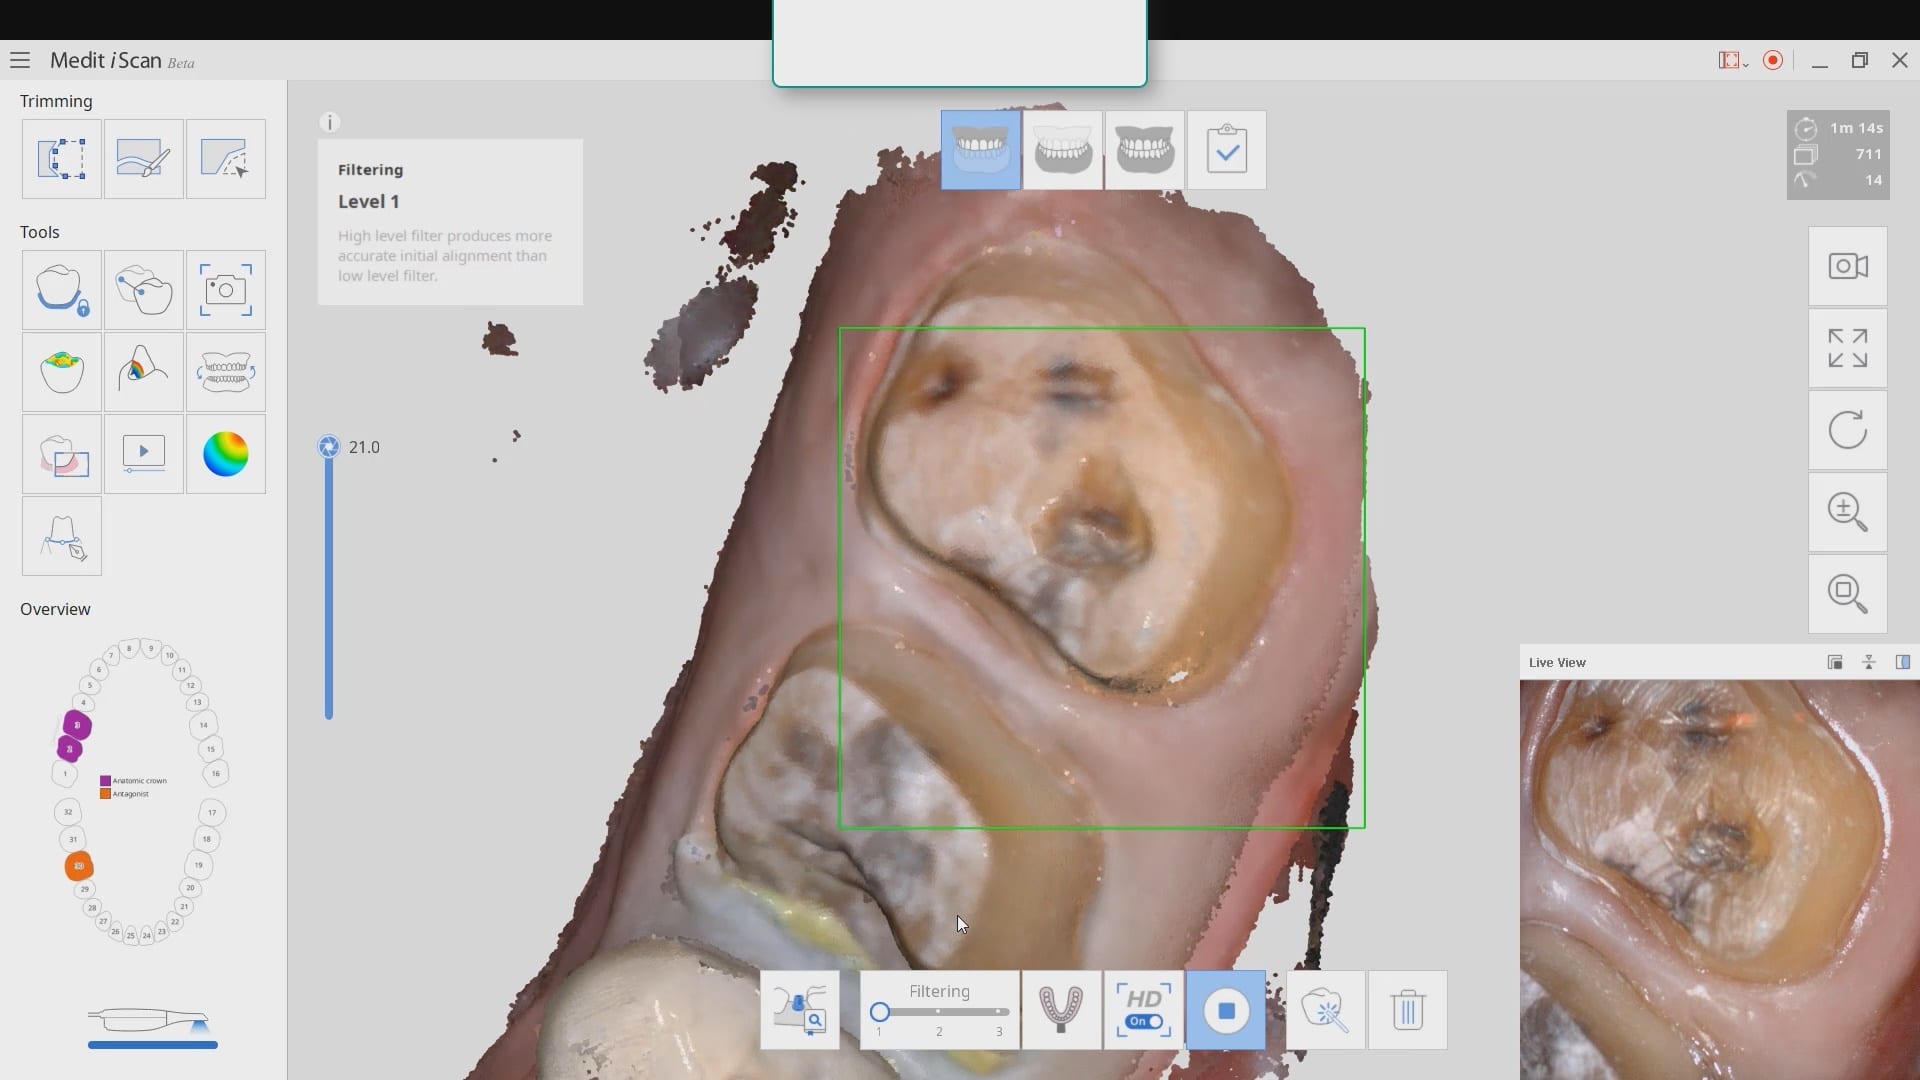
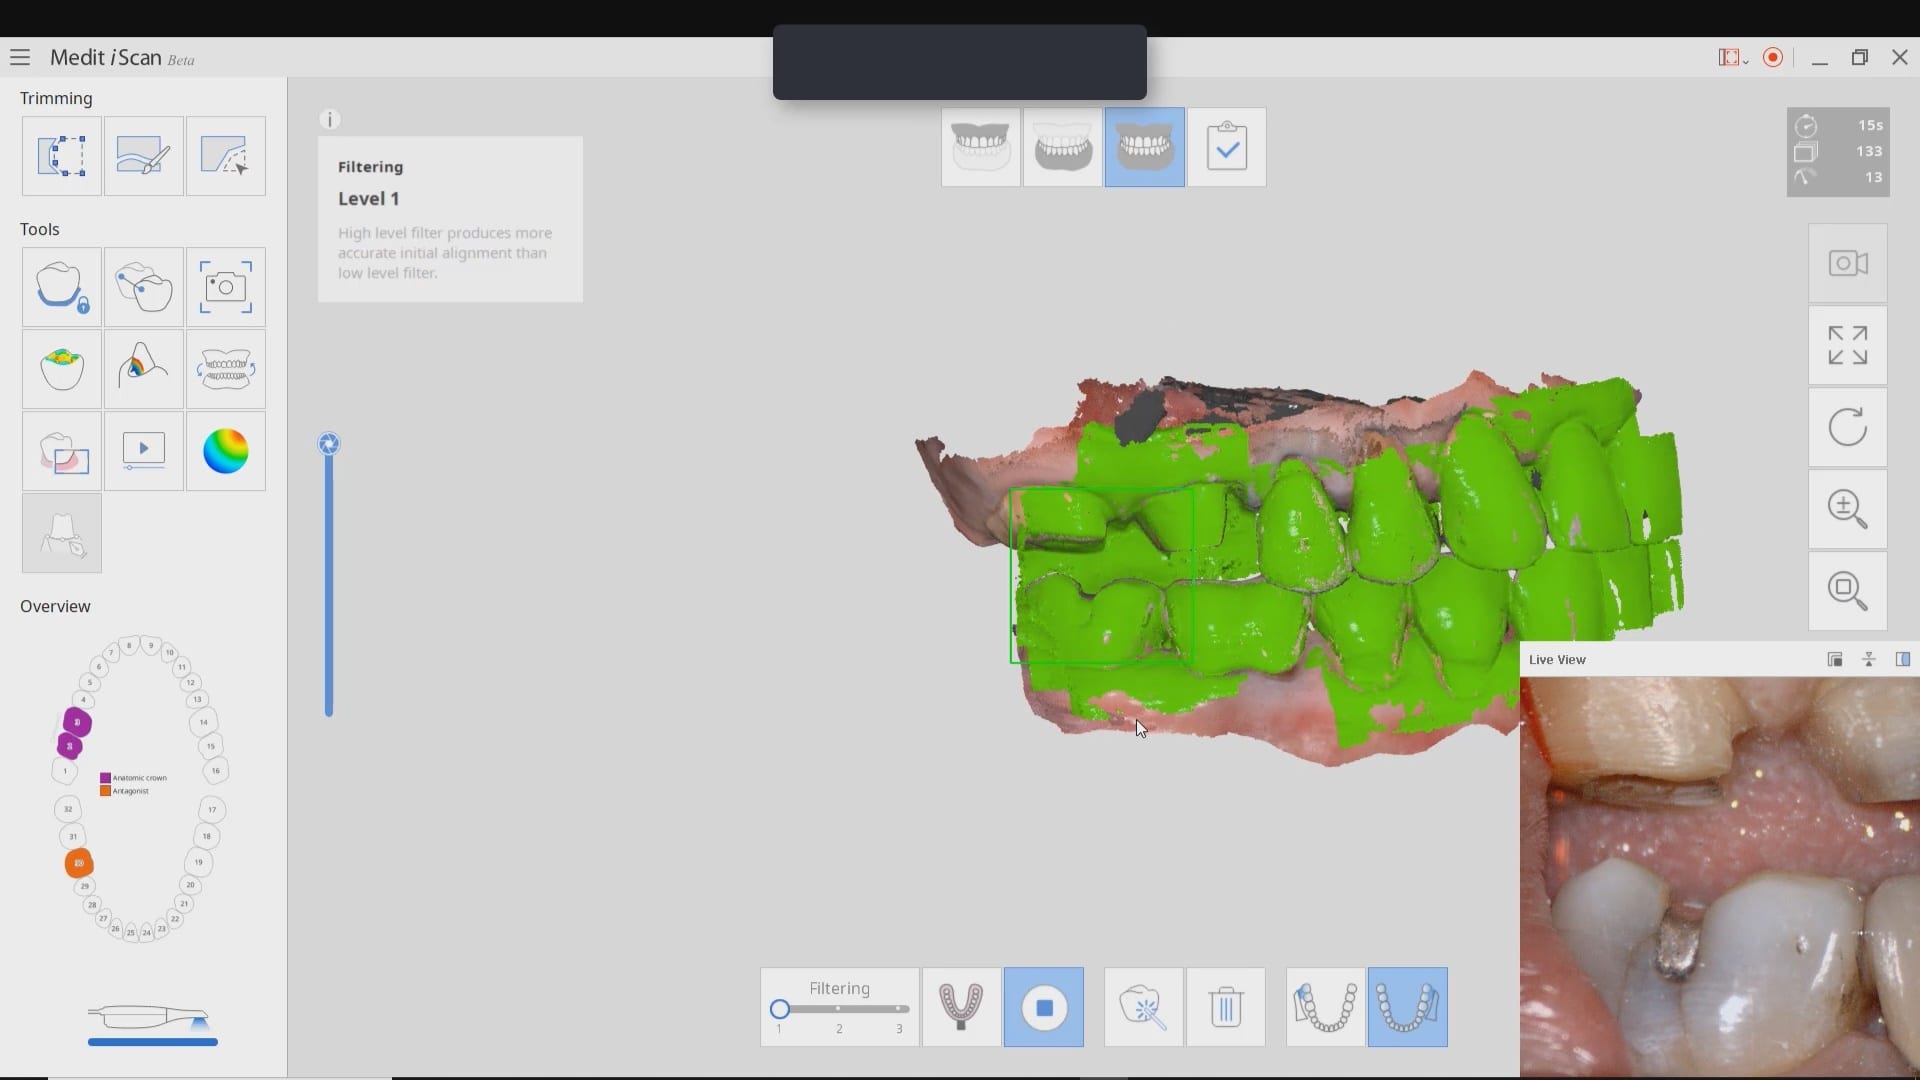
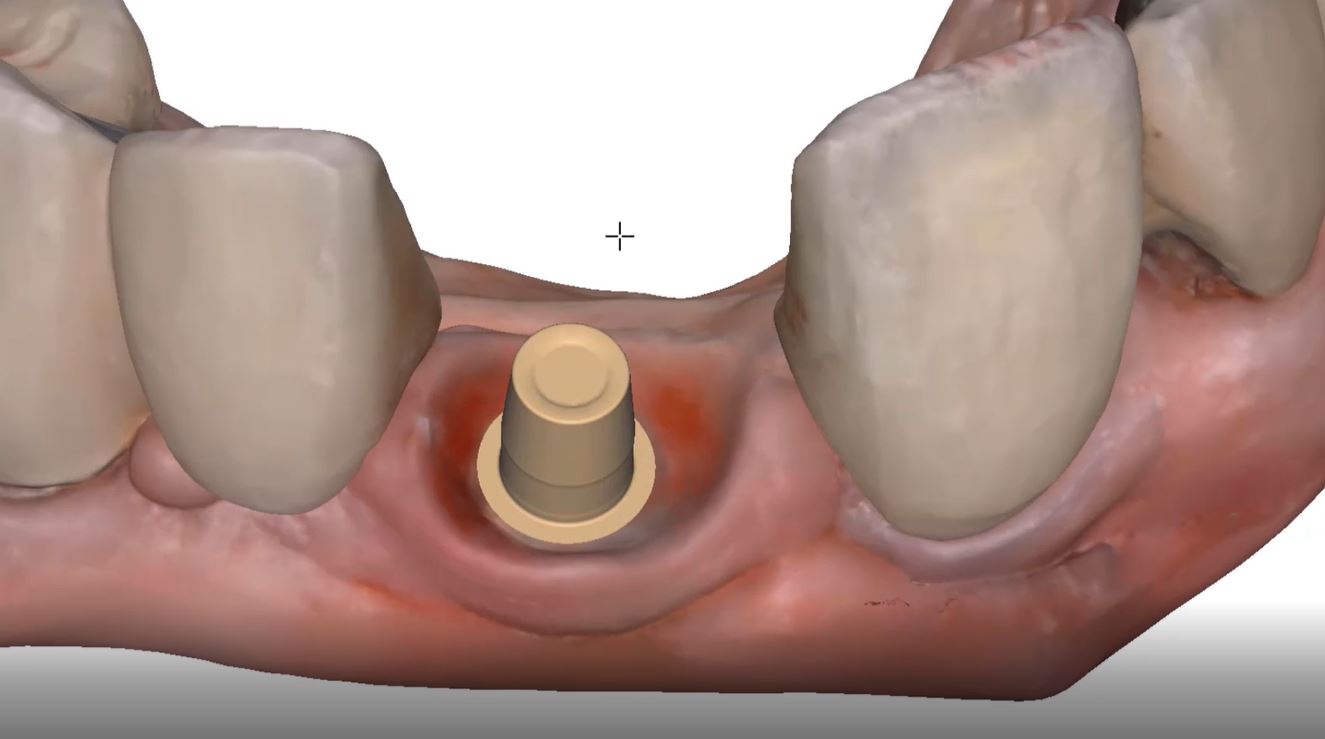
In this case, we demonstrate how we utilize the Medit i500 to capture a Tibase from Blueskybio, Biomax NP Conical Connection.  Once the tibase is seated, we simply start scanning and then use the artificial intelligent implant suprastructure identification system to identify the location of the tibase.  This in essence allows you to capture your margins OUTSIDE the mouth and you don’t have to bother with imaging the tibase, which is highly reflective in the patient’s mouth.

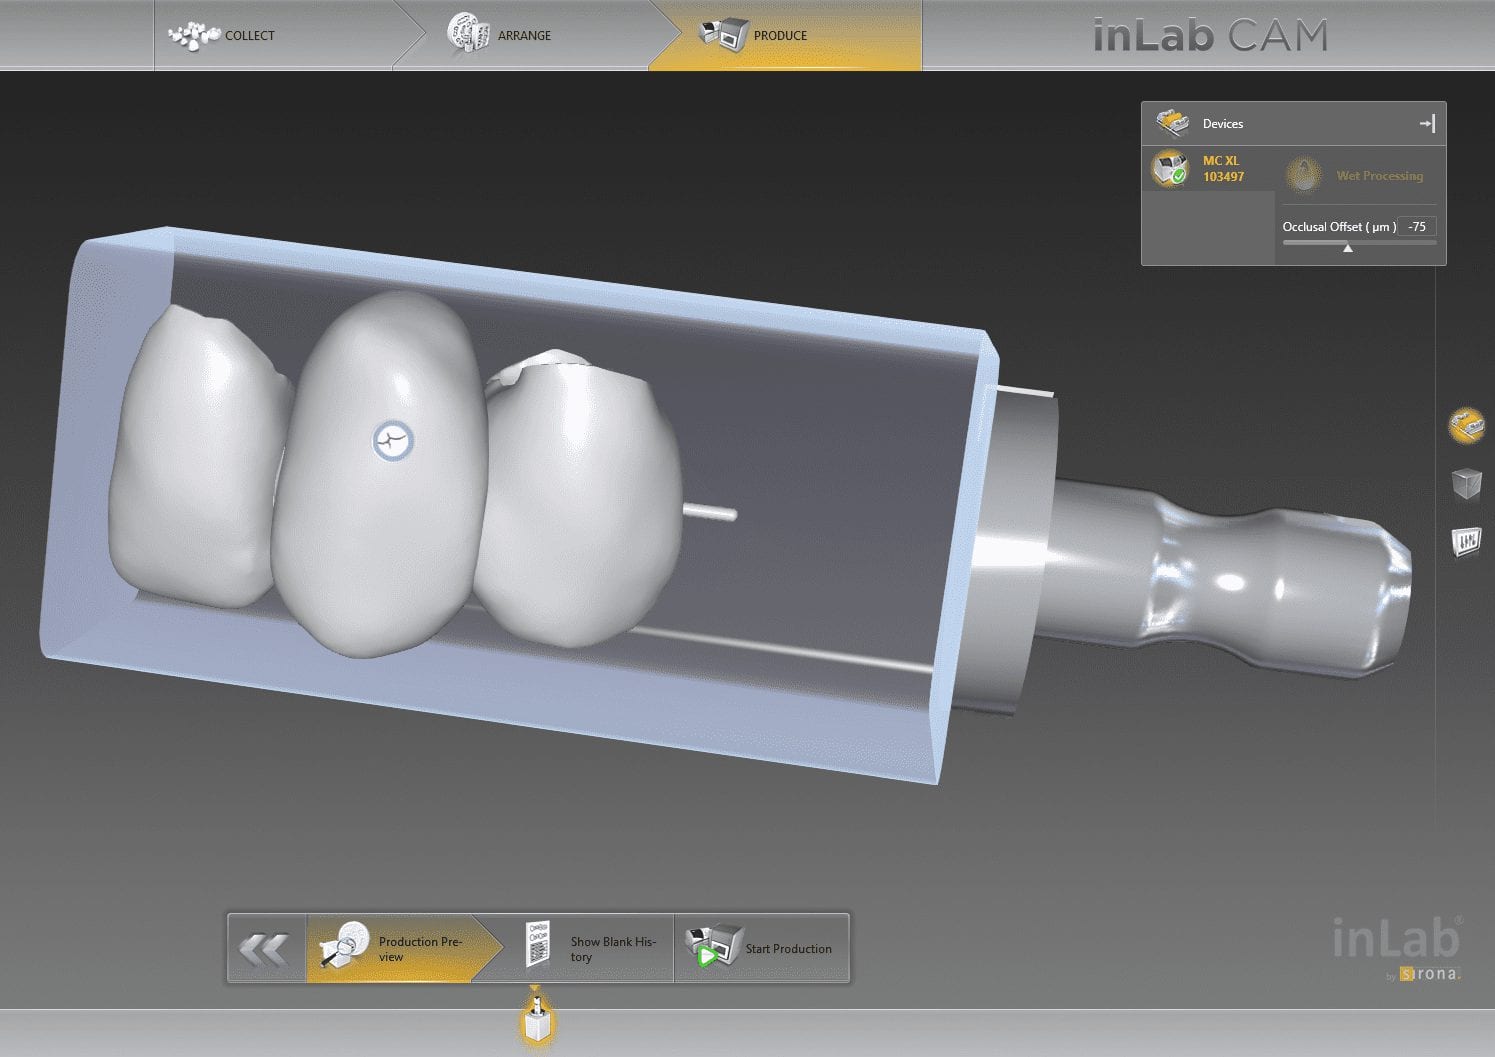
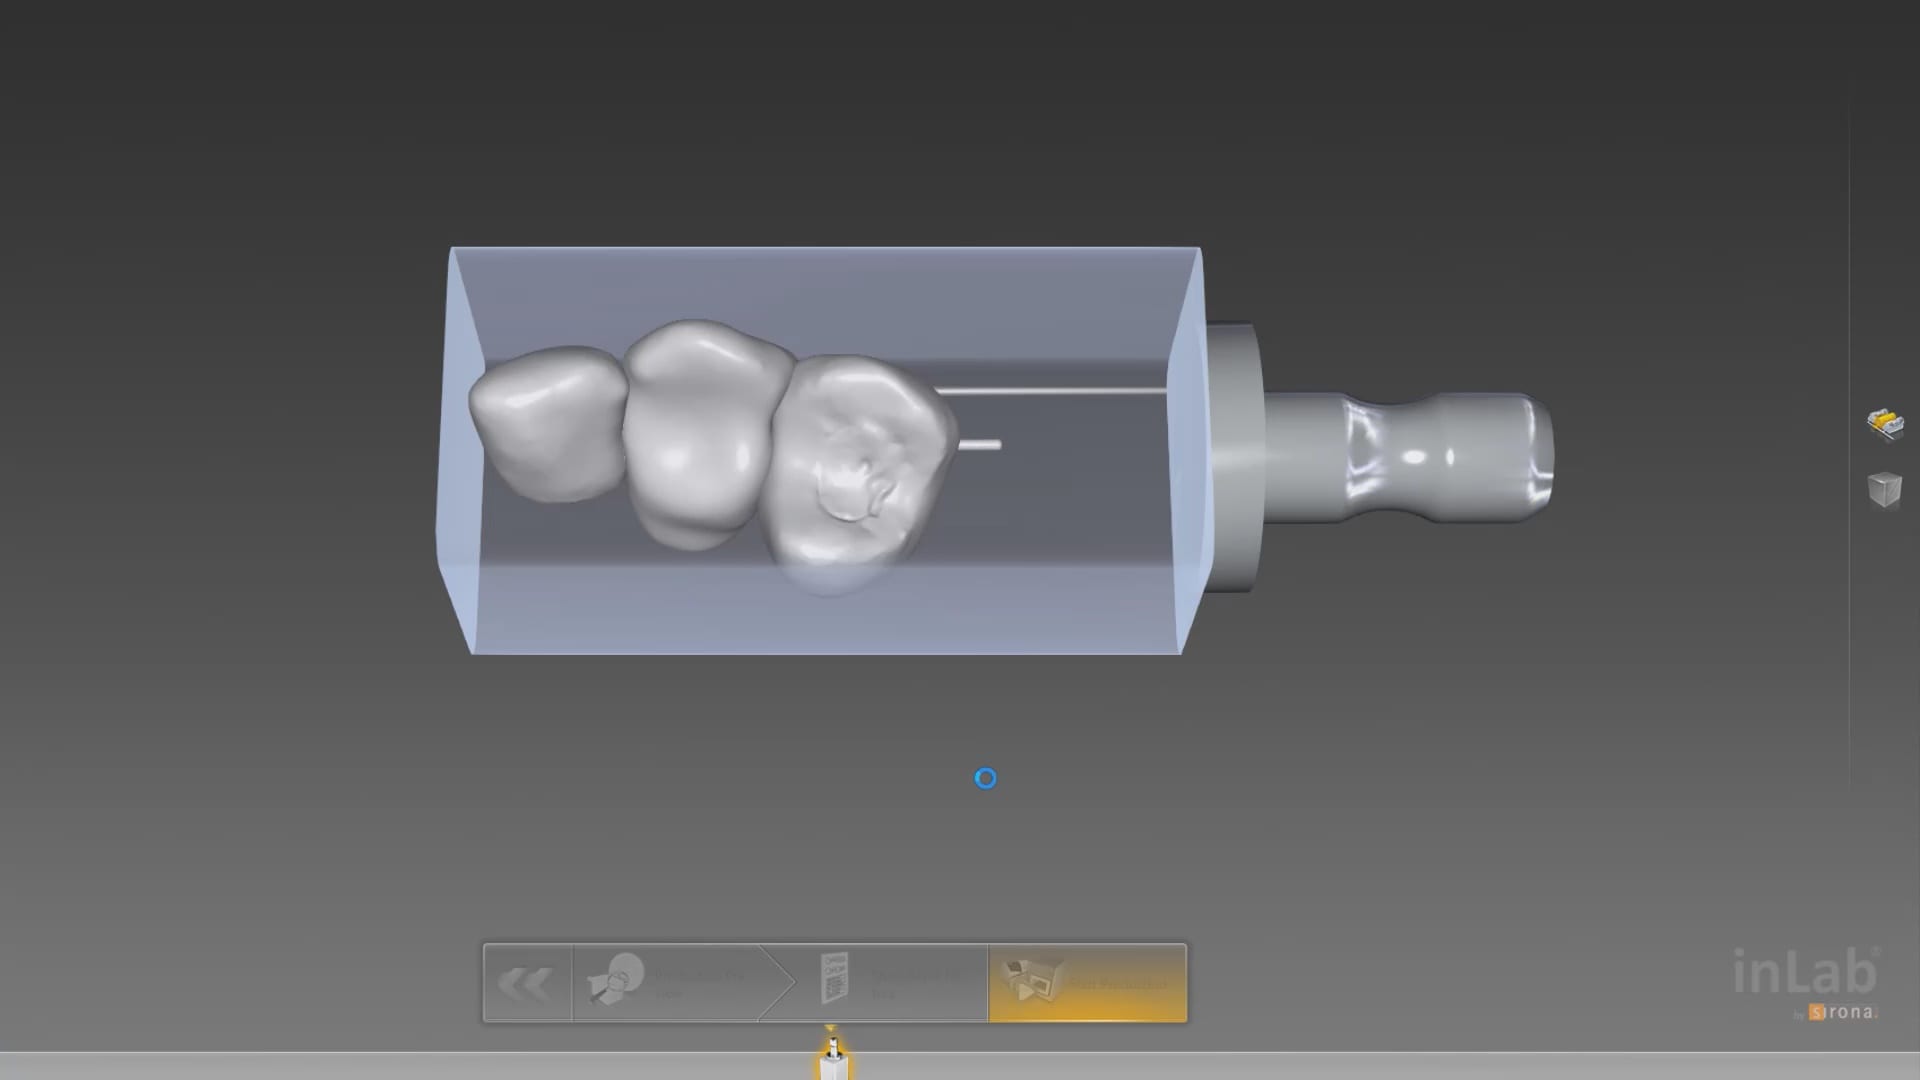
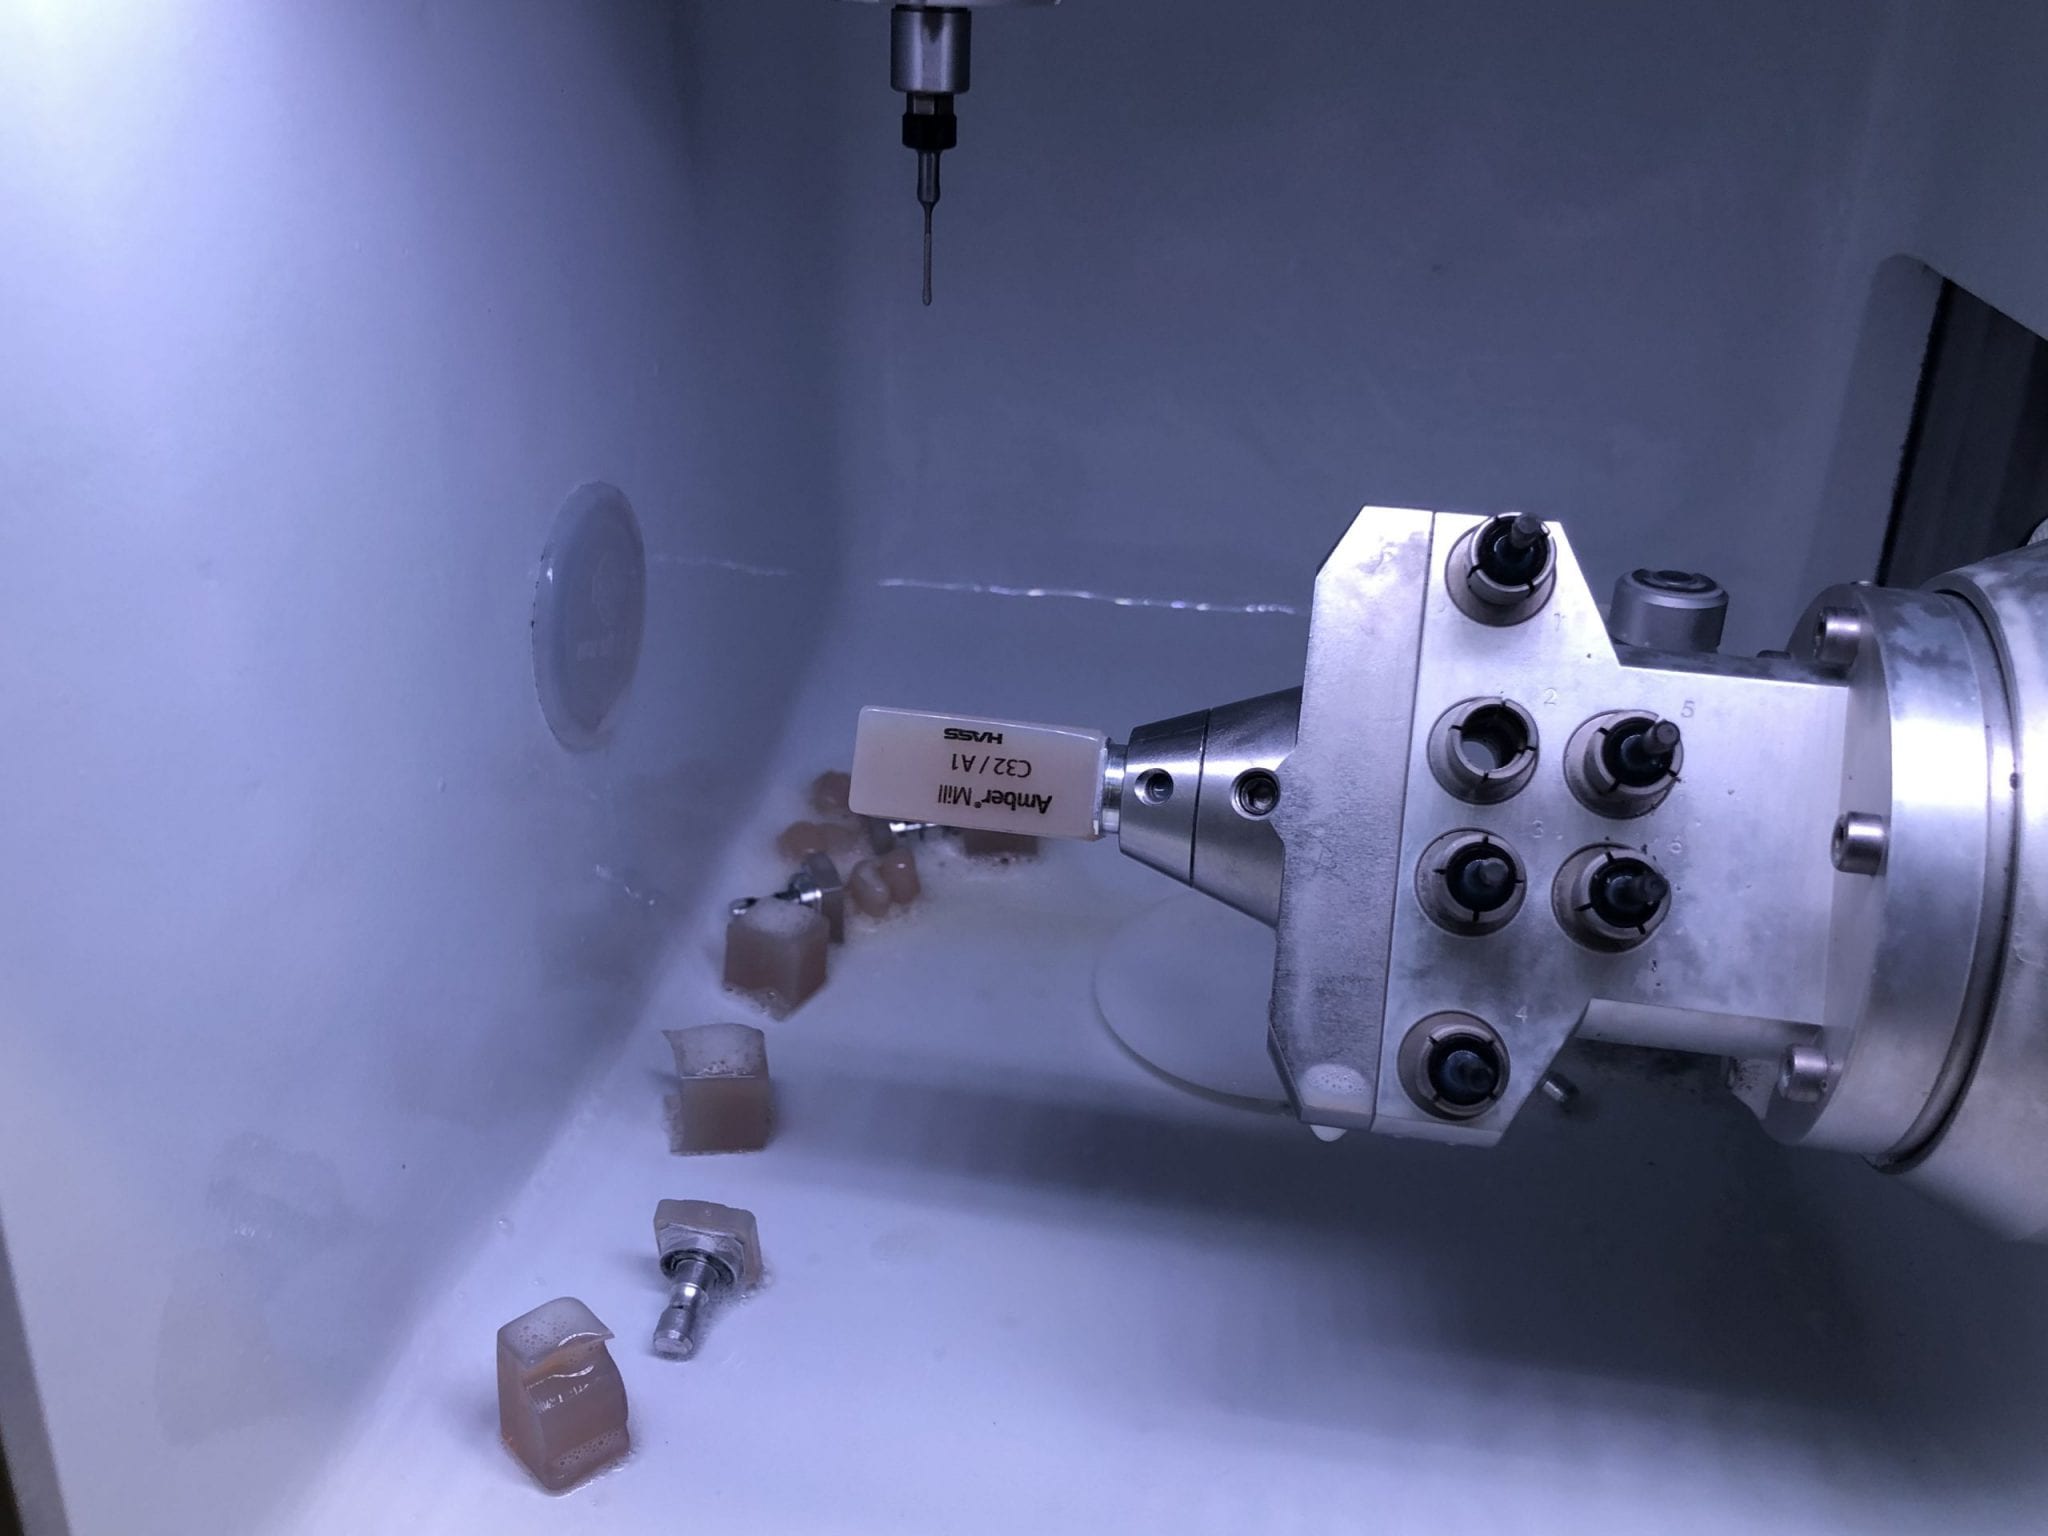
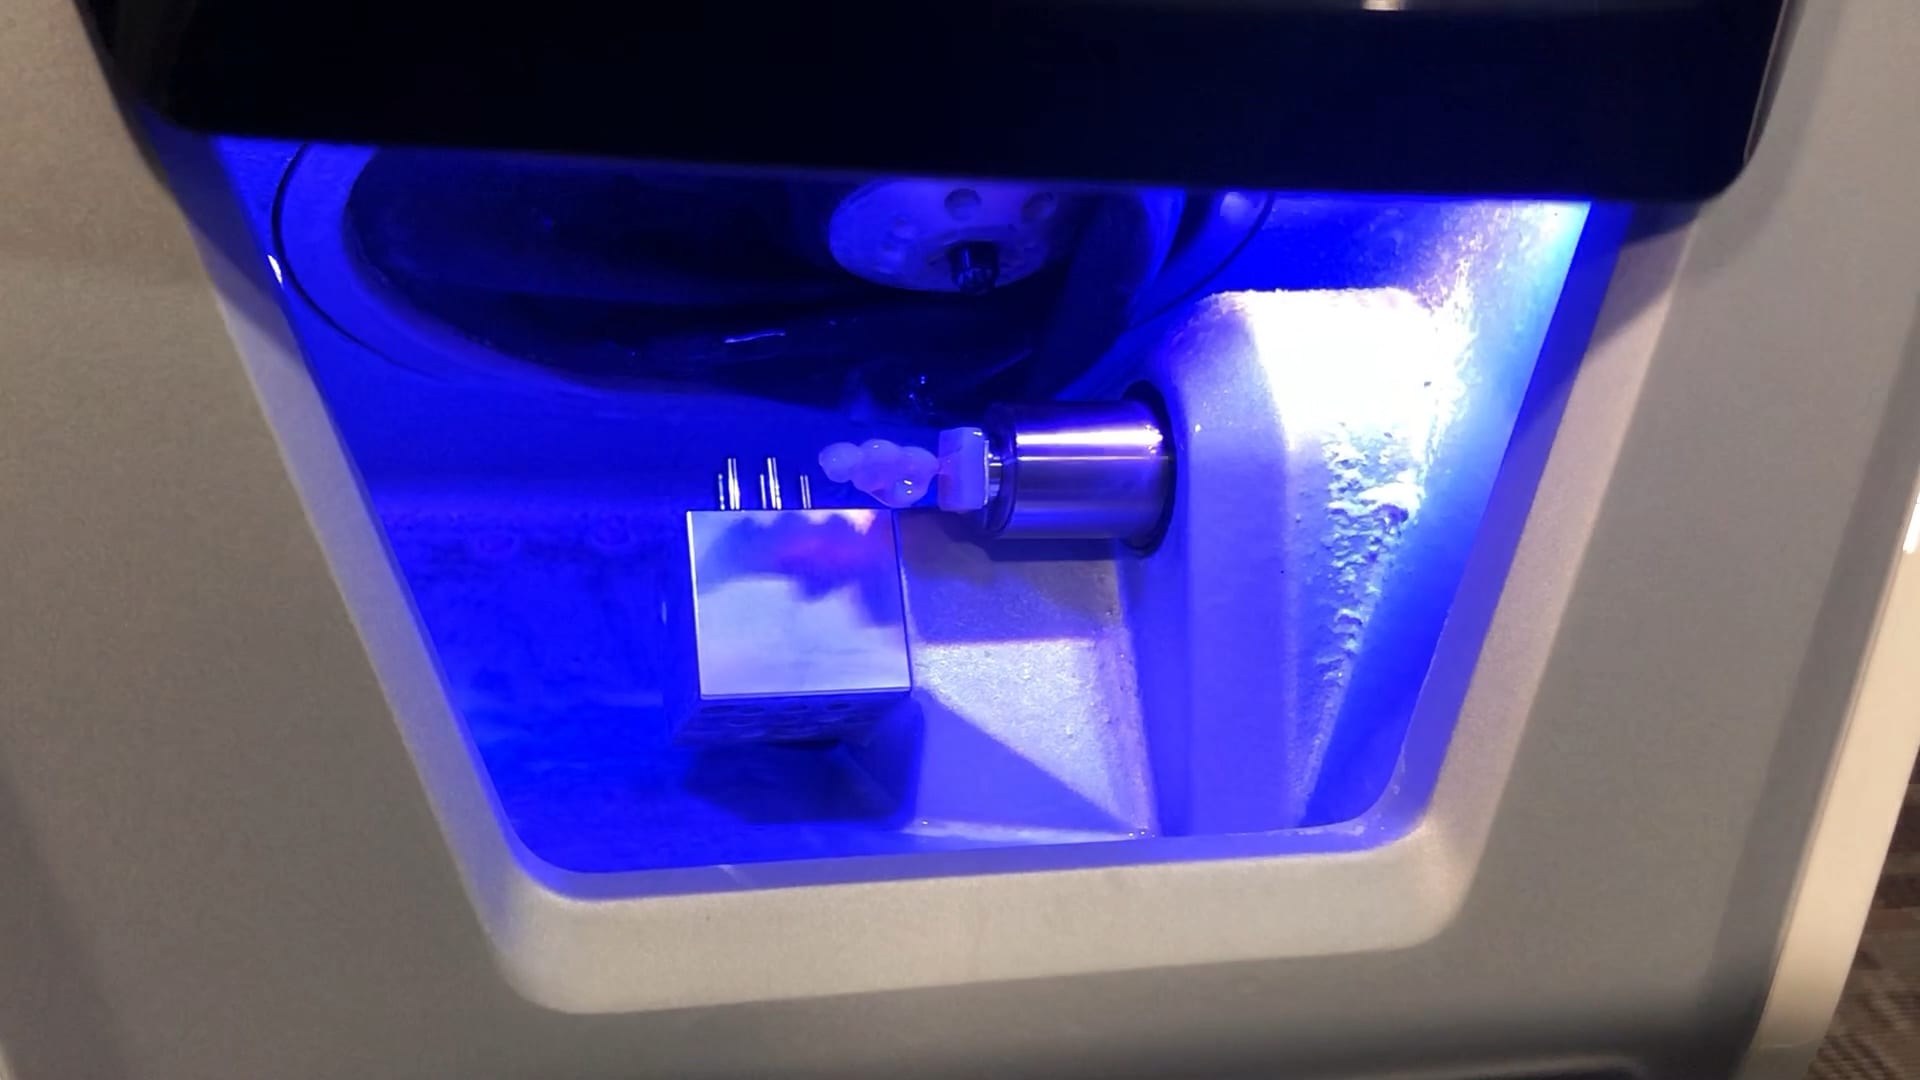
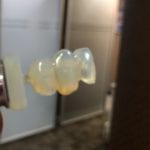
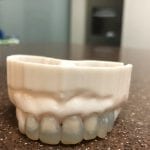
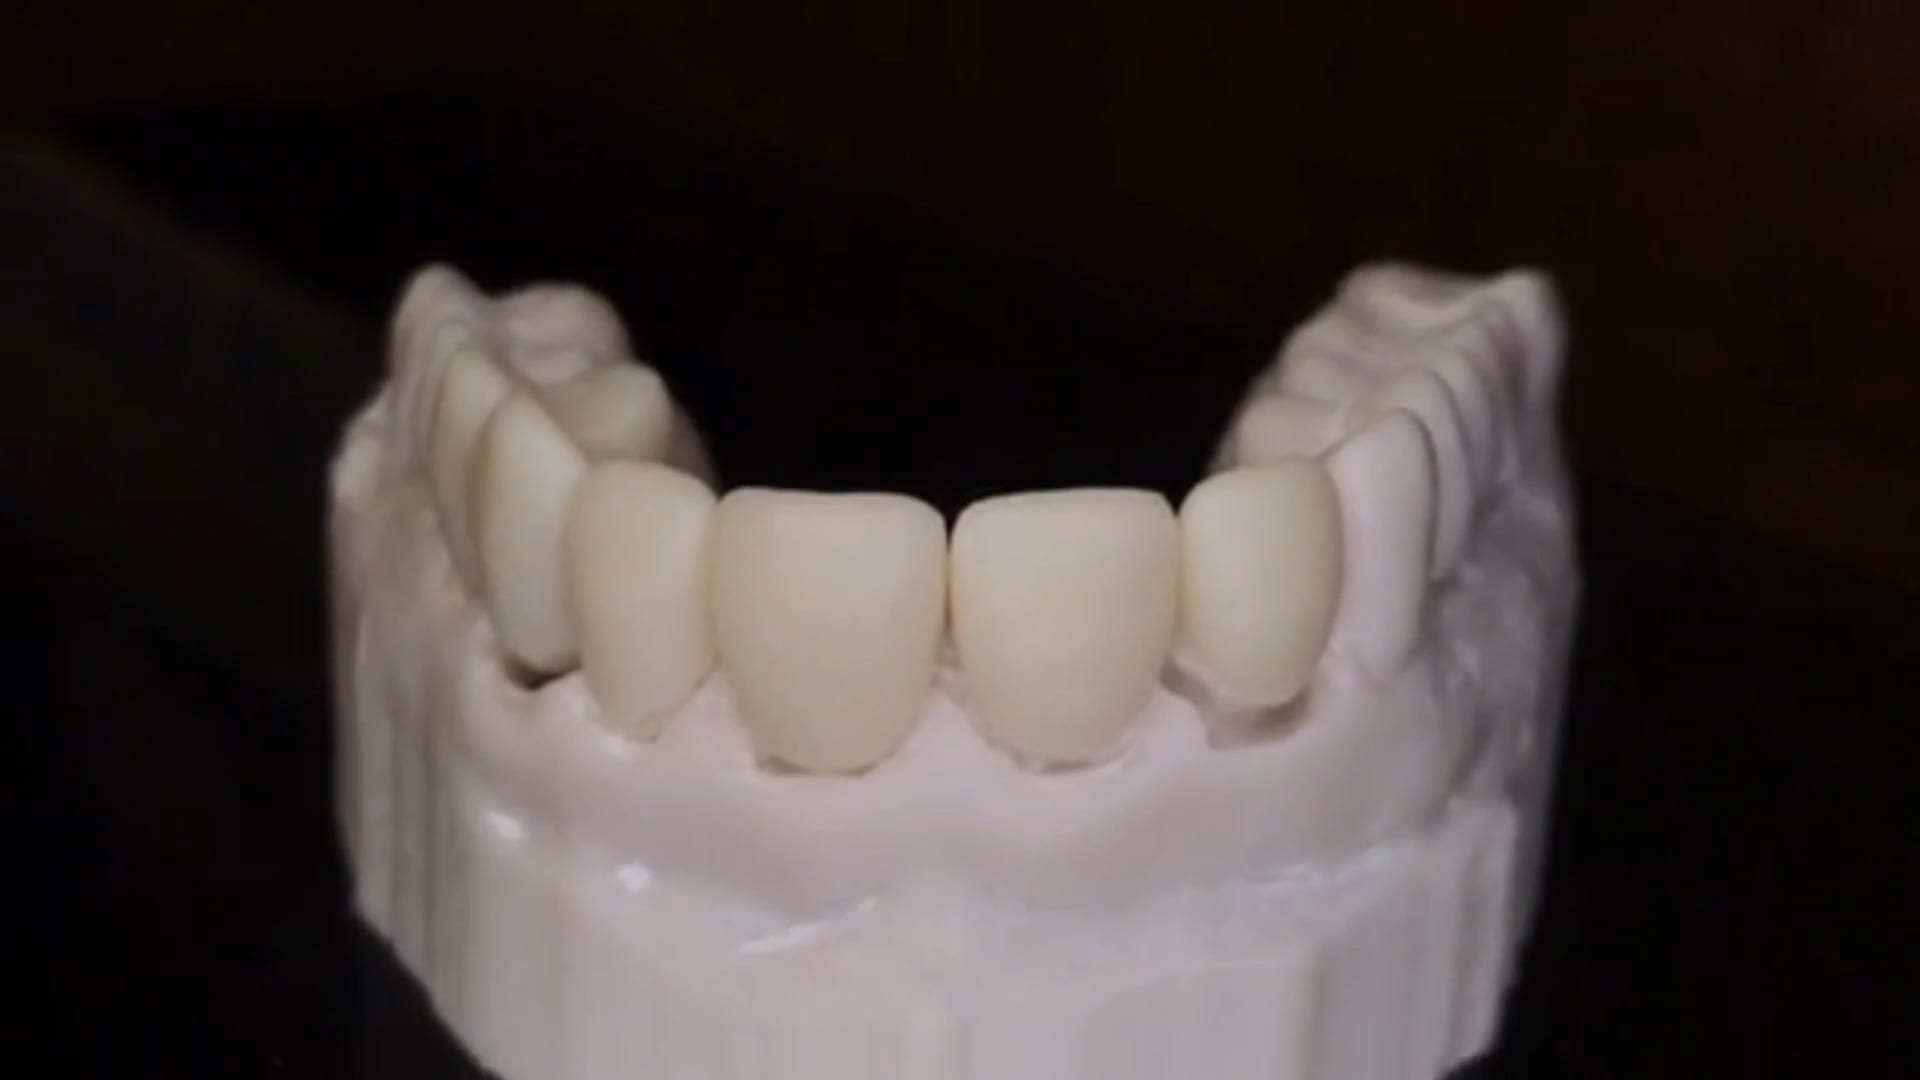
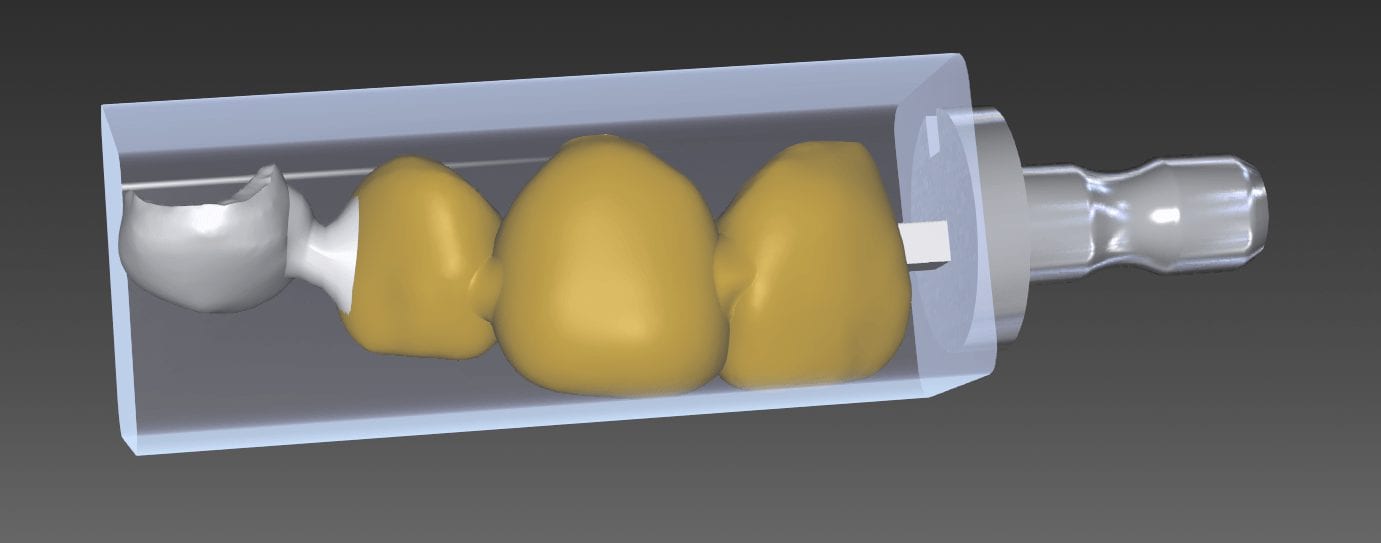
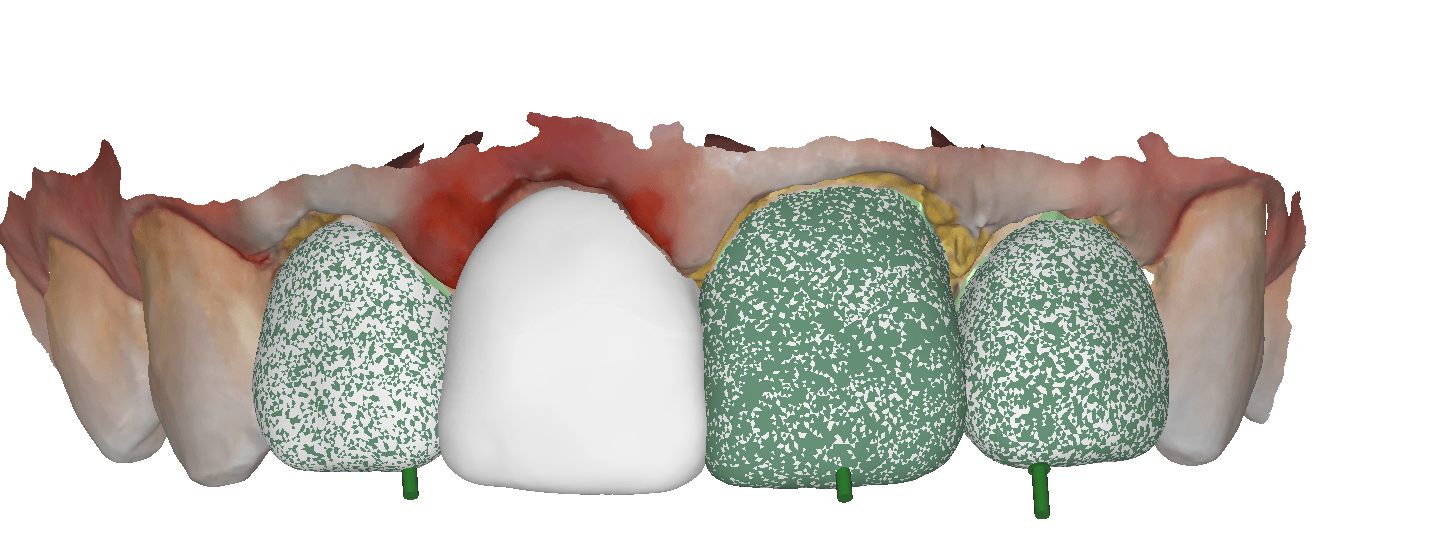
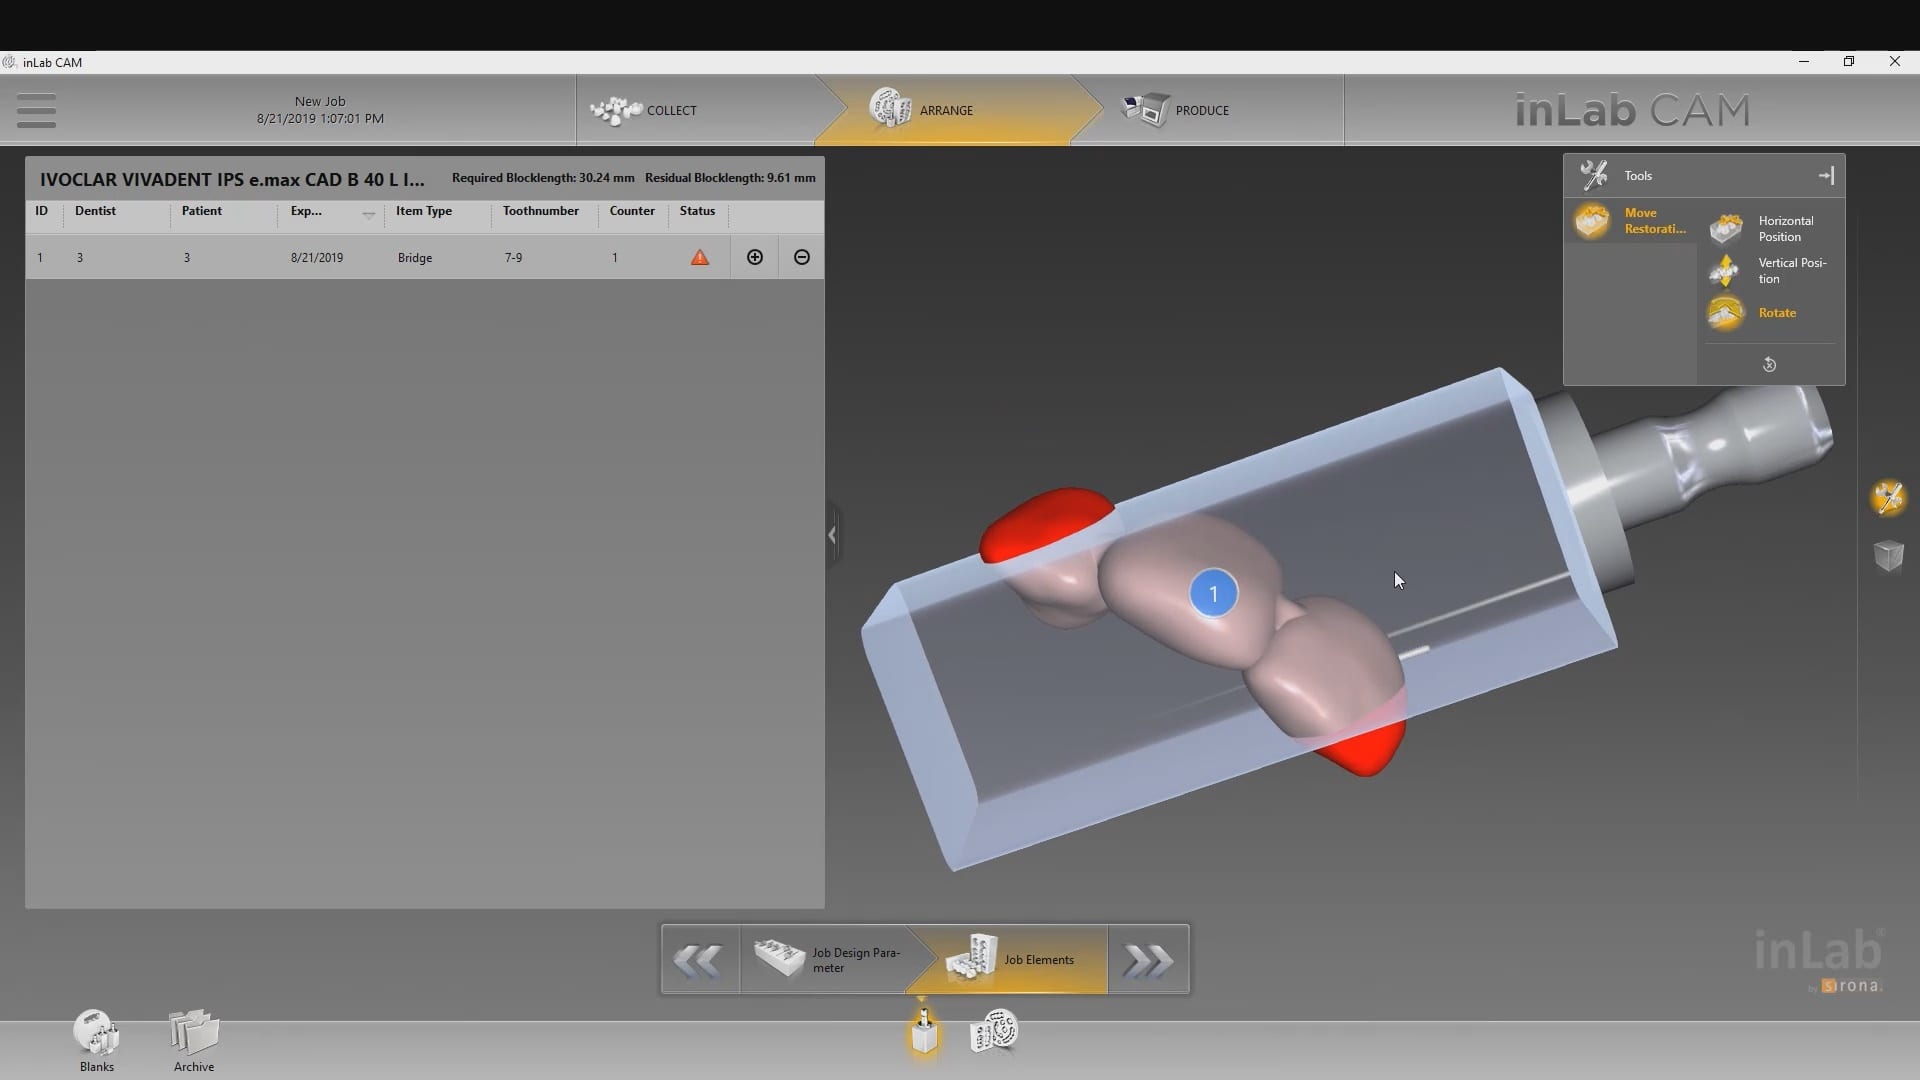
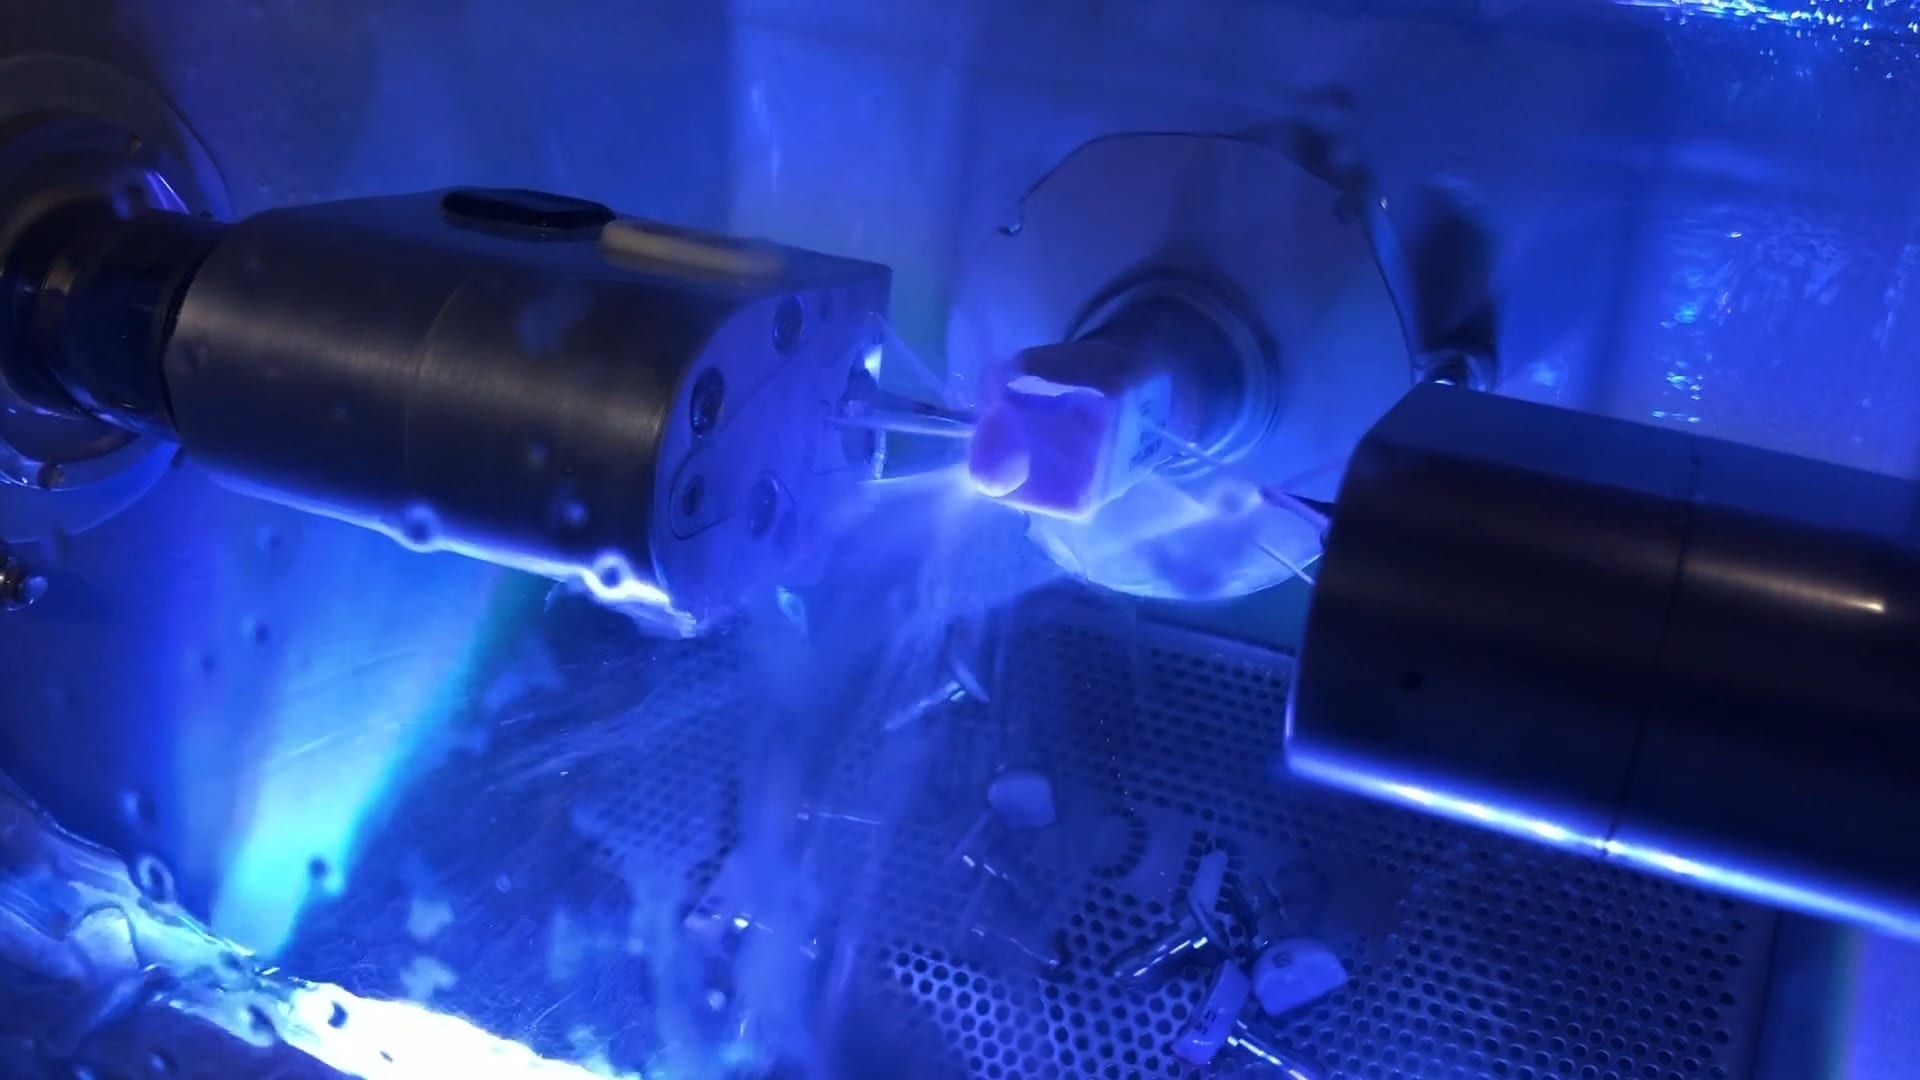
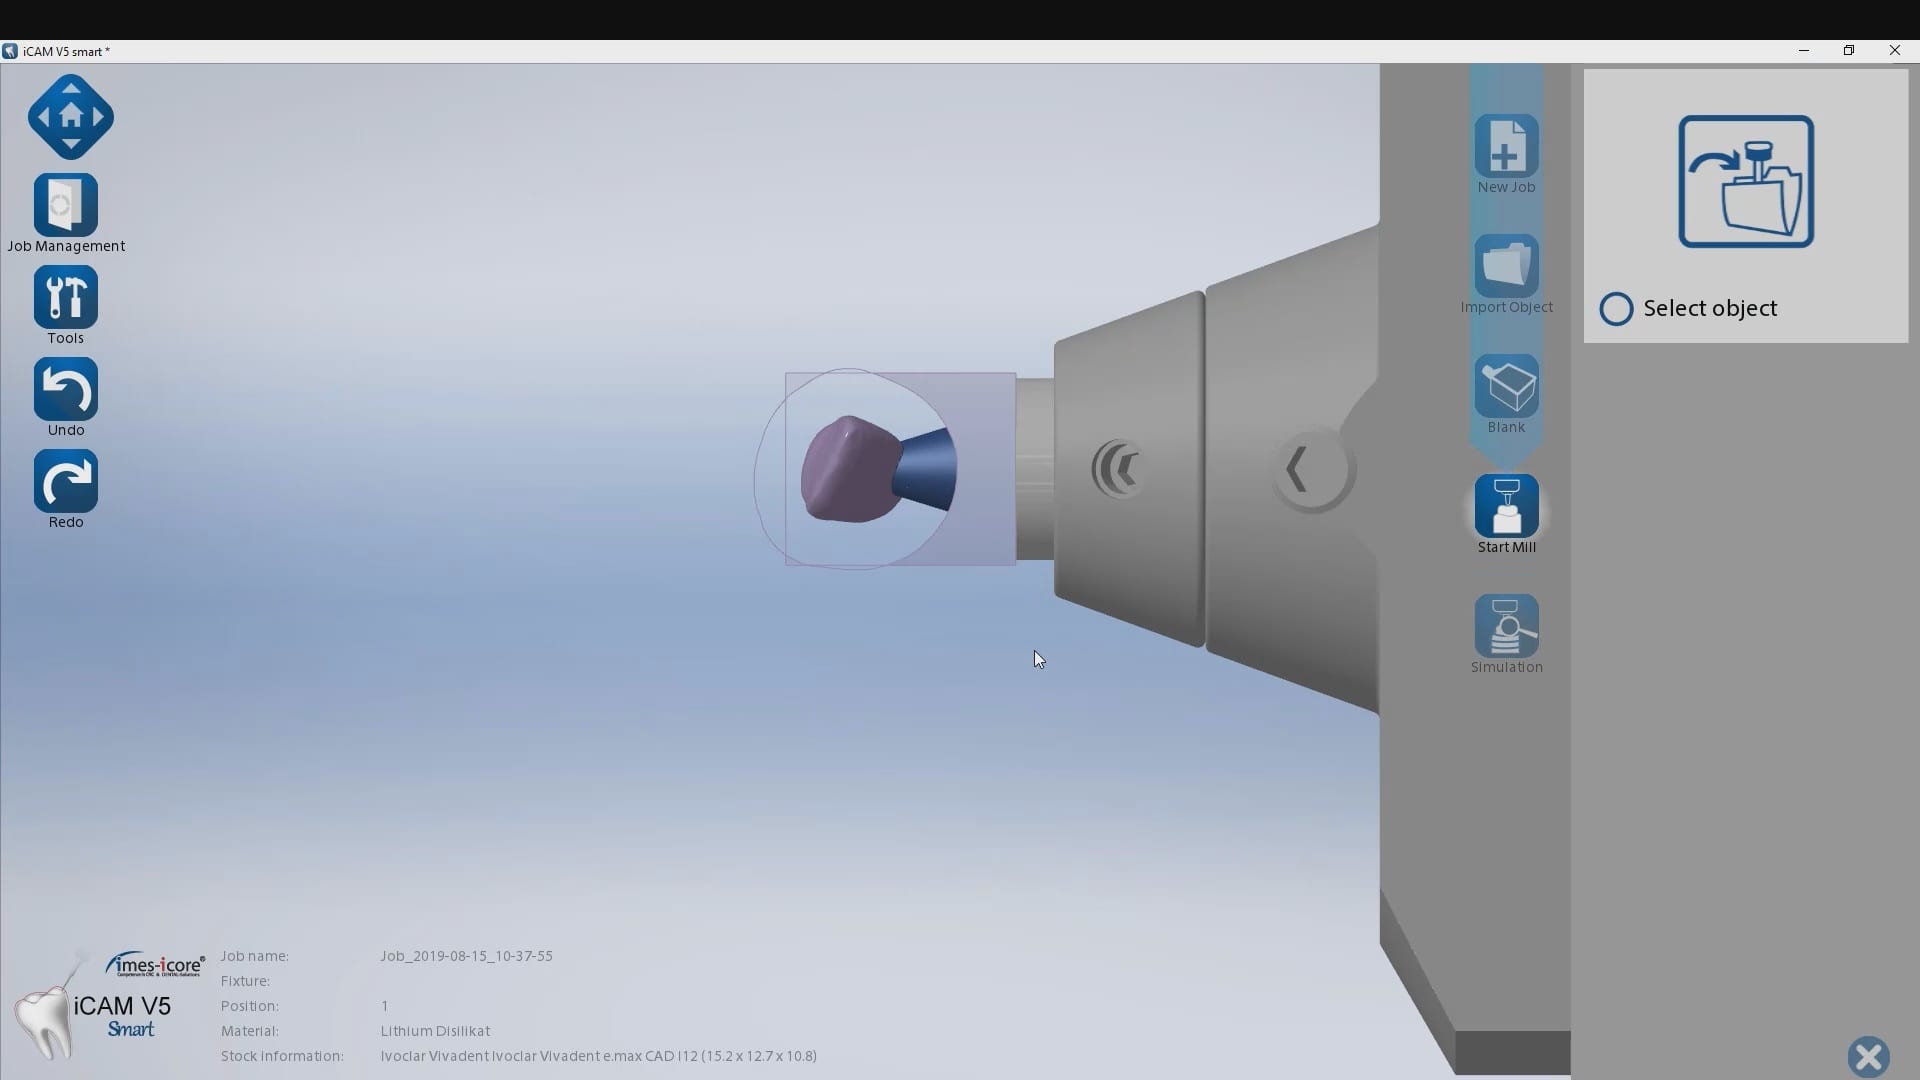
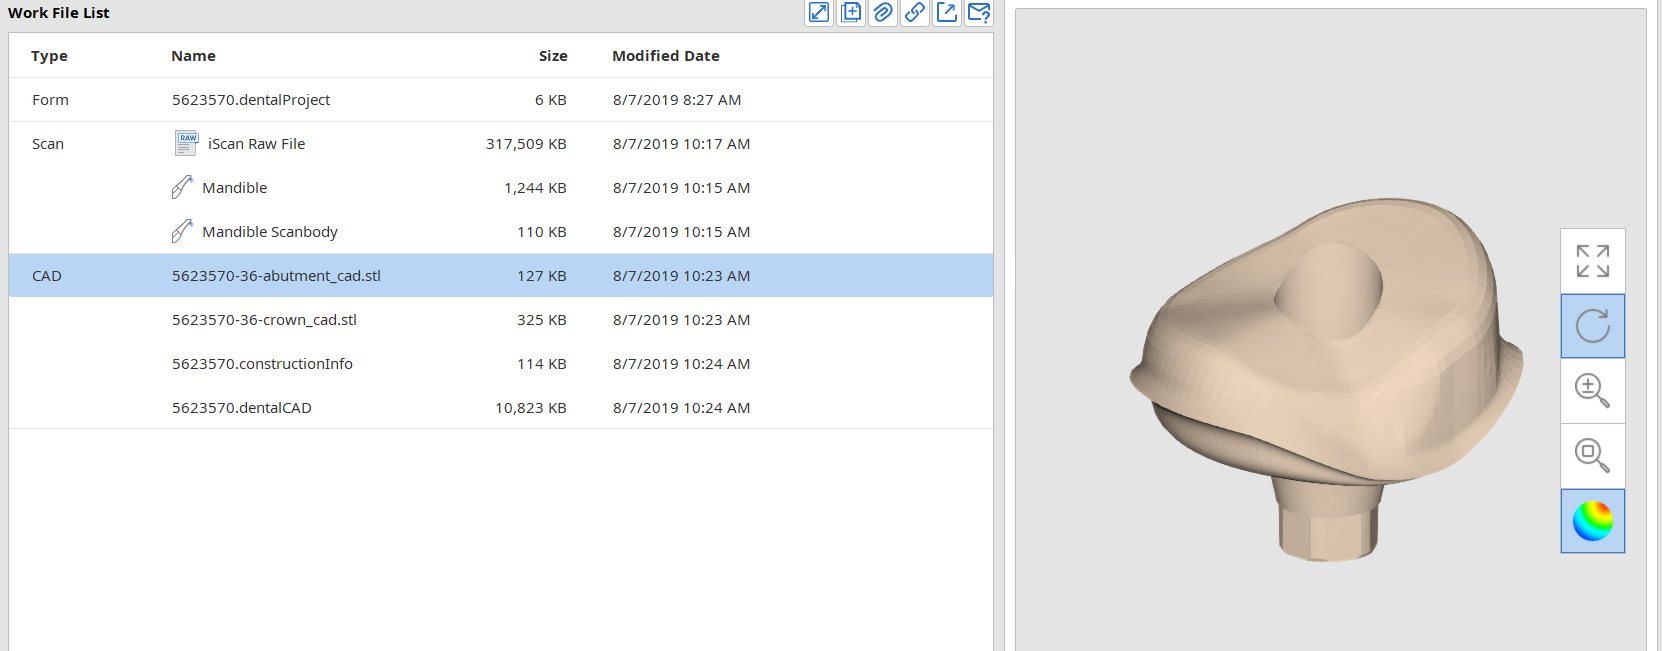
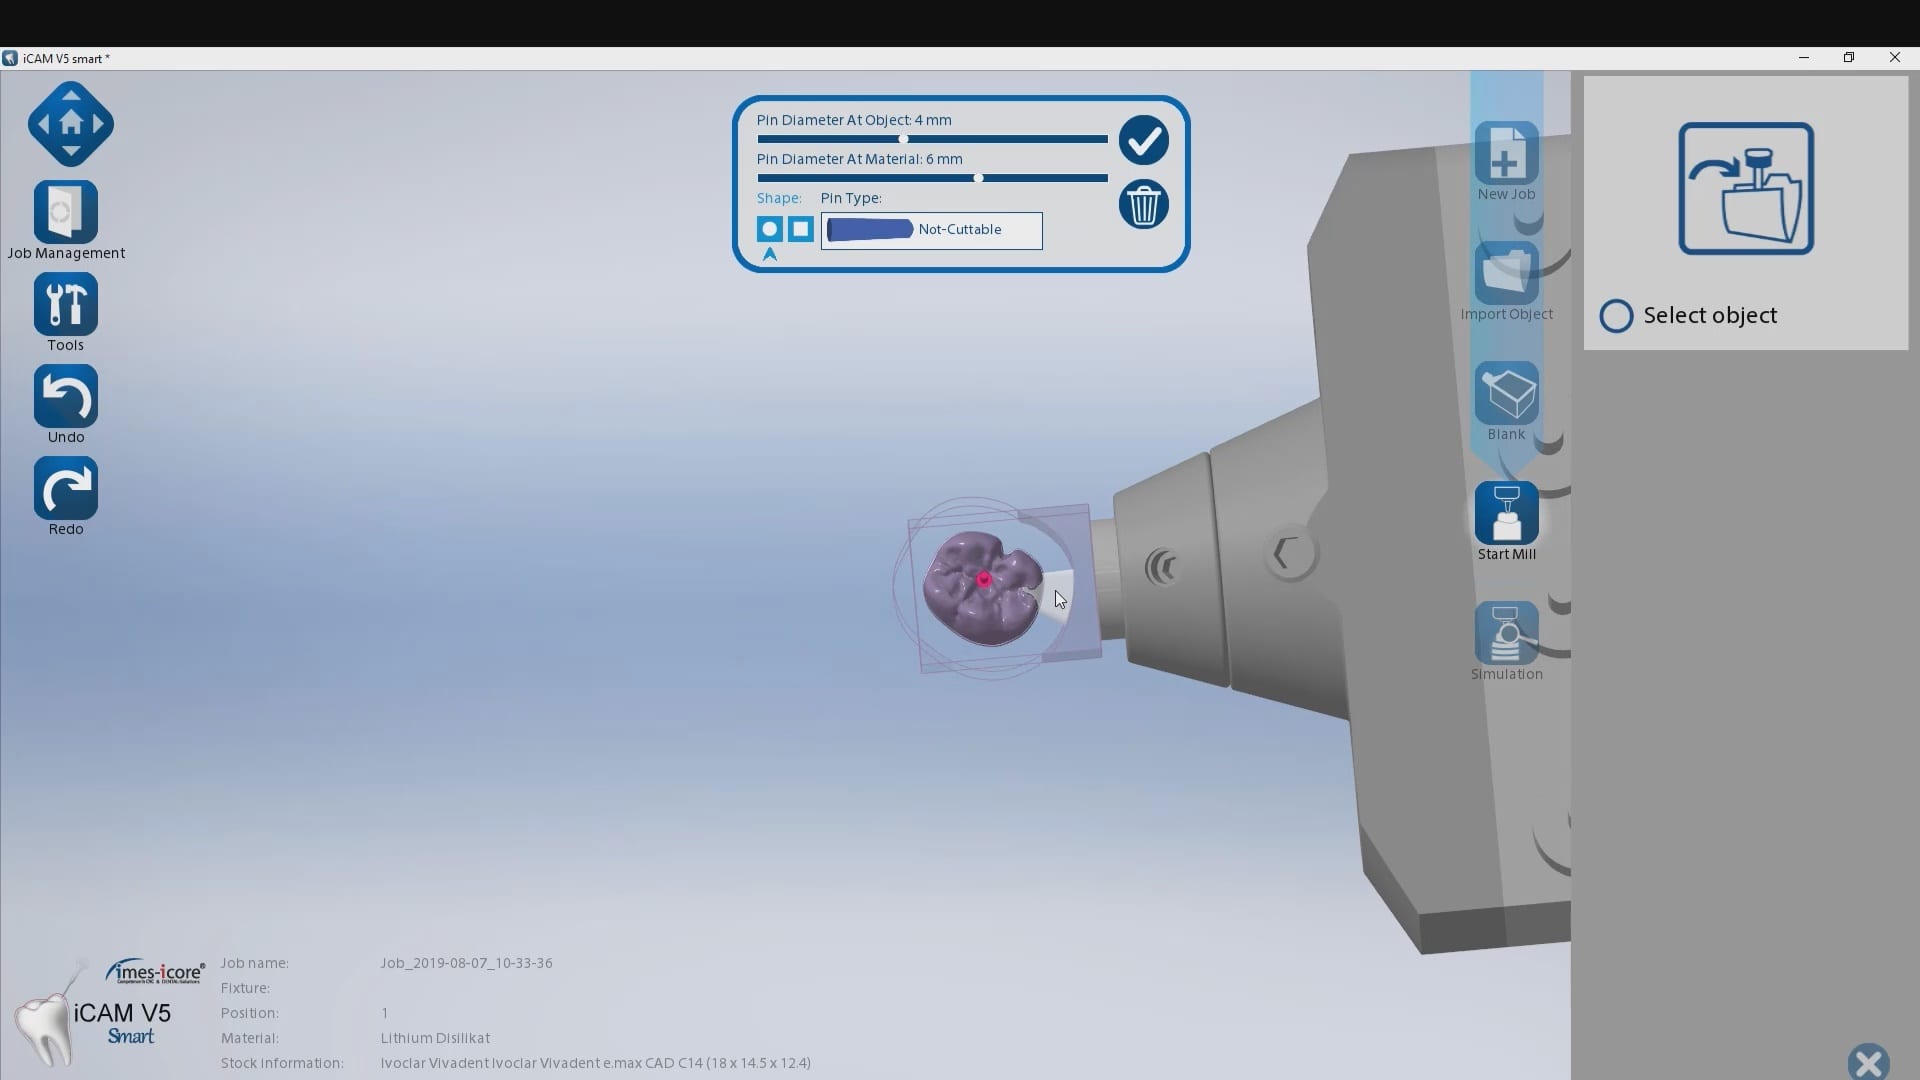
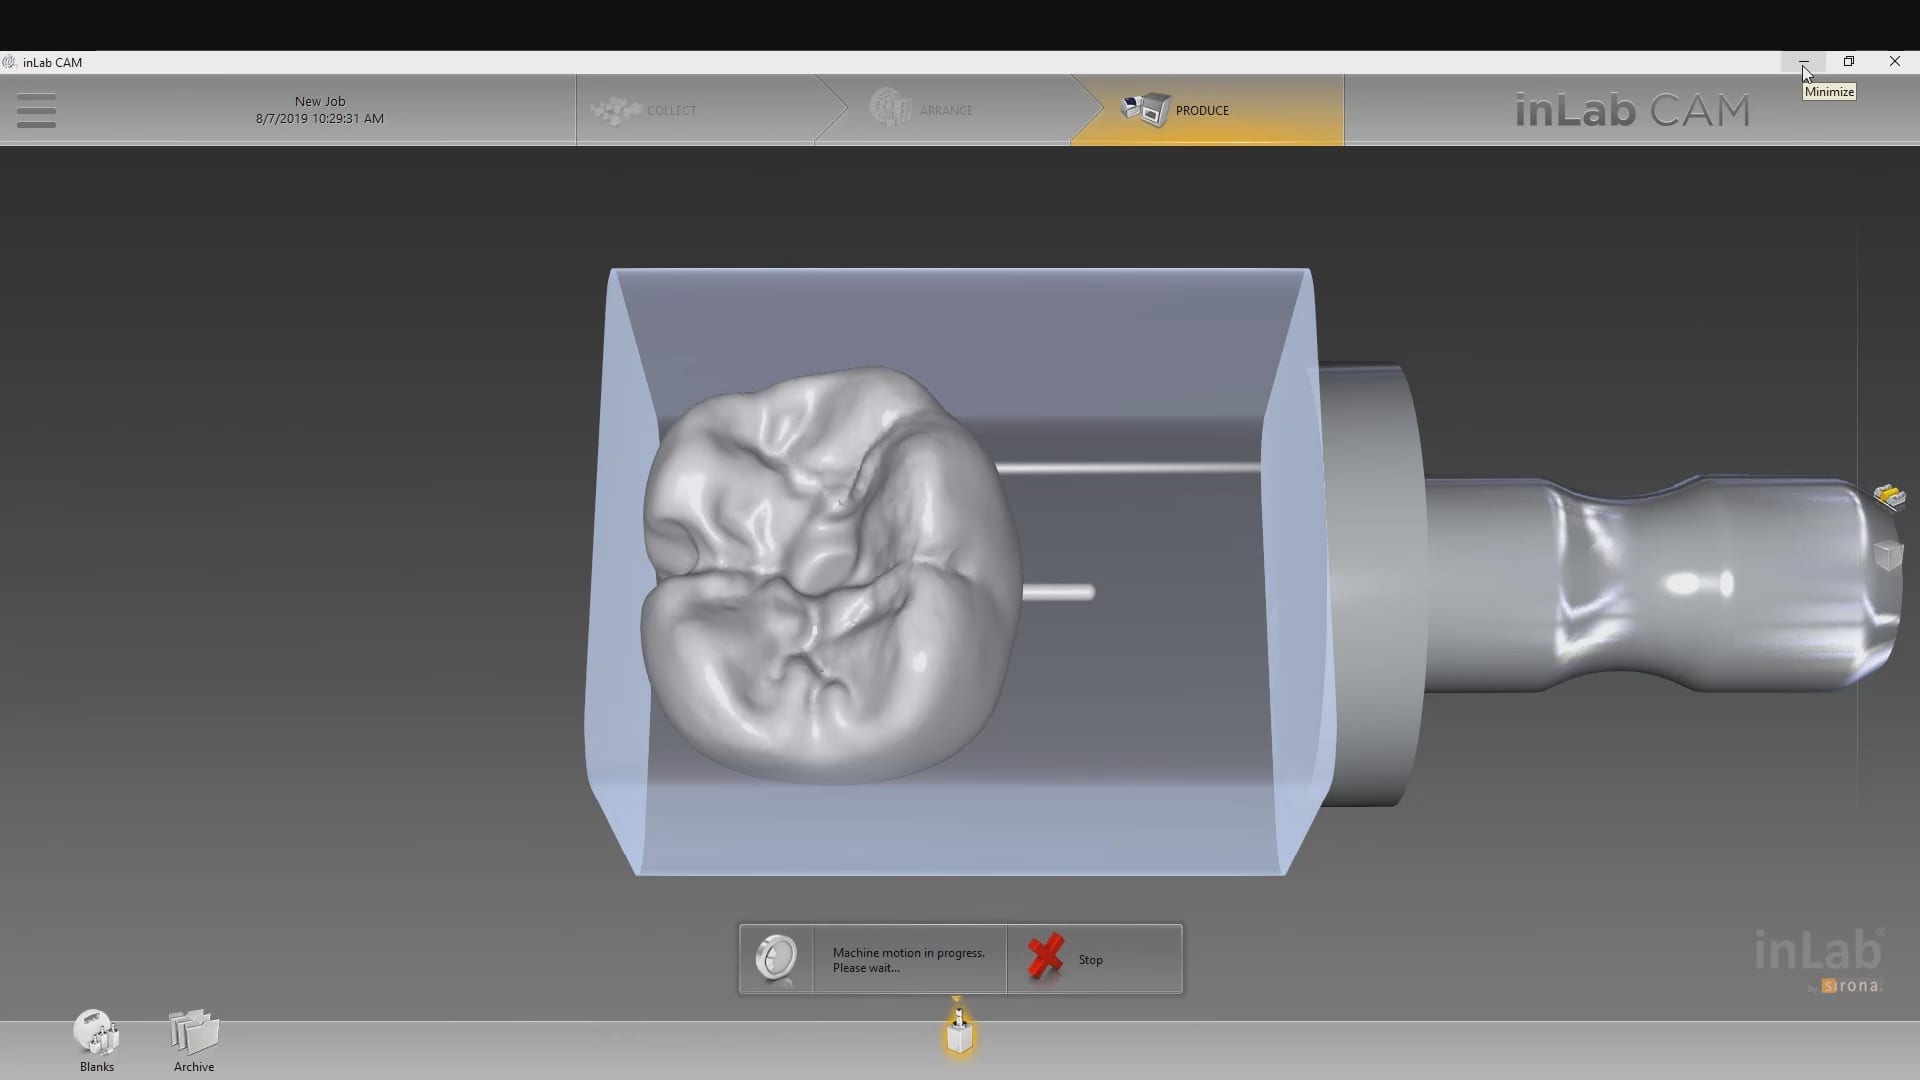
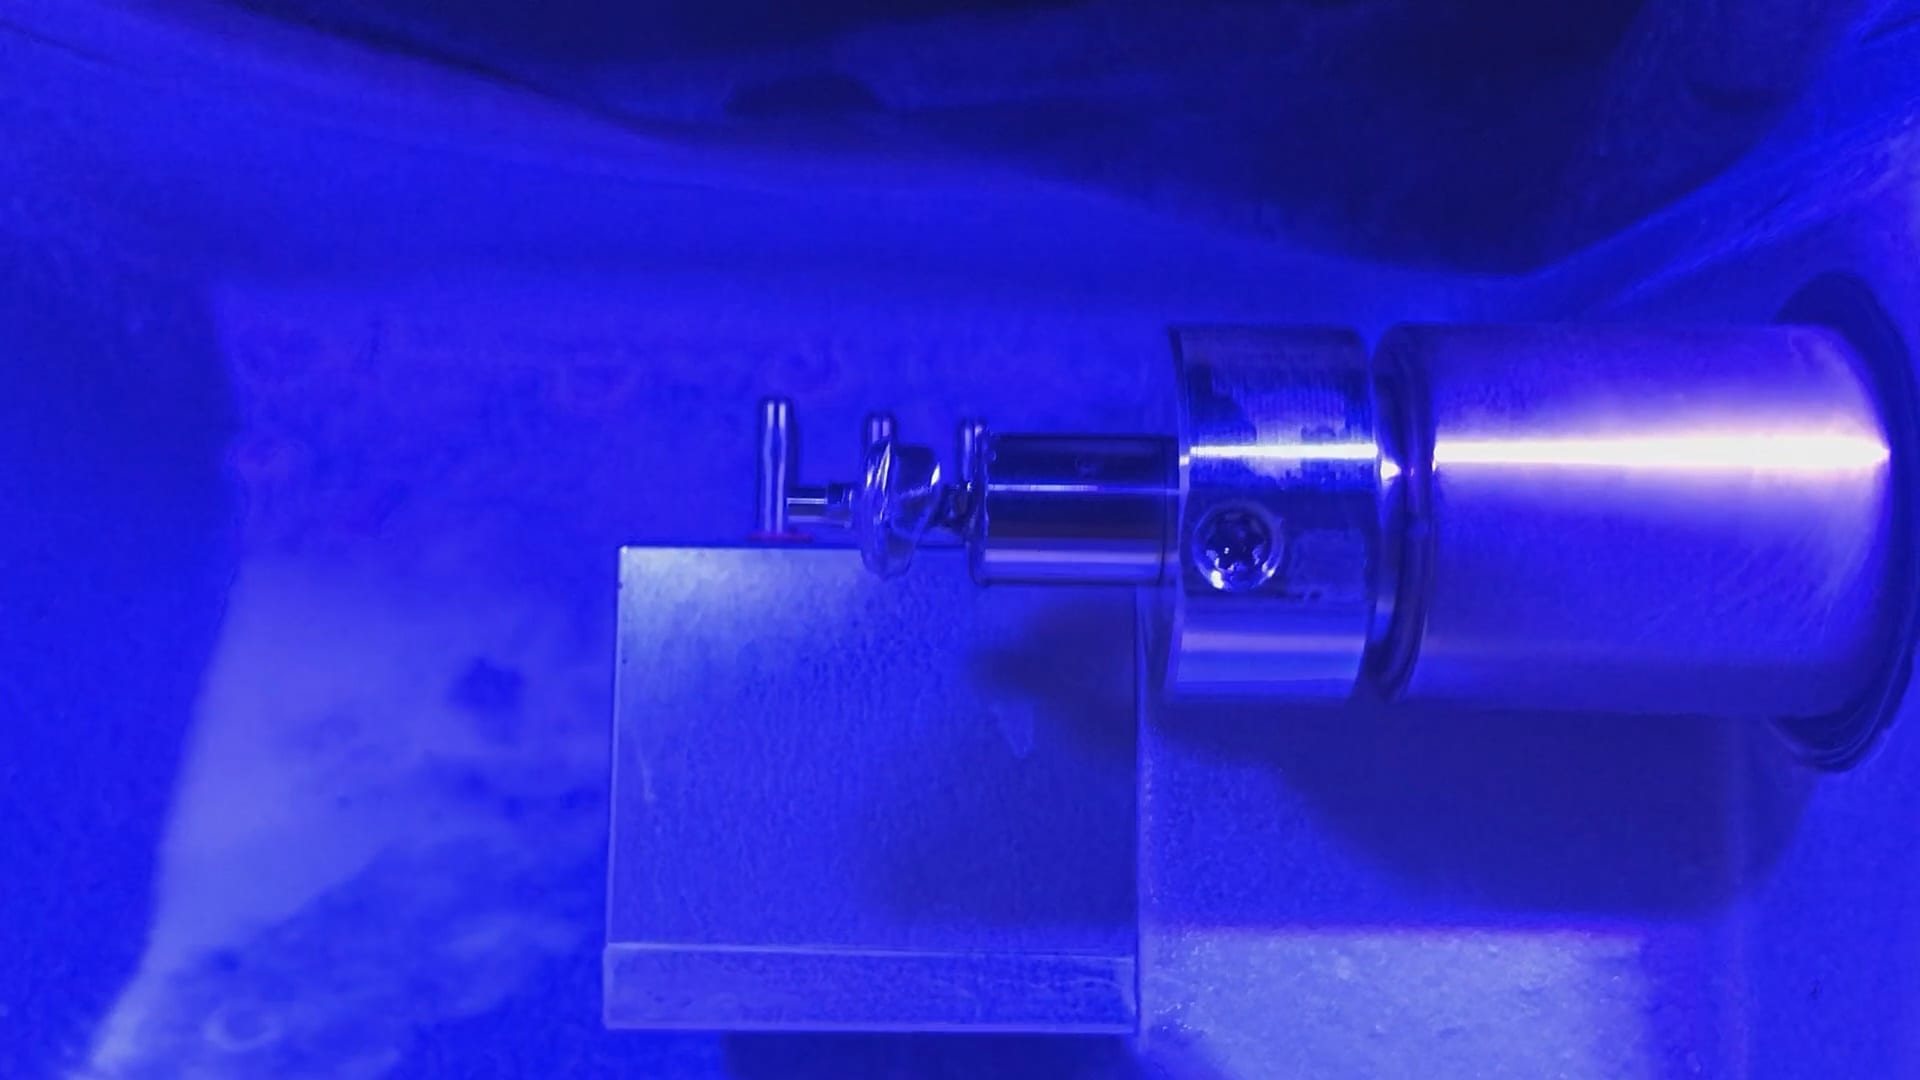
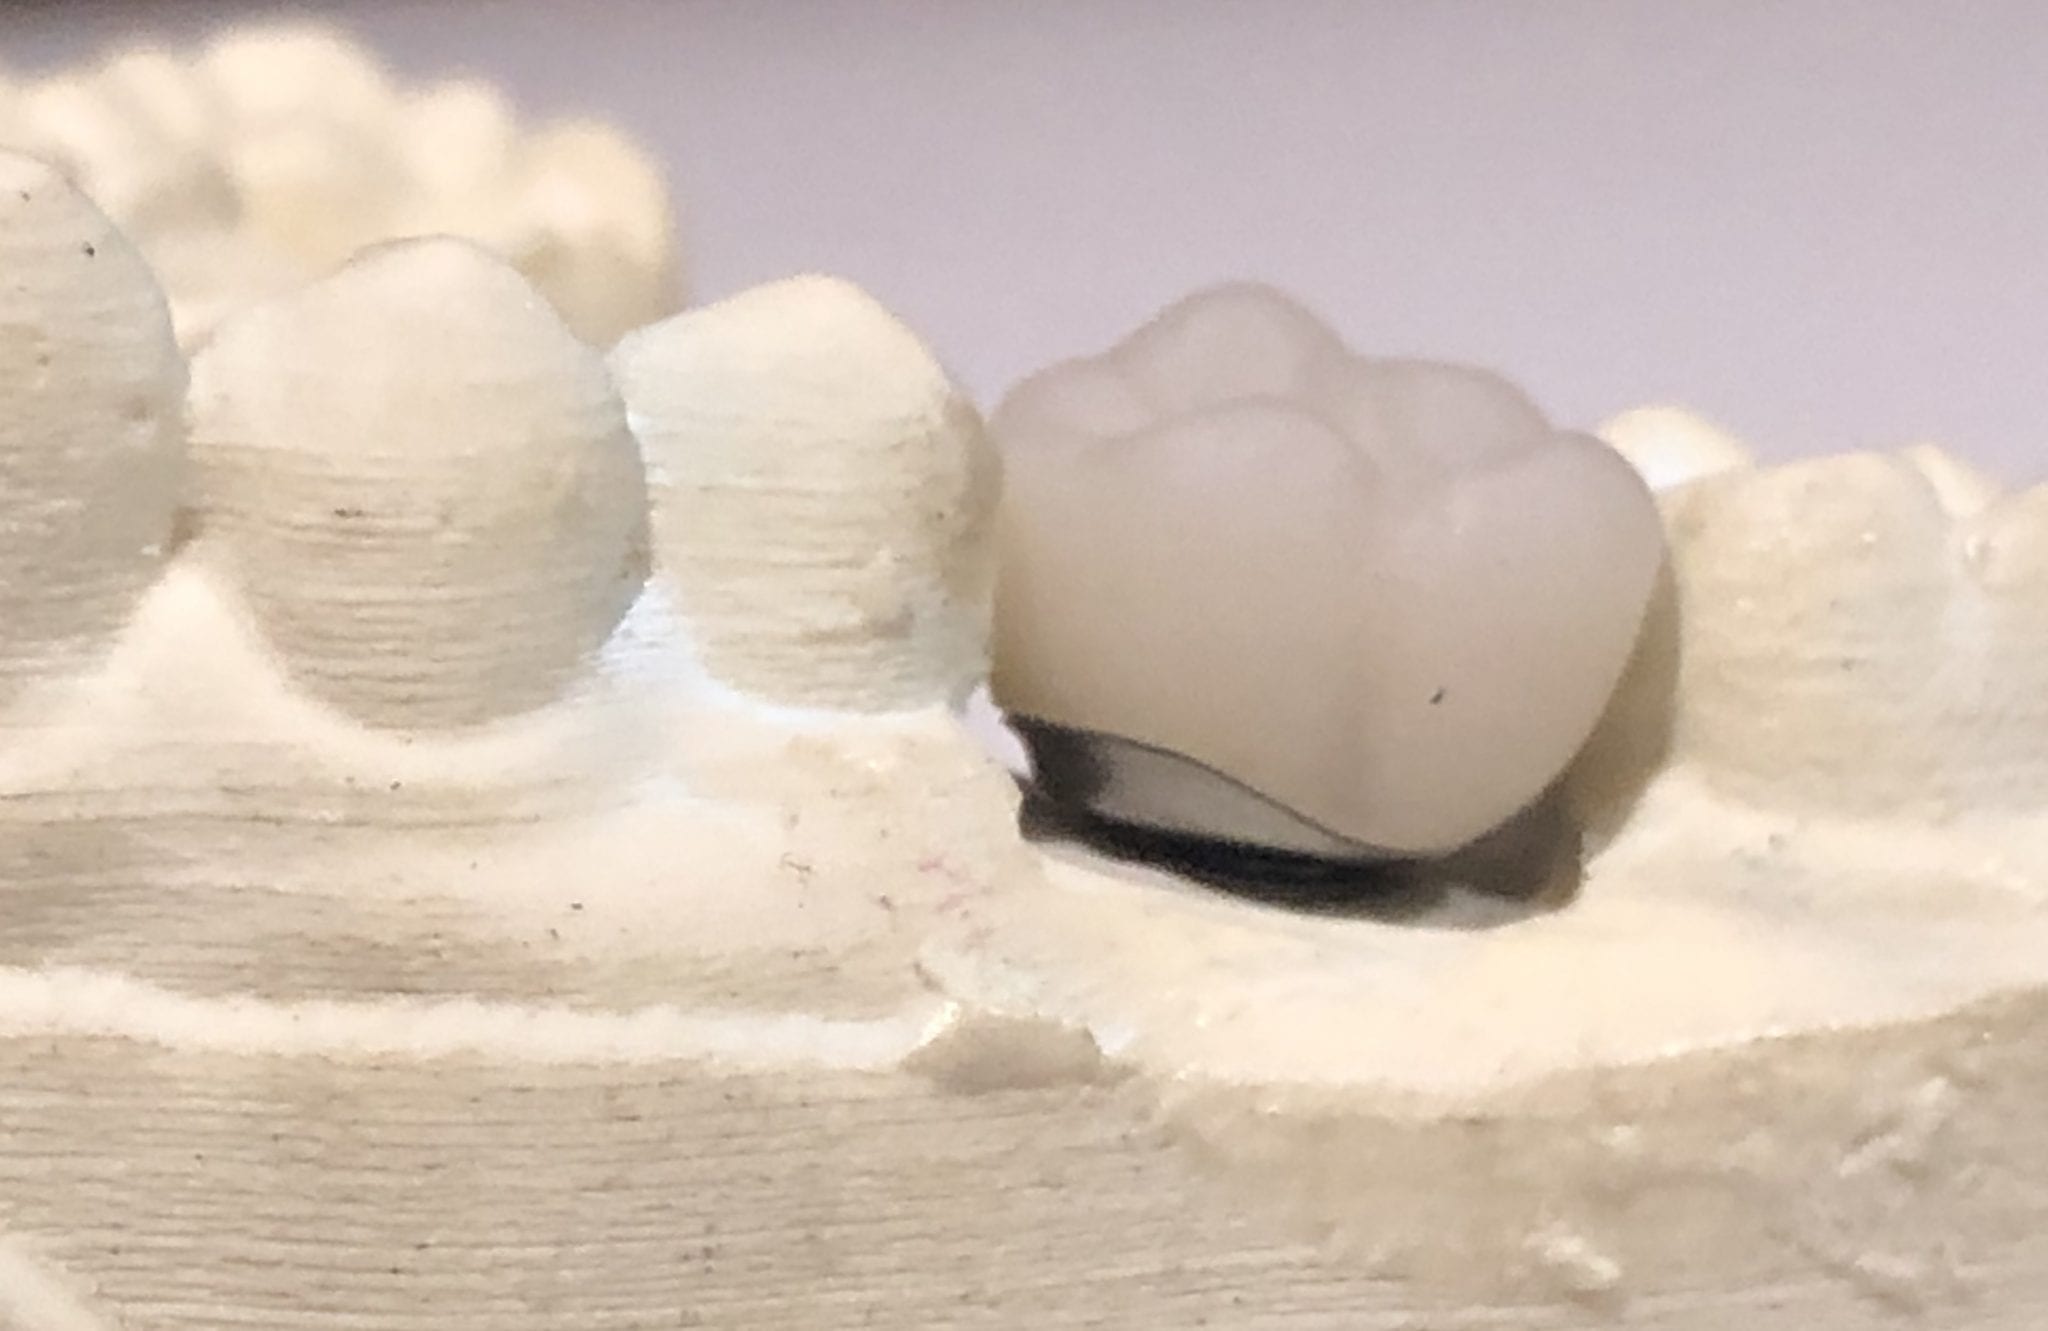
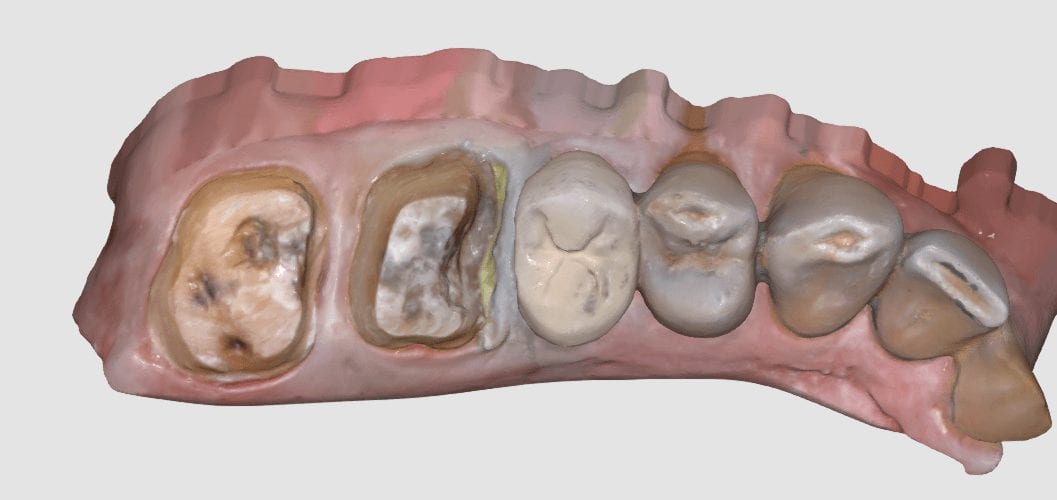
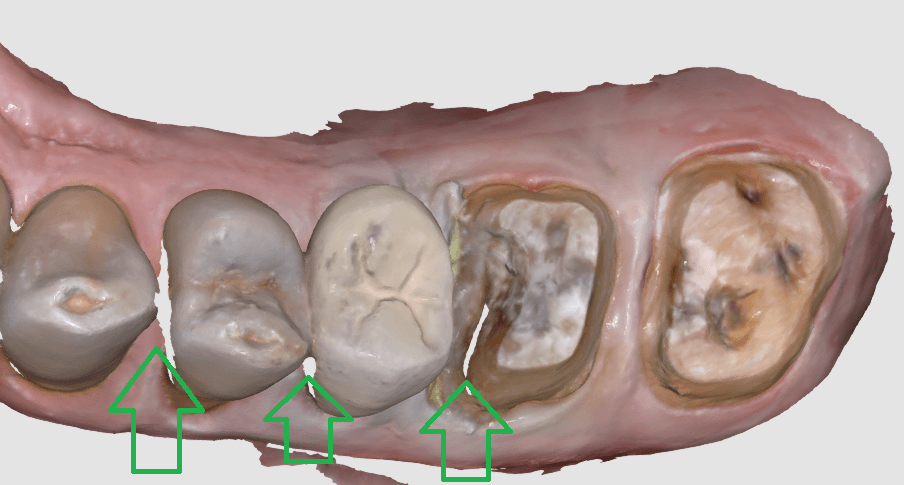
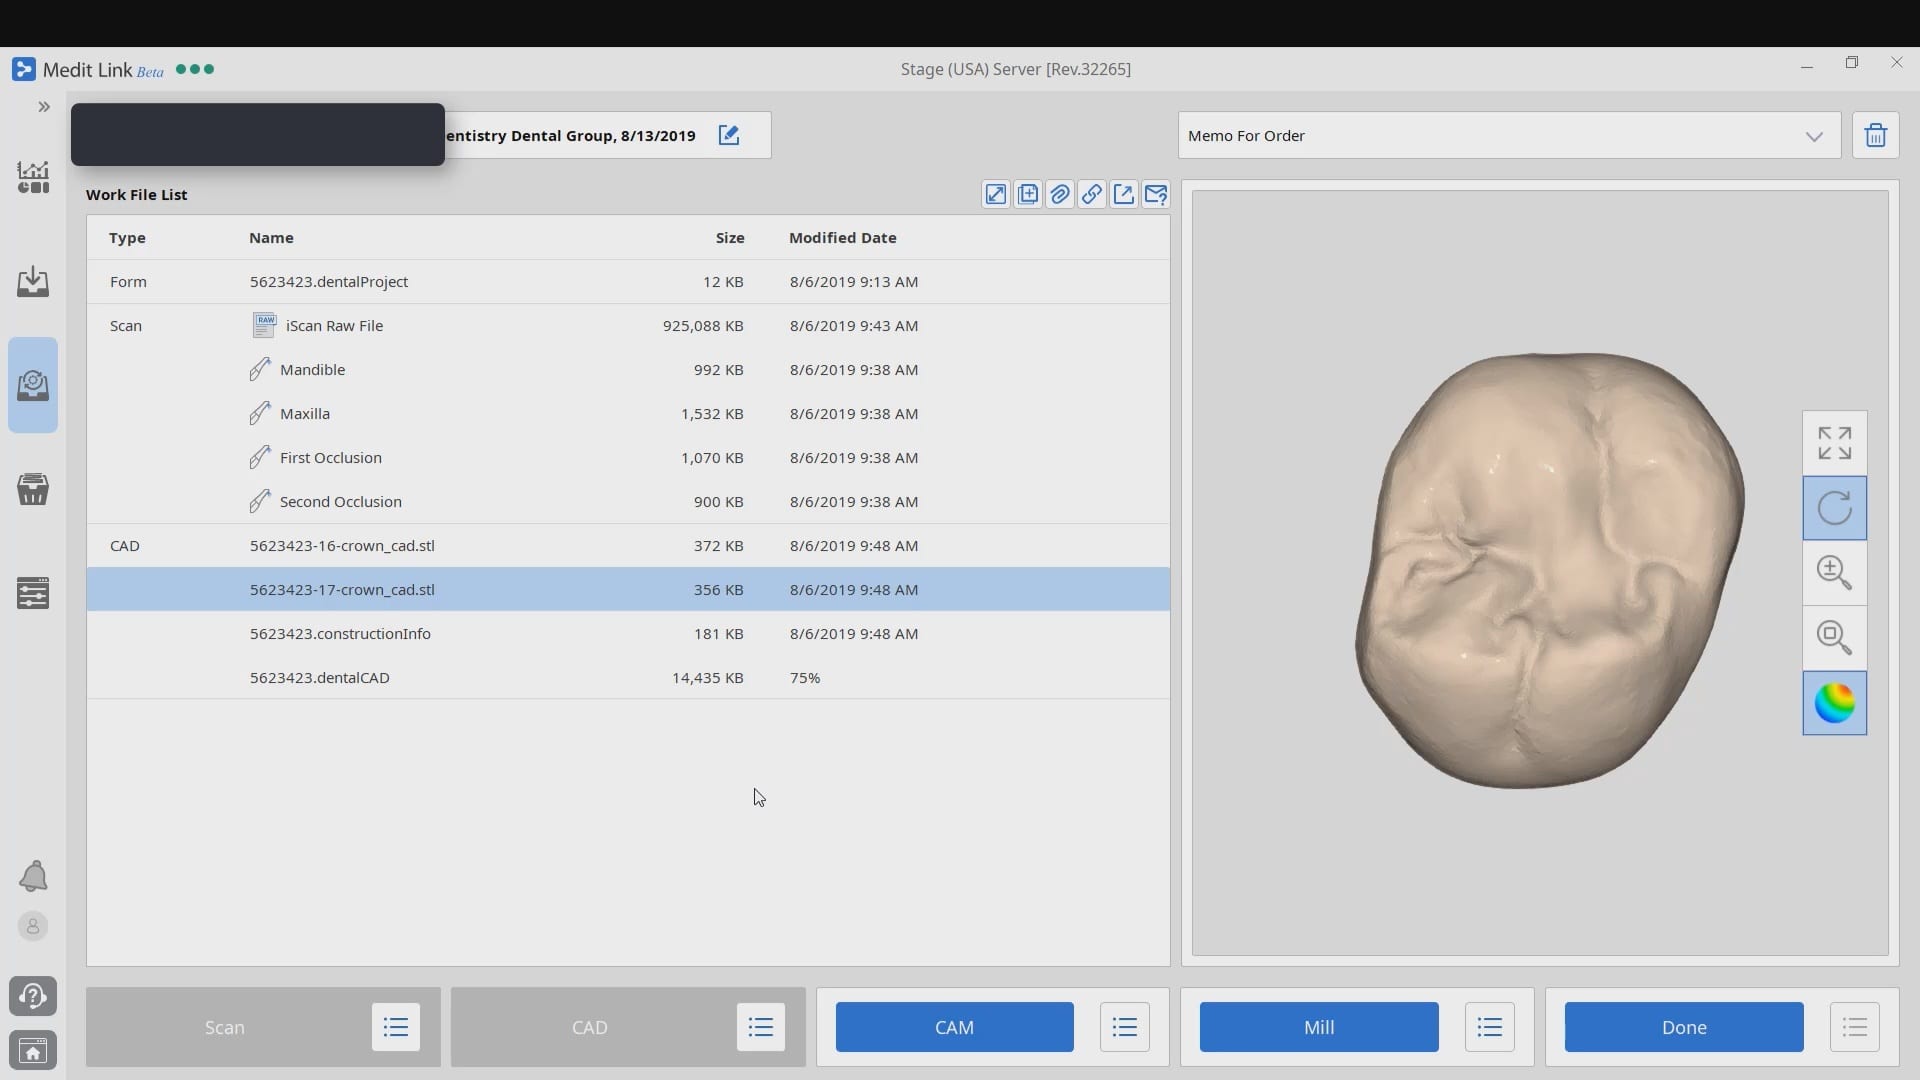
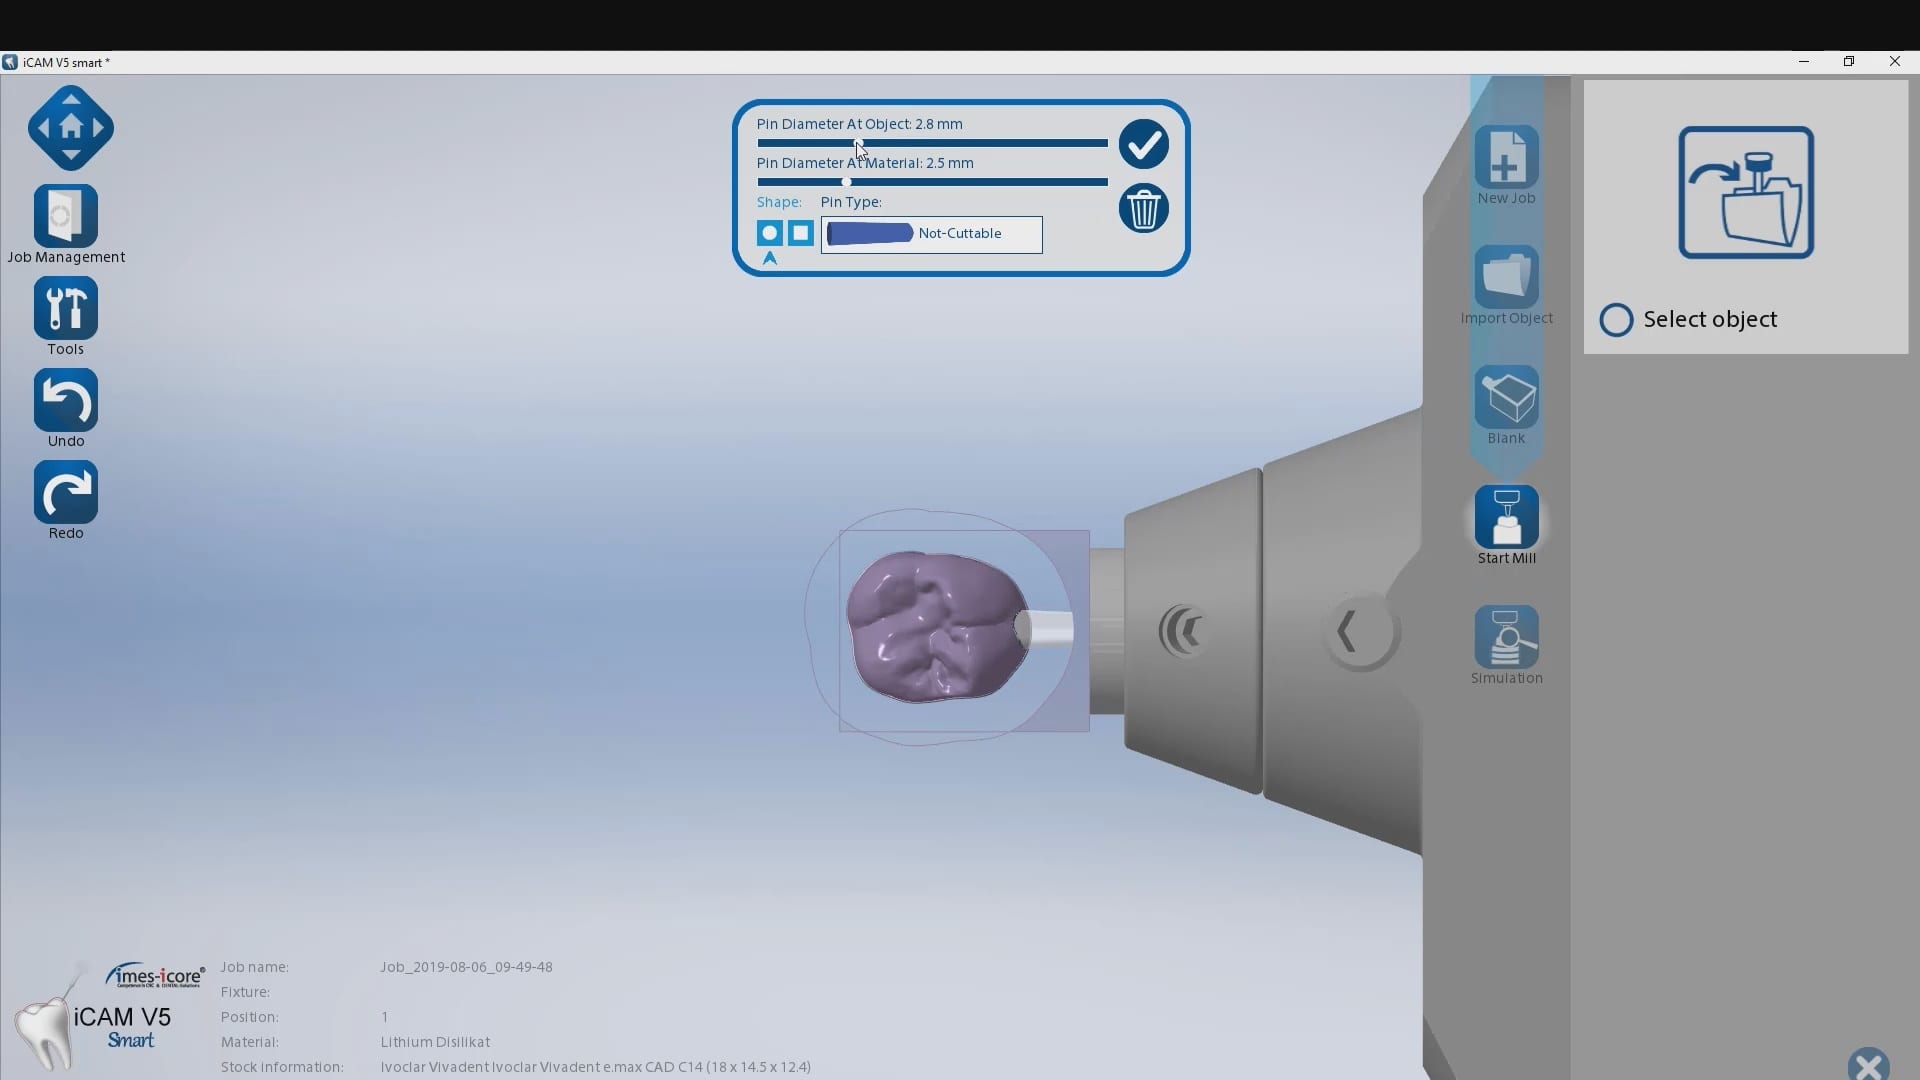
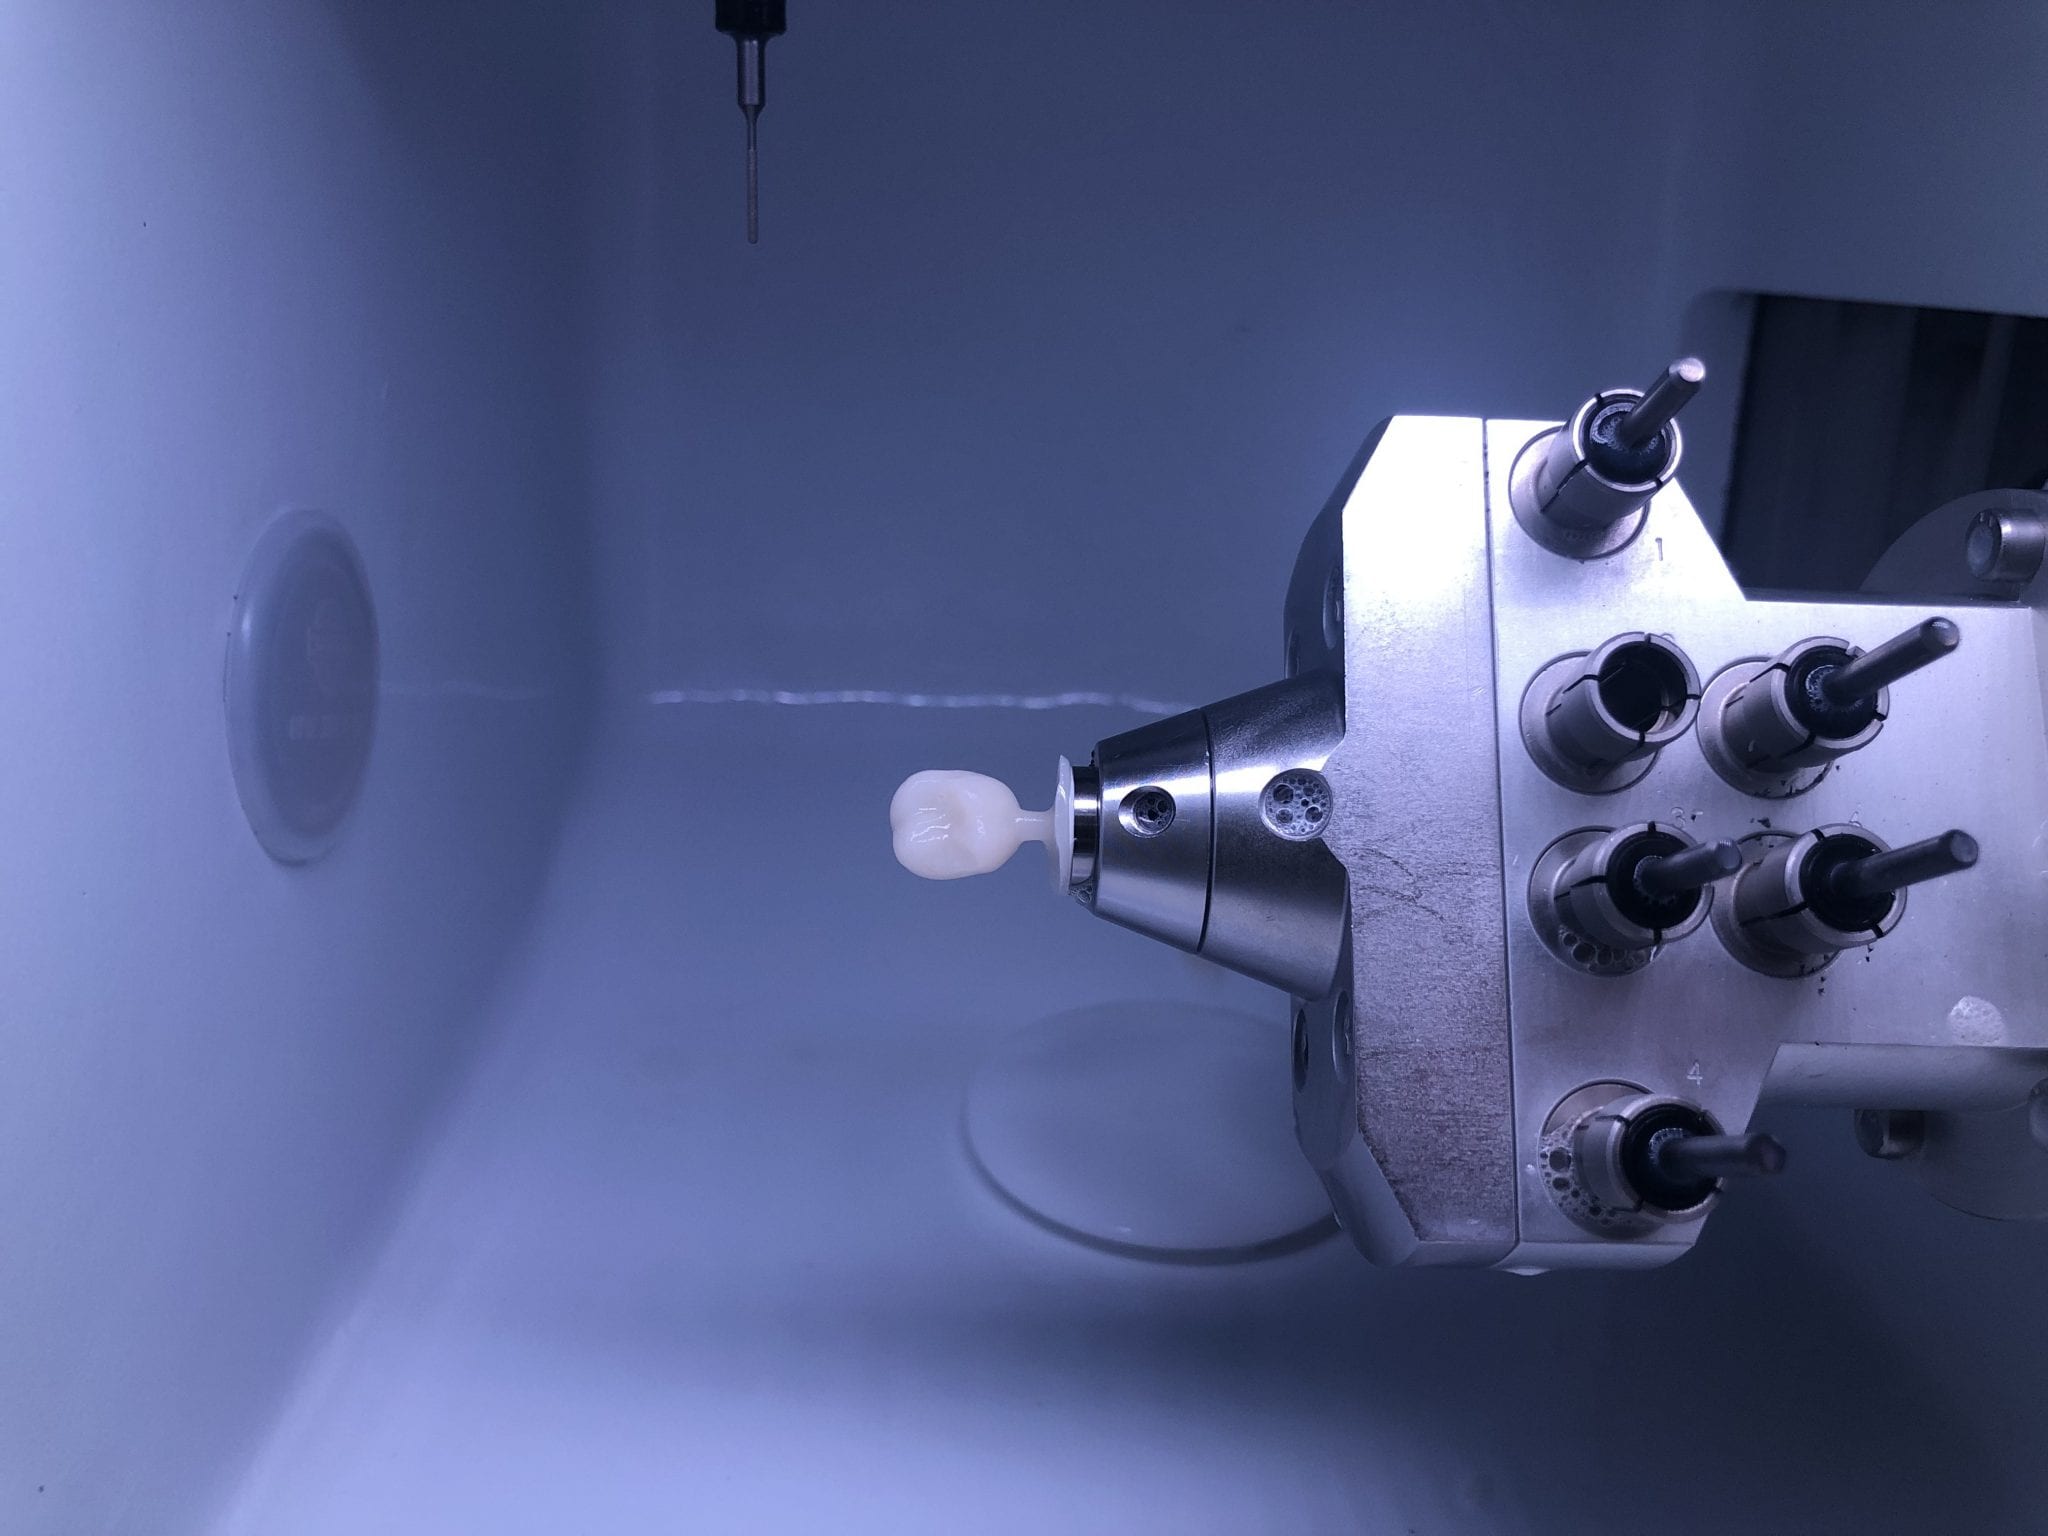
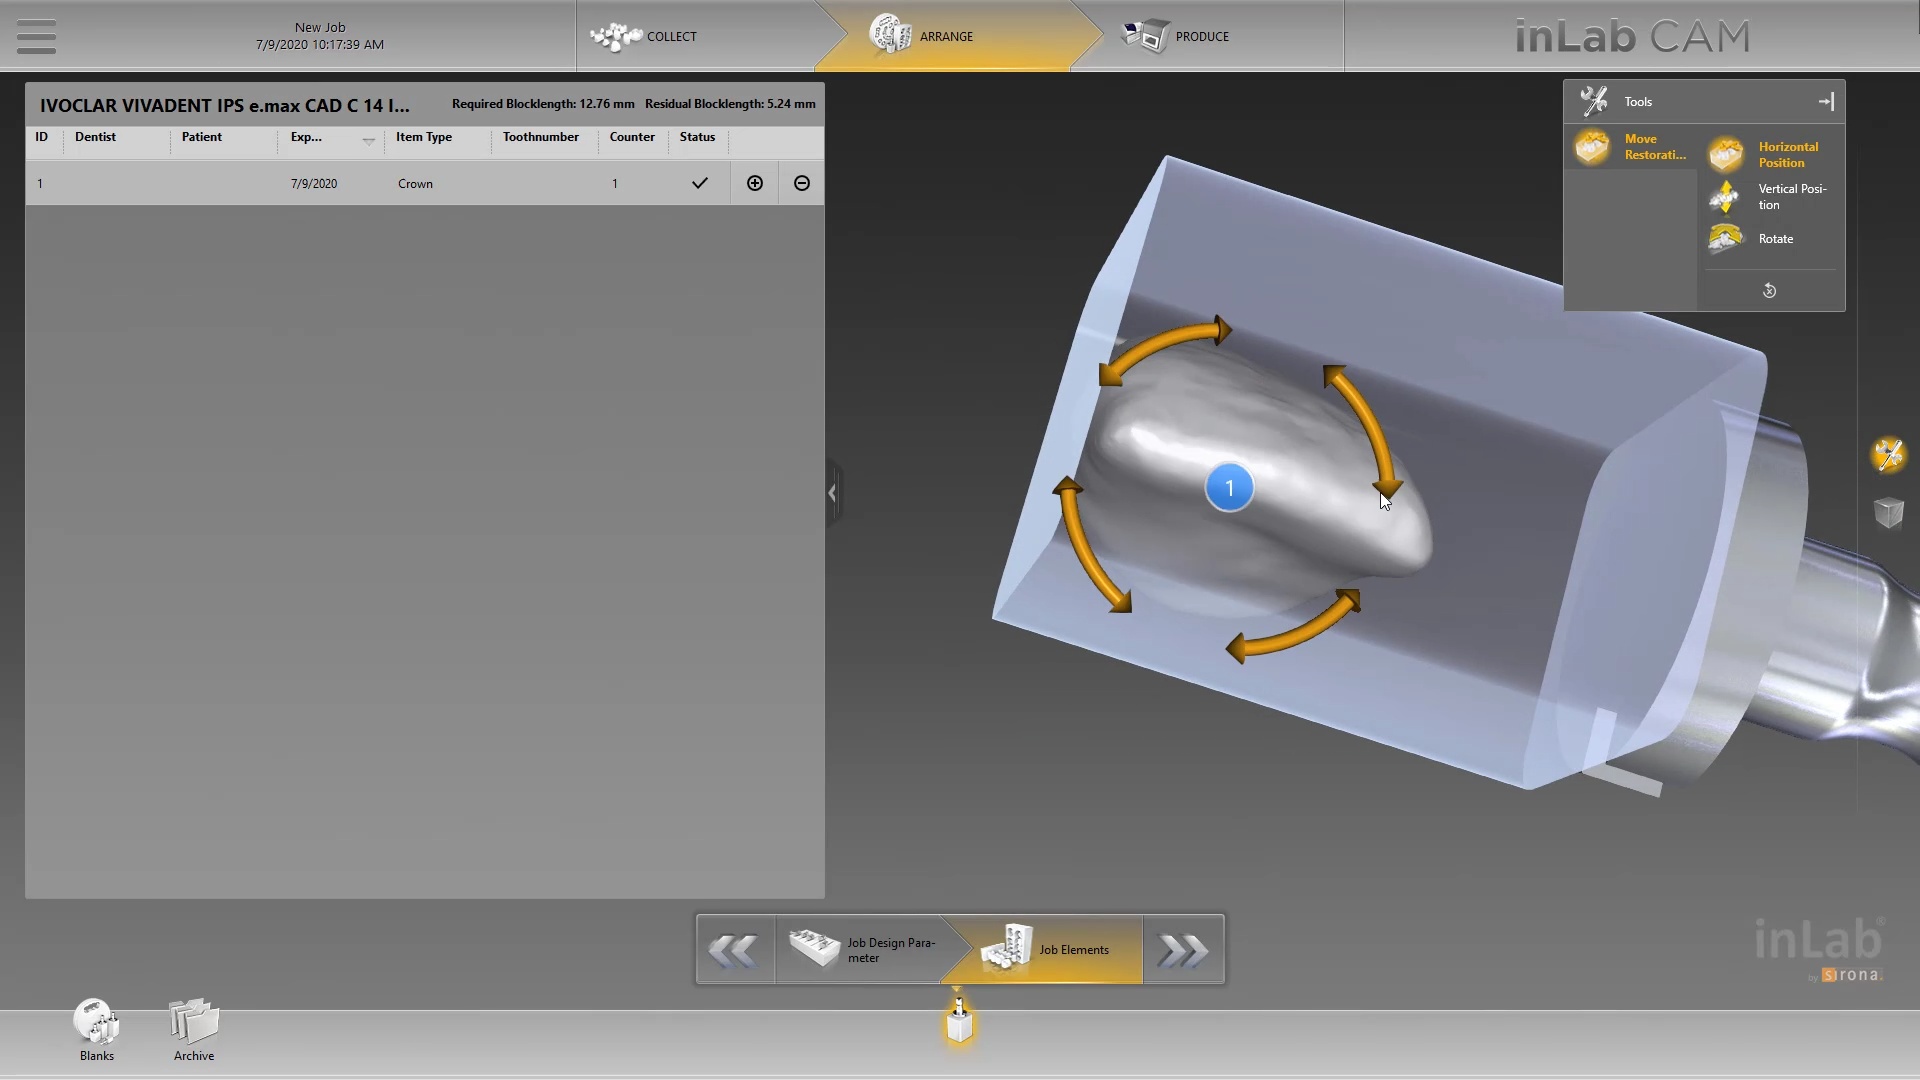
Once processed, you can then modify the tissue digitally and gain access to the tibase margins.  You can print the model if you want and manufacture the restoration. In this particular case, we took the design to the CEREC mcxl inlab cam, nested it, and milled it out to demonstrate how we can image with one device from one manufacturer and fabricate a restoration by another company’s manufacturing machine.  But the single greatest benefit is that you can place the sprue wherever you want.

IMPORTANT NOTE: The Tibase that you use MUST be wider than the drill milling the intaglio and the sprue must be thick enough to handle the milling process.

video
play-rounded-fill
image tibase in medit i500 and mill with mcxl


Once you understand how the digital workflow goes, you can image with one device, design in another, and then either print or manufacture with yet another device. Here we mill a sectional stent with the cerec that was designed in Blueskybio plan, although printing makes more sense because it is less wear and tear on your drills

PRODUCTS USED IN THIS CASE:

Posted on Leave a comment

Milling a Bridge with Cerec mcxl (and imes icore coritec and z4 by VHF) from same scan and design

In Digital Dentistry, once you acquire your models accurately, the CAD software doesn’t care where and how you capture them.  Once you are done with the design, the cam and the milling machine have no clue what scanner you used.

here we take an intra-oral scan with the medit i500 and design in exocad and send it to 2 different milling machines. One is the CEREC MCXL and the other is the imes icore coritec one.

video
play-rounded-fill
image with medit i500, desgin in exocad, and mill to cerec mcxl or any other milling machine

we even milled the bridge with the z4 milling machine by vhf just to show the concept works


video
play-rounded-fill
Milling the bridge with the z4 by VHF


video
play-rounded-fill
baked but unglazed amber mill


Please Note: This page is from dentalcadcamshop.com: 13.03.2020

When it comes to single visit dentistry (procedures in under 90 minutes), CEREC is tough to beat. From the integrated camera, CAD software and mill, CEREC is the most streamlined technology to serve patients in one visit.

Nevertheless, increasingly doctors are expanding their range of indications with CAD/CAM technologies and sometimes we simply want to combine CEREC with other equipment and software manufacturers. But wait, isn’t CEREC a closed system? Yes and no. While nobody would accuse CEREC of being a completely open system, it is possible to export .STL files of CEREC scans which gives us some flexibility to bring CEREC scans into other programs.

But today we are not focusing on exporting CEREC scans, but rather:

1) How can we bring scans from other cameras into CEREC?

Example: I own a 3rd Party Camera and I want to import those scans into CEREC for making crowns, etc.

2) How can we use CEREC to mill CAD objects made from 3rd Party Software?

Example: I own a 3rd Party CAD Software and want to import those into CEREC for milling.

But wait, I thought no 3rd Party files (scans or CAD designs) may be imported into CEREC. How, then, can we unlock the system? The missing piece to the puzzle is the inLab Software! With inLab Software, the CEREC system can be opened up for all kinds of interesting workflows. Here are two workflows CEREC owners constantly ask us about:

 1) I own a 3rd Party Camera – How do I mill from my MC XL?

2) I own a 3rd Party CAD Software (e.g. exocad) and I want to mill (e.g. crowns) designed with 3rd Party software and mill them with my MC XL


Please note carefully the Requirements listed above!

–  If you want to import a Scan .STL… You will need the inLab SW Interfaces Module, inLab CAD Software (18.0 and above) andthe inLab CAM Software (18.0 and above).

–  If you want to import CAD .STL designs for milling… You only need inLab CAM Software (18.0 and above).

–  In case you never owned any inLab Software before, or your copy of inLab Software is below 4.X, you will additionally need to order the License Stick (SKU: 6364785) and install the License Stick on the PC or workstation on which you are using the inLab Software (CAD or CAM). Please note this is NOT the same License Stick as you have on your CEREC AC unit!

–  In no case can the inLab Software mill on the CEREC MC!

Still have questions? No problem, we are here with answers: Contact us

Good luck everyone and Happy Milling!

Import Scan .STL

P

V 18.0

Shop inLab SW Interface Module

Shop inLab CAD SW 18.0

Shop inLab CAM SW 18.0

Shop inLab License Stick


(Save 15%)

P

V 19.0

Shop inLab Interface Module

Shop inLab CAD SW 19.0

Shop inLab CAM SW 19.0

Shop inLab License Stick


(Save 15%)


Import CAD .STL

P

V 18.0

Shop inLab CAM SW 18.0

Shop inLab License Stick


(Save 15%)

P

V 19.0

Shop inLab CAM SW 19.0

Shop inLab License Stick


(Save 15%)

Posted on Leave a comment

Instant Designs In Copy Mode and Cement Spacer Settings

In this particular case, we are restoring a lower left molar with a full coverage crown. The pre-existing condition has multiple fracture lines and the patient currently wears a retainer. The pre-op optical impression is taken while the patient is reaching anesthesia. Once enough reduction has been achieved, the preparation is captured and an immediate proposal is rendered that replicates the pre-op condition perfectly.

Note how the settings for the start of the adhesive gap influence the cement line that you see on the post-op bitewing after immediate delivery, even though it was milled with the CEREC MCXL.

copy mode- instant proposal
play-rounded-fill

copy mode- instant proposal

Posted on Leave a comment

Three Unit Bridge and A Single Unit Veneer Milled with 40 mm Emax Block

three unit bridge and single unit vaneer milled

This 4 unit case was imaged in Medit i500 and designed in exocad. The final restoration was taken to CEREC inlab cam. When the construction file is imported into cam, it contains data such as the margin line which is important for the milling machine to know for its tool path calculations.

In this particular situation, the construction file dictated the position of the restoration in the block which would have not allowed for proper milling. Instead of loading the construction file, we imported the stl design, redrew the margins really quickly and were able to mill the two separate (4 unit) case out of a single emax block.

video
play-rounded-fill
pros and cons of construction line delineating margin lines

The milled restorations were then separated and finished free-hand

video
play-rounded-fill
4 units milled out of a 40 mm block

try in and deliver of 3 unit bridge and single unit veneer after extraction of right central incisor

try in and delivery of a 3 unit bridge and a single unit veneer
play-rounded-fill

try in and delivery of a 3 unit bridge and a single unit veneer

Posted on Leave a comment

Anterior Copy Crown With Medit i500 Direct Import Into CAD for Design and Mill with CEREC MCXL and CORiTEC ONE

medit i500 direc timport into cad for design and mill with cerec mcxl vs coritec one

In this article, we feature an upper left lateral crown that needed to be replaced due to recurrent decay.  While the patient was getting numb, we defined the job description in the Medit i500 software and imaged the pre-existing crown, the opposing and the bite.  We digitally cropped out the tooth to be prepared and proceeded with crown removal. Once the margins were refined and the tissue was displaced, we imaged the preparation in HD mode and processed the case.

Crown Replacement Due To Recurrent Decay with Medit i500
play-rounded-fill

Once the digital models were rendered, we launched the integrated CAD software that automatically imported the pre-op, the opposing, the prep model, and the bite. Their relationship is preserved in the CAD software and no modifications were necessary.  You have two ways to copy the pre-op; one way is to program the CAD software so it replicates the pre-op perfectly while the other gives you a raw proposal that you can then choose to adapt to pre-existing situation.

video
play-rounded-fill
Direct Import of Models into CAD Software for Design and Mill

Once the case is designed in the CAD software, you can then take it to any CAM and Milling Machine to produce a restoration. Here we milled an emax restoration with the CEREC MCXL and the imes icore CORiTEC ONE at the same time so we can compare the final results.  The CEREC milling machine produced a restoration faster by about 90 seconds but the final results of the margins by the CORiTEC Machine was far superior.  Also, the CAM software, Millbox in this situation, allows us to choose a third drill that is 0.6 mm in diameter.  This increases milling time but results in less overmilling than the 1.2 mm burrs that milll the intaglio of the CEREC Machine.


Nesting to Mill To imes icore CORiTEC One
play-rounded-fill


Hacked Margins by CEREC
play-rounded-fill

Immediate post op 

video
play-rounded-fill
Posted on Leave a comment

Custom Abutment And Crown Designs Milled With Multiple Milling Machines

medit link to CAD to CAM

With the Meditlink software you can design a case and then export the designs and take them to any milling machine of your choice.  In this demonstration, we use the CORiTEC ONE to mill out the metal abutment in 45 minutes. This procedure is not intended to be a single appointment visit so timing is not critical and you don’t place undue wear and tear on the milling machine.

The crowns were milled with two different milling machines.  A Celtra Duo block was used and milled with the CEREC MCXL and retrofitted to the abutment to verify the fit and accuracy.  The same crown stl was milled out of Vita material in the imes icore machine.  The whole point of the demonstration is that you can take scans from any intra-oral scan, take it to CAD software (in this case exocad) and then export the case and take it to any printer or milling machine of your choice.  You must make sure critical information is accurately transferred from your CAD software to your CAM software, which is generally the construction / project file that accompanies the STL files of the prosthetic components

Crown Nested and Milled with CEREC MCXL
play-rounded-fill
Design Custom Abutment And Crown

The same crown was milled out of Vita’s Suprinity material in 20 minutes with the imes-icore CORiTEC ONE.  Take note of the internal adaptation of the metal abutment and the restoration and how when it is flipped upside down, the restoration does not fall out easily!

play-rounded-fill
Posted on Leave a comment

A Pair Of Molar Crowns With Medit i500, exocad Designs, And Milled With CEREC MCXL And CORiTEC ONE

two unit molar multiple charise restorations in single visit

For our advanced users, we demonstrate how to plan and manage a two unit molar case so they can deliver multiple chairside restorations in a single visit.  There are numerous short-cuts to this treatment protocol and we present them in great detail during our courses.  The limiting factor for most doctors is that they have a single milling machine and we show our users how to balance prep and mill time so that they can complete 2 units in less than 90 minutes.

In this case however, we present two restorations that were prepared and delivered at the same time.  The sequence of steps are:

  • Anesthetize the upper right first and second molar
  • While the patient is getting numb, image the arch to be prepped, image the opposing, and image the bite WITHOUT the teeth being prepared
  • Reduce the occlusal height of your preparation but do not image them
  • Check your reduction visually or with the camera function of the Medit i500
  • Reduce more tooth structure until you have the proper clearance for material strength
  • Finish refining your preparations, displace the tissue, reach hemostasis, and then crop out the area of the model that you have altered
  • Image the two preps into that equation.  Most people turn on the HD mode for capturing the margins
  • For distal extension cases, we recommend that you take the second bite.  While imaging the second bite (NOT the left vs right bite), if the occlusal model turns green, it is a clear Indication that the vertical has no changed from the pre-op to the prep situation and that you will have minimal post-op adjustments to make.  If the second buccal bite does not register in green, it should serve as a warning to you that the vertical dimension has changed
Managing a Pair of Molars
play-rounded-fill
Pre-Existing Condition

As advanced users, you quickly recognize what areas in the model need to be closed either with imaging or with the “close hole” options during the processing step of the Meditlink software.  If you are familiar with exocad or other CAD software programs you can just ignore these areas as they do not have any clinical significance whatsoever.

video
play-rounded-fill

Once the case is designed you can mill them with your milling machine of choice. The testing of materials, fit, and milling machines are a constant at CAD-Ray.com so we milled the first molar with emax material and the MCXL and the second molar, a Celtra Duo material, was milled with the Imes Icore CORiTEC Once

video
play-rounded-fill

An immediate post-op bitewing X-ray was taken to verify fit and to make sure that there was no excess resin cement left behind in the interproximal area.  The premolar mesial to the working field also needs to be replaced and will be in the near future