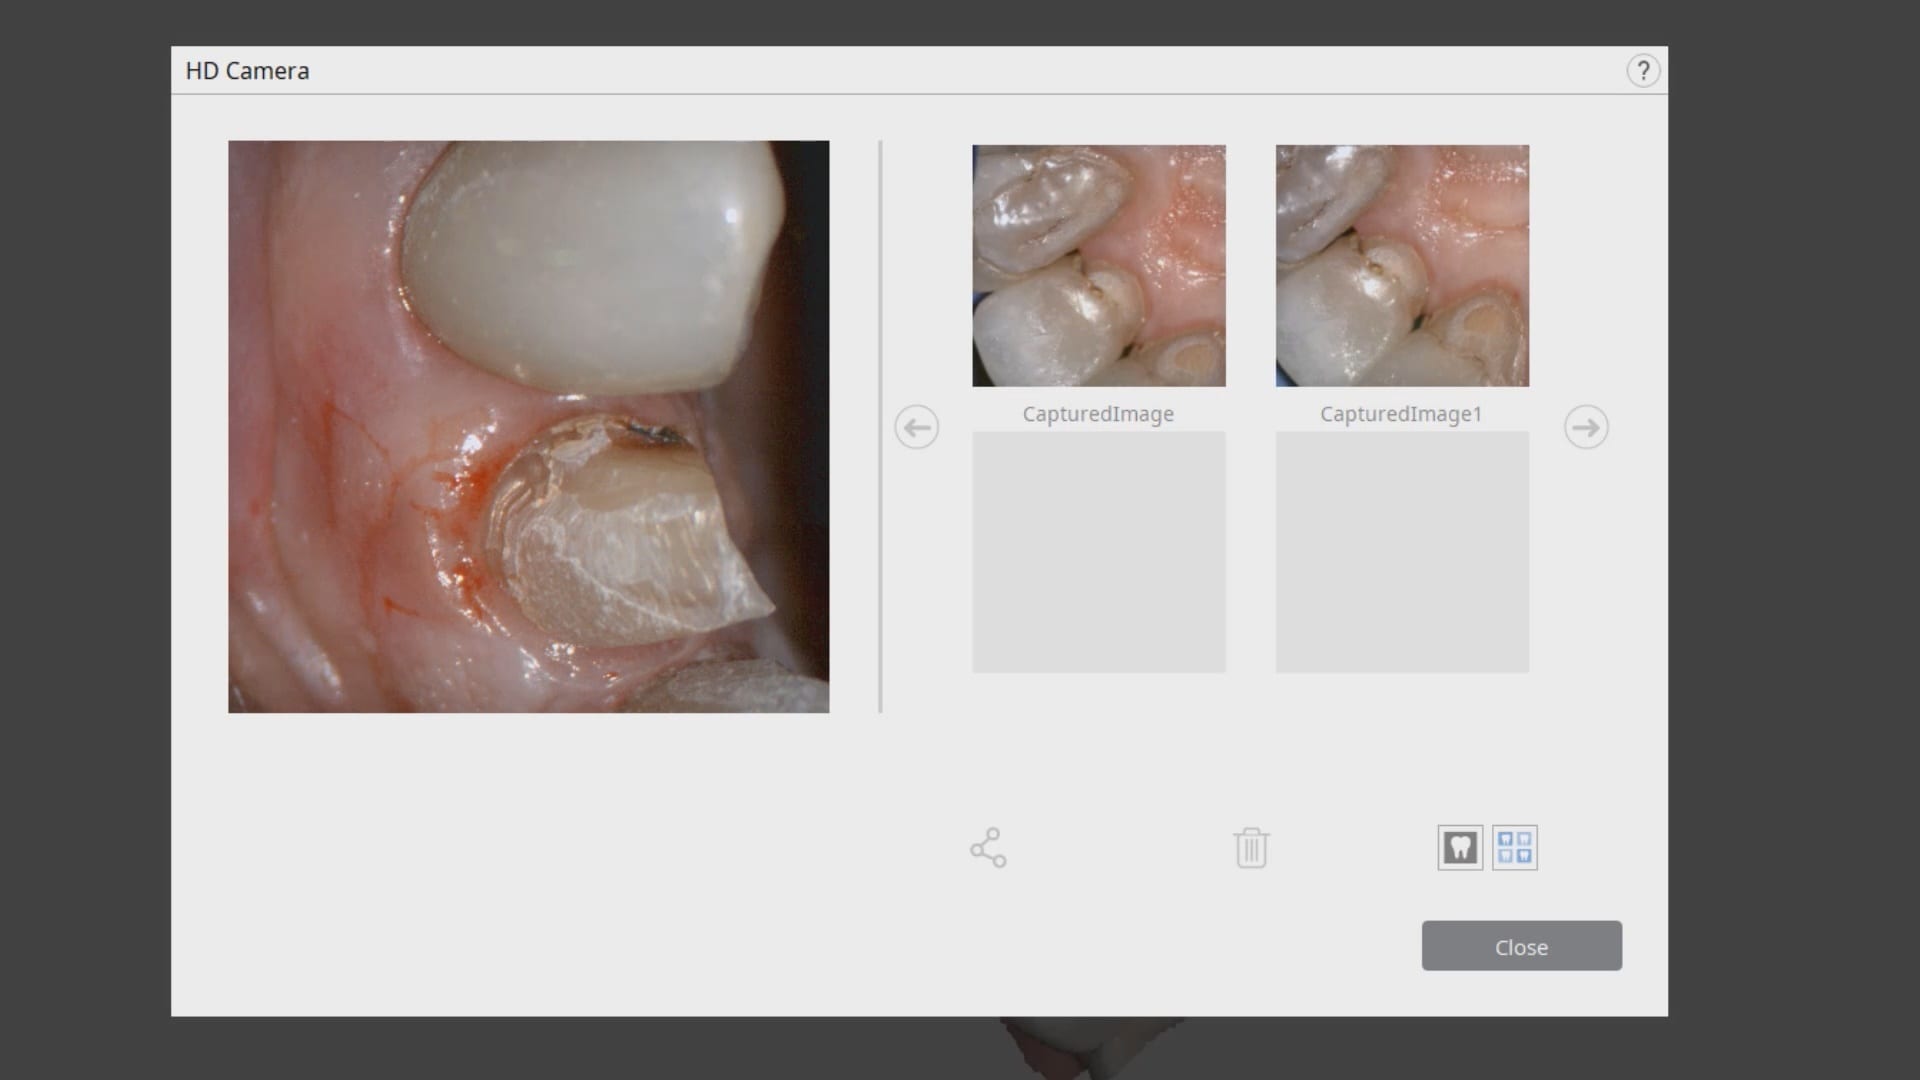
Fantastic folks. I'm an orthodontist and opened an office in 2020. They helped me find the perfect intraoral scanner to suit my needs. Not too much or too little, and a great price. Every time we have a technical question, a sharp human answers the p...read moreFantastic folks. I'm an orthodontist and opened an office in 2020. They helped me find the perfect intraoral scanner to suit my needs. Not too much or too little, and a great price. Every time we have a technical question, a sharp human answers the phone, troubleshoots, and remotes in when needed-- navigating MS updates and graphics card issues. My i500 died this week. They overnighted me a trade-in at a totally reasonable price, and even shipped me a laptop to drive the i600 while I got a new one (they knew my 2020 laptop wouldn't keep up!). CAD-Ray has consistently hit it out of the park.read less - 4/14/2025
Engy Hassan
Amazing customer service! Excellent on time feedback. Thank you Kaila - 12/08/2021
Benjamin Polan
A while ago I became interested in an intra oral scanner for my office especially for dental sleep medicine and TMJ appliances. I searched online for Medit and found cad ray. Laura from Cad-ray quickly responded and set up a zoom meeting so she could...read moreA while ago I became interested in an intra oral scanner for my office especially for dental sleep medicine and TMJ appliances. I searched online for Medit and found cad ray. Laura from Cad-ray quickly responded and set up a zoom meeting so she could demo the unit. Great job at helping me understand. She set up the financing and I got my unit. A few glitches with my internet speed and getting IT to help with my upload and download speeds and I was ready to go. Every time I had a question I texted Laura and almost like she was waiting for my call she responds. We it turned out my unit wasn't just right so she immediately responded we will replace you unit. Laura has been a joy to work with and the customer service given will only encourage me to do business with cad-ray again.
Benjamin Polan DMD, D,ABDSMread less - 8/27/2021
Great 1st lesson with Ryan on the Mediti700. We are ready to scan:) - 12/30/2022
Ryan Anardi
Just ordered my i700 yesterday and it ships today. Customer support has been amazing in answering all my questions completely. Looking forward to my delivery day like a kid at Christmas. - 11/03/2021
You guys are great! I have been a Cerec user for about a decade and wanted to expand my horizons. I bought the I700 and have just loved it. We don't do impressions any more, only scanning, even for the full arch. The customer service has been excelle...read moreYou guys are great! I have been a Cerec user for about a decade and wanted to expand my horizons. I bought the I700 and have just loved it. We don't do impressions any more, only scanning, even for the full arch. The customer service has been excellent, even though I haven't had any problems with the scanner. I really like the online learning modules, they have been awesome getting me up to speed with the scanner quickly. I am looking forward to some of the in person courses to maximize the usefulness of this scanner. -- Jeff Allred, DDS FAGD DABOI FAAIDread less - 9/28/2021
I’ve been using Medit 500 since spring of 2021 and really like it. The support system has been very good so far. I just called yesterday and spoke with Frank Deluca, he was very informative and helpful. - 12/07/2021
Cole Smith
These guys are great. My favorite part about them is they set you up for success with your products. A lot of dental companies will be happy to sell you big ticket tech item but don't have much to set you up for success. I bought the Medit i500 and t...read moreThese guys are great. My favorite part about them is they set you up for success with your products. A lot of dental companies will be happy to sell you big ticket tech item but don't have much to set you up for success. I bought the Medit i500 and they have tons of videos on how to get it working and working well for you in your office. If you need a much of hand holding they have that our if you are like me and like the do it yourself videos they have that. I am sure you can buy these products all over but it is there service that sets them apart. If to are looking to buy some dental tech use these guys!read less - 6/05/2020
Matt McReynolds
These guys are ALWAYS there to help if you get stuck. I’ve been happy with the mill (coritec one) and scanner (i500) I bought from them 2 years ago. I’d do business with them again. - 7/01/2021
K. Banani
Amazing customer service. I haven’t ever worked with a company where there is an issue, you can immediately get help and assistance and so far have not had an issue that CADRAY wasn’t able to fix. They made the process buy buying and maintaining a sc...read moreAmazing customer service. I haven’t ever worked with a company where there is an issue, you can immediately get help and assistance and so far have not had an issue that CADRAY wasn’t able to fix. They made the process buy buying and maintaining a scanner seamless. Highly recommend!read less - 2/23/2024
Peipei Yu
I purchased a Medit scanner in August and I am very happy with the scanner. I was trained on an Omnicam in dental school and used Omnicam for 4 years in my associateship. The speed and quality of the Medit scanner is comparable to a CEREC scanner but...read moreI purchased a Medit scanner in August and I am very happy with the scanner. I was trained on an Omnicam in dental school and used Omnicam for 4 years in my associateship. The speed and quality of the Medit scanner is comparable to a CEREC scanner but you can’t beat the price of the Medit! I would highly recommend this if you are a beginner or pro in digital dentistry!read less - 9/22/2020
Stephen S
Choosing an digital intraoral scanner these days can be quite a daunting task. When I reached out to CAD-Ray, as was recommended by many colleagues, I was connected to Frank DeLuca, and he made my decision-making process very simple. Upon receiving...read moreChoosing an digital intraoral scanner these days can be quite a daunting task. When I reached out to CAD-Ray, as was recommended by many colleagues, I was connected to Frank DeLuca, and he made my decision-making process very simple. Upon receiving my 3shape Trios 4 scanner, Frank and the entire tech support team/customer service were very helpful every step of the way. Frank makes himself available when he can in order to address all of the questions I have regarding the digital workflow. I highly recommend CAD-Ray. It will make your transition to digital scanning a positive experience.read less - 1/24/2023
Iggy “Iggy” Deleon
There’s a reason why all cardray reviews are 5 stars only. They have the best people on their team. Jesse is the best trainer and provides above and beyond support. I can’t count the number of times that he’s saved me in the clinic with his designs. ...read moreThere’s a reason why all cardray reviews are 5 stars only. They have the best people on their team. Jesse is the best trainer and provides above and beyond support. I can’t count the number of times that he’s saved me in the clinic with his designs. He’s truly a master at his craft and one of the best assets to the cad ray team!read less - 2/02/2023
Caleb King
Kaila Larson is the support specialist for our office and has been outstanding. She gets back to us quickly with any questions we have, and will log into the computer and fix issues so we don't even have to worry about them. She is extremely knowled...read moreKaila Larson is the support specialist for our office and has been outstanding. She gets back to us quickly with any questions we have, and will log into the computer and fix issues so we don't even have to worry about them. She is extremely knowledgeable about the MEDIT scanner and the supporting software. She responds to calls and texts or emails and will communicate with us in whatever way is most convenient for our office. She has saved us hours of time and headache by always being available to help.read less - 5/25/2022
Christopher Chin
This was my intro into intraoral scanning and I did research for quite awhile. The i500 and the team at Cad Ray are top notch. The company has done such a great job putting this scanner in the ranks of the premier ones. With constant updates it gets...read moreThis was my intro into intraoral scanning and I did research for quite awhile. The i500 and the team at Cad Ray are top notch. The company has done such a great job putting this scanner in the ranks of the premier ones. With constant updates it gets better and better (though I’m still behind on updates). My crowns have never been better. They drop right in with no models. I didn’t believe it but I’m loving digital dentistry. I can’t wait to go to the class after COVID calms down!read less - 6/16/2020
We have been using the scanner for a few weeks now. It’s been a blast to use and they have made it easy to learn with video tutorials. We have yet to go to the training, but we are excited to continue learning and expanding our digital dentistry. - 6/19/2020
Barton Davis
Every time I need support for my scanner, the Cad-Ray team is there to help. I recently had a question on how to manipulate a scan and export it back to Medit Scan. Damien logged in and helped me out. Problem solved in under five minutes. Awesome ser...read moreEvery time I need support for my scanner, the Cad-Ray team is there to help. I recently had a question on how to manipulate a scan and export it back to Medit Scan. Damien logged in and helped me out. Problem solved in under five minutes. Awesome service. Thanks Cad-Ray support team!read less - 3/04/2022
Richard Salvatore
I purchased a Medit Scanner from Cad Ray and the entire experience has been phenomenal. Their customer service is top notch and always accessible by text! I have FaceTimed Frank more than once during a hectic day to help me with my scanner. Thanks te...read moreI purchased a Medit Scanner from Cad Ray and the entire experience has been phenomenal. Their customer service is top notch and always accessible by text! I have FaceTimed Frank more than once during a hectic day to help me with my scanner. Thanks team!read less - 6/19/2020
Island Dental Lab
Just got my Medit IOS delivered last week and the service from Jon was great! I had a ton of questions before placing the order and he happily answered. This is the type of customer support many dental suppliers are missing. Great company to work wit...read moreJust got my Medit IOS delivered last week and the service from Jon was great! I had a ton of questions before placing the order and he happily answered. This is the type of customer support many dental suppliers are missing. Great company to work with.read less - 6/23/2020
Tony Cascino
I just purchased the CAD-Ray unit at Chicago Mid Winter meeting. We have used it for single crowns so far and have been very pleased. Nick was my sales contact and he has helped a great deal with some of our 'learning curve " issues. I looked at a nu...read moreI just purchased the CAD-Ray unit at Chicago Mid Winter meeting. We have used it for single crowns so far and have been very pleased. Nick was my sales contact and he has helped a great deal with some of our 'learning curve " issues. I looked at a number of scanners and felt CAD-Ray was the best-two of the labs I use also feel it is the best scanner.read less - 5/12/2020
Jonathan Acker
Awesome people who care about their clients. - 7/09/2021
Gunther Heyder
Fantastic Scanner. Has changed the way I practice dentistry. Opens up more time in my schedule and opens up new methods to allow for more consistent, satisfactory results. Customer service is fantastic. Feels like friends are on the other side of the...read moreFantastic Scanner. Has changed the way I practice dentistry. Opens up more time in my schedule and opens up new methods to allow for more consistent, satisfactory results. Customer service is fantastic. Feels like friends are on the other side of the phone. Good work CAD-Ray!read less - 12/08/2021
Dong Lim
One of the best investments I’ve made for my office. A fraction of the cost compared to cerec. No monthly club fee. Easy maintenance. Saving a ton on lab costs. Milling and designing crowns is honestly my favorite things to do now. - 6/29/2020
Bought a medit 6 months ago and customer service has been nothing short of amazing. Always very responsive and helpful. Great scanner, too! - 6/16/2020
Jose Morales
Service is extremely quick and on point. Highly recommended to join the Cad Ray facebook group! - 6/01/2022
Matt St George
I had 3 Cerec machines and switched to medit. It’s awesome and do not regret the switch one bit. This is the place to buy it bc Armen and Frank are a wealth of knowledge and Frank is awesome with support. He’s always there whenever I need him! - 10/10/2019
This scanner is amazing! It’s hard to believe that it is less then half the price of 3 shape with zero yearly charges. I highly recommend you give it a try! - 10/09/2019
Digital dentistry has changed my work flow for the better and could not imagine going back. So important that I have the support when things don't work as expected. CAD-Ray has been there every step and trust their expertise and knowledge! - 4/20/2022
Laura
Very helpful and attentive when setting up my new Medit scanner. Seamless process from start to finish - 10/28/2024
Mehryar Ebrahimi
Great costumer service. I needed a part for my i700 and they were able to ship overnight. No down time. - 5/06/2022
Lauren Schulte
Frank and the CAD-Ray team are fantastic! They go above and beyond to help their doctors be successful. The CAD-Ray team doesn't just sell you a product and leave you high and dry. Frank is always ready to answer questions and offer support when need...read moreFrank and the CAD-Ray team are fantastic! They go above and beyond to help their doctors be successful. The CAD-Ray team doesn't just sell you a product and leave you high and dry. Frank is always ready to answer questions and offer support when needed. I highly recommend!read less - 1/24/2023
Andy M
It has been great to work with Laura and Heather. The purchase, financing, shipping, and training process has been smooth. The training was very comprehensive and not rushed at all. I love my Medit i-600 scanner, and I recommend CAD-RAY 100%! - 5/22/2024
Evan Sachs
Great staff and support when needed! There is a bit of a learning curve like with any new tech, but I highly recommend the Medit i500 and the Cad-Ray staff is great. Special thanks to Laura and Jeff for helping out! You guys rock. Great company and ...read moreGreat staff and support when needed! There is a bit of a learning curve like with any new tech, but I highly recommend the Medit i500 and the Cad-Ray staff is great. Special thanks to Laura and Jeff for helping out! You guys rock. Great company and product!read less - 11/11/2020
Caroline Langlois
It's so nice to enter the digital age for scanning! I've been taking impressions since 1975. Medit i700 is amazing and our #1 supporter, Laura has been with us every step of the way. I truly don't know what I would do without Laura and Nick in tec...read moreIt's so nice to enter the digital age for scanning! I've been taking impressions since 1975. Medit i700 is amazing and our #1 supporter, Laura has been with us every step of the way. I truly don't know what I would do without Laura and Nick in tech support. They definitely need a raise! Yes, we had a couple of glitches (mostly operator error) but they were there with us all the way. The detail that the scan gives, whether it's a crown, bridge, full mouth scan for patient review and now many scans for NTI's is truly amazing! We recommend it highly to all who are interested! I am proof that as a dental assistant who's 64, you CAN teach an old dog new tricks!!!read less - 12/09/2021
Russell Schafer
Overall great company to work with. They sell wondeful products and give stellar service for a much lower price than any of the supply houses. I can't recommend them enough. - 8/19/2022
Evelyn Chan
Going with CAD-RAY and Laura is one of best investment I've made year 2020 ( I have MEDIT 500). Jumping into scanning is something that intimidated me since I am not a techie person and taking PVS impression is something second nature to me. Laur...read moreGoing with CAD-RAY and Laura is one of best investment I've made year 2020 ( I have MEDIT 500). Jumping into scanning is something that intimidated me since I am not a techie person and taking PVS impression is something second nature to me. Laura made everything a breeze, she is very accomodating and most importantly responds so fast, I never felt left out. Attending the level 1 course of Armen M. was awesome , learned the basics and it was taught in a way so easy to apply. Since my first scan, I never looked back, thinking to myself , I should have done this earlier. The crowns comes back with little to no adjustements which saves a lot of chair time. Cannot get better than this. Big shout out to CAD-RAY, Laura and Armenread less - 10/19/2021
What can I say ! I have been extremely pleased with my scanner ! I recommend it to all my colleagues ! The support is the best , I bought the extended warranty and my scanner hada small crack and within one day they shipped my a new one ! I can’t wo...read moreWhat can I say ! I have been extremely pleased with my scanner ! I recommend it to all my colleagues ! The support is the best , I bought the extended warranty and my scanner hada small crack and within one day they shipped my a new one ! I can’t work without it ! Thank you !read less - 2/09/2022
Alex Vo
Great service and scanner support! Company delivers well above my expectations! Love my medit scanner. - 1/29/2023
JCarlos Mendoza
Had a good experience when purchasing my scanner, it was very easy, and to date after three months of using the scanner no support is a plus, anytime I call me I will answer and troubleshoot - 7/10/2022
Jeff Johnston
Very Helpful, good company to work with. Always been there for me - 3/10/2017
Obdulia Rondon
Thanks for delivering amazing courses. Always thinking beyond dentistry. Thanks for sharing all so selflessly. - 11/13/2022
Michael Pagano (CPT Pagano)
I bought a Medit i500 from Cad-Ray. The service was fantastic. This group also does ongoing training to keep you up to date on how to use the technology.I had a minor issue with hardware and Cad-Ray resolved the issues no questions asked!They have a ...read moreI bought a Medit i500 from Cad-Ray. The service was fantastic. This group also does ongoing training to keep you up to date on how to use the technology.I had a minor issue with hardware and Cad-Ray resolved the issues no questions asked!They have a very active online forum that is supportive. I wouldn’t hesitate to purchase more equipment from them!read less - 10/23/2020
arthur lyford
I cannot say enough about the support I have received from the beginning. I chose CadRay ultimately because of the support reviews...I can attest first hand...they are all right on...though I have been practicing for more than 35 years, this old dog ...read moreI cannot say enough about the support I have received from the beginning. I chose CadRay ultimately because of the support reviews...I can attest first hand...they are all right on...though I have been practicing for more than 35 years, this old dog has been taught a lot of new tricks from the support staff at Cad Ray...Truly impressed with every interaction so far! Thanks 10/4/2023 And they did it again today with ten minutes before the pt came in 3Shpe server would not connect with the computer and Andy got to 3Shape directly and had us up and running...thankfully I didn't have to call anyone but CadRay...thanks again....read less - 10/05/2023
Thomas Lim
5 stars for a great product and great service. After much research I knew I was set on the Medit 500. I considered some of my local equipment reps, as well as cad-ray. Cad-ray won out due to their efficiency, speed of service, and knowledge. The...read more5 stars for a great product and great service. After much research I knew I was set on the Medit 500. I considered some of my local equipment reps, as well as cad-ray. Cad-ray won out due to their efficiency, speed of service, and knowledge. Their online presence makes it easy to get help via messaging, social media, or phone.
The scanner itself works great, but make sure to contact them to get the minimum specs required for a laptop -- it will make a difference in how the scanner performs.
To make the scanner mobile, I purchased this cart from Staples: https://www.staples.com/Oklahoma-Sound-Premium-Audio-Visual-Presentation-Cart-40-1-2-H-x-18-W-x-30-D-Black-Ivory-Wood/product_932437.
Lastly, I purchased "3M Dual Lock Fastener" to keep the power module attached to the wand from falling off the cart. I carry the scanner between two offices, so I wanted something sturdy, but removable. (see in photos). The hockey puck shaped holder (comes with the scanner) works great for holding the wand itself.read less - 10/10/2019
Great help when you need it. Frank, Armen and team will take care of you. - 12/10/2021
Brent Hale
Been using my i700 for a month now and it's been great. The tutorials that Cad-ray provides have been very helpful. This scanner with a fast computer turns out great results. - 11/01/2021
I always rely on Frank to help with any questions or concerns regarding our printer. The best in tampa. - 1/25/2023
Aram Grigoryan
I'm really grateful with the service CAD-Ray has provided! I'm also very happy with Laura's presentation with the Medit i700, and overall help in choosing the right scanner for my practice. I'm really happy with the scanner and the SprintRay Pro 95 P...read moreI'm really grateful with the service CAD-Ray has provided! I'm also very happy with Laura's presentation with the Medit i700, and overall help in choosing the right scanner for my practice. I'm really happy with the scanner and the SprintRay Pro 95 Printer as well. Thank you.read less - 8/31/2021
CAD-Ray is a great resource for all things digital. Knowledgeable team but also able to anticipate your needs and because they’ve done it so many times they seem to know what you need before you do! Definitely the first place to look for digital ha...read moreCAD-Ray is a great resource for all things digital. Knowledgeable team but also able to anticipate your needs and because they’ve done it so many times they seem to know what you need before you do! Definitely the first place to look for digital hardware and integration!read less - 6/16/2020
Amber Thomas
Andy was very patient and informative during our Medit Training. He made sure that we understood exactly what we needed to know in order to be successful during scans. Since our training we've moved full steam ahead in completing scans for lab fabric...read moreAndy was very patient and informative during our Medit Training. He made sure that we understood exactly what we needed to know in order to be successful during scans. Since our training we've moved full steam ahead in completing scans for lab fabrications of crowns, bridges, and Invisalign. Thanks so much!!!read less - 4/05/2022
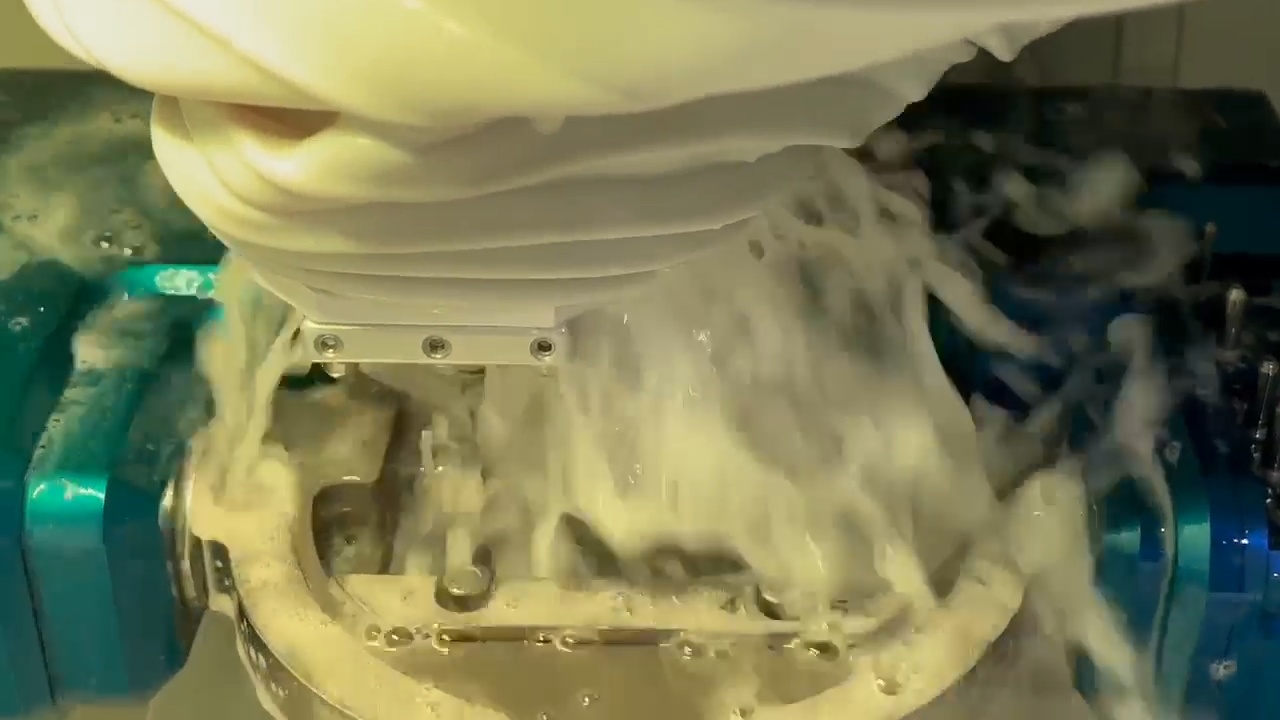
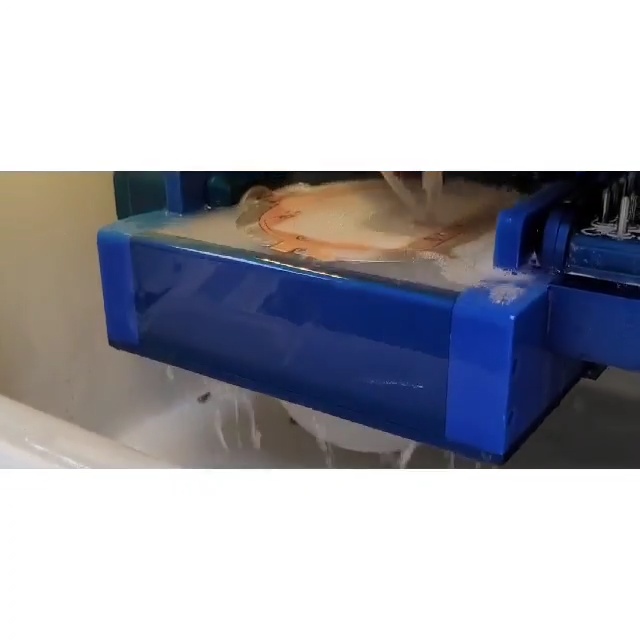
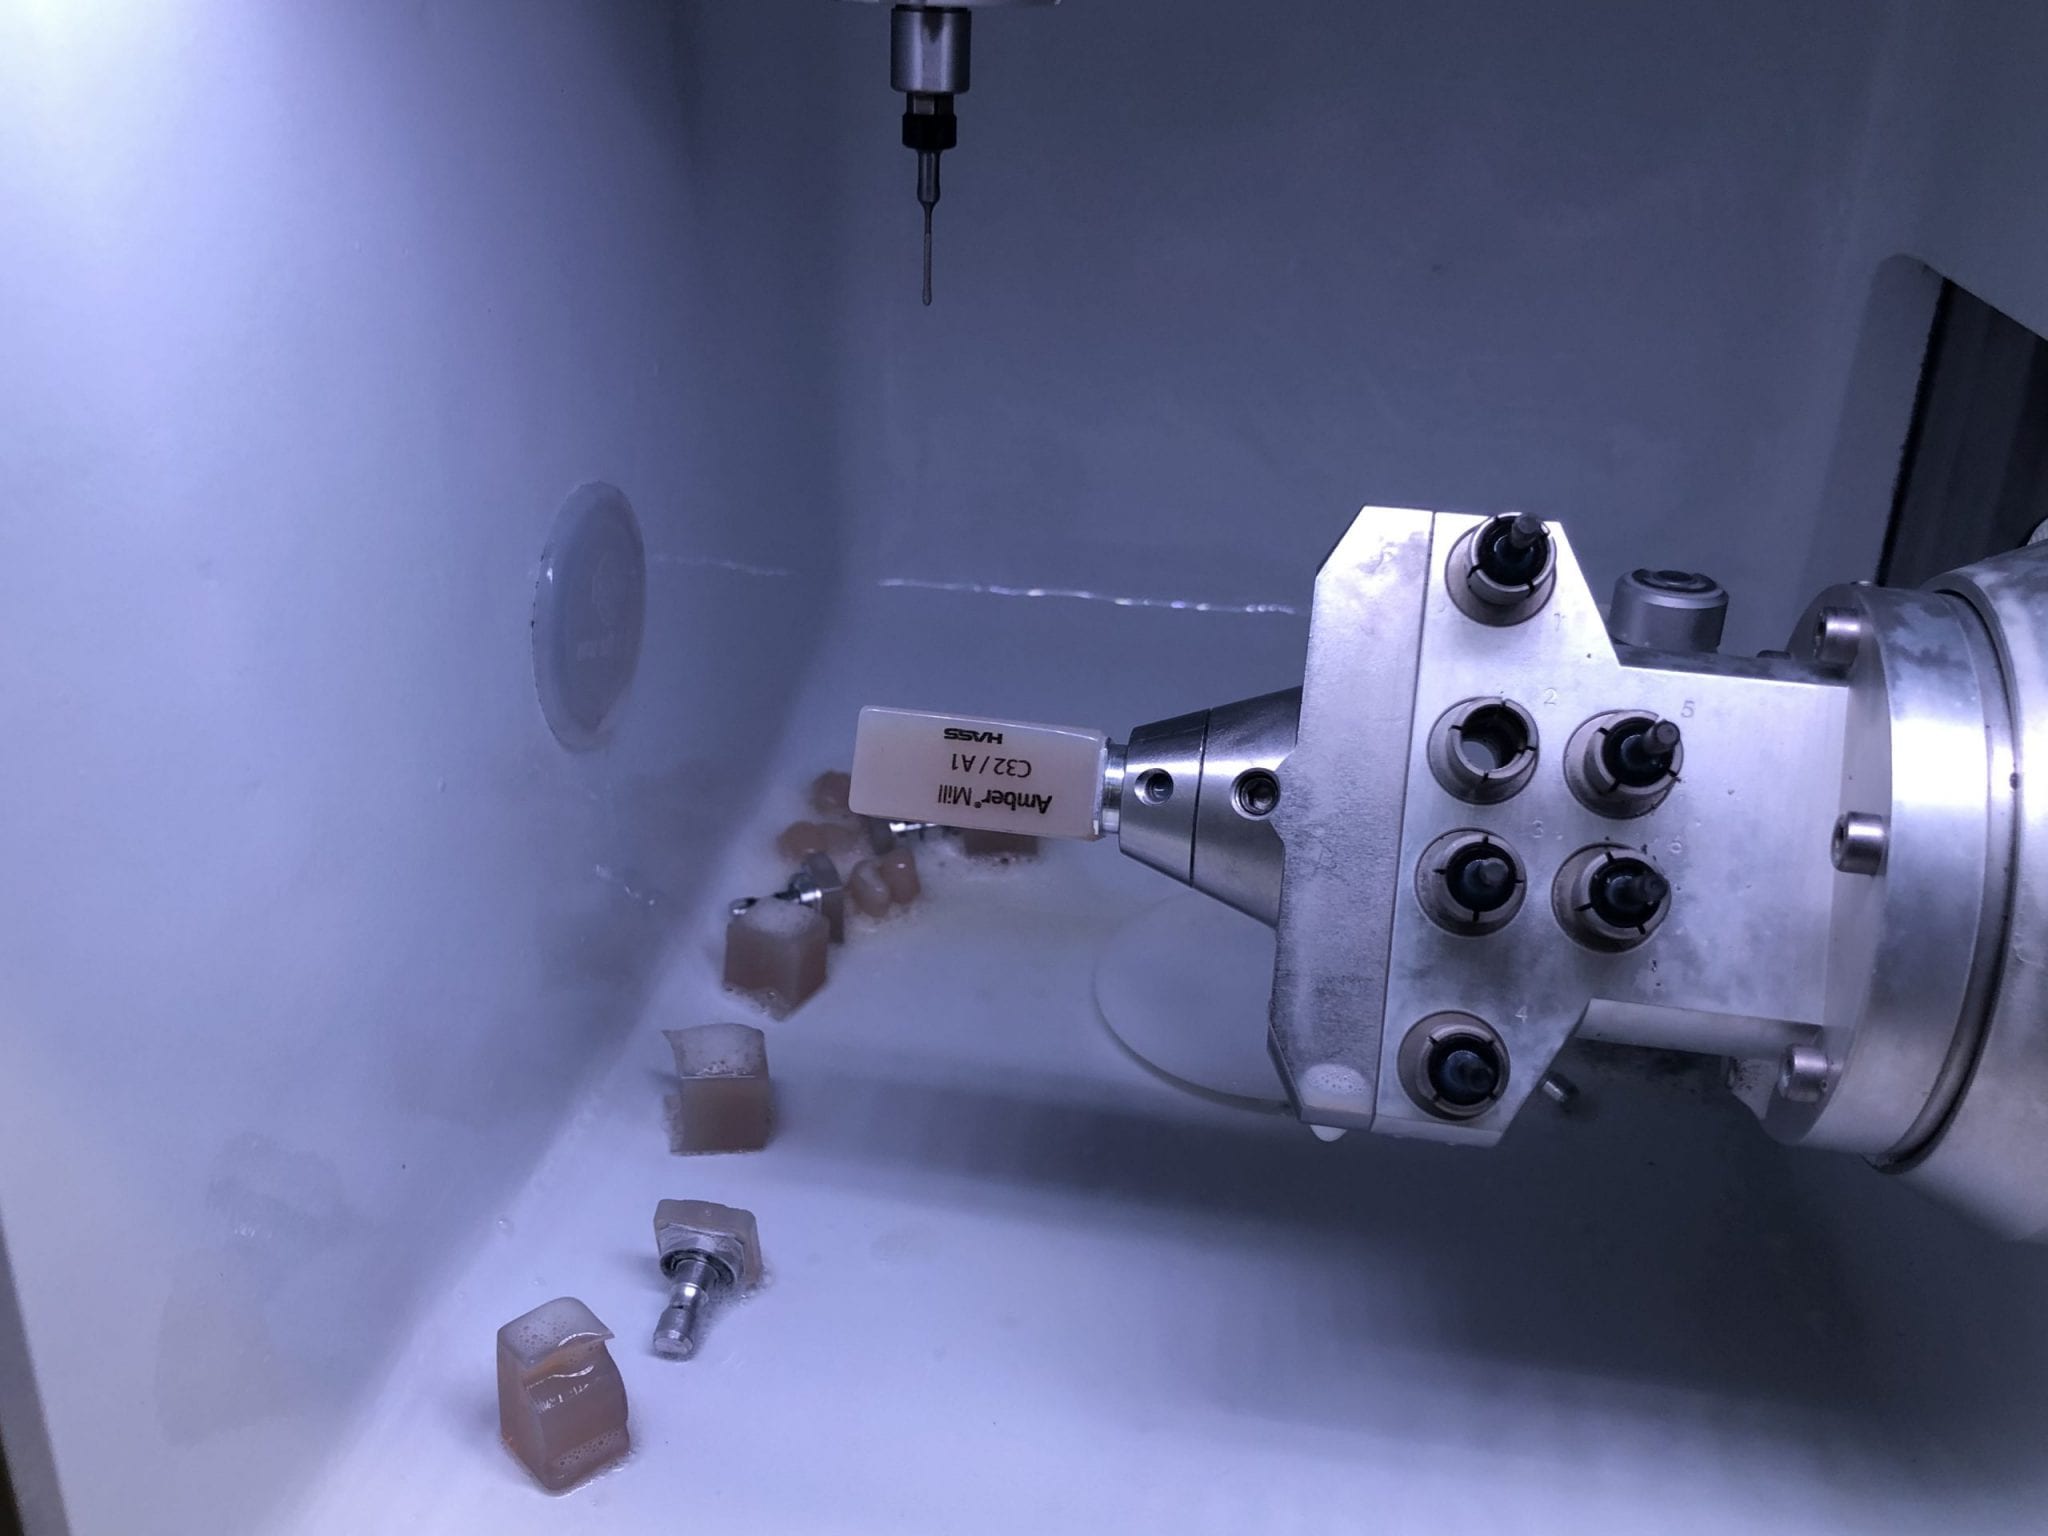
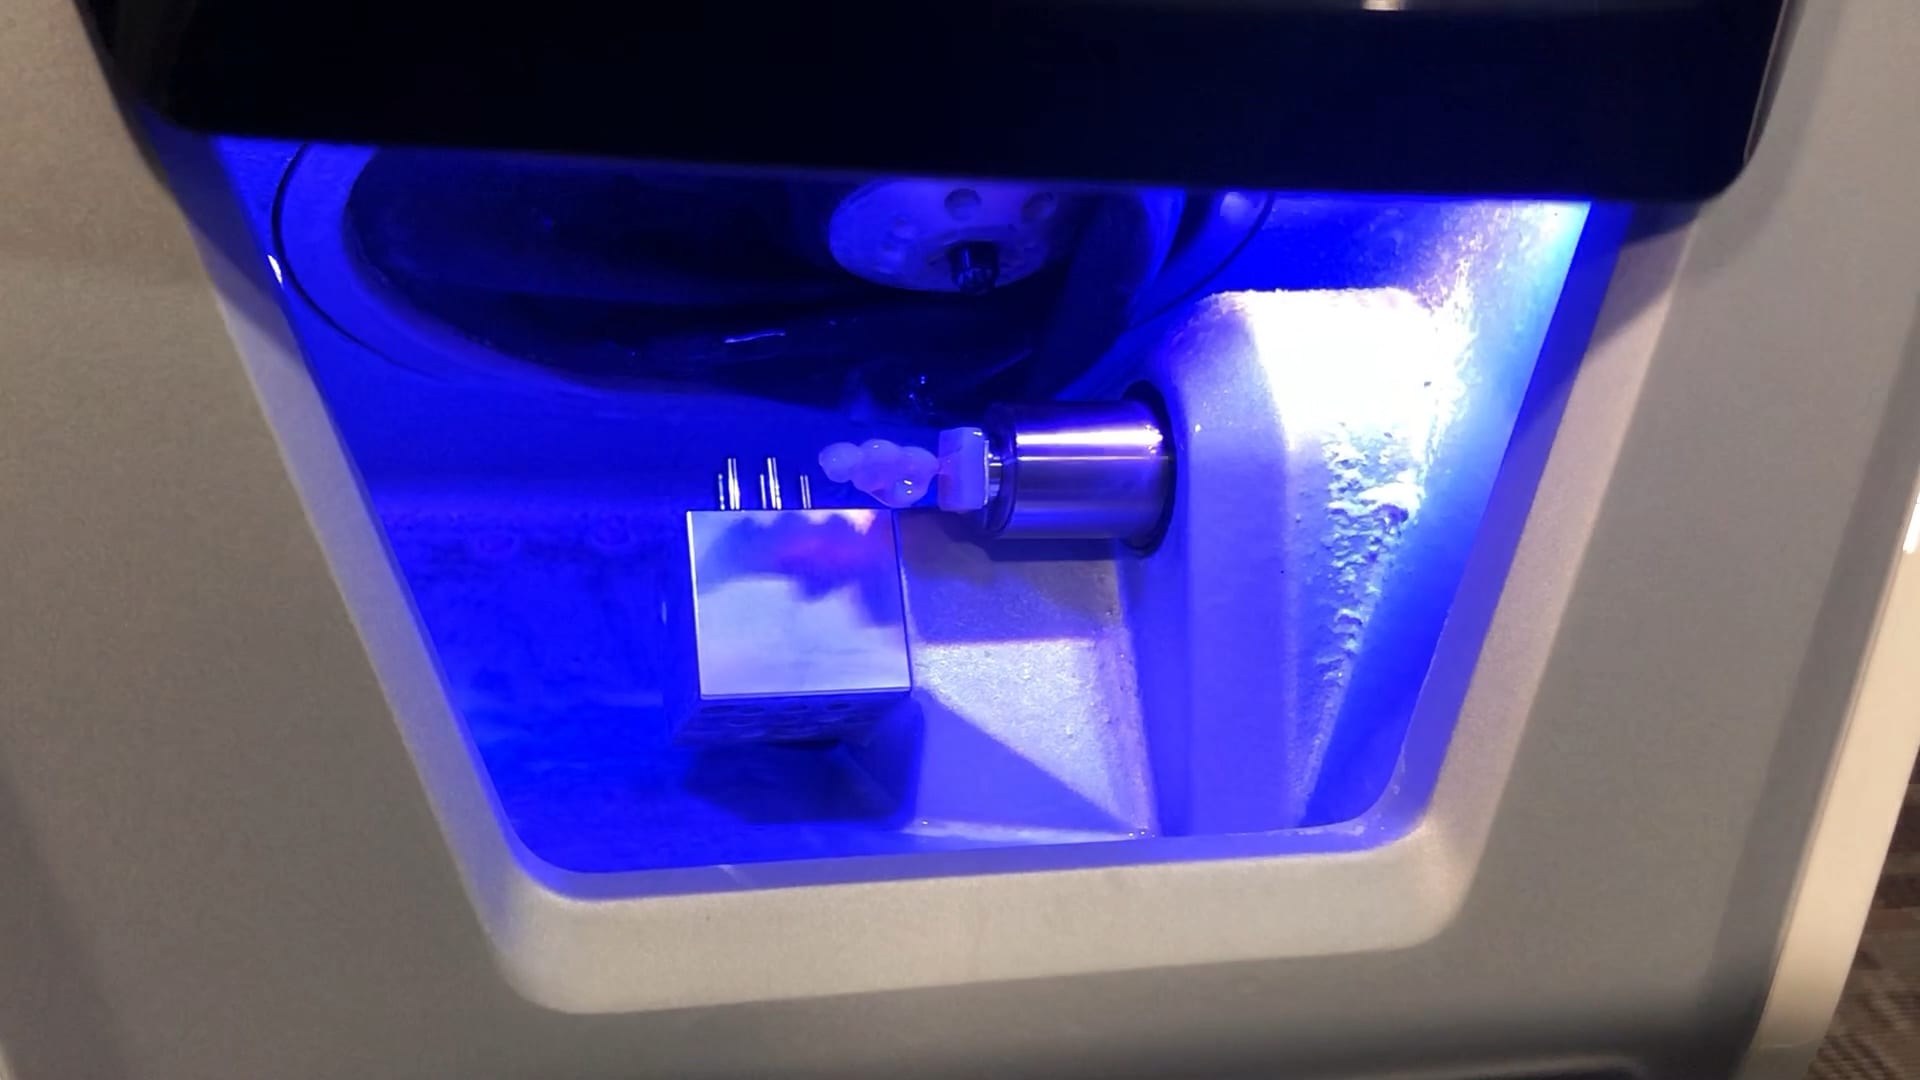
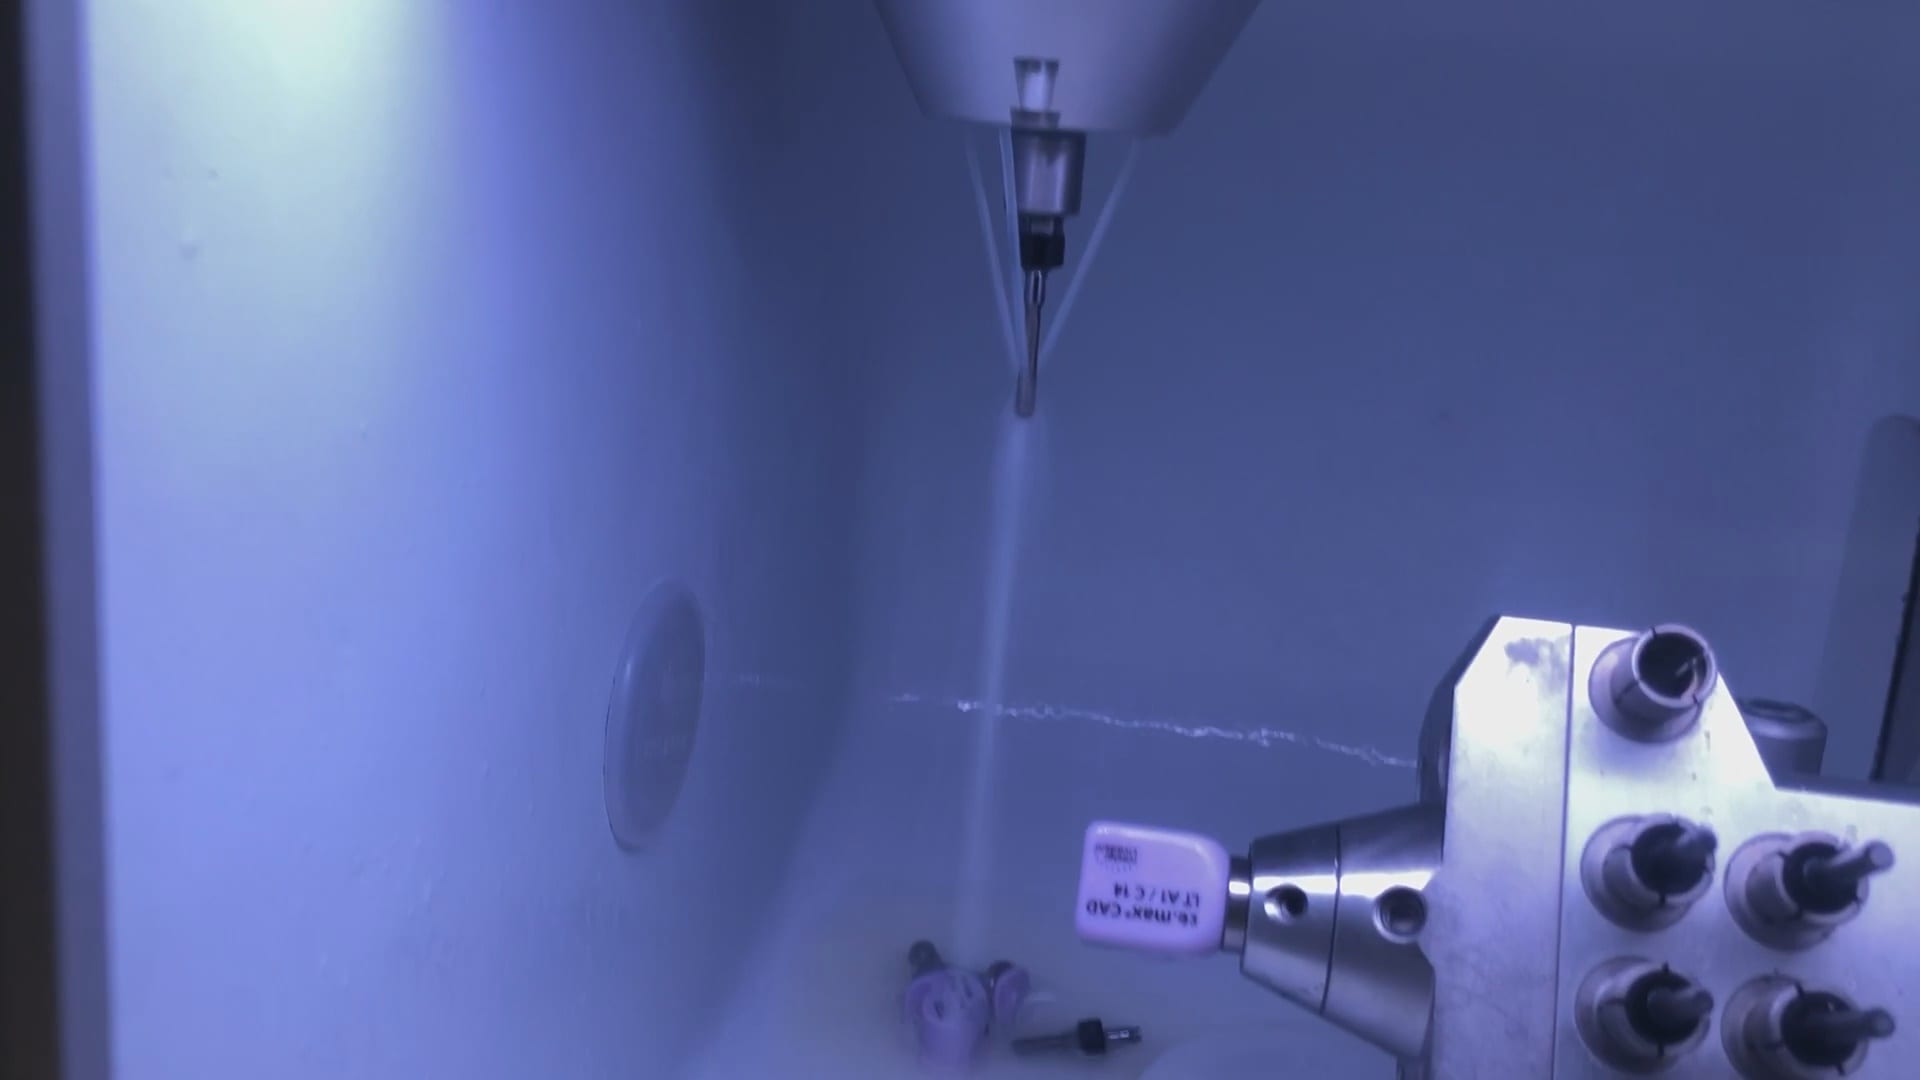
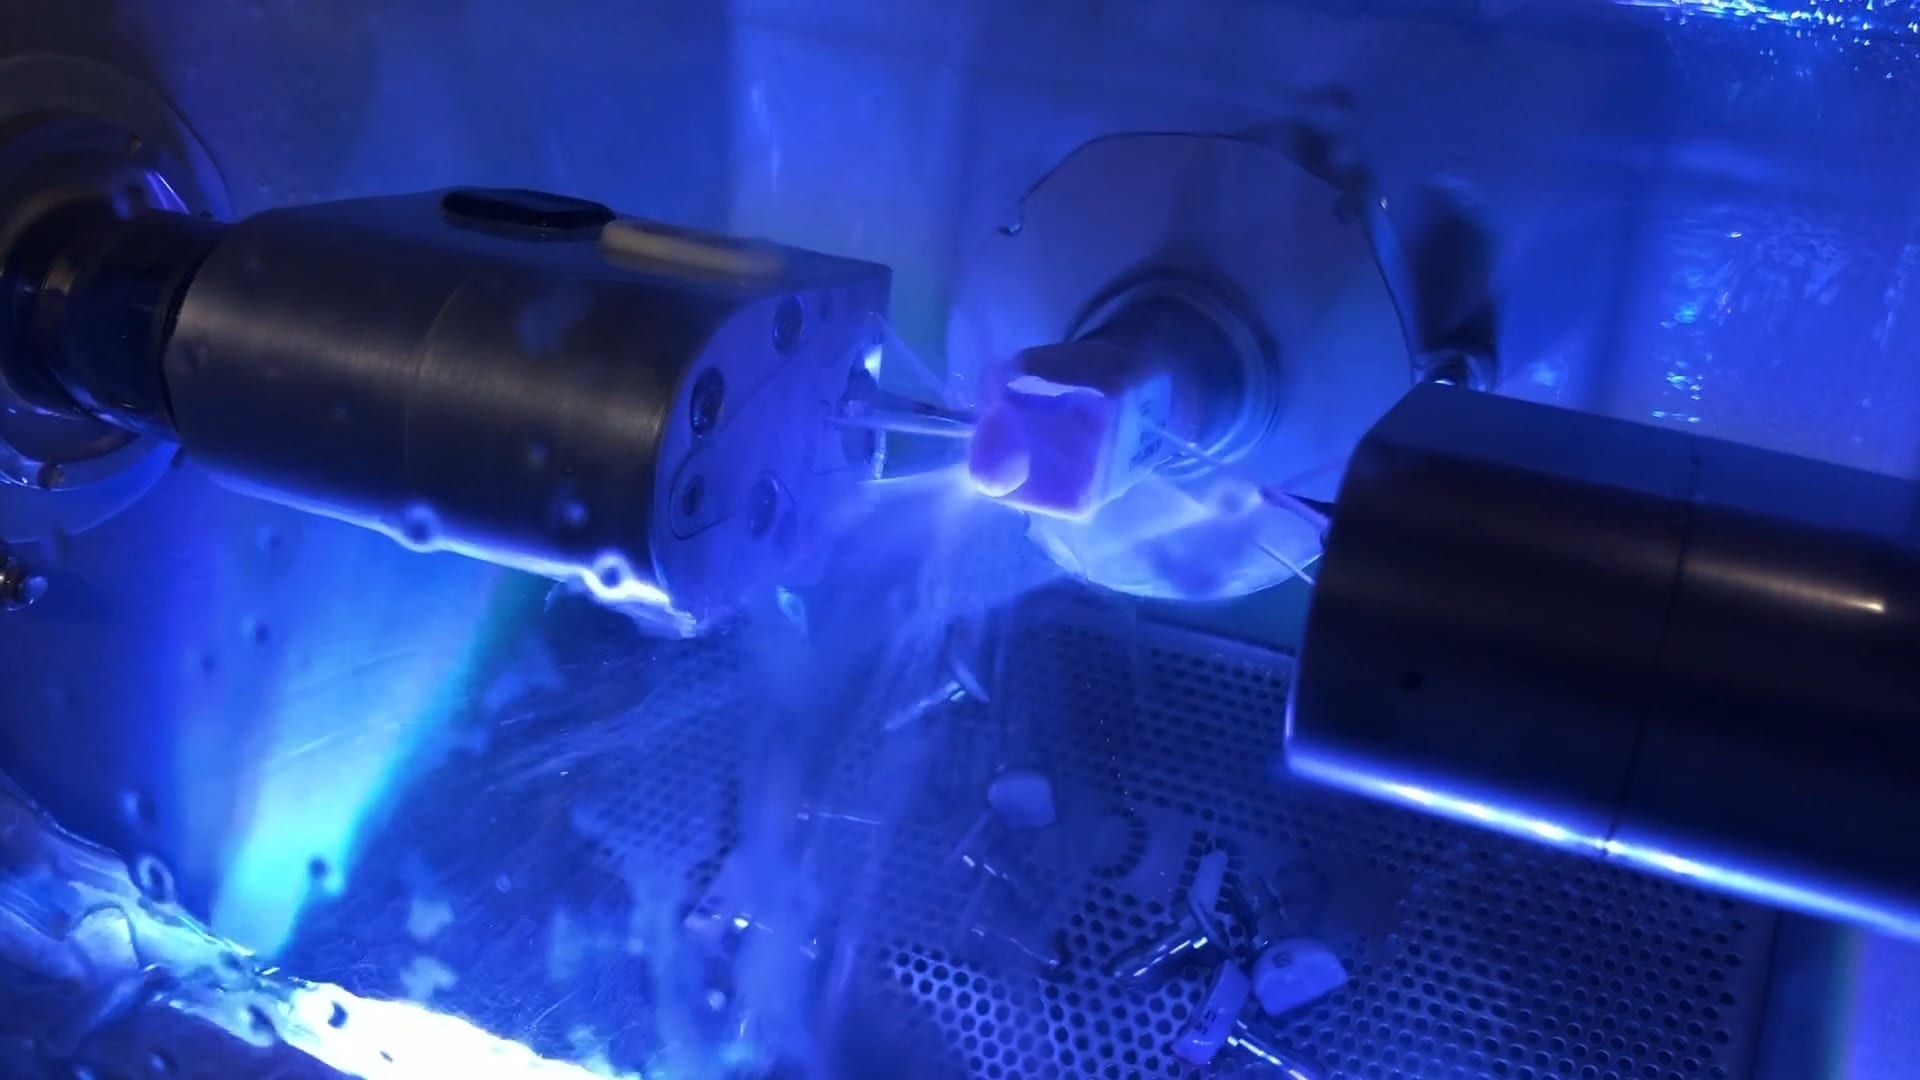
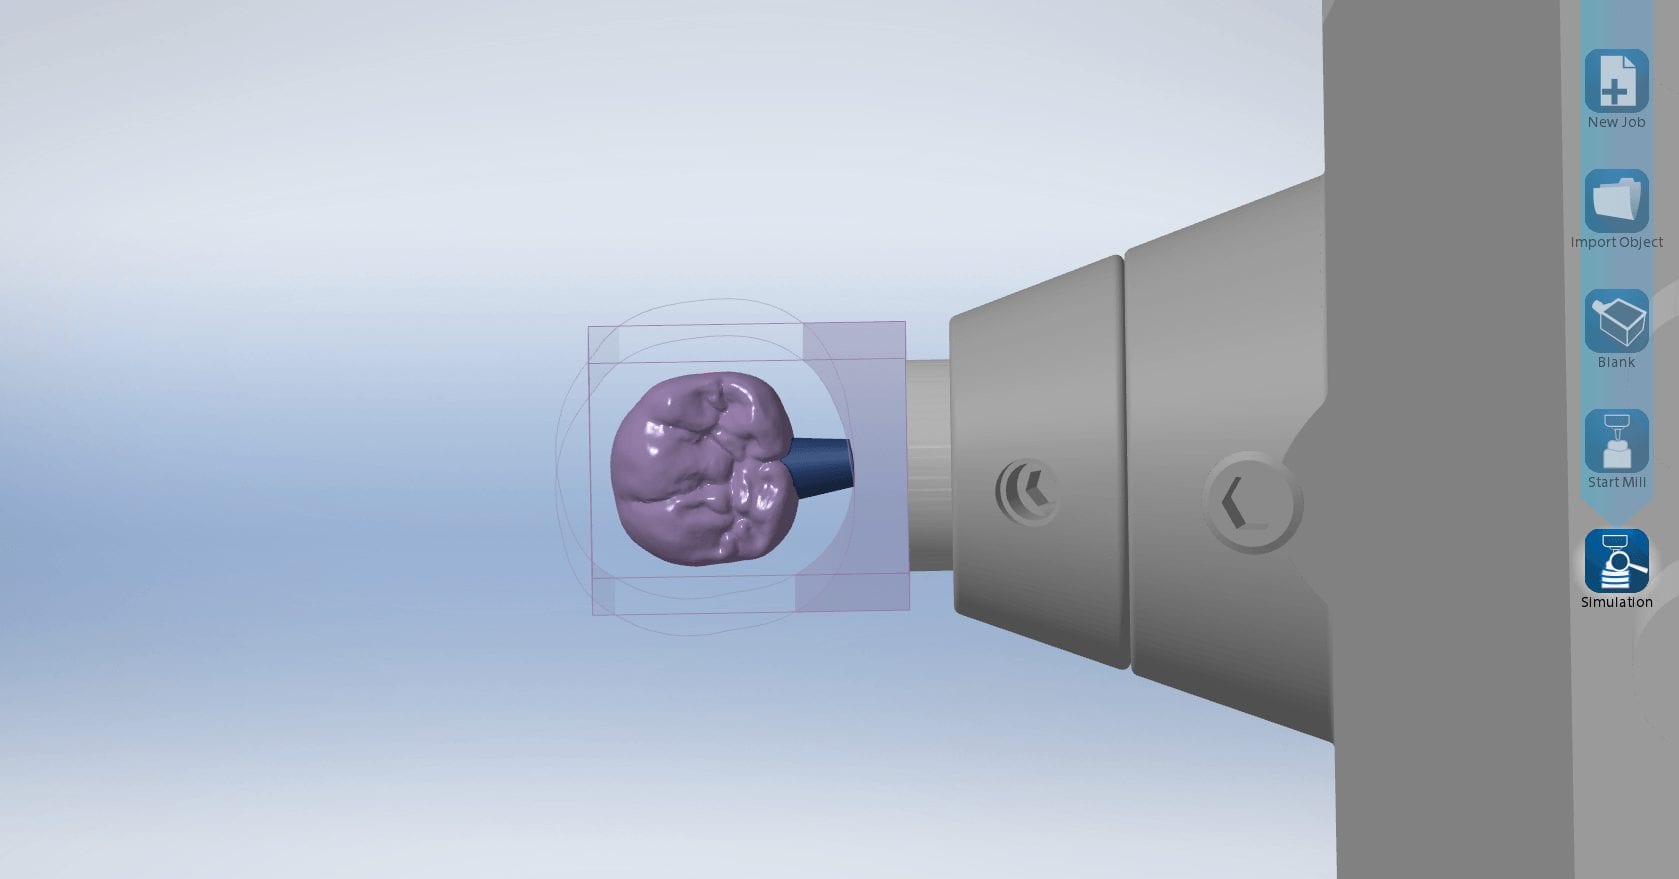
Most if not all milling machines do not adequately cool the tools or restoration while milling. At CAD-Ray we have developed augmenting tools that reduce or eliminate any dry milling of glass ceramic restorations. We can either run tubing from the holding tank or we can submerge the block for soaked milling
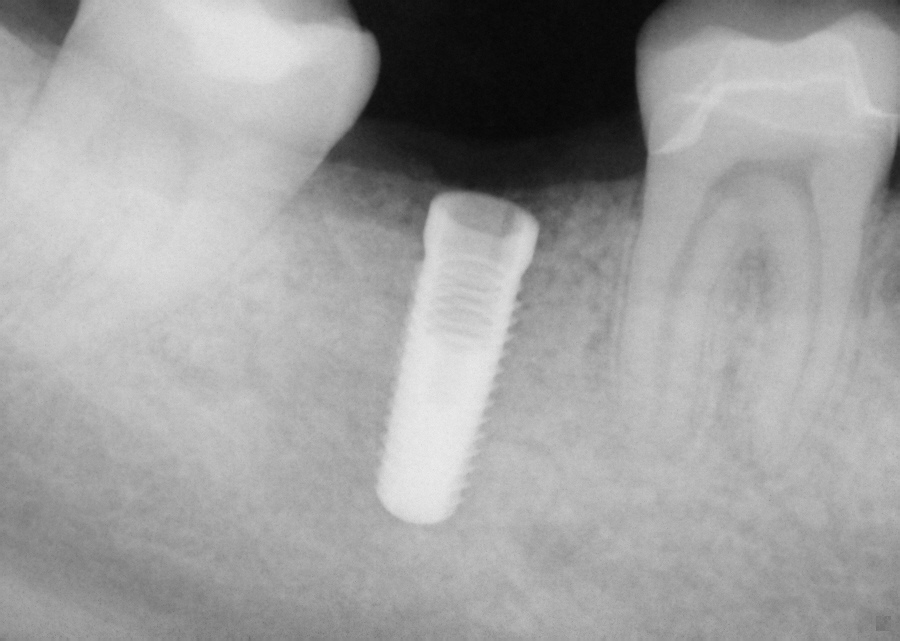
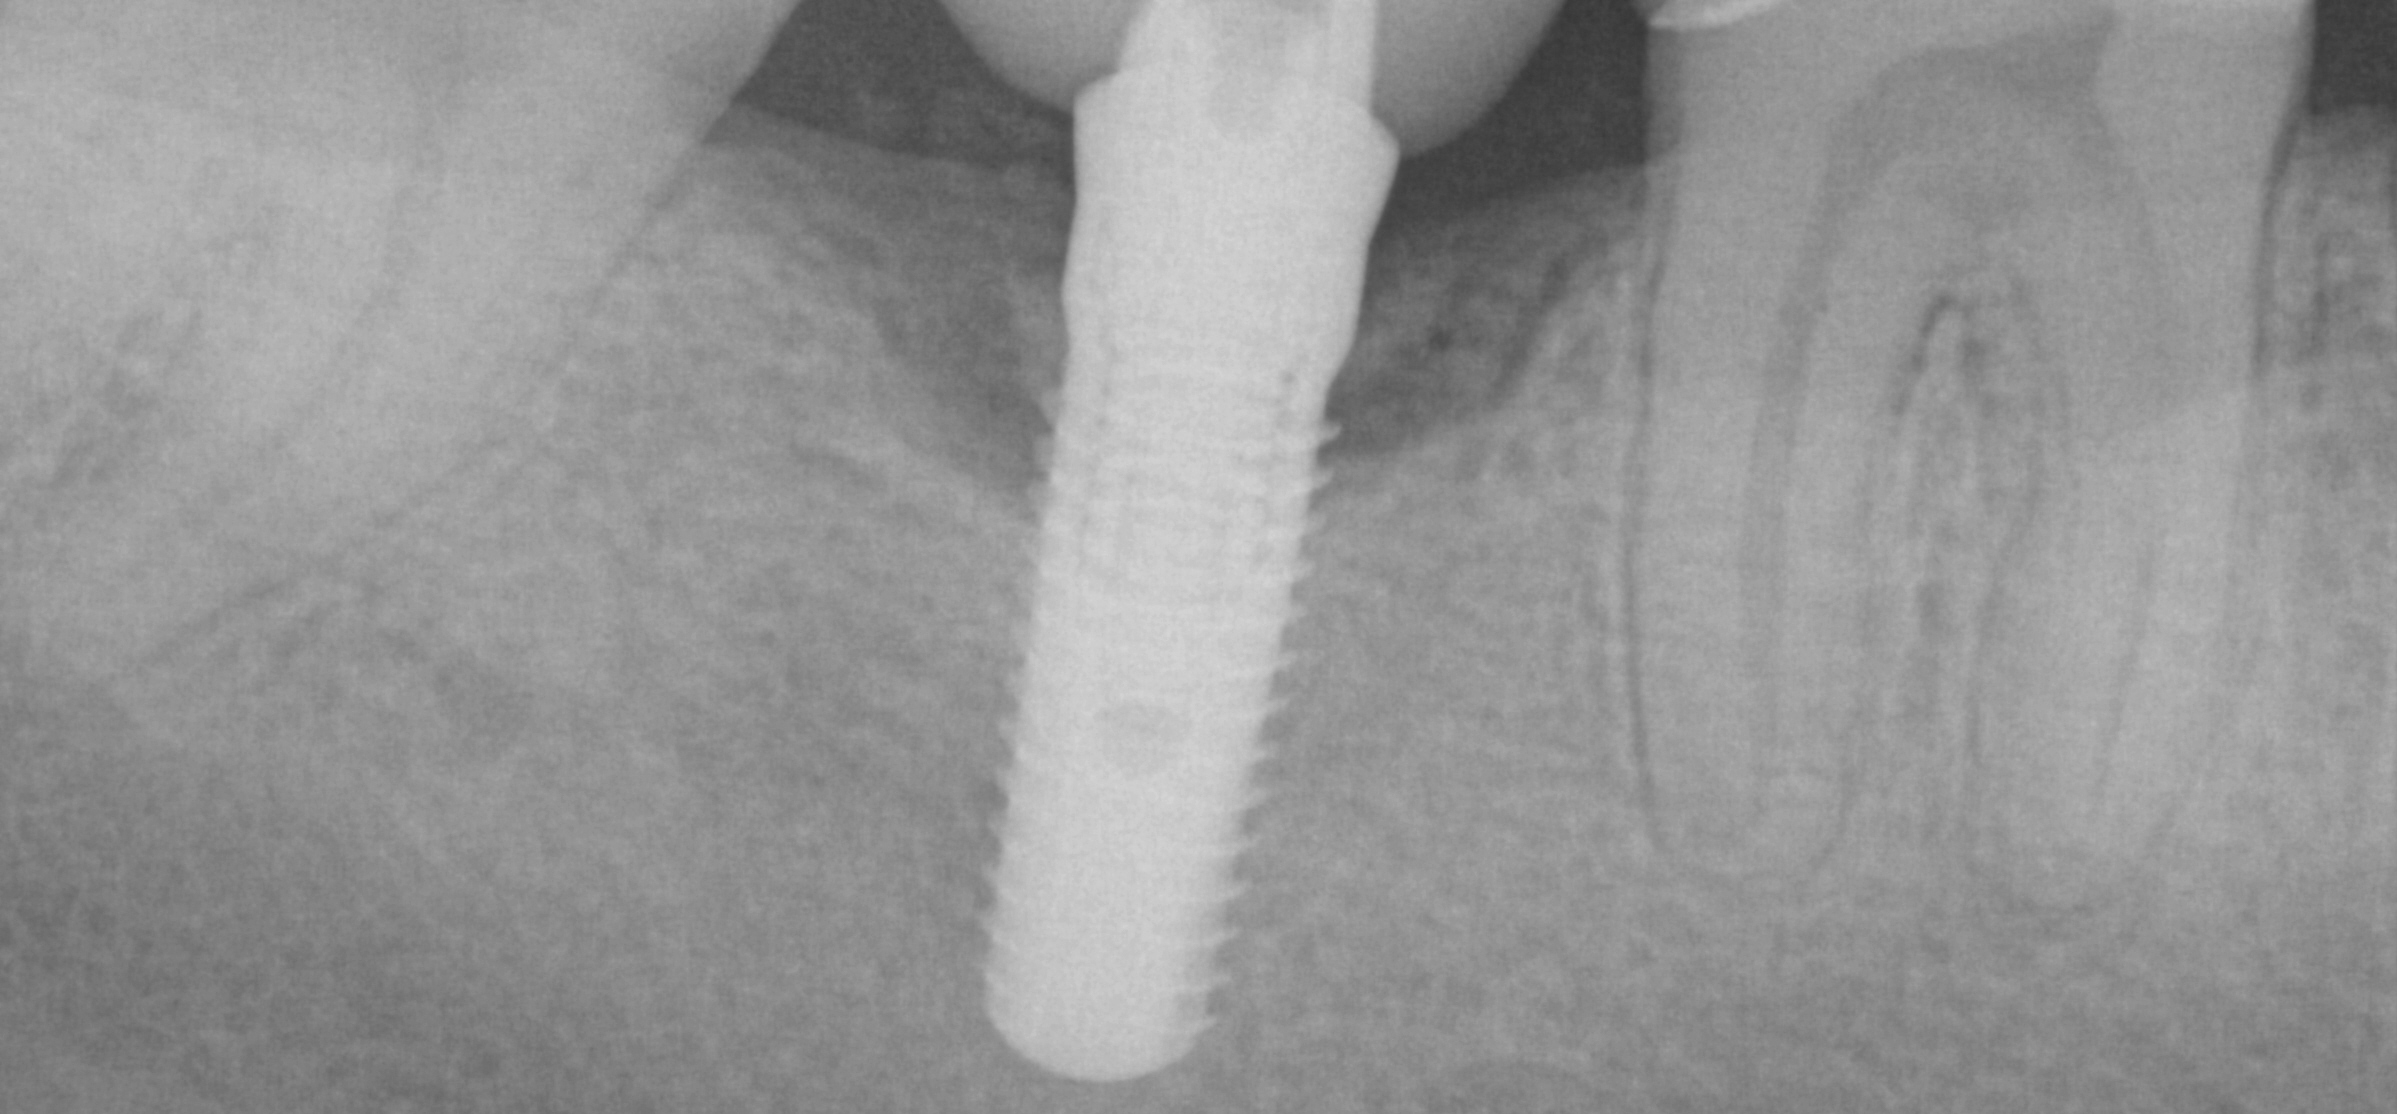
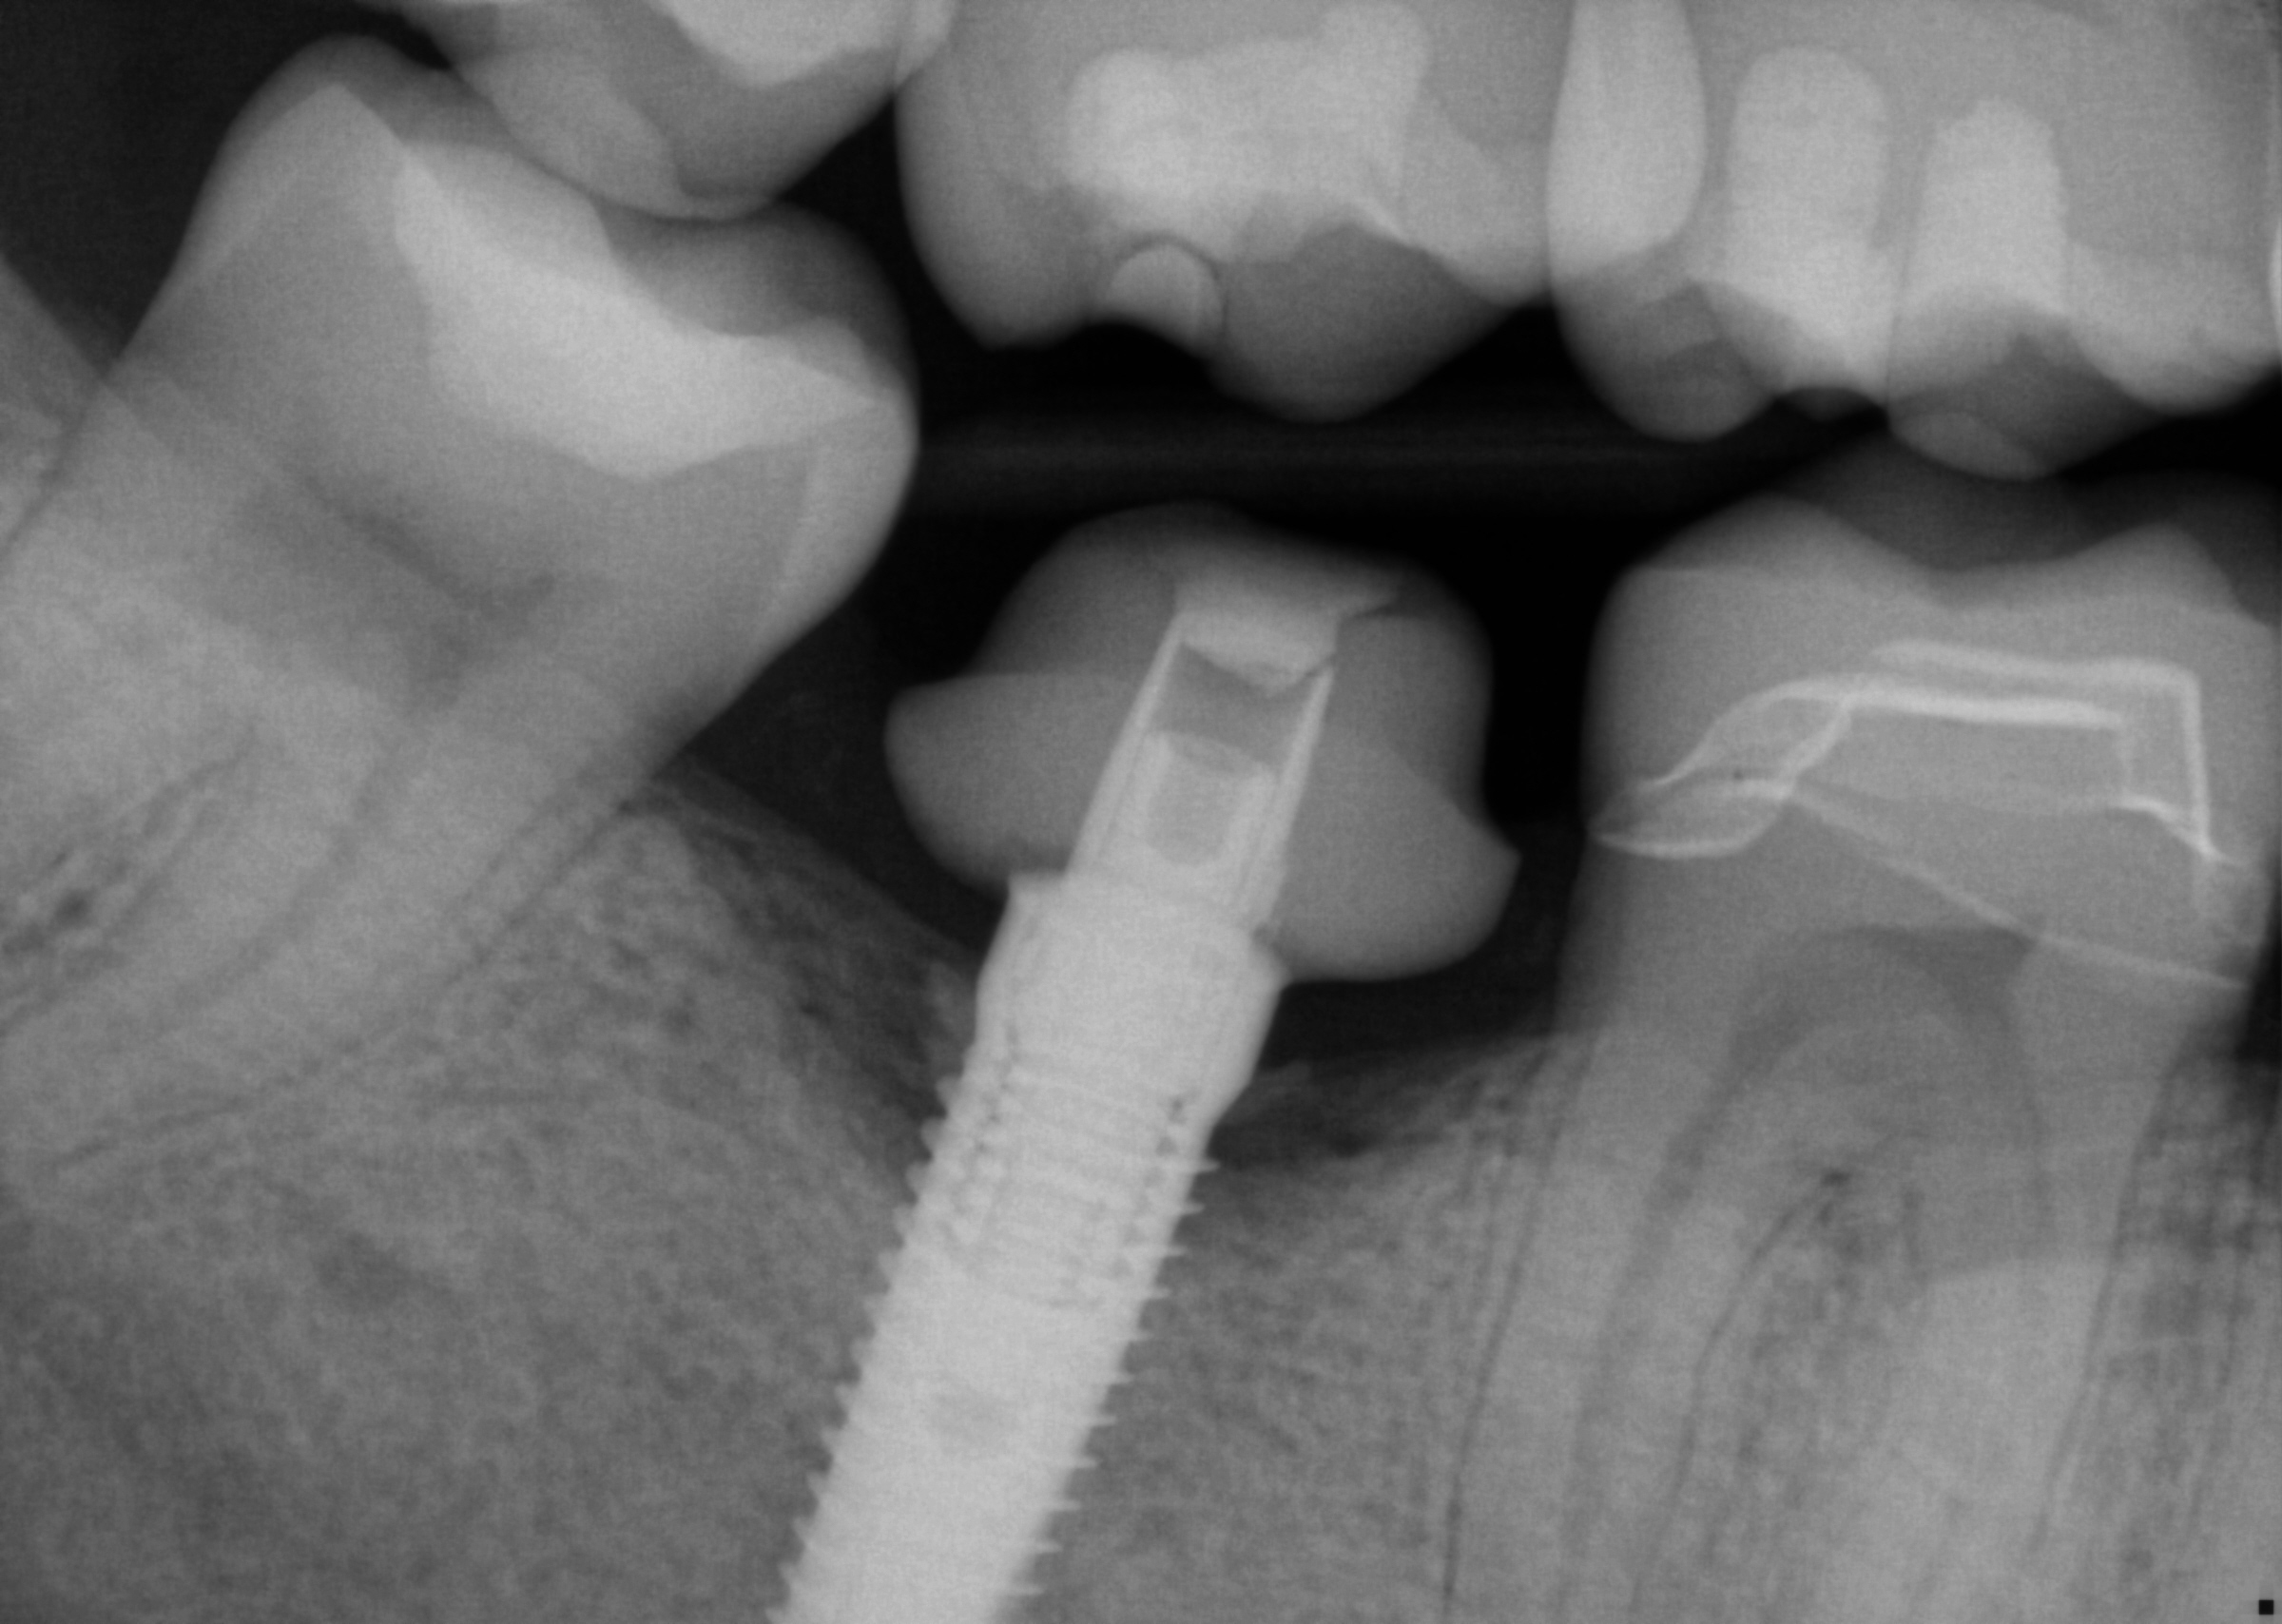
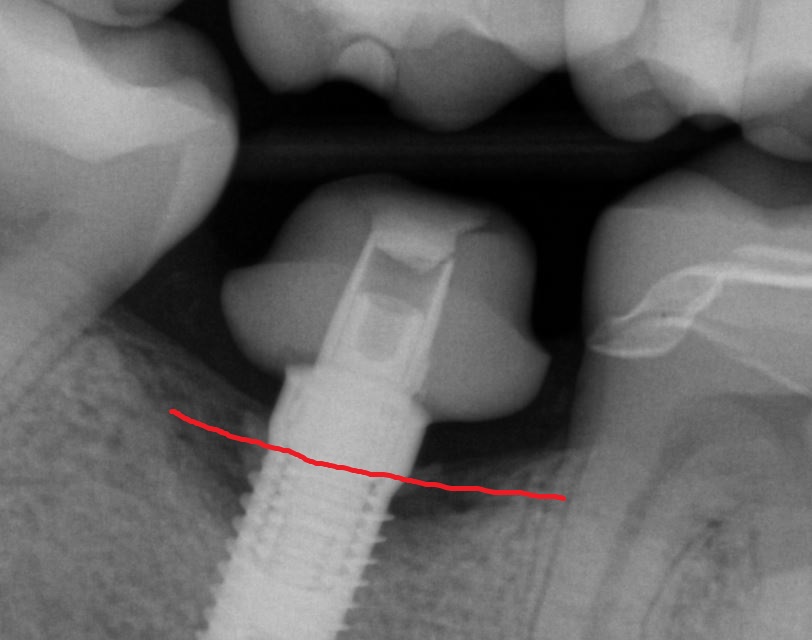
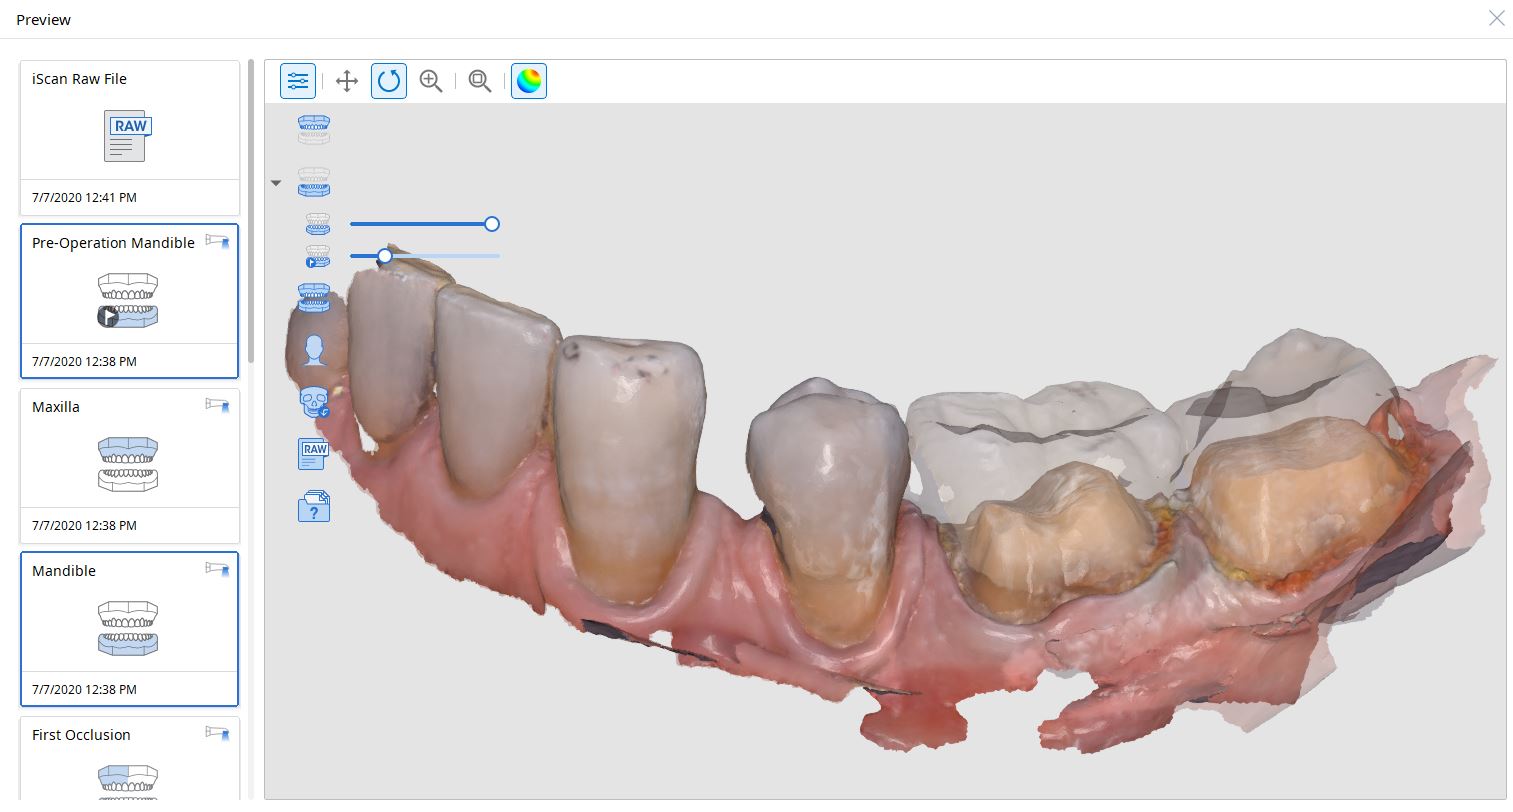
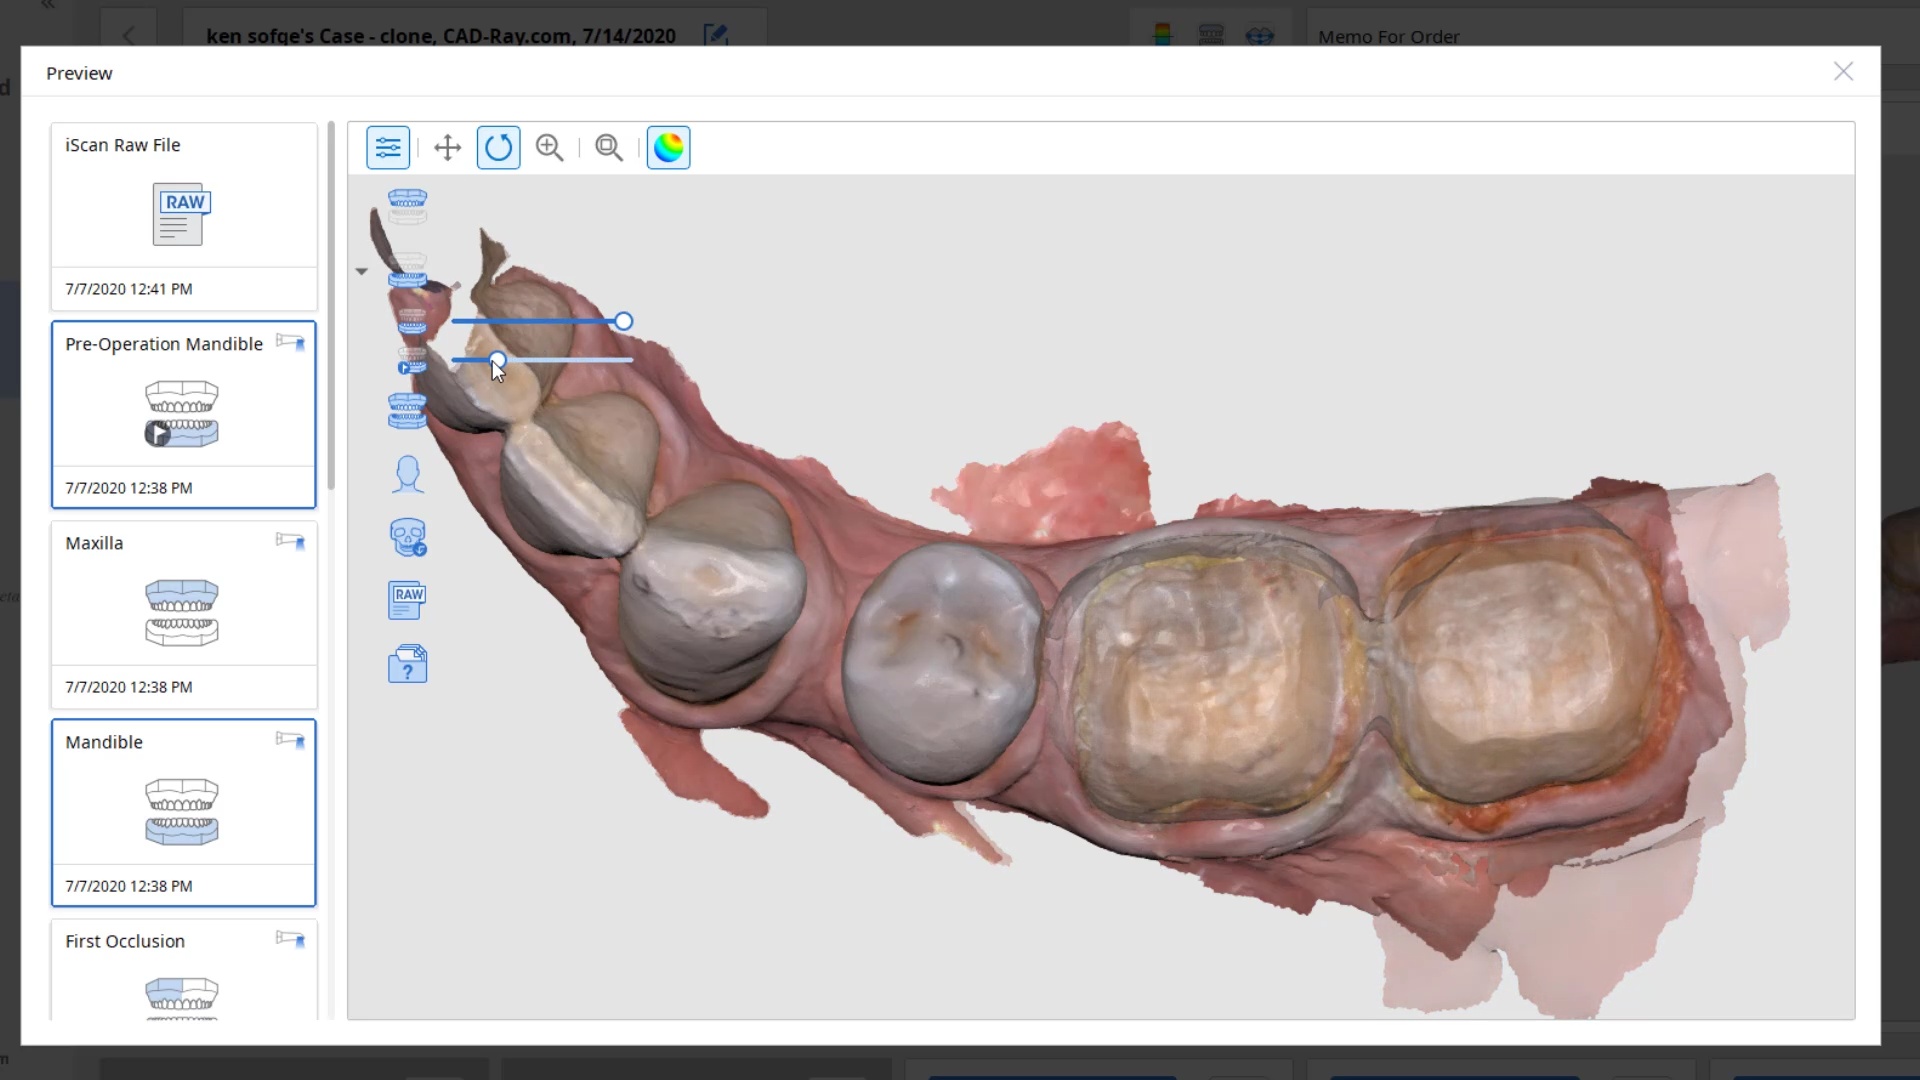
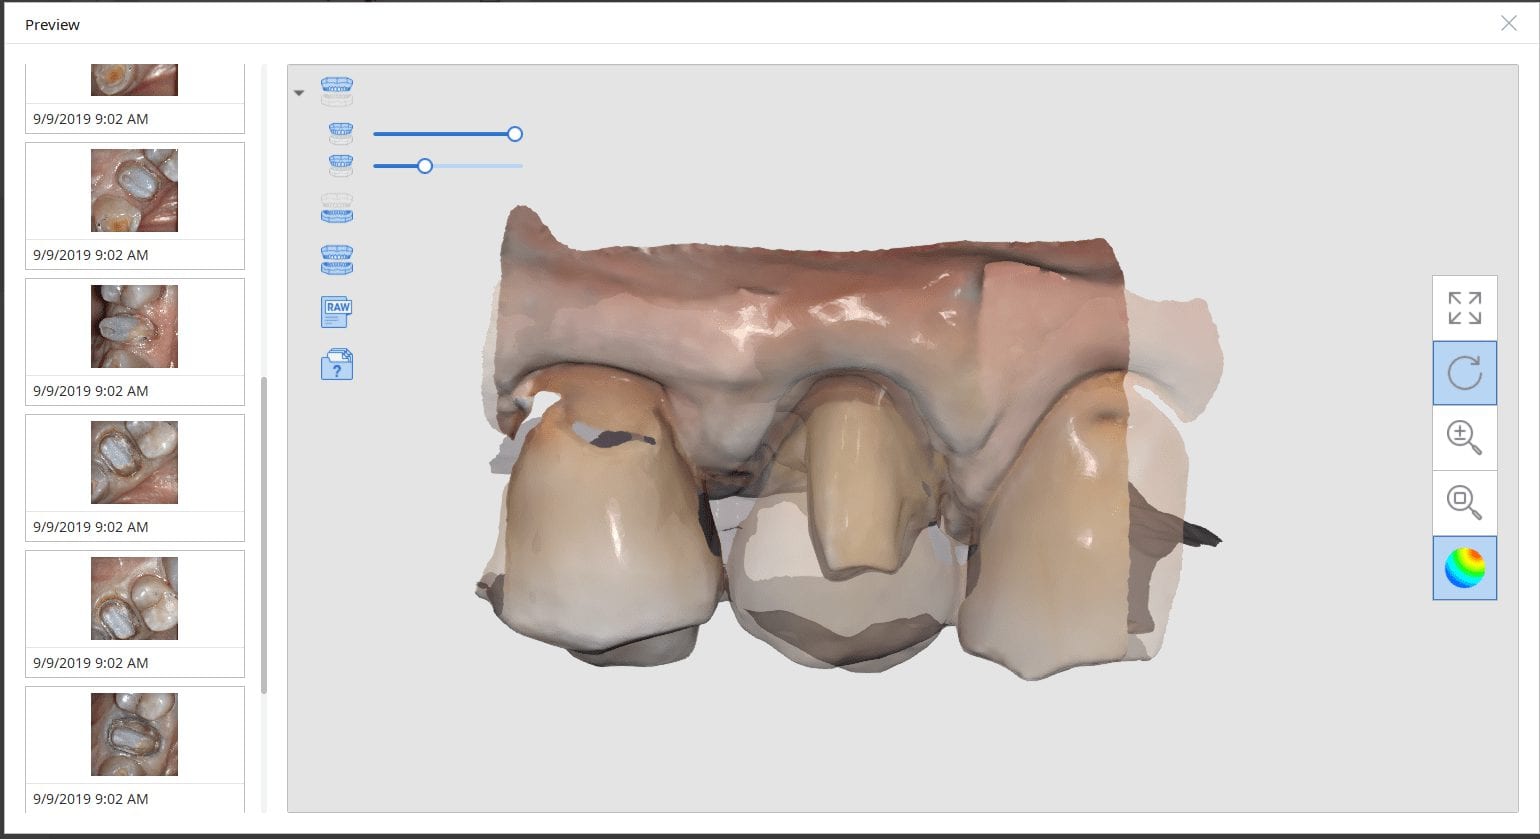
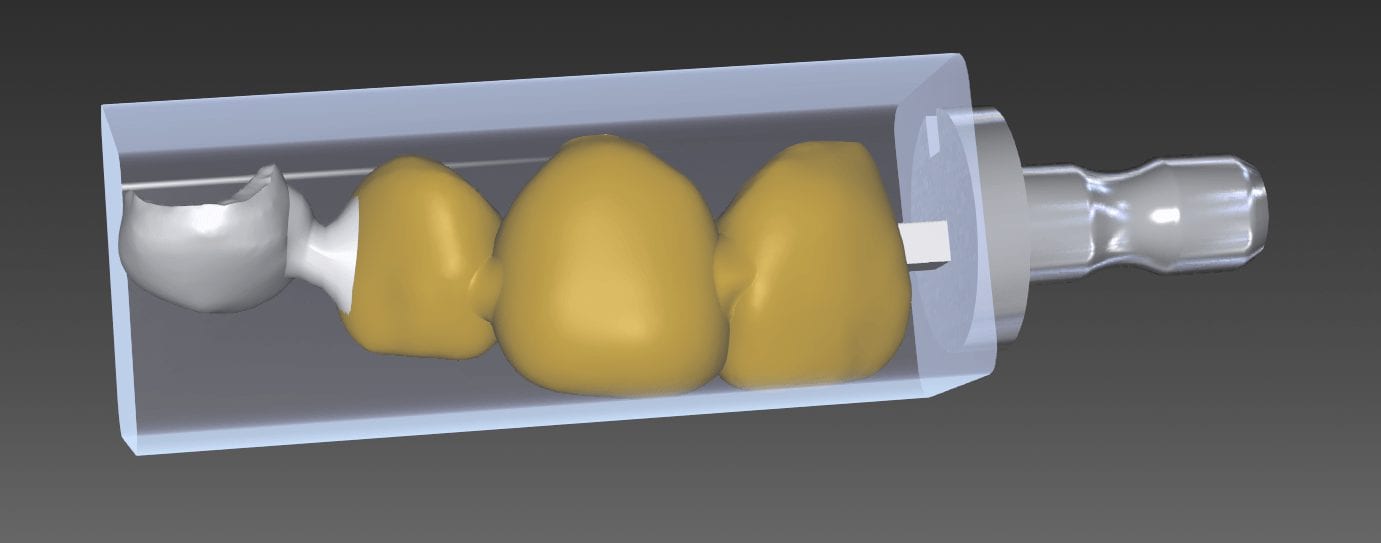
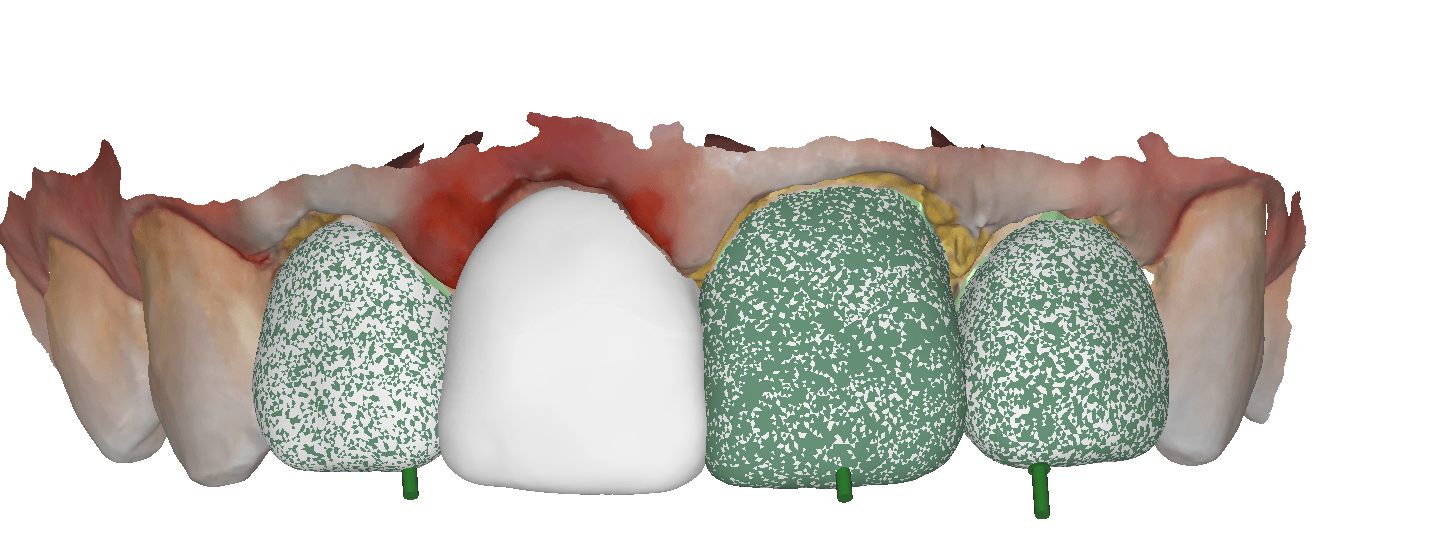
This implant was initially placed at the crest of the ridge in 2012. its placement did not allow proper emergence profile and subsequently lost bone around the head of the implant by 2015. The lack of blood flow to the crest of the bone at the cortical plate certainly could have contributed to its demise. By 2015, the bacteria trap forced a new restoration to be placed which also ultimately lead to chronic inflammation due to improper contours. The implant itself was well integrated and the decision was made to remove the top 3-5 mm of the implant and treat it as a cast post and core.
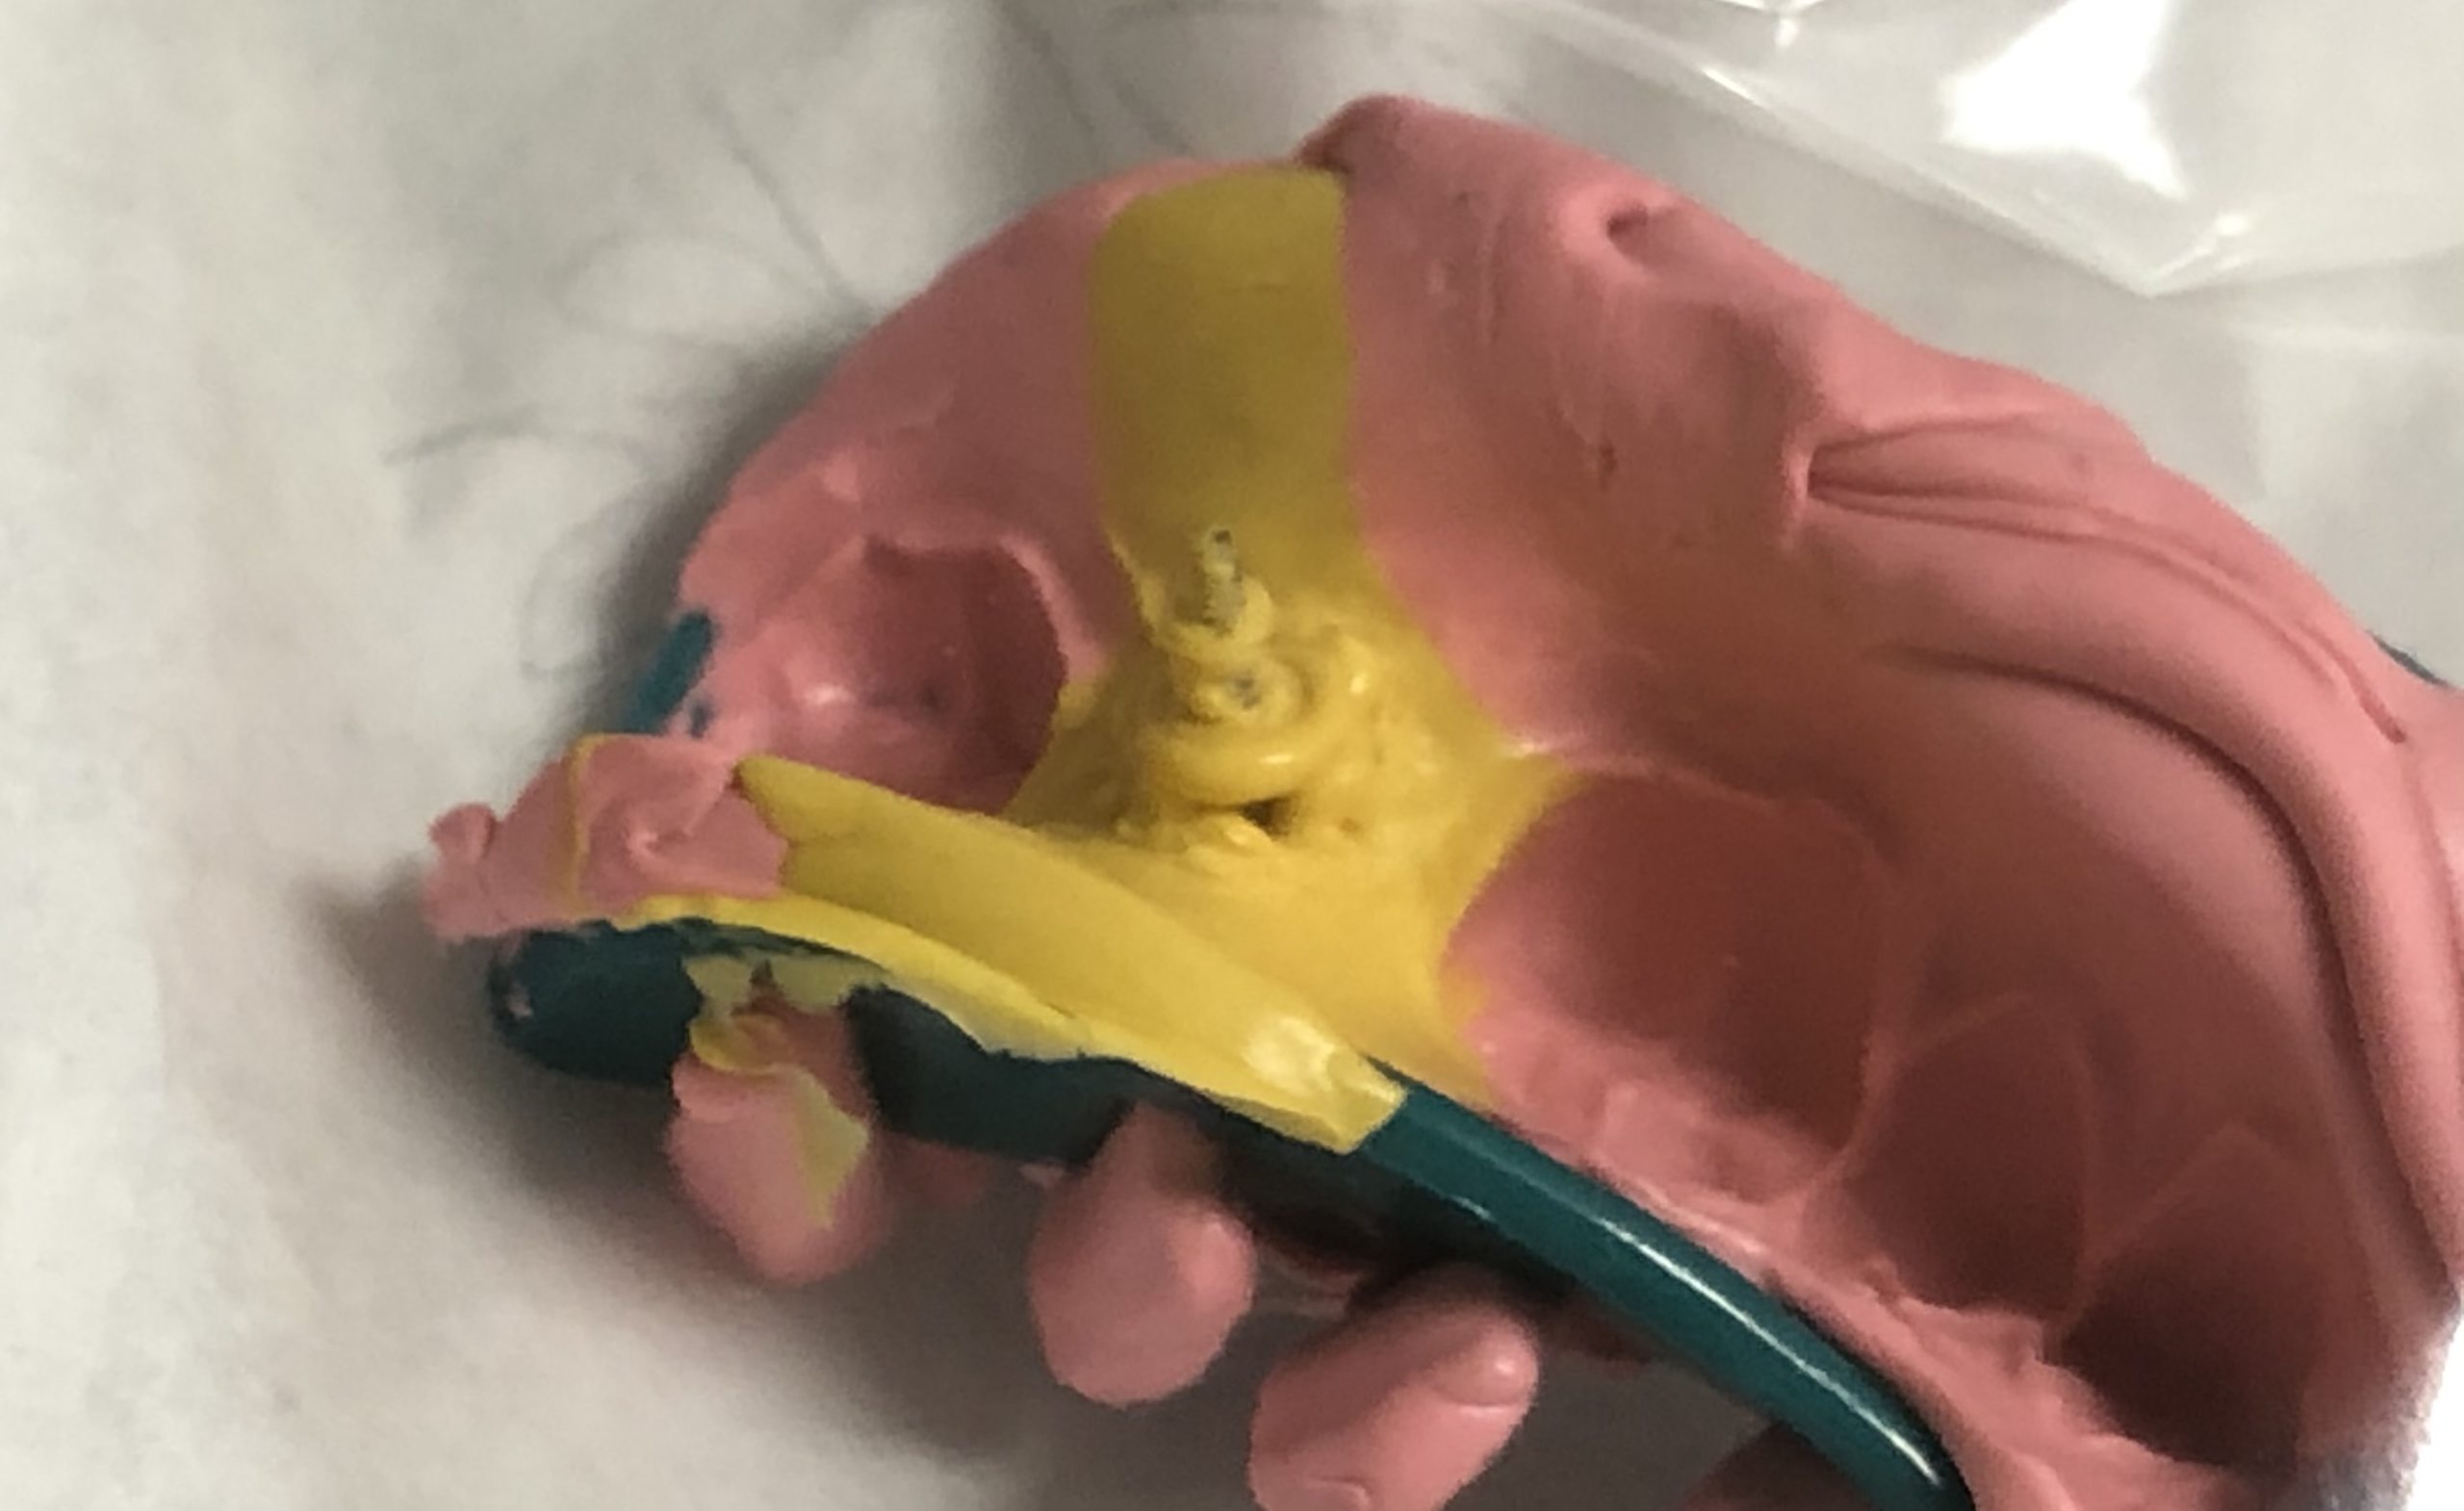
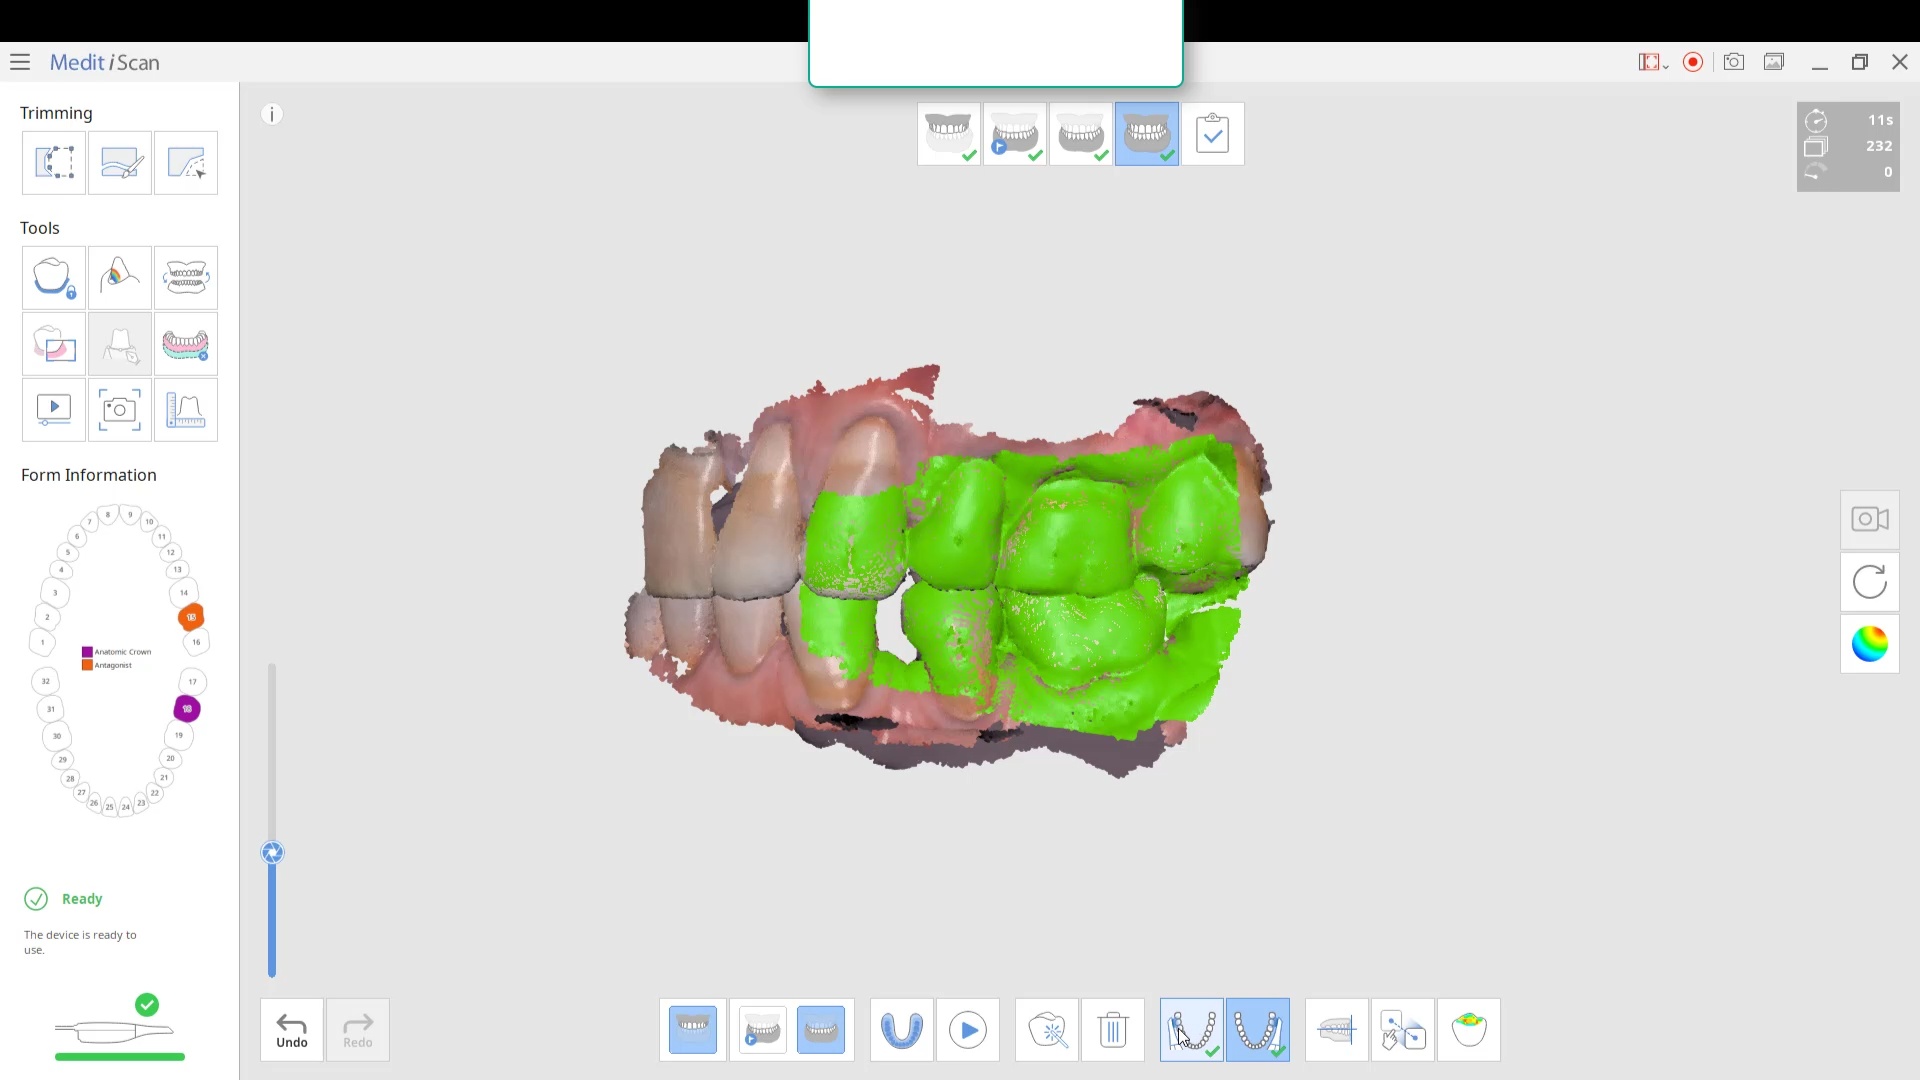
You can see how the Medit i700 was used to mix intra-oral scans with a PVS impression to capture the fixture. Advanced users can utilize the stl of the implant itself to fabricate a post and core digitally.
The post and core and the emax restoration were returned for delivery. The emax was not crystalized until after the abutment was cemented and then it was tried in by itself to assure proper contours and contacts. The great feature of lithium dissilicate is that you can add contact and glaze at the same time, which was required here as the mesial contact was weaker than desired after some minor adjustments
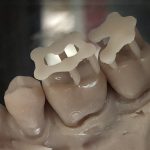
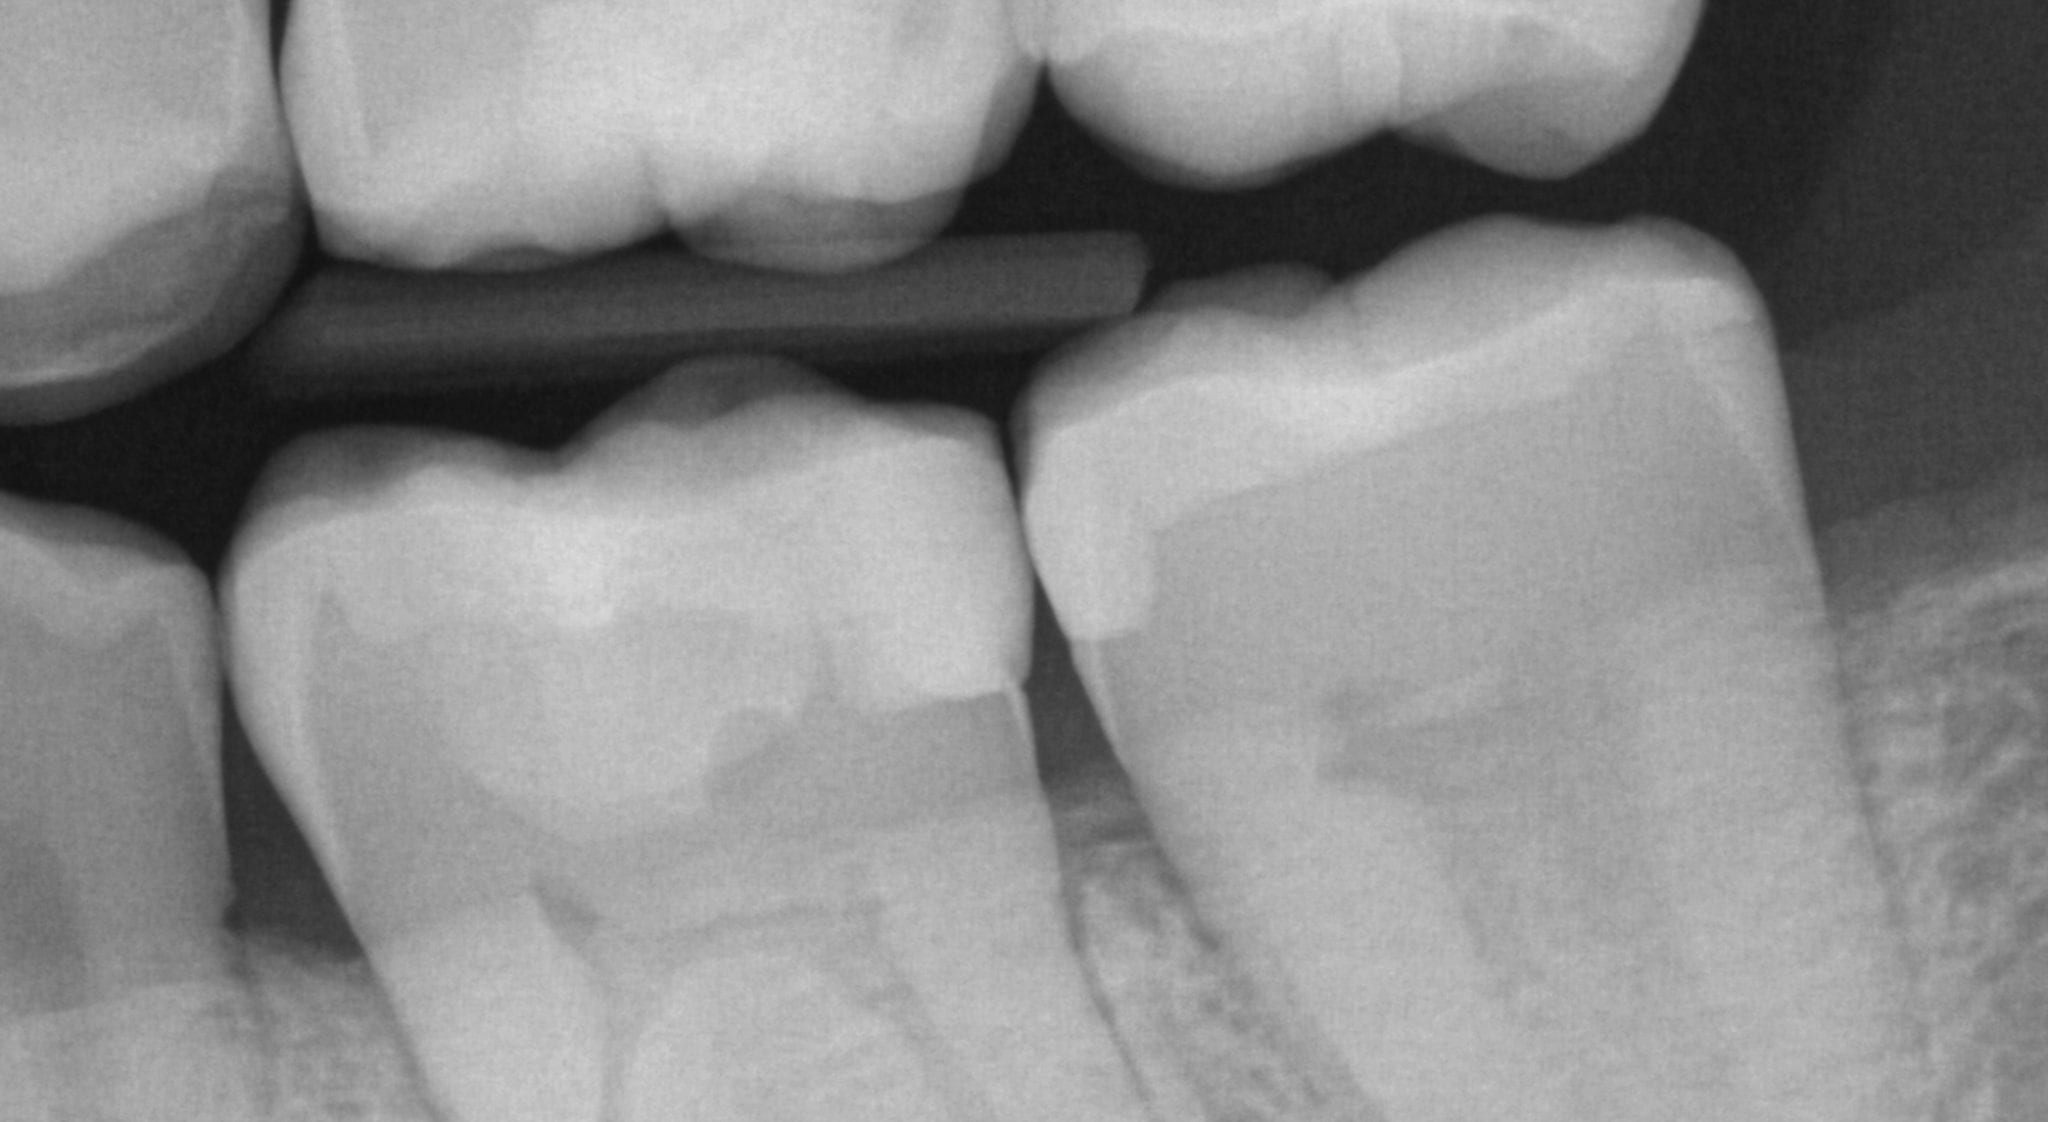
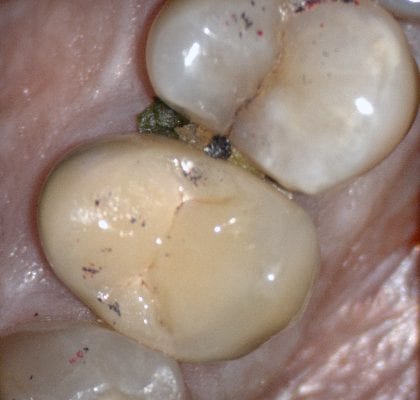
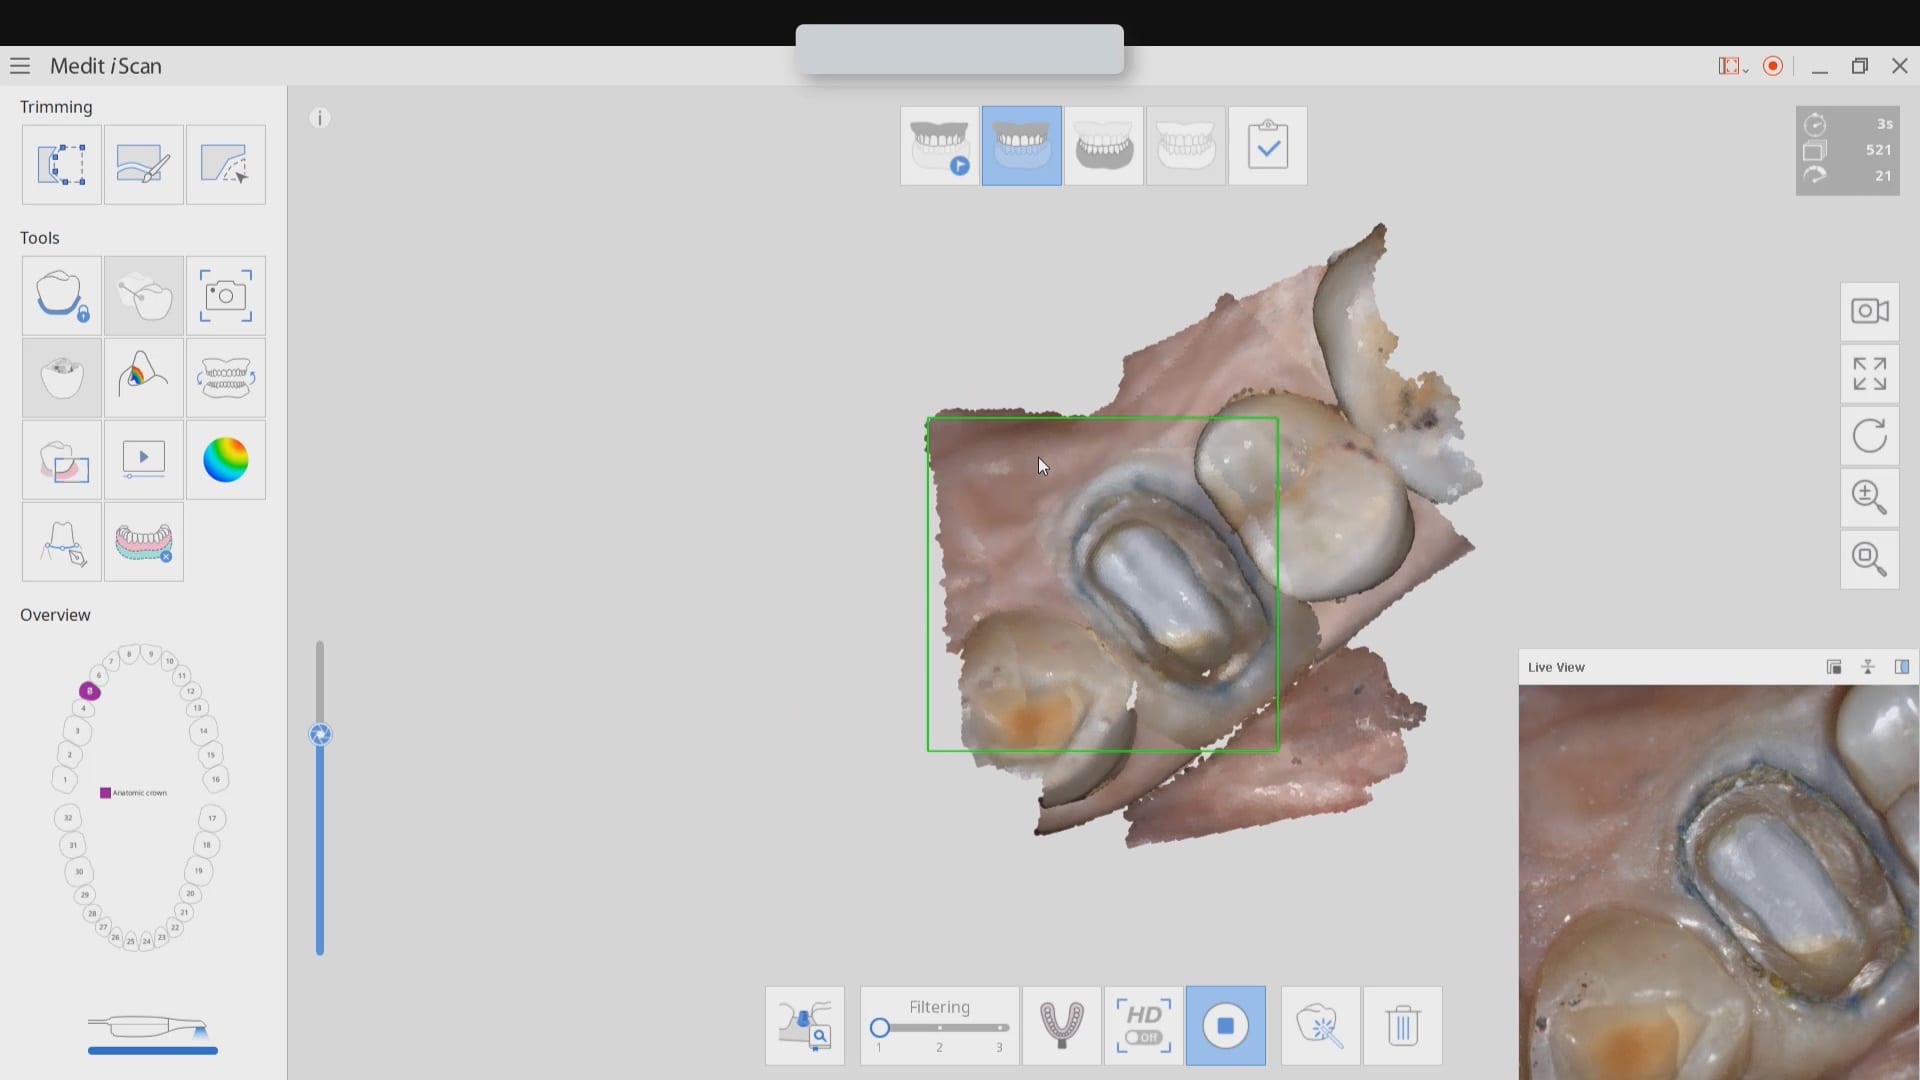
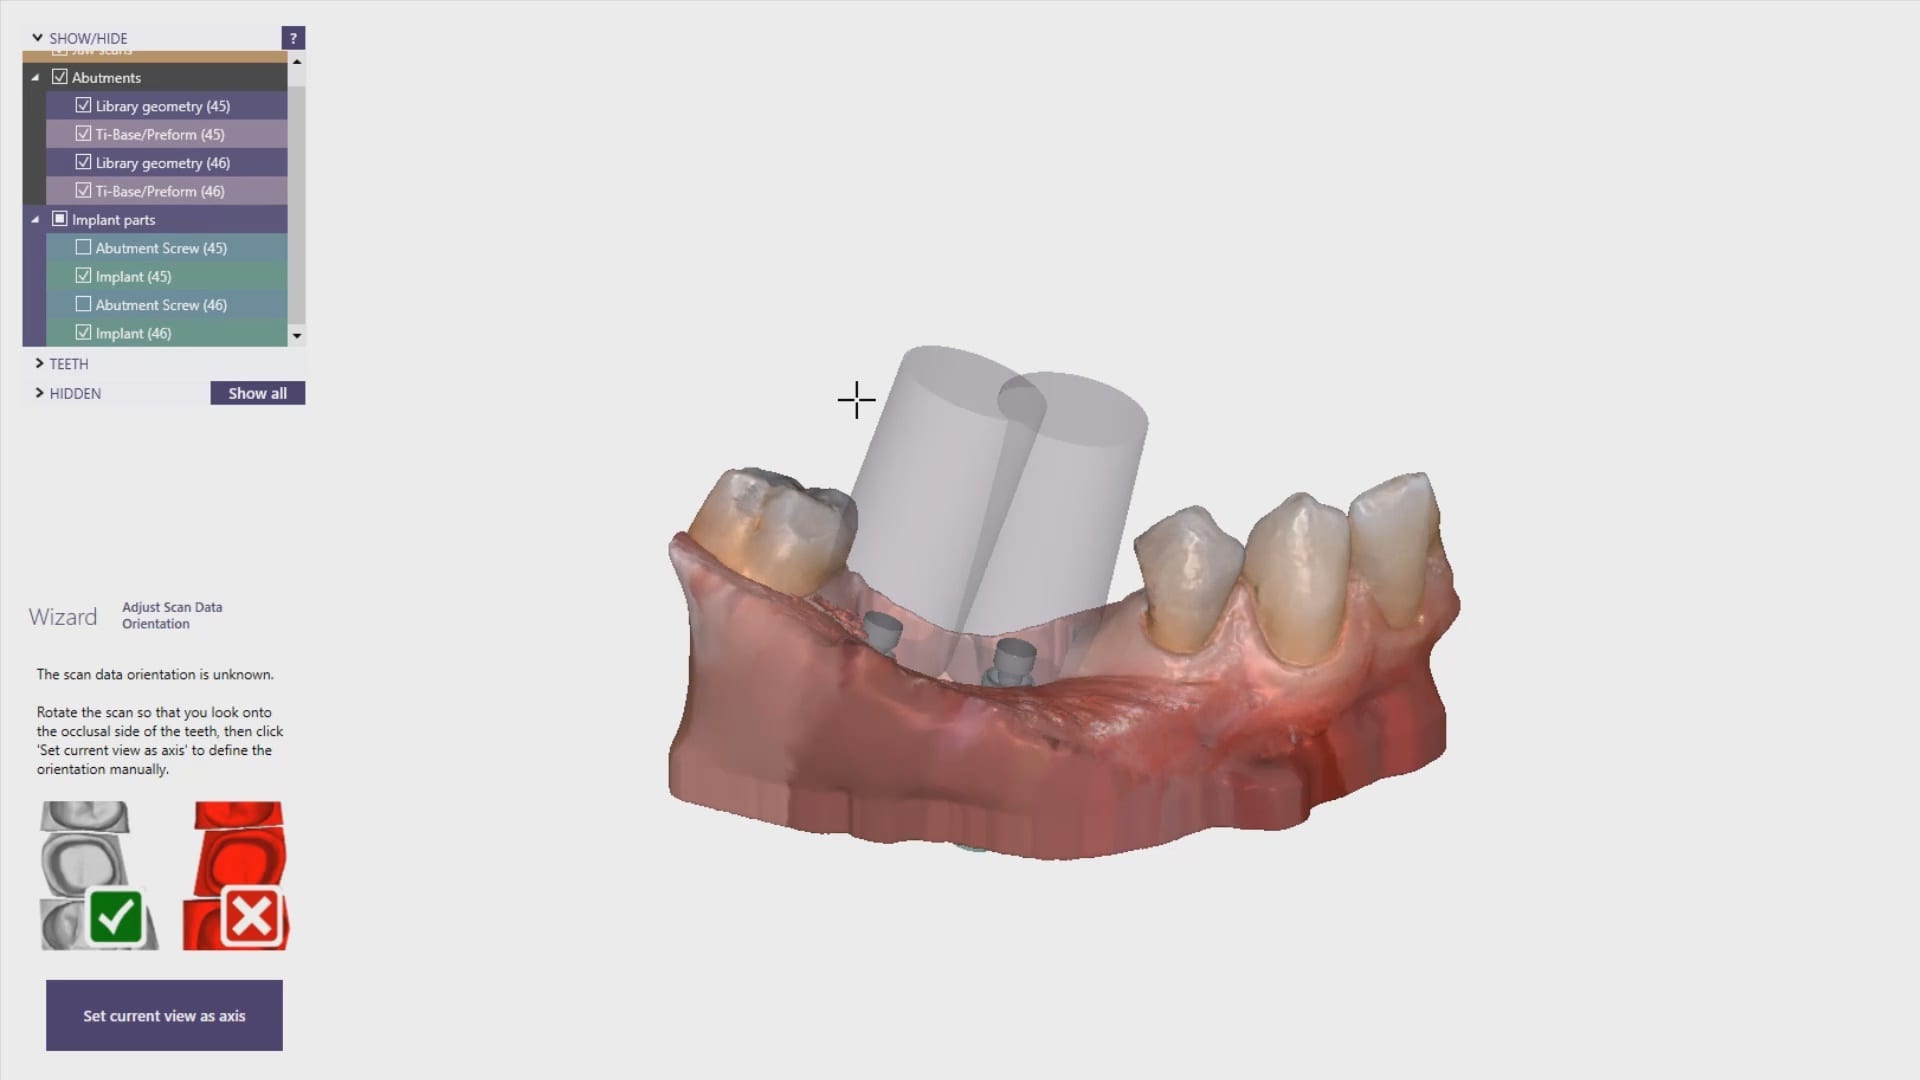
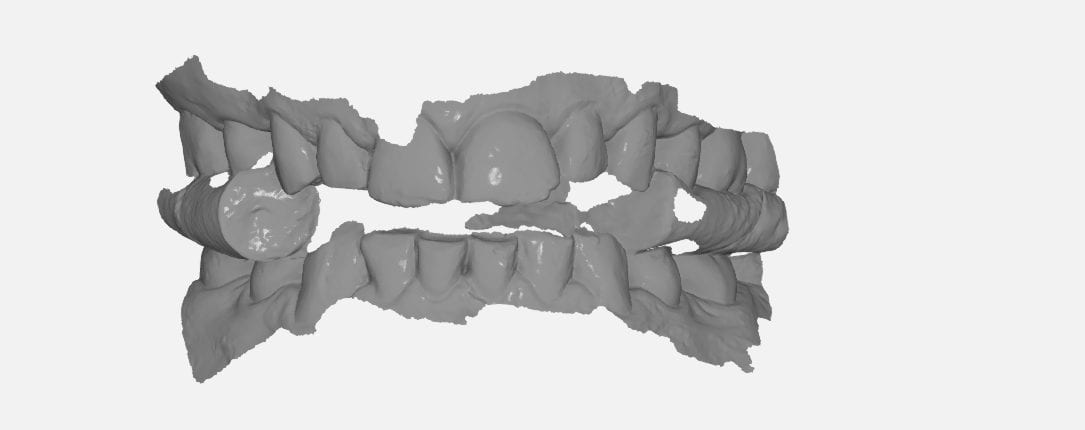
For our advanced users who mill in house or what to speed up their digital impressions we advocate taking advantage of digital dentistry’s unique features that allow you to take impressions over a period of time and segments, building larger models over different sequences and time. In this particular case we have two molars in the lower left quadrant that warranted replacement. The traditional method would be to prep both, isolate both, retract both, and take your final impression, but we will approach this as if there are two separate patients involved
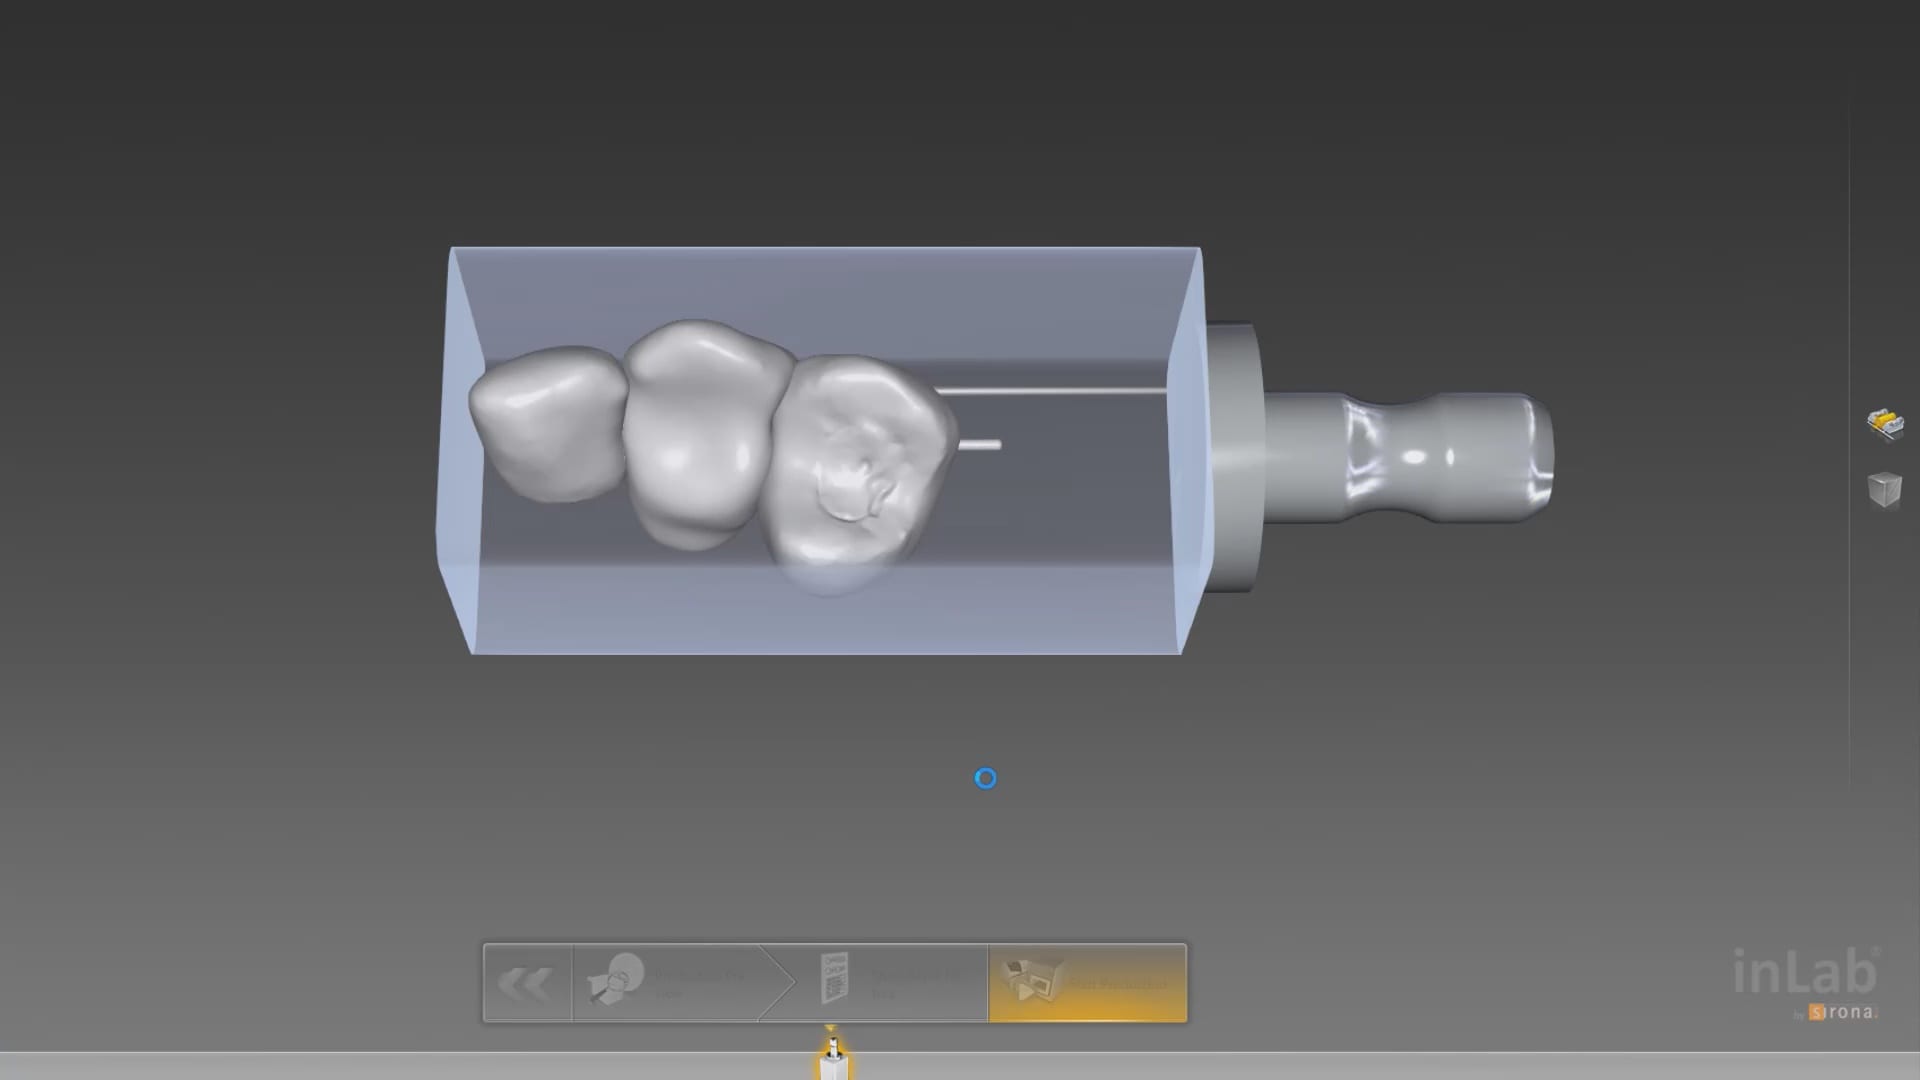
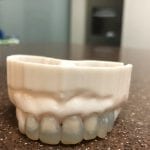
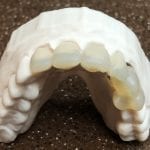
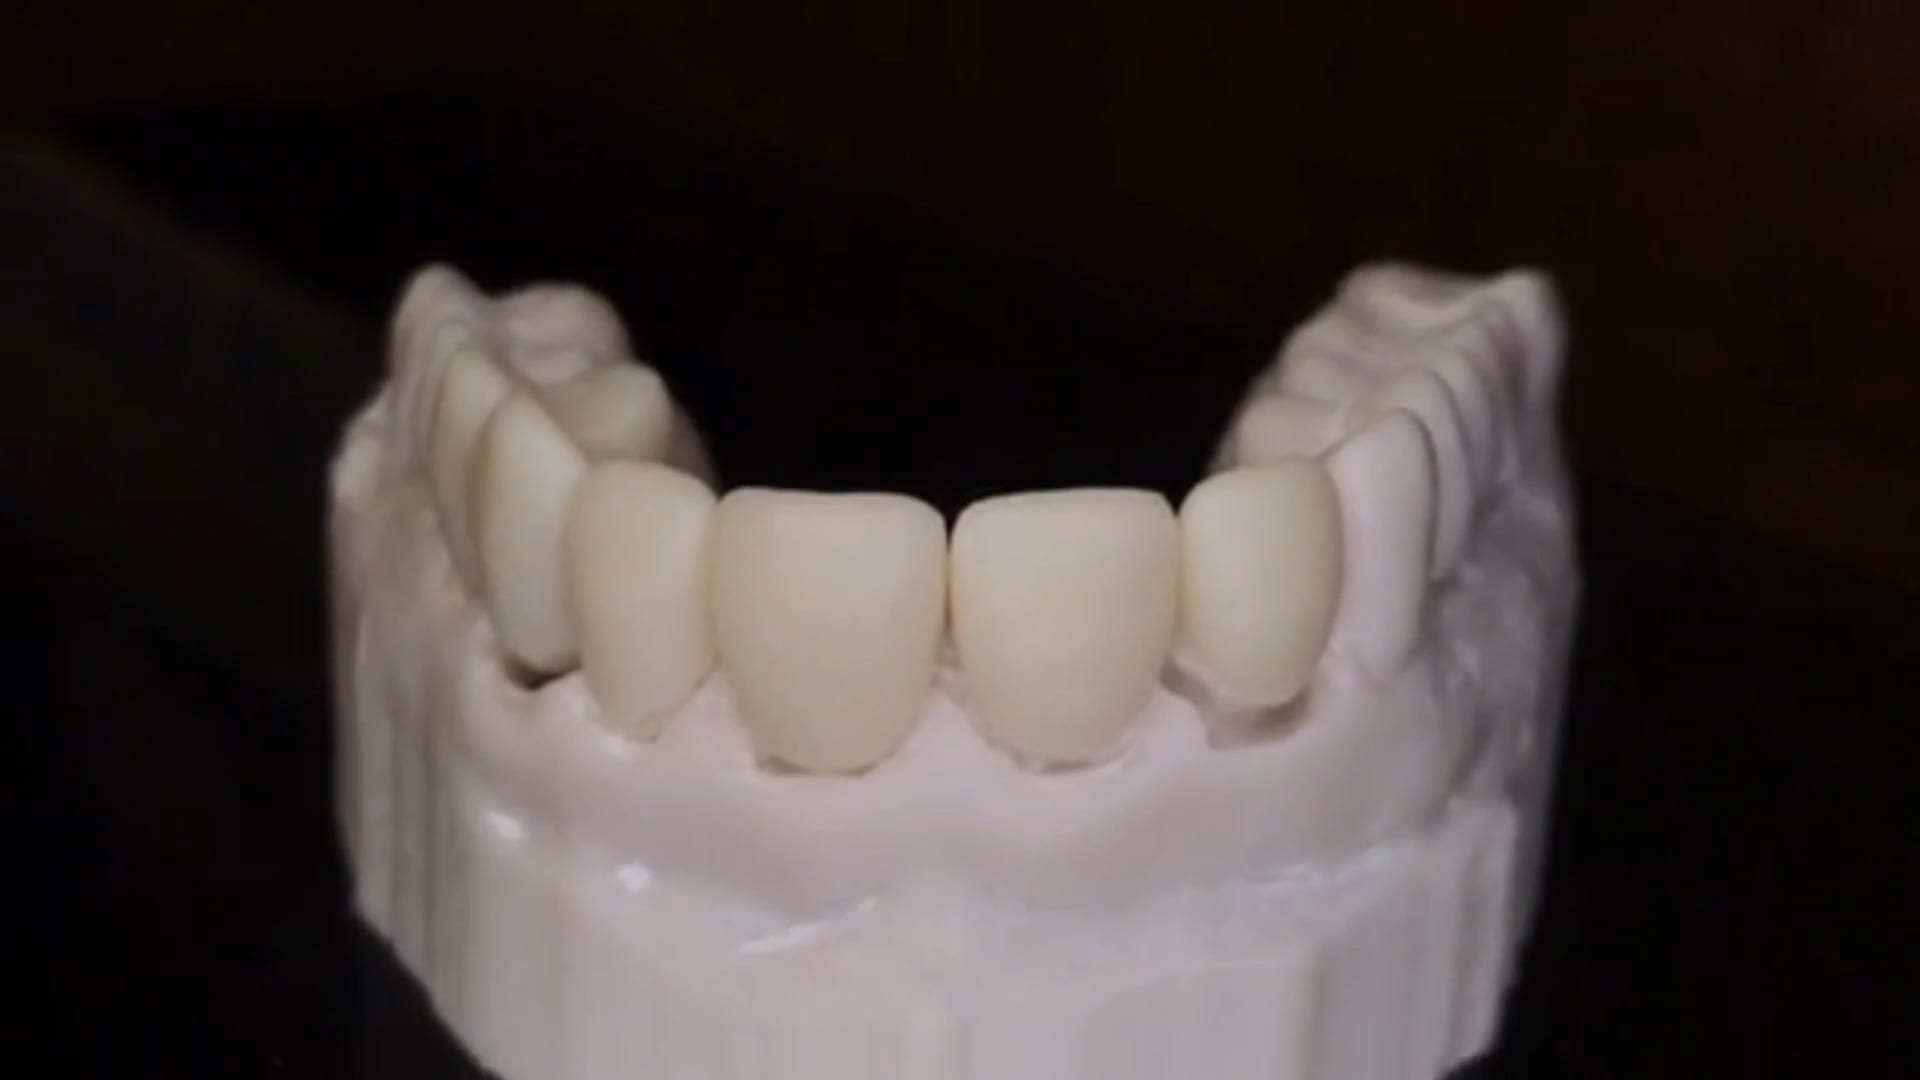
Case Presentation on how to manage two crowns with a single milling machine
For the second molar, we will take advantage of the anesthesia time and capture the first bite, the opposing, the pre-existing situation and then crop out the preparation area digitally. Once the tooth is prepared, we will check for proper reduction. We will then take the second bite to verify the vertical dimension has not changed.
While the second molar is being designed and milled in the first case, we will launch a second window by cloning the first case. All the data remains the same and this time we crop out the first molar digitally and protect the rest of the arch. Once the first molar is isolated, it is digitally captured and then designed and milled.
image first molar while second molar is being milled
To manage the contact between the two crowns, there are many advanced applications. Here is a simple explanation of how we use the prep model from case 1 as the pre-op model for case two. Since the second molar in case 1 made contact with the distal wall of the first molar, when we design the crown for the first molar in case 2, all we have to do is make sure the distal wall is flush to the pre-op. This guarantees us a contact between the two. There are lots of shortcuts to this puzzle once you get the basics of digital impressions under your belt.
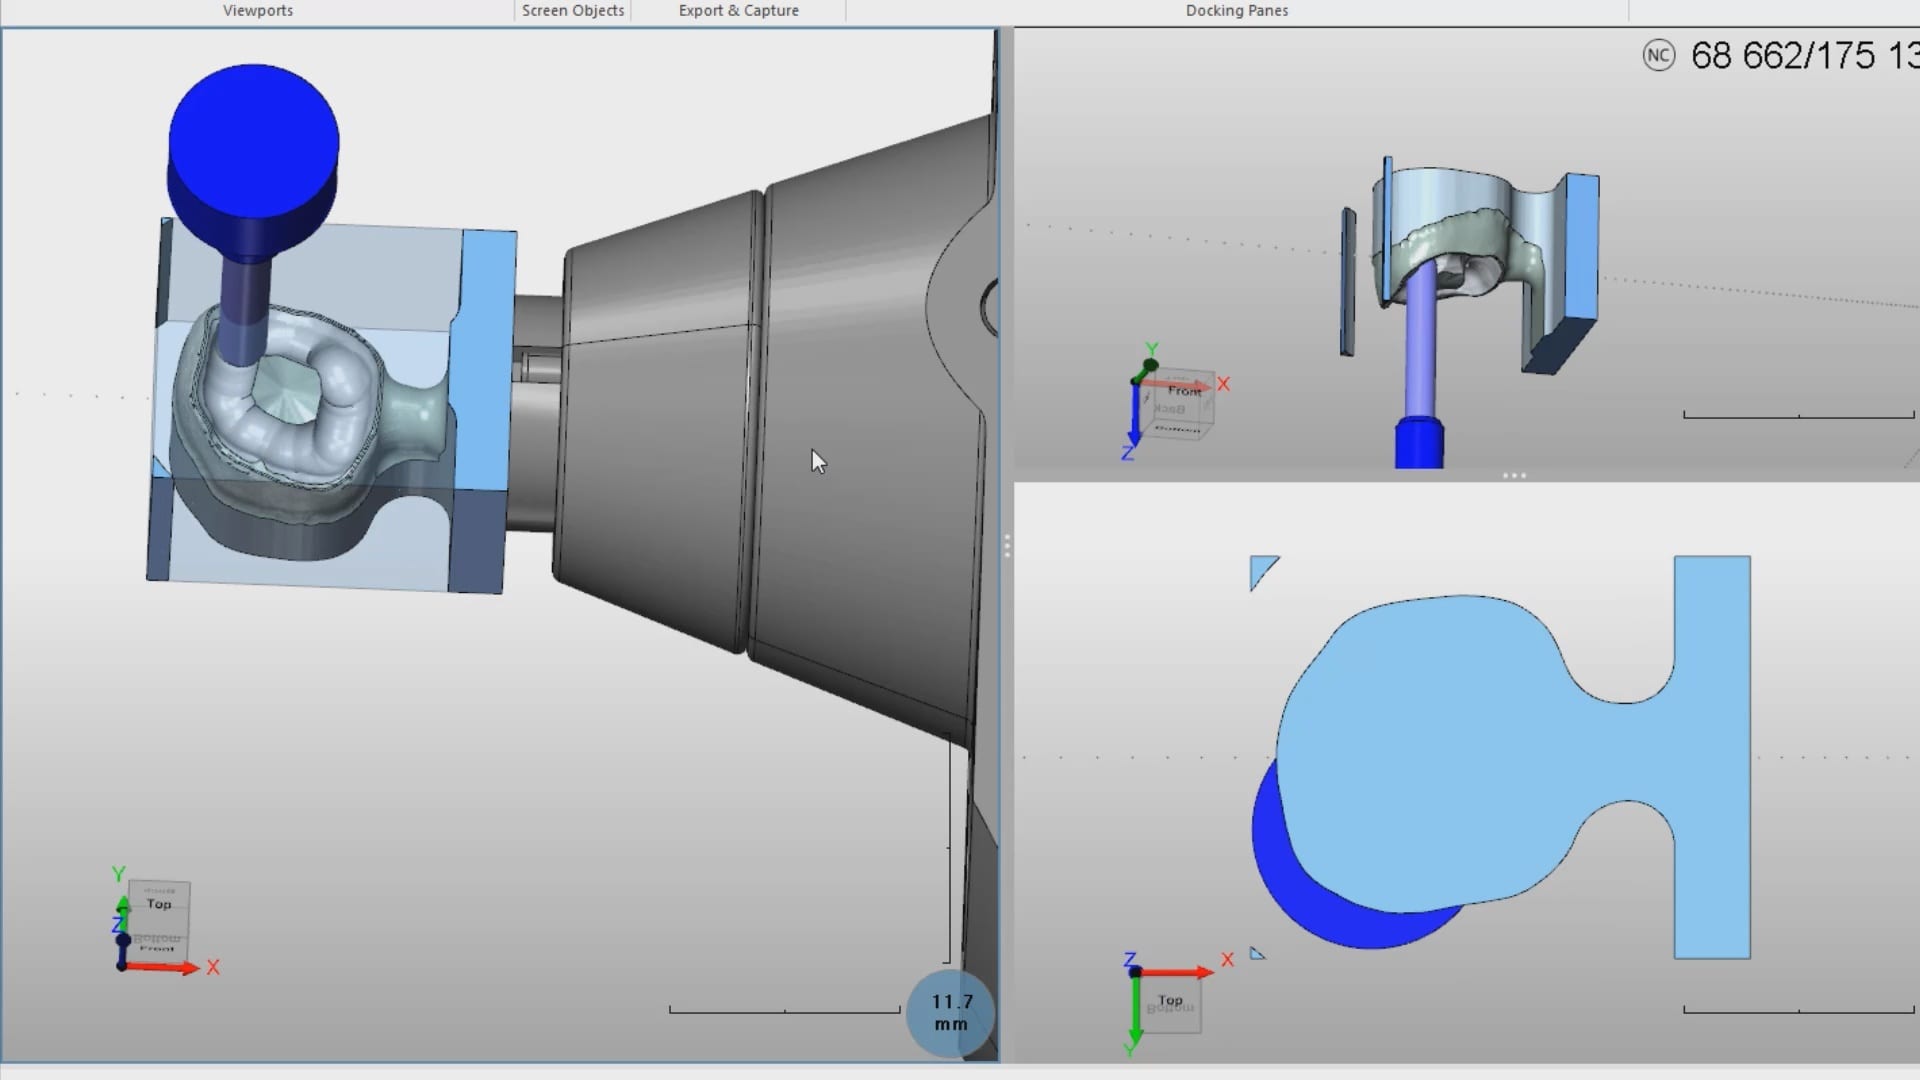
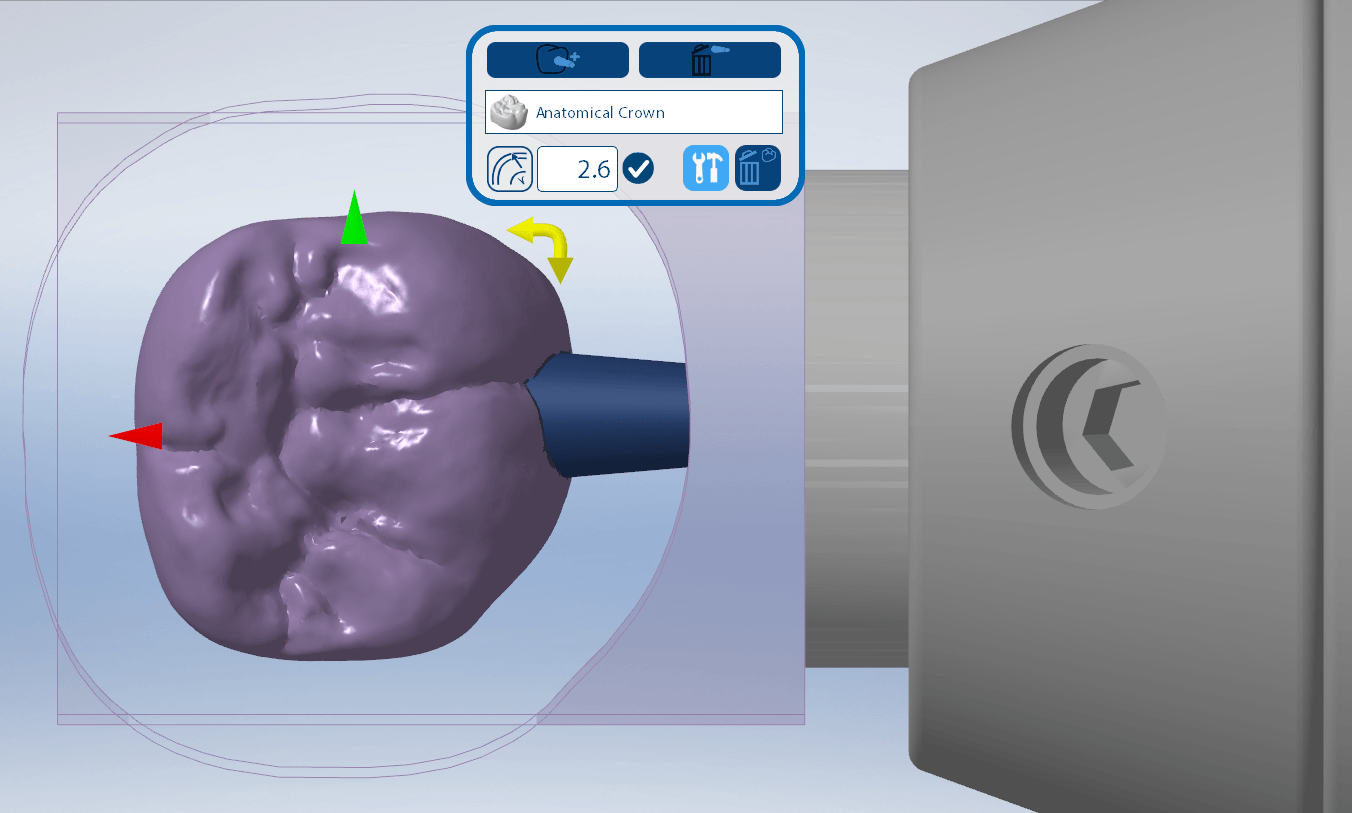
For our coritec users: new users often mislabel restorations in the Rx form that leads to a lot of trouble. like calling a crown and onlay or vice versa. this can lead to all kinds of trouble
first sign of trouble is if the two purple lines don’t define the borders of the the restoration. sometimes it is missing, other times it is off the restoration. so always double check this step and usually the missed nomenclature is what causes the trouble.
the next problem people have is that the default setting for the sprue design is poor. it makes the sprue thicker at the mandrel than the restoration. this creates a crevice that the drill can’t get to. this leads to quick drill breakage as it tries to drill into that space (red circle). it is easy to set change these settings so the drill “flows” with the design of the sprue and you get a lot of use out of it. it’s annoying to do this manually so a subsequent video shows you how to change this by default.
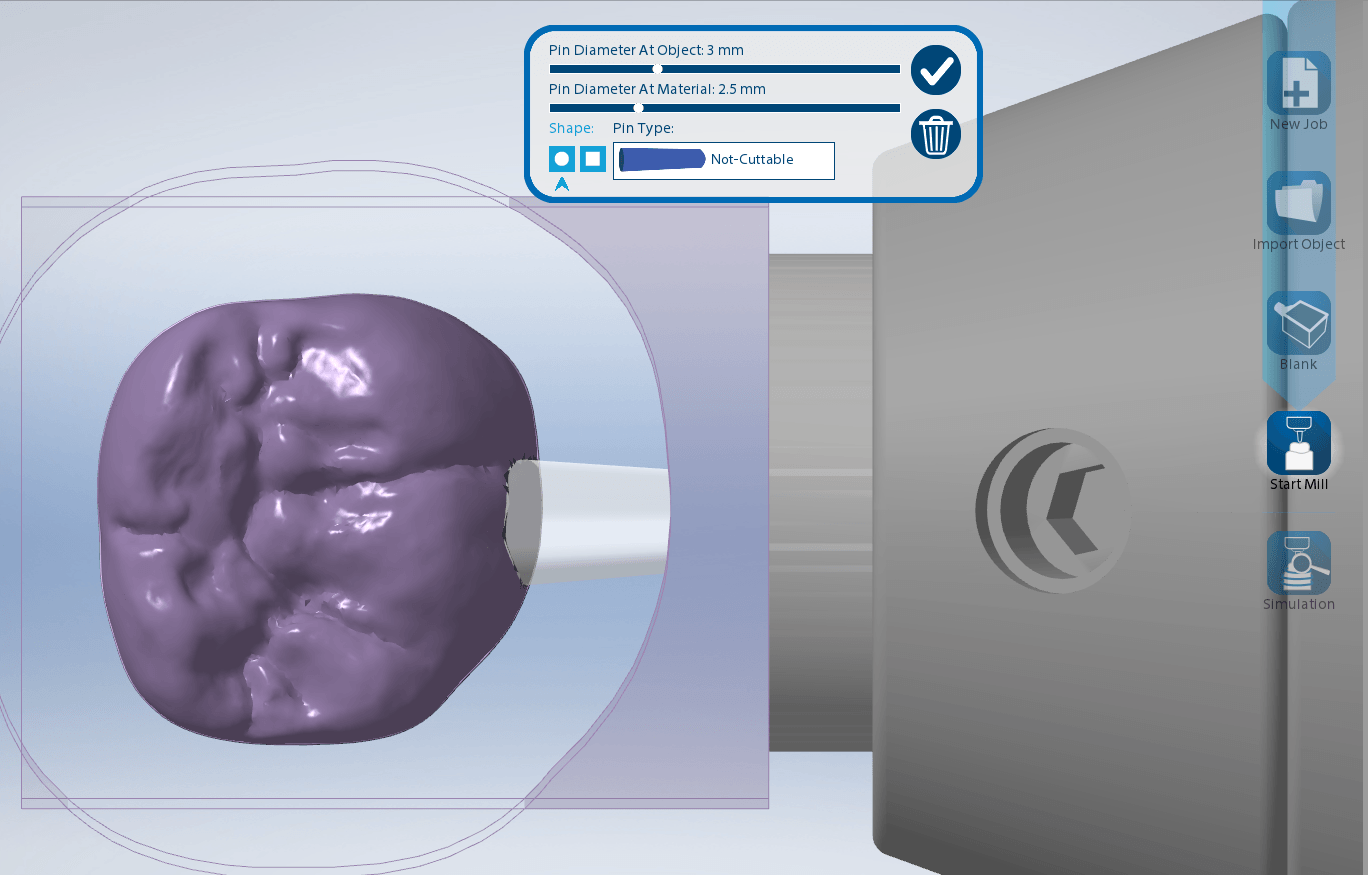
another problem is the offset. the last video shows the distance from the restoration to the mandrel as 2mm. the drill is 2.5 in diameter. if you set it at 2, the calculation doesn’t allow enough space for the drill that also breaks it off. set it at 2.7 or 3 and it will last you a long time.
two subsequent videos will show you how to create your own blocks and change their orientation, so you can fit a taller design into a smaller size block
Here are two very simple examples of clinical advantages of digital impressions over analog ones. You can edit or add to your models and you can work independent of time and sequence.
You can also know immediately if you have captured your margins correctly. Once you understand these concepts, there are dozens of ways you can apply these principles to make some of the most challenging clinical cases very easy to manage
distinct advantages of digital dentistry over analog dentistry
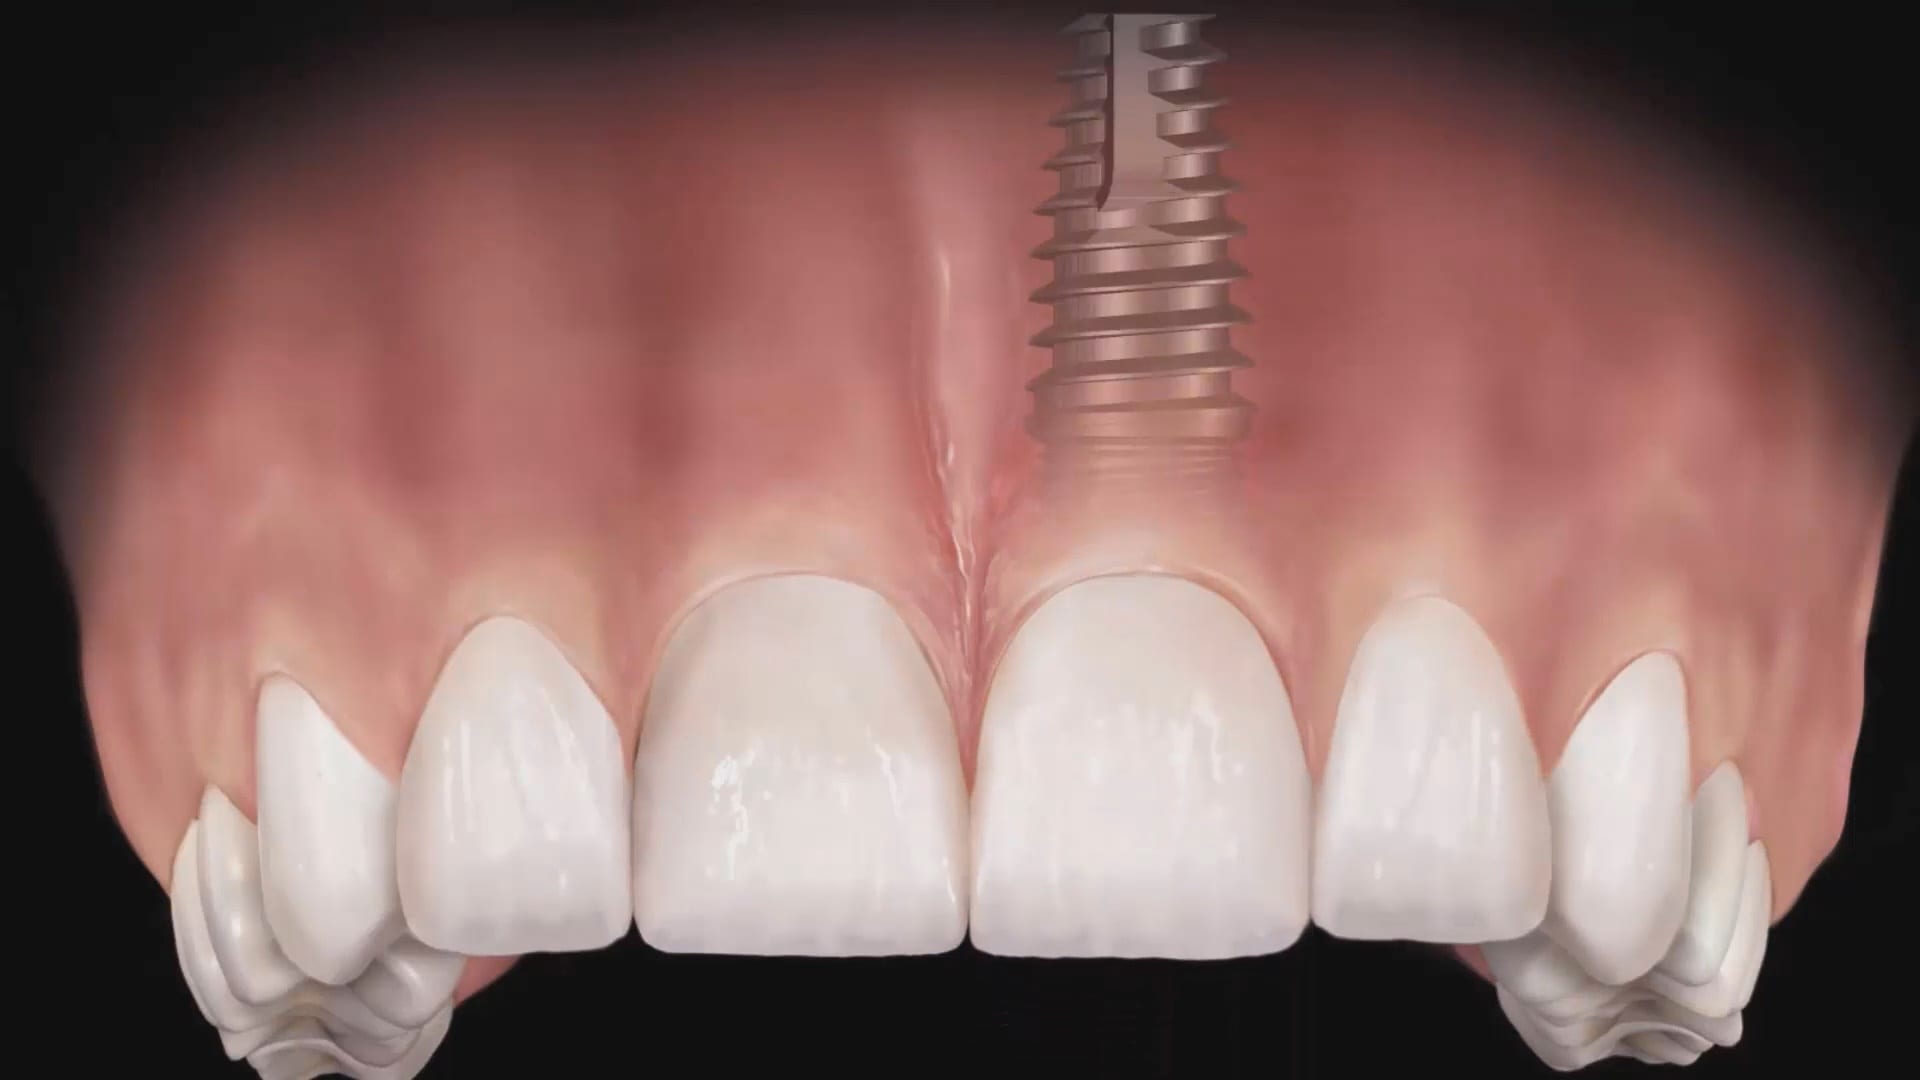
FIND OUT HOW RESTORING IMPLANTS CAN BE THE MOST PREDICTABLE PROCEDURE YOU CAN DO
For decades, placing and restoring implants was a very stressful and unpredictable procedure. Digital dentistry has reversed that trend, making it now the most predictable procedure you can perform. You can easily capture contacts, opposing dentition, and the location of the implant. More importantly, you can design the emergence profile to your liking.
SEE HOW EASY IT IS TO ADD A CONTACT TO A RESTORATION WITH AN OVEN
Emax restorations are milled in a pre-crystalized state (blue phase) as it is more gentle on the drills than the final crystallized form. A big advantage of emax lithium dissilicate material is that you can easily add contacts with addition powder in the same cycle as glazing. This reduces the stress of try-ins and allows you to recover without wasting precious time. Other materials on the other hand may require extensive oven times or a re-mill (or send the restoration back to the lab)
In Digital Dentistry, once you acquire your models accurately, the CAD software doesn’t care where and how you capture them. Once you are done with the design, the cam and the milling machine have no clue what scanner you used.
here we take an intra-oral scan with the medit i500 and design in exocad and send it to 2 different milling machines. One is the CEREC MCXL and the other is the imes icore coritec one.
Please Note: This page is from dentalcadcamshop.com: 13.03.2020
When it comes to single visit dentistry (procedures in under 90 minutes), CEREC is tough to beat. From the integrated camera, CAD software and mill, CEREC is the most streamlined technology to serve patients in one visit.
Nevertheless, increasingly doctors are expanding their range of indications with CAD/CAM technologies and sometimes we simply want to combine CEREC with other equipment and software manufacturers. But wait, isn’t CEREC a closed system? Yes and no. While nobody would accuse CEREC of being a completely open system, it is possible to export .STL files of CEREC scans which gives us some flexibility to bring CEREC scans into other programs.
But today we are not focusing on exporting CEREC scans, but rather:
1) How can we bring scans from other cameras into CEREC?
Example: I own a 3rd Party Camera and I want to import those scans into CEREC for making crowns, etc.
2) How can we use CEREC to mill CAD objects made from 3rd Party Software?
Example: I own a 3rd Party CAD Software and want to import those into CEREC for milling.
But wait, I thought no 3rd Party files (scans or CAD designs) may be imported into CEREC. How, then, can we unlock the system? The missing piece to the puzzle is the inLab Software! With inLab Software, the CEREC system can be opened up for all kinds of interesting workflows. Here are two workflows CEREC owners constantly ask us about:
1) I own a 3rd Party Camera – How do I mill from my MC XL?
2) I own a 3rd Party CAD Software (e.g. exocad) and I want to mill (e.g. crowns) designed with 3rd Party software and mill them with my MC XL
Please note carefully the Requirements listed above!
– If you want to import a Scan .STL… You will need the inLab SW Interfaces Module, inLab CAD Software (18.0 and above) andthe inLab CAM Software (18.0 and above).
– If you want to import CAD .STL designs for milling… You only need inLab CAM Software (18.0 and above).
– In case you never owned any inLab Software before, or your copy of inLab Software is below 4.X, you will additionally need to order the License Stick (SKU: 6364785) and install the License Stick on the PC or workstation on which you are using the inLab Software (CAD or CAM). Please note this is NOT the same License Stick as you have on your CEREC AC unit!
– In no case can the inLab Software mill on the CEREC MC!
Still have questions? No problem, we are here with answers: Contact us
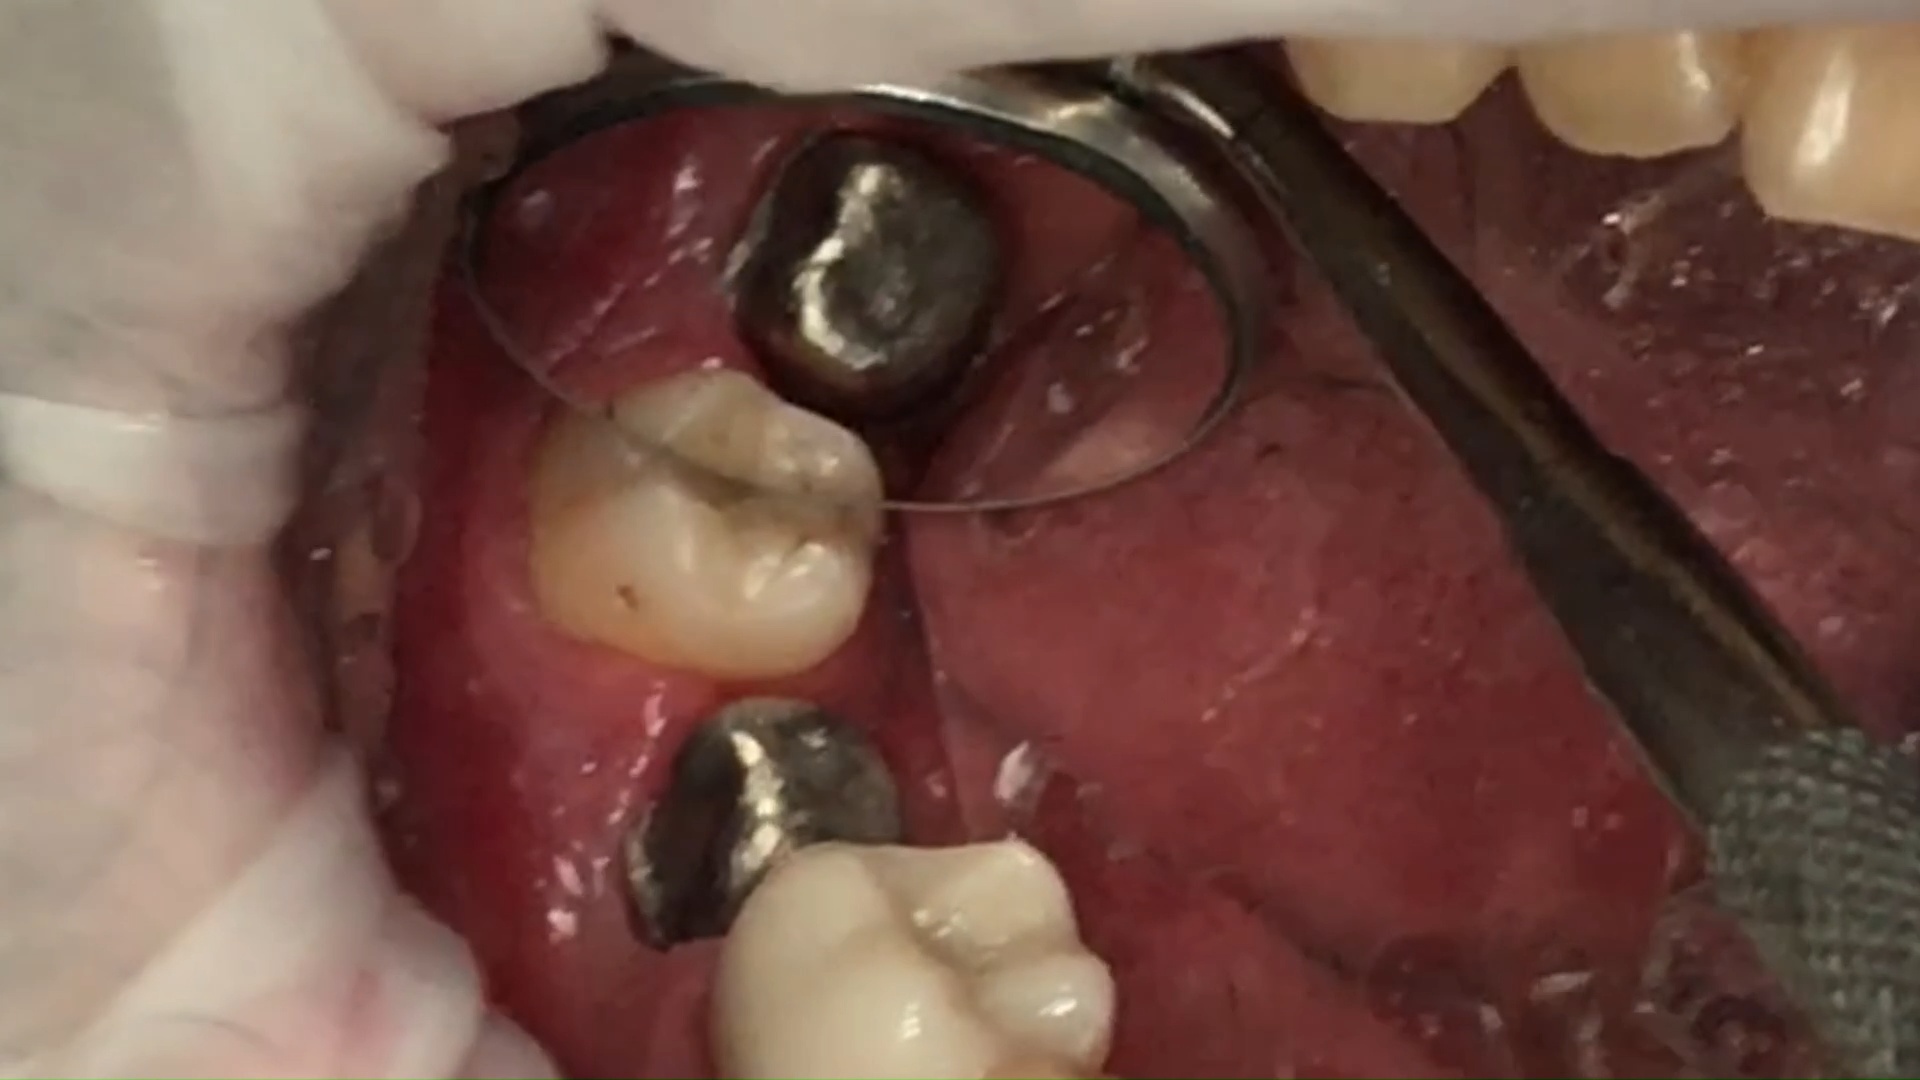
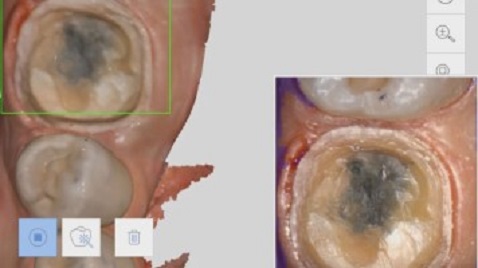
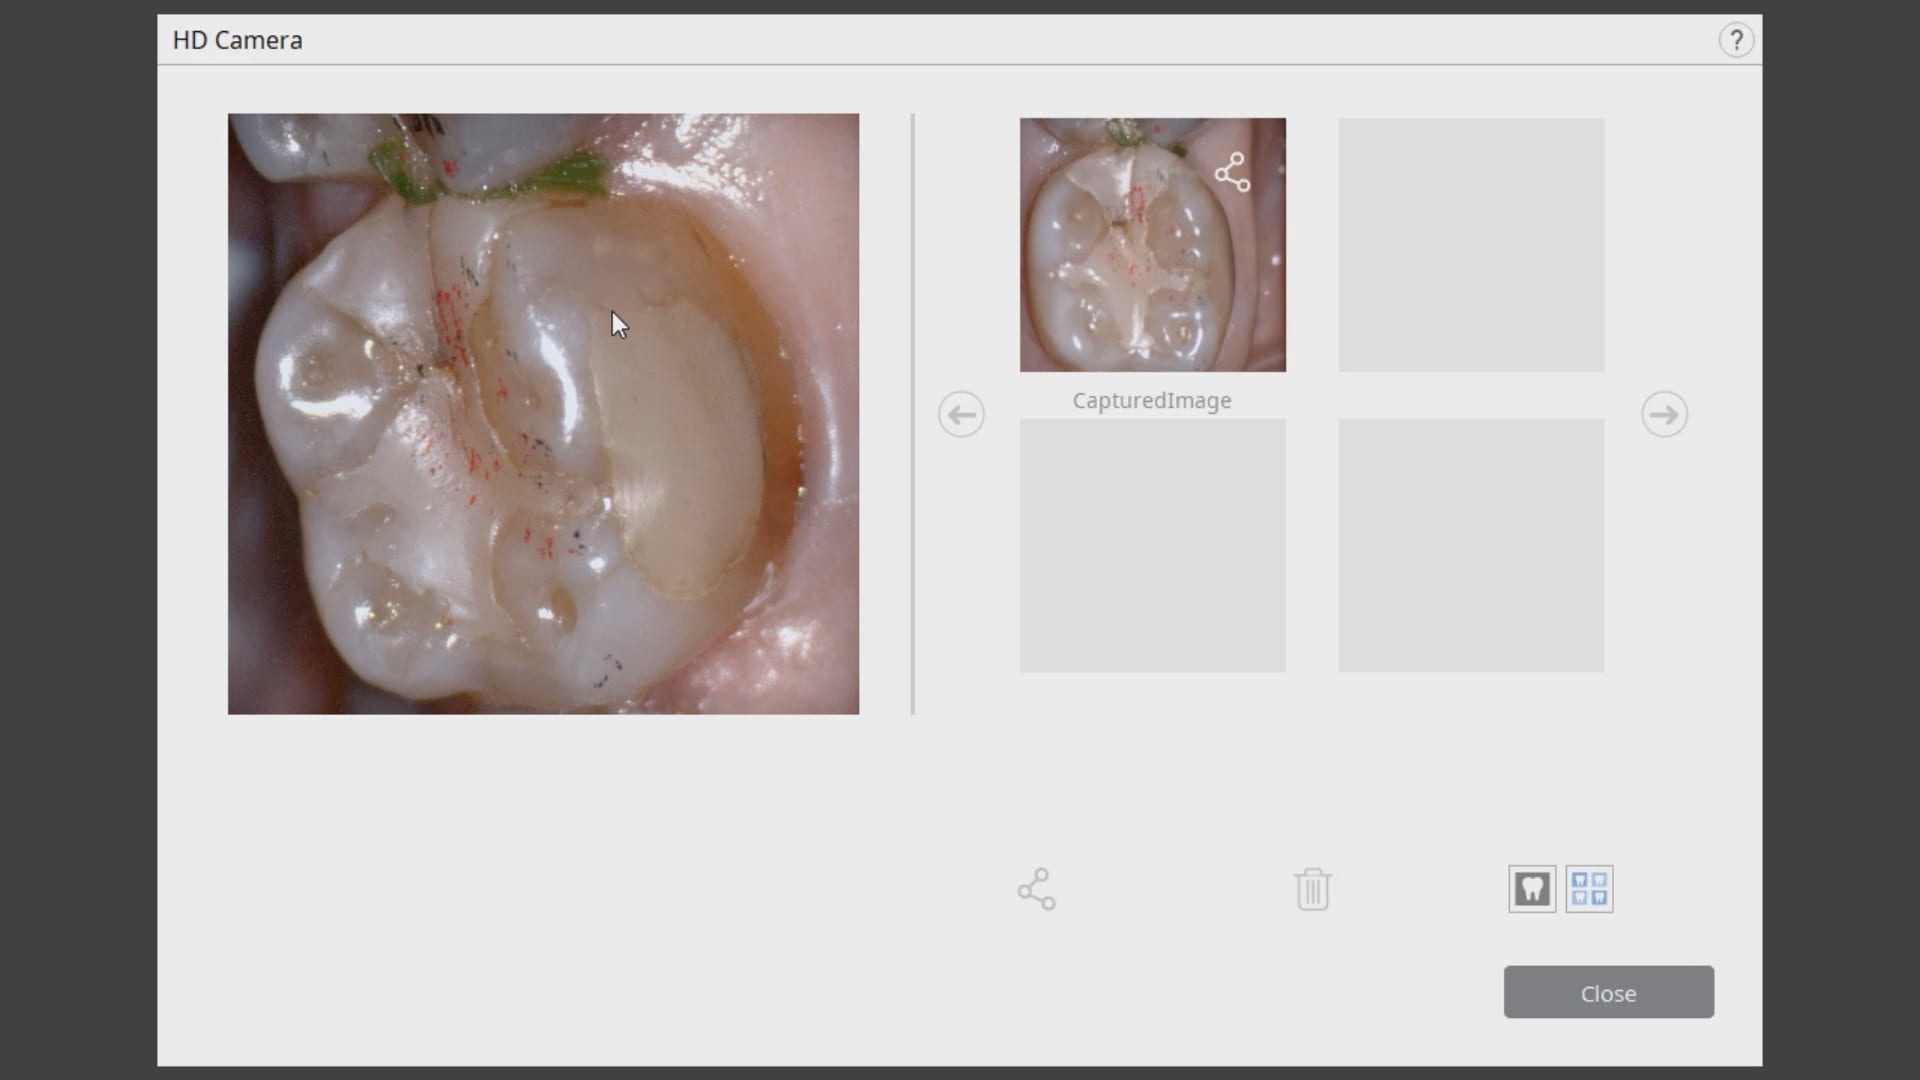
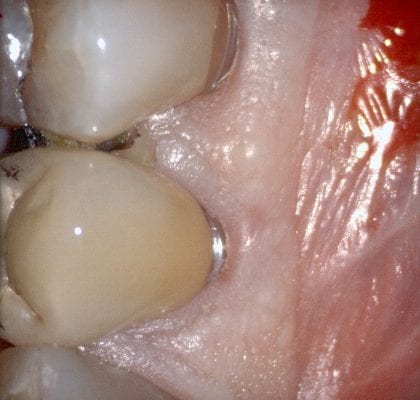
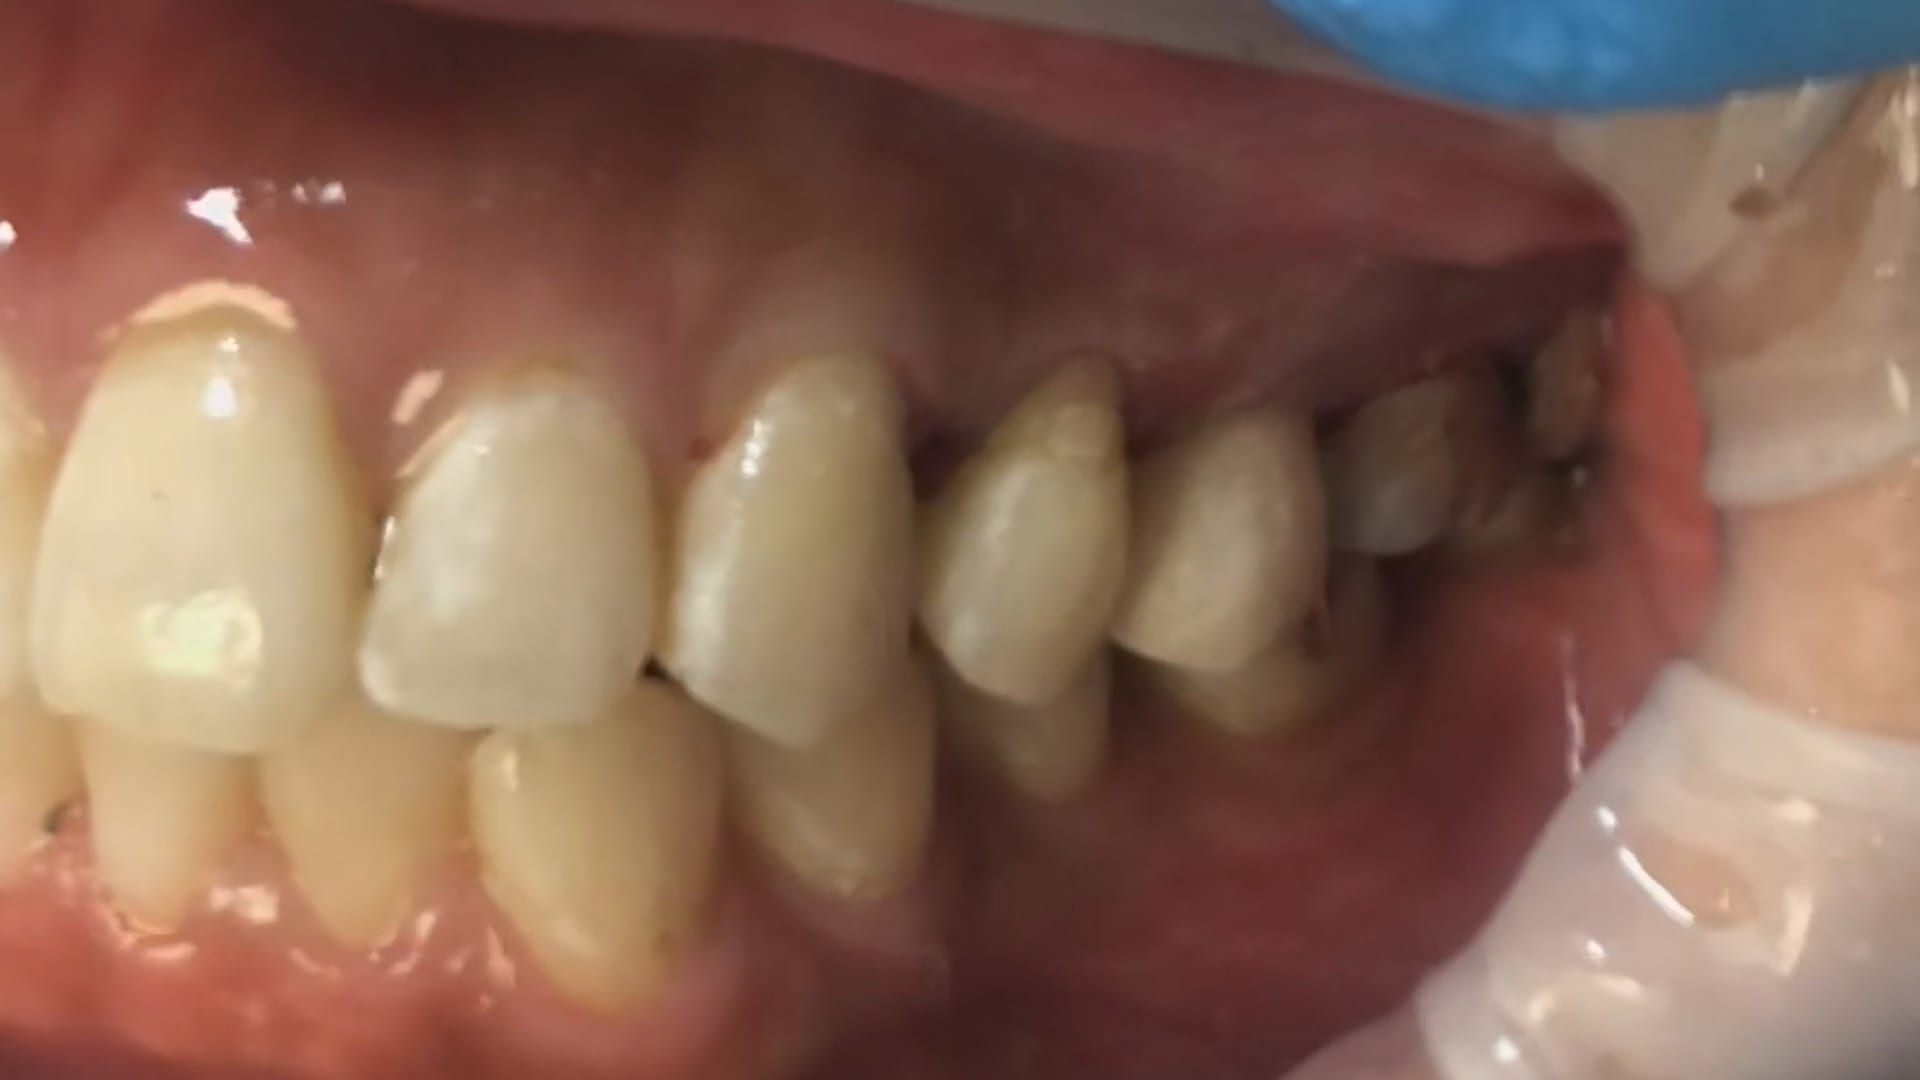
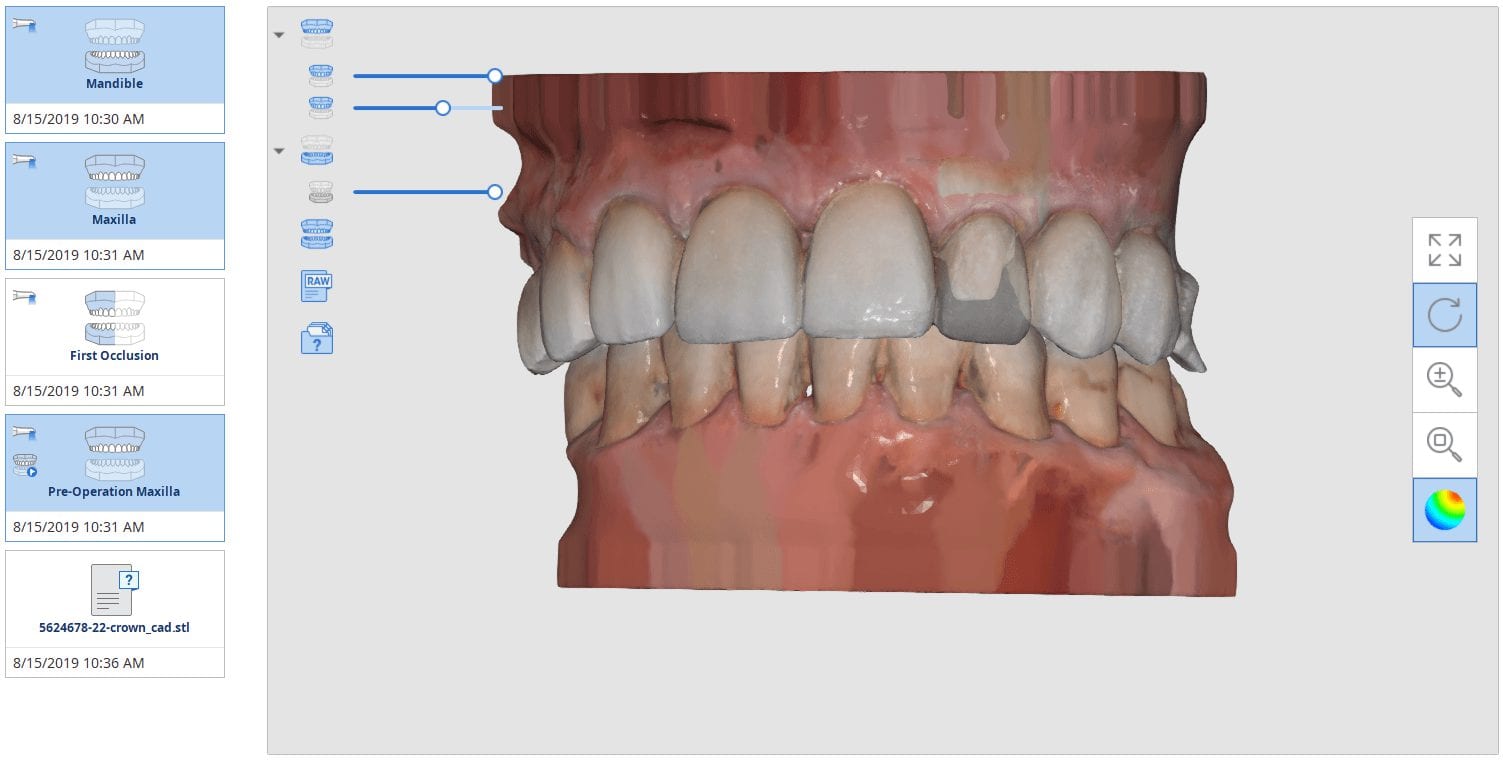
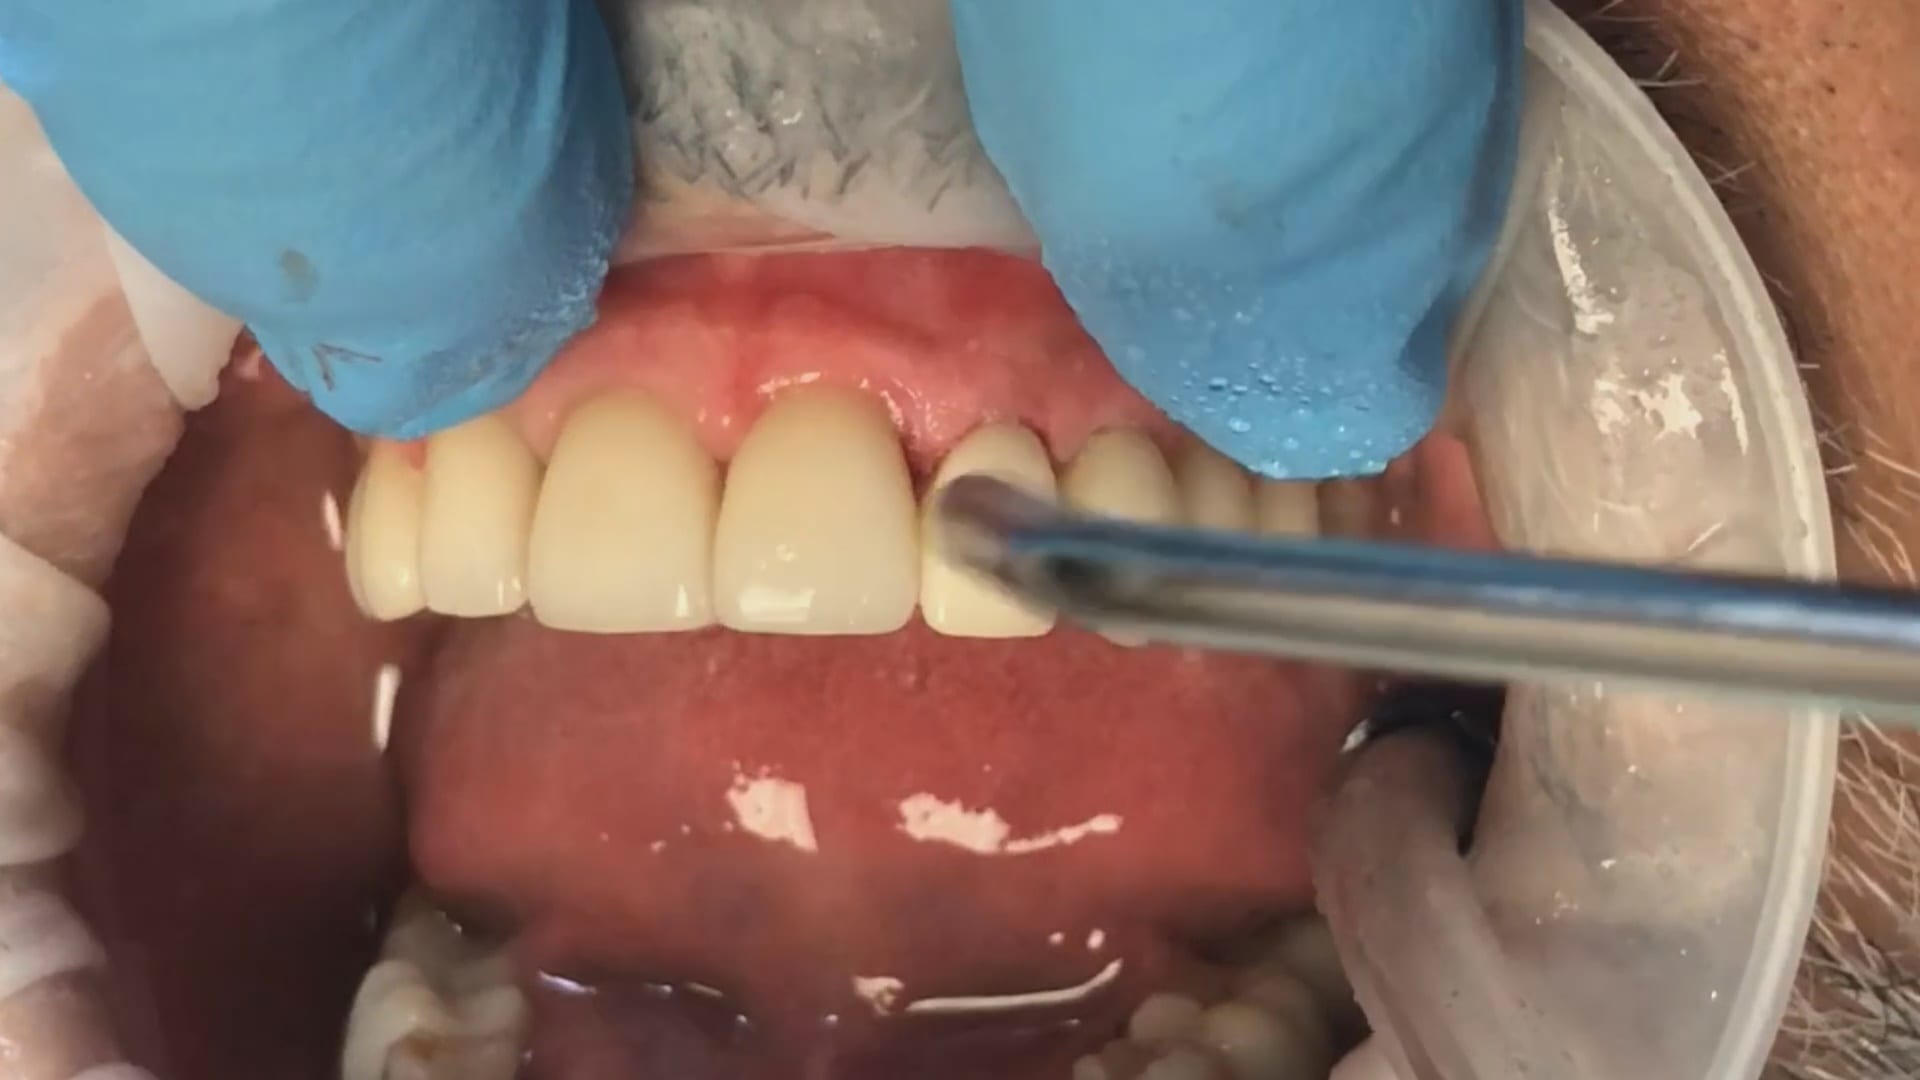
In this clinical case a patient lost a pre-existing crown. The remaining tooth structure had recurrent decay and a new crown was warranted.
After anesthesia was administered, the clearance from opposing dentition was assessed. The preparation was reduced to accommodate the necessary thickness of the material.
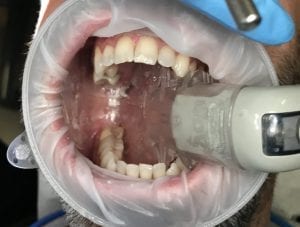
Once adequate clearance was achieved an Optragate was placed and an isolite was used to isolate the area. The preparation was scanned and then the lower arch was captured. The buccal bite was then taken to along the arches together
With Meditlink software, you have the option of designing the case yourself or sending it off to your partnered lab. The following video shows what happens to your case once the lab downloads the case
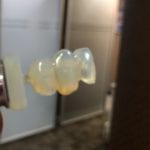
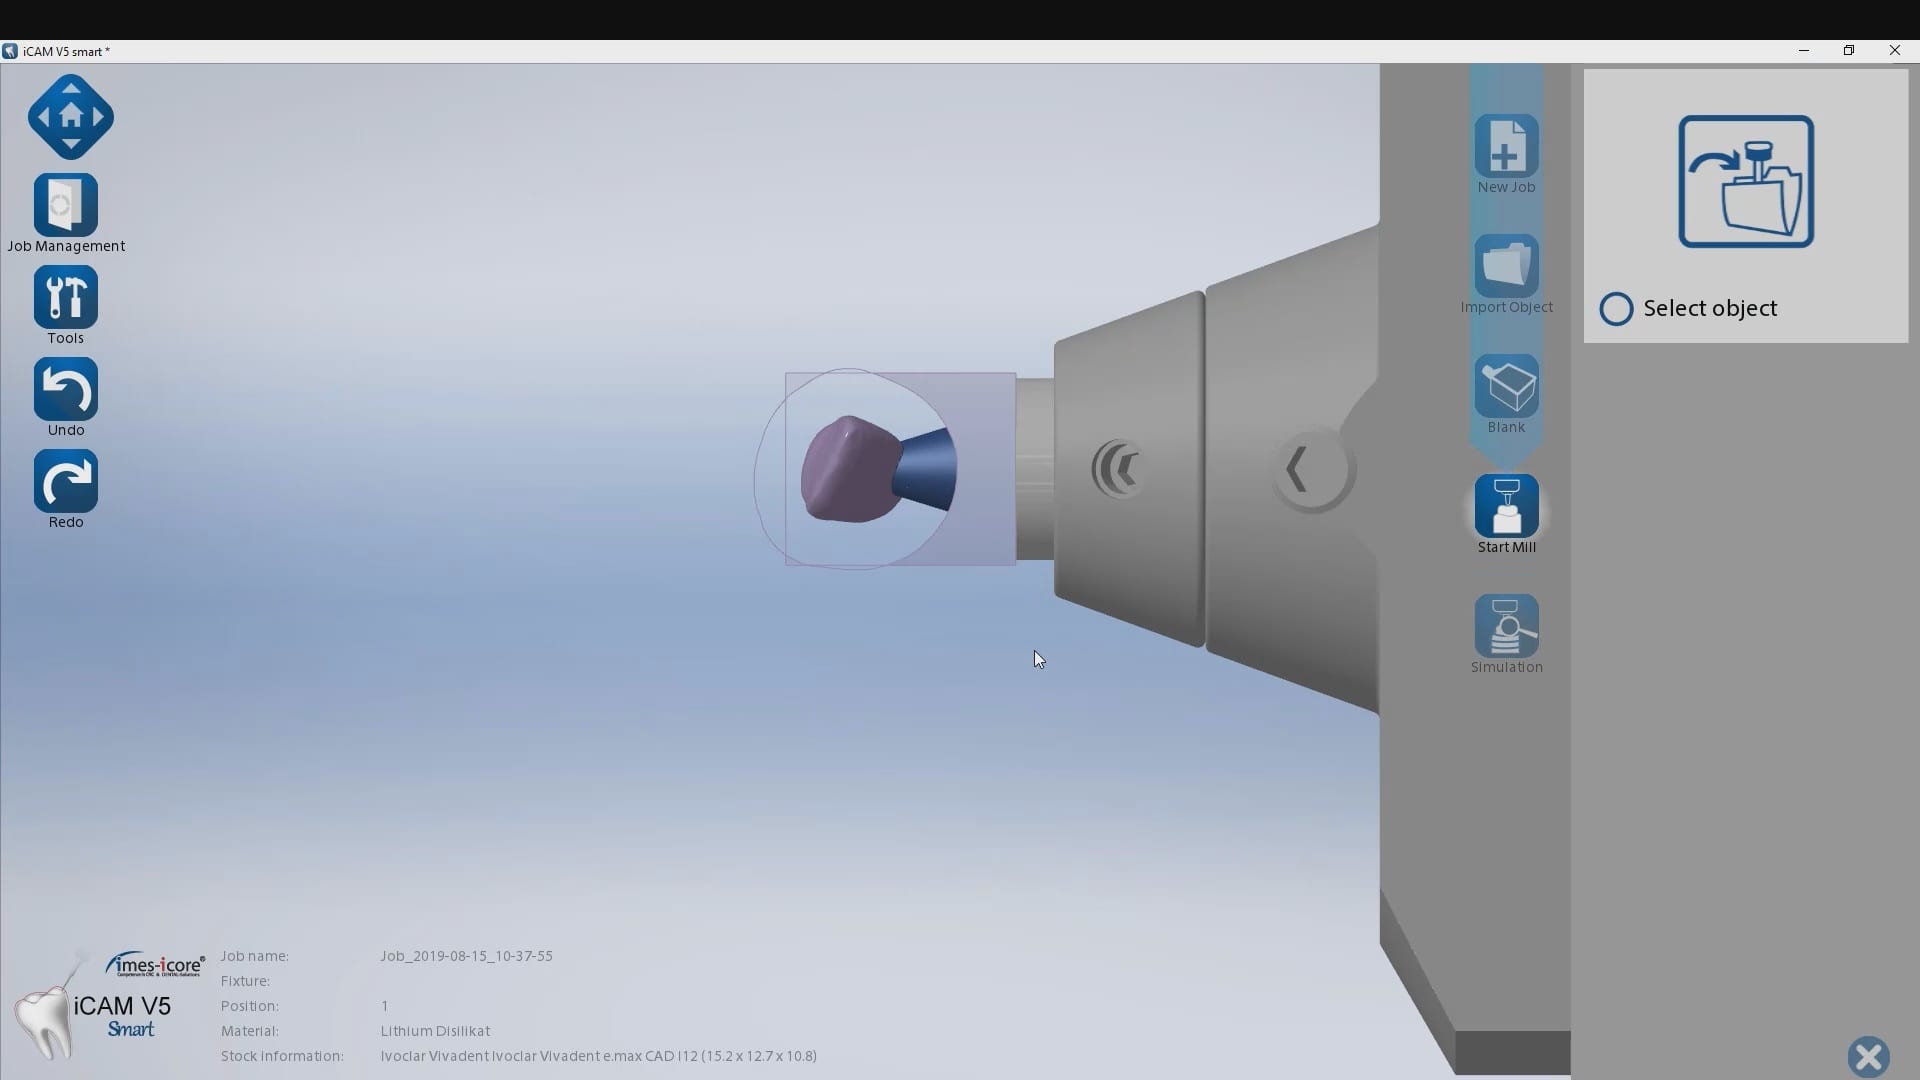
In this particular case, we designed our own crown and milled it with the coritec one milling machine
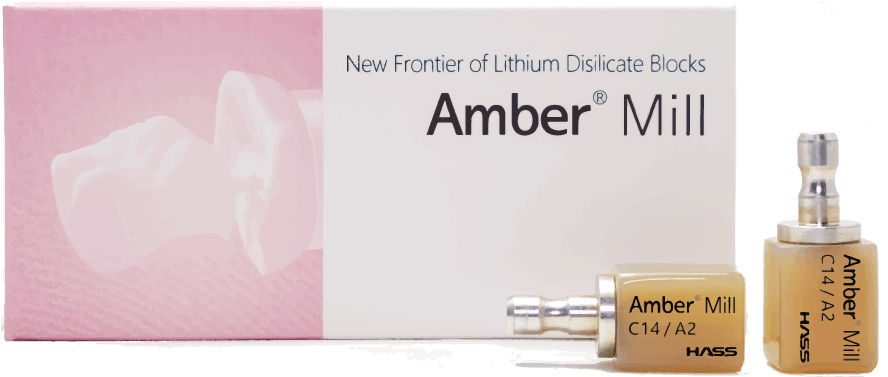
Once the amber lithium disilicate material was milled, its for was verified clinically. The crown was then crystallized and seated with NX3 resin cement
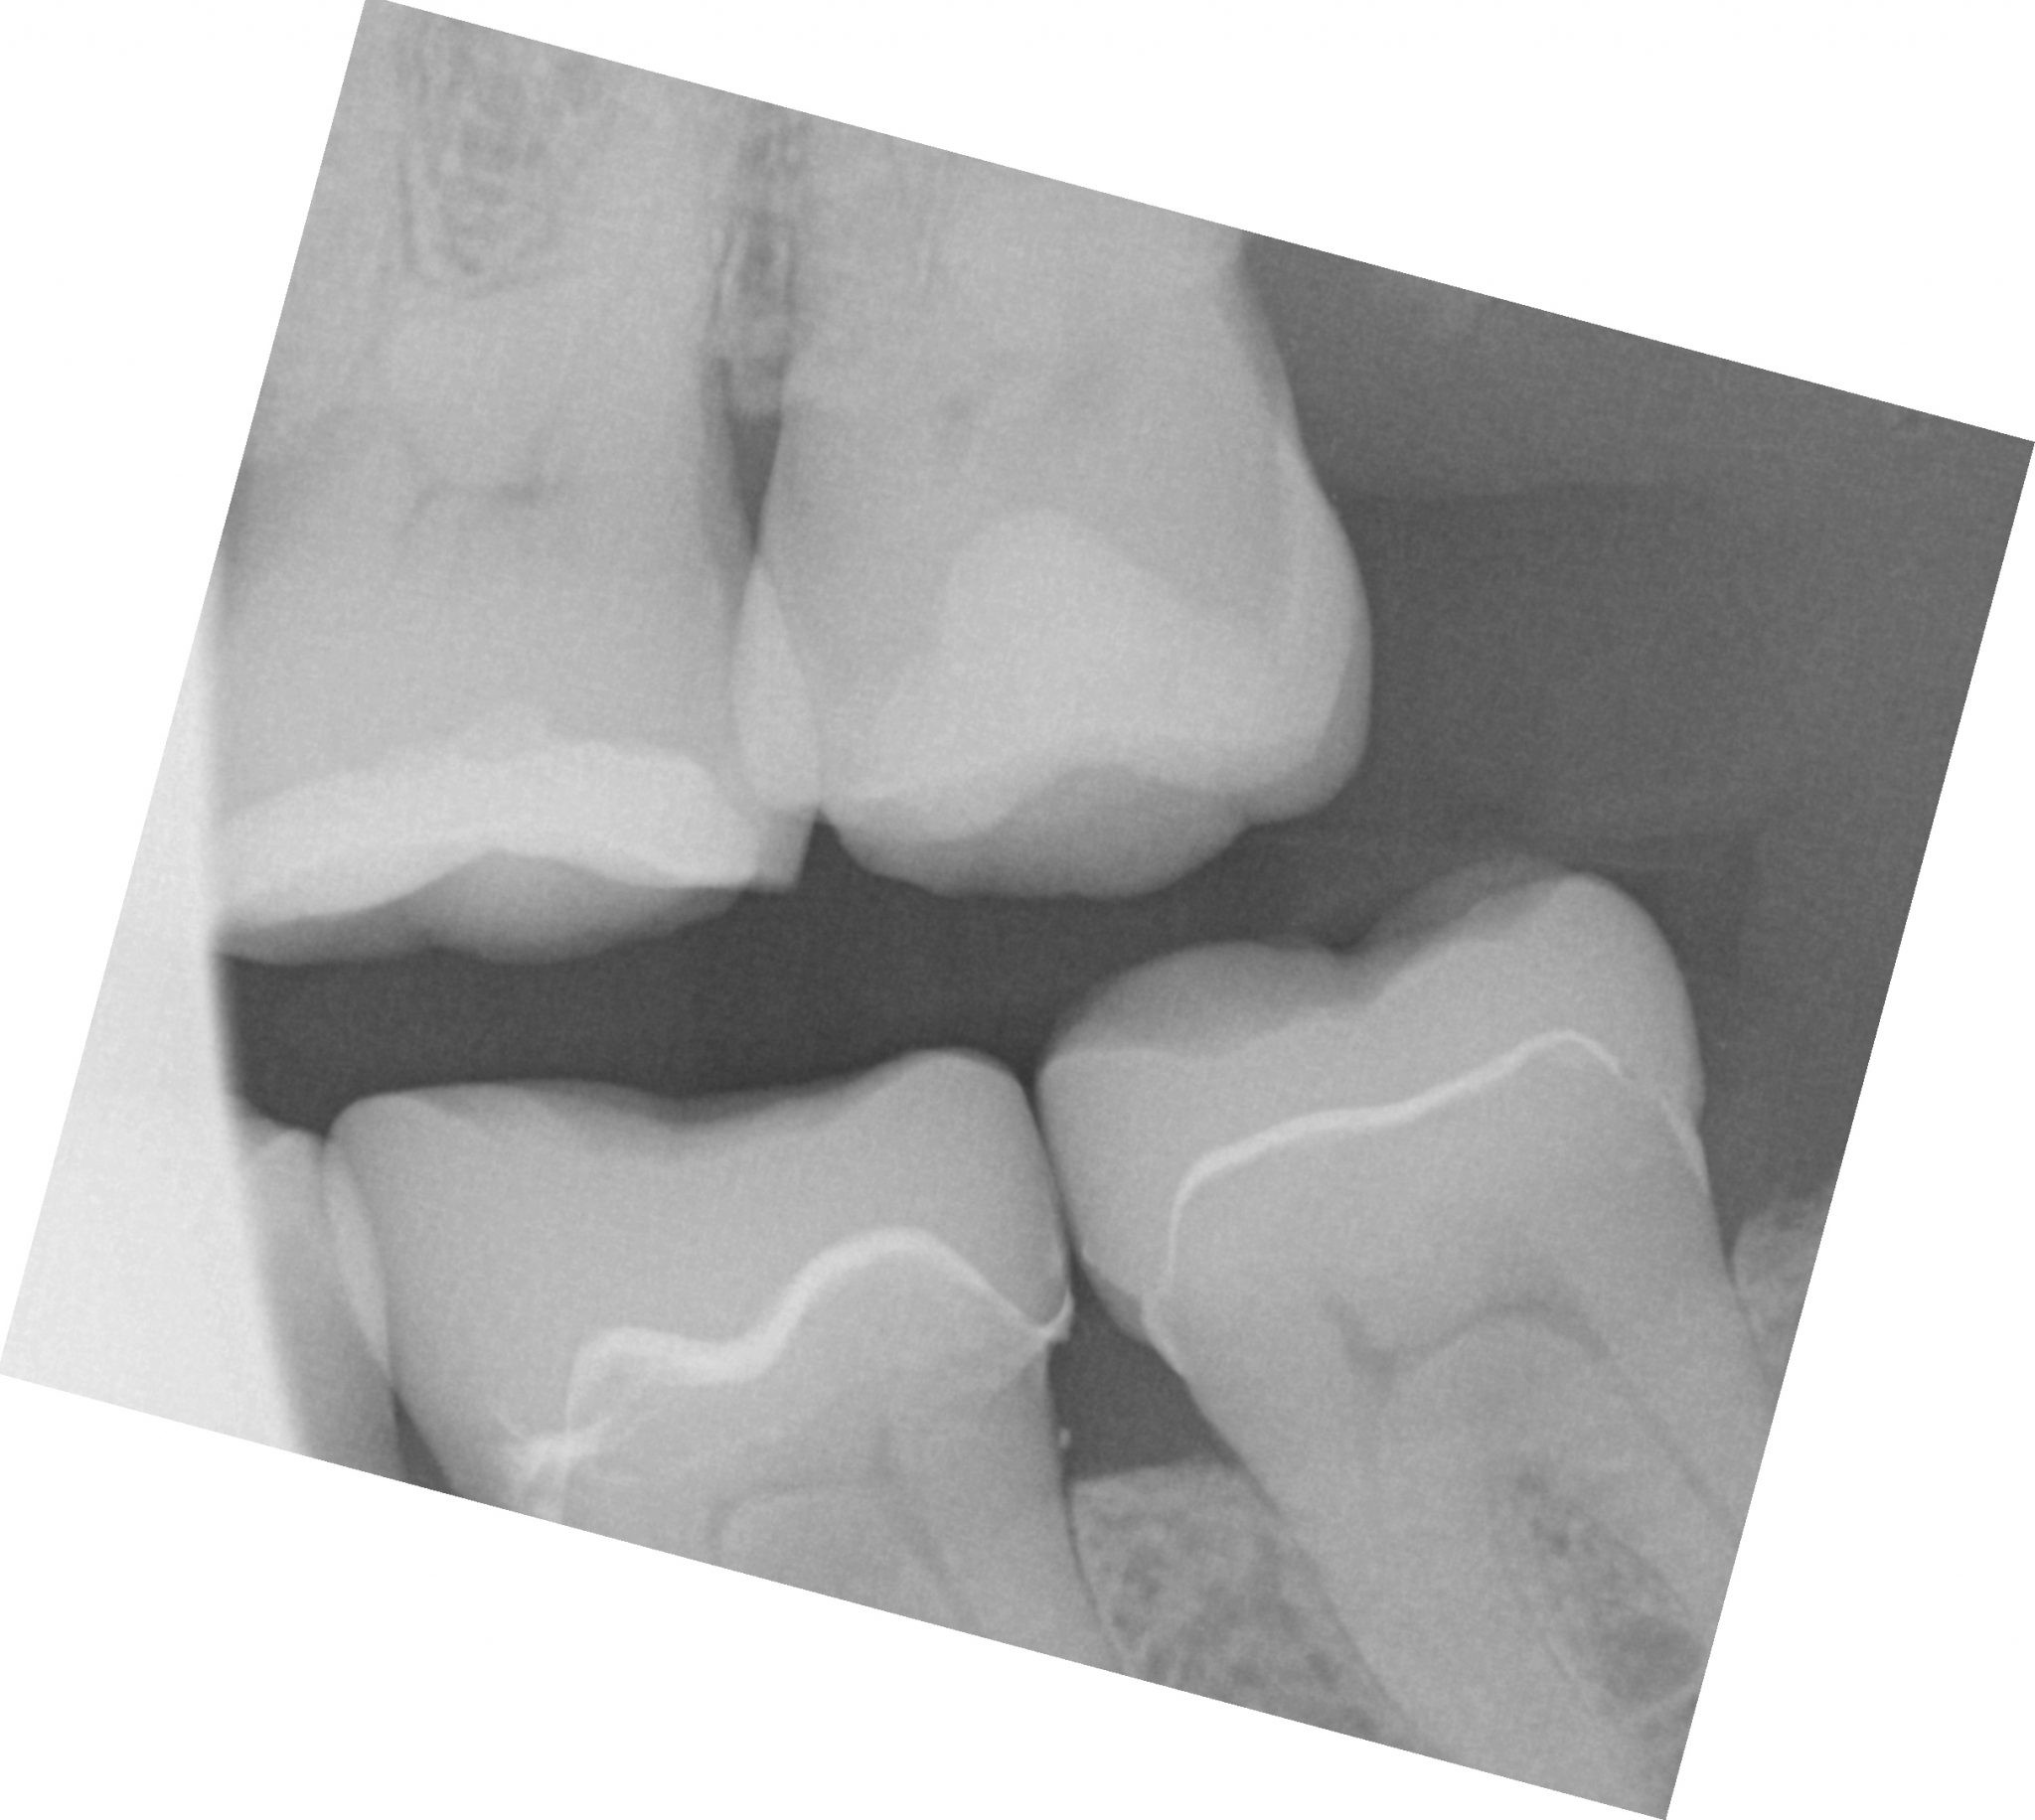
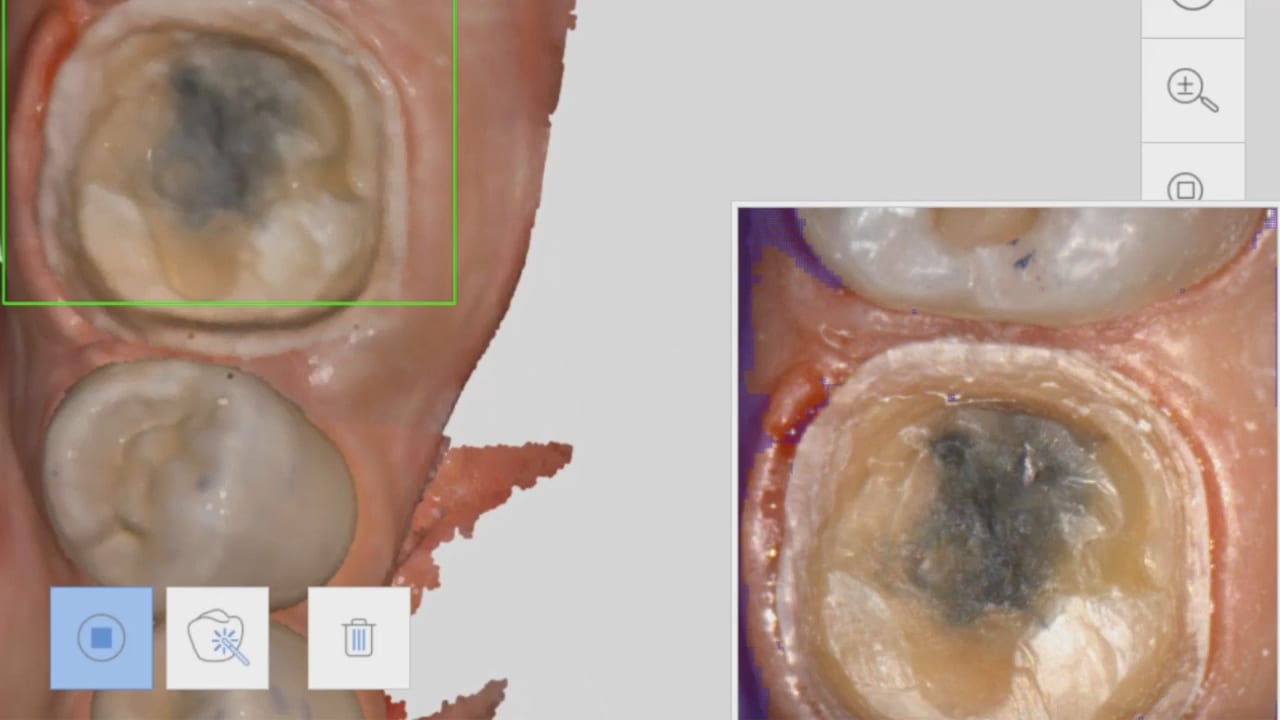
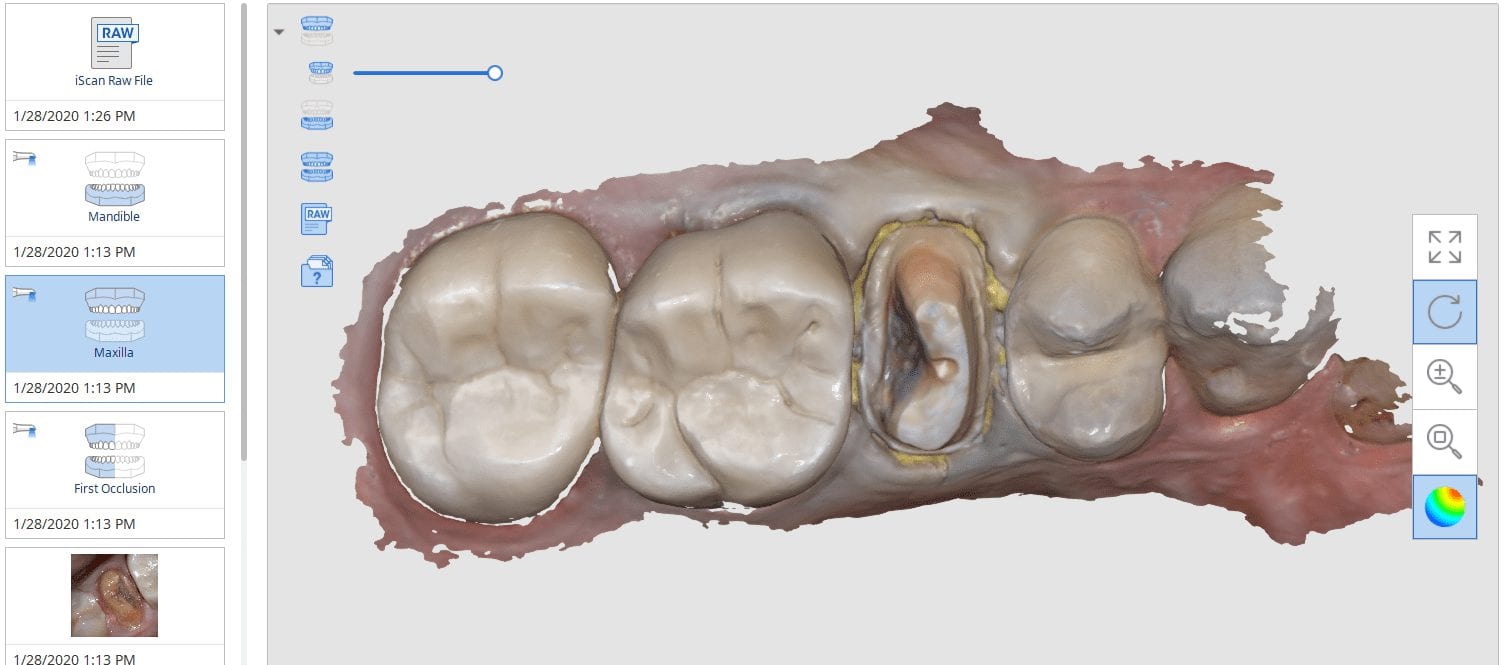
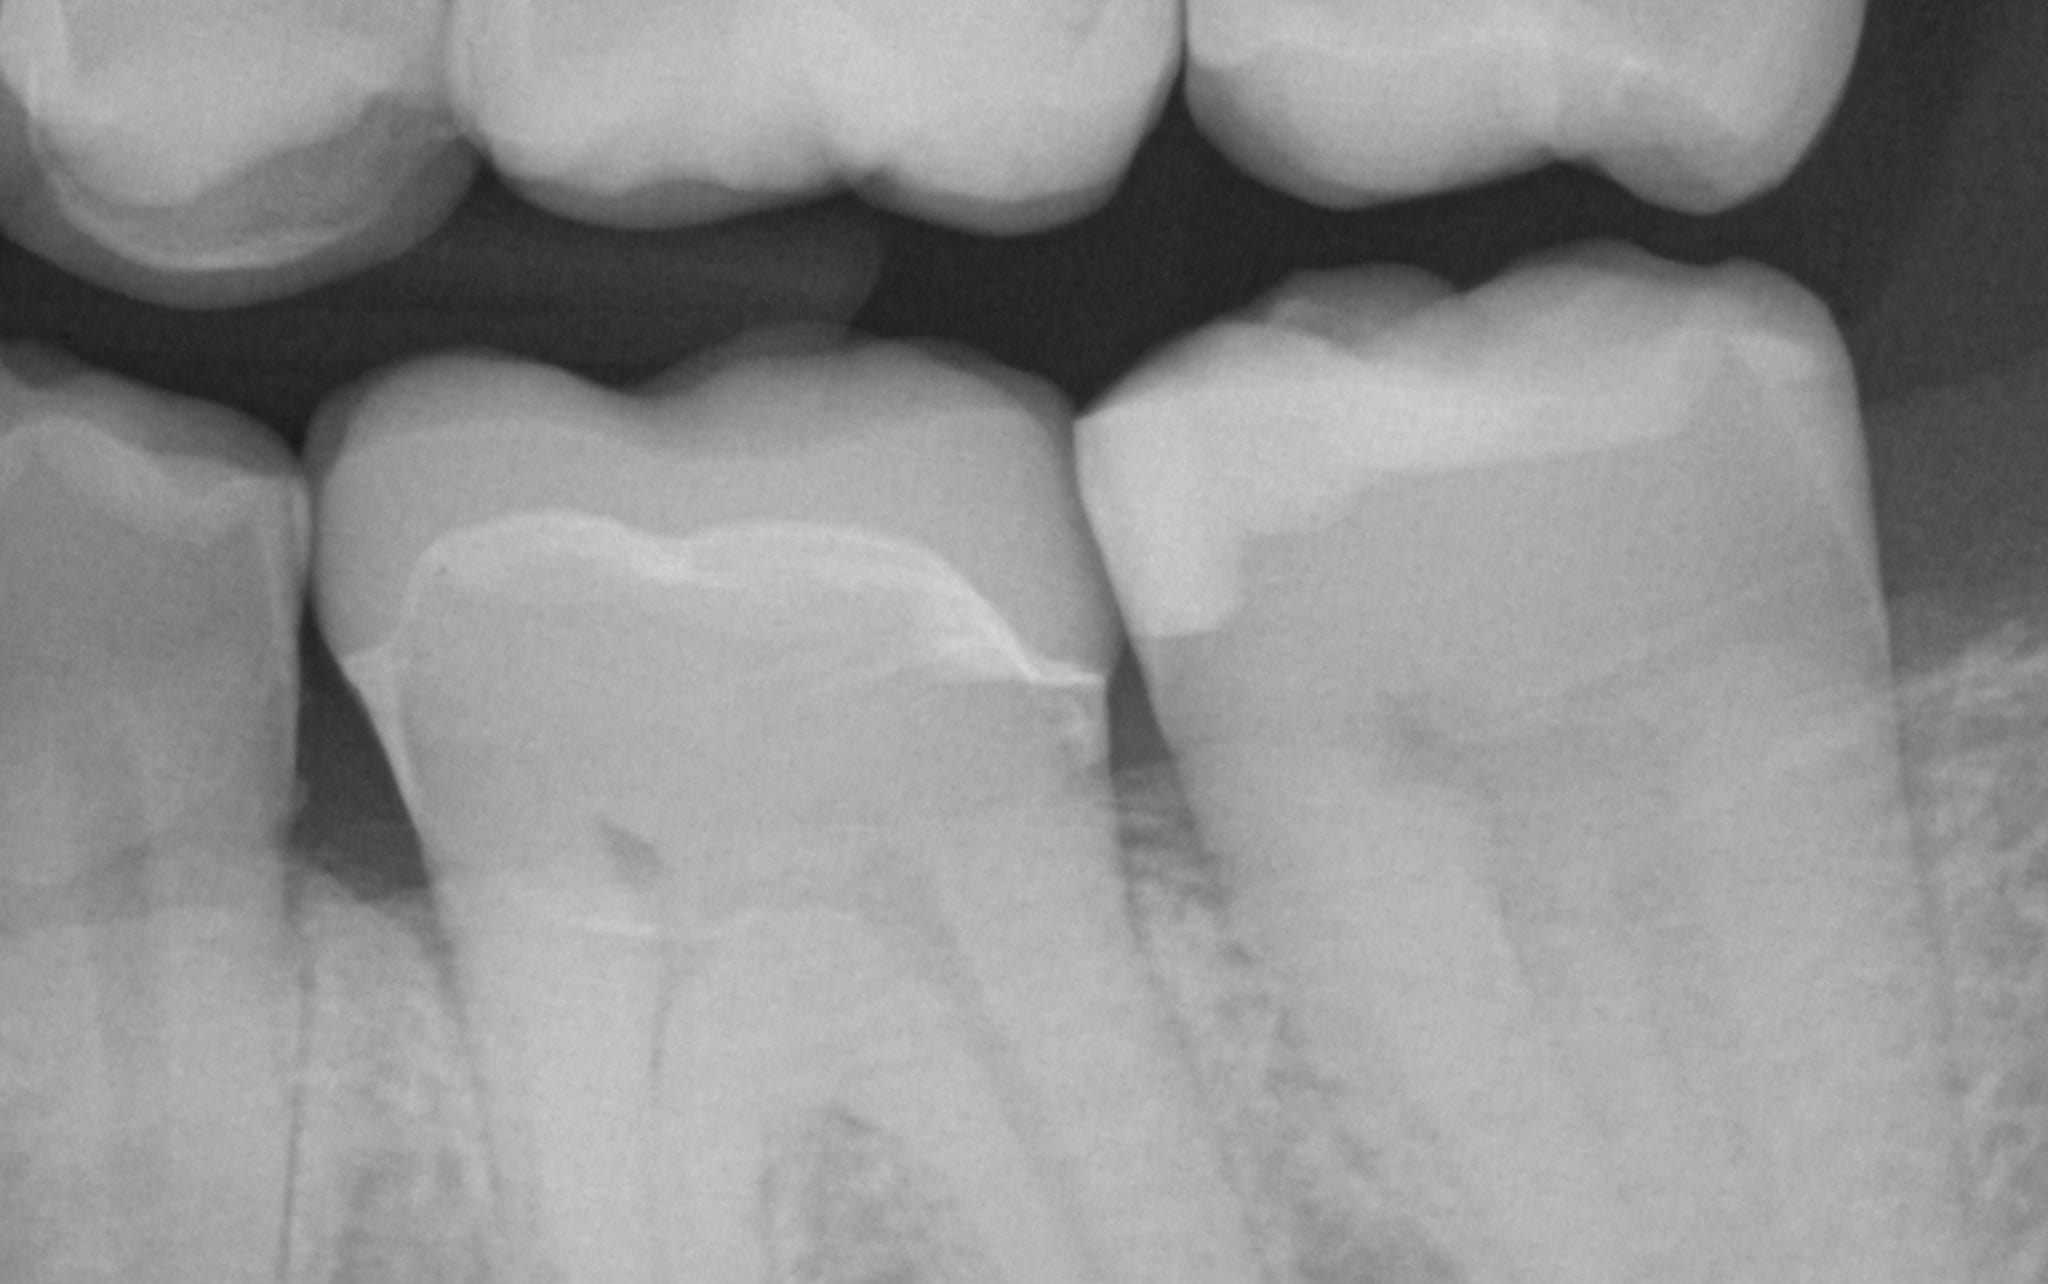
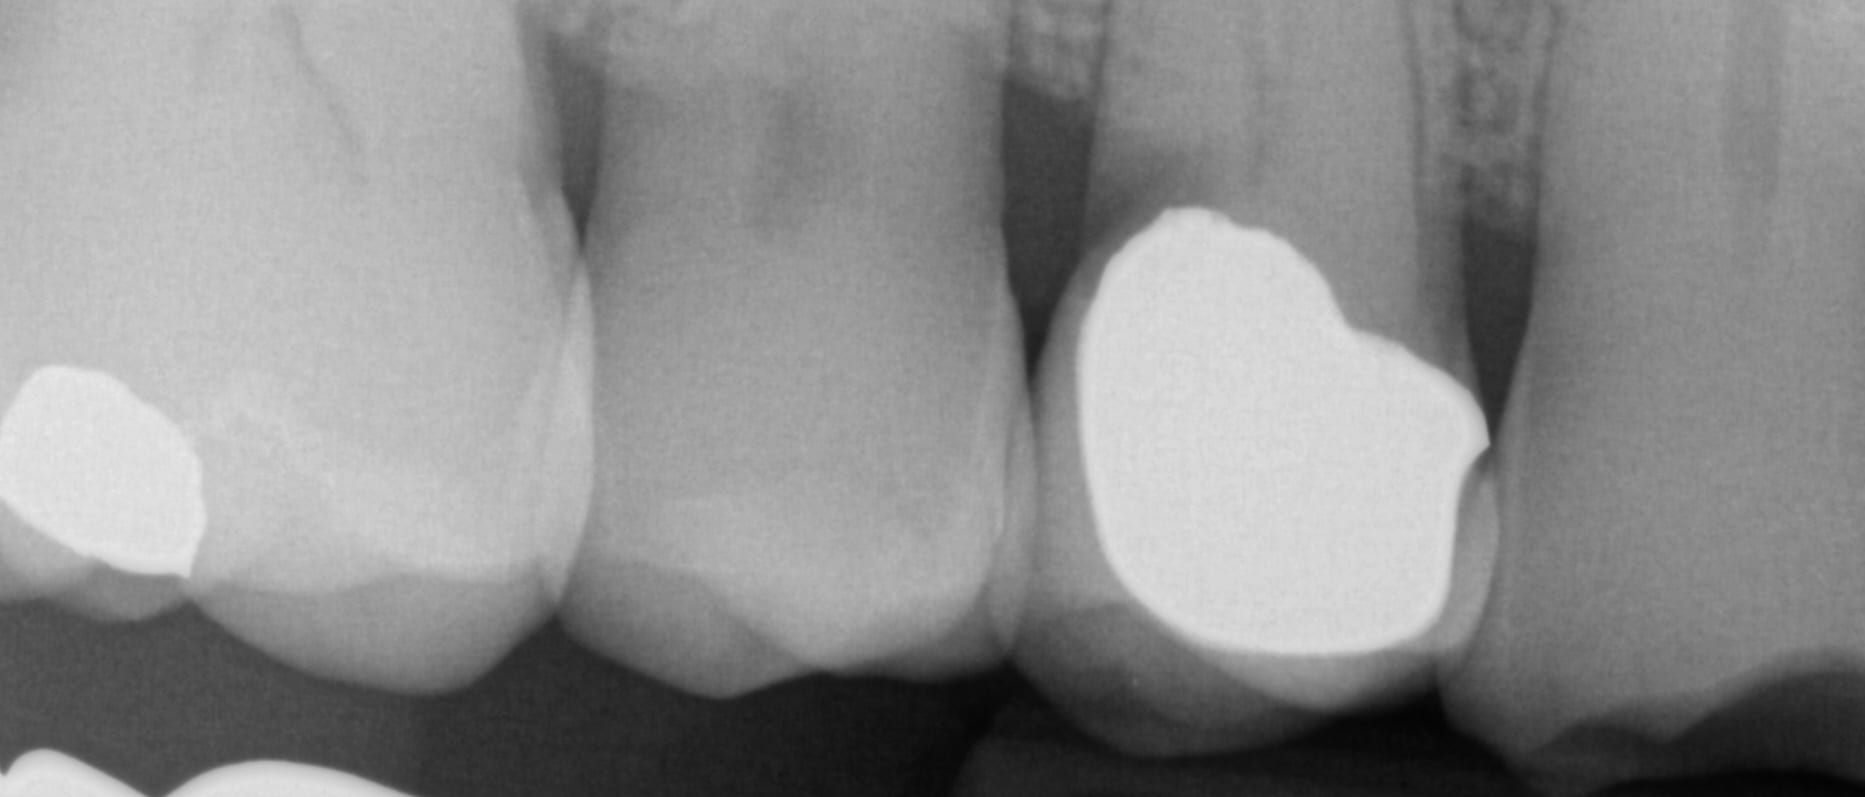
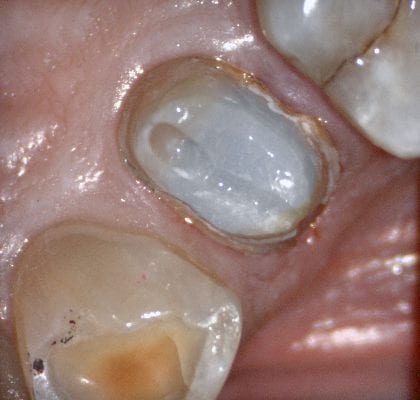
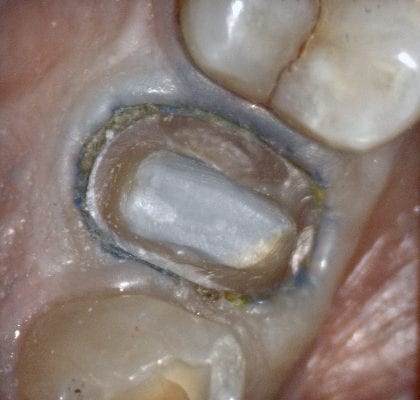
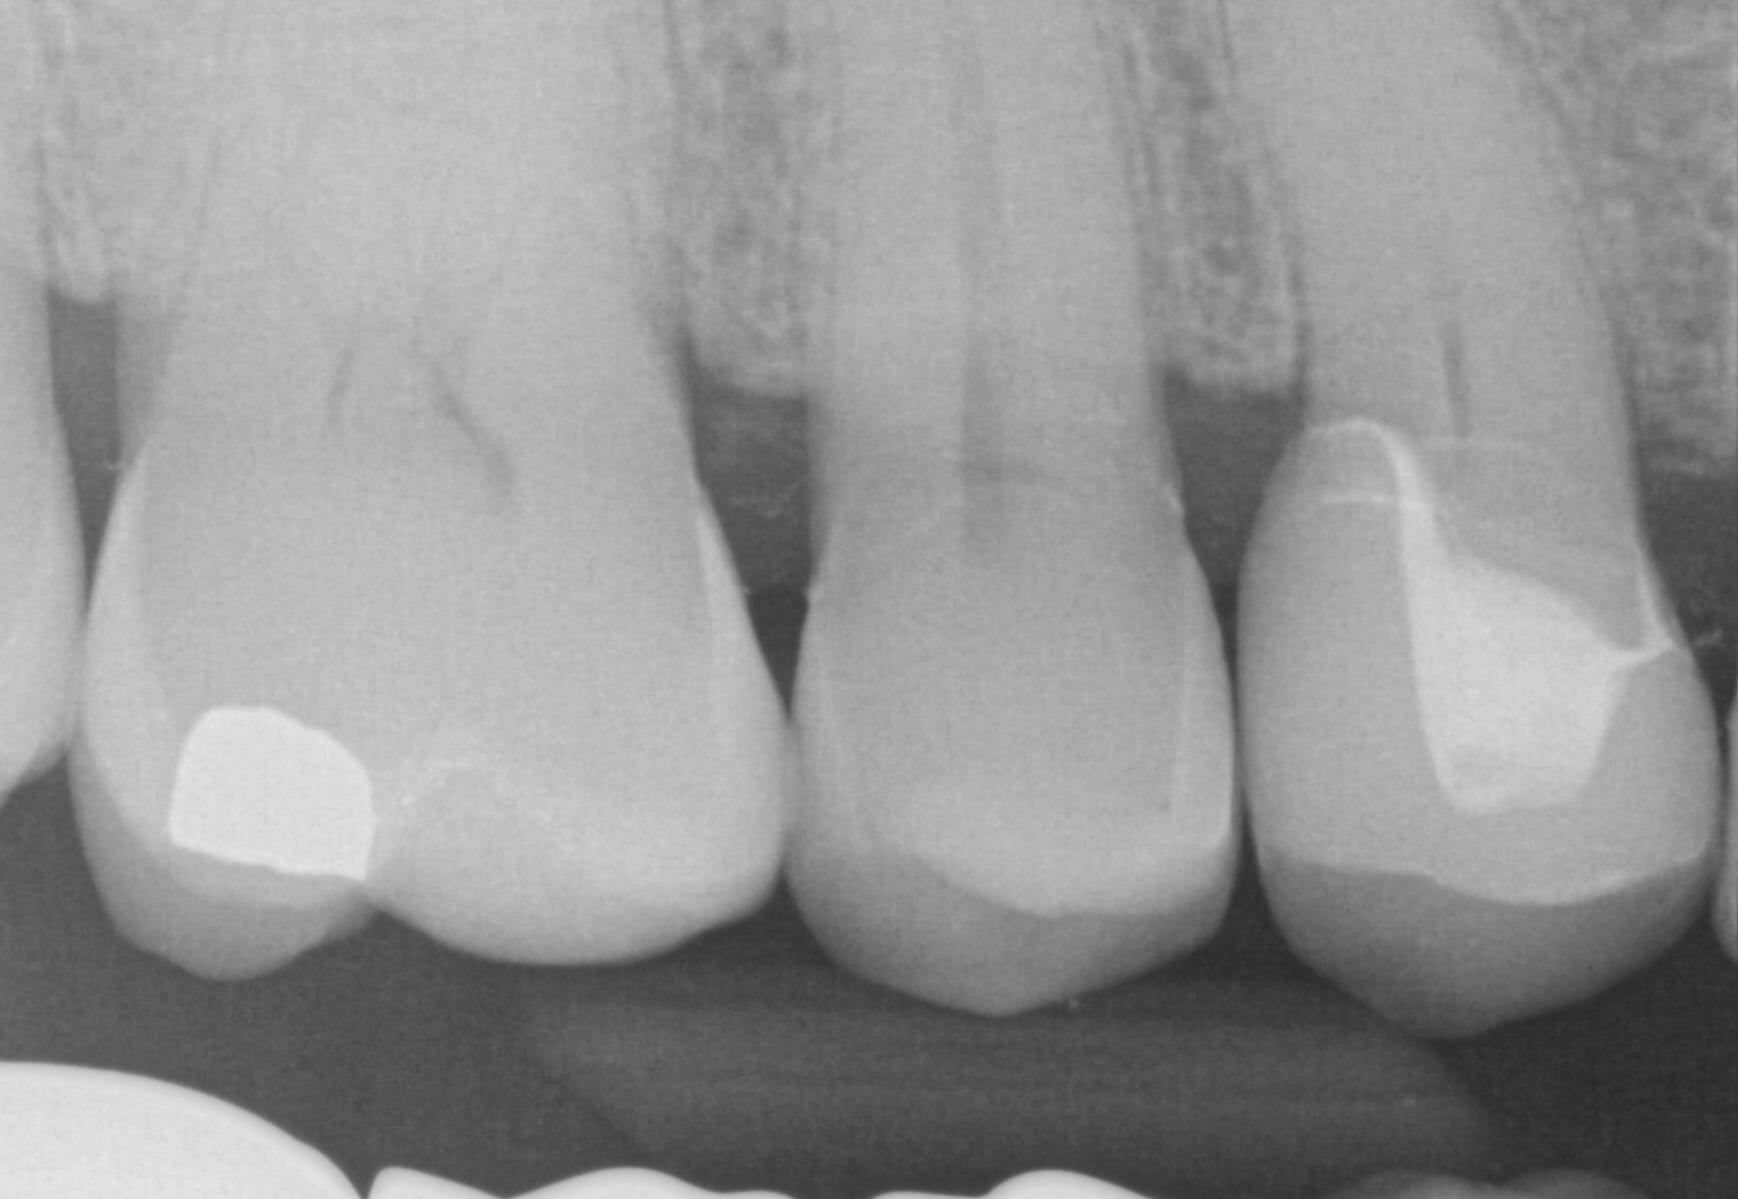
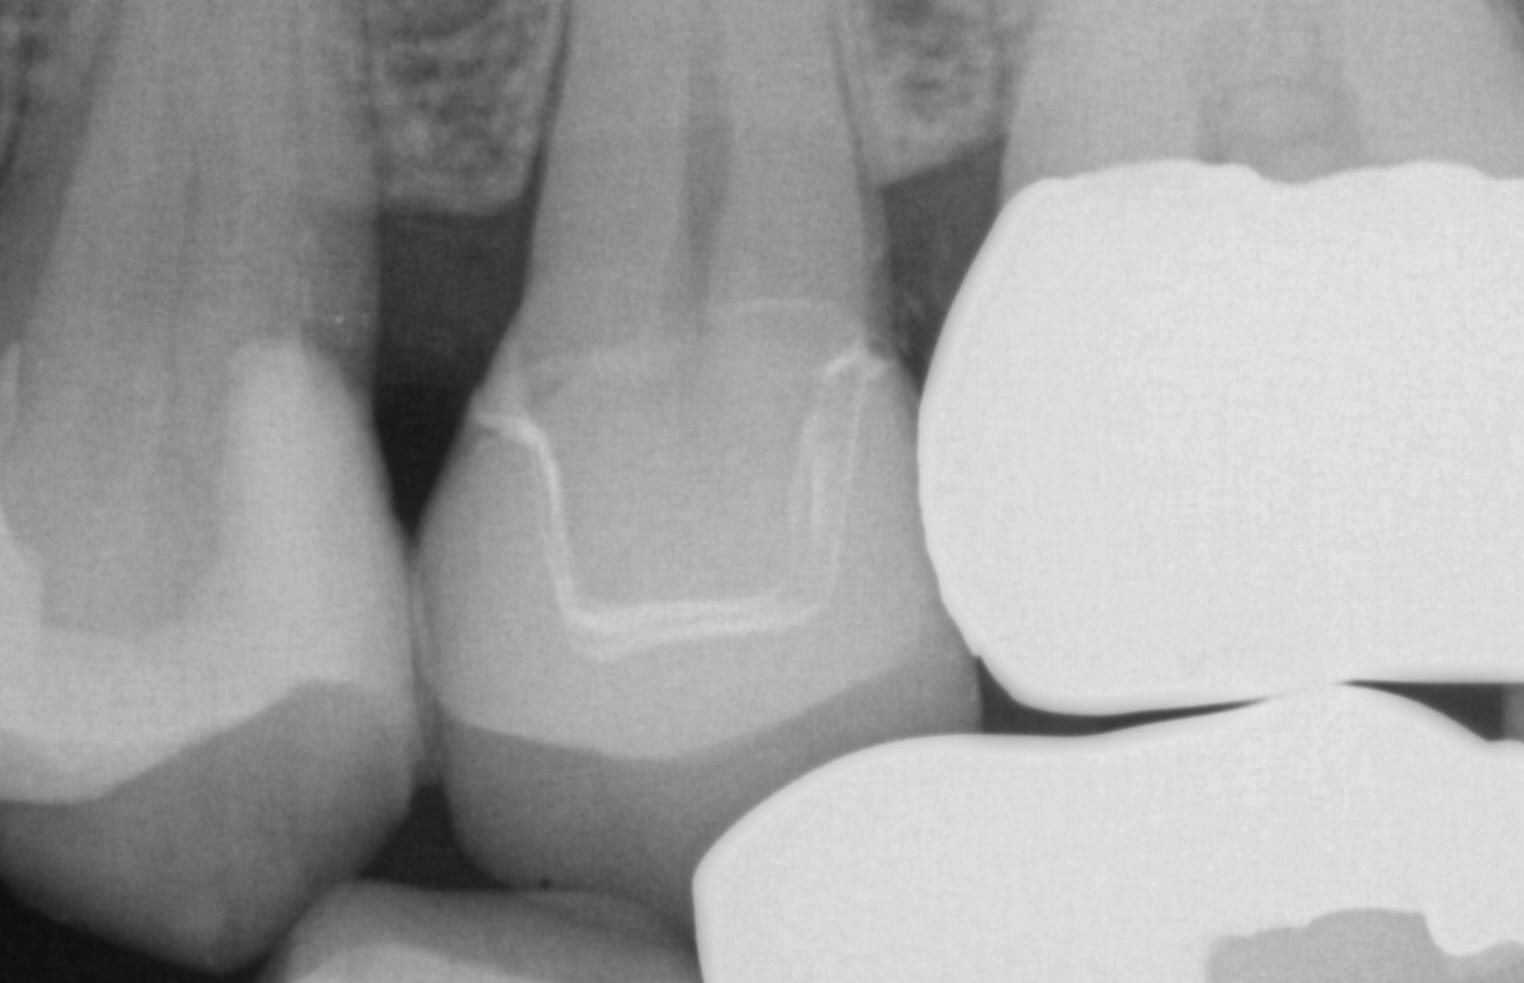
In this case presentation, we utilize the medit i500 to image the pre-existing crown and to fabricate a restoration that is a replica of the pre-existing condition. The patient was advised that the recurrent decay was in close proximity to the canal space and that endodontic treatment may be a possibility. The CBCT showed no evidence of any peri-apical radiolucency and the premolar tested vital prior to treatment
CT used to evaluate apex of premolar for crown replacement
Case set up involved imaging the pre-existing condition in the pre-op catalog box. Excess information was cropped to reduce file size. The data was then copied to the maxillary arch catalog box and the area to prepared was edited out in preparation for final optical impressions.
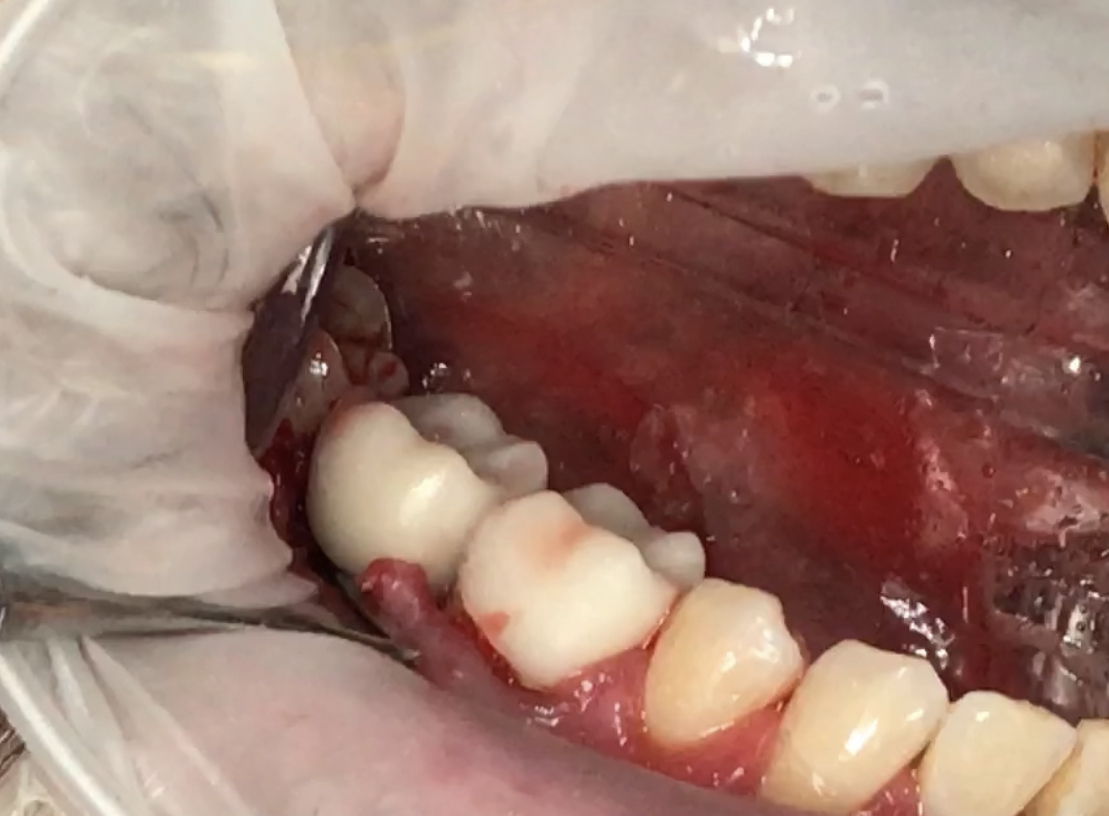
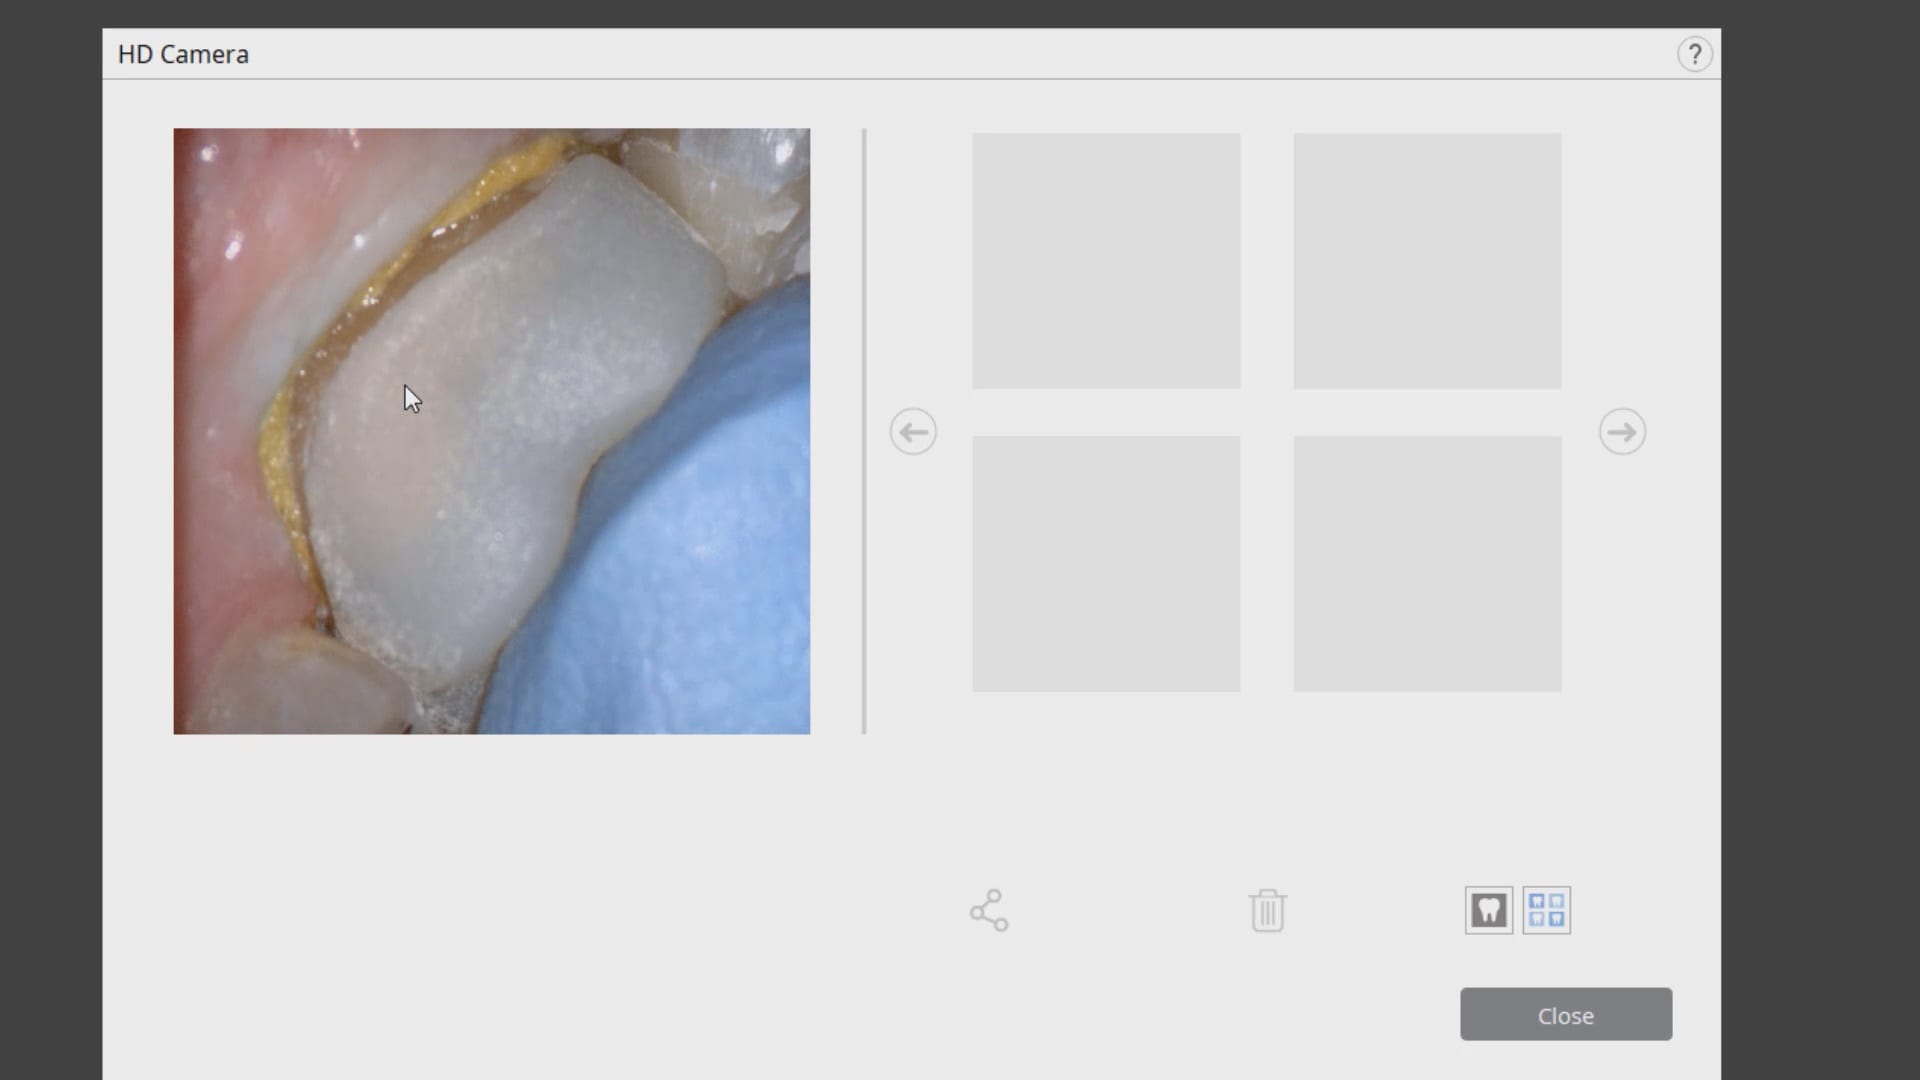
Immediate Post Op
The remaining decay and previous build up material was removed just prior to bonding the restoration with NX3 dual cure resin cement so the dentin was exposed for the least amount of time possible.
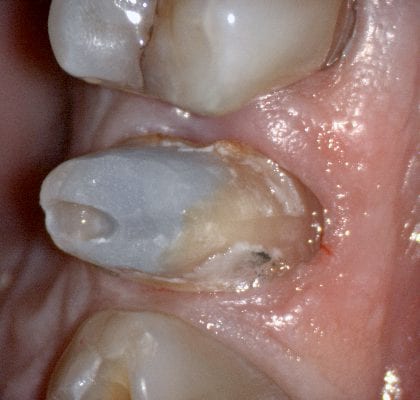
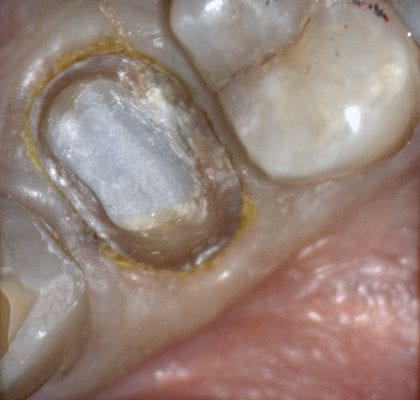
In this article, we demonstrate how to manage a crown replacement on a second upper premolar with the Medit i500, exocad, and the imes icore CORiTEC ONE milling machine. The pre-existing crown was over 2 decades old and the recession revealed a supra-gingival margin. Furthermore, there was no room to improve the anatomy or its outline form as it was in occlusion with the opposing dentition.
A powerful design technique is the copy of the pre-existing crown. Images of the pre-op are taken while the patient is numb and its contours are copied onto the final design of the restoration. This process usually takes a minute or so, after which we milled a size 12 emax block restoration.
One of the most dreaded procedures in dentistry is to cut off a bonded lithium disilicate material. With zirconia, since the bond strength is weak, just “rattling” the crown helps it pop off. You could also debond the restoration with a laser pretty quickly. With emax, you must use copious amounts of water so you don’t fry the pulp. You must also refrain from splitting the crown with a crown remover because you can damage the remaining tooth structure catastrophically.
In this sequence of photos, you will see how we recommend the removal of the bonded restoration. You must first create a trough across the occlusal surface of the crown. Ideally, use a 1.6 mm disposable bur to reach the interface between tooth structure and restorative material. As soon as you reach this junction, take a flat ended diamond bur and start working that same location and remove all the ceramic on the occlusal surface. Staying right at the junction of the material and tooth is the critical part of the process.
After you have removed the occlusal surface, you can take any bur and work the junction one the axial wall. By this time enough work has been done where the walls of the restoration start to break and peel off on their own.
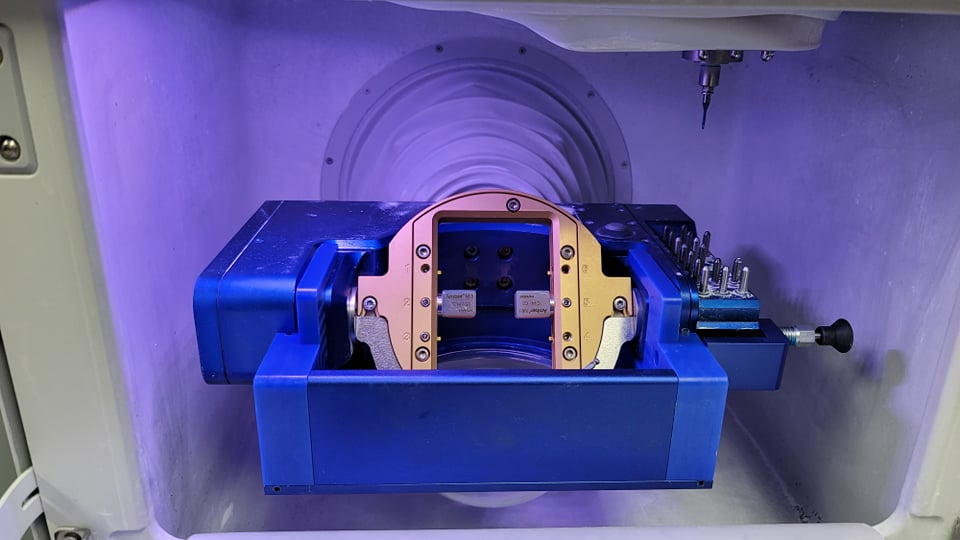
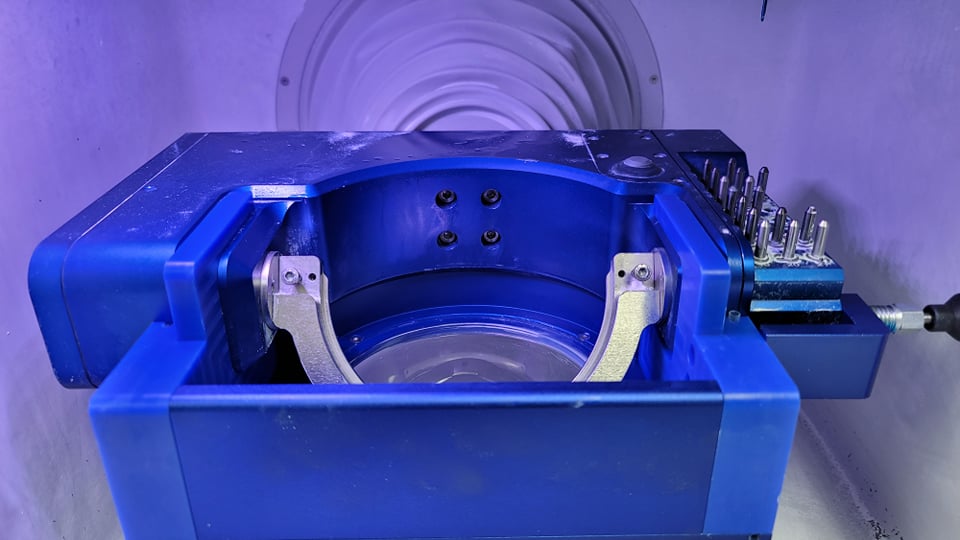
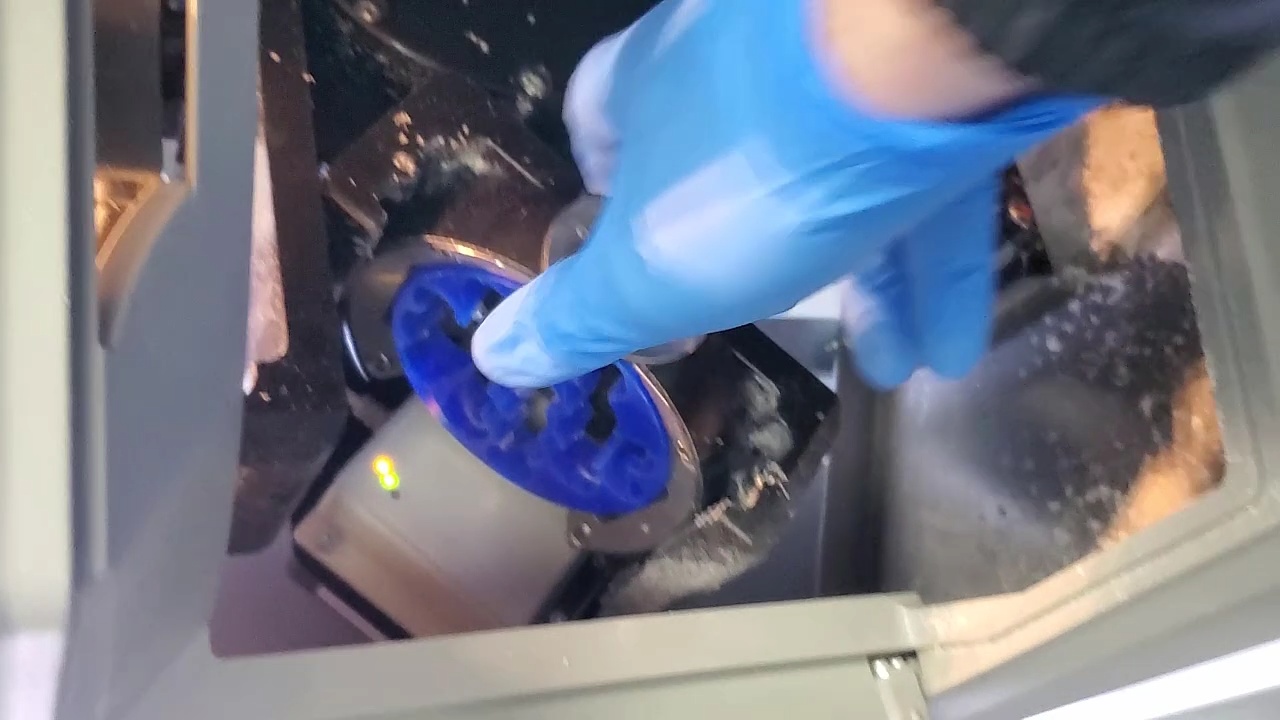
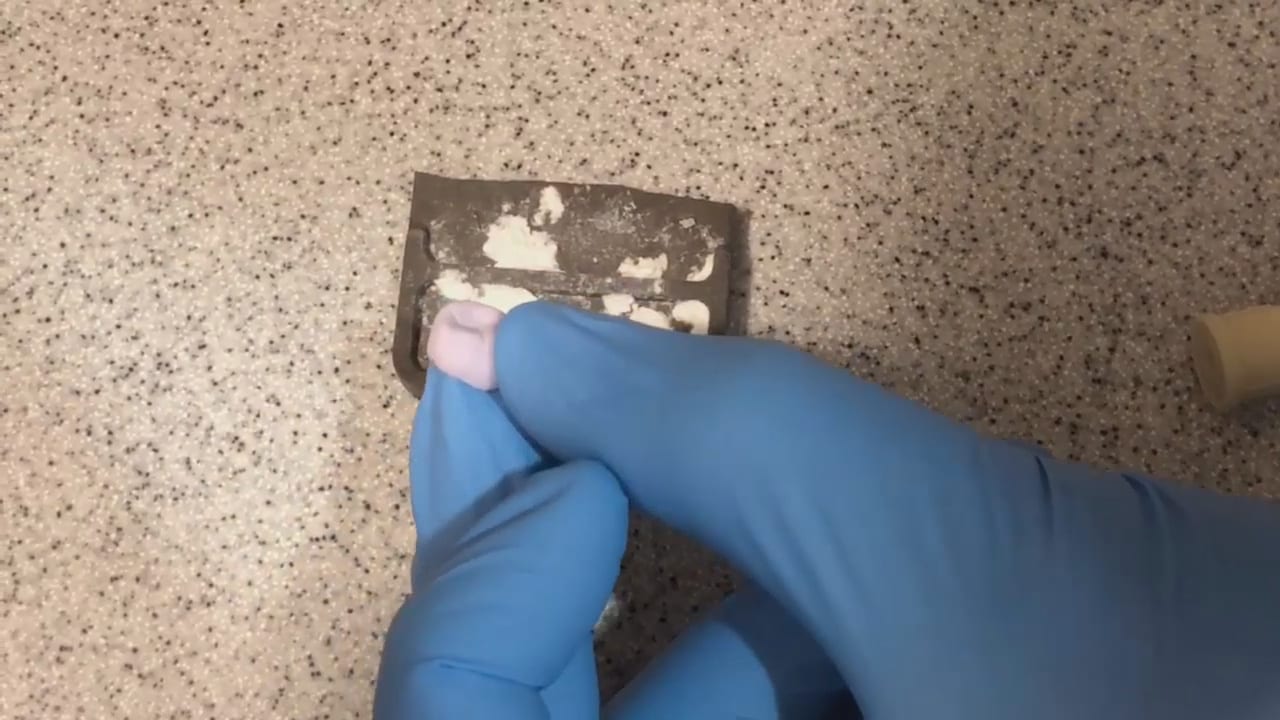
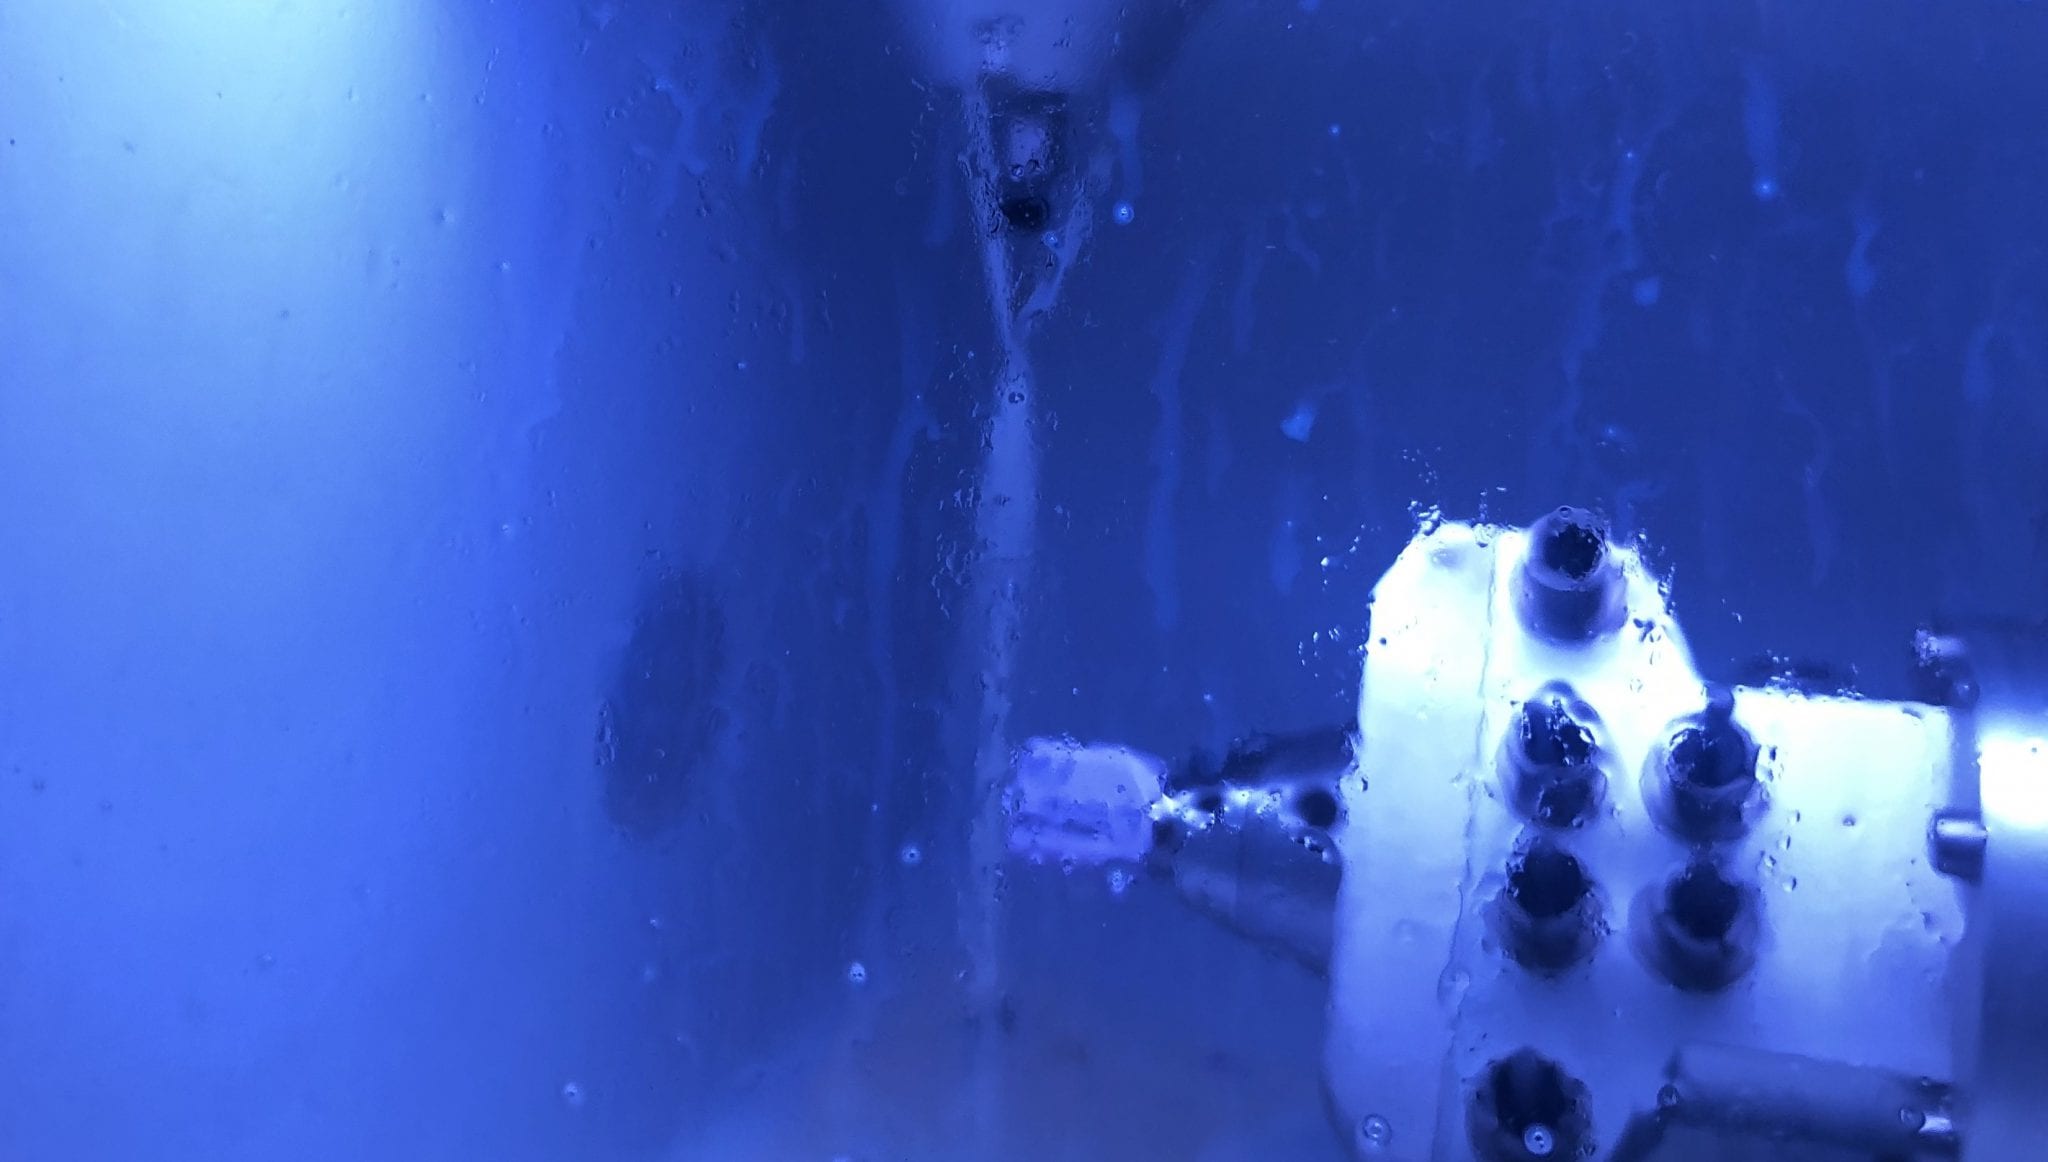
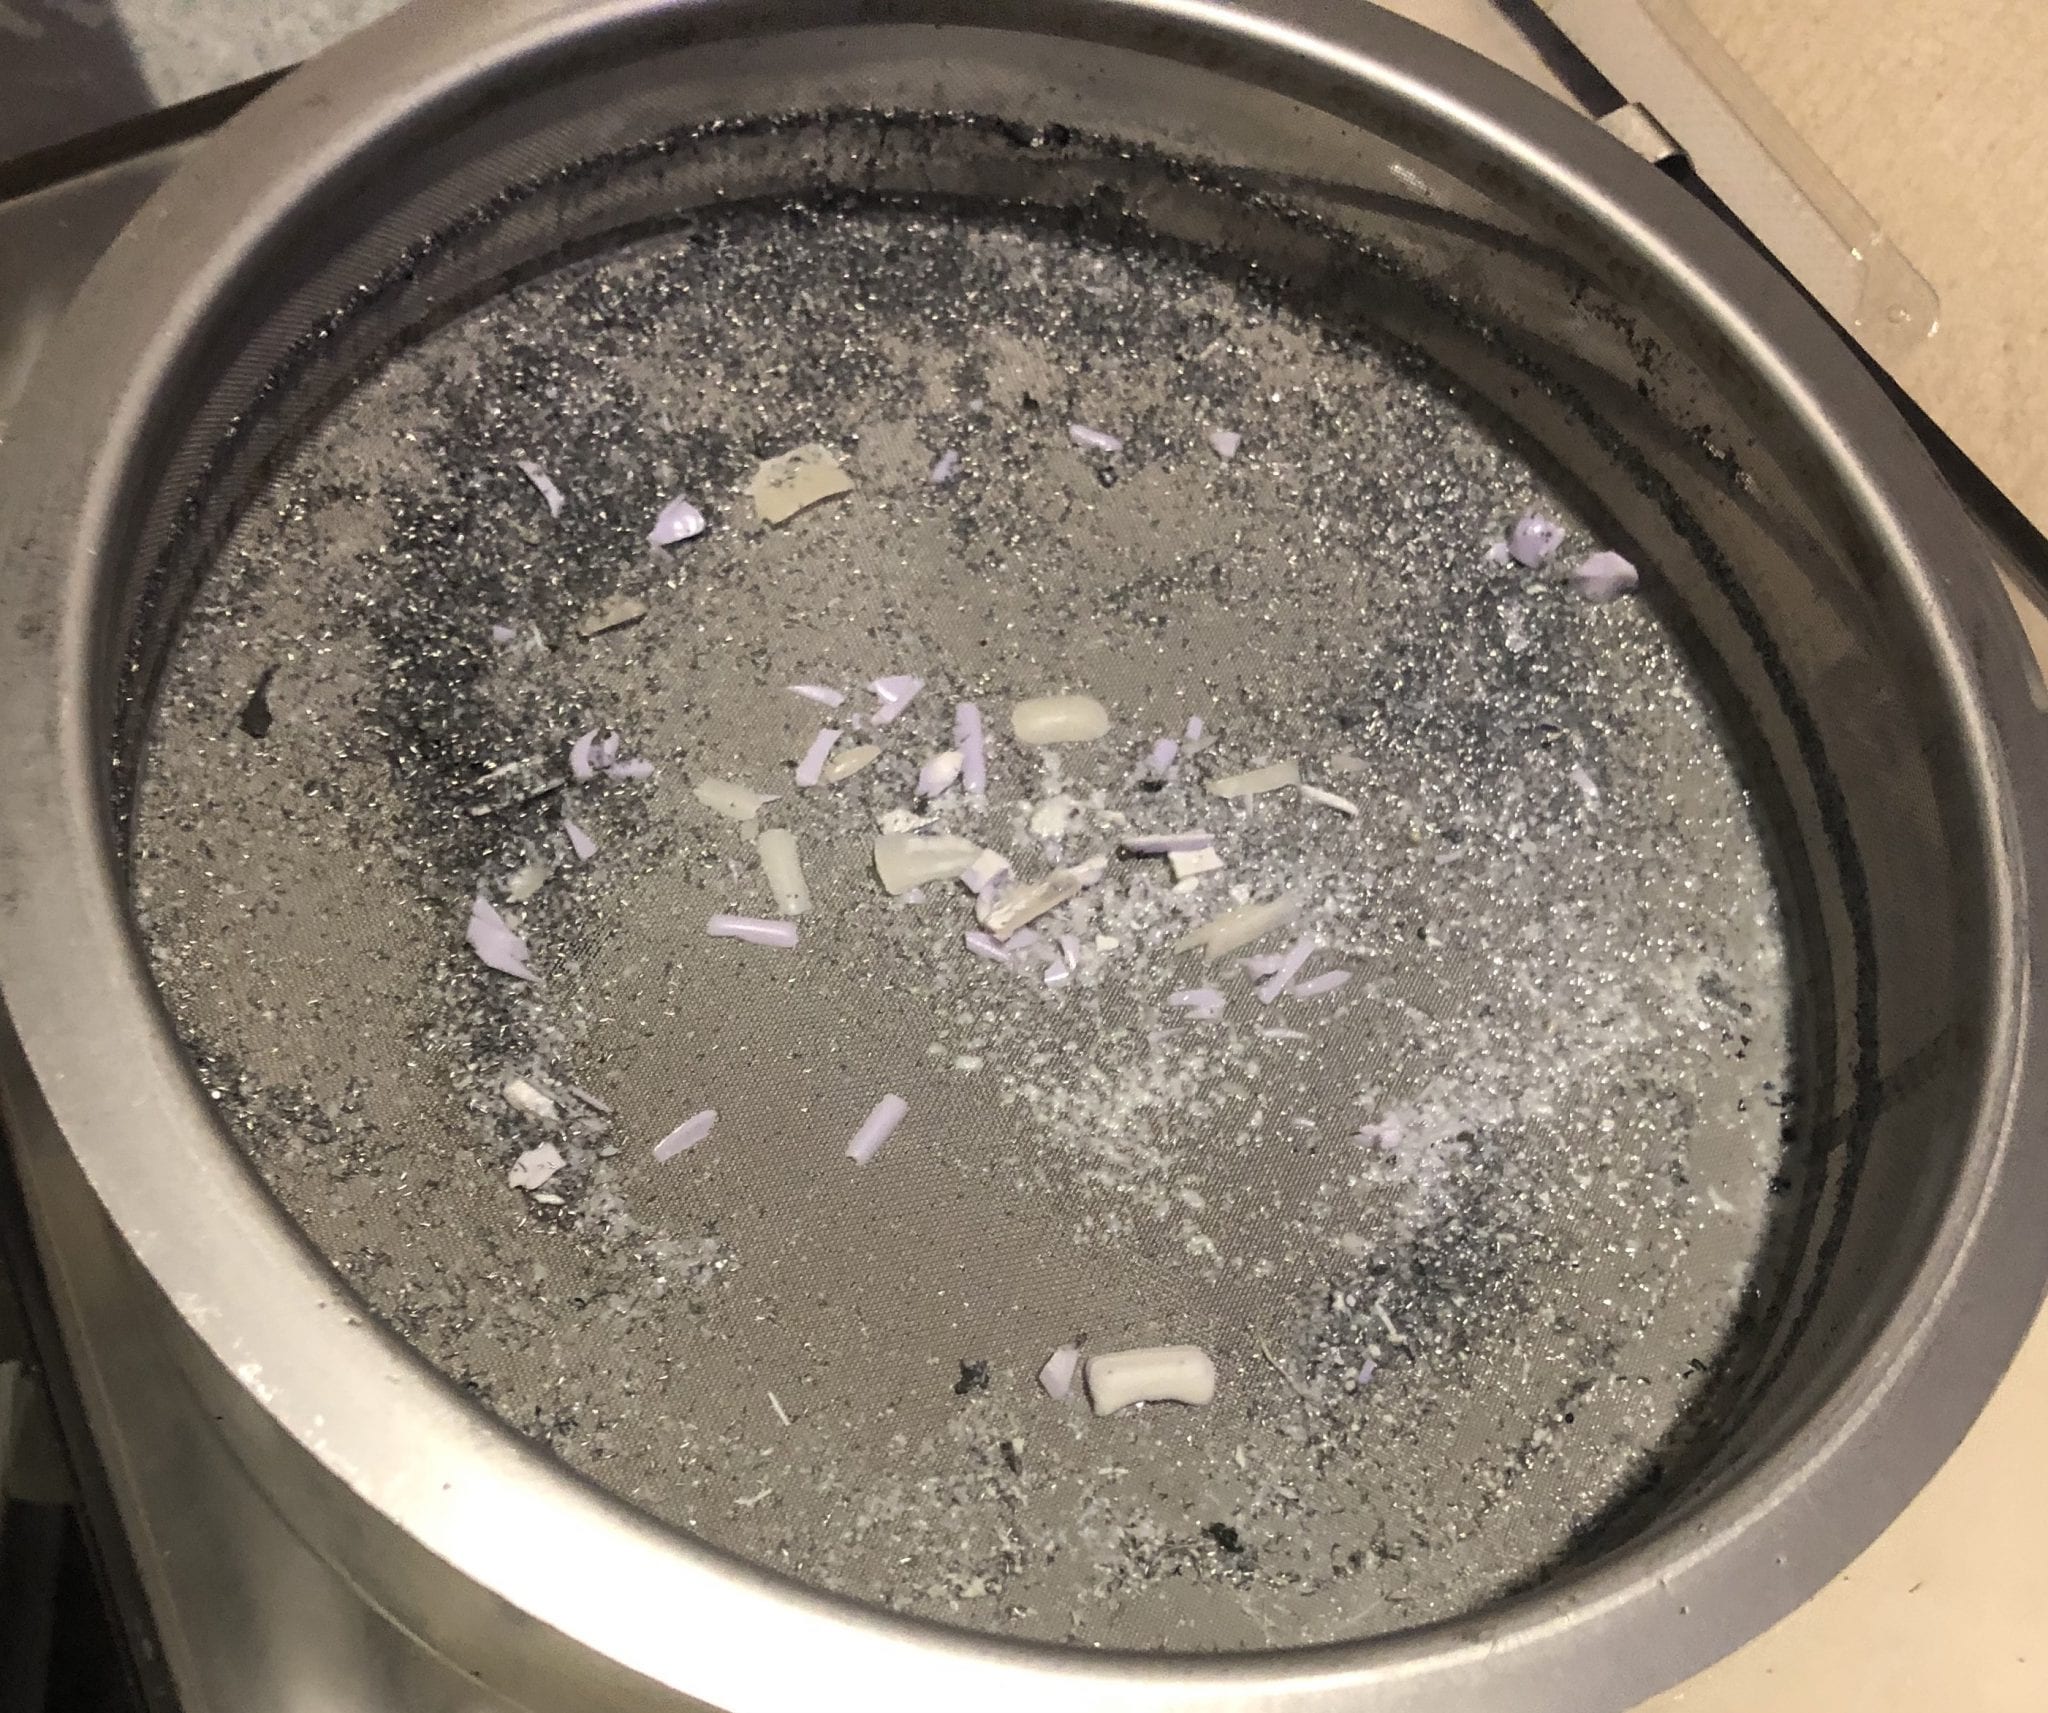
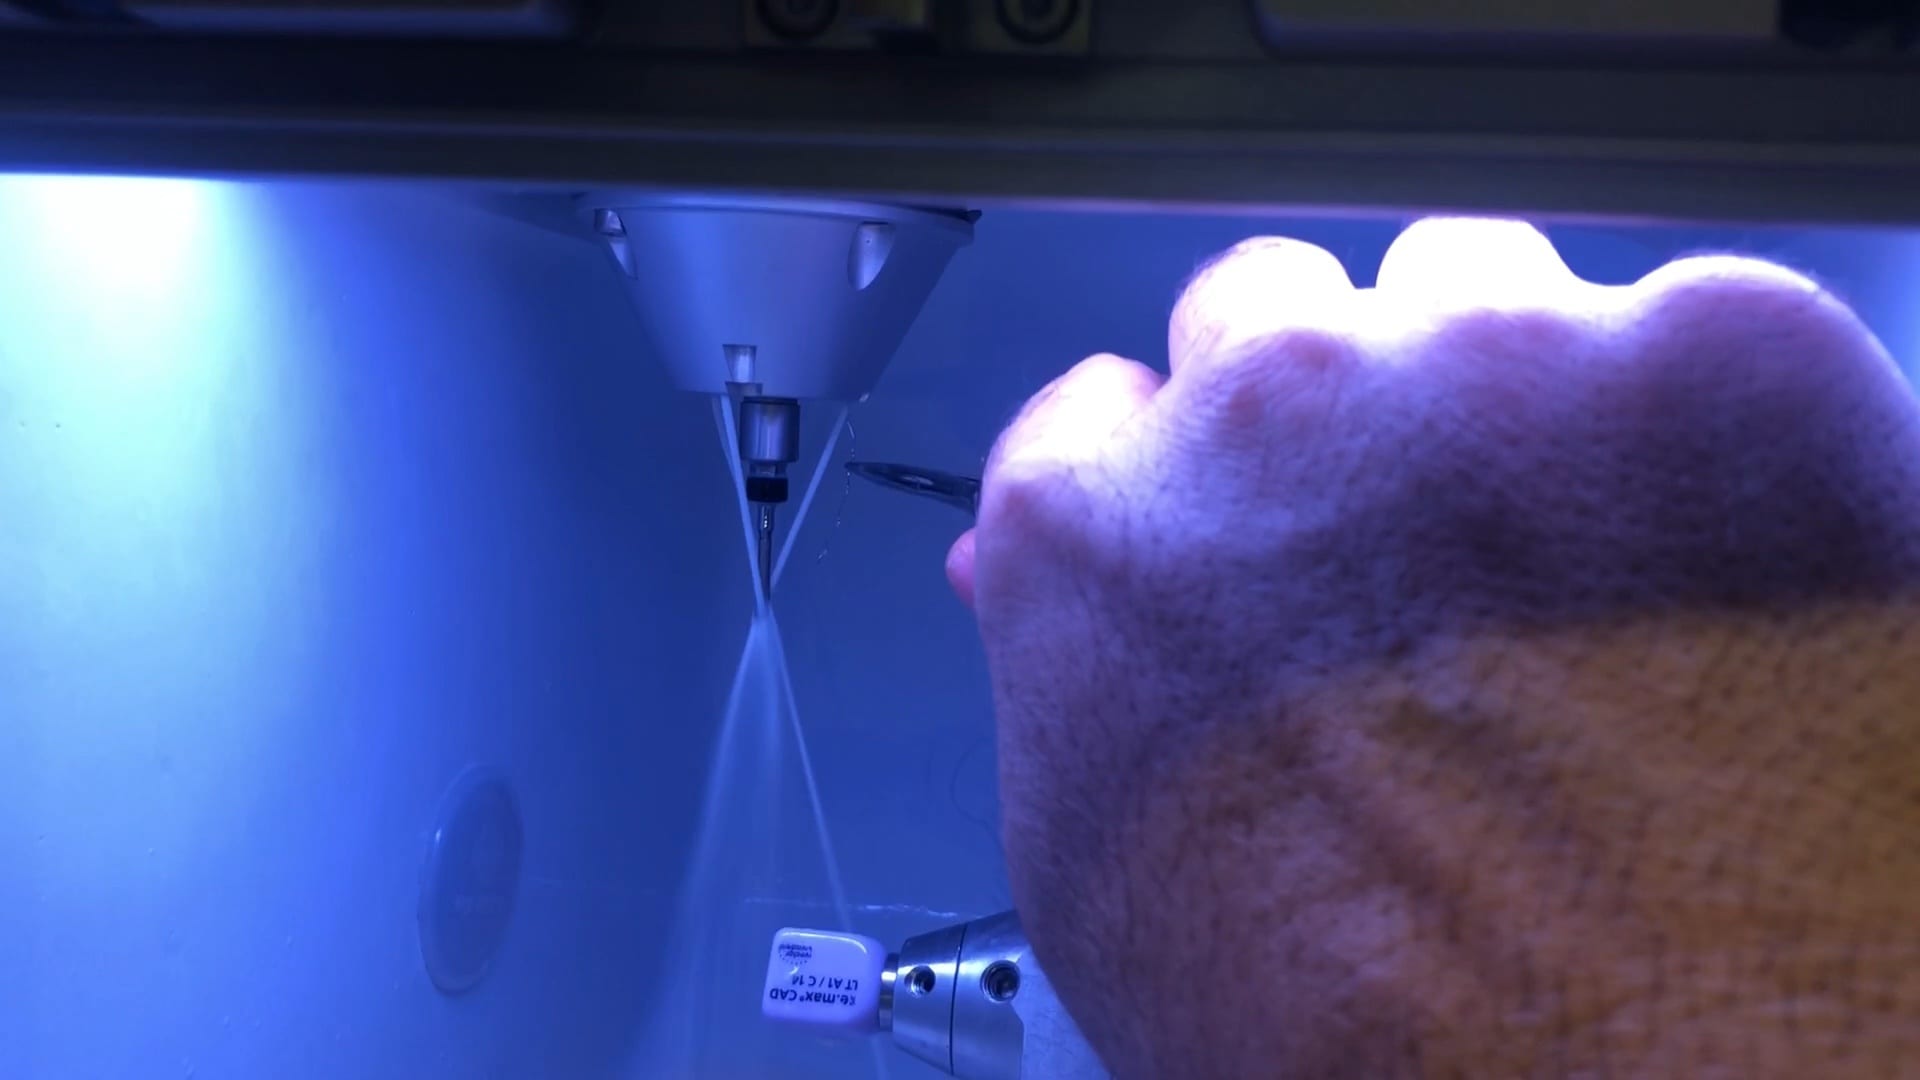
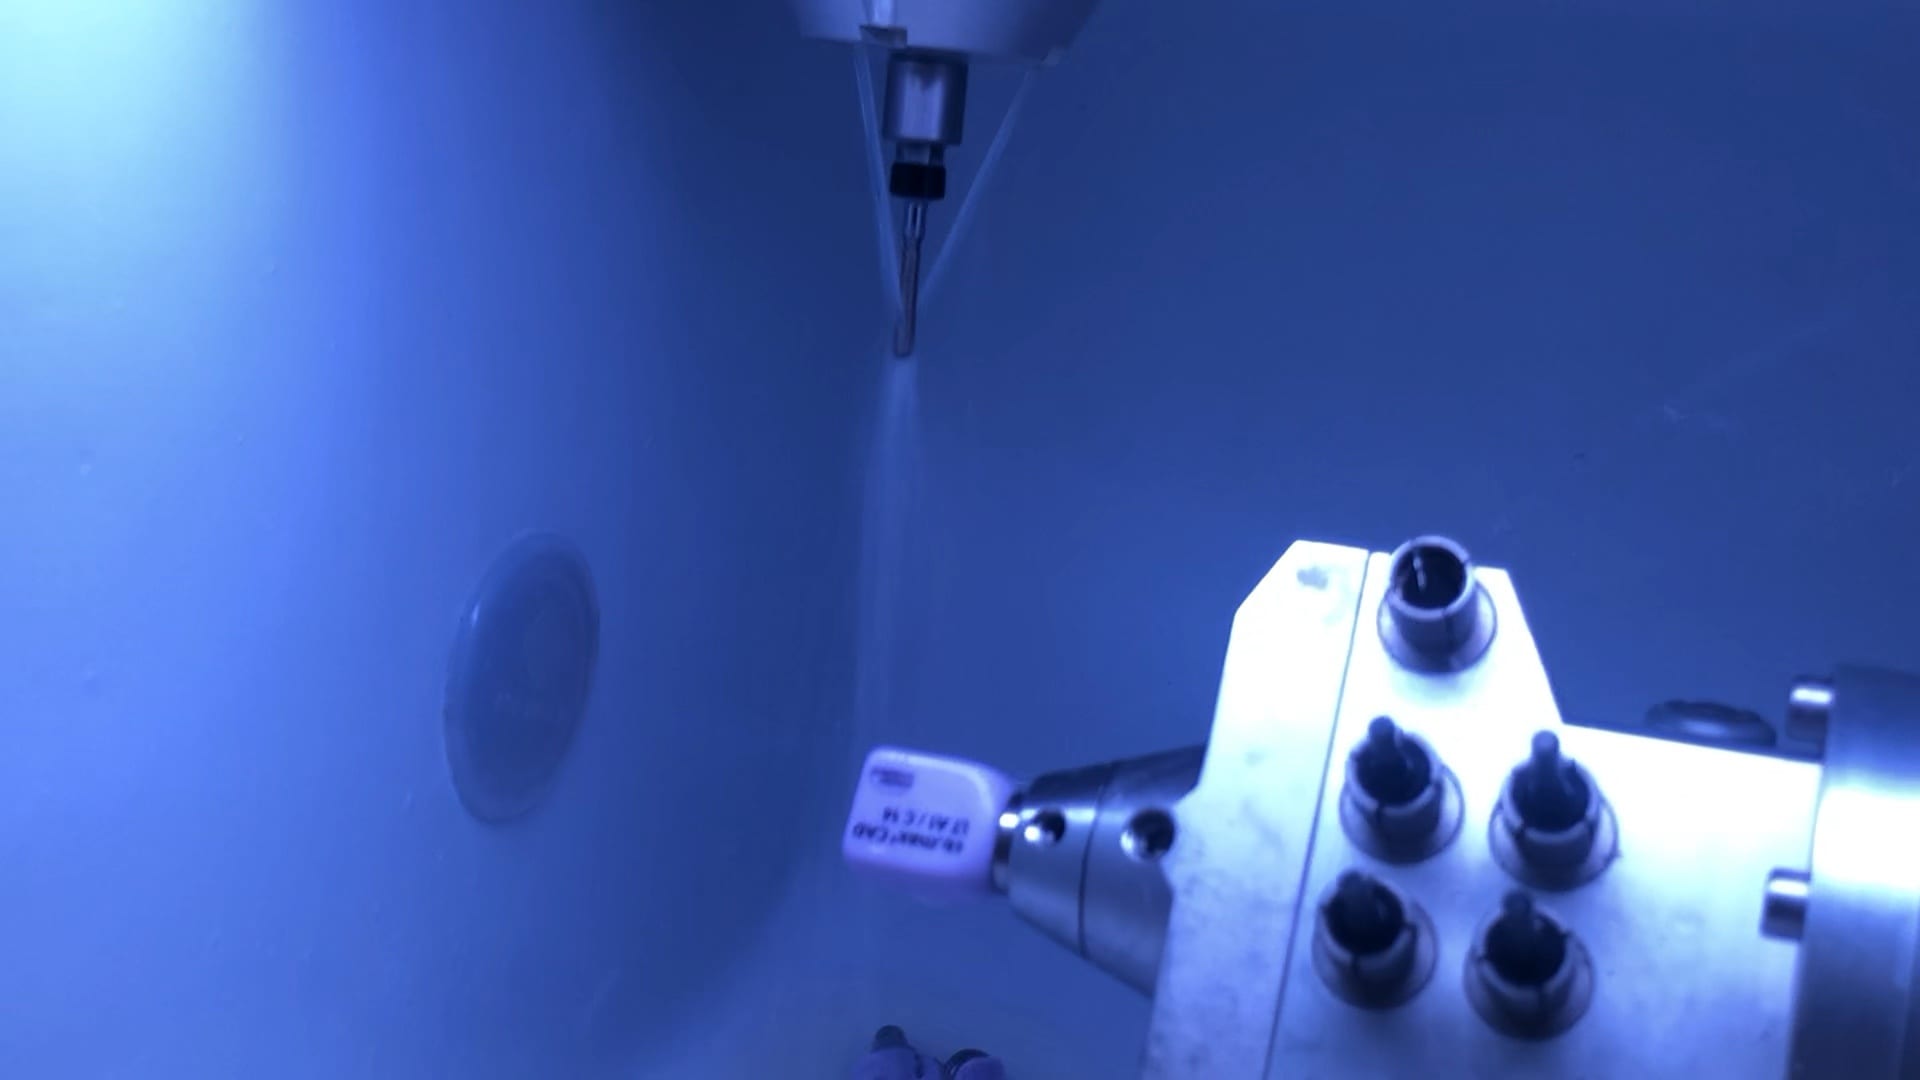
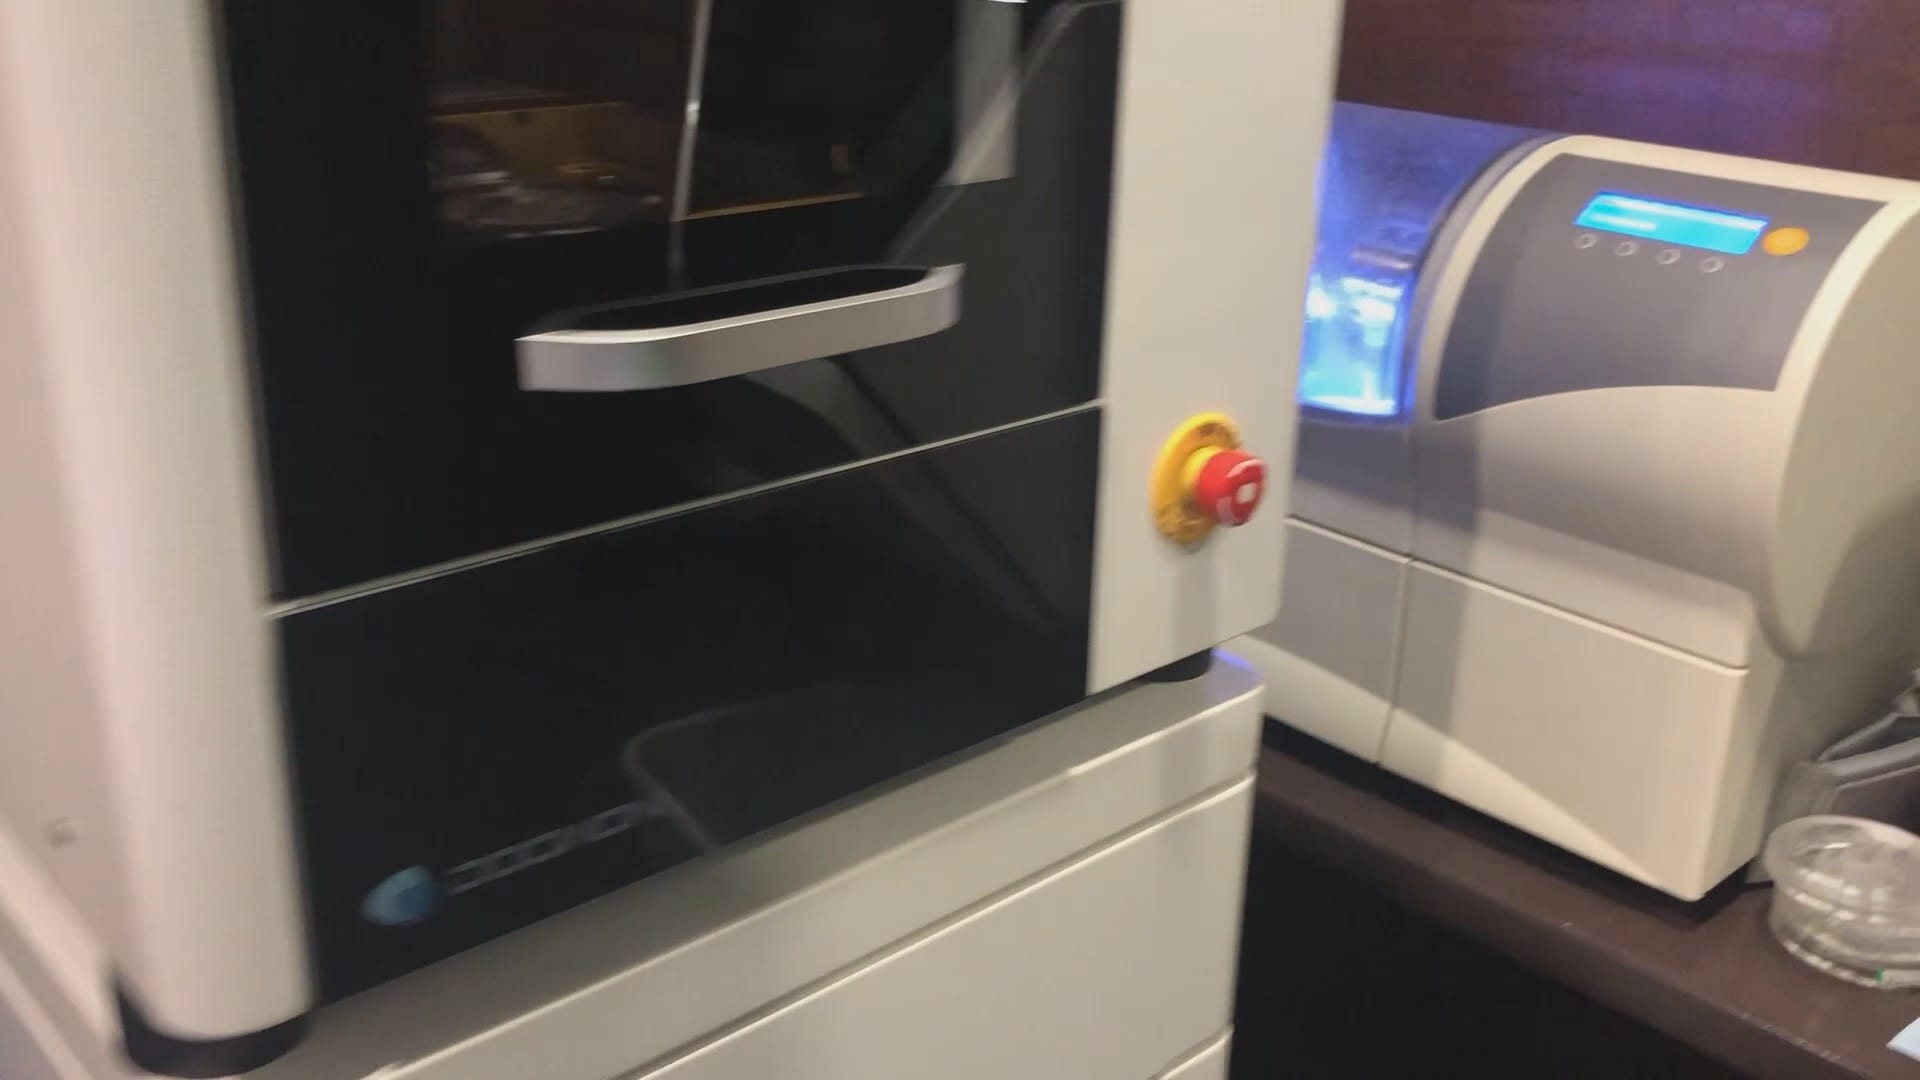
All milling machines have guidelines for proper cleaning and maintanance. The imes icore CORITEC ONE’s spray channels must be kept clean, otherwise they will spray off the target block materials. Essentially you will dry mill ceramic which will damage the material and break the drills very quickly.
You can see how little particles of ceramic and titanium dust can clog the lines.
Here we just used an ortho plier and orthowires to unclog the lines. It’s easiest to have the water spraying so you can identify the channels and see the immediate results.
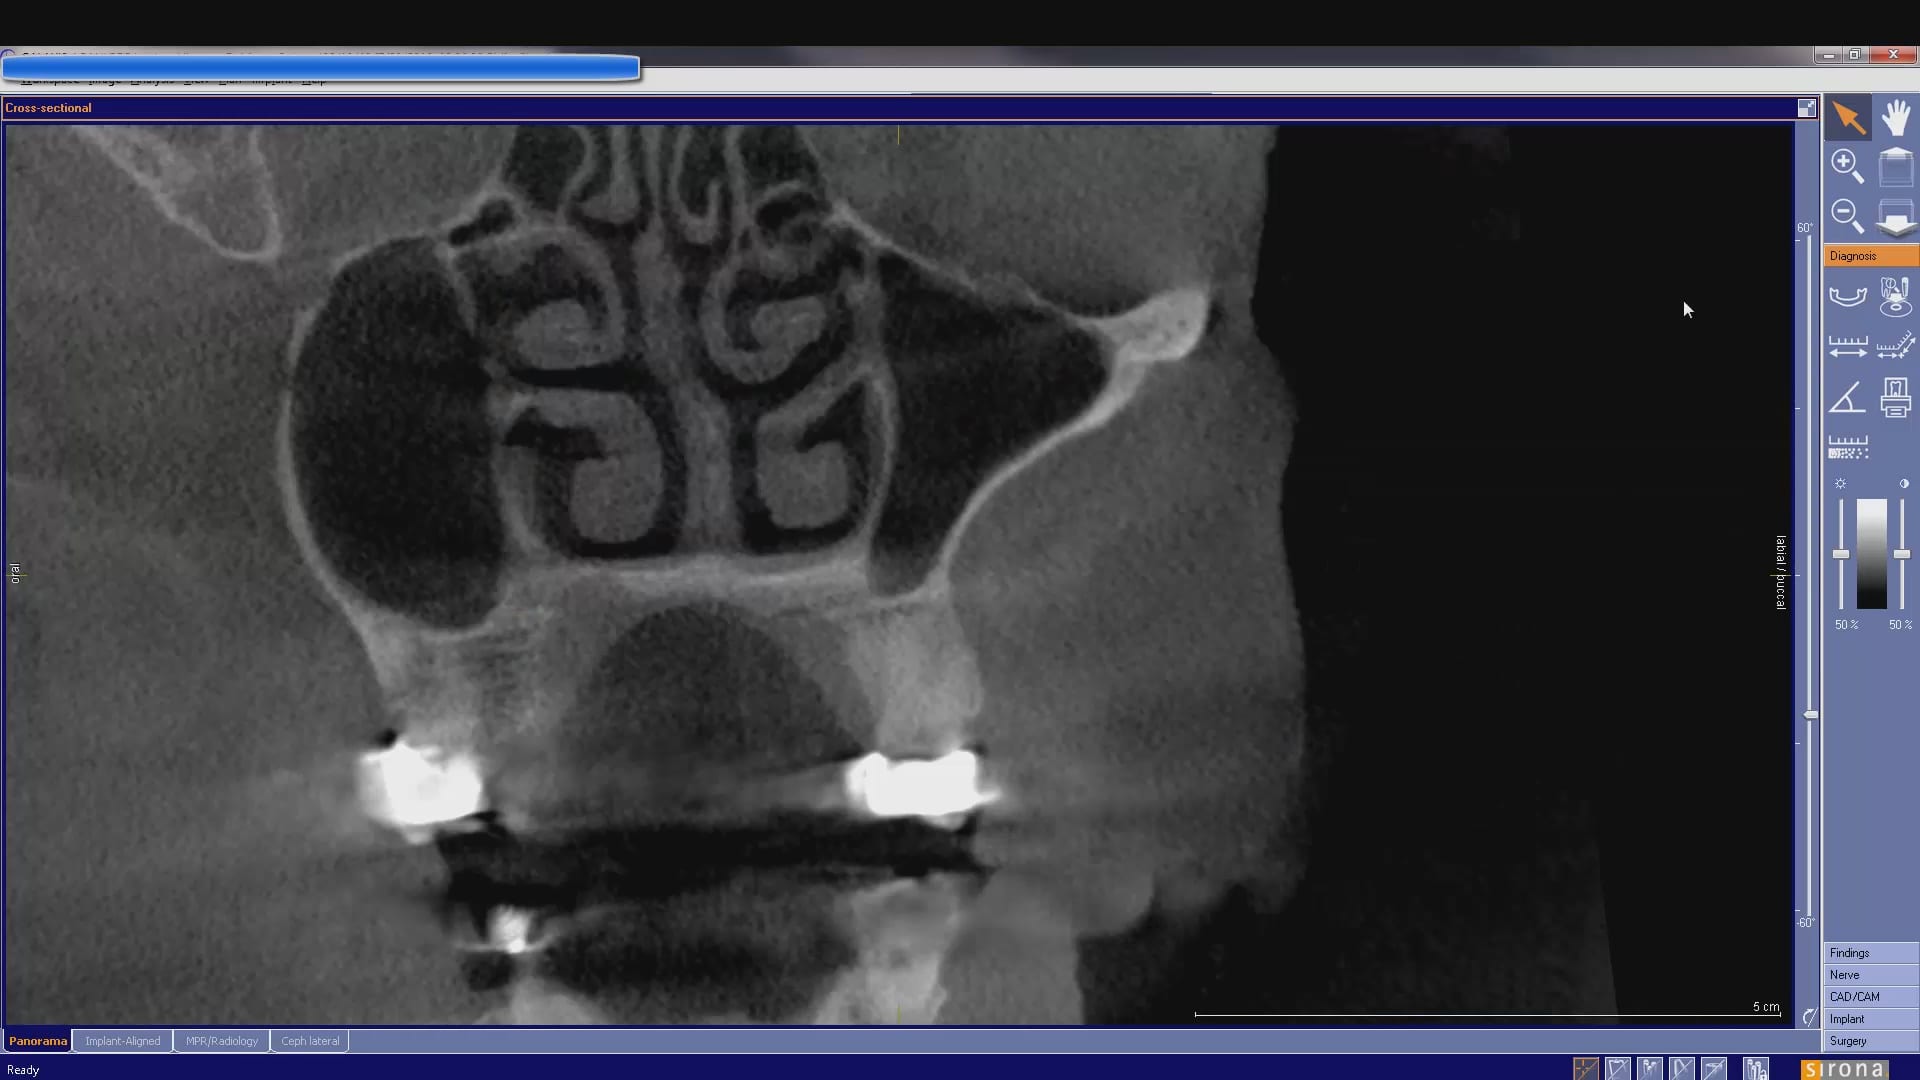
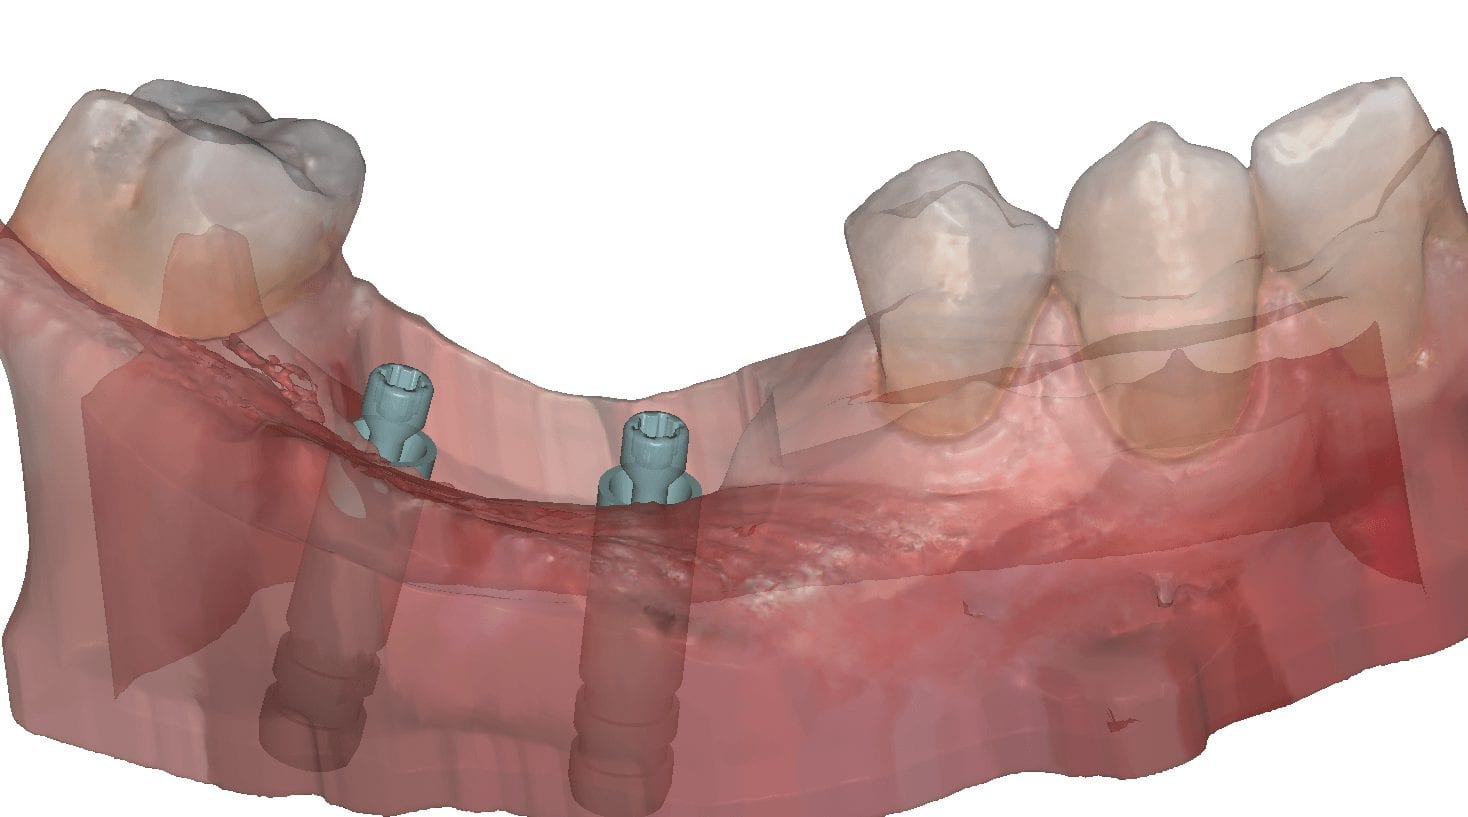
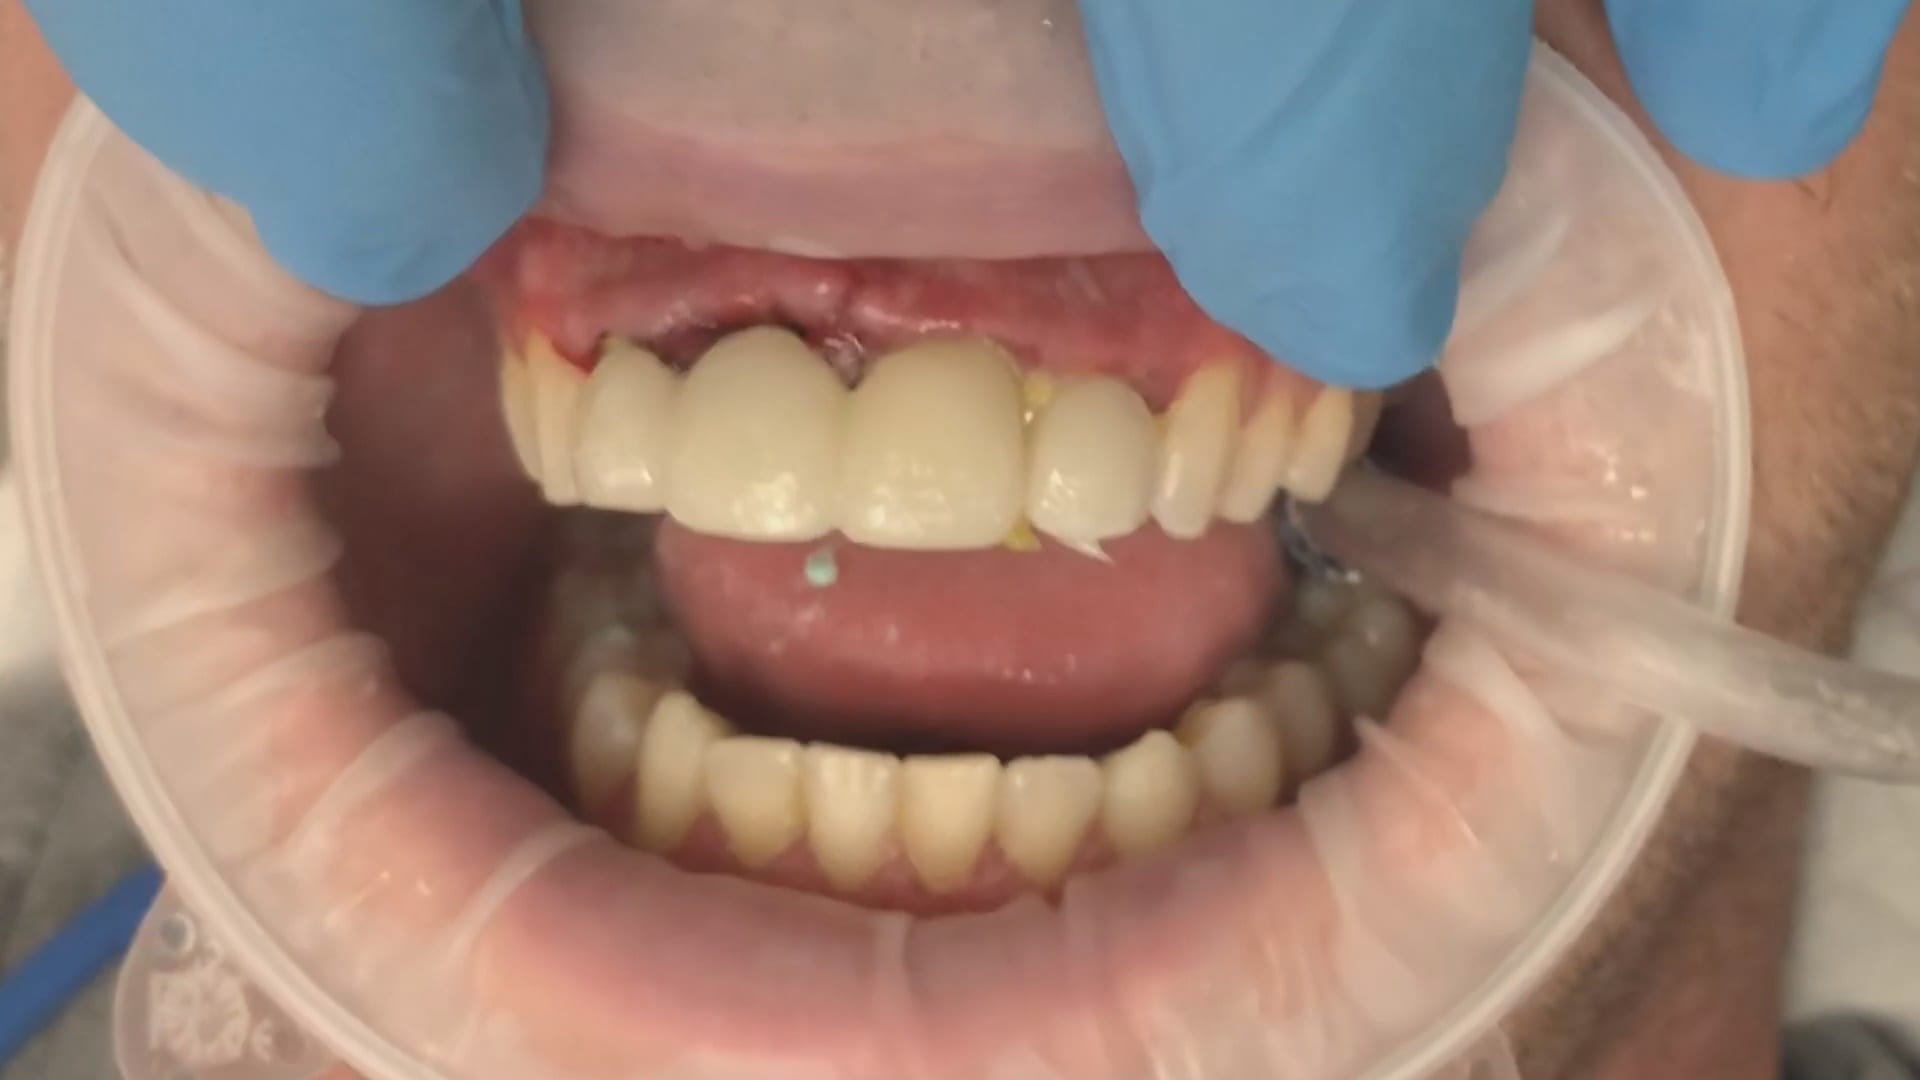
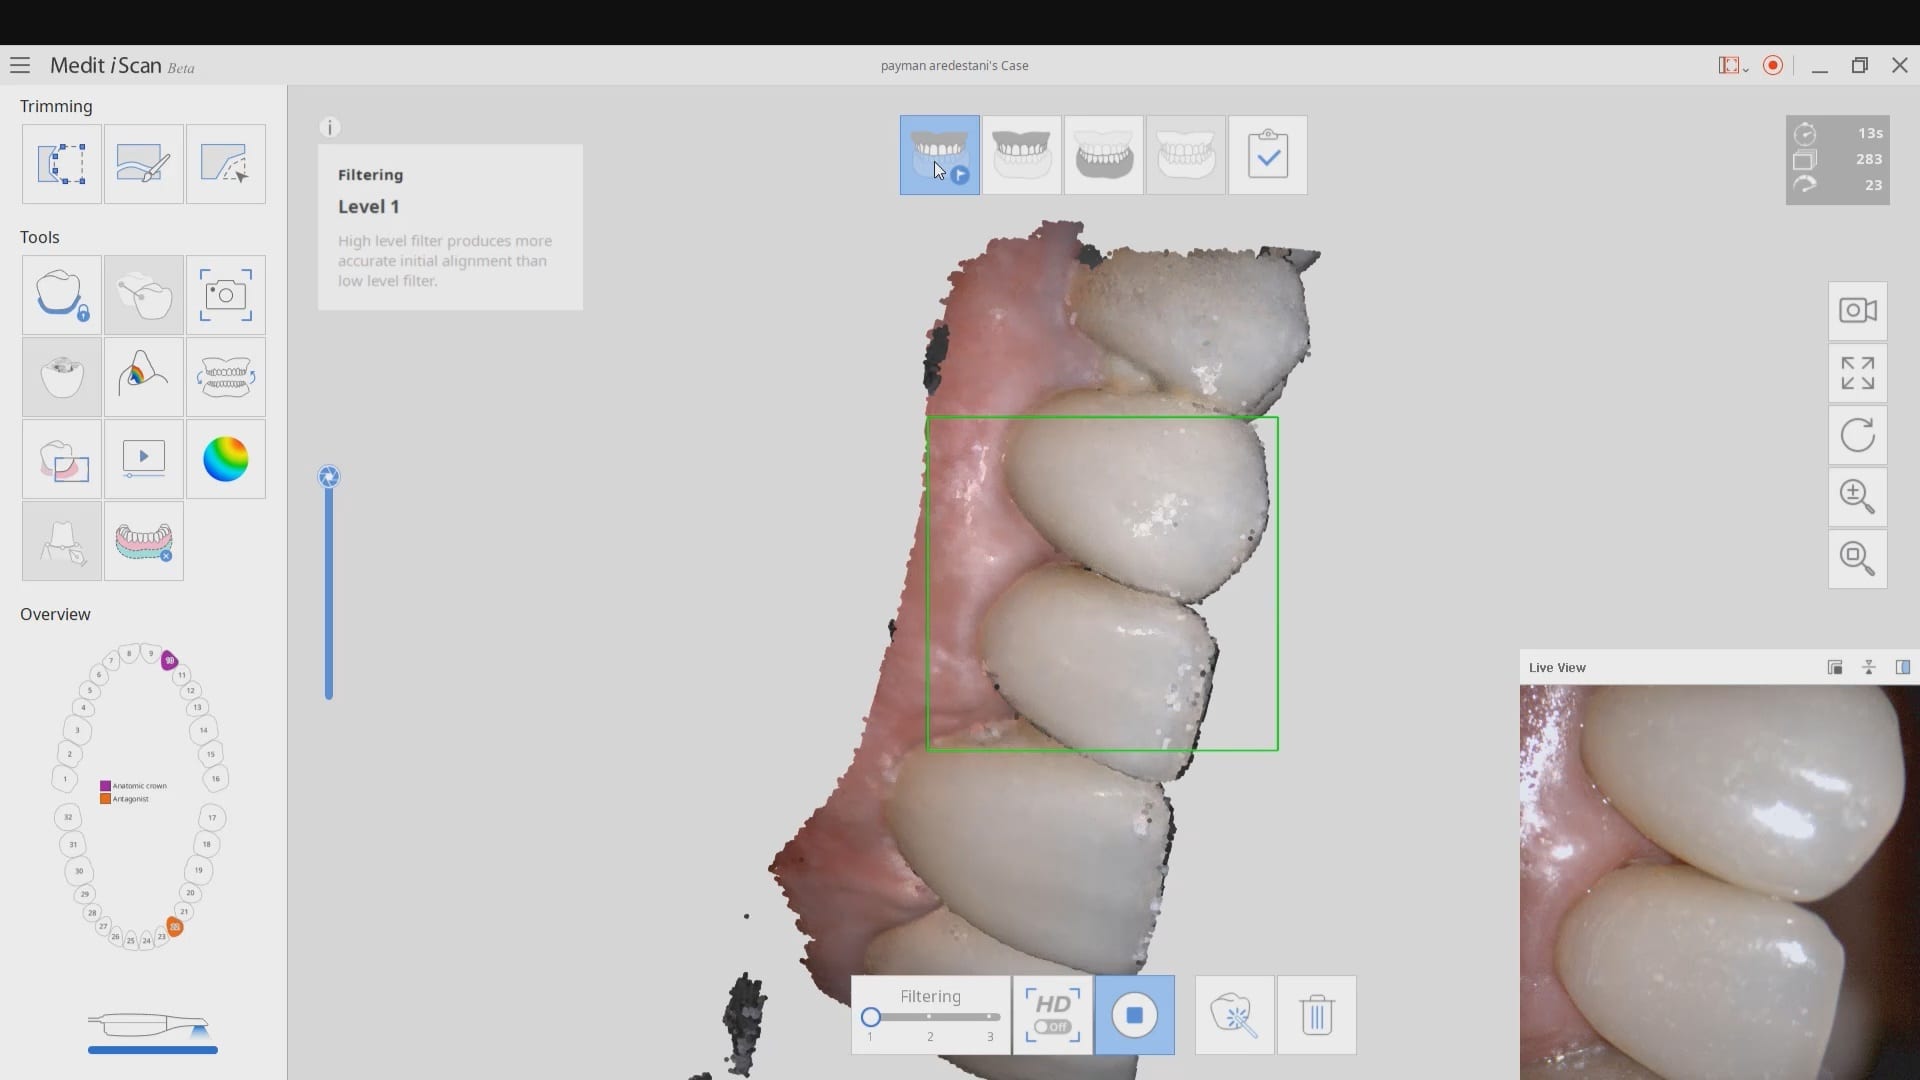
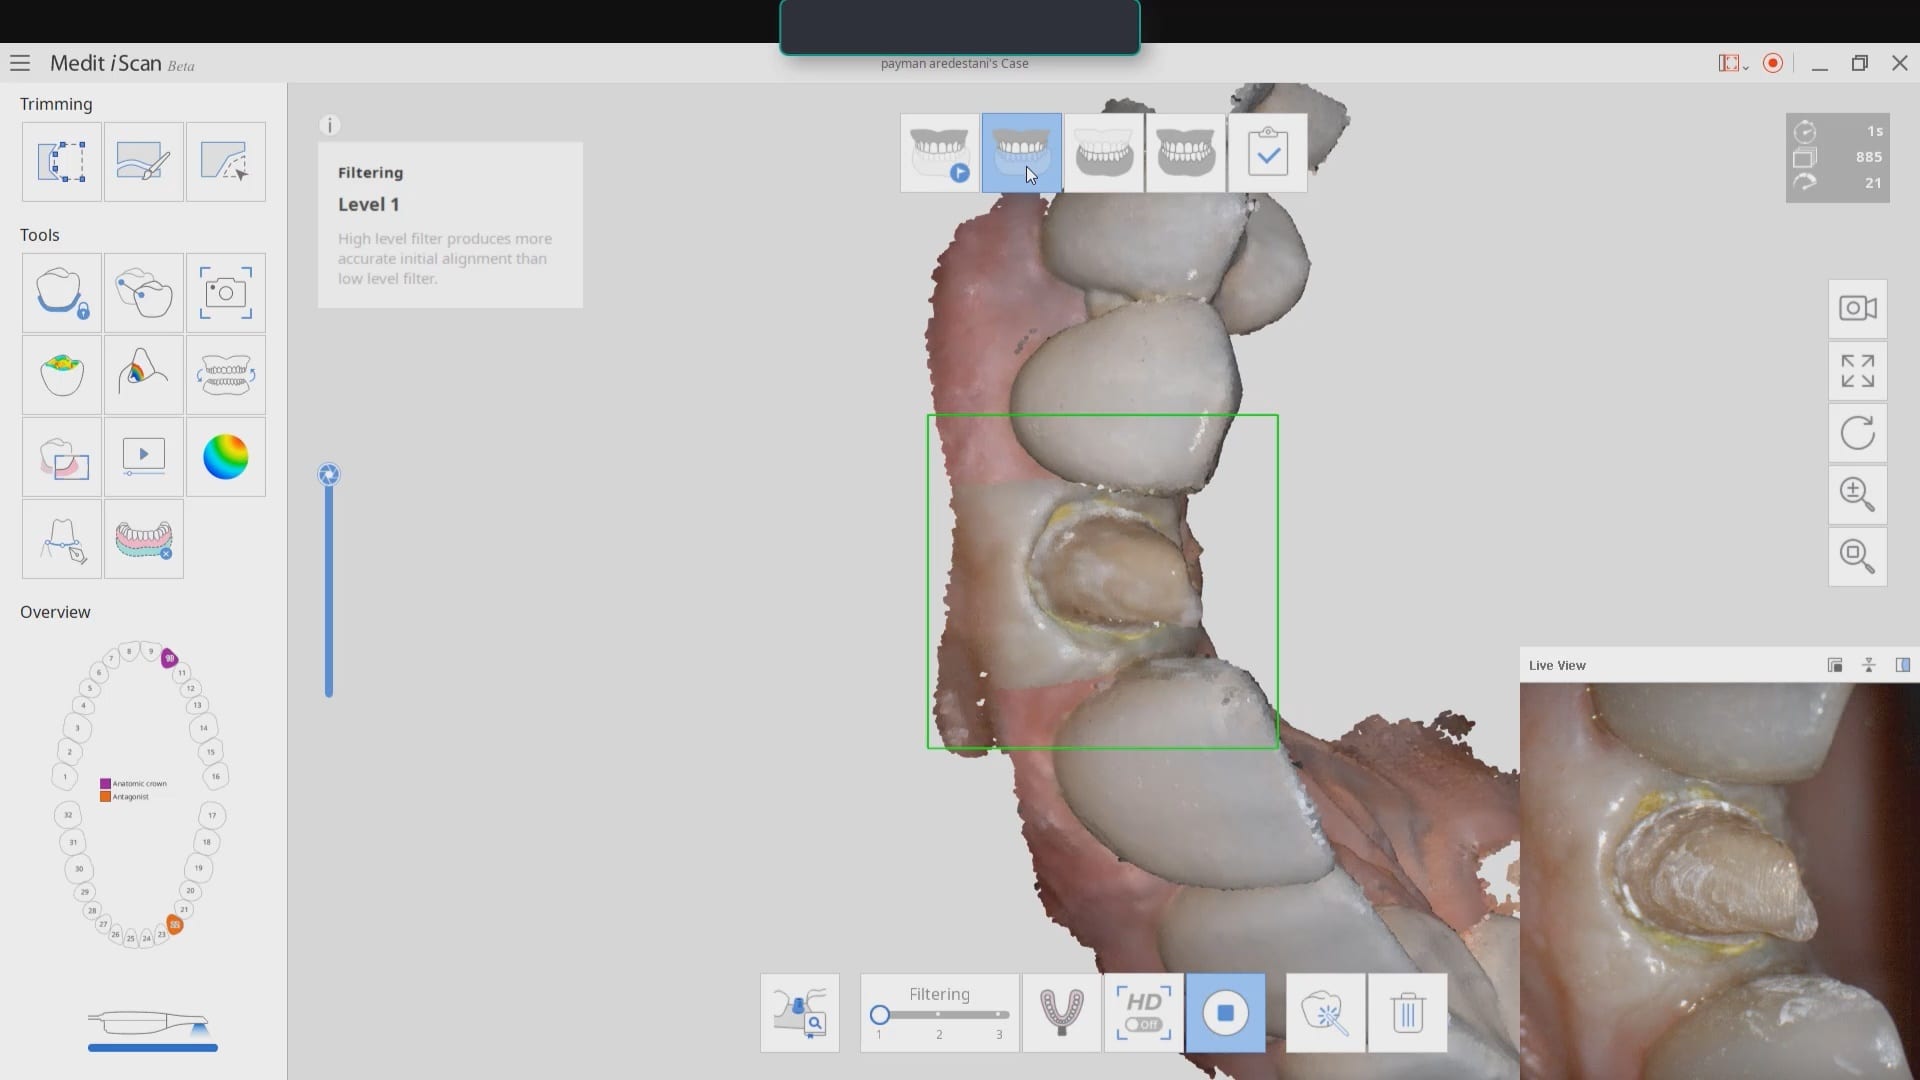
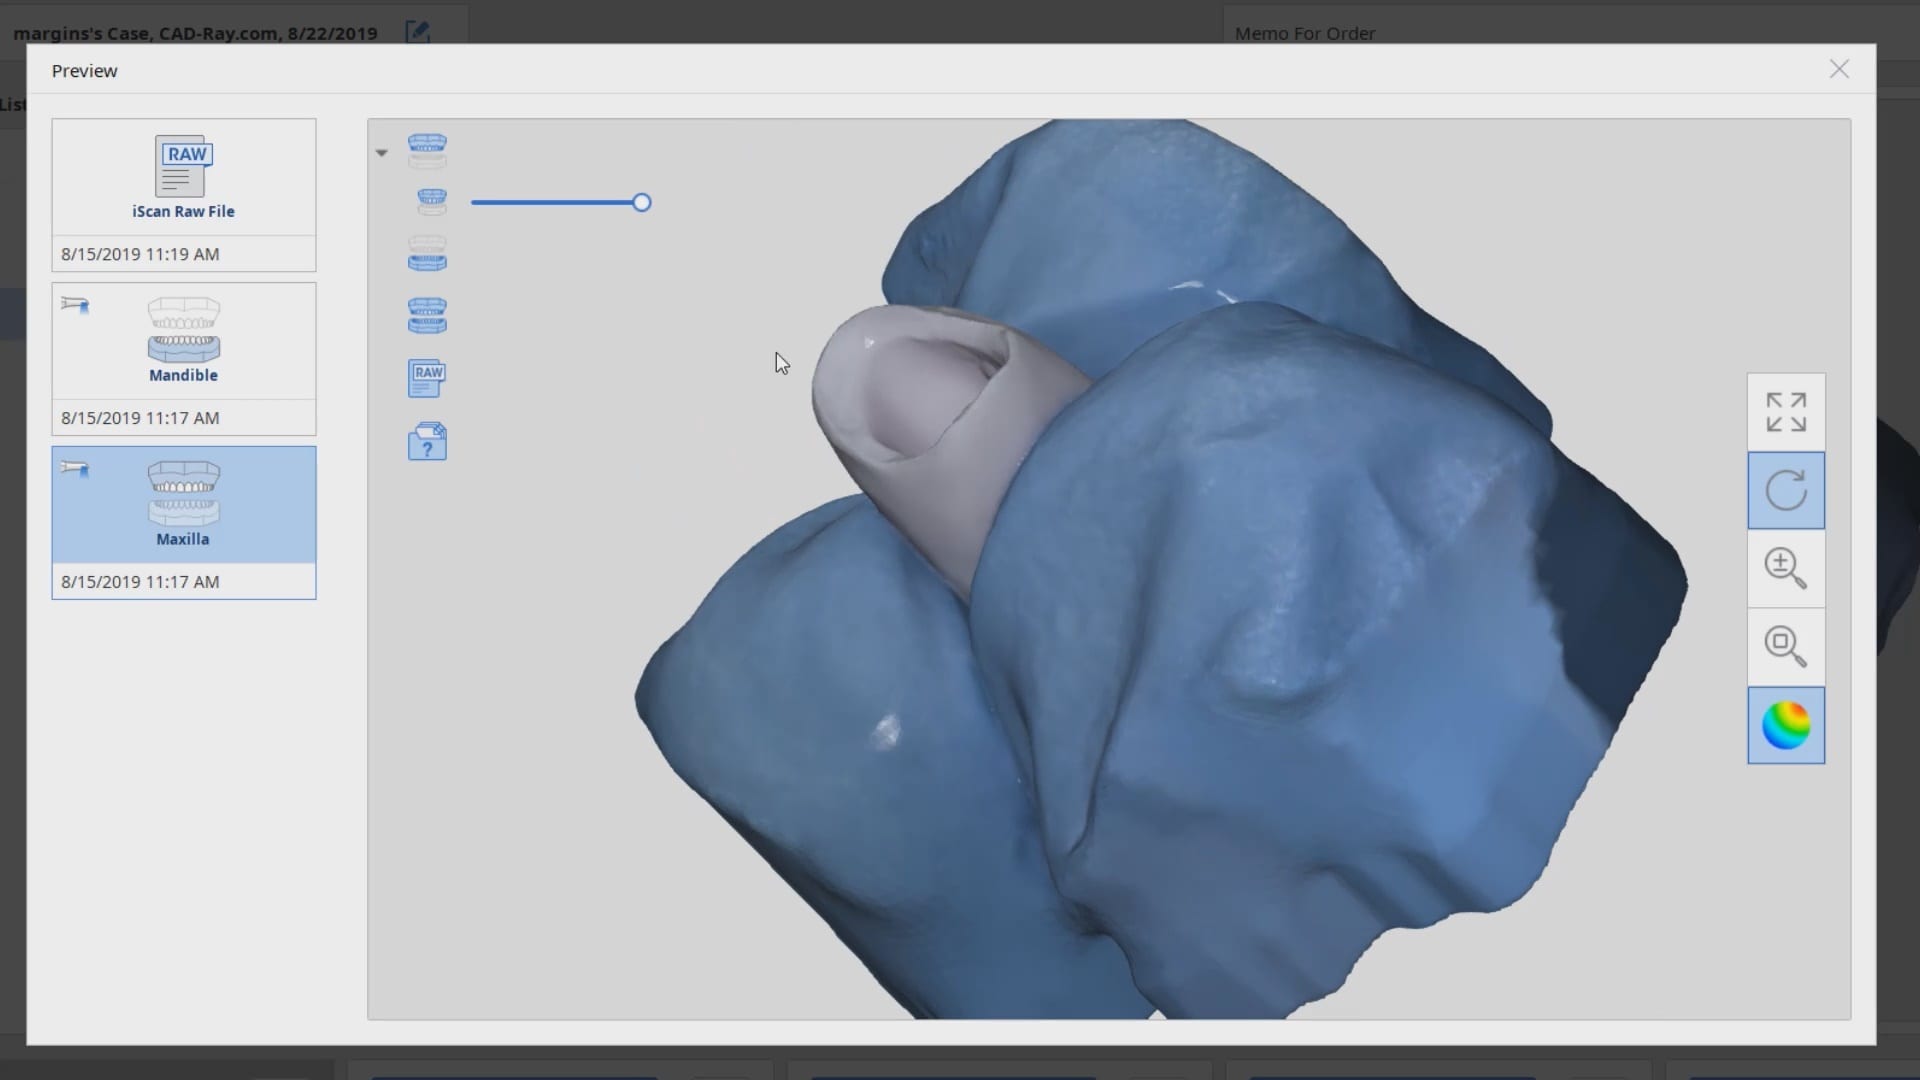
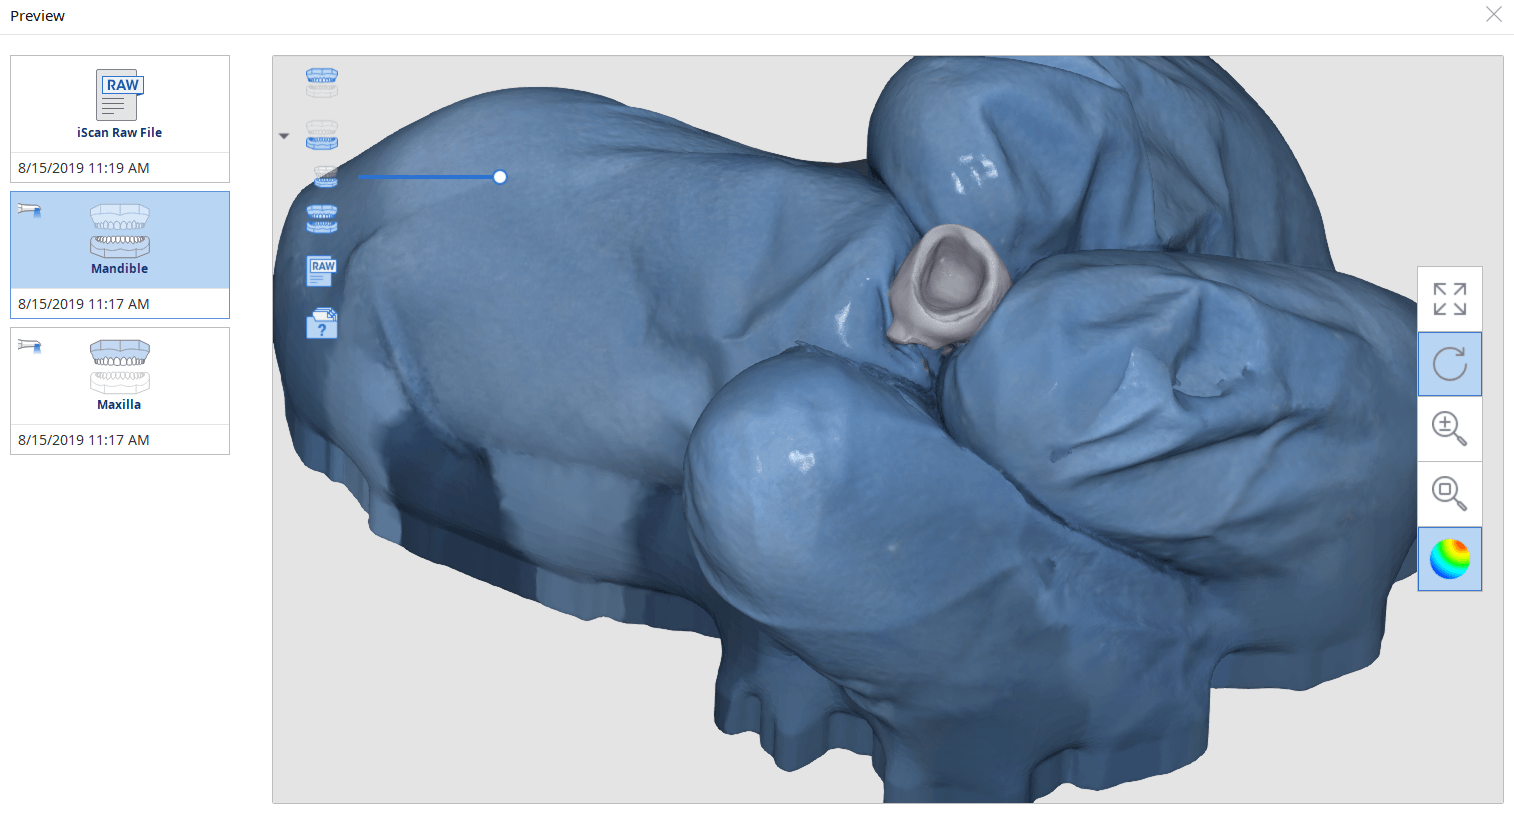
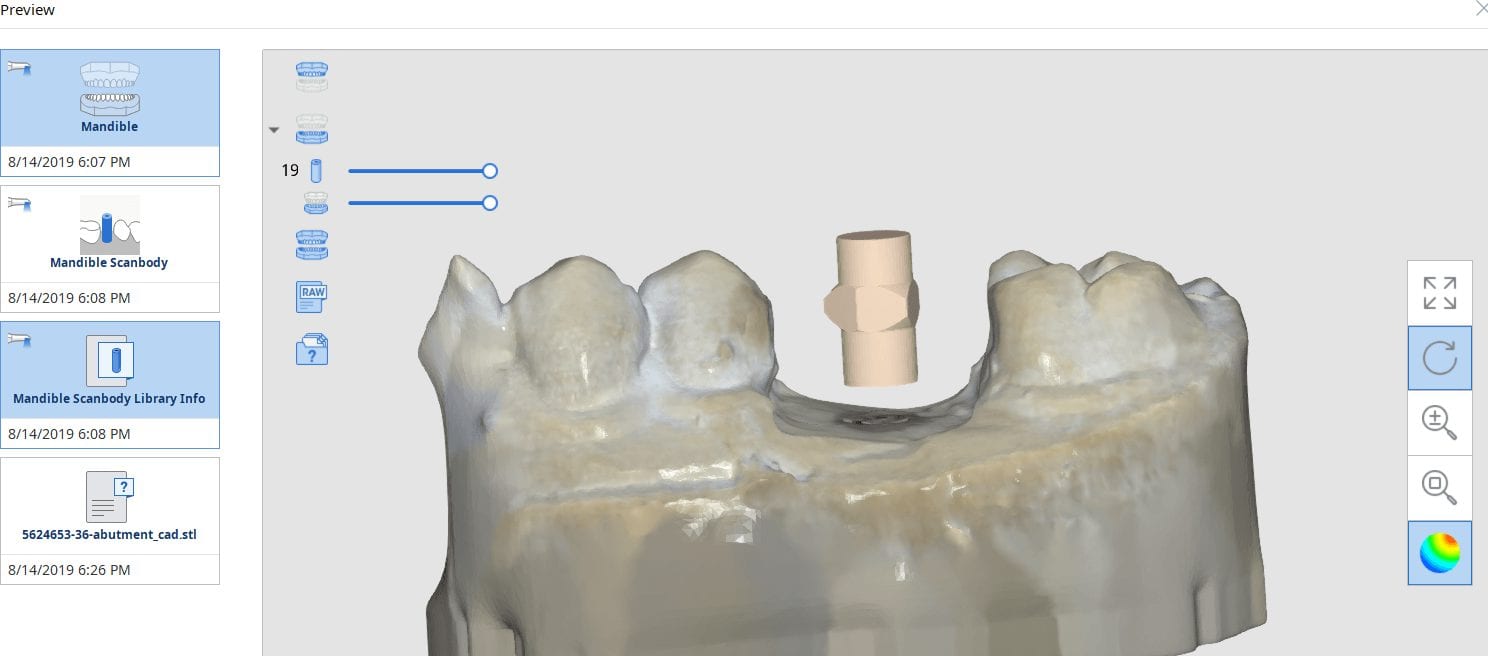
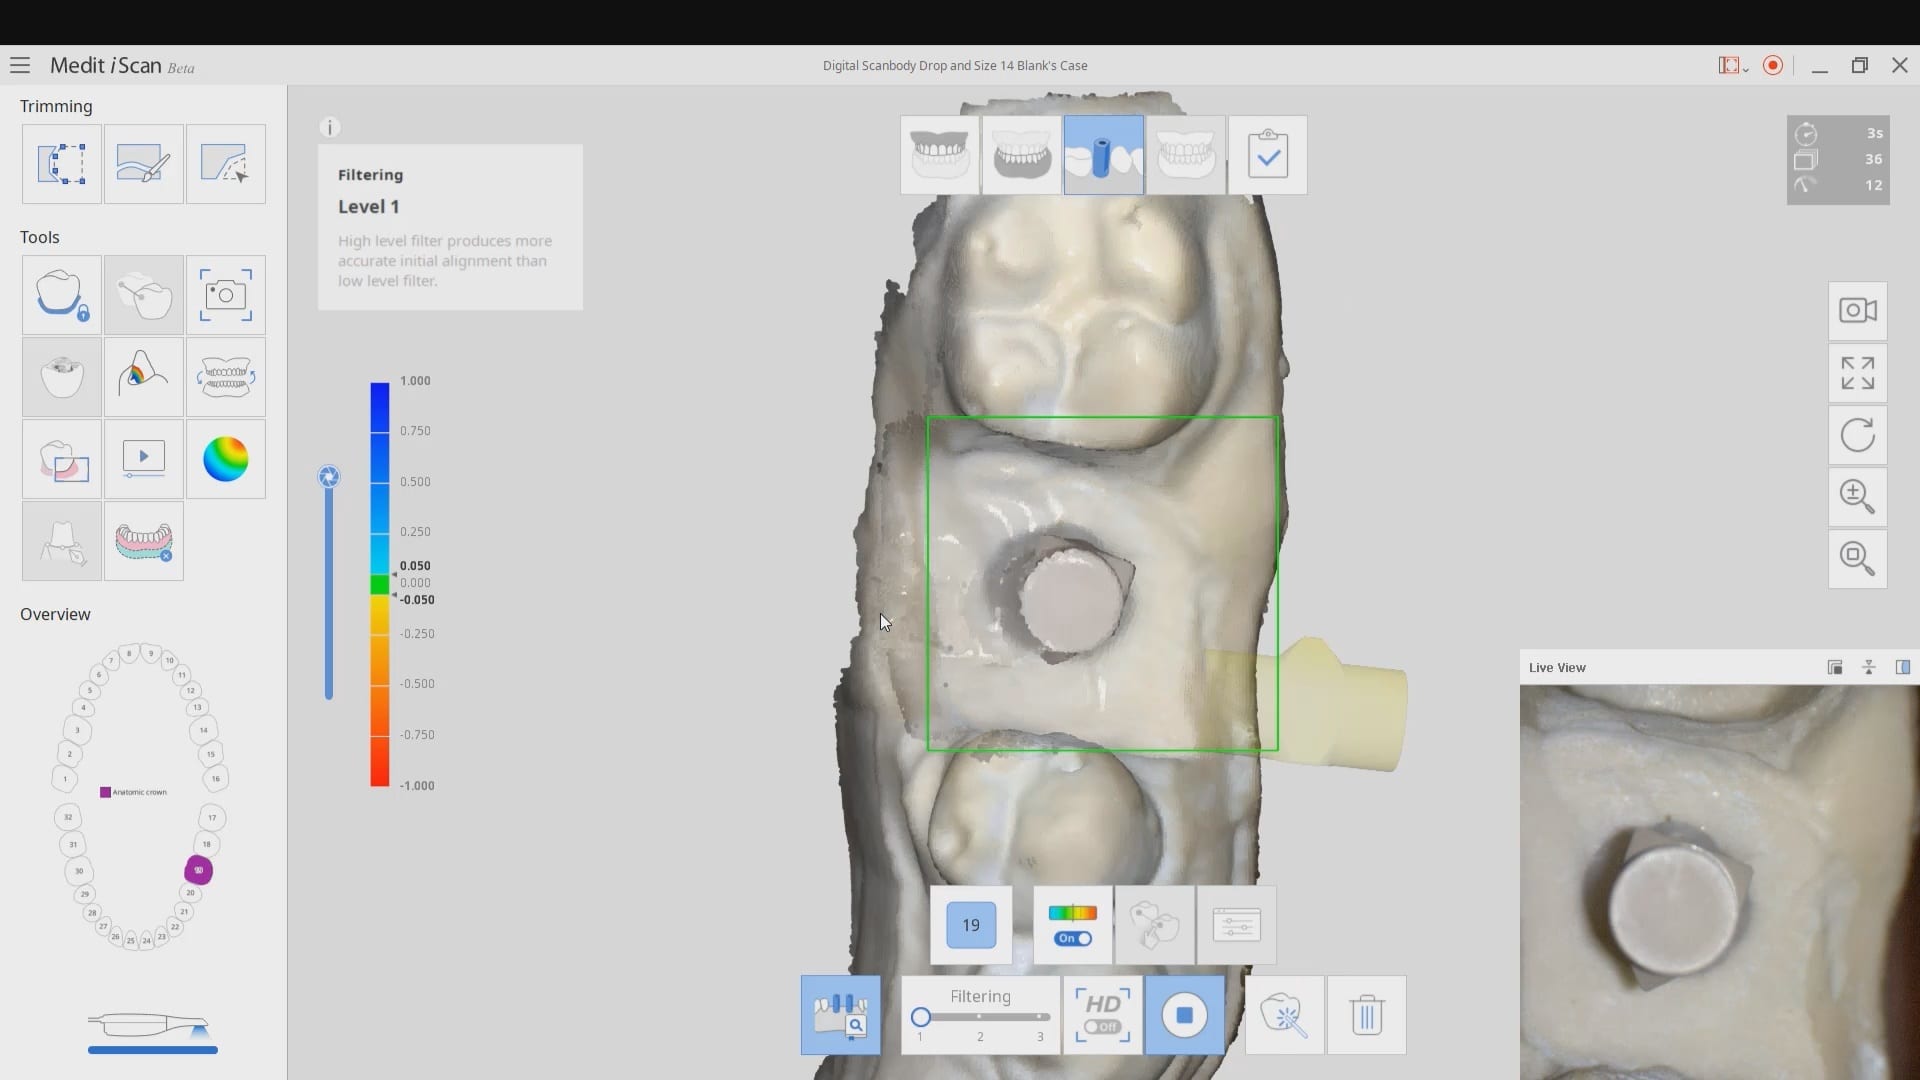
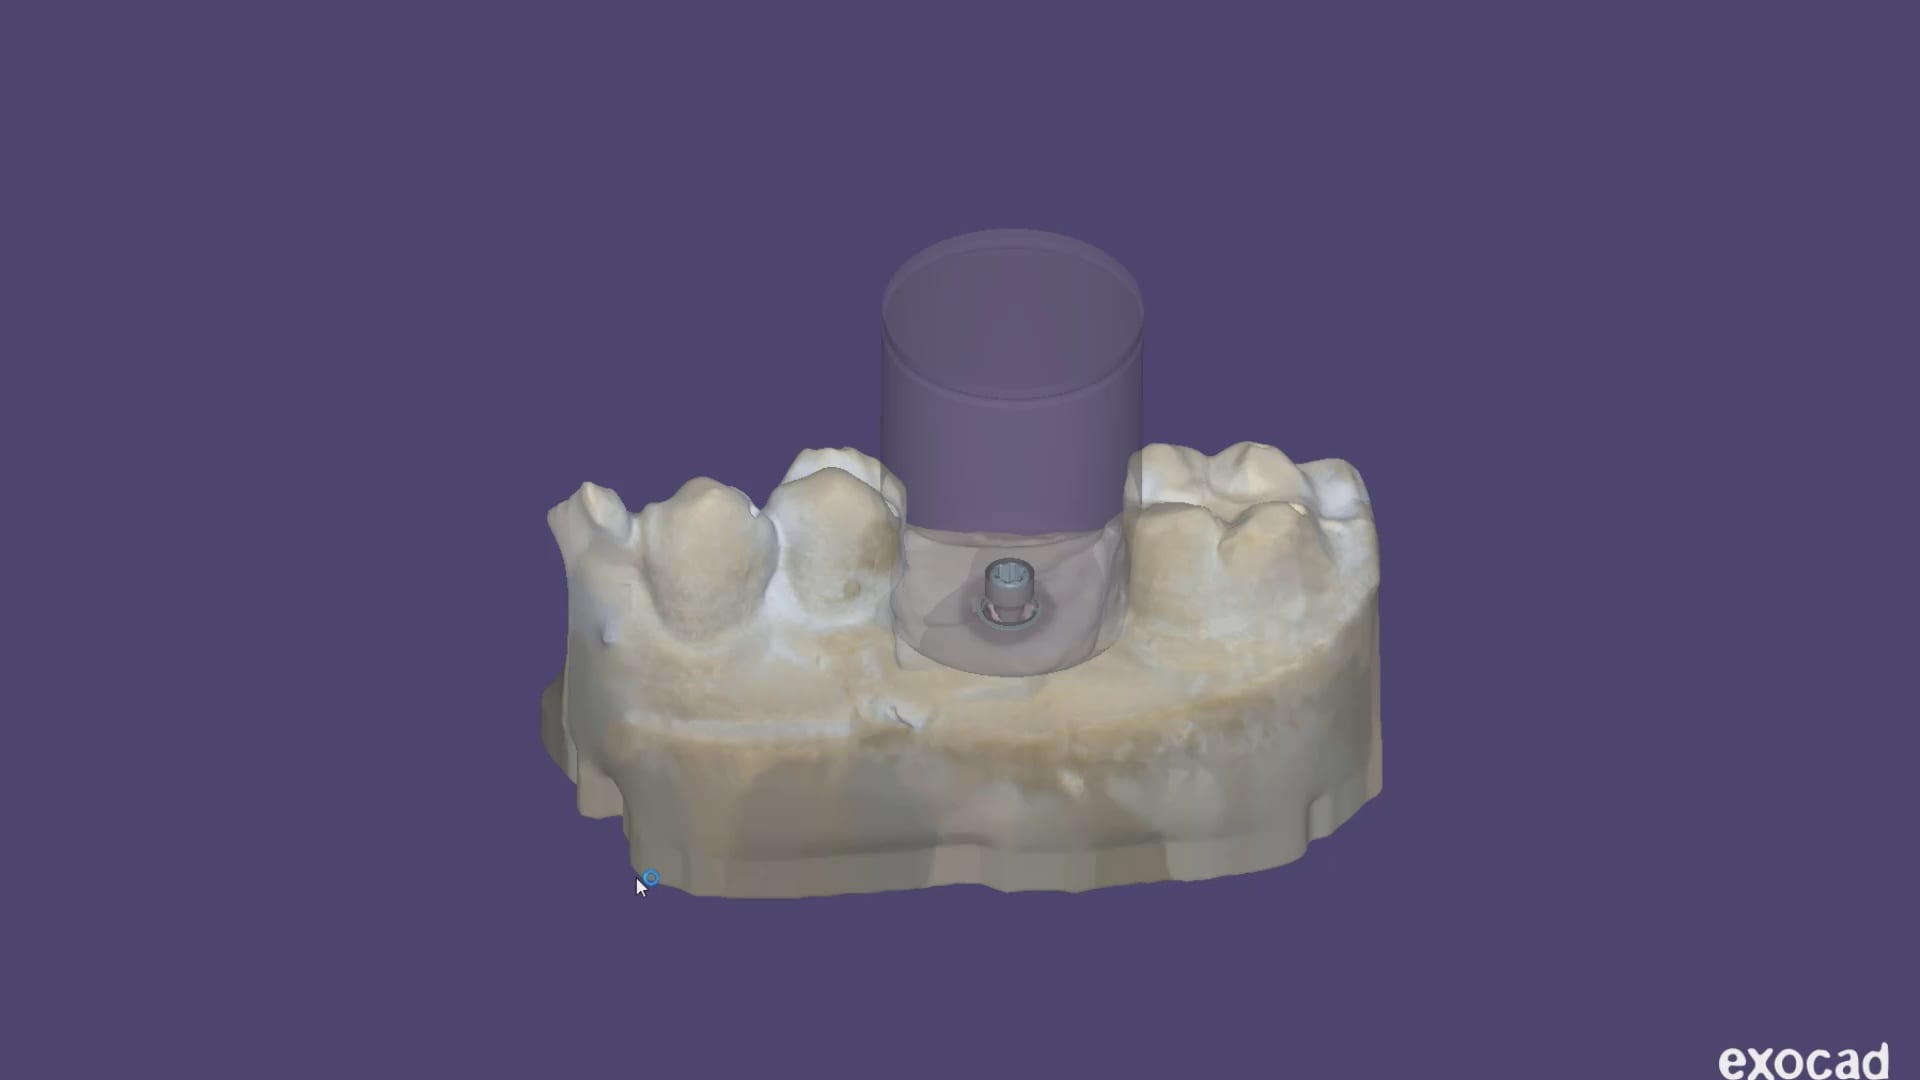
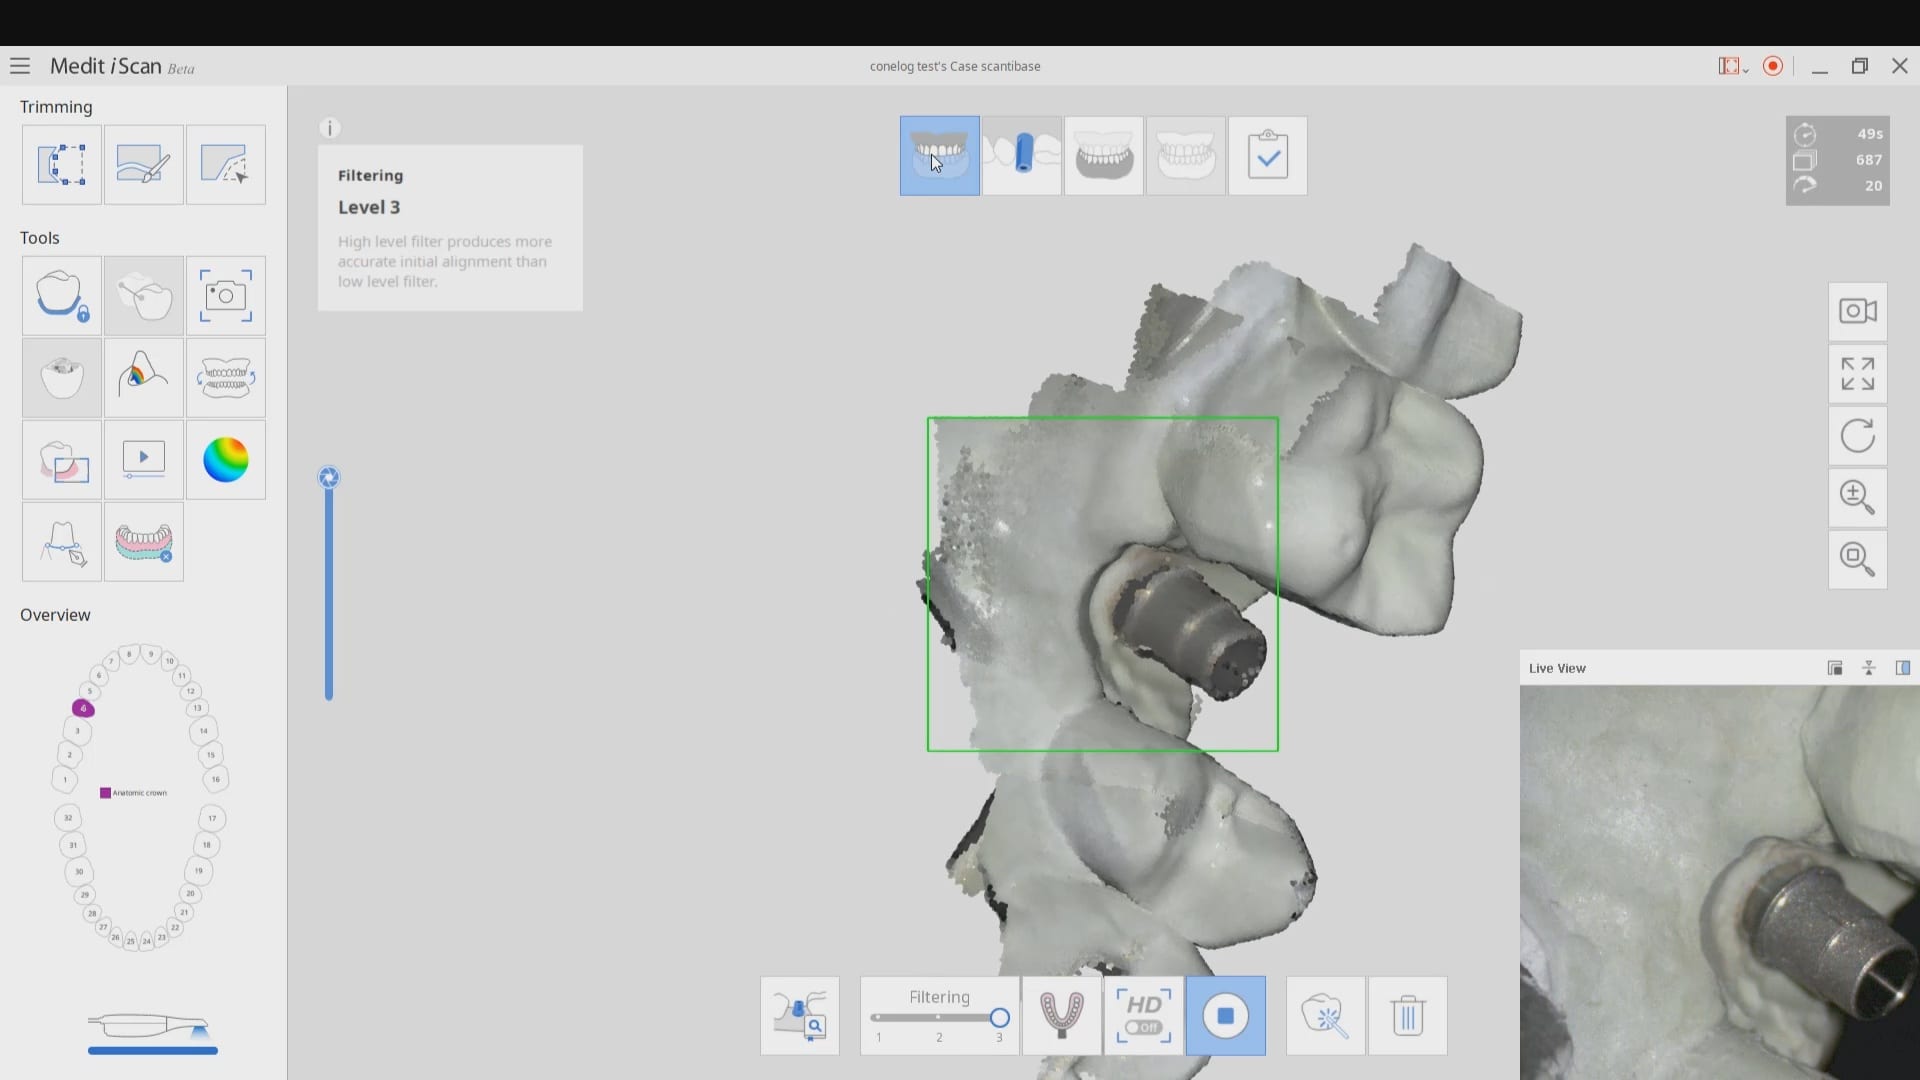
A new feature coming to Medit i500 is the automatic detection of scanbodies while you are imaging. In this clinical case, two implants are placed in the lower left quadrant in a fully guided fashion. Spacing limitations and proximity to vital anatomy did not allow for proper parallelism. This can create all kinds of headaches with analog dentistry where the trays can inadvertently lock in the mouth of distort upon poor up.
With the digital approach, you can scan the gingiva, the arch with easy access to adjacent contacts, and then the scanbodies themselves. What is great is that you do not disturb the primary stability you just achieved by placing physical forces on freshly placed implants.
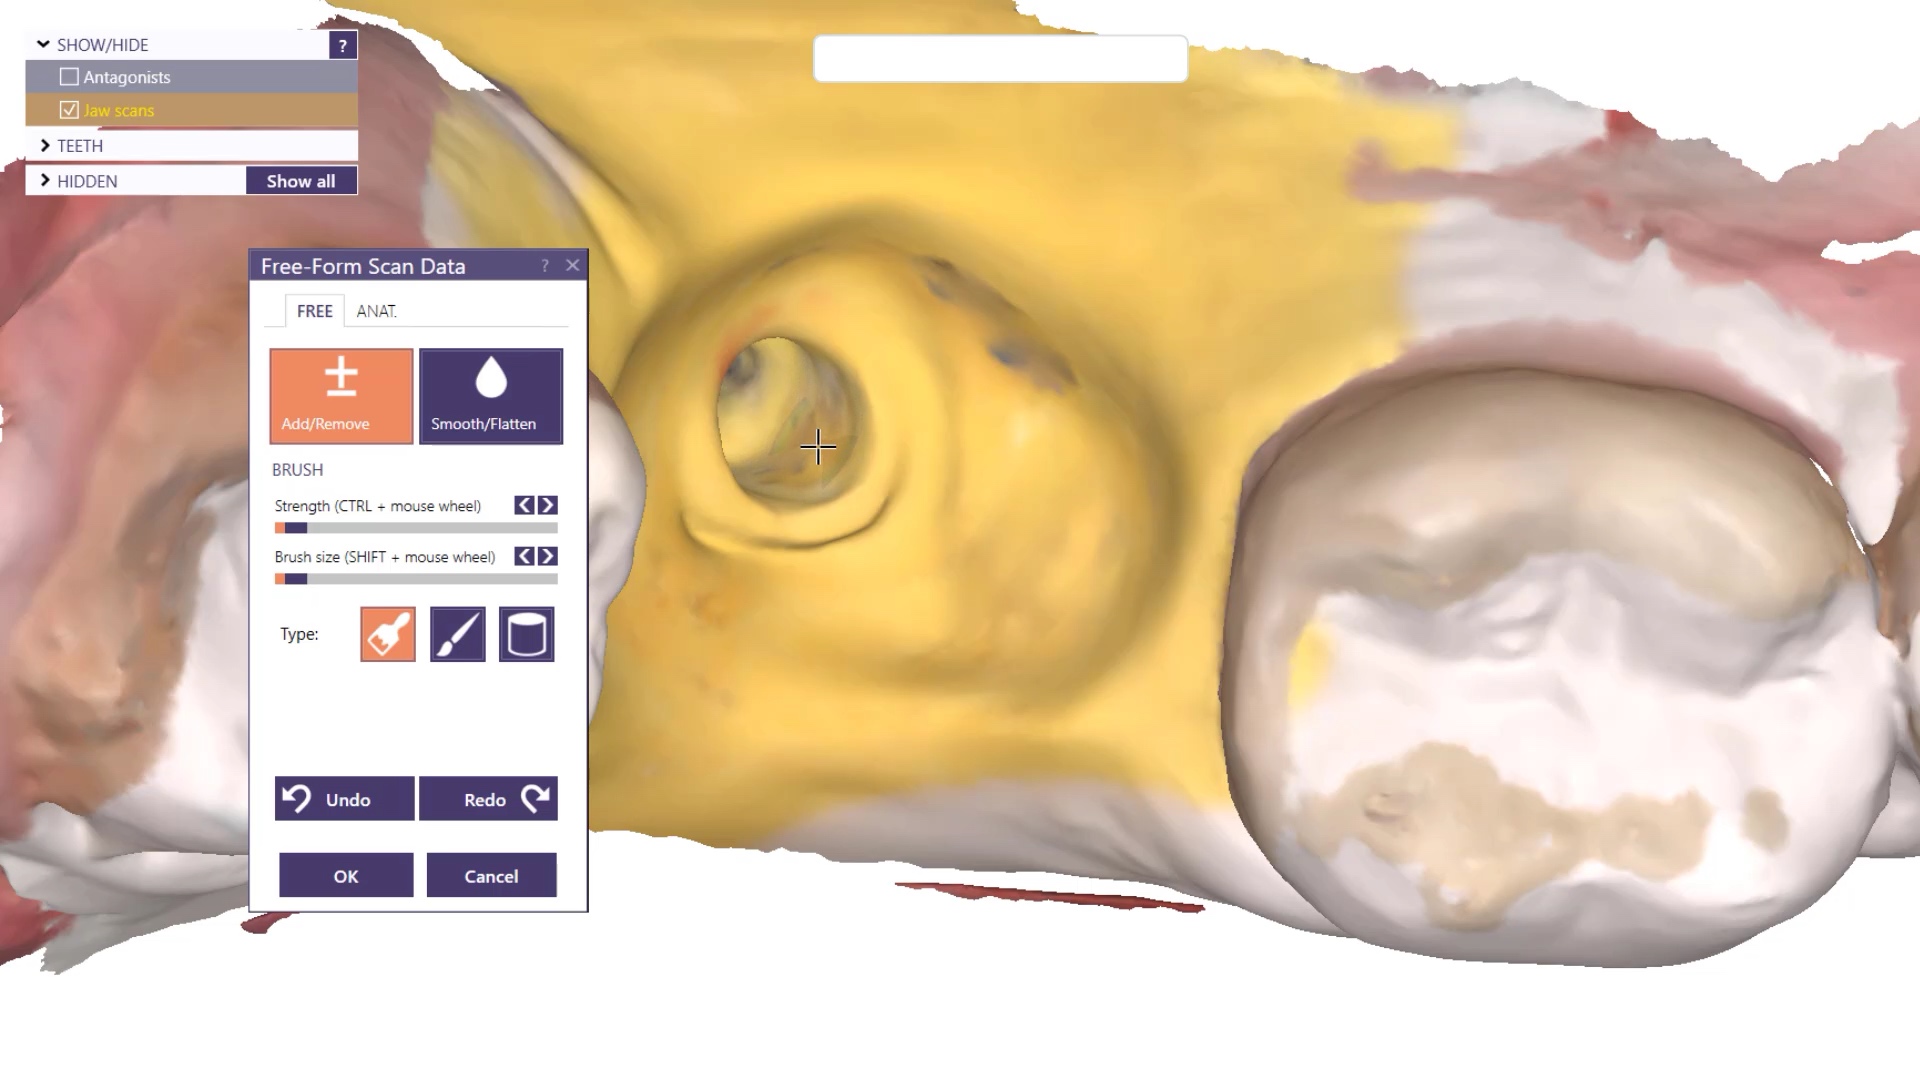
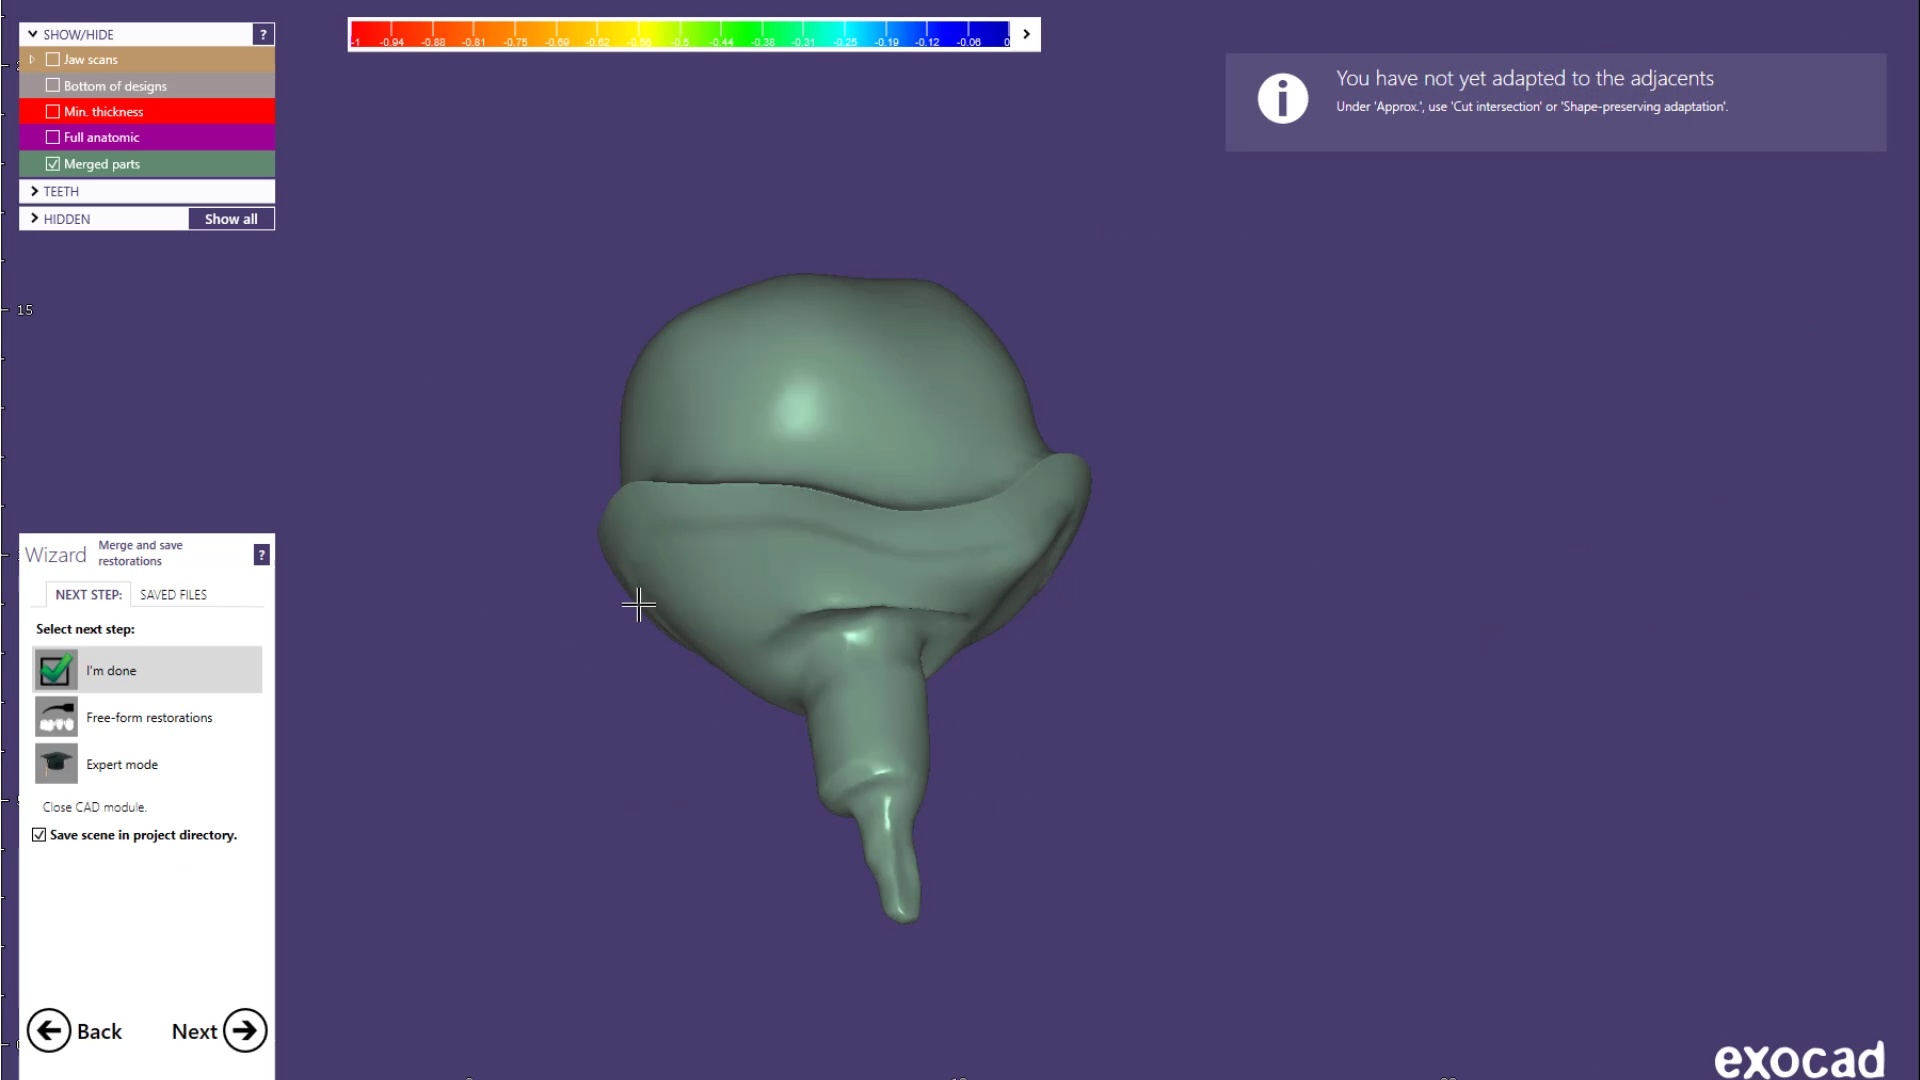
Once the images are captured and the scanbodies are identified, we launch exocad and the data is not only automatically imported into the Computer Aided Design Software, it also plots the fixtures in the correct position and identifies their location and timing so you can proceed with the design of the custom abutment and / or tibase restoration.
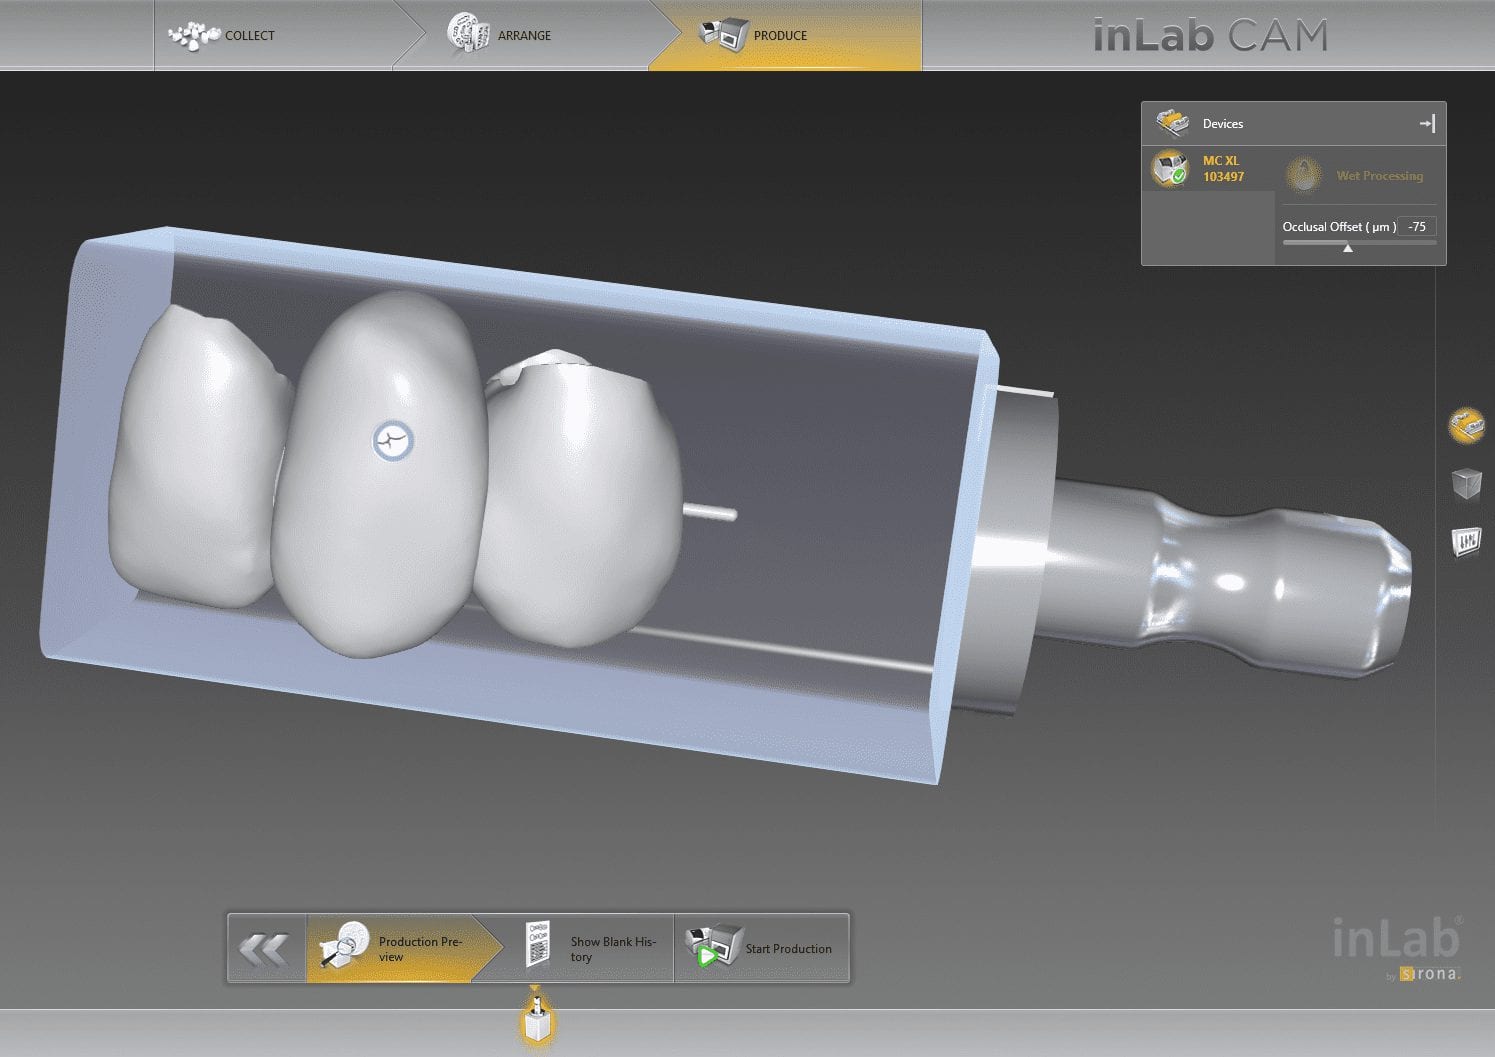
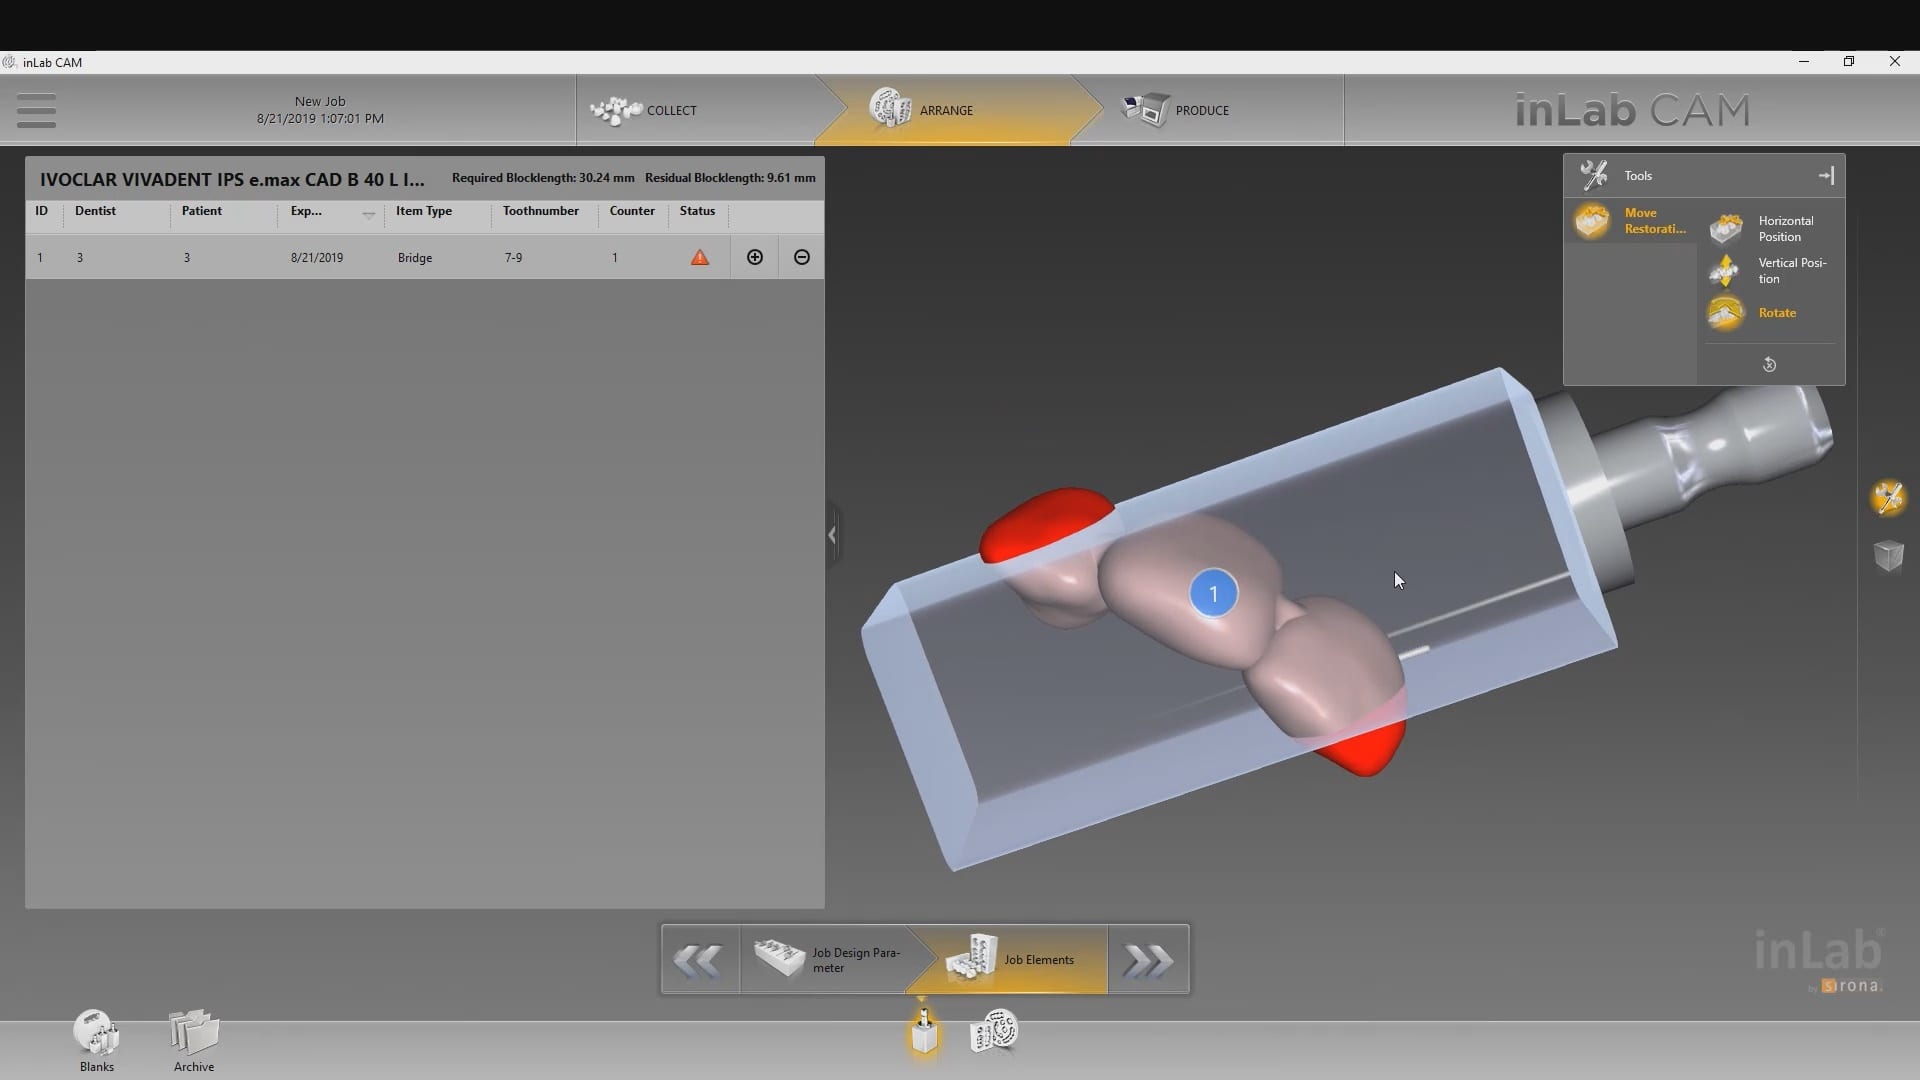
This 4 unit case was imaged in Medit i500 and designed in exocad. The final restoration was taken to CEREC inlab cam. When the construction file is imported into cam, it contains data such as the margin line which is important for the milling machine to know for its tool path calculations.
In this particular situation, the construction file dictated the position of the restoration in the block which would have not allowed for proper milling. Instead of loading the construction file, we imported the stl design, redrew the margins really quickly and were able to mill the two separate (4 unit) case out of a single emax block.
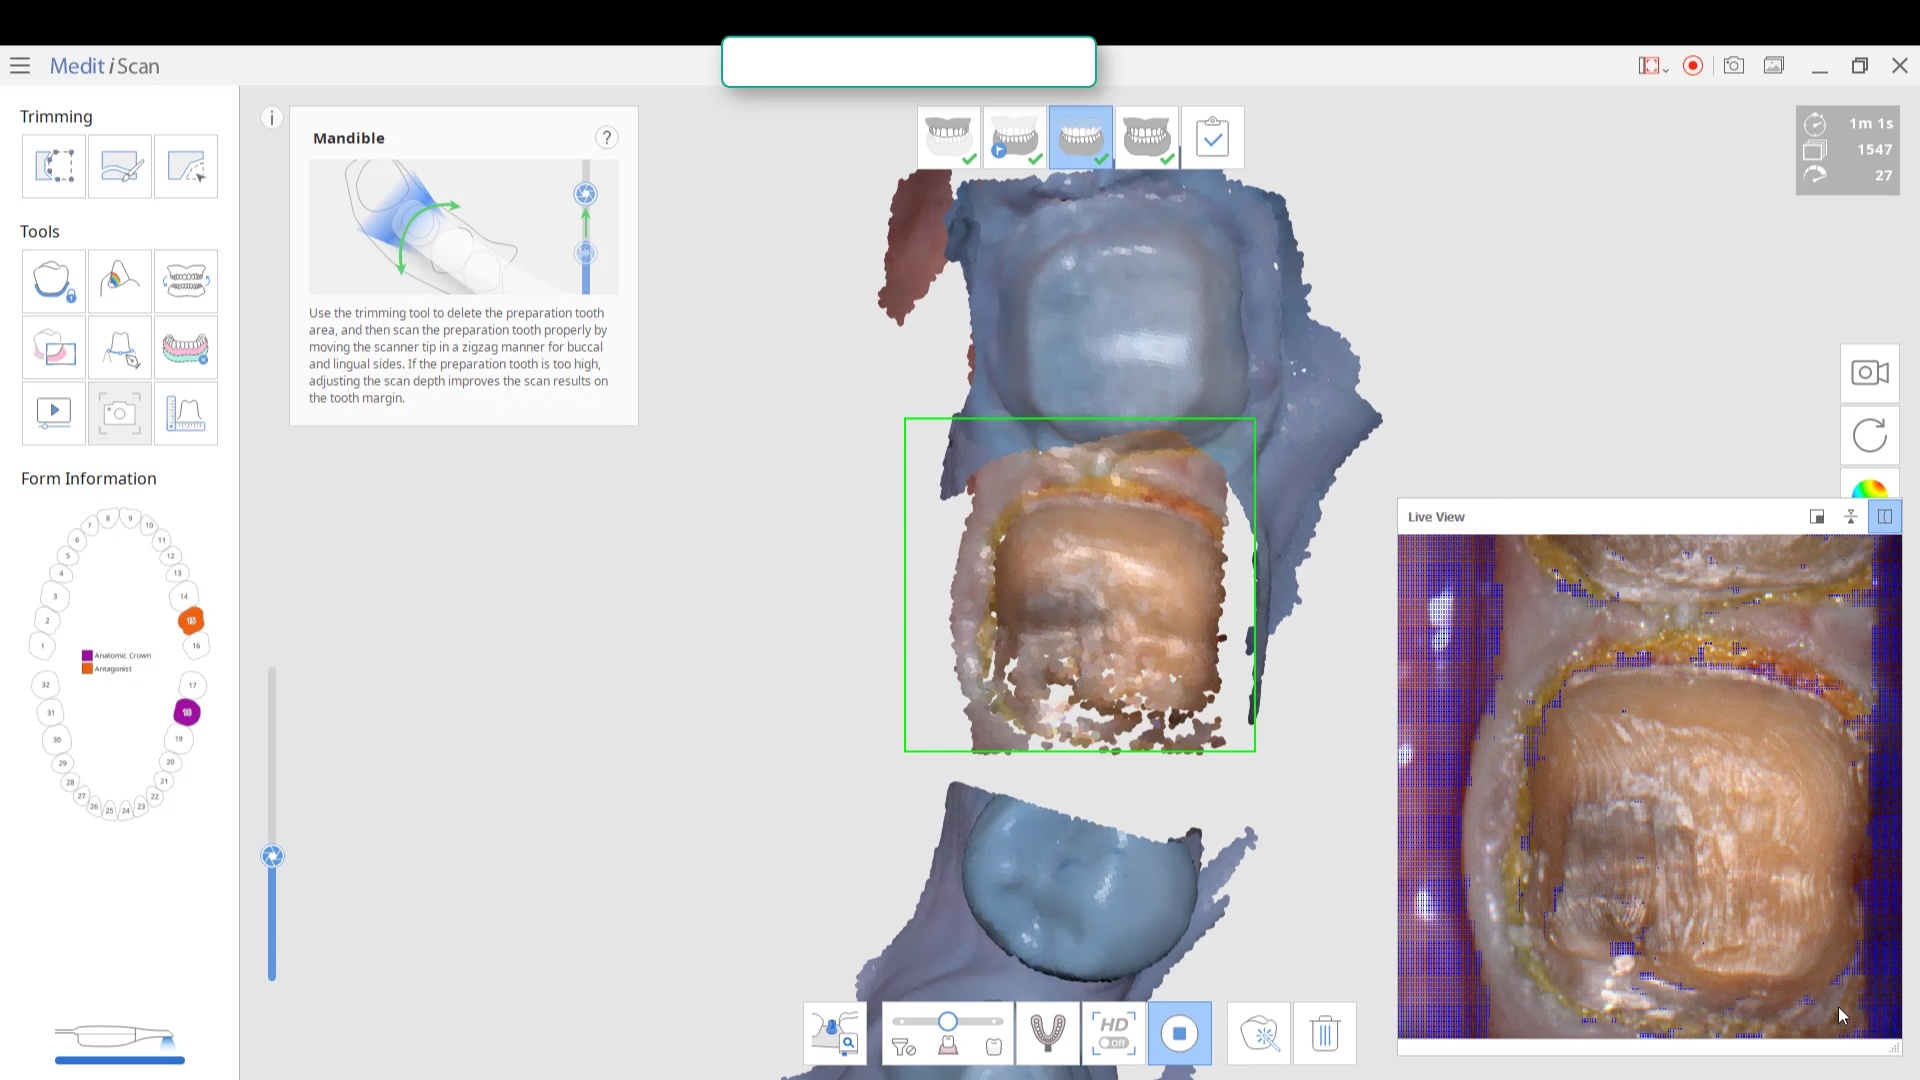
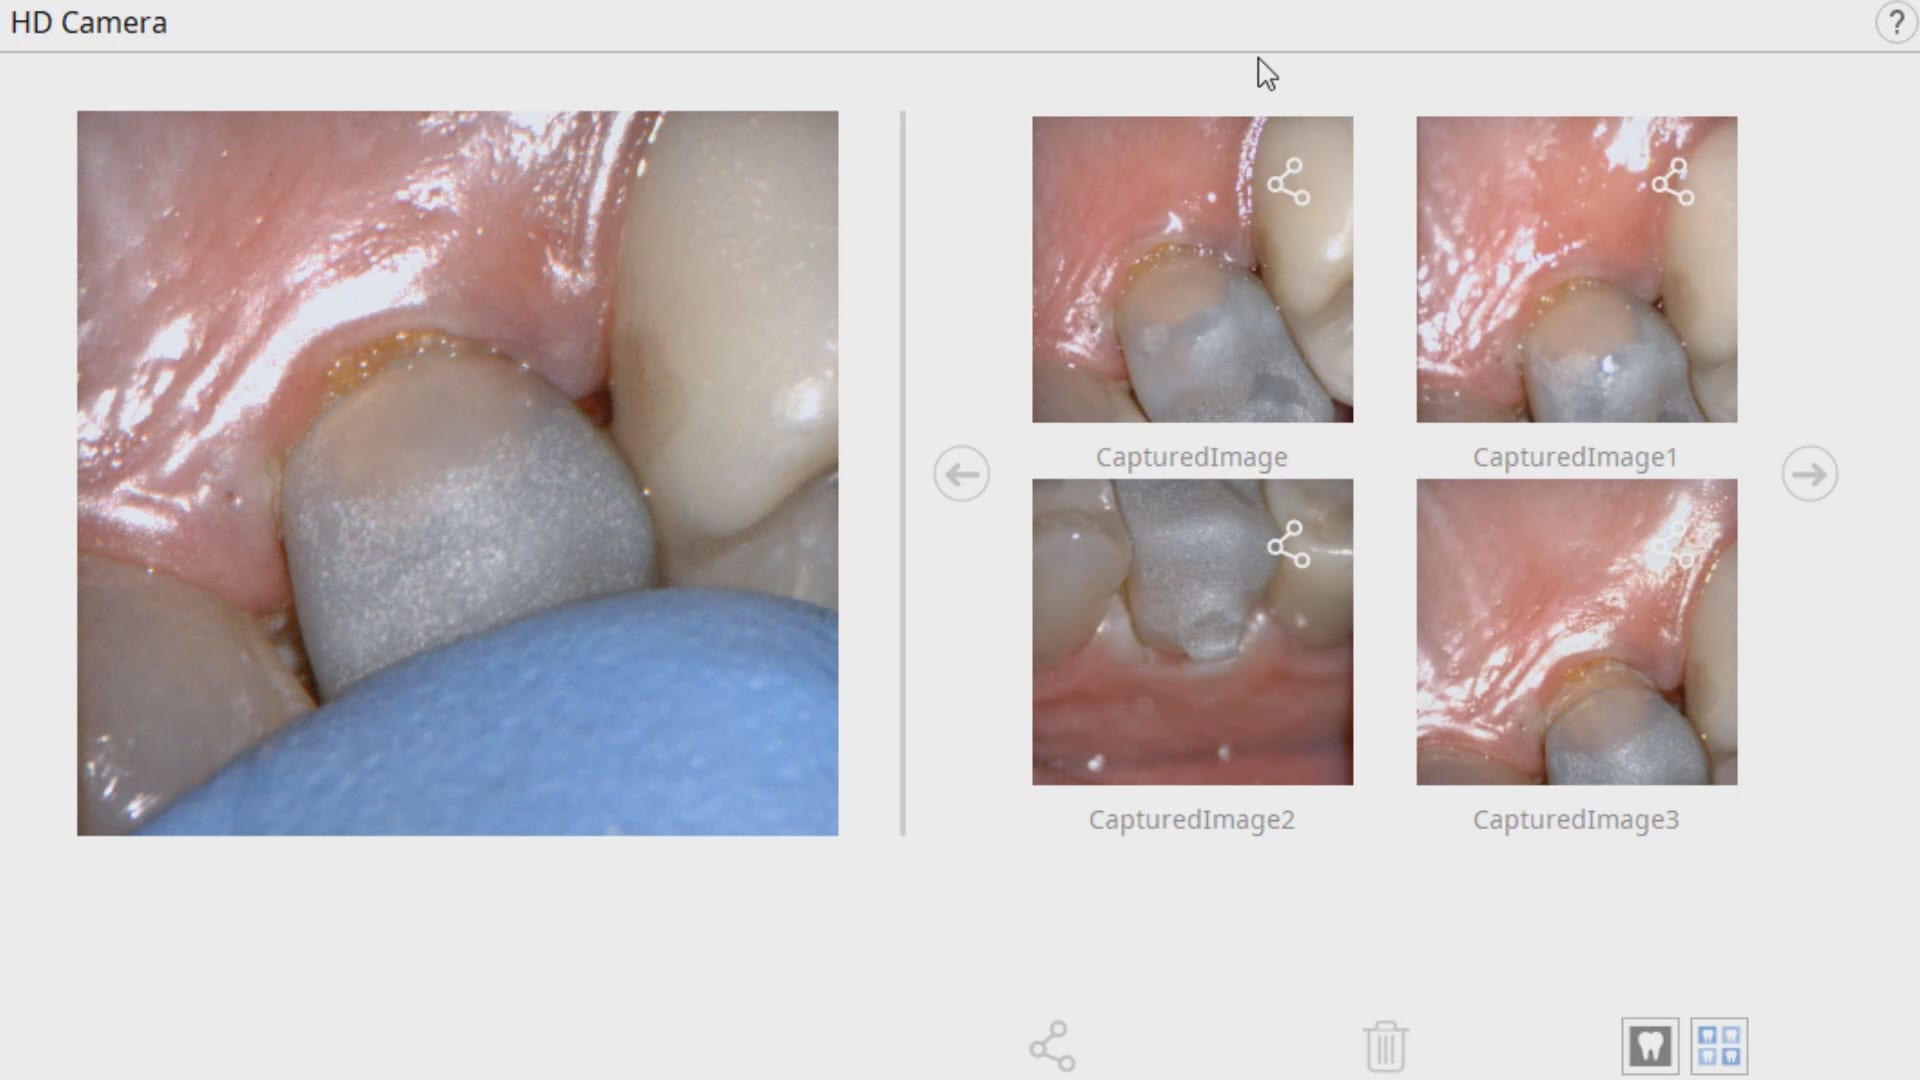
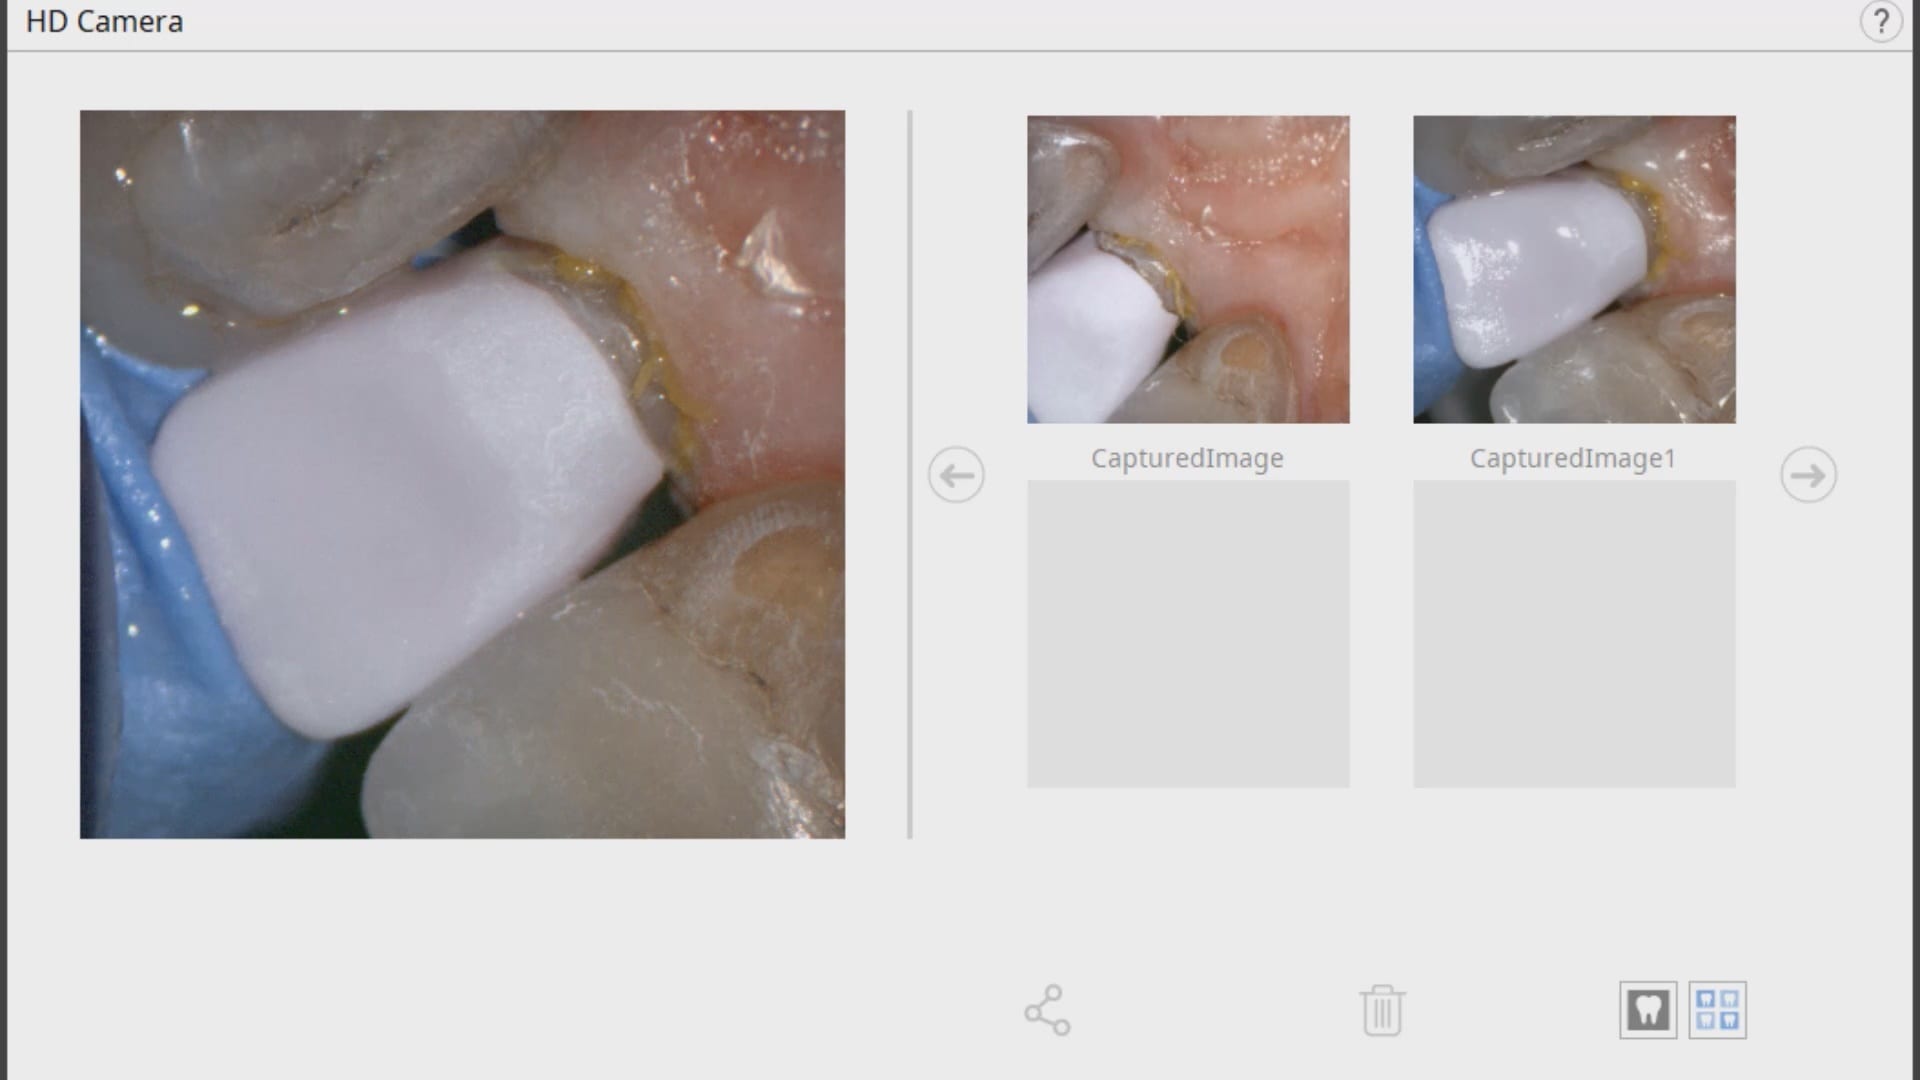
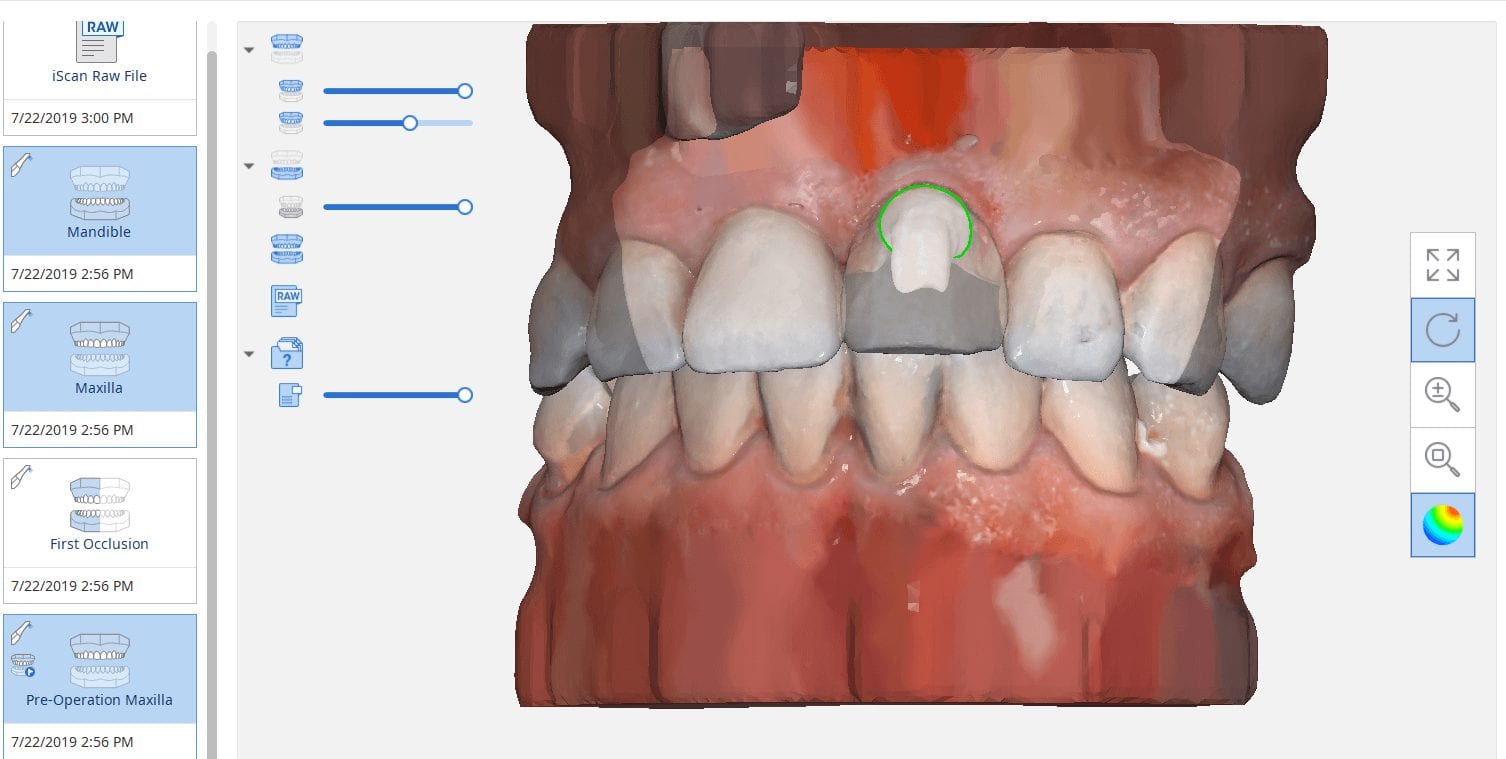
In this article, we feature an upper left lateral crown that needed to be replaced due to recurrent decay. While the patient was getting numb, we defined the job description in the Medit i500 software and imaged the pre-existing crown, the opposing and the bite. We digitally cropped out the tooth to be prepared and proceeded with crown removal. Once the margins were refined and the tissue was displaced, we imaged the preparation in HD mode and processed the case.
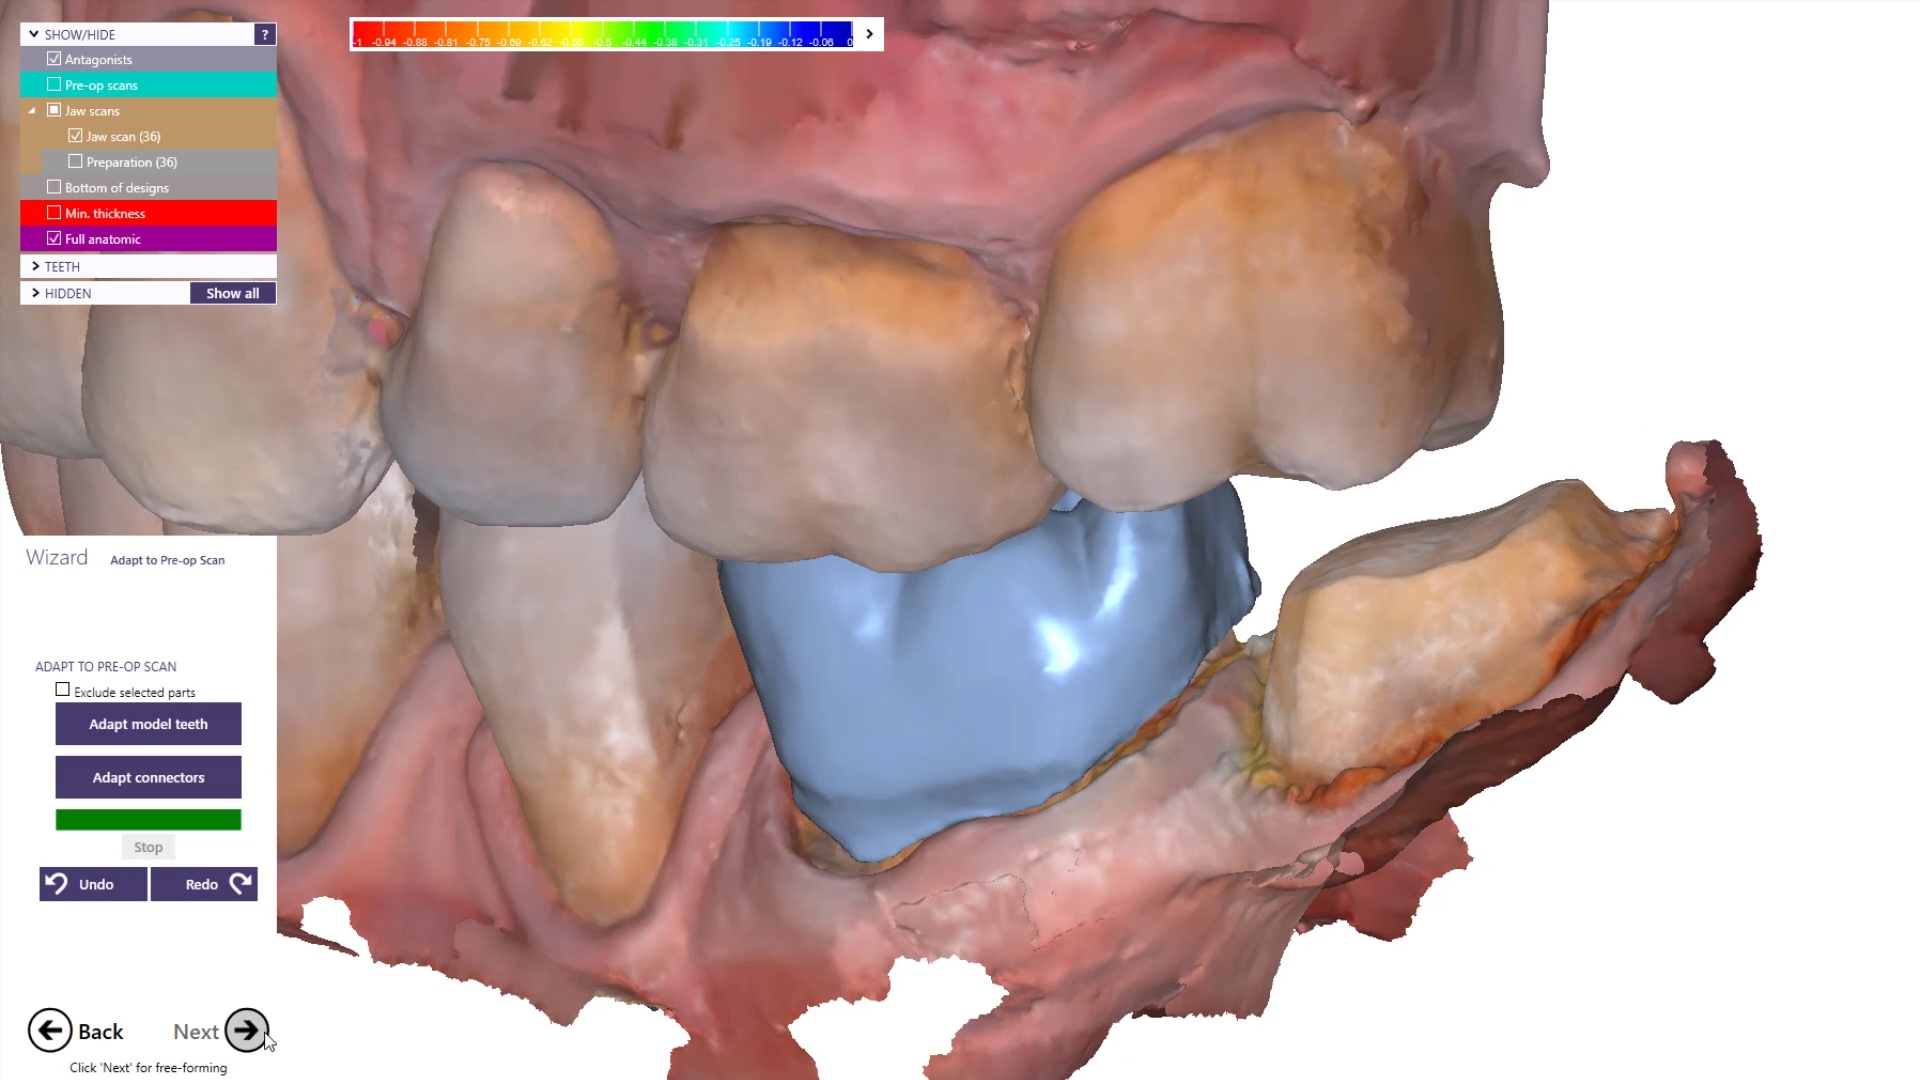
Once the digital models were rendered, we launched the integrated CAD software that automatically imported the pre-op, the opposing, the prep model, and the bite. Their relationship is preserved in the CAD software and no modifications were necessary. You have two ways to copy the pre-op; one way is to program the CAD software so it replicates the pre-op perfectly while the other gives you a raw proposal that you can then choose to adapt to pre-existing situation.
Direct Import of Models into CAD Software for Design and Mill
Once the case is designed in the CAD software, you can then take it to any CAM and Milling Machine to produce a restoration. Here we milled an emax restoration with the CEREC MCXL and the imes icore CORiTEC ONE at the same time so we can compare the final results. The CEREC milling machine produced a restoration faster by about 90 seconds but the final results of the margins by the CORiTEC Machine was far superior. Also, the CAM software, Millbox in this situation, allows us to choose a third drill that is 0.6 mm in diameter. This increases milling time but results in less overmilling than the 1.2 mm burrs that milll the intaglio of the CEREC Machine.
Please, take a seat, you should not be standing while you watch this.
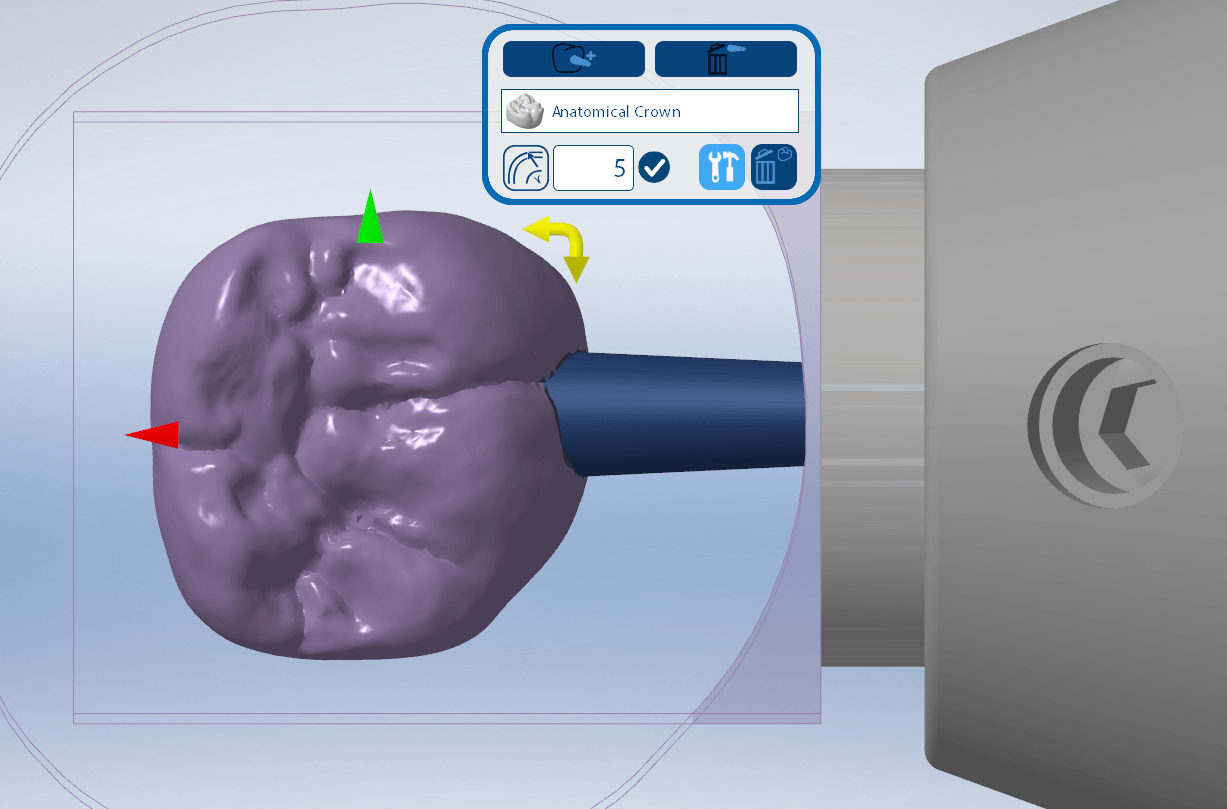
Artificial intelligence by Medit i500 now identifies the location of your scanbody but it also automatically launches all that proper information into CAD software for instant abutment designs. Make sure to watch both videos. Enjoy.
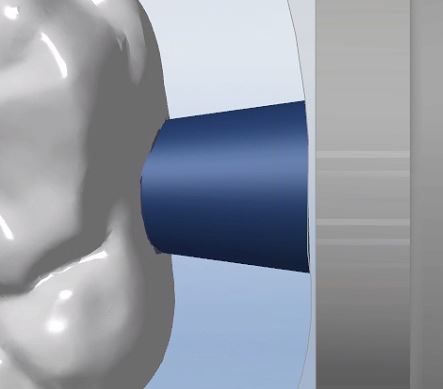
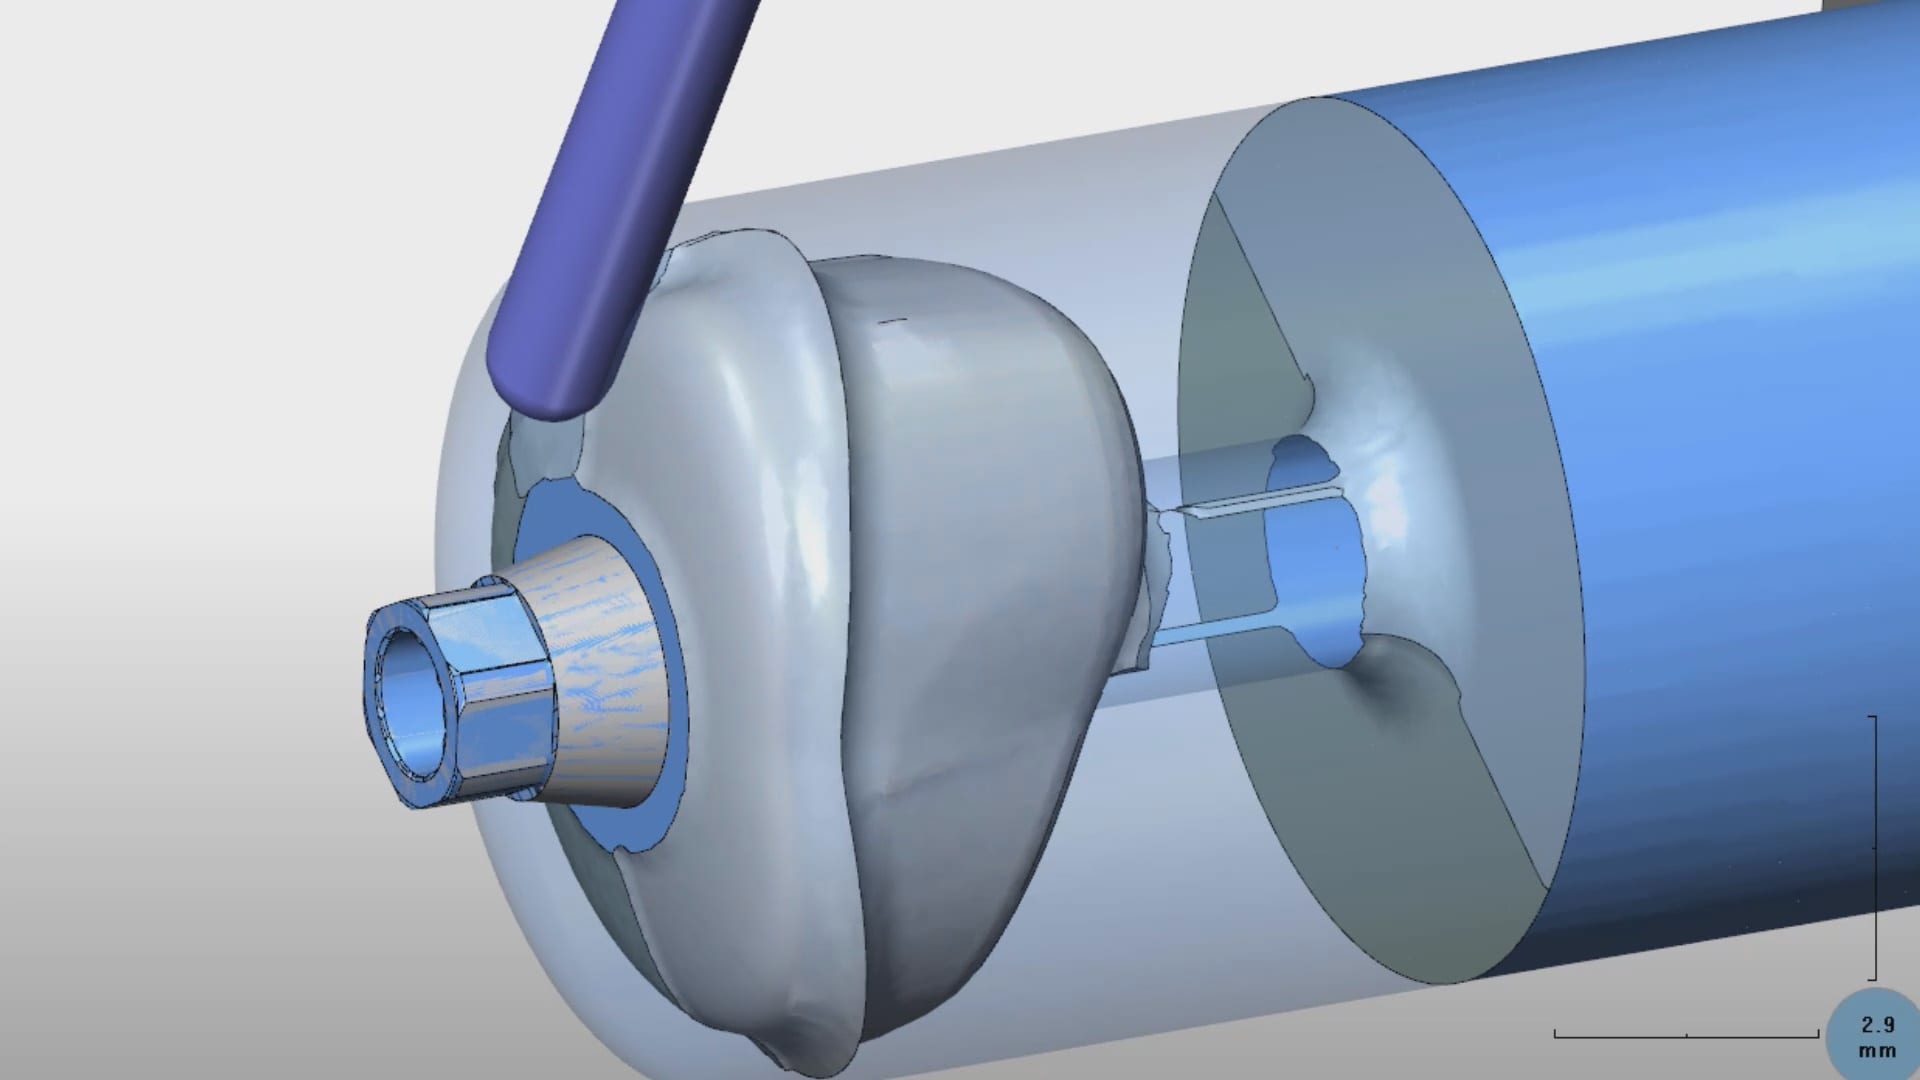
A custom titanium metal abutment is milled in such a manner where the drills DO NOT touch the connection. The type of connection is predetermined by the blank manufacturer and the cylindrical part of the abutment is milled out. This makes the symmetric geometry of the abutment a bit tricky for some to handle as indexing it properly to manage the timing of the connection is critical for easy delivery.
It is a good idea to know the exact dimension of the screw access hole. You want to set the diameter just outside the channel so that you don’t have to do a lot of post production adjustments. if it is made too thin however, you can have a mis-mill and have to repeat it. We’ve found 2.5 mm the perfect setting for the DESS titanium abutments.
At CAD-Ray, we are constantly looking for solutions that will satisfy a clinician’s needs in a dental practice. For the better part of a full year, we have been developing milling strategies that can speed up the manufacturing process and increase the longevity of the drills and the instruments used in fabrication.
In this video, we demonstrate a sample crown milling simulation where we try and place the restoration in the block to render the fastest crown in the shortest amount of time possible, with little wear on the drills.
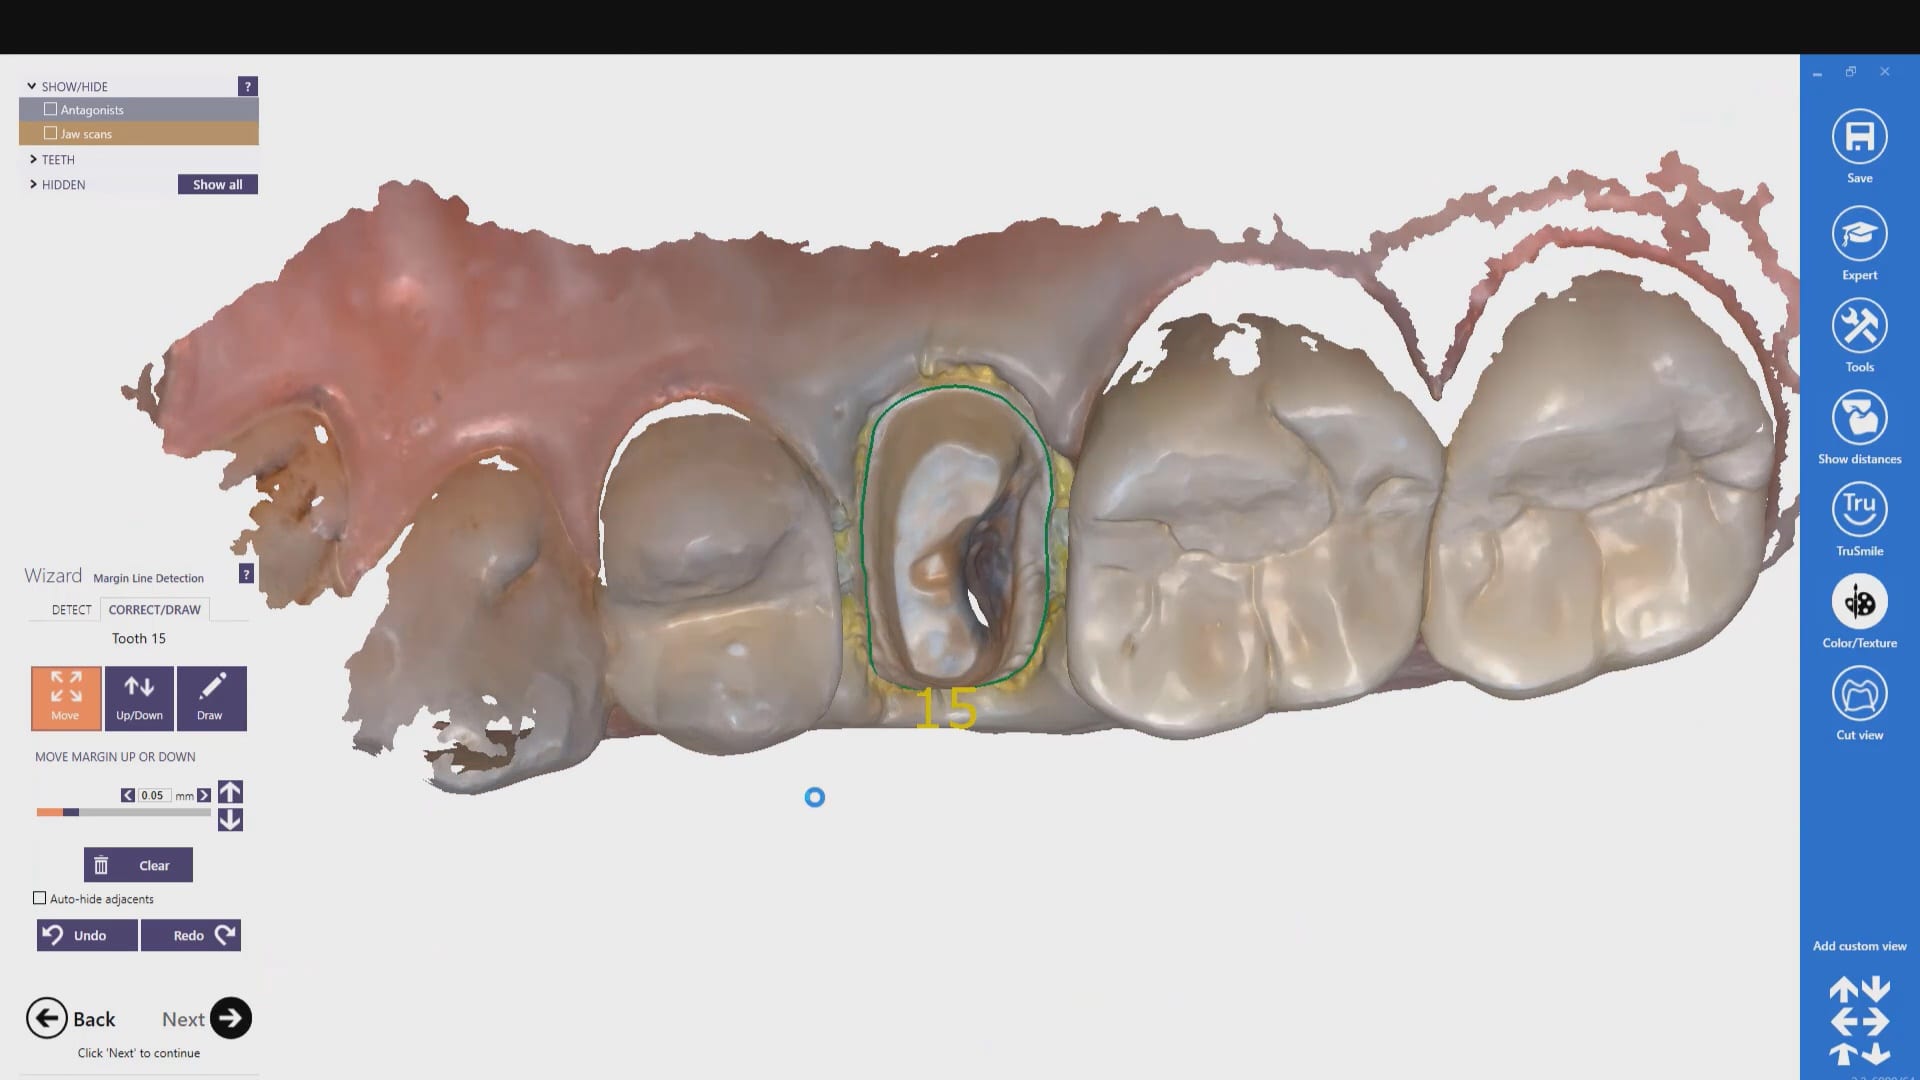
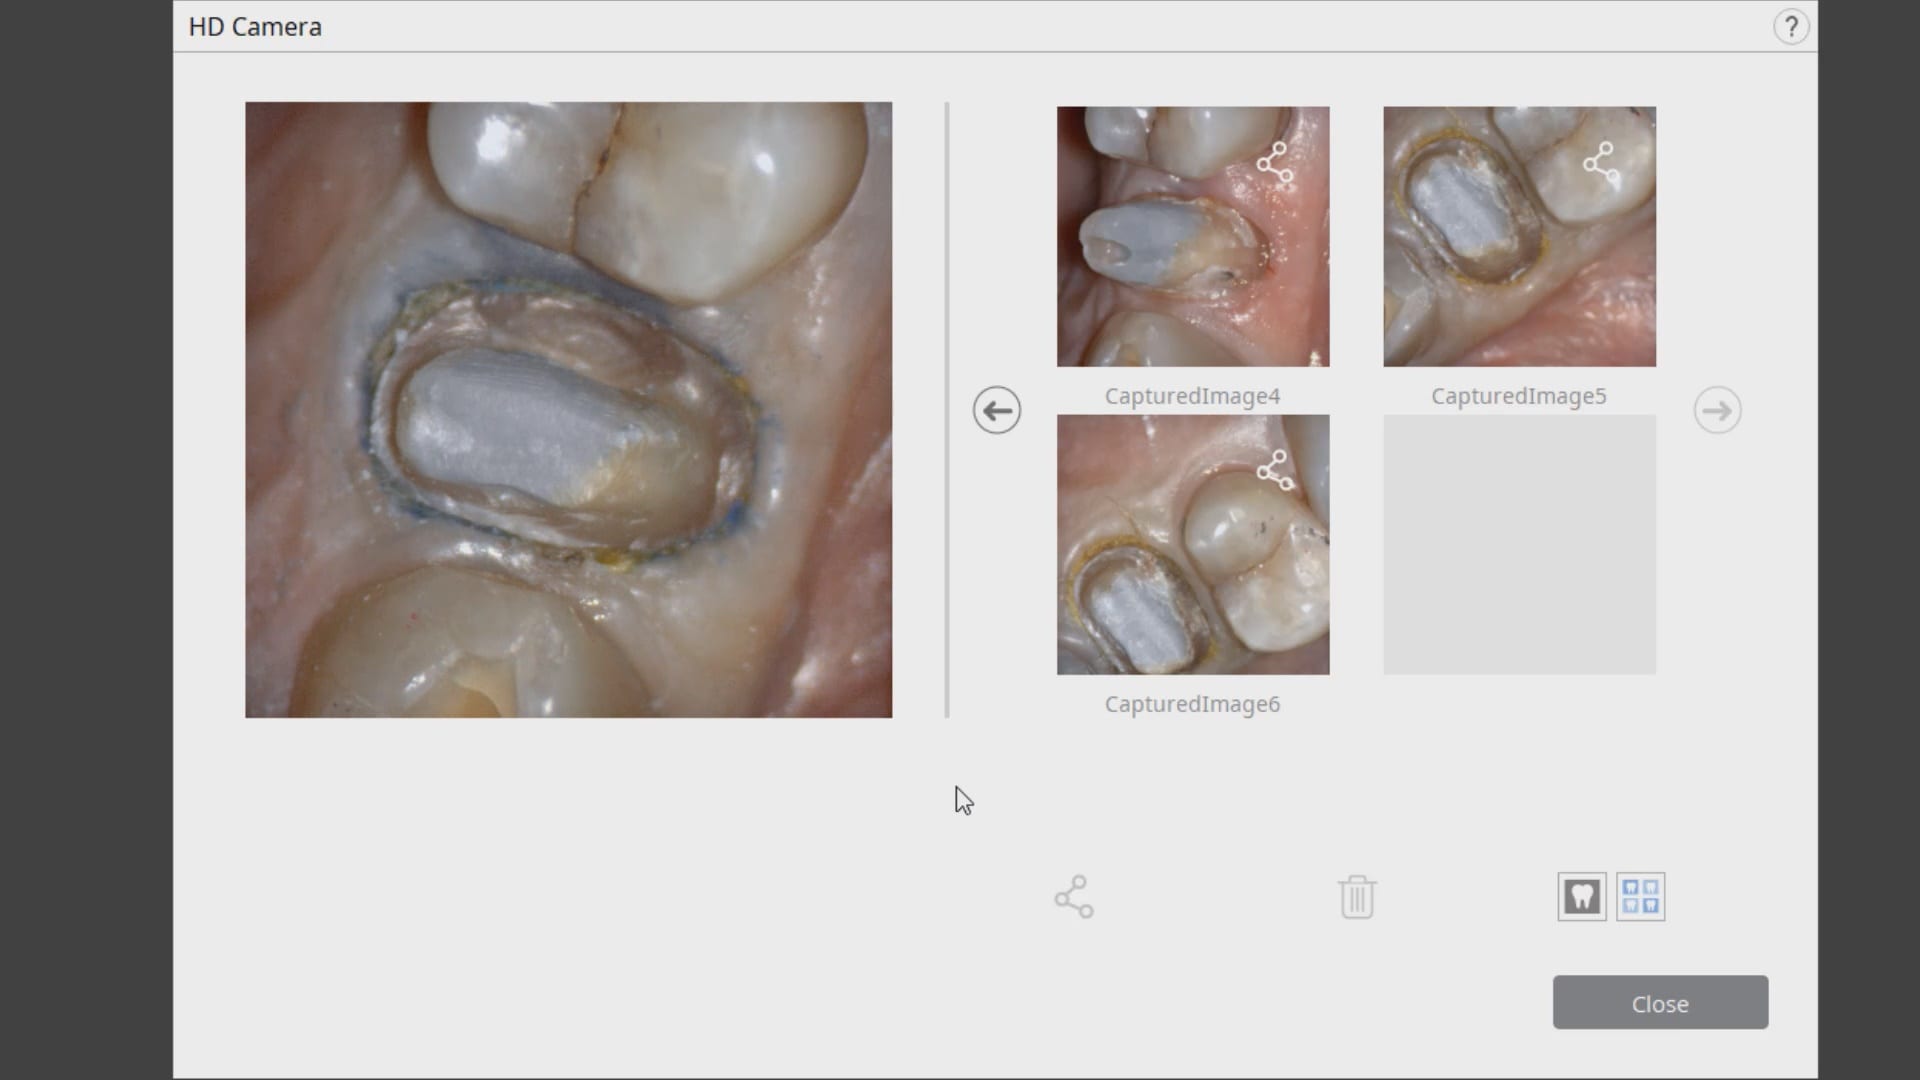
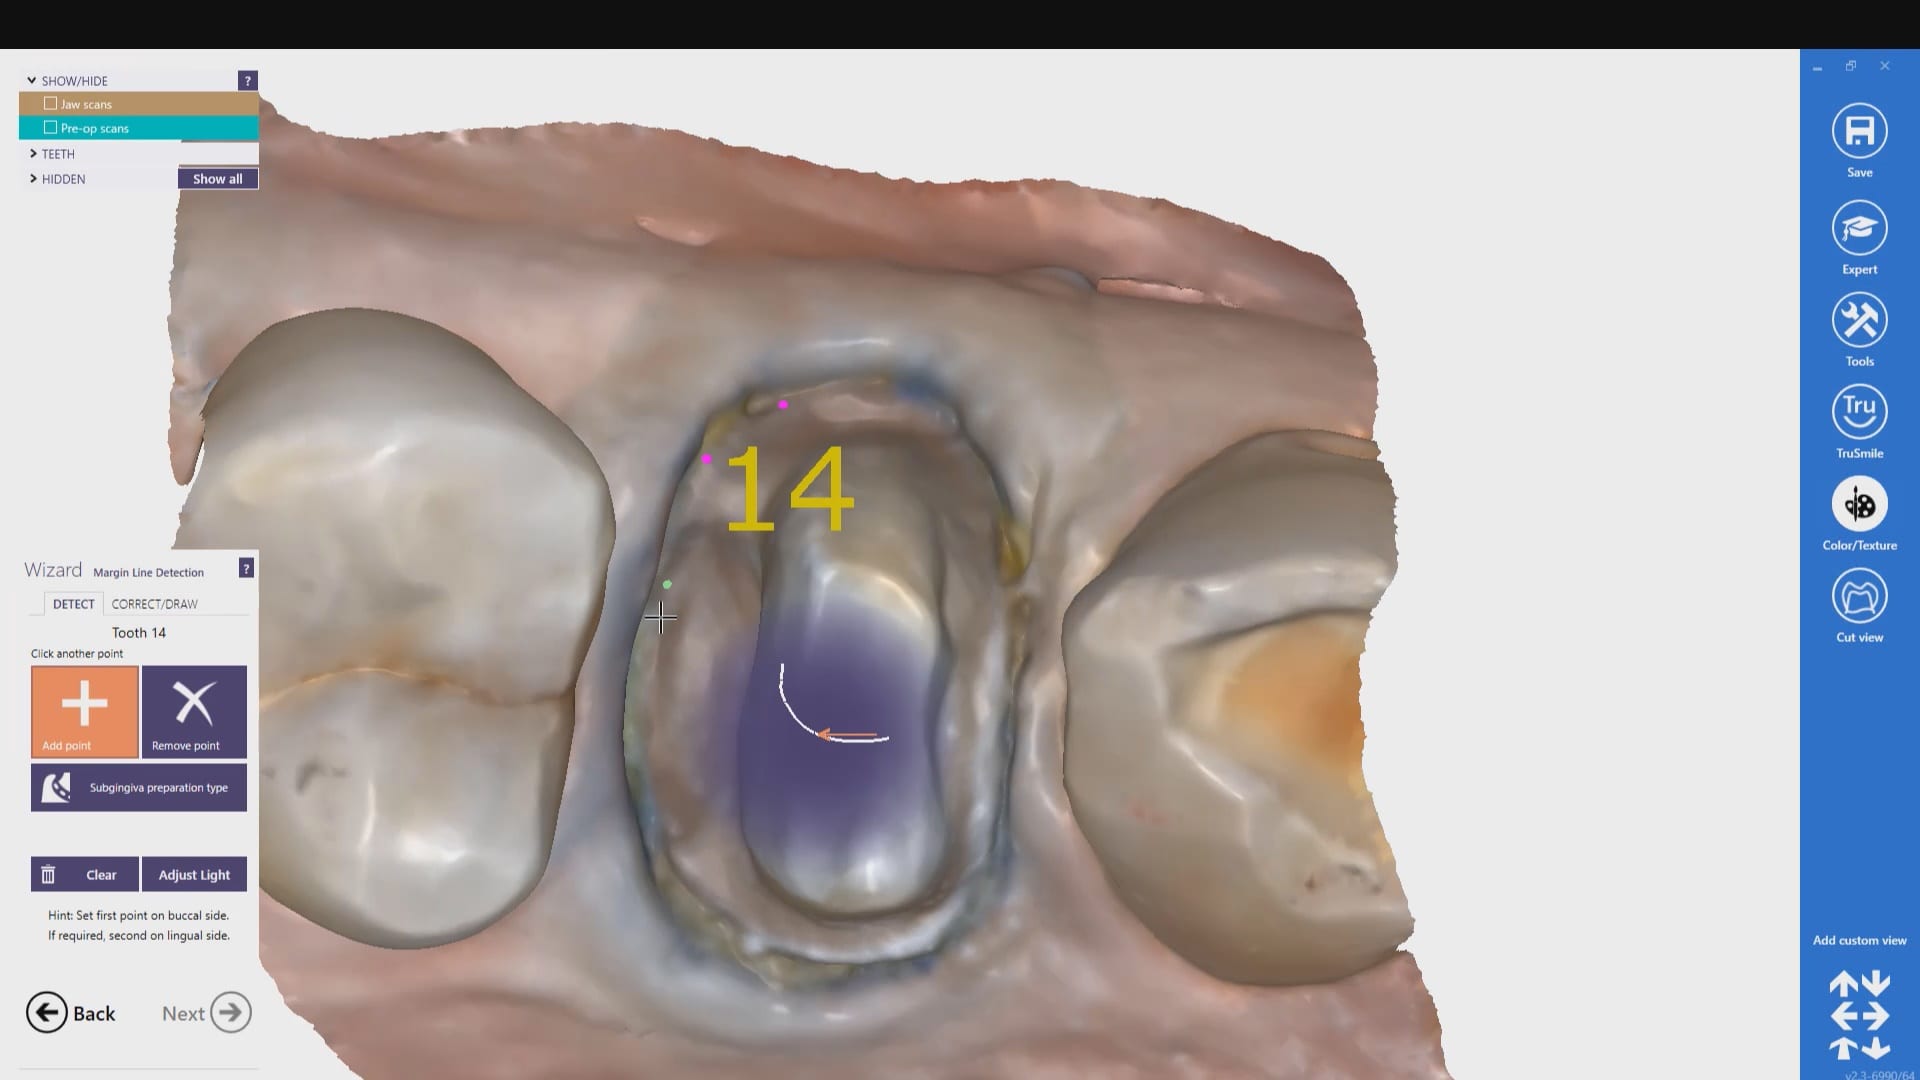
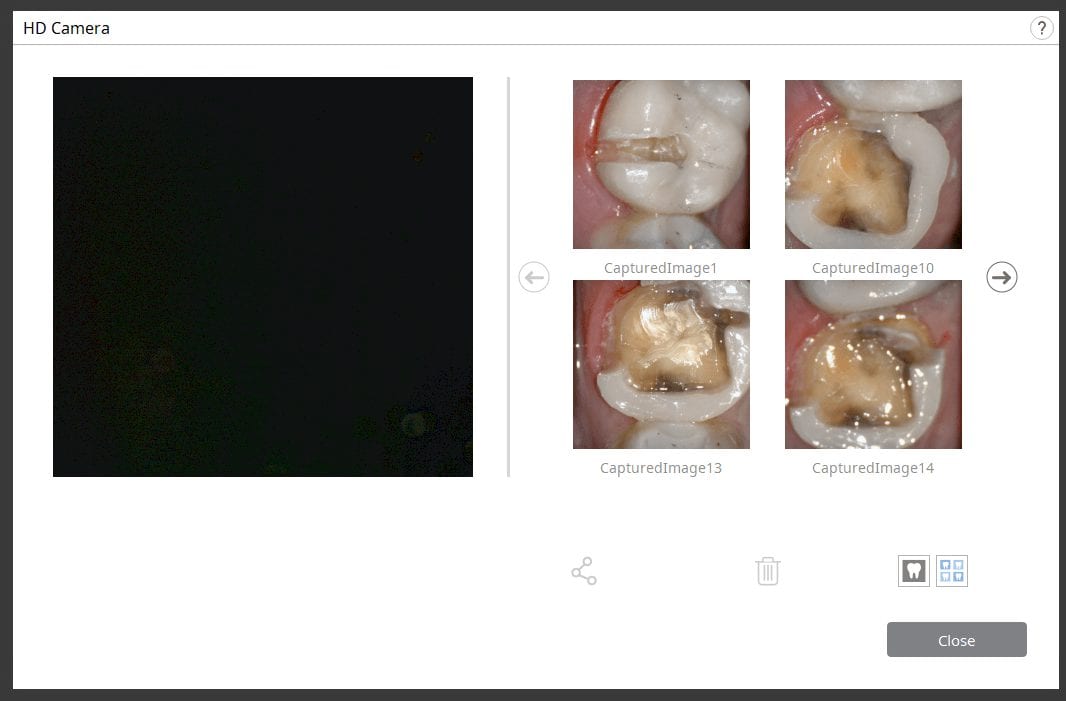
The new Medit i500 software will feature the ability to mark margins in the imaging step before you import the case into a CAD software or send it to the lab. In this article we showcase a case where a 12 year old implant crown needed replacement. The pre-op images were captured, along with the opposing and the bite.
After the area was anesthetized and the crown was removed, expasyl was used to achieve hemostasis and tissue retraction. The margins of the abutment were imaged. Note how we used a feature in the Medit scanner to change the scan light from blue to white, which allows you to pick up red (blood and tissue) that is normally difficult to capture.
Once the margins were captured, we activated the margination tool. You highlight the area you want to address and the meshwork is calculated and processed locally, where you can then designate your margins that are exported to CAD software along with the jaw model, the opposing, the pre-op and the bite.
Alternatively, the traditional way would be to not place the margins in the native Medit software and to place it in the CAD software itself. As you can see both options are very viable and you do not lose any resolution of the scanned data between the imaging program or the design software.
In this particular case, we designed an occlusal splint for a patient that is a heavy bruxer. We captured the bite by having the patient gently bite down on cotton rolls on both sides. The first purpose of this is to block out the tongue and the orophayrynx when imaging the buccal bite. But it can also help you find the proper vertical dimension and dramatically reduces the time it takes to deliver an appliance.
Ideally, you place the cotton rolls in such a manner so that you don’t obstruct your view of the second molars. This allows you to see and verify the proper clearance in the most critical area! If you take it one step further and design the guard to the opposing, your seat appointments are just a few minutes long.
Once the upper jaw and the lower jaw are related to each other in the medit scan, and the clearance is verified, the models are brought into exocad’s Bite Splint Module. The case is designed in the CAD software and then milled with a 5 axis milling machine. This step should ideally be delegated to a lab as it is not practical to fabricate these in the office.
The delivery of the appliance is very predictable when you capture the bite with digital impression and you don’t have to grind away to get the jaws to close in the anterior, as the distance was taken into consideration during the design process.