


The new Medit i500 software will feature the ability to mark margins in the imaging step before you import the case into a CAD software or send it to the lab. In this article we showcase a case where a 12 year old implant crown needed replacement. The pre-op images were captured, along with the opposing and the bite.

After the area was anesthetized and the crown was removed, expasyl was used to achieve hemostasis and tissue retraction. The margins of the abutment were imaged. Note how we used a feature in the Medit scanner to change the scan light from blue to white, which allows you to pick up red (blood and tissue) that is normally difficult to capture.
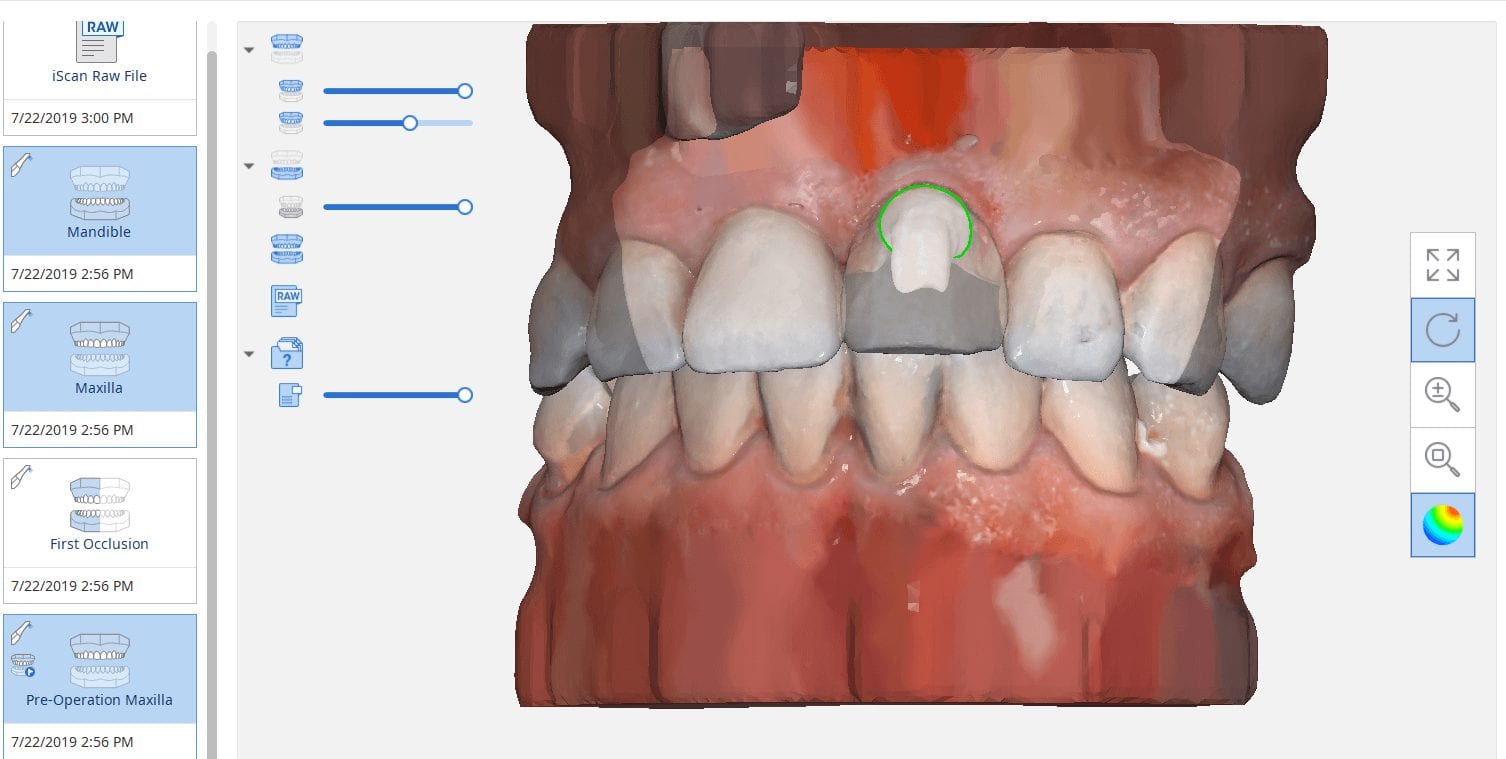
Once the margins were captured, we activated the margination tool. You highlight the area you want to address and the meshwork is calculated and processed locally, where you can then designate your margins that are exported to CAD software along with the jaw model, the opposing, the pre-op and the bite.
This is a preview of the models that you can export and send to a lab or take directly to design software for chairside milling.
Alternatively, the traditional way would be to not place the margins in the native Medit software and to place it in the CAD software itself. As you can see both options are very viable and you do not lose any resolution of the scanned data between the imaging program or the design software.

