Posted on Leave a comment

Second Molar Crown Replacement in Copy Mode

crown replacement using medit i500 to mark margins

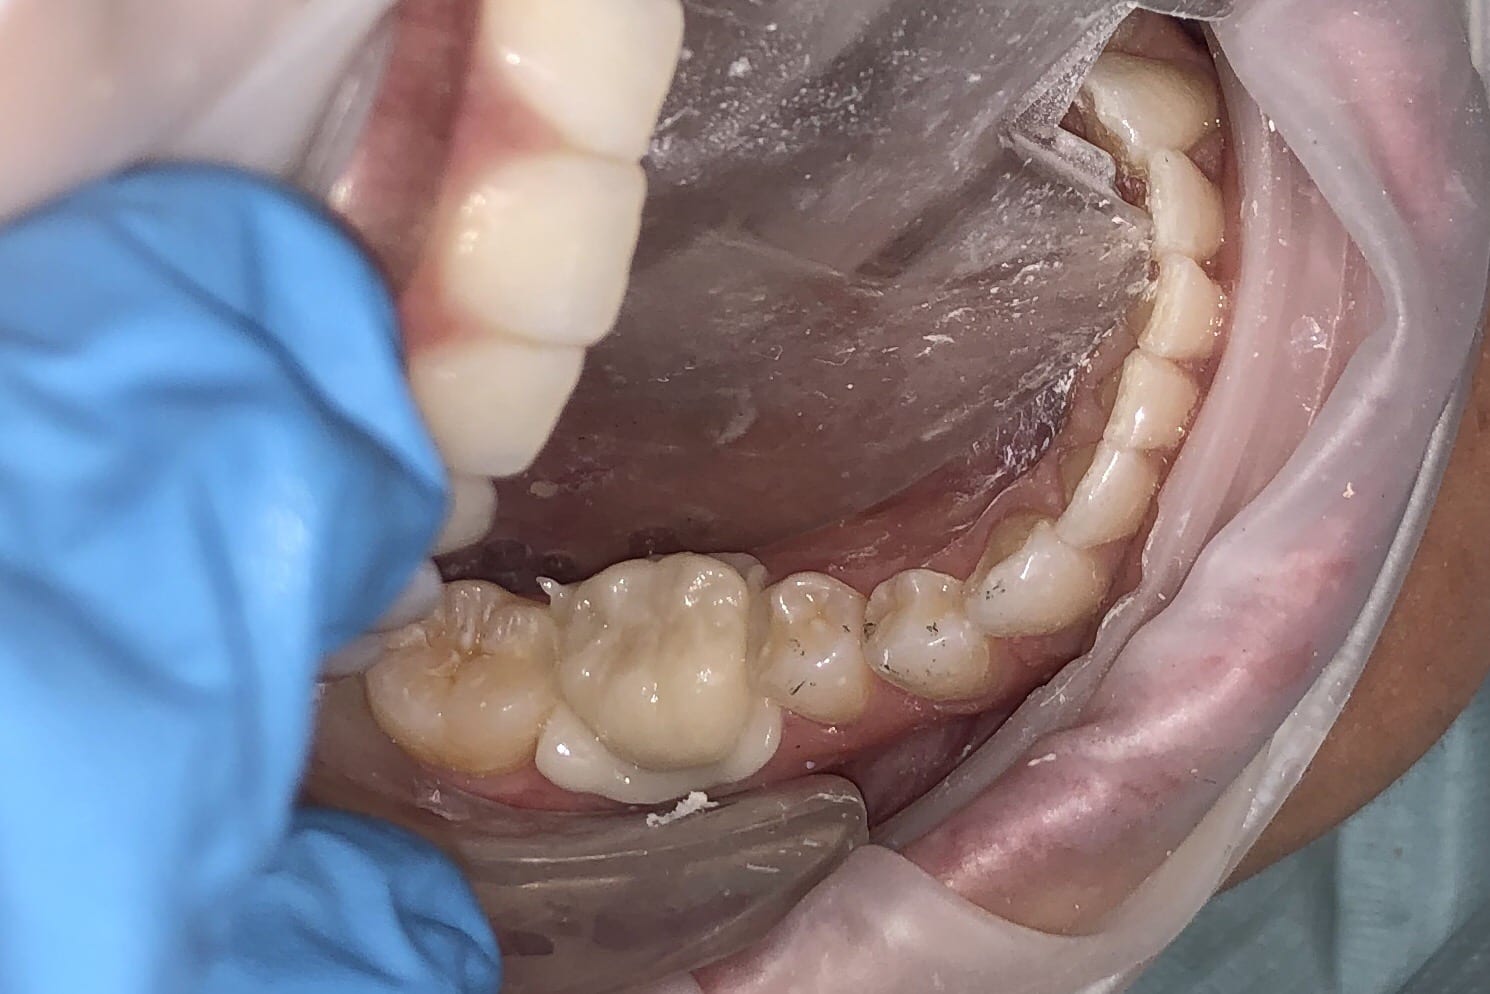
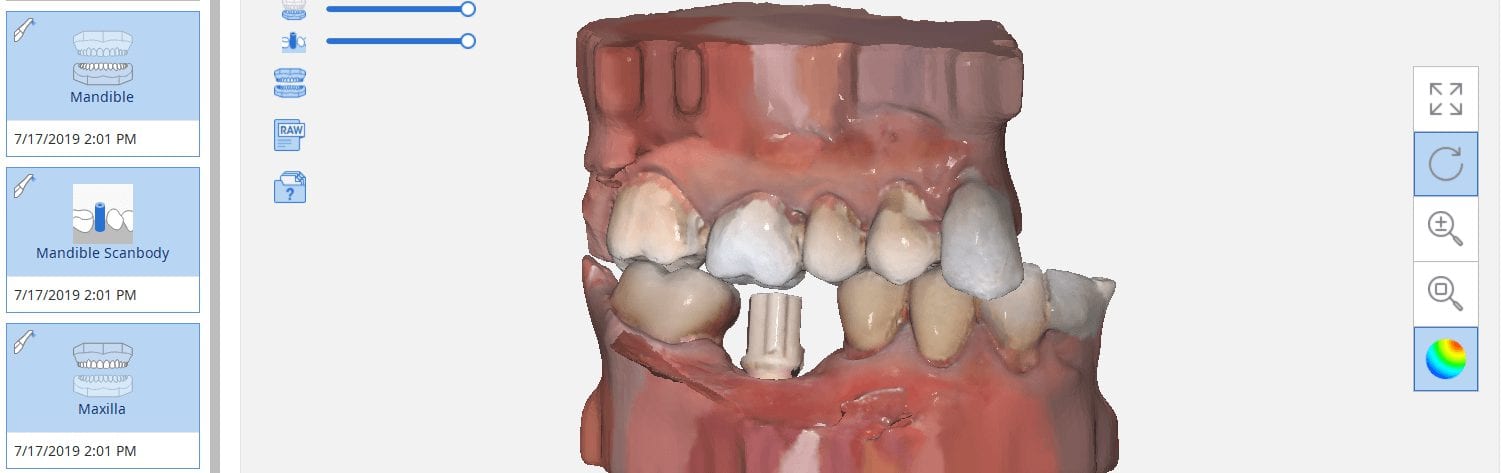
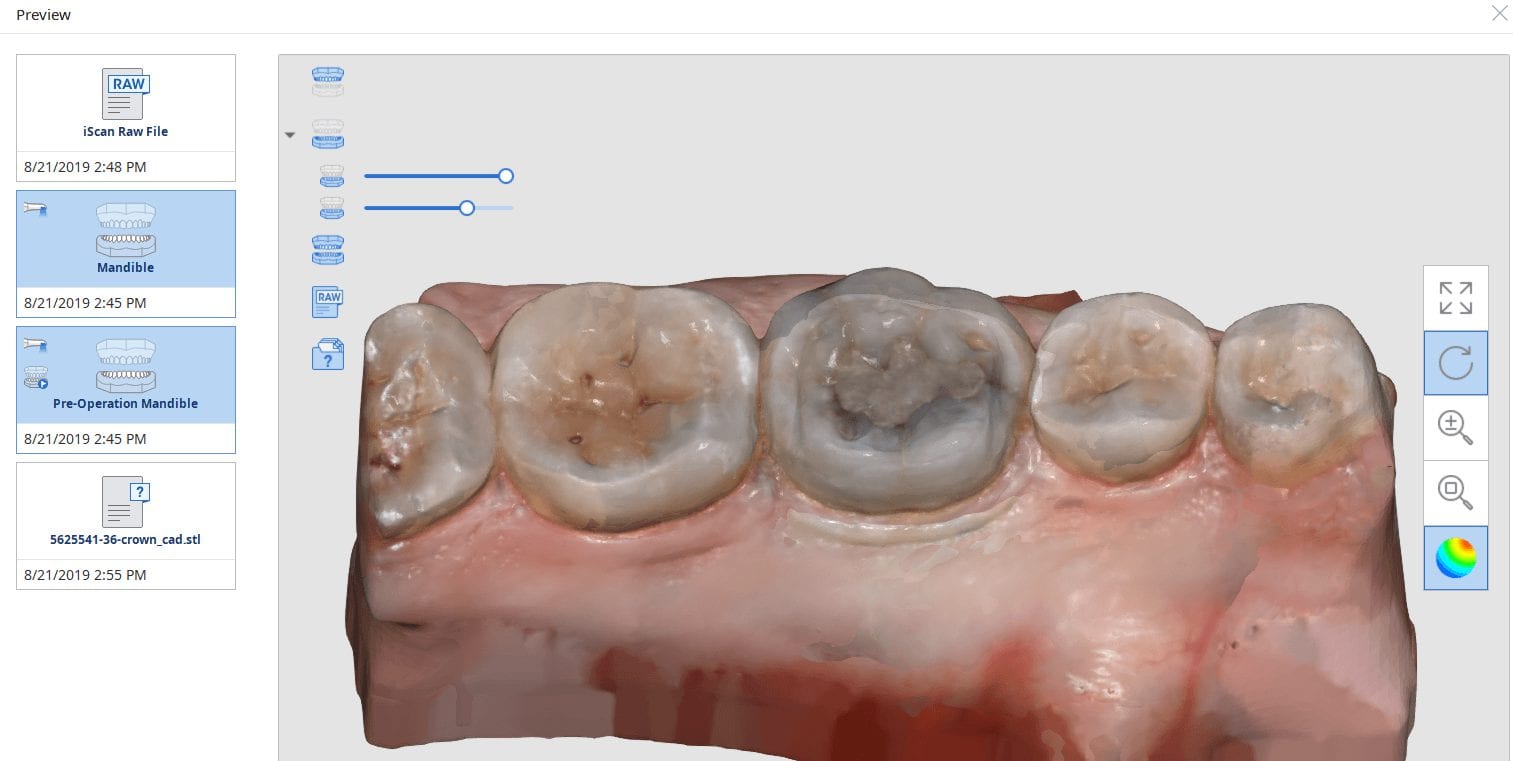
In this case presentation, we feature a crown that needs to be replaced due to open margins and recurrent decay.

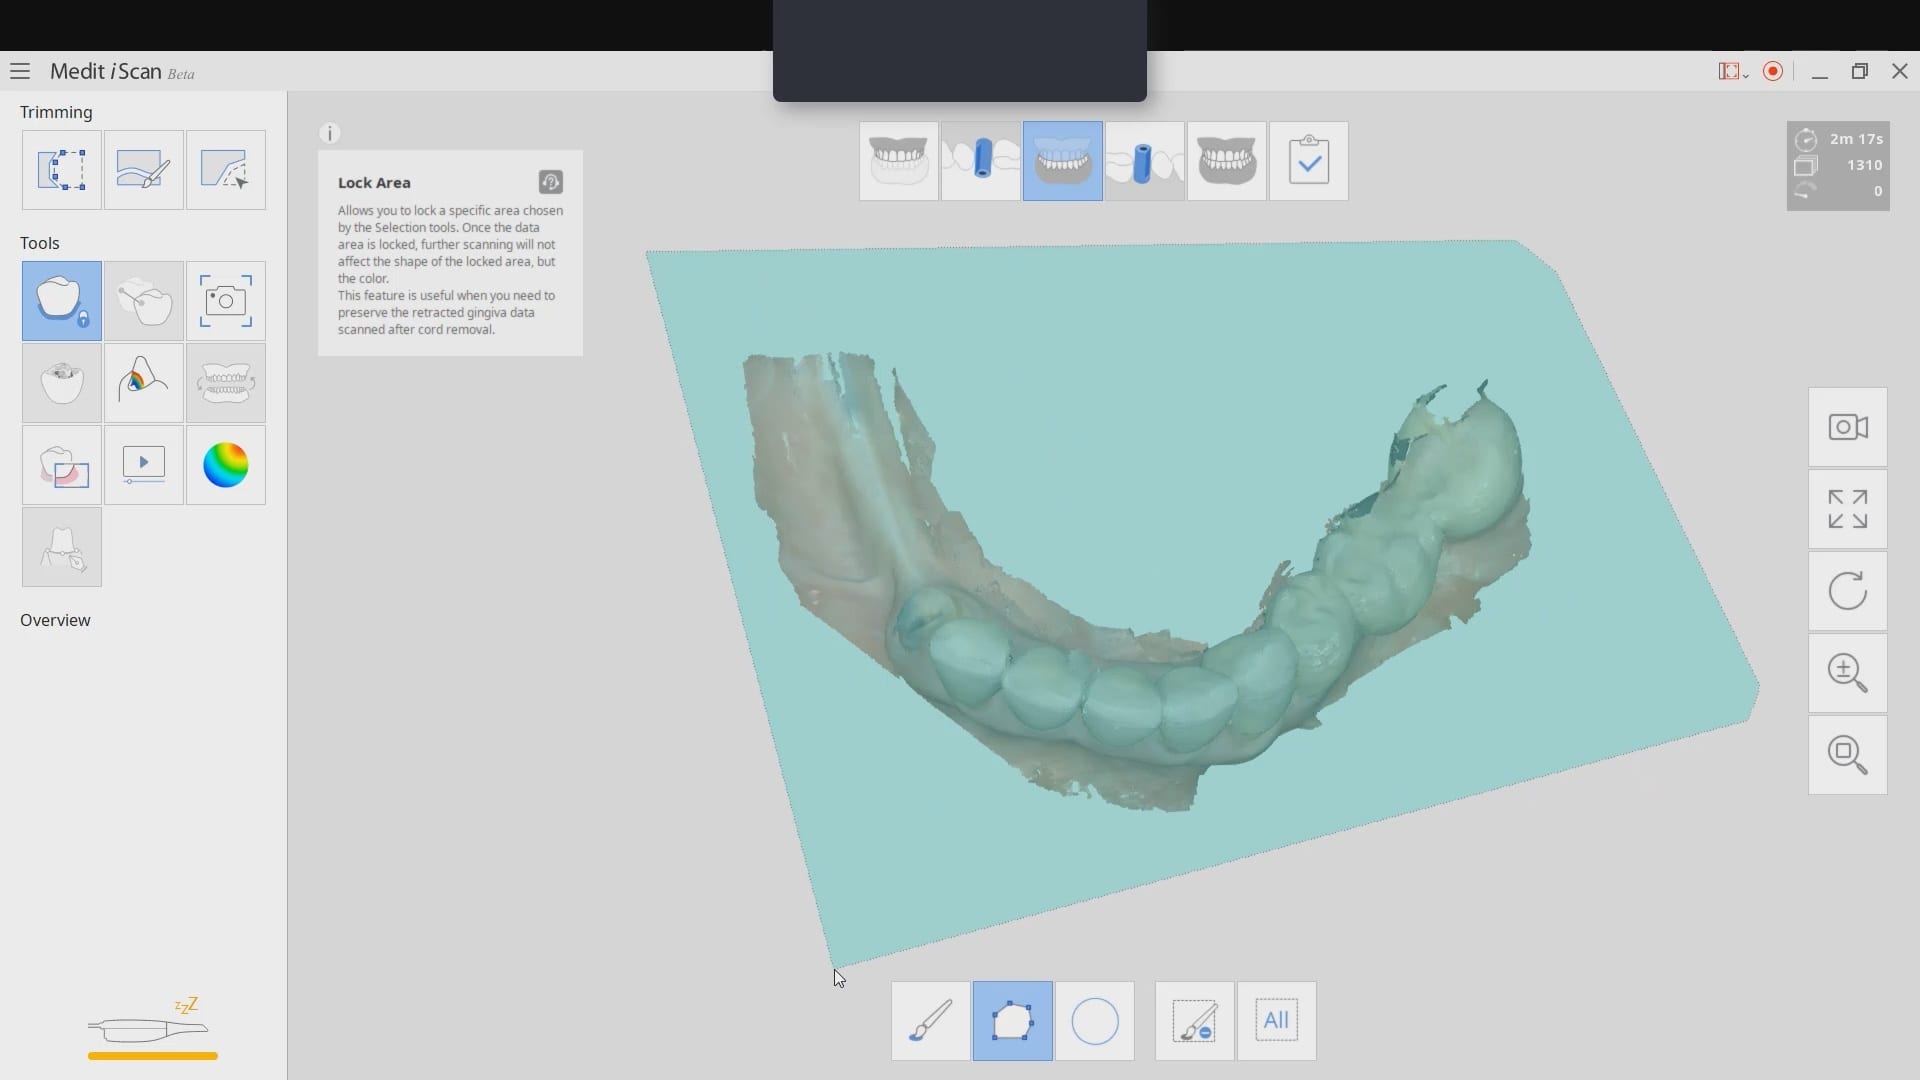
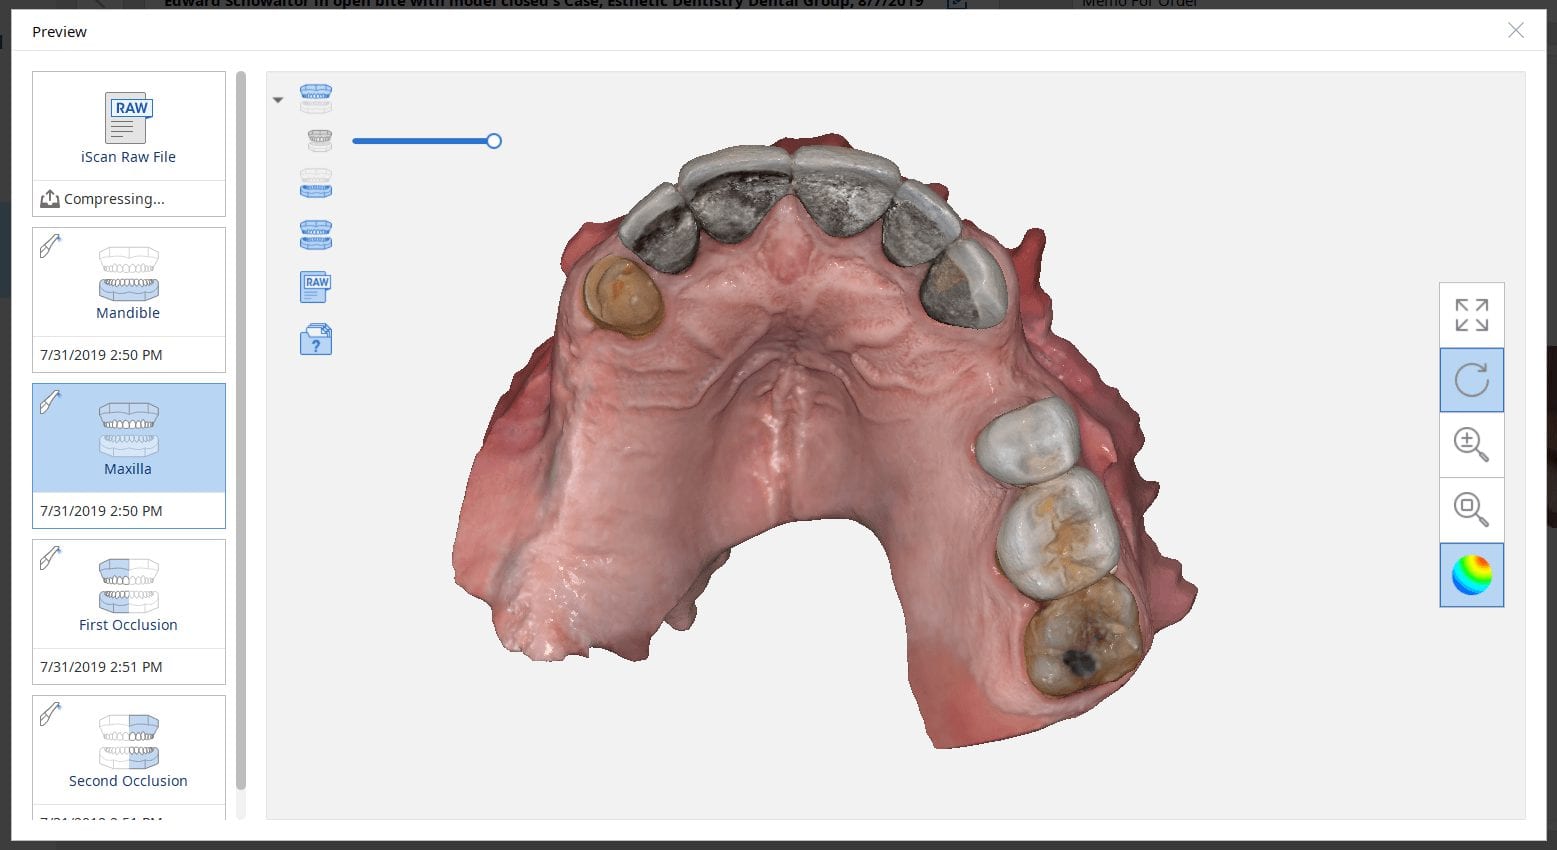
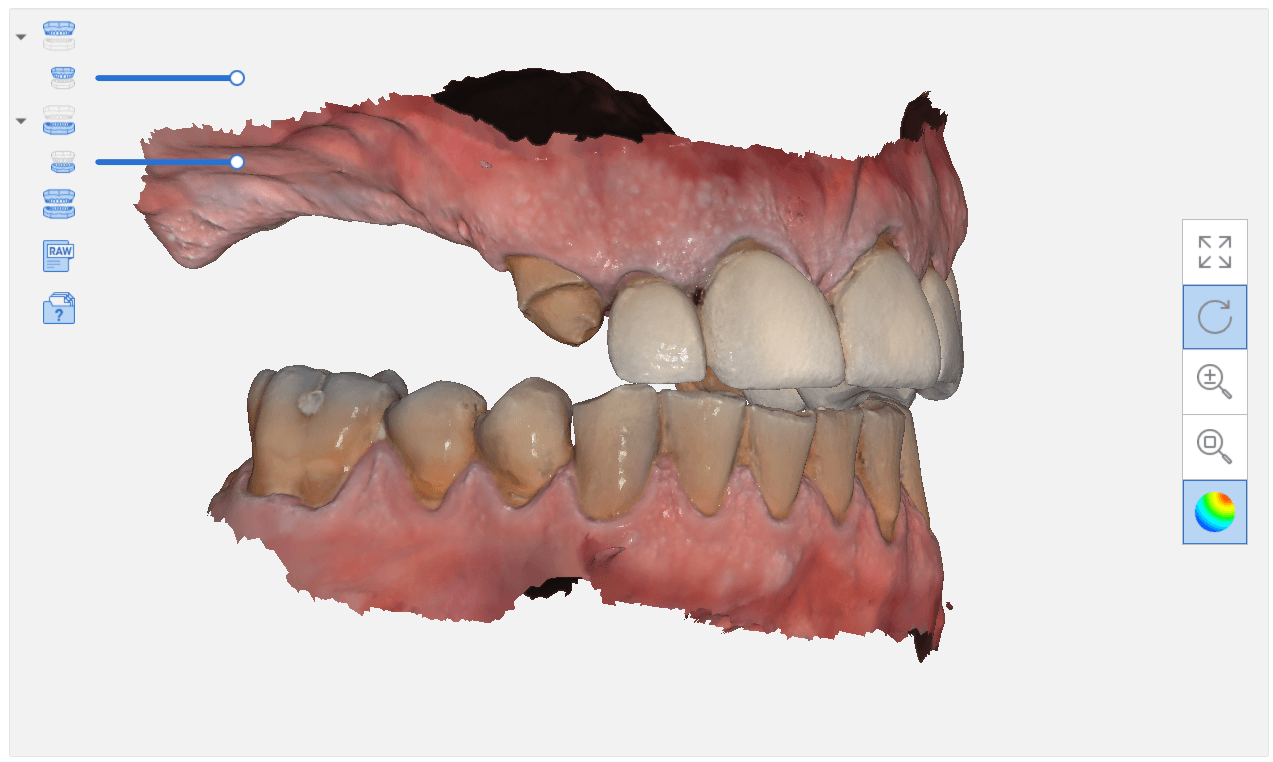
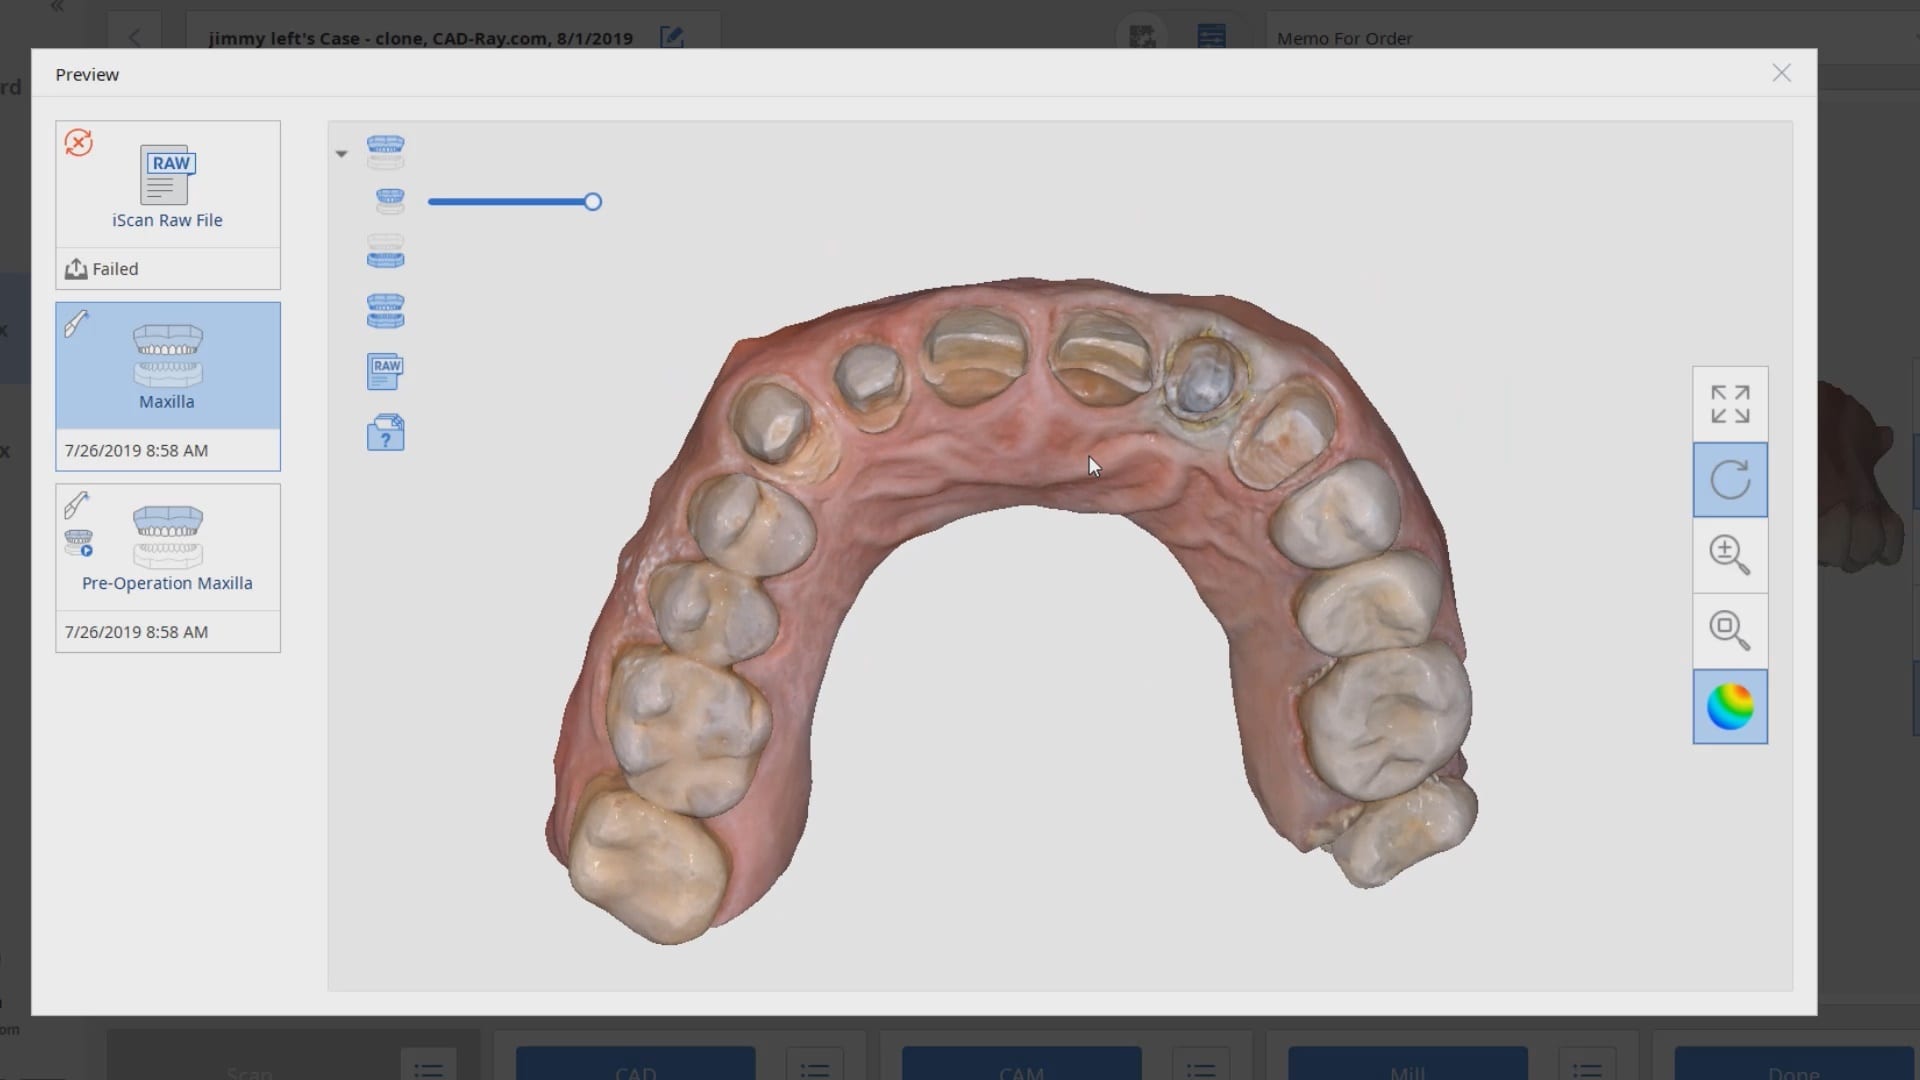
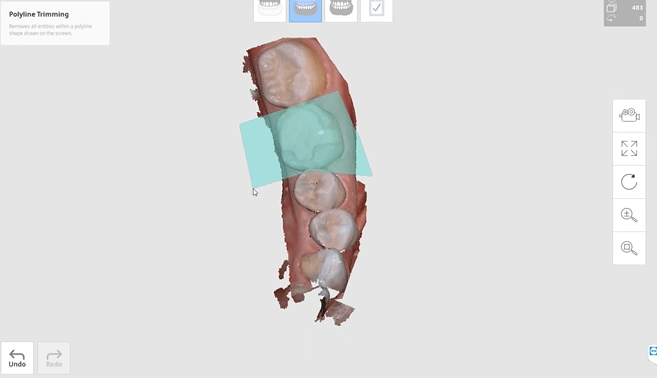
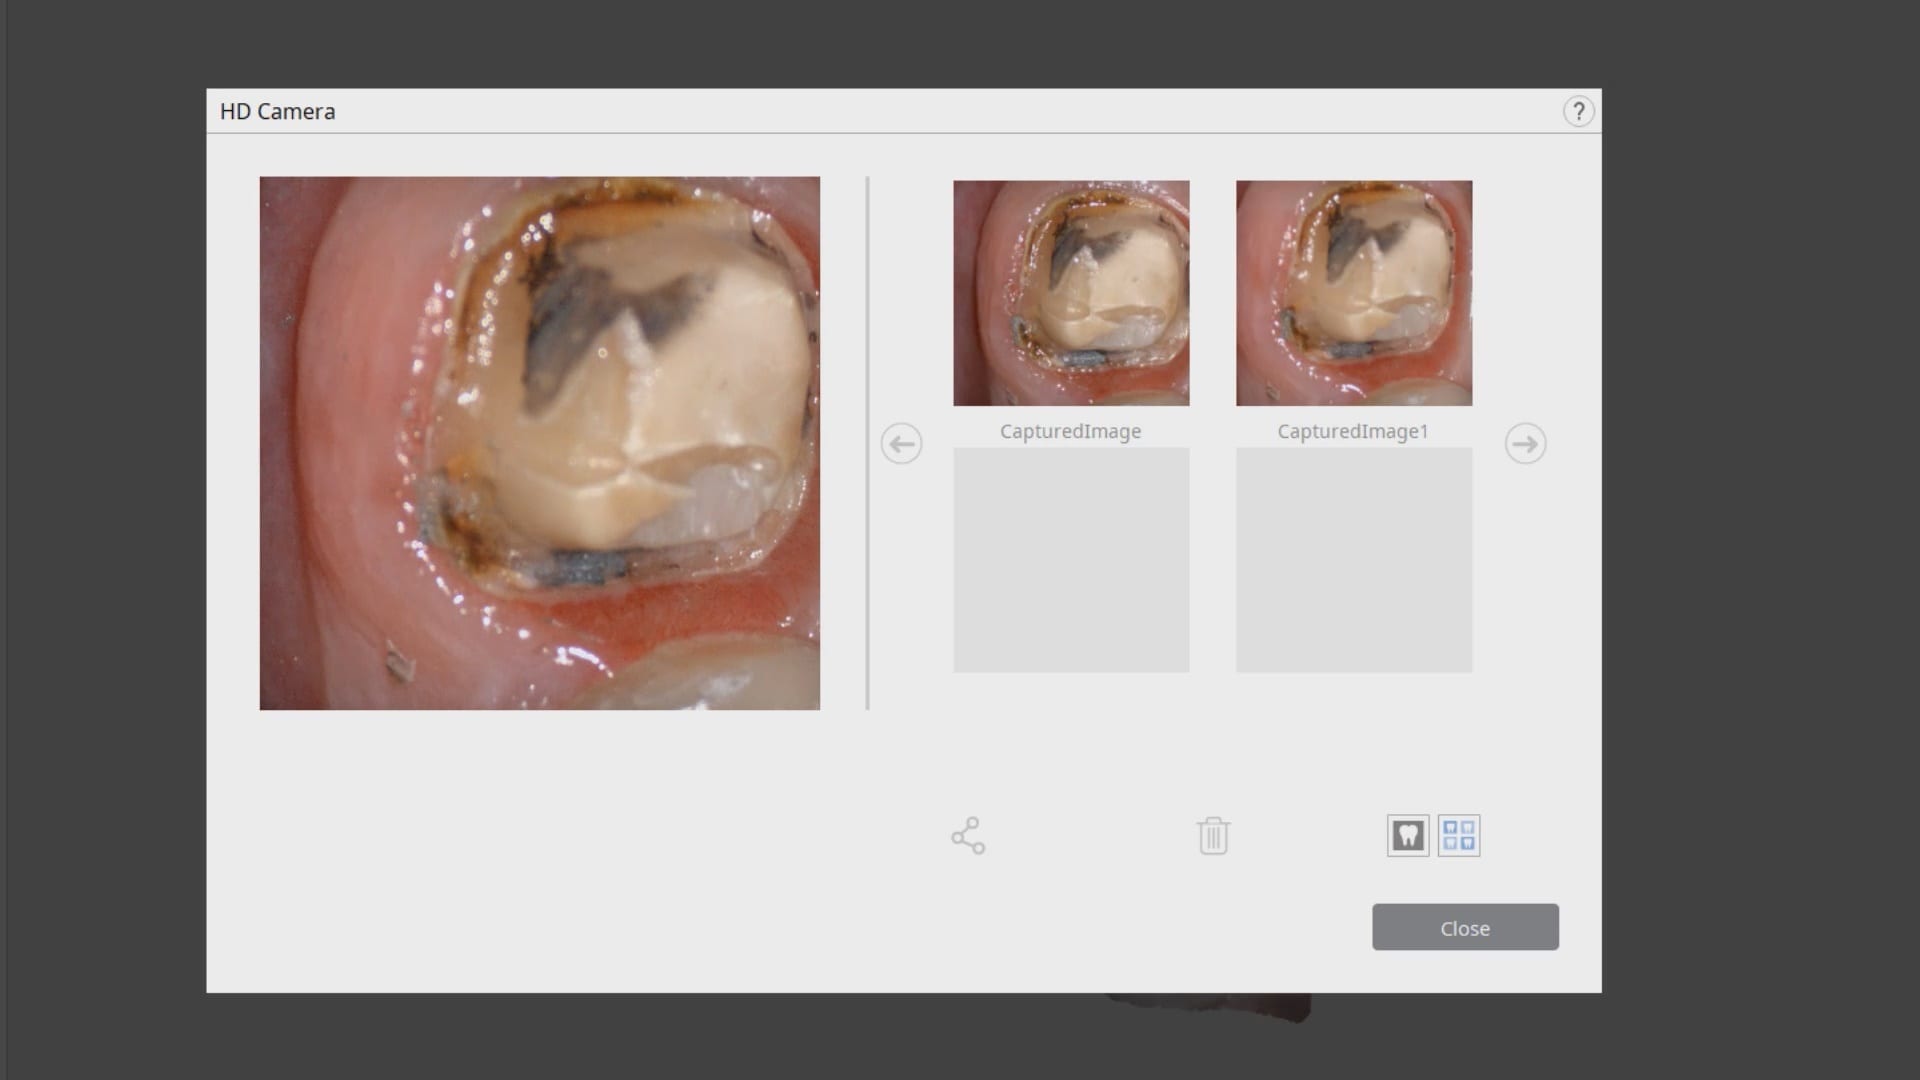
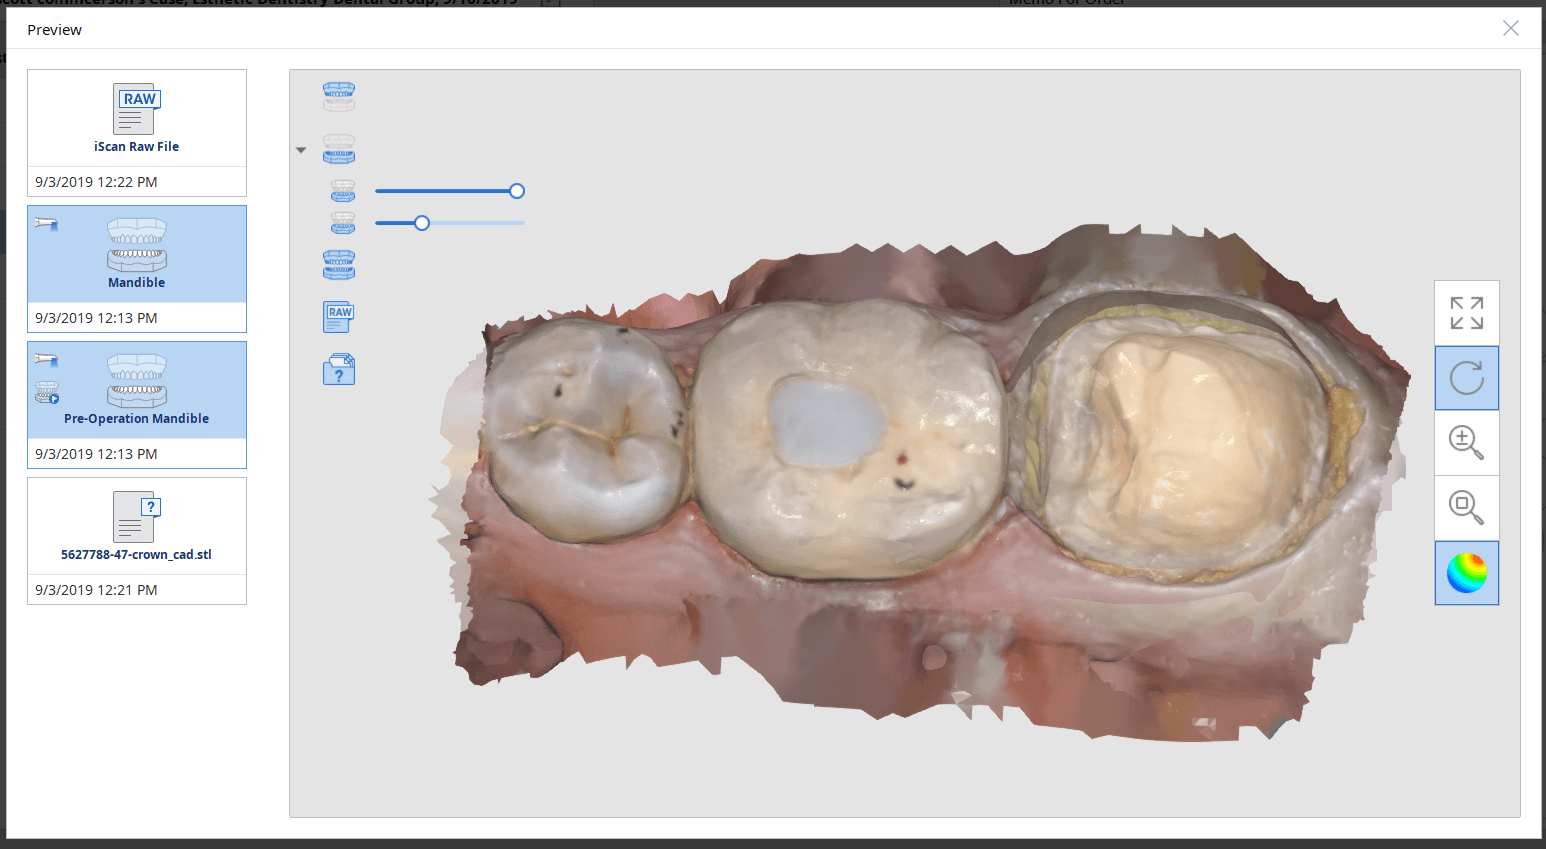
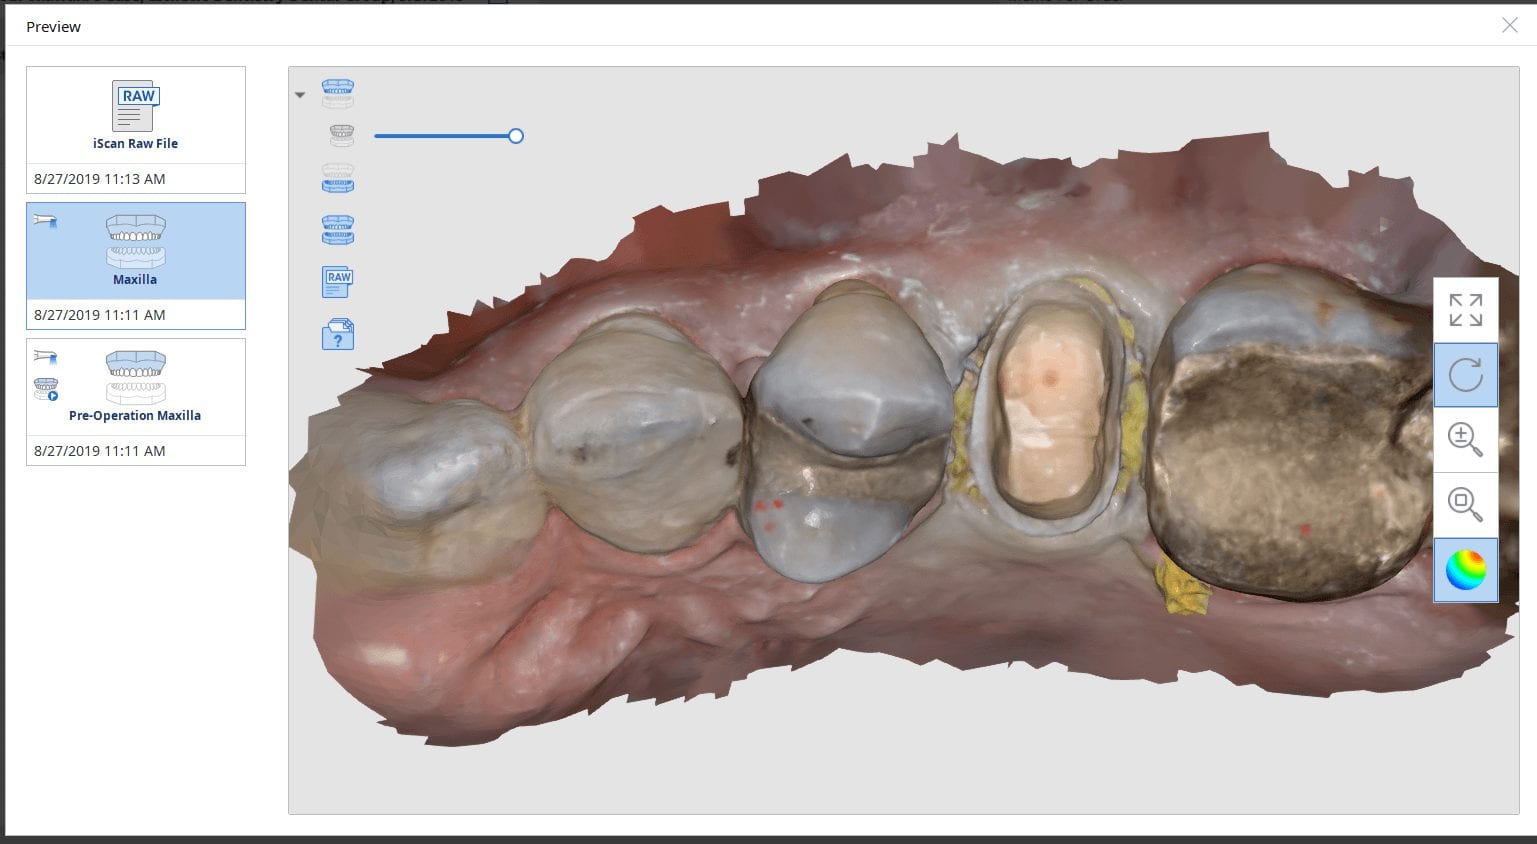
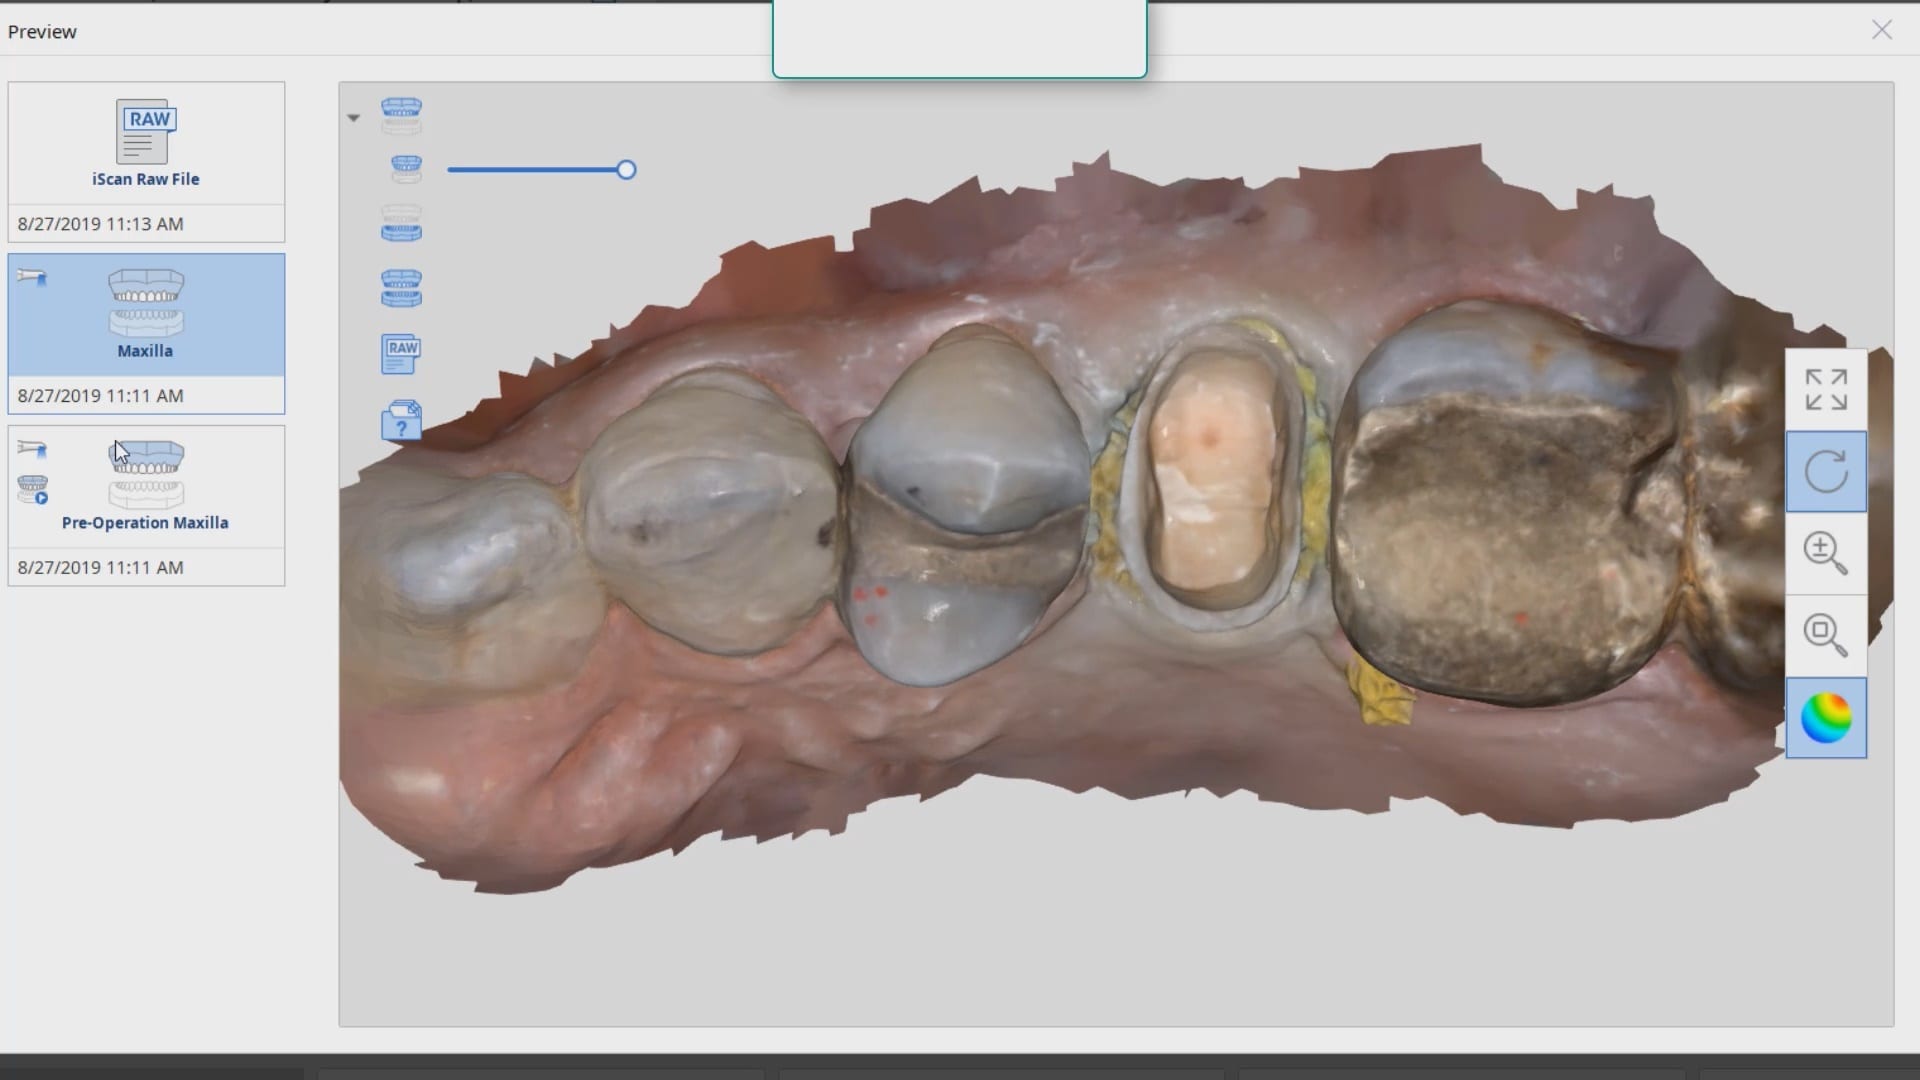
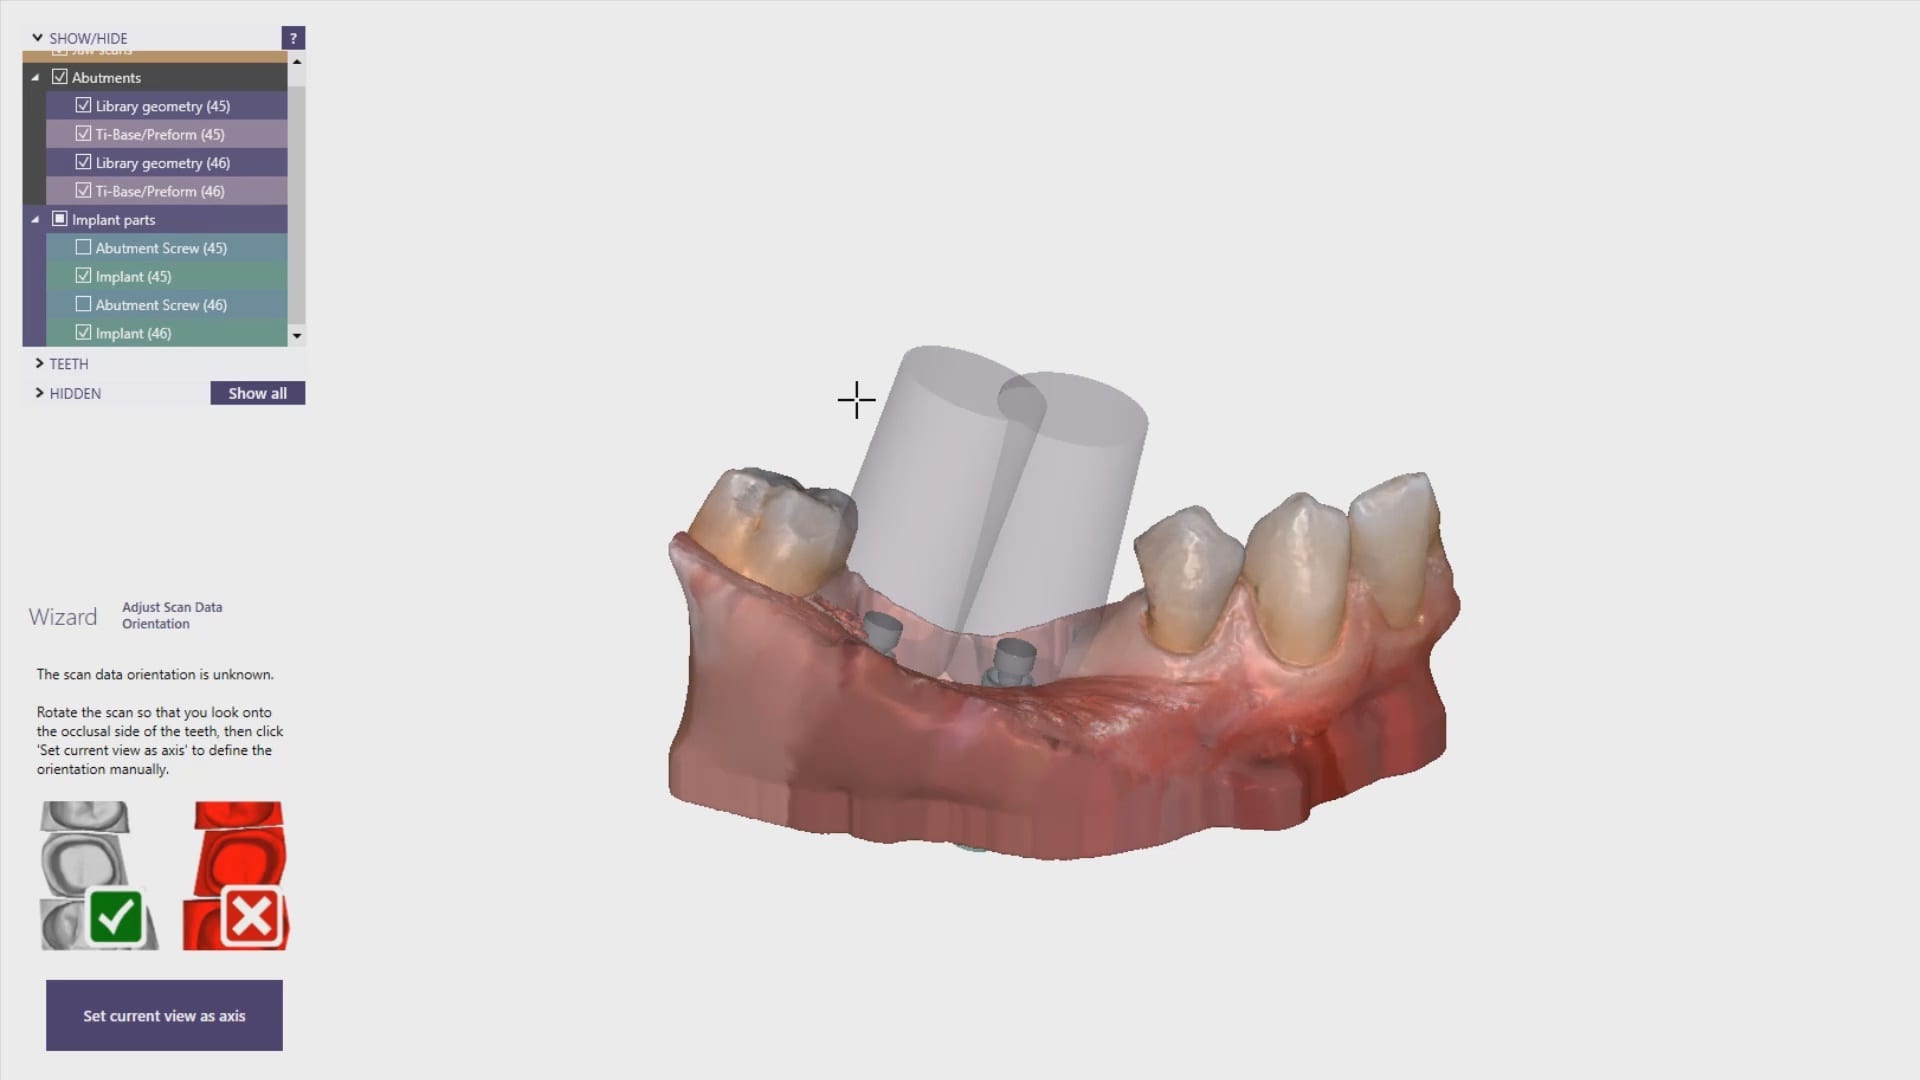
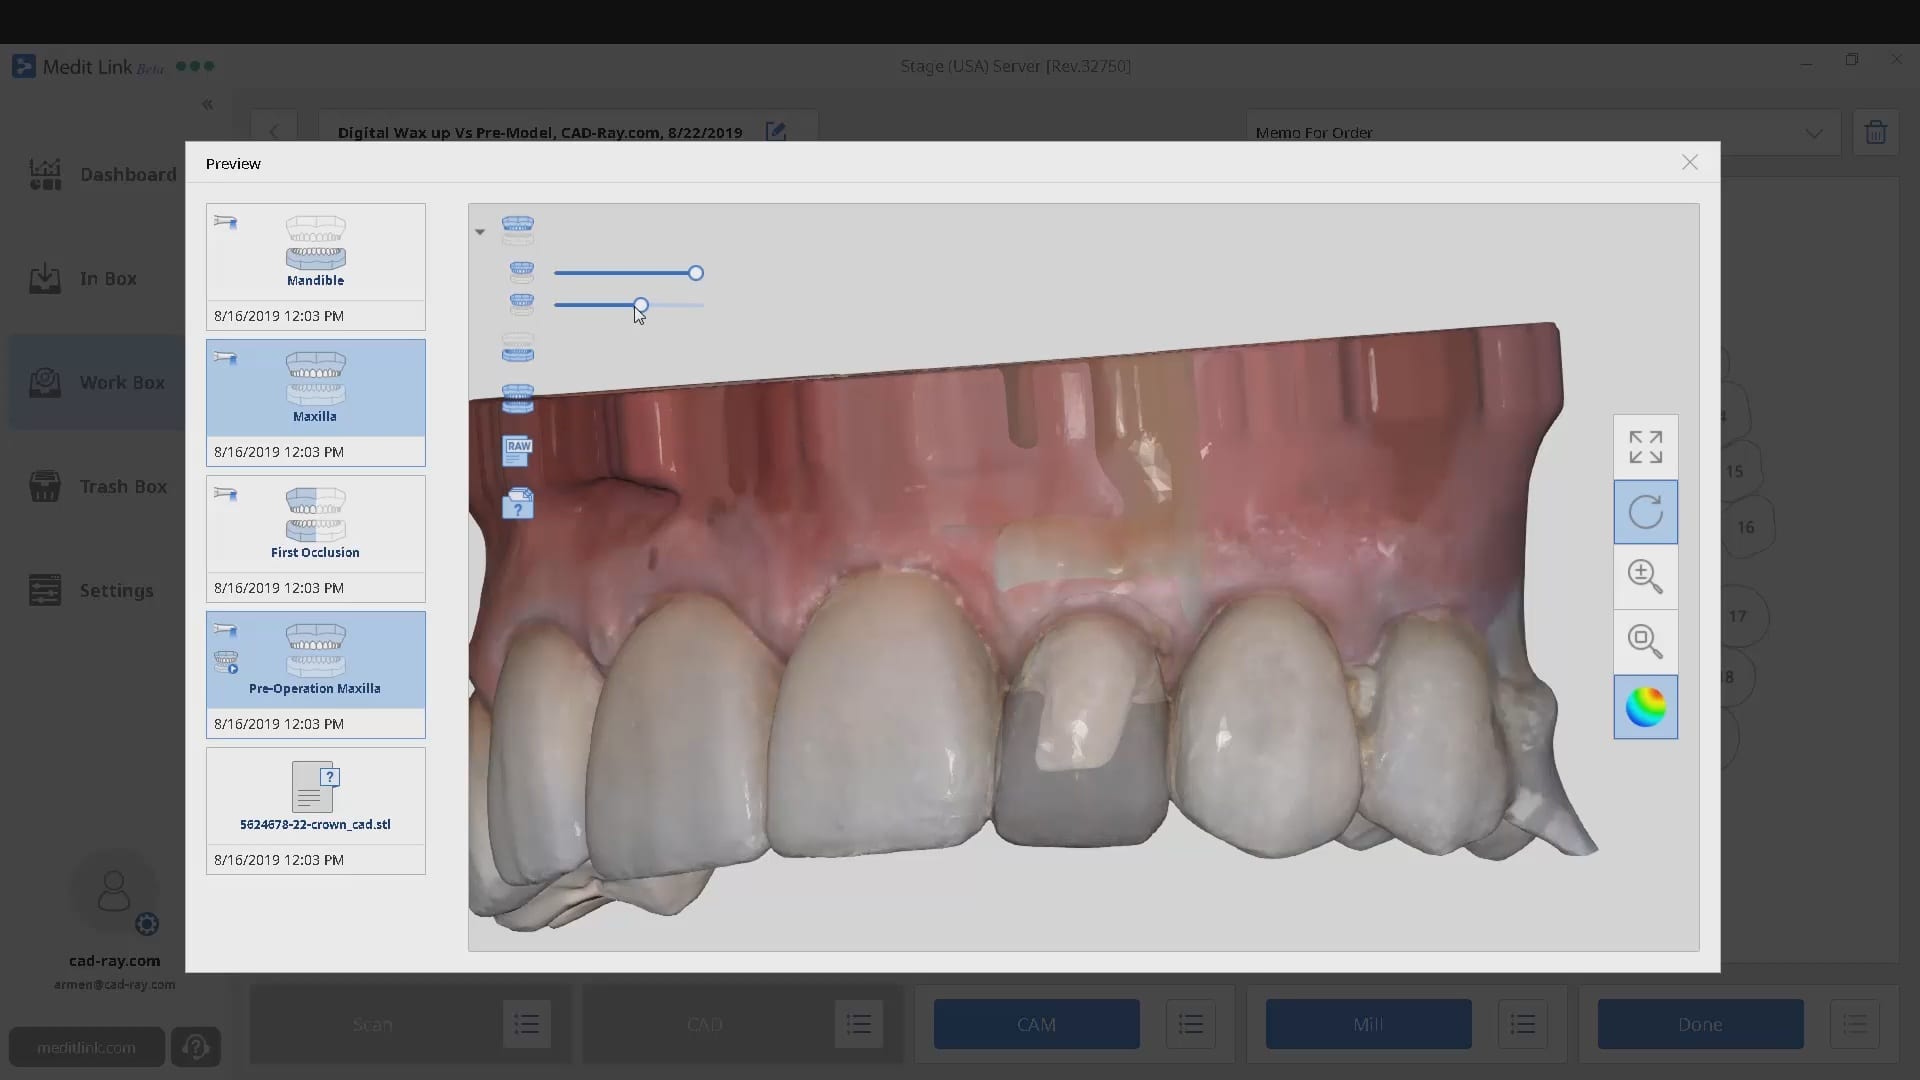
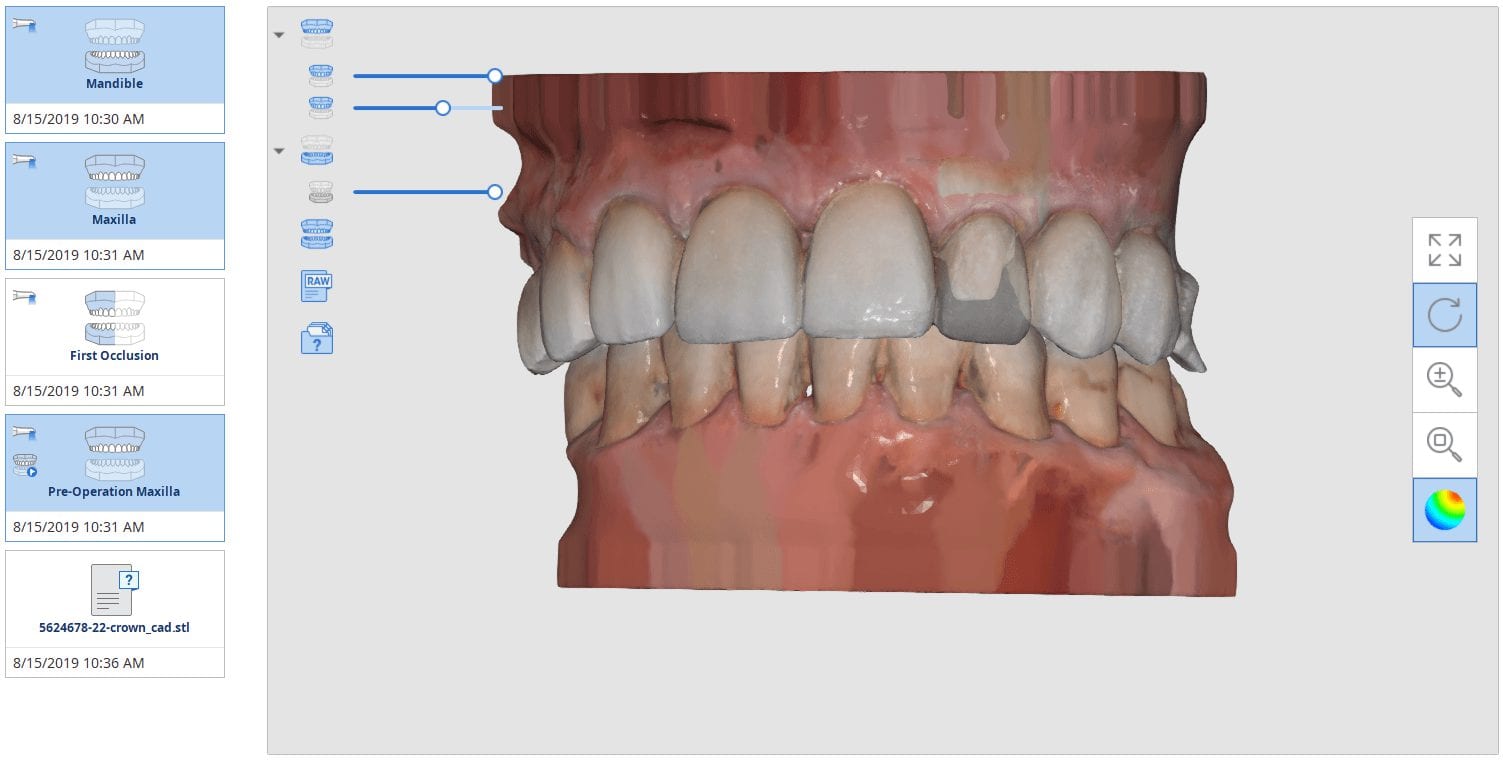
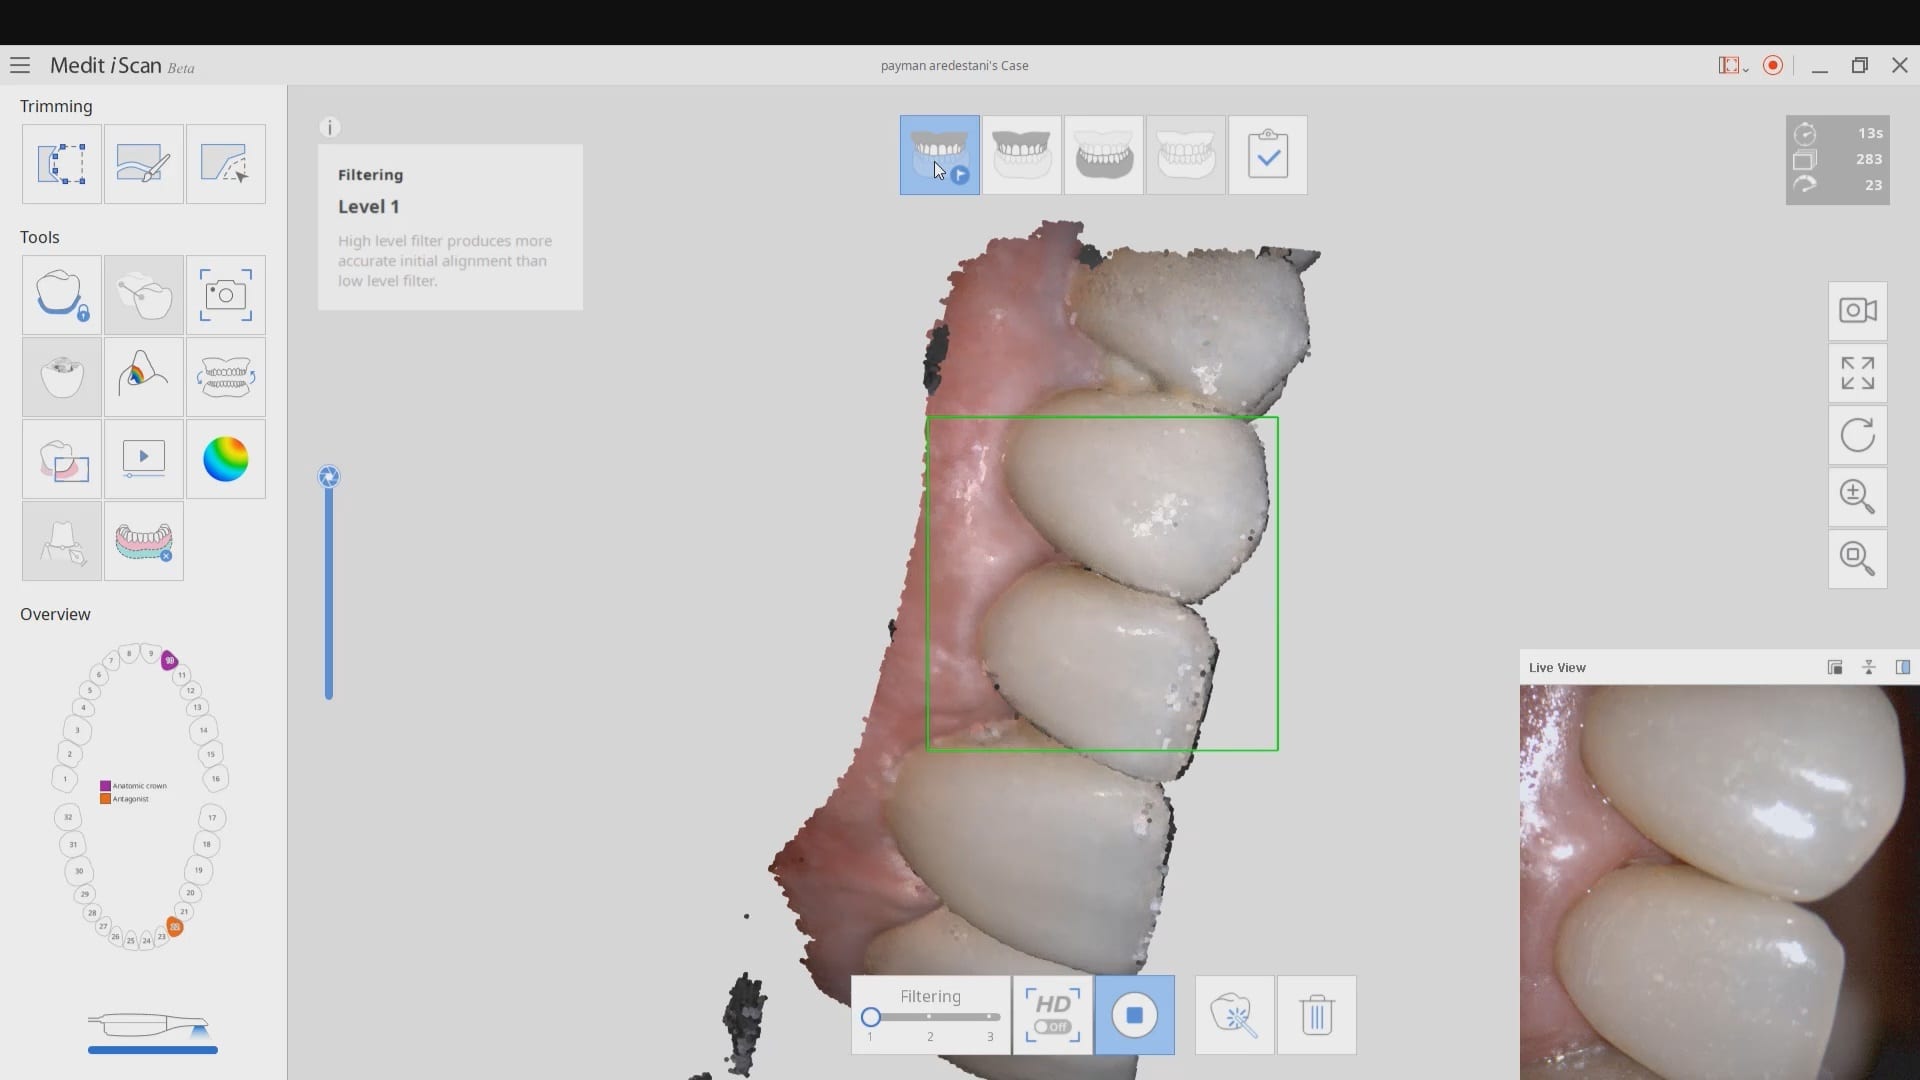
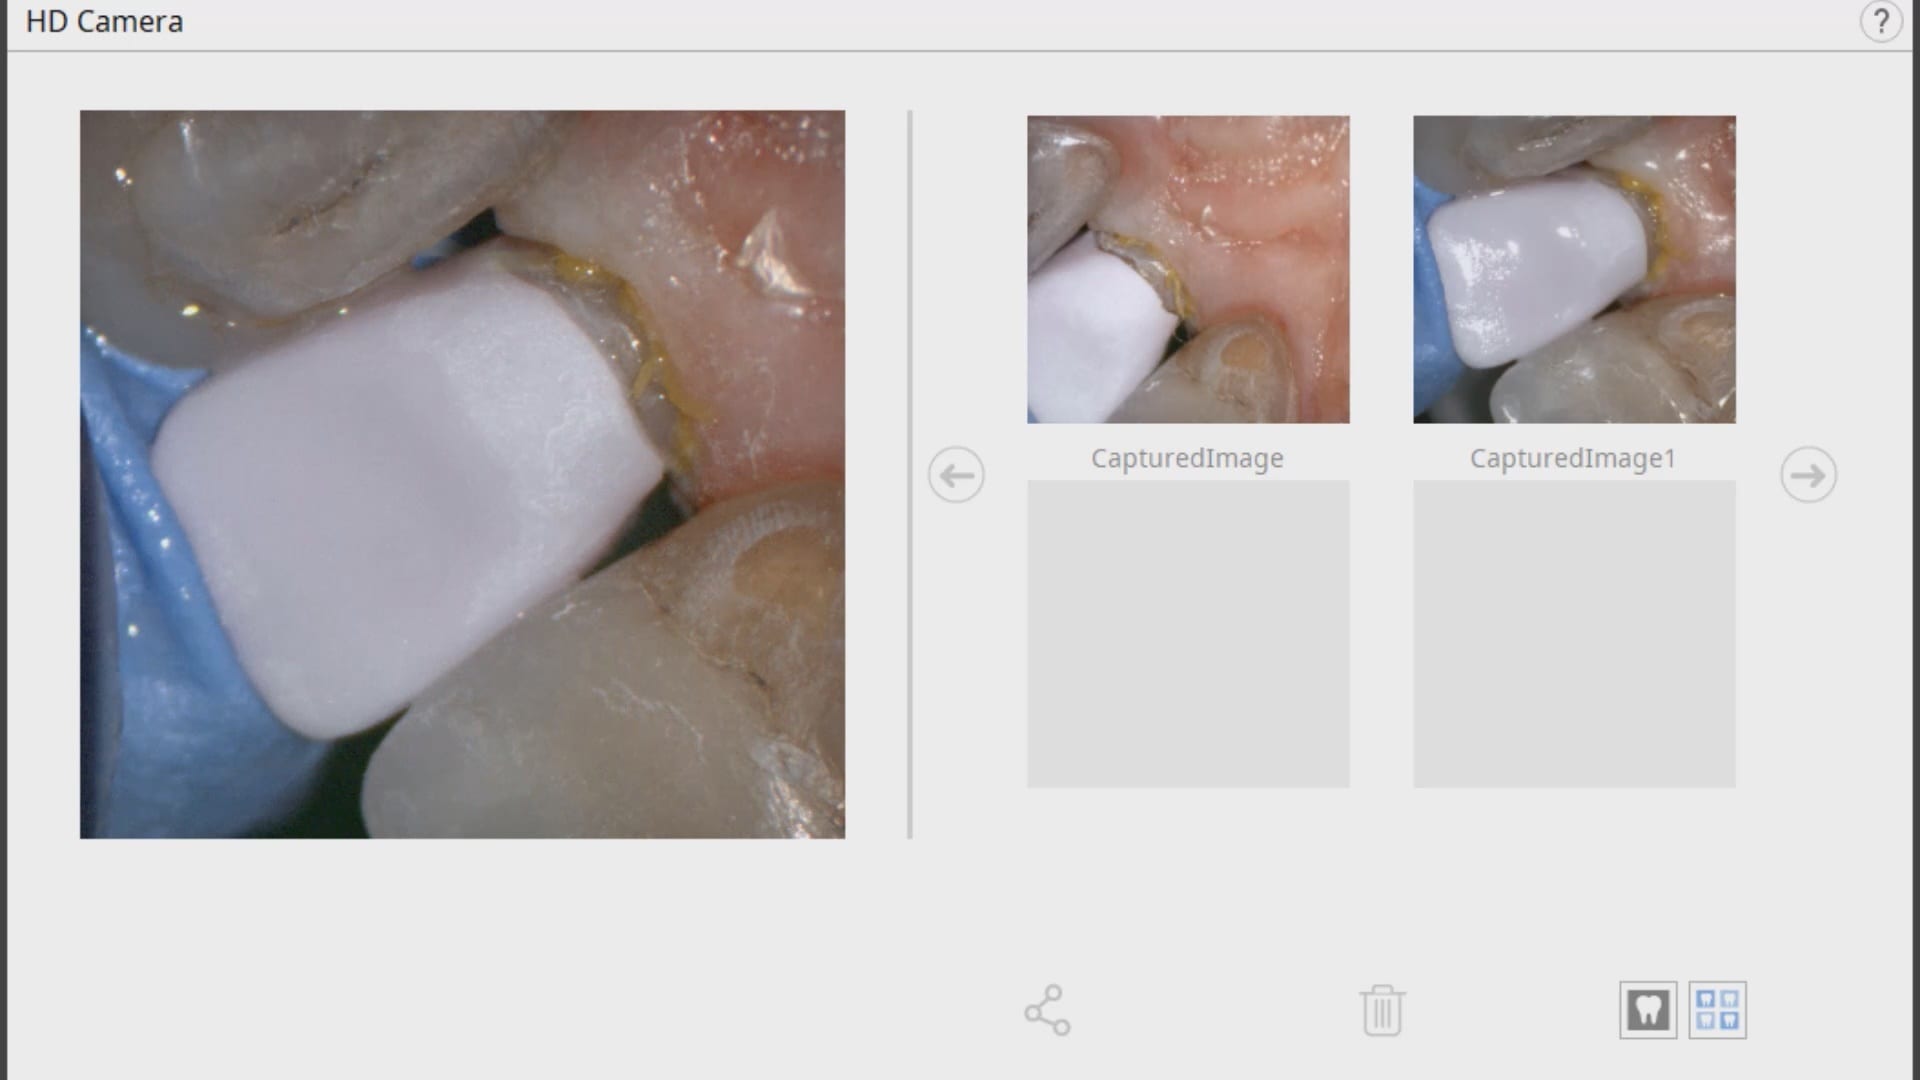
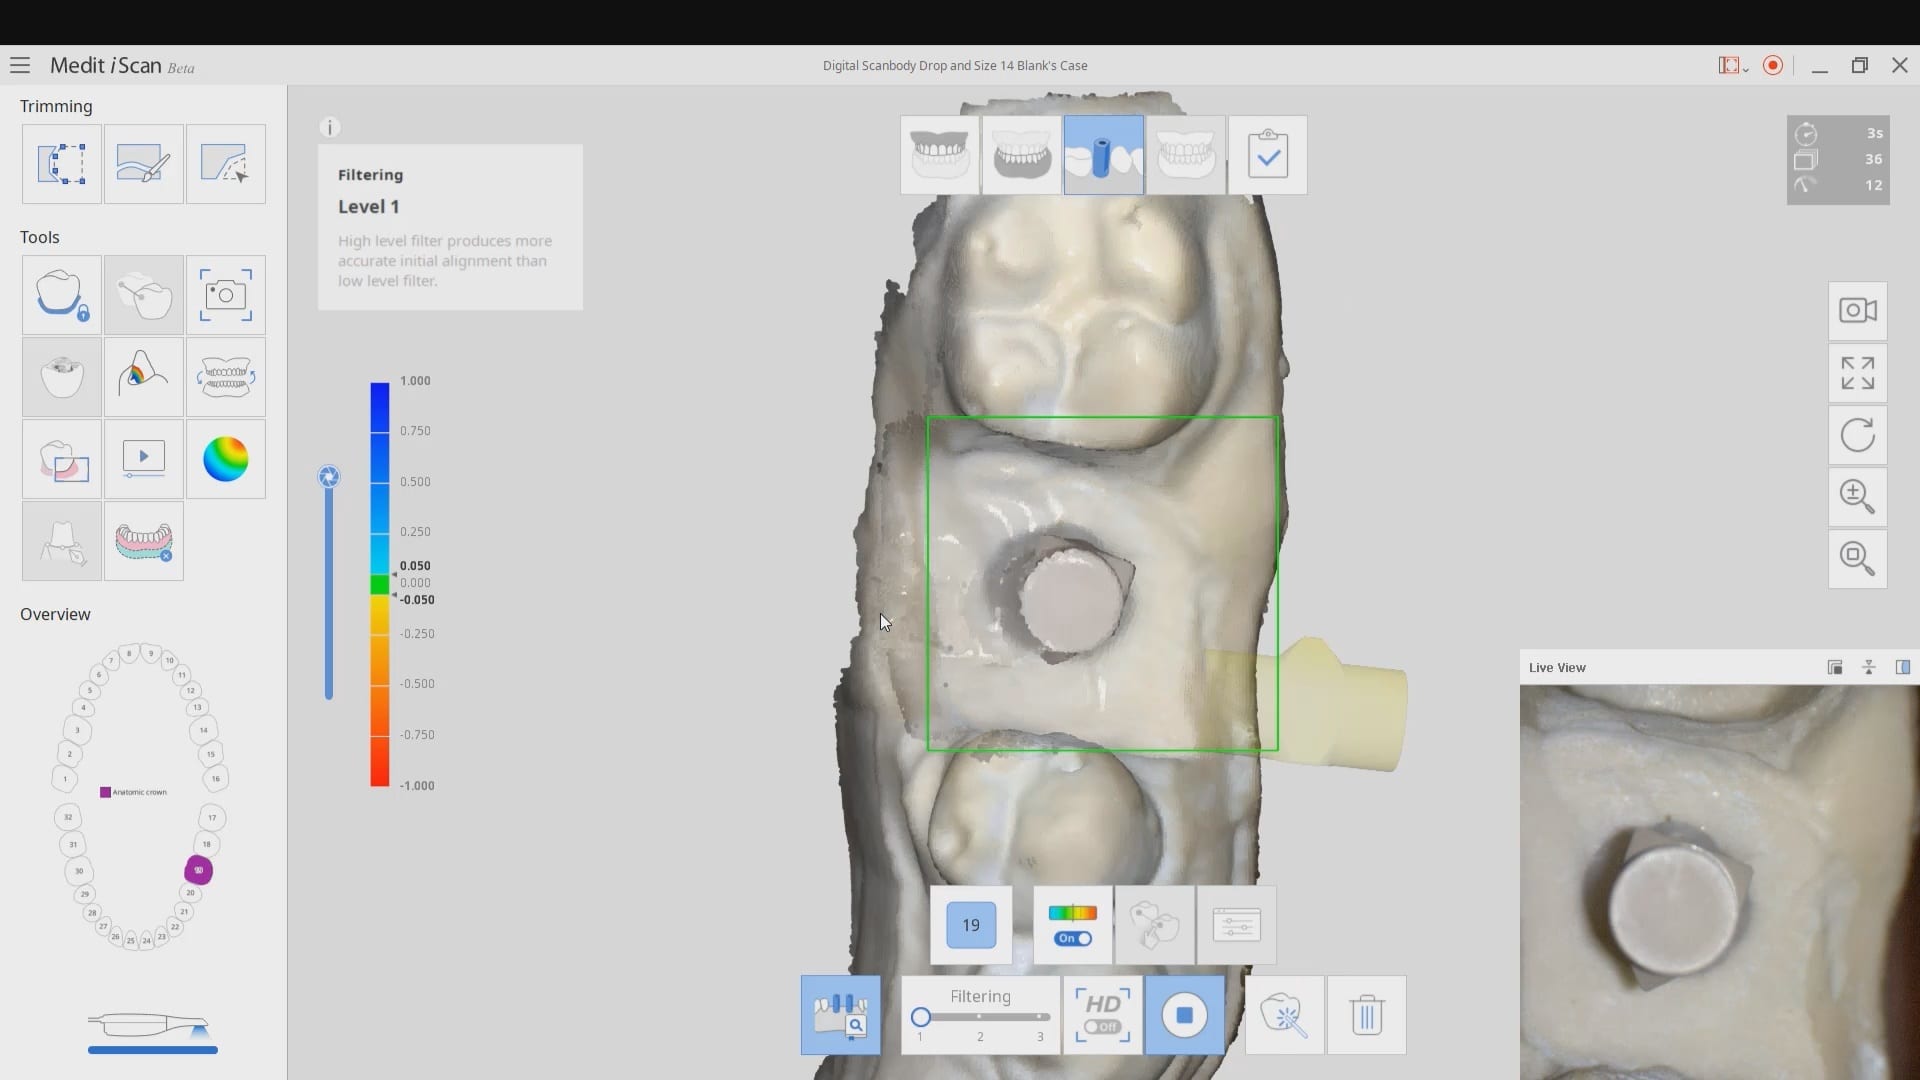
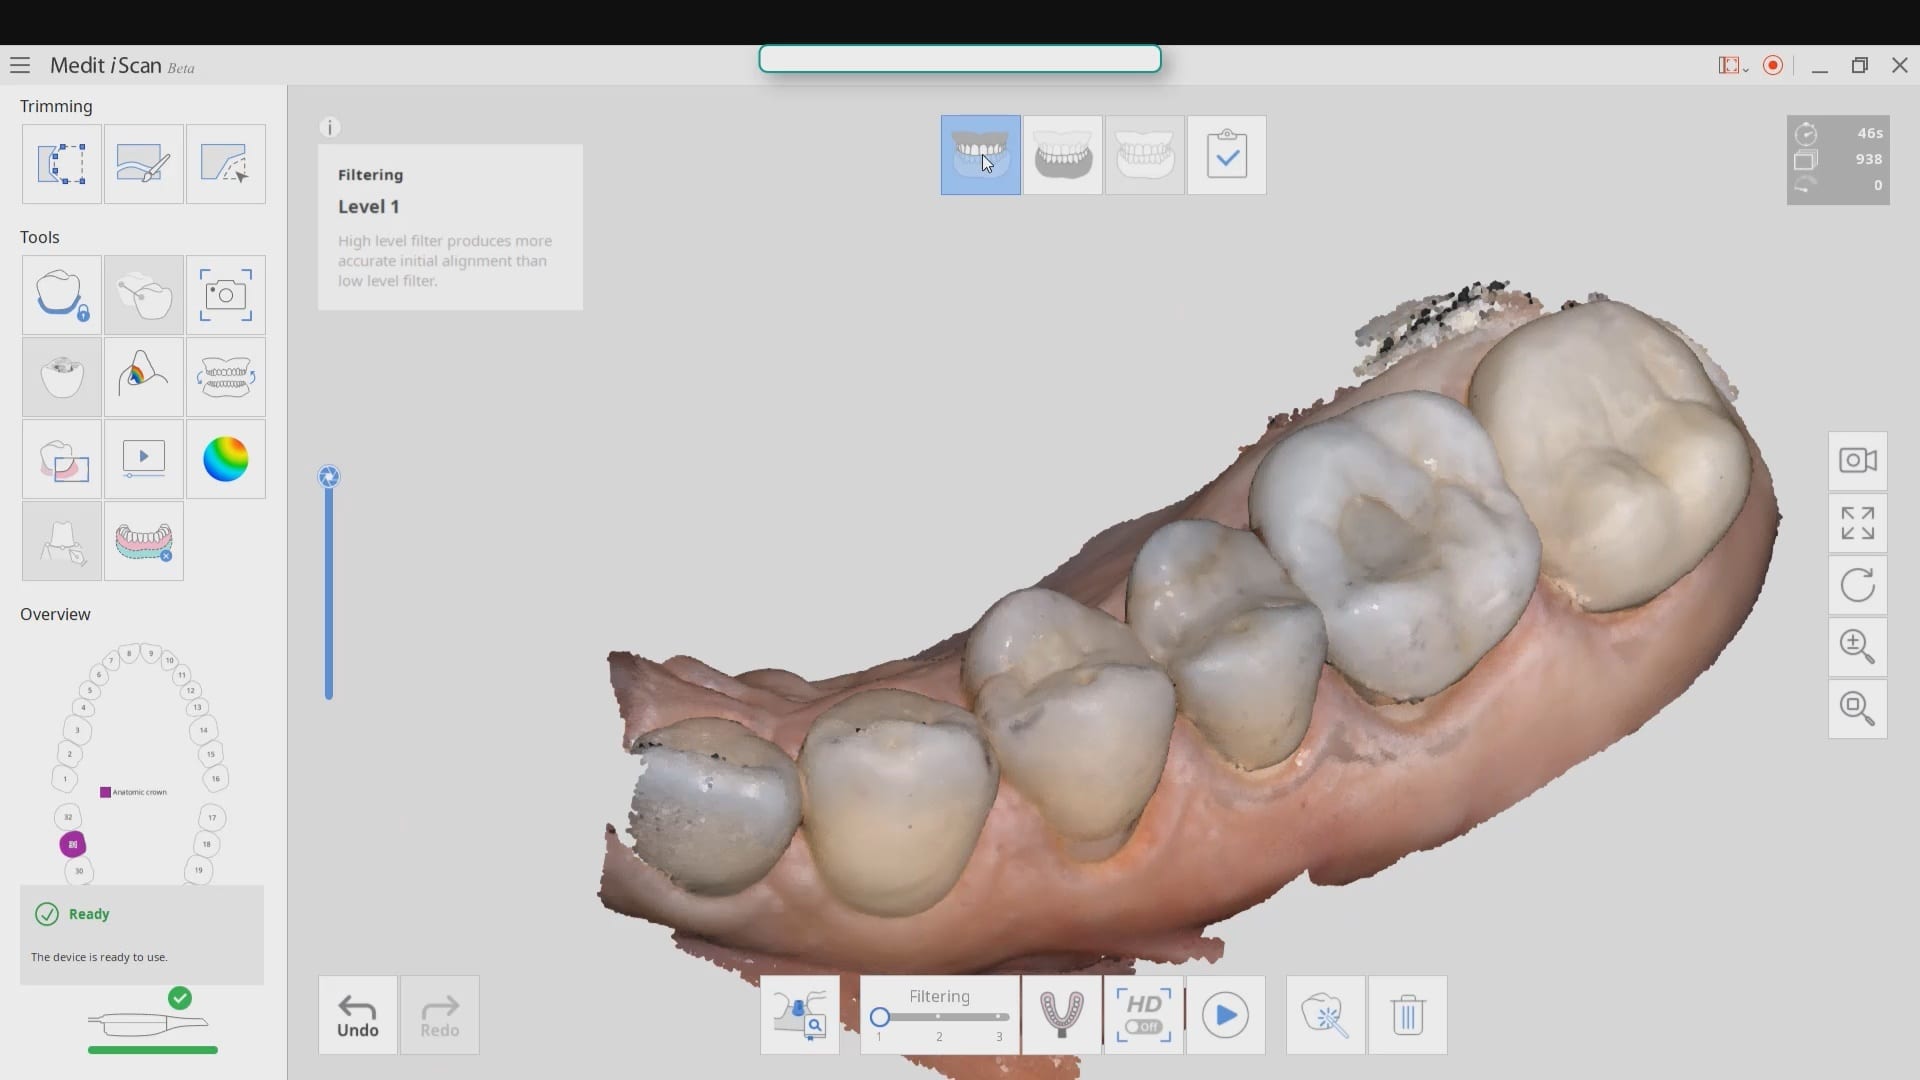
With the Medit i500, after the patient is anesthetized and the area is isolated, the pre-existing crown is imaged in the pre-op catalog box. The area to be prepared is cropped out in anticipation of the imaging the modified preparation.

video
play-rounded-fill

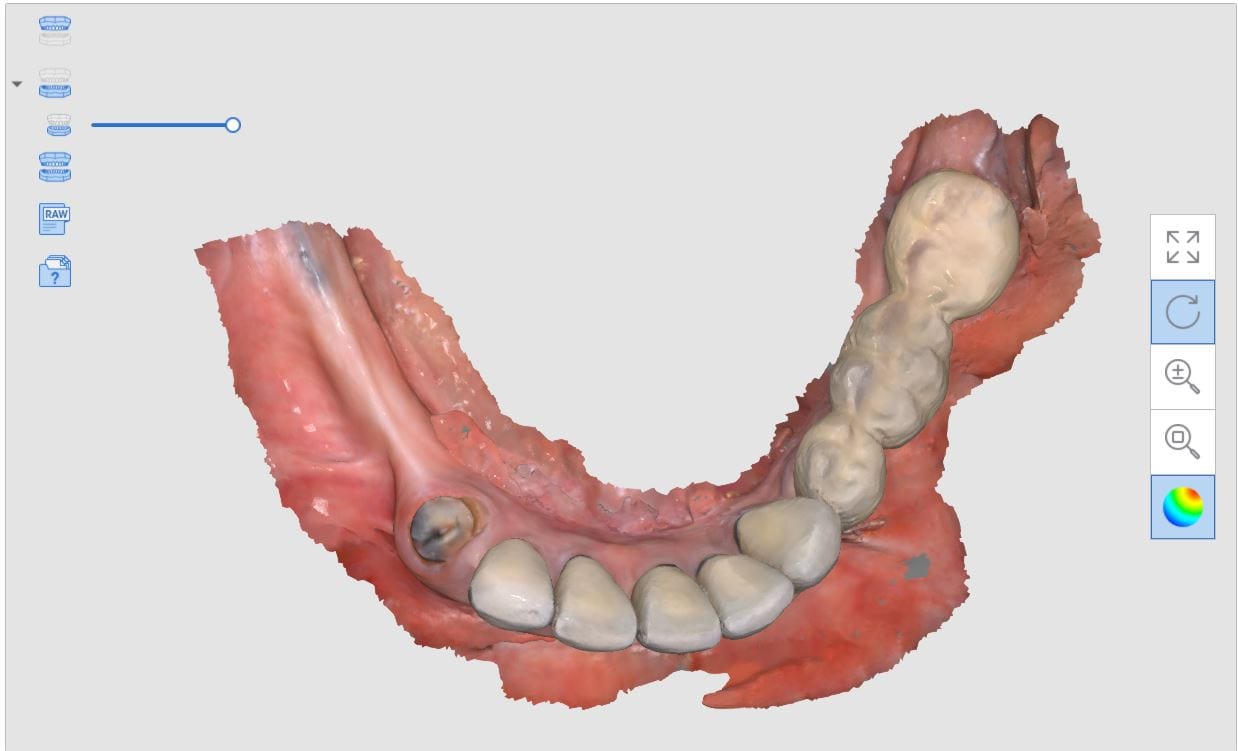
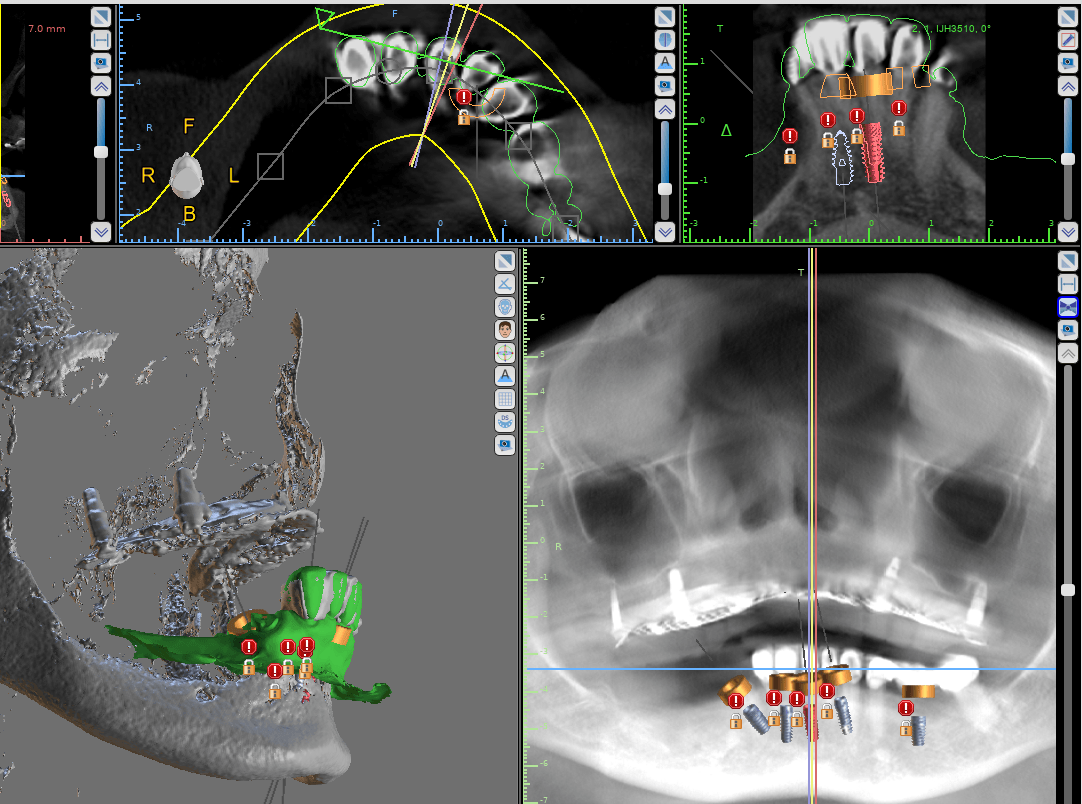
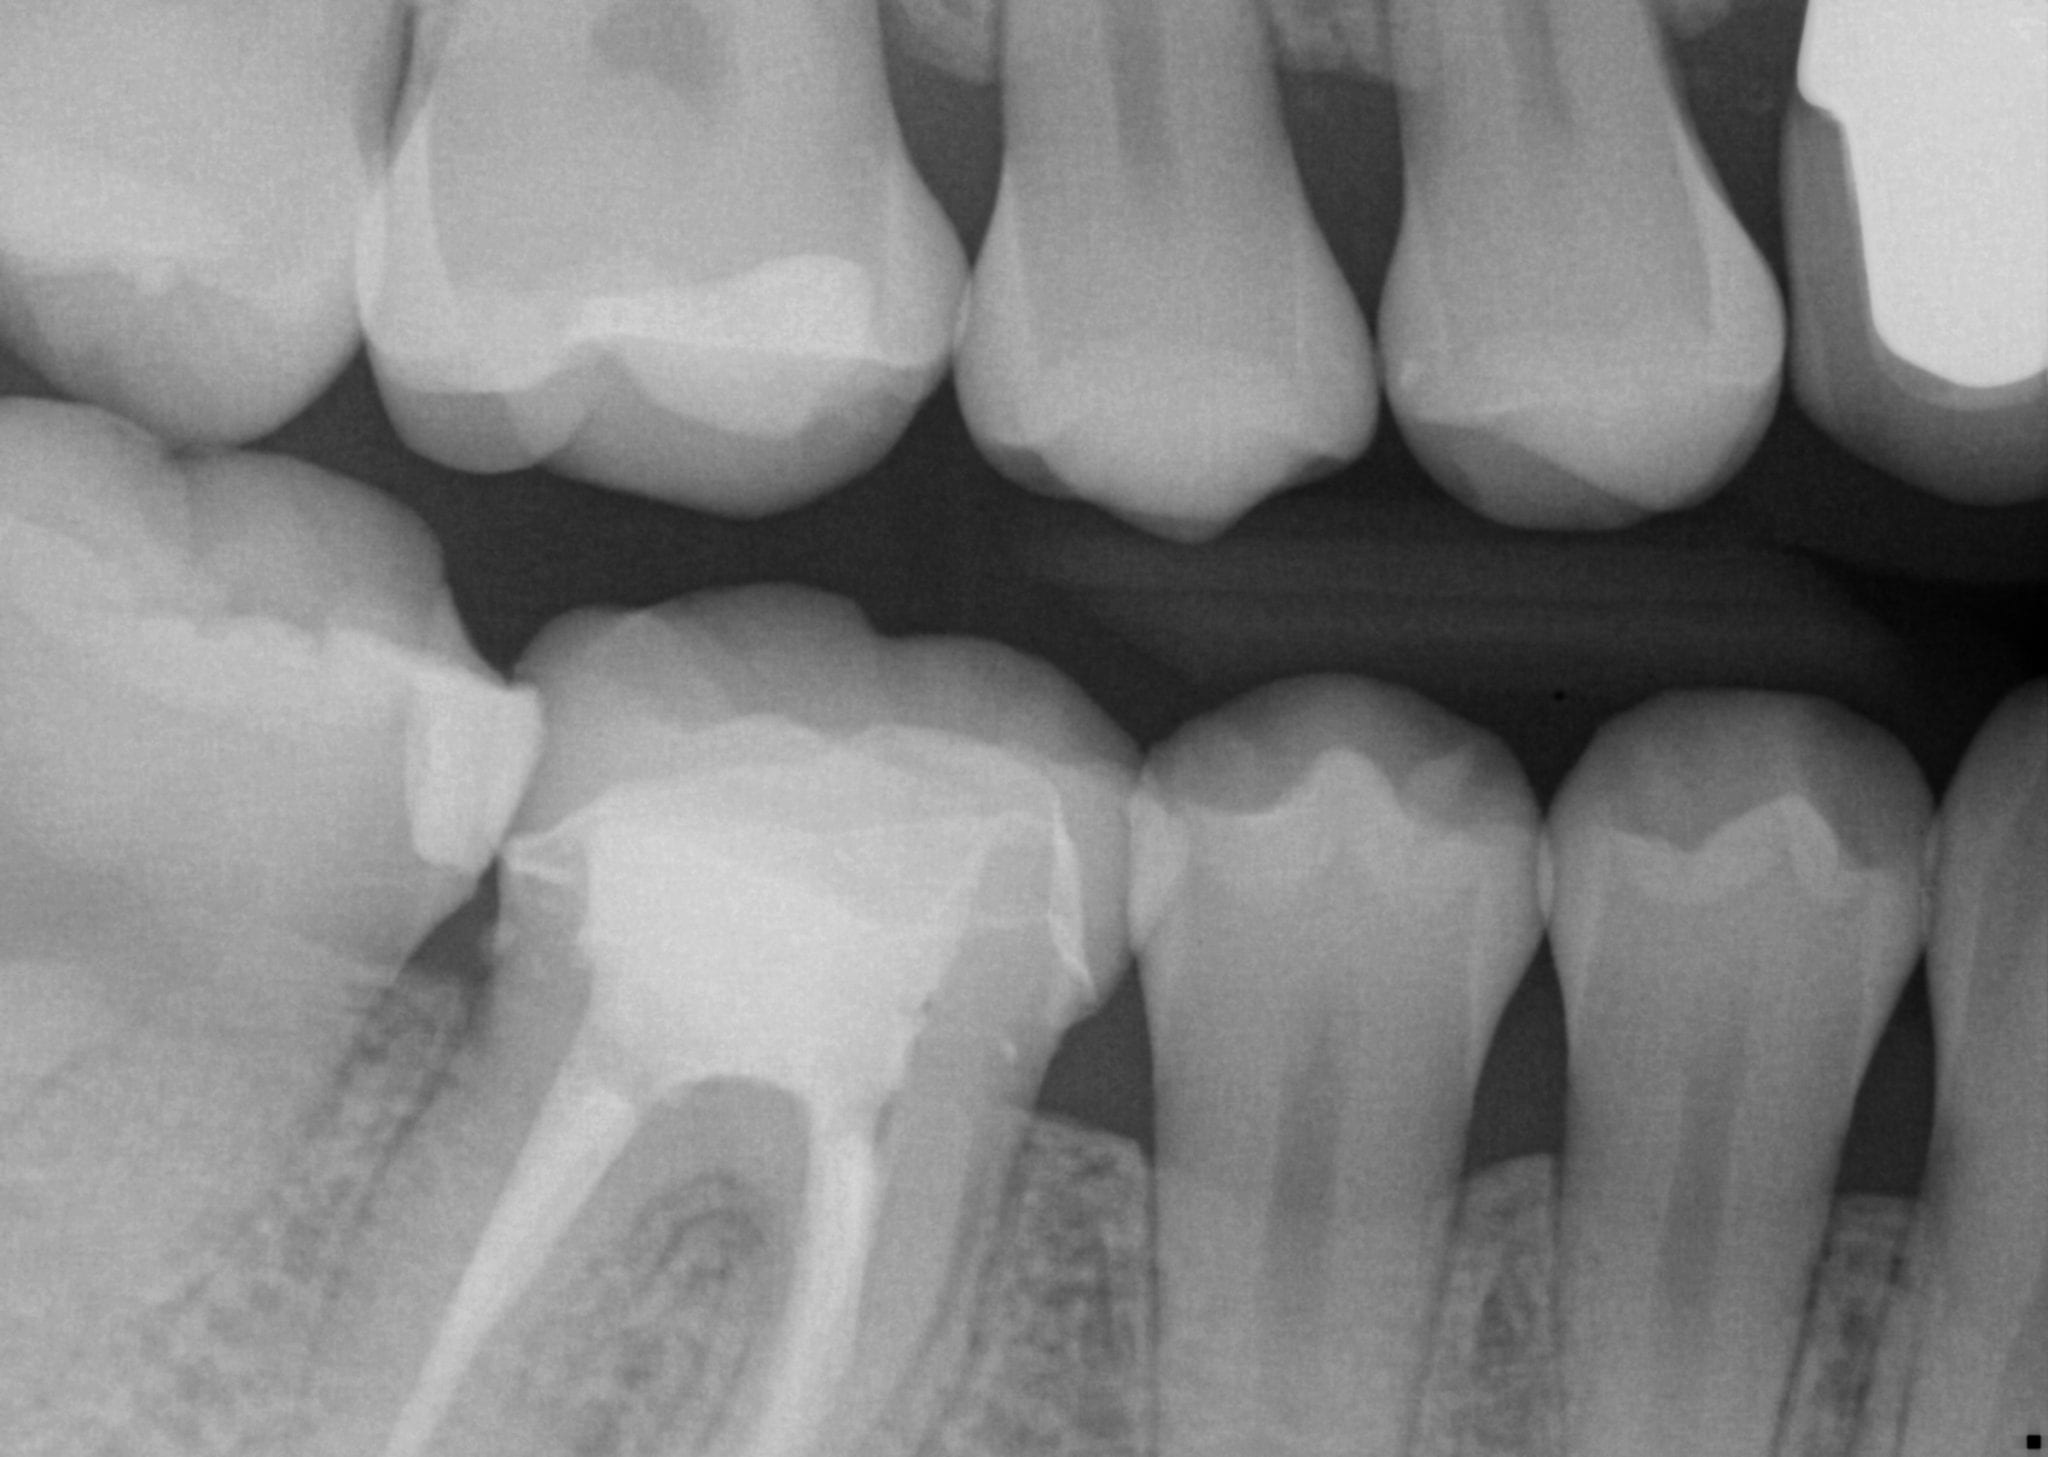
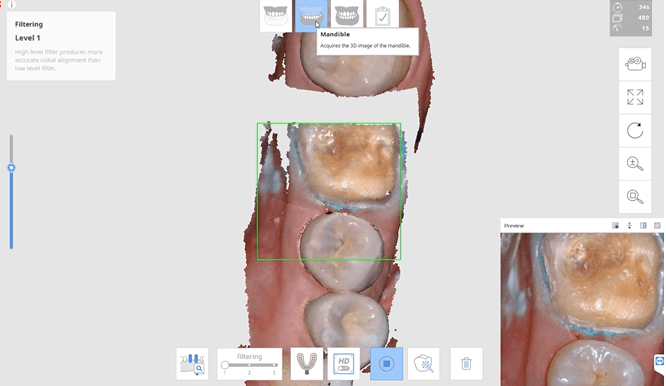
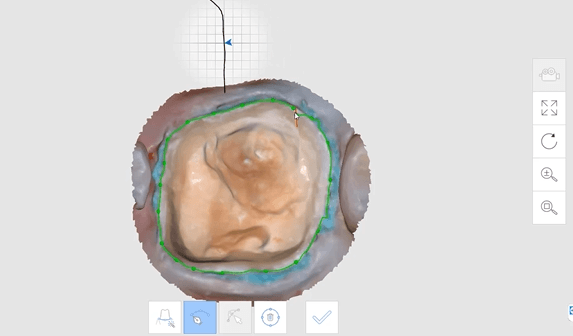
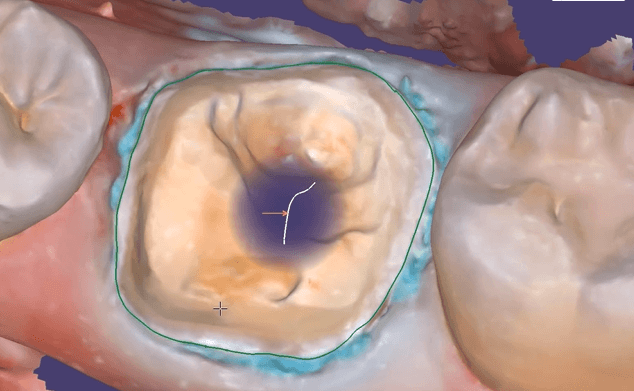
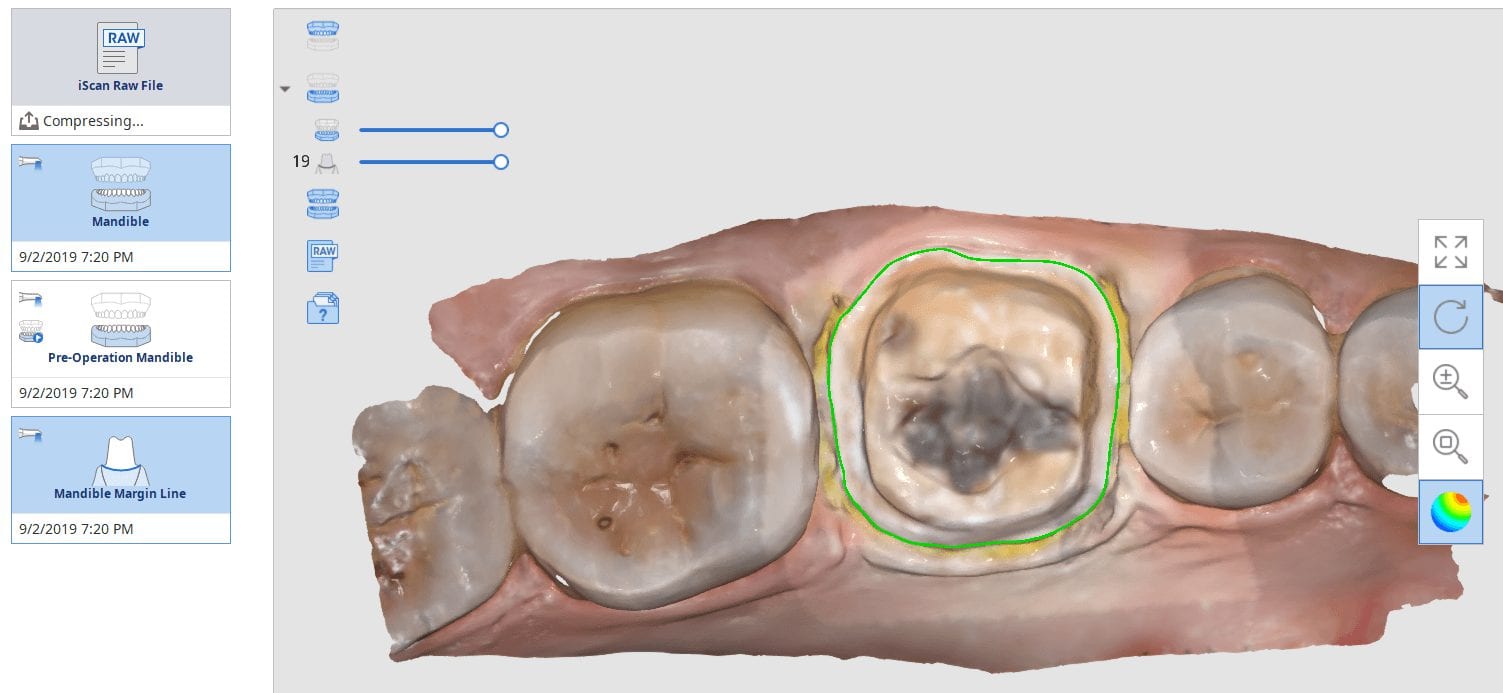
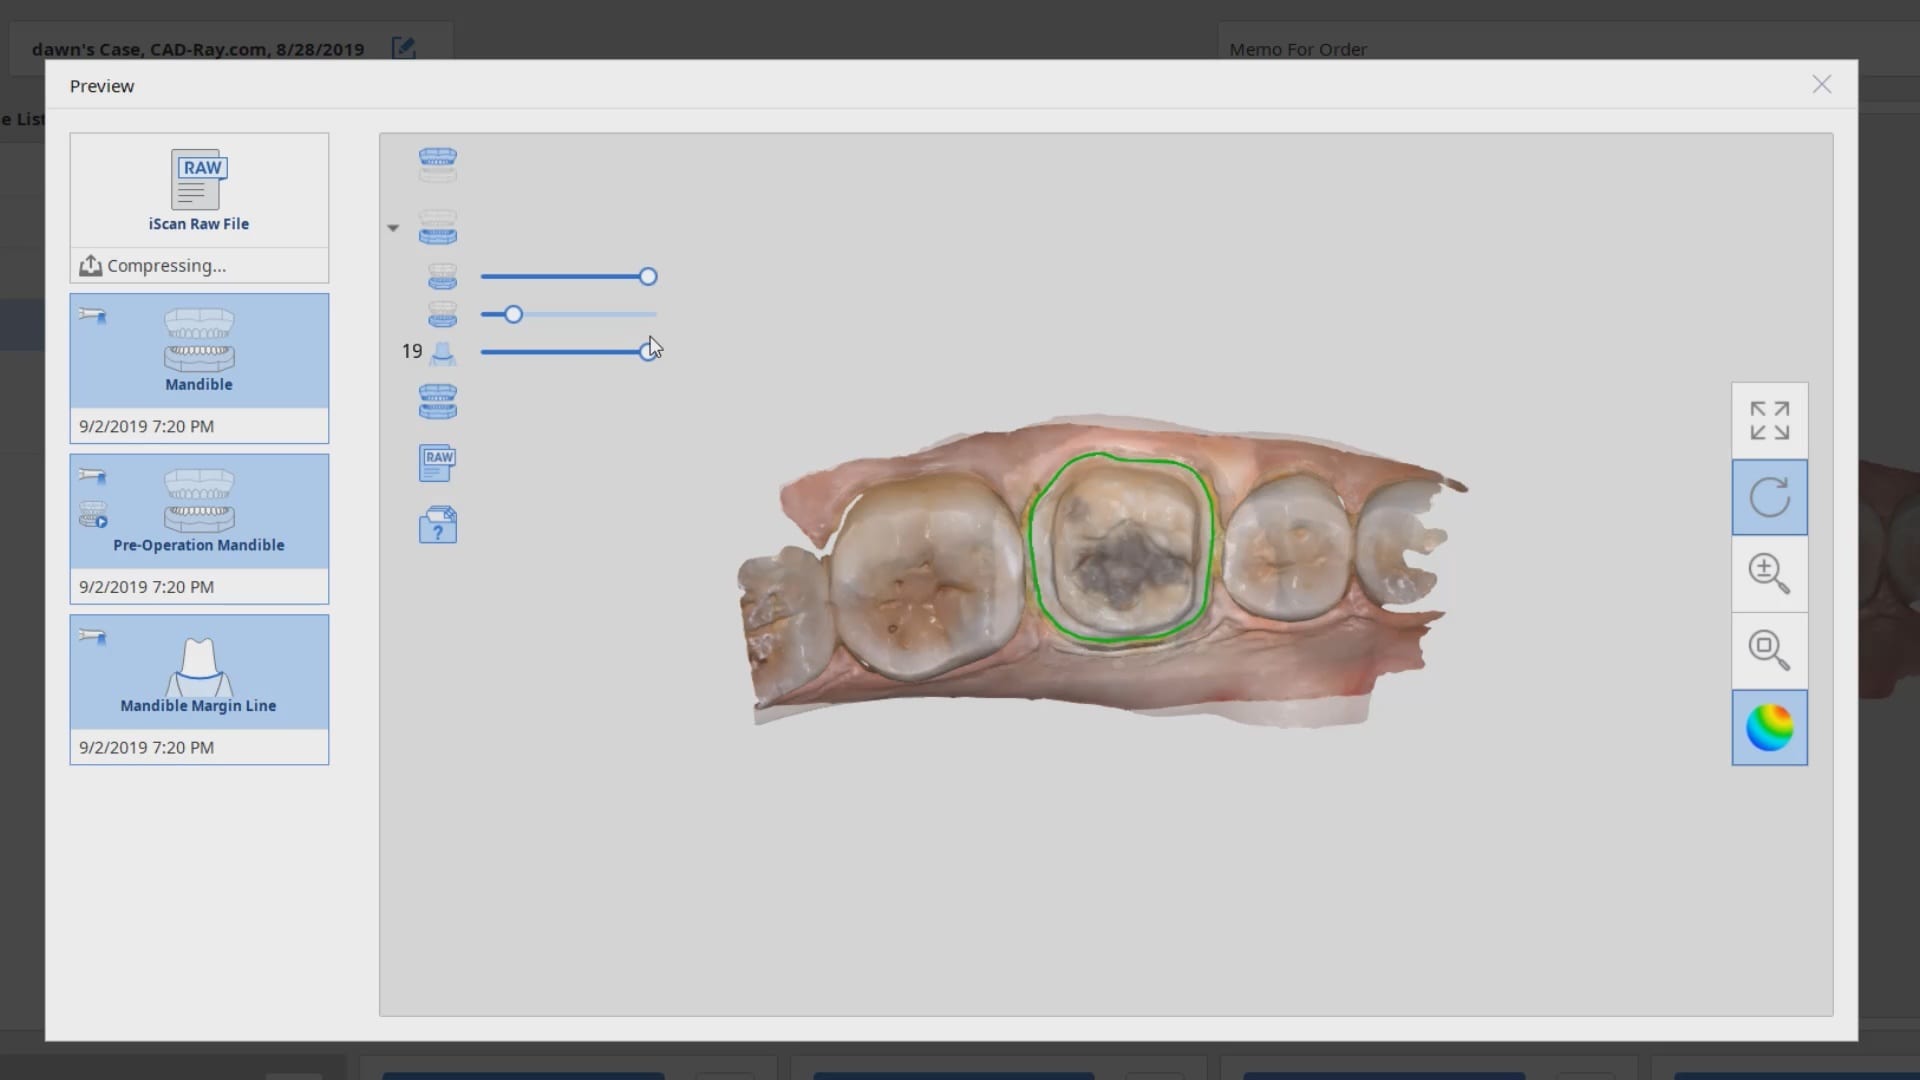
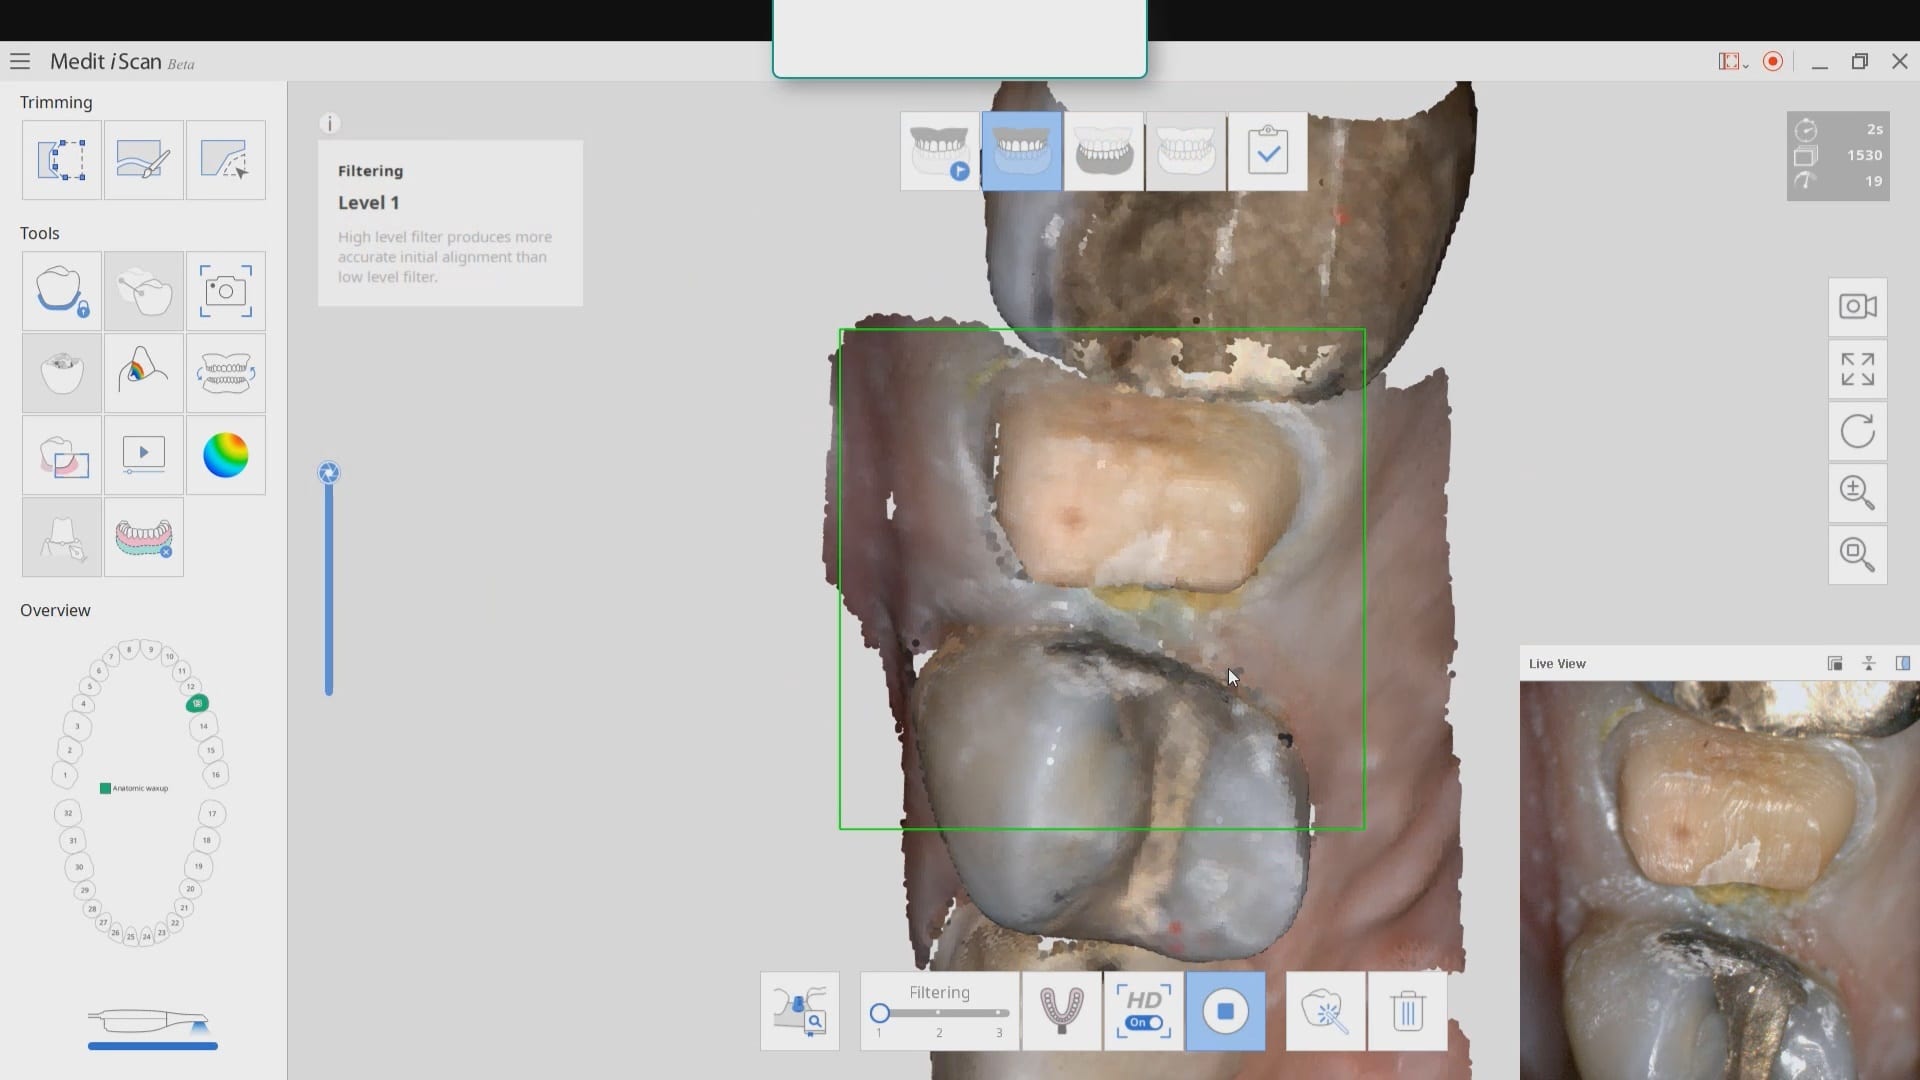
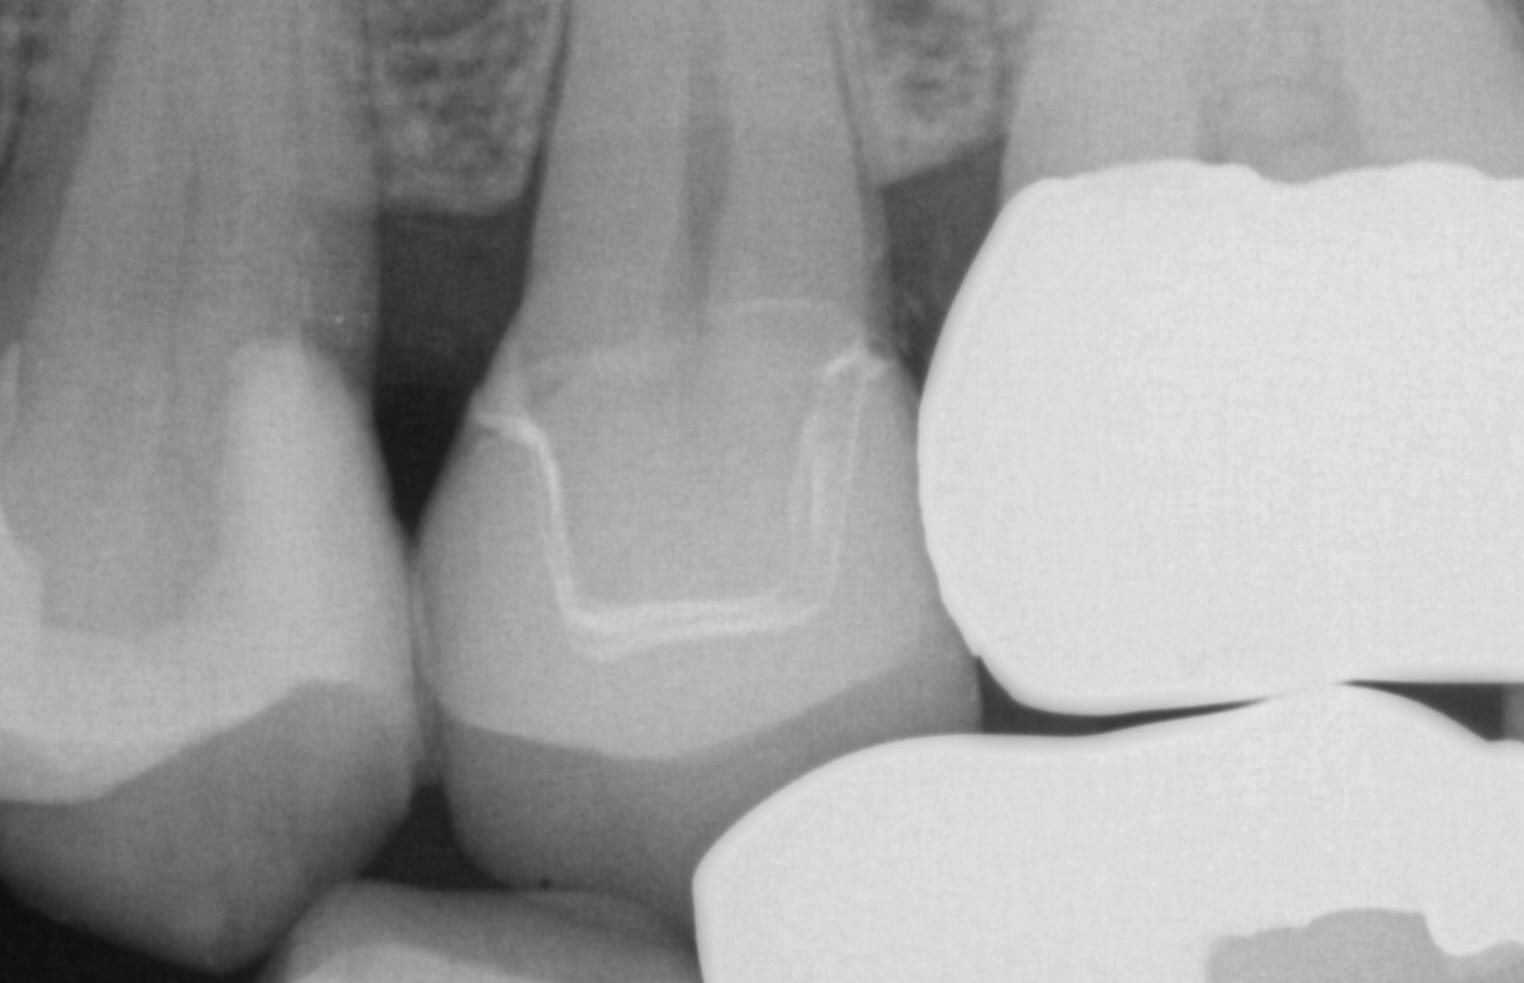
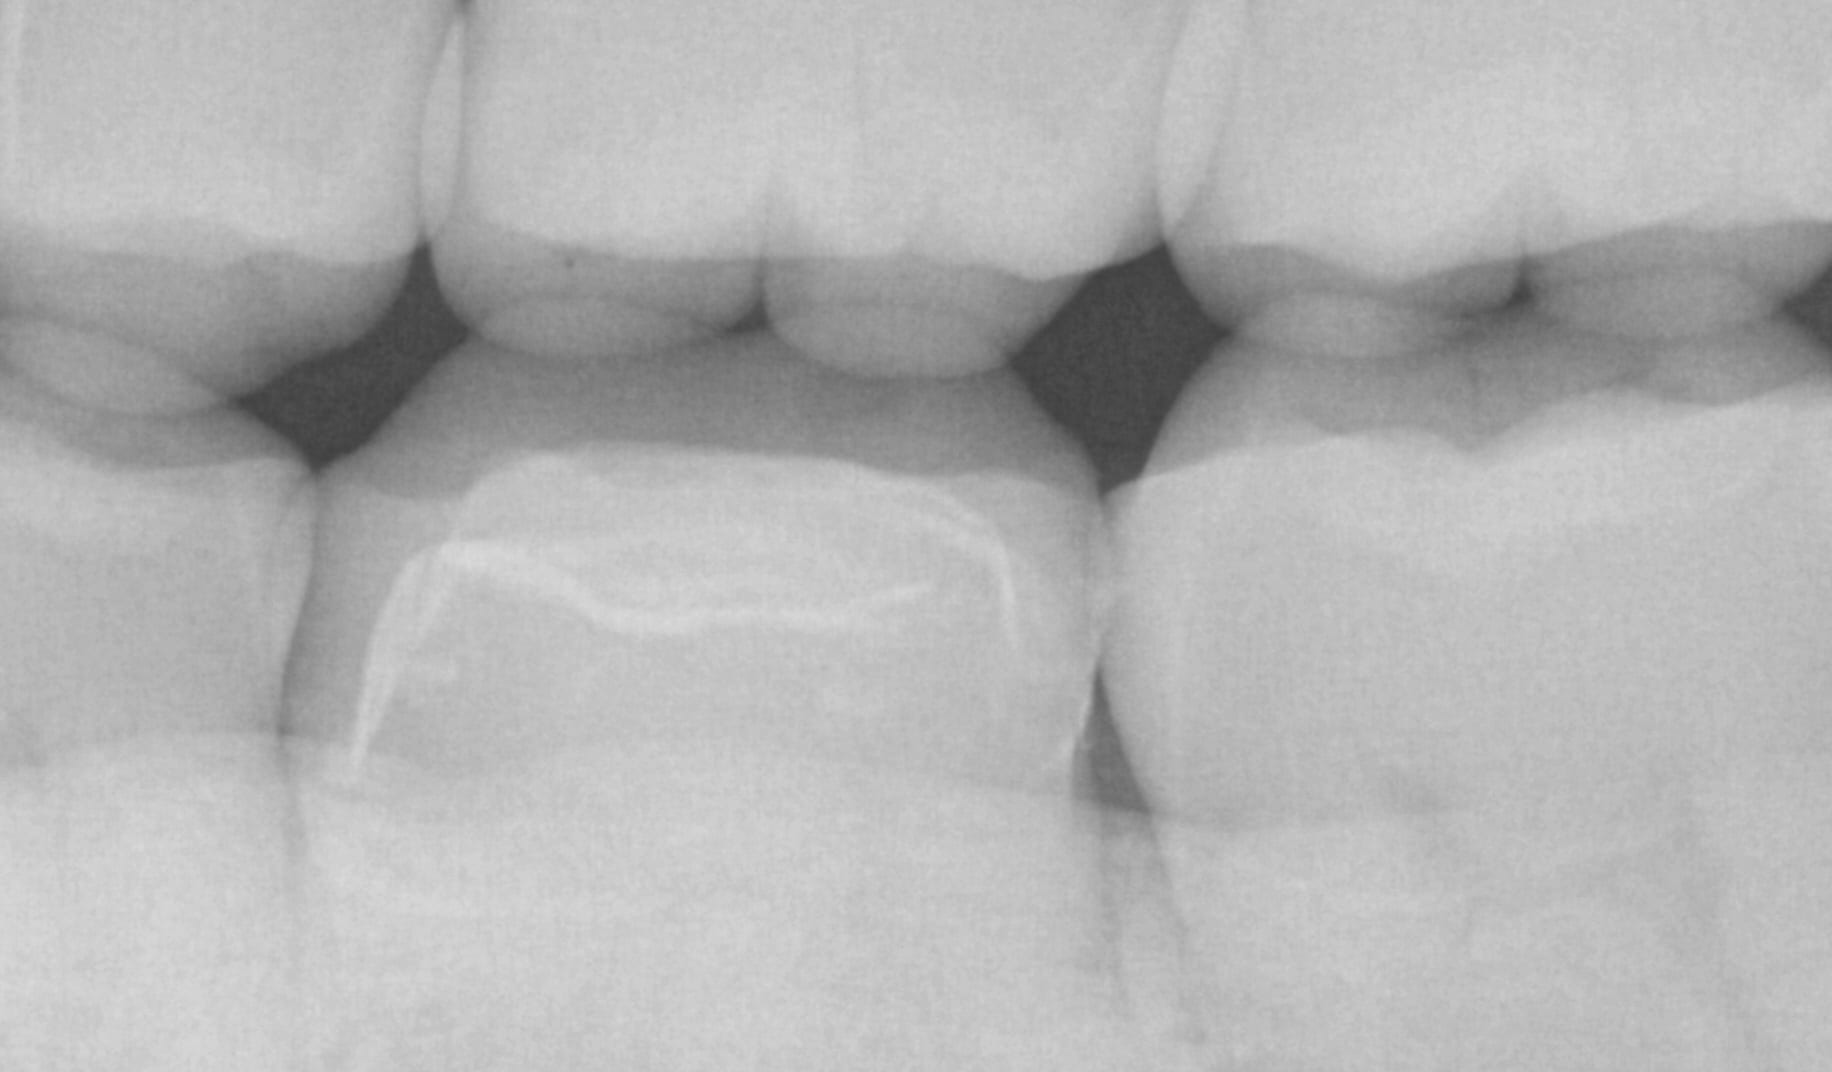
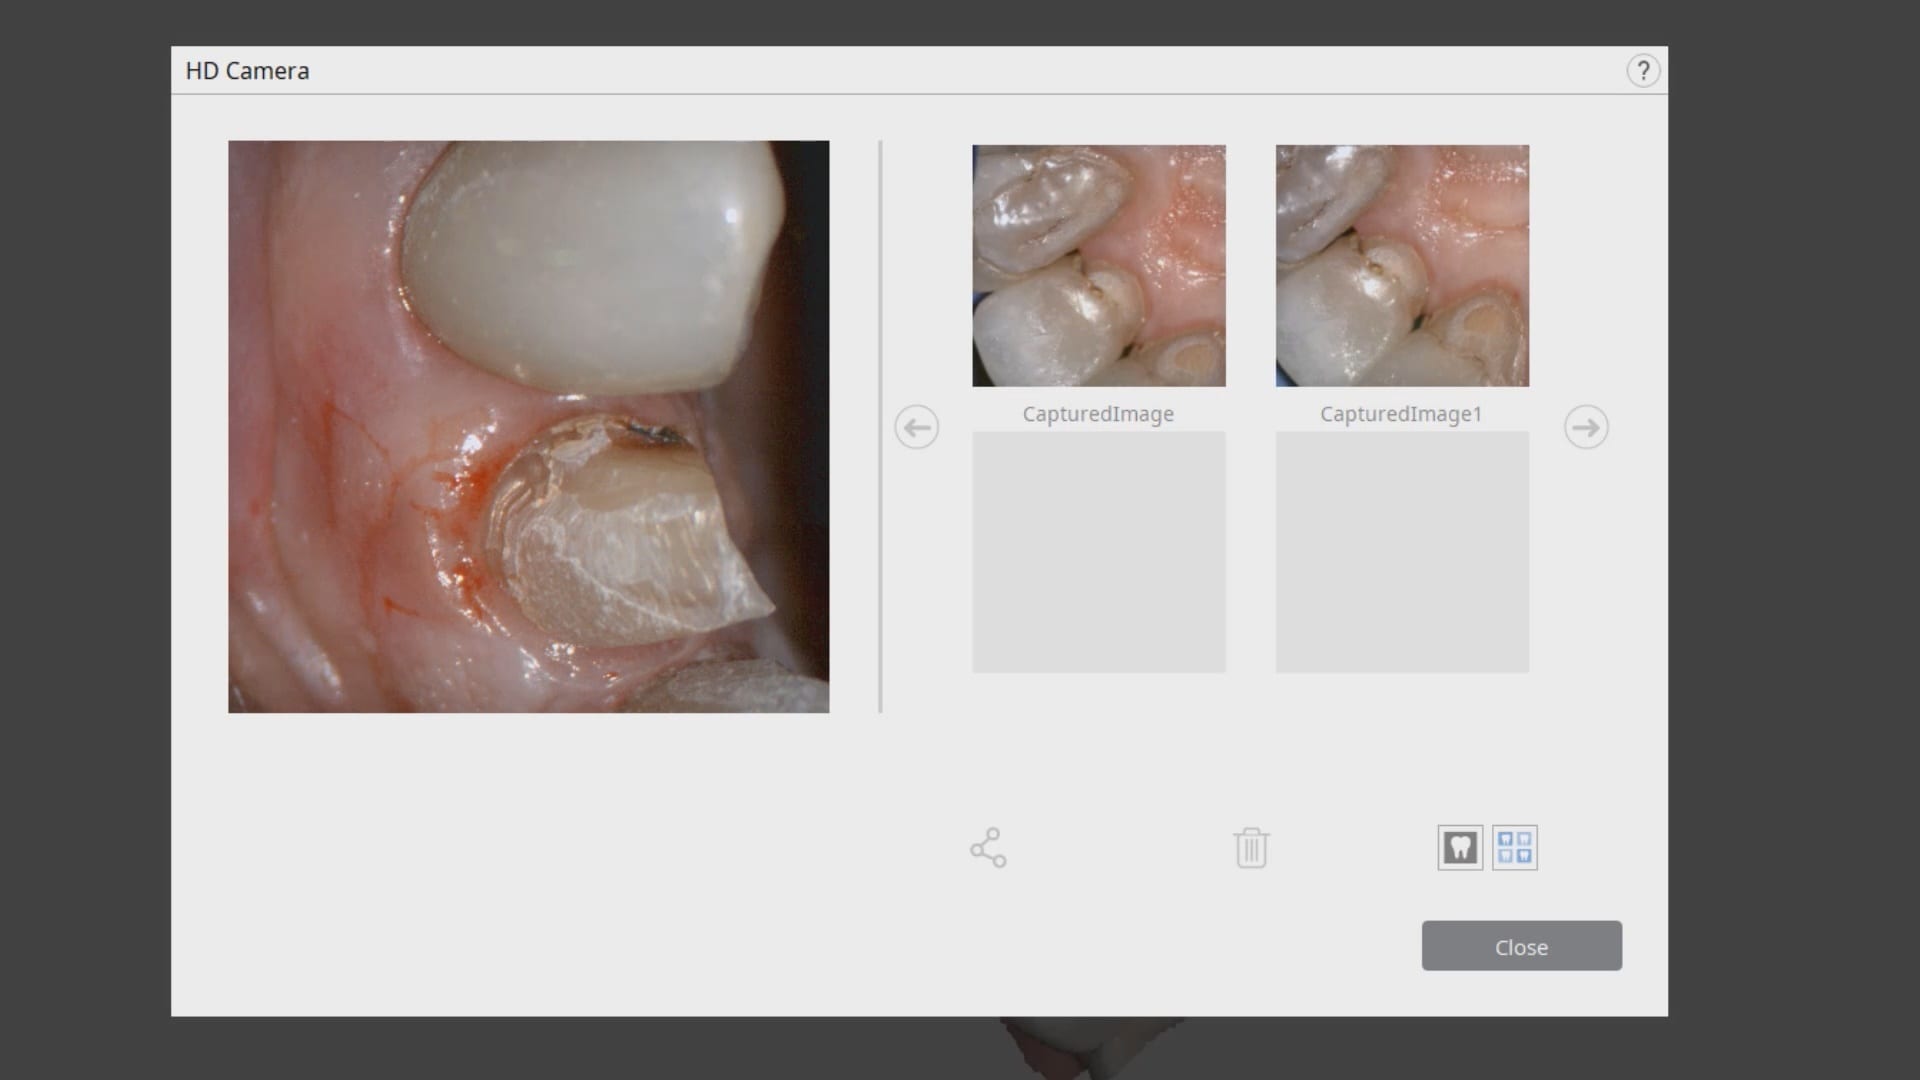
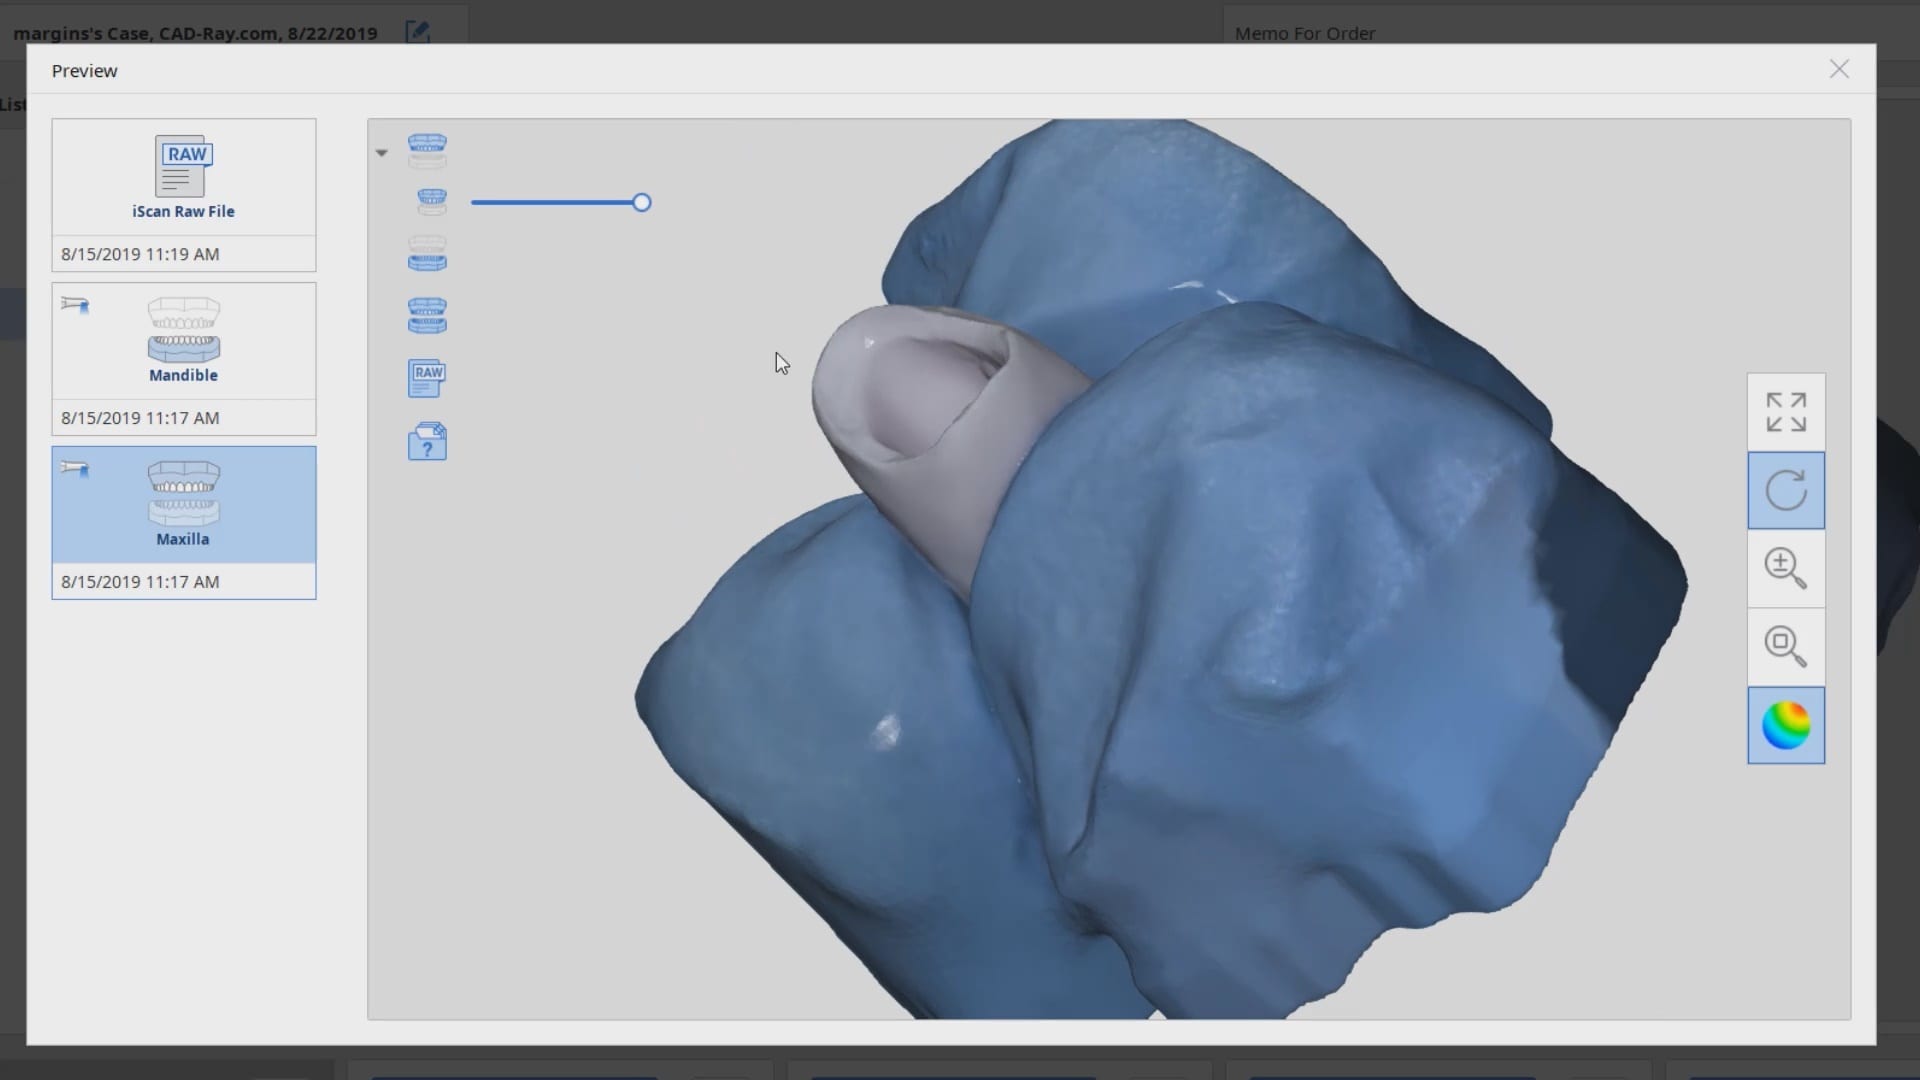
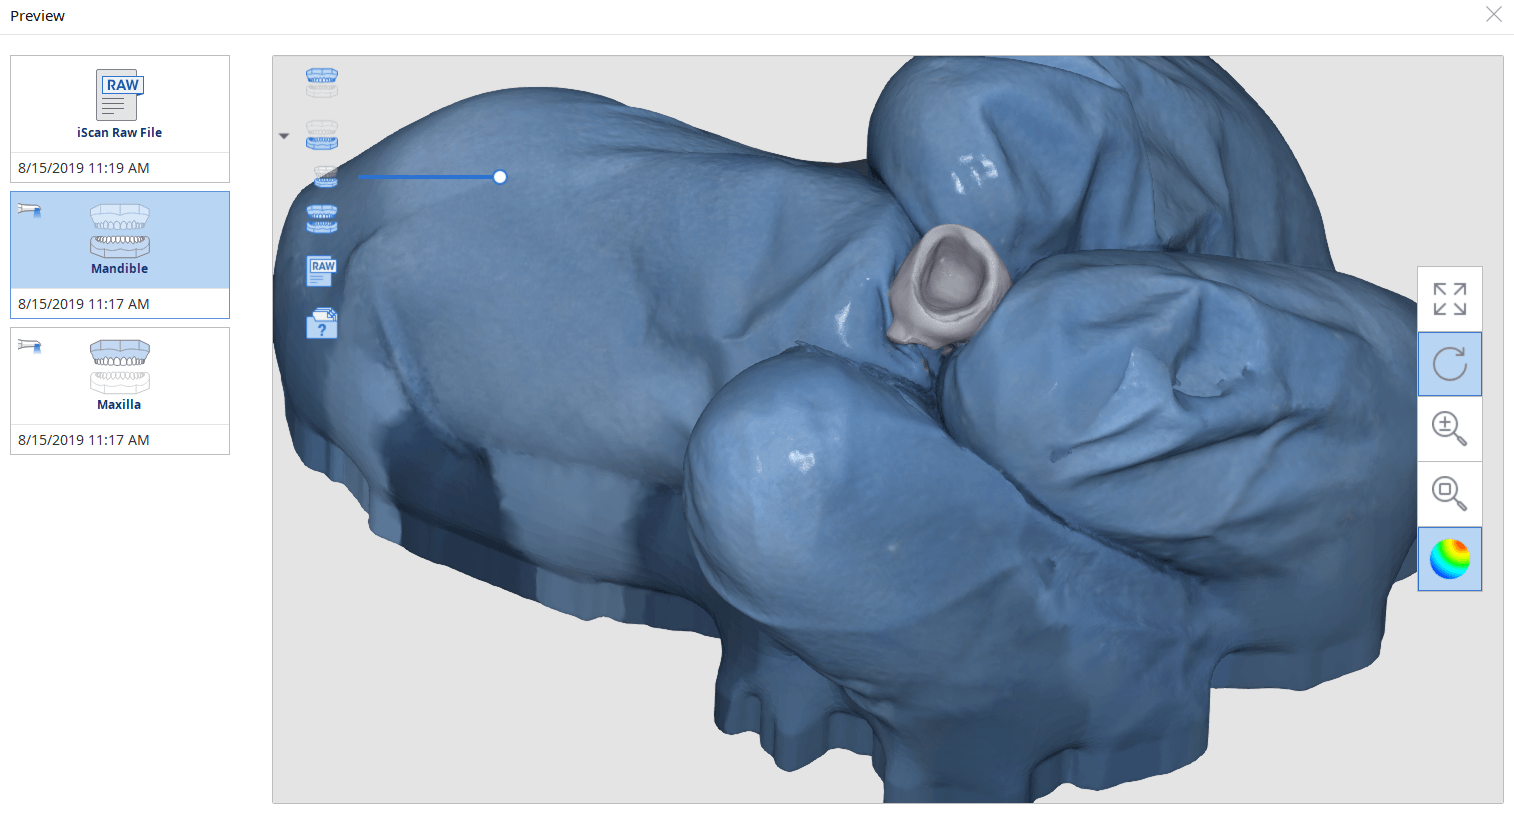
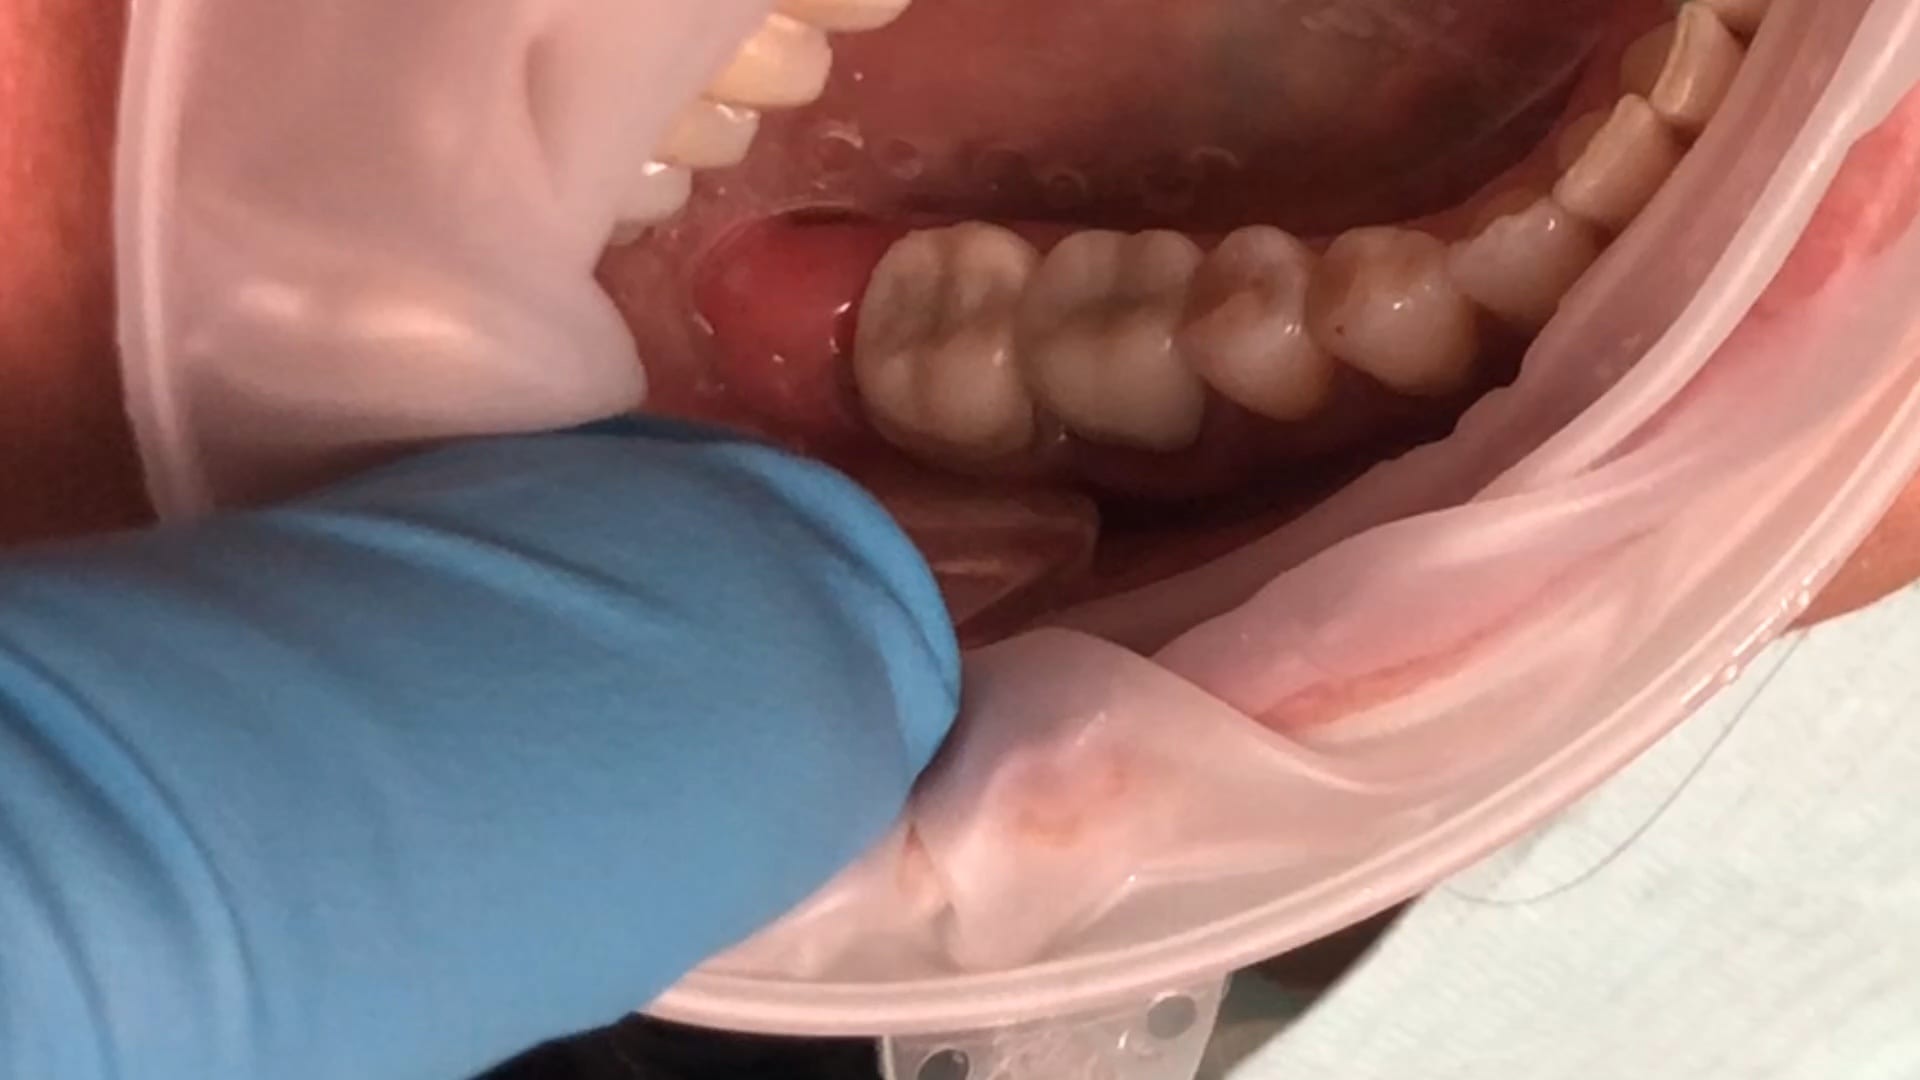
Once the crown is removed, expasyl is packed into the sulcus with a Number 2 cord. With the pre-op bitewings X-ray it was readily apparent that the tissue should be positively displaced in order to capture the margins. It took two layers of cord to achieve hemostasis for imaging with the Medit i500.

video
play-rounded-fill

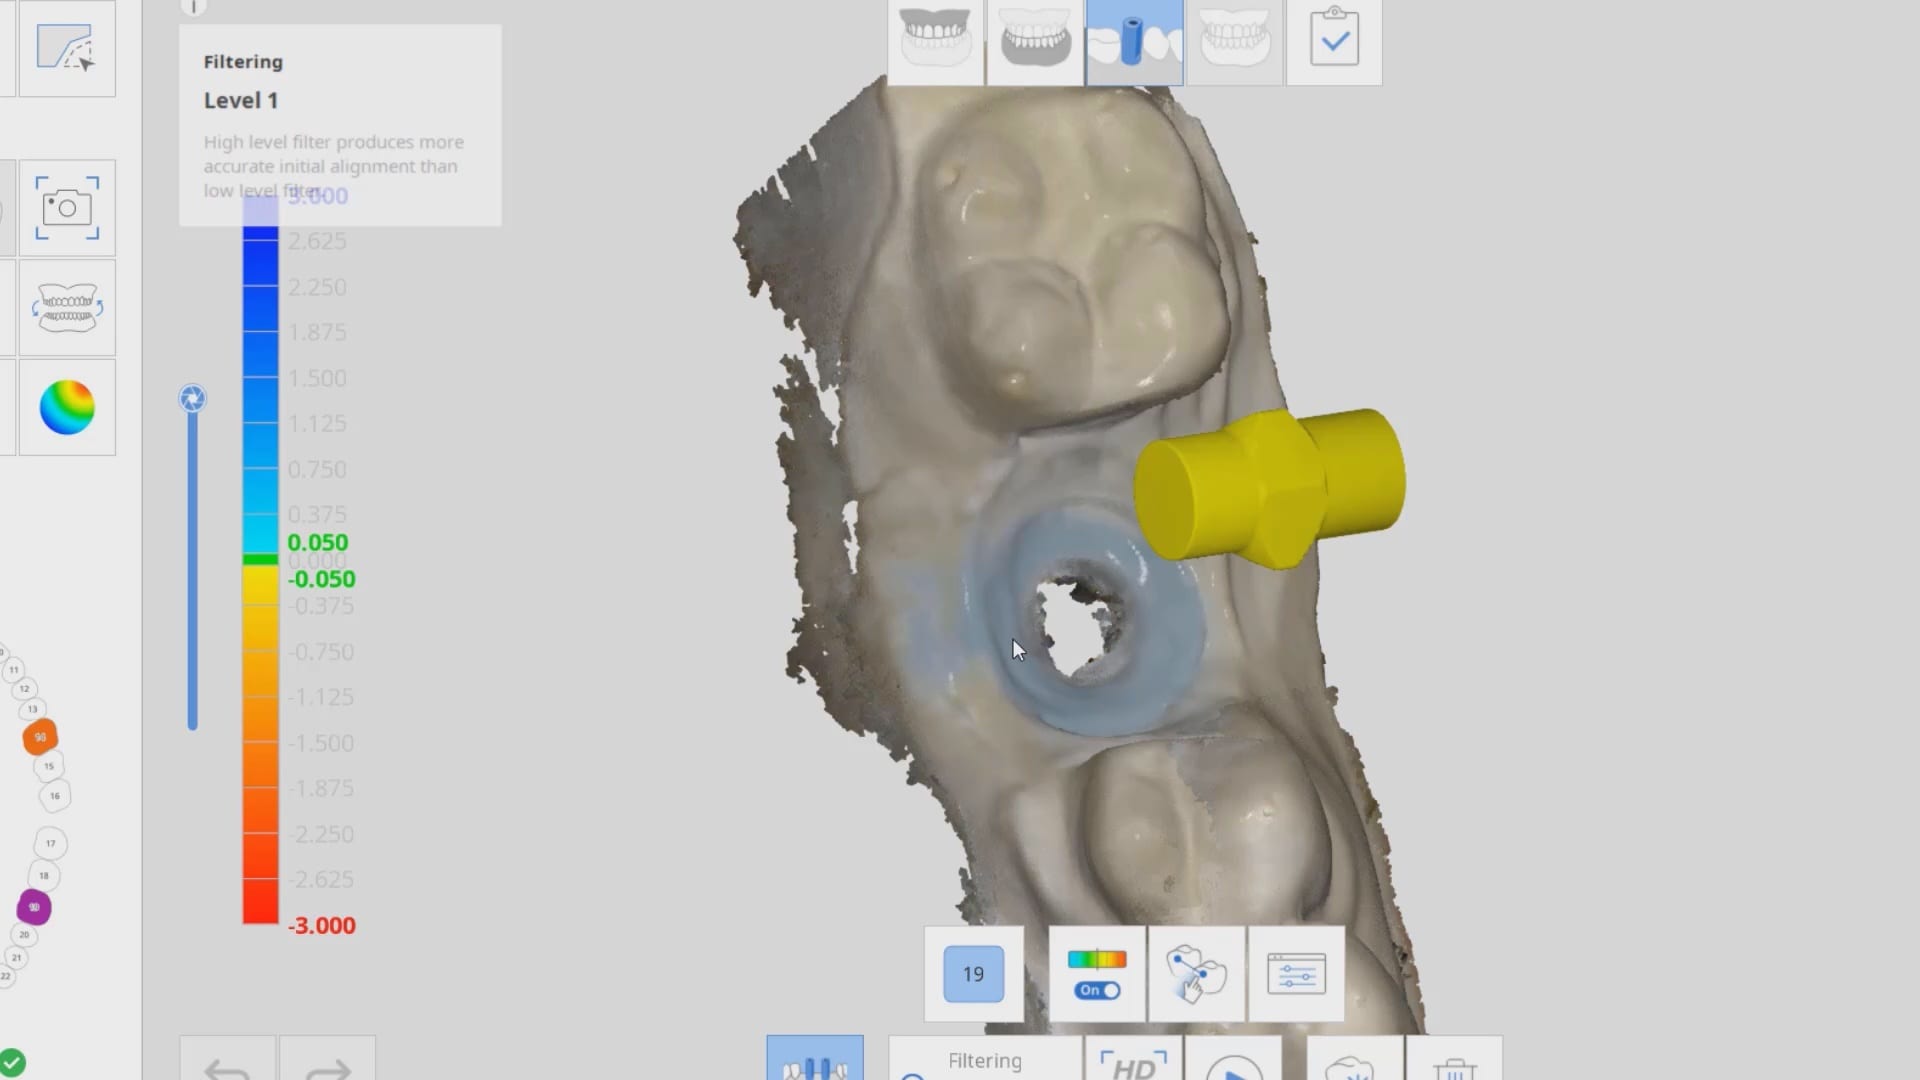
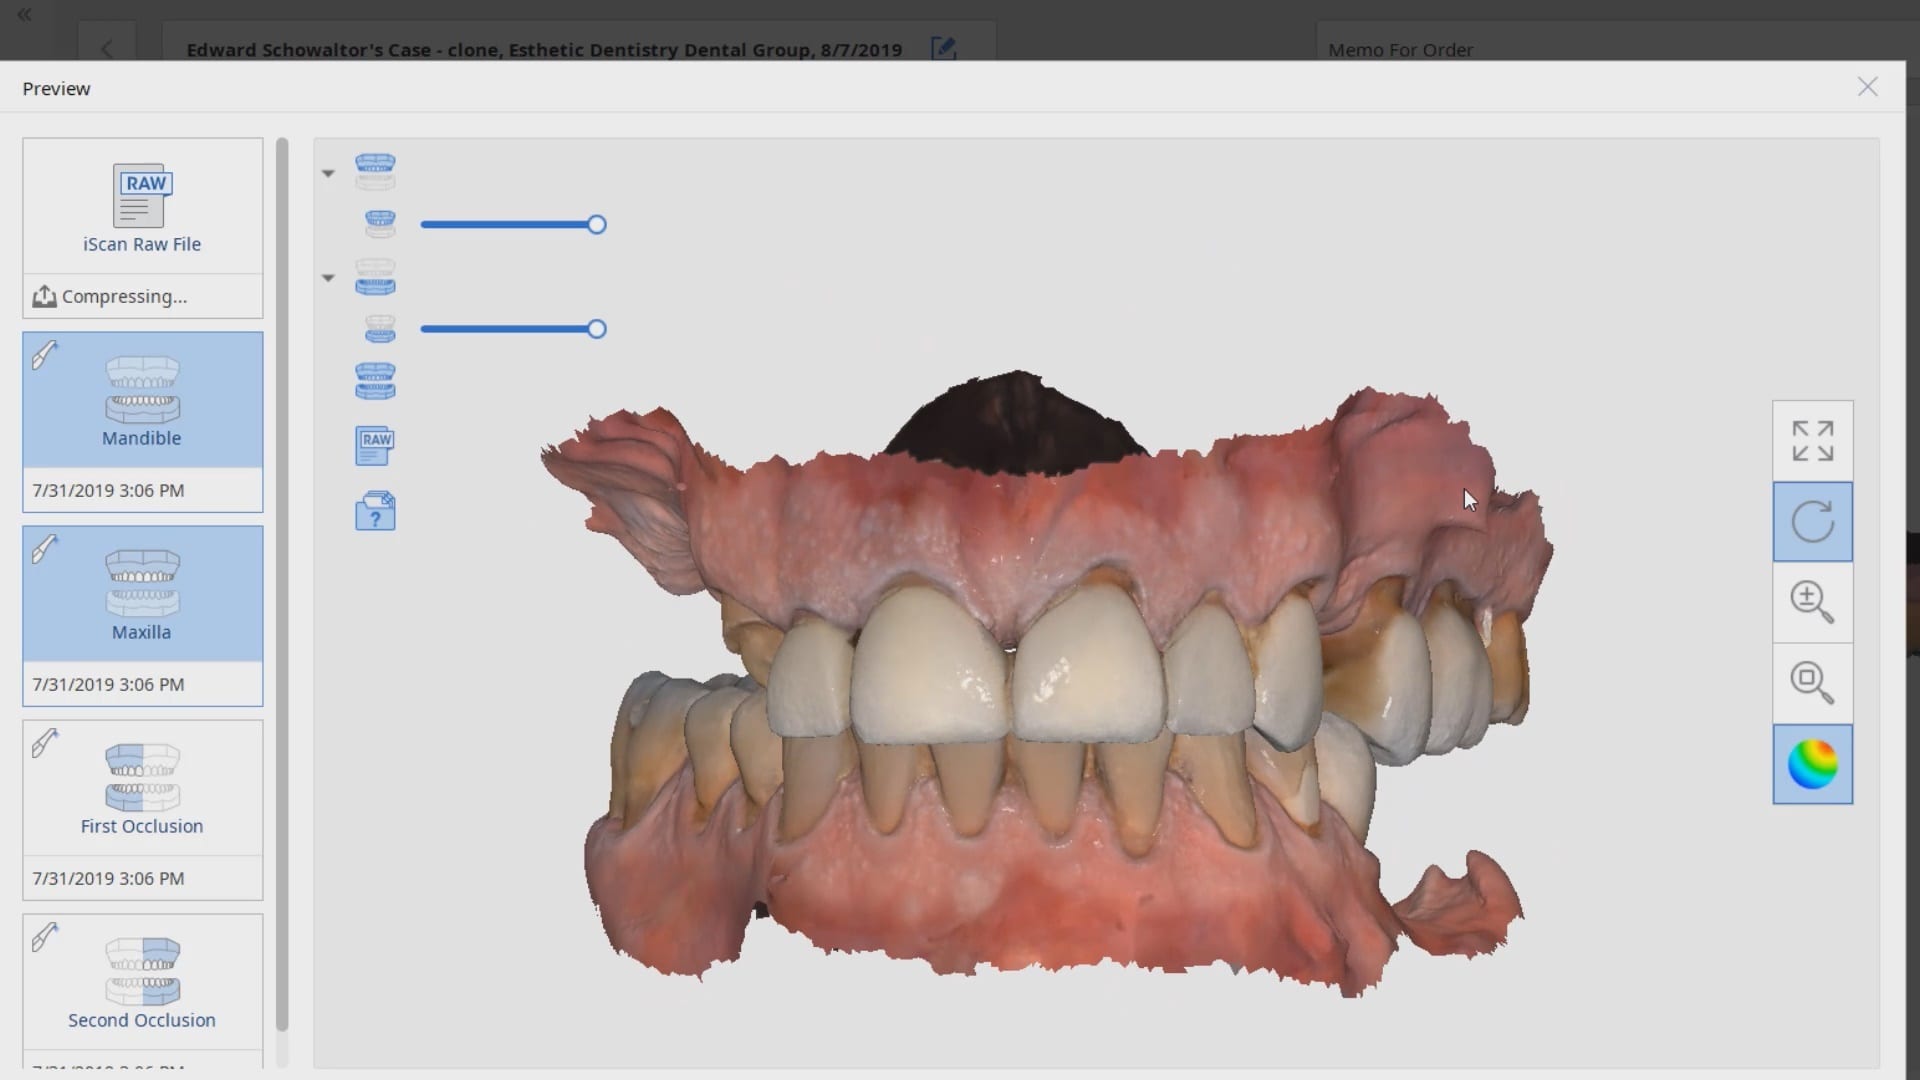
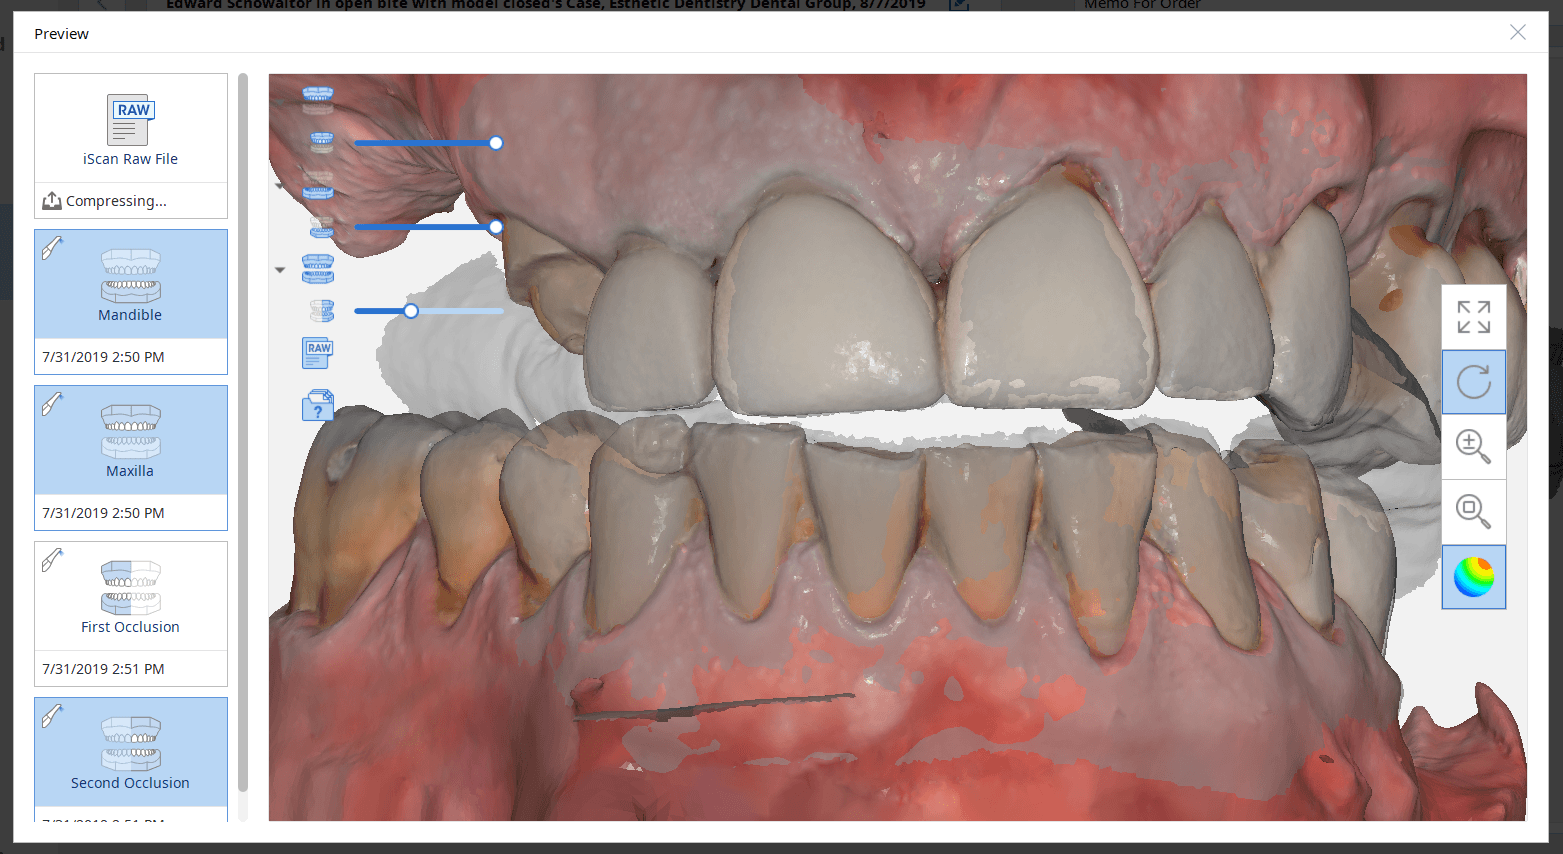
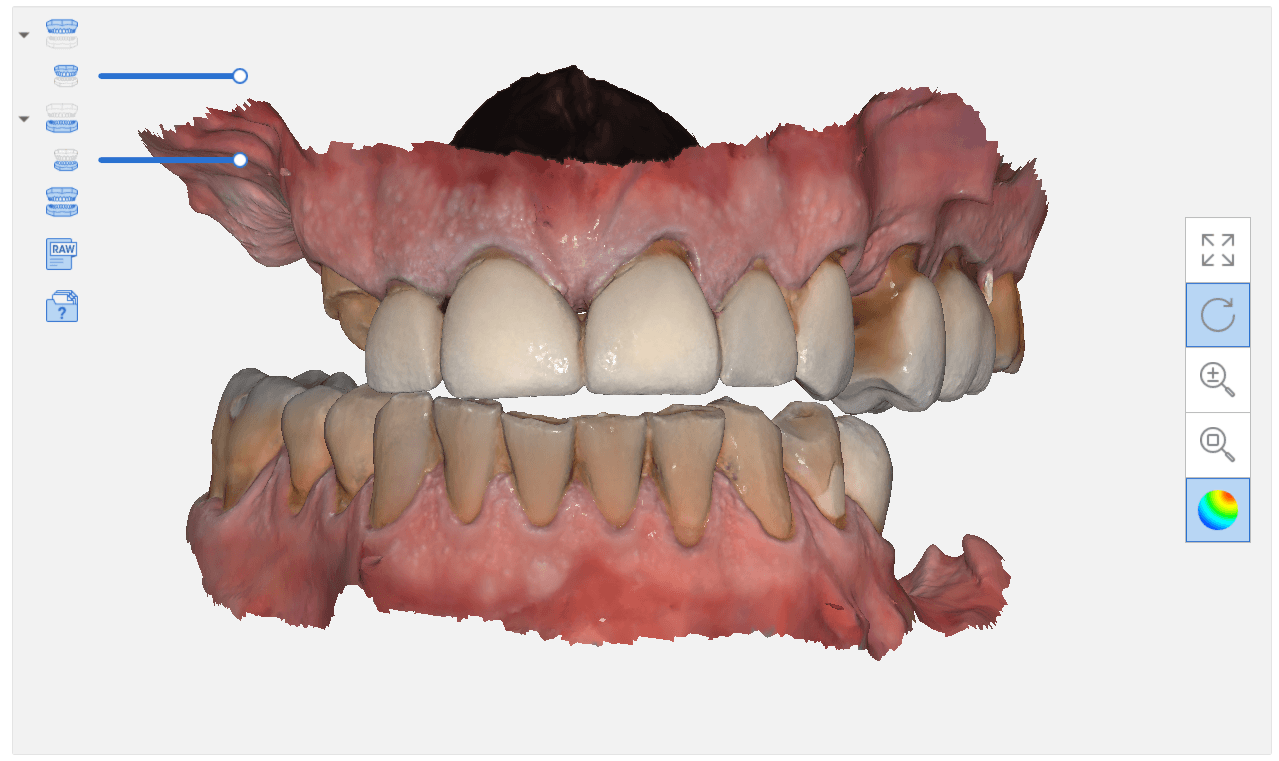
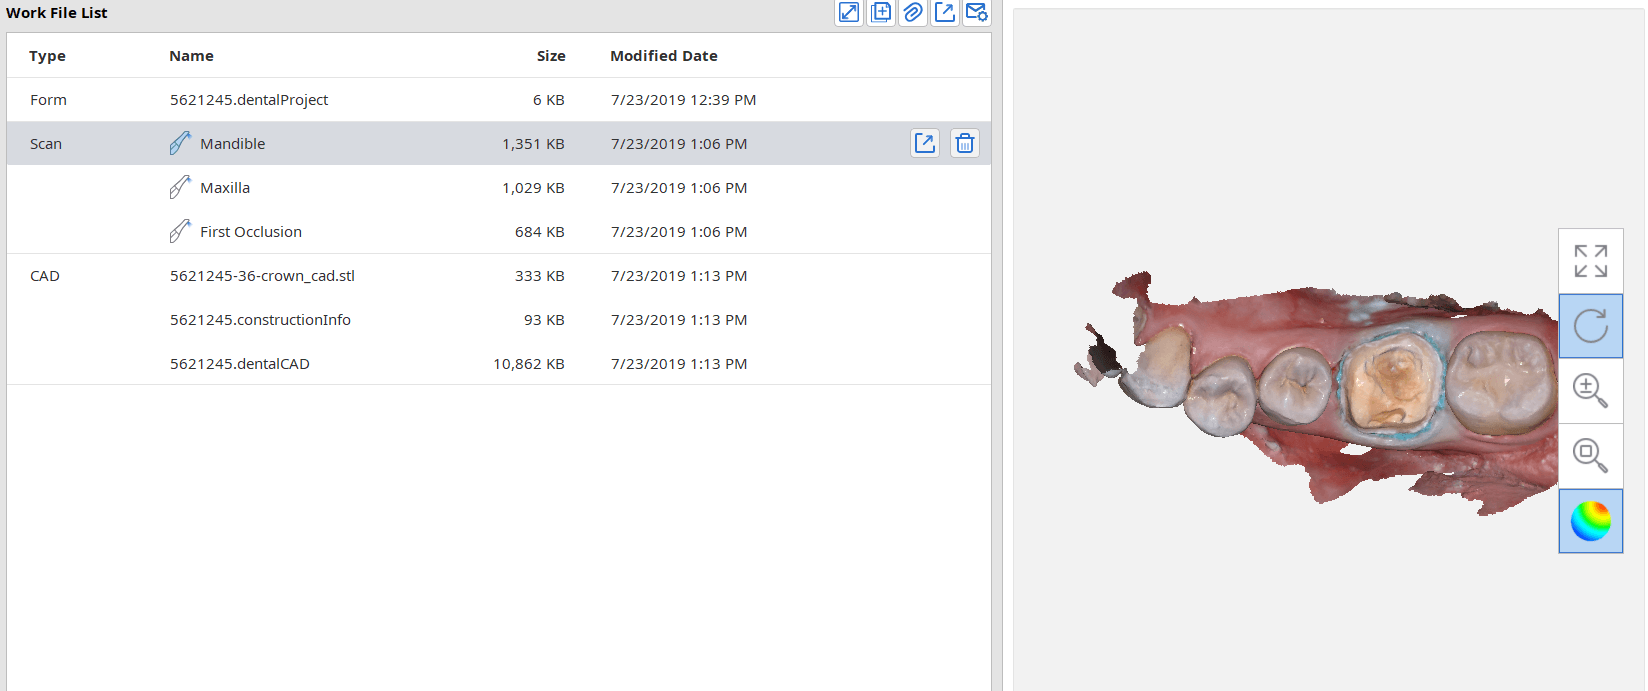
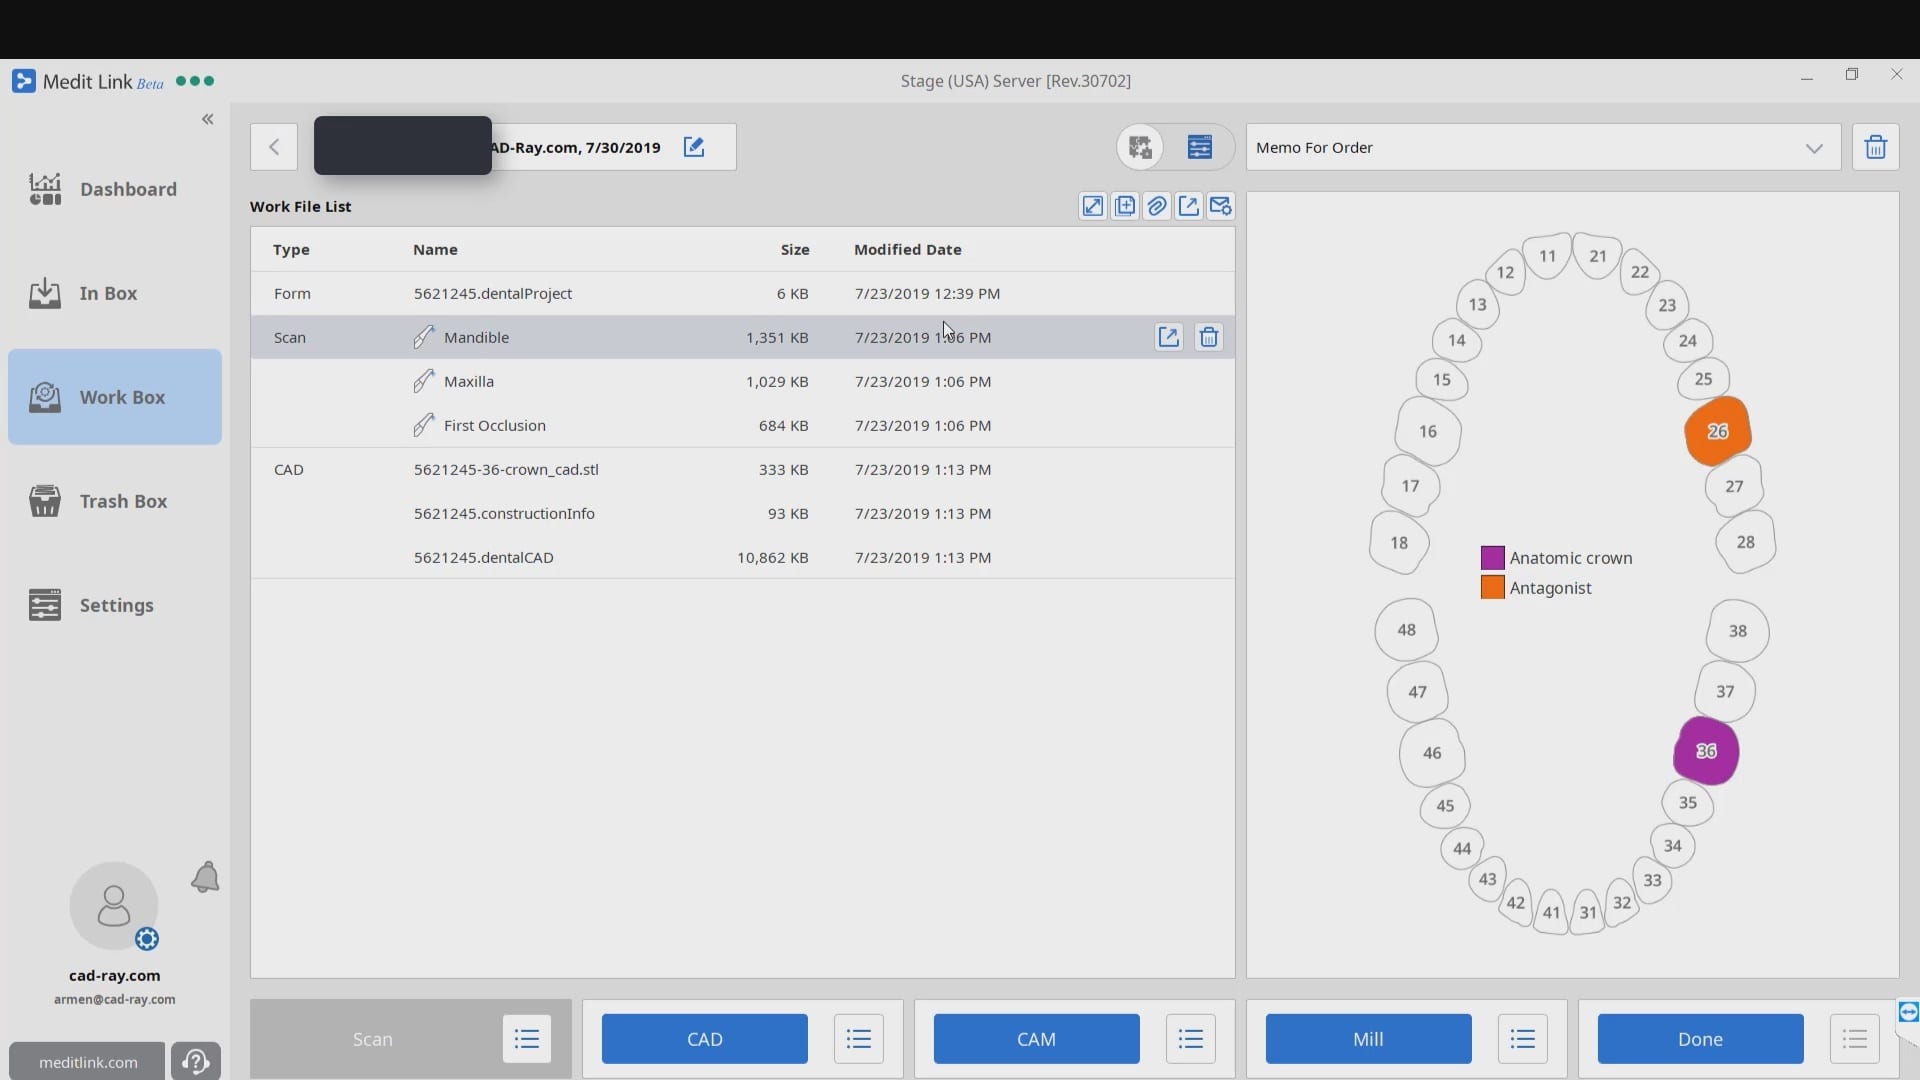
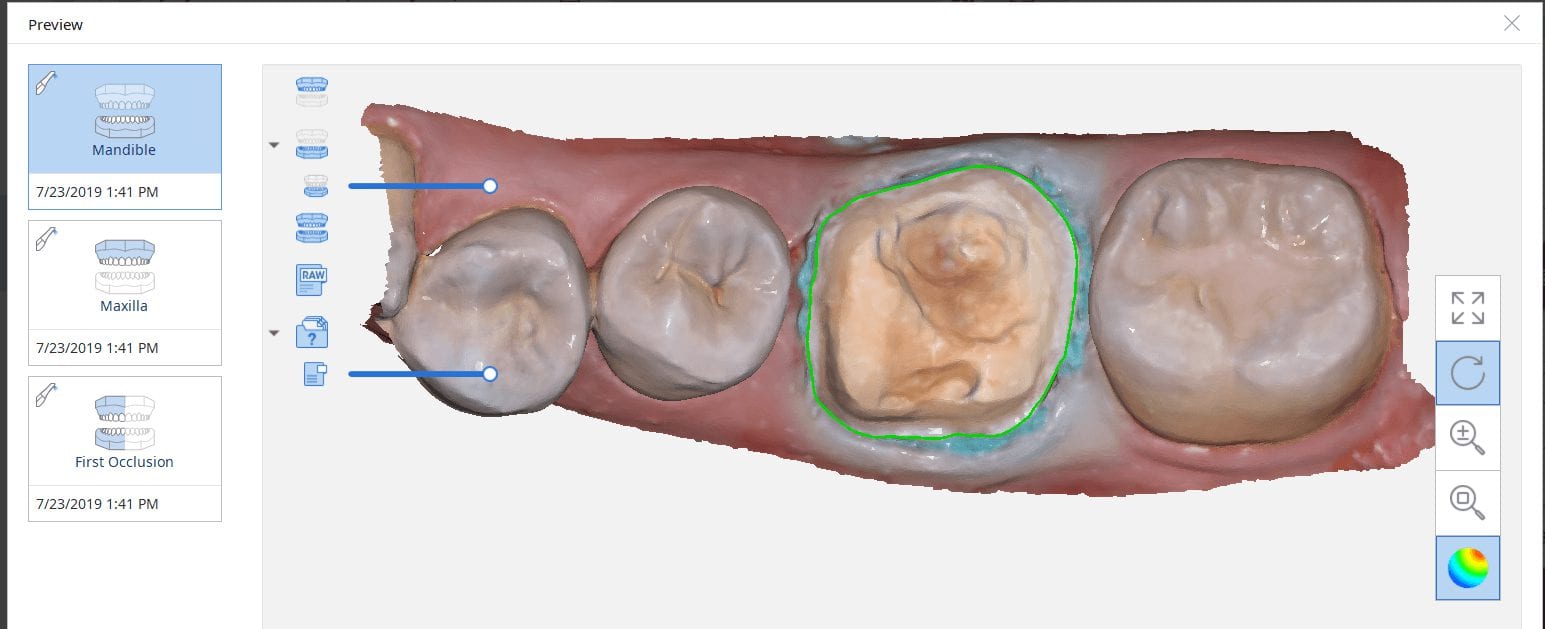
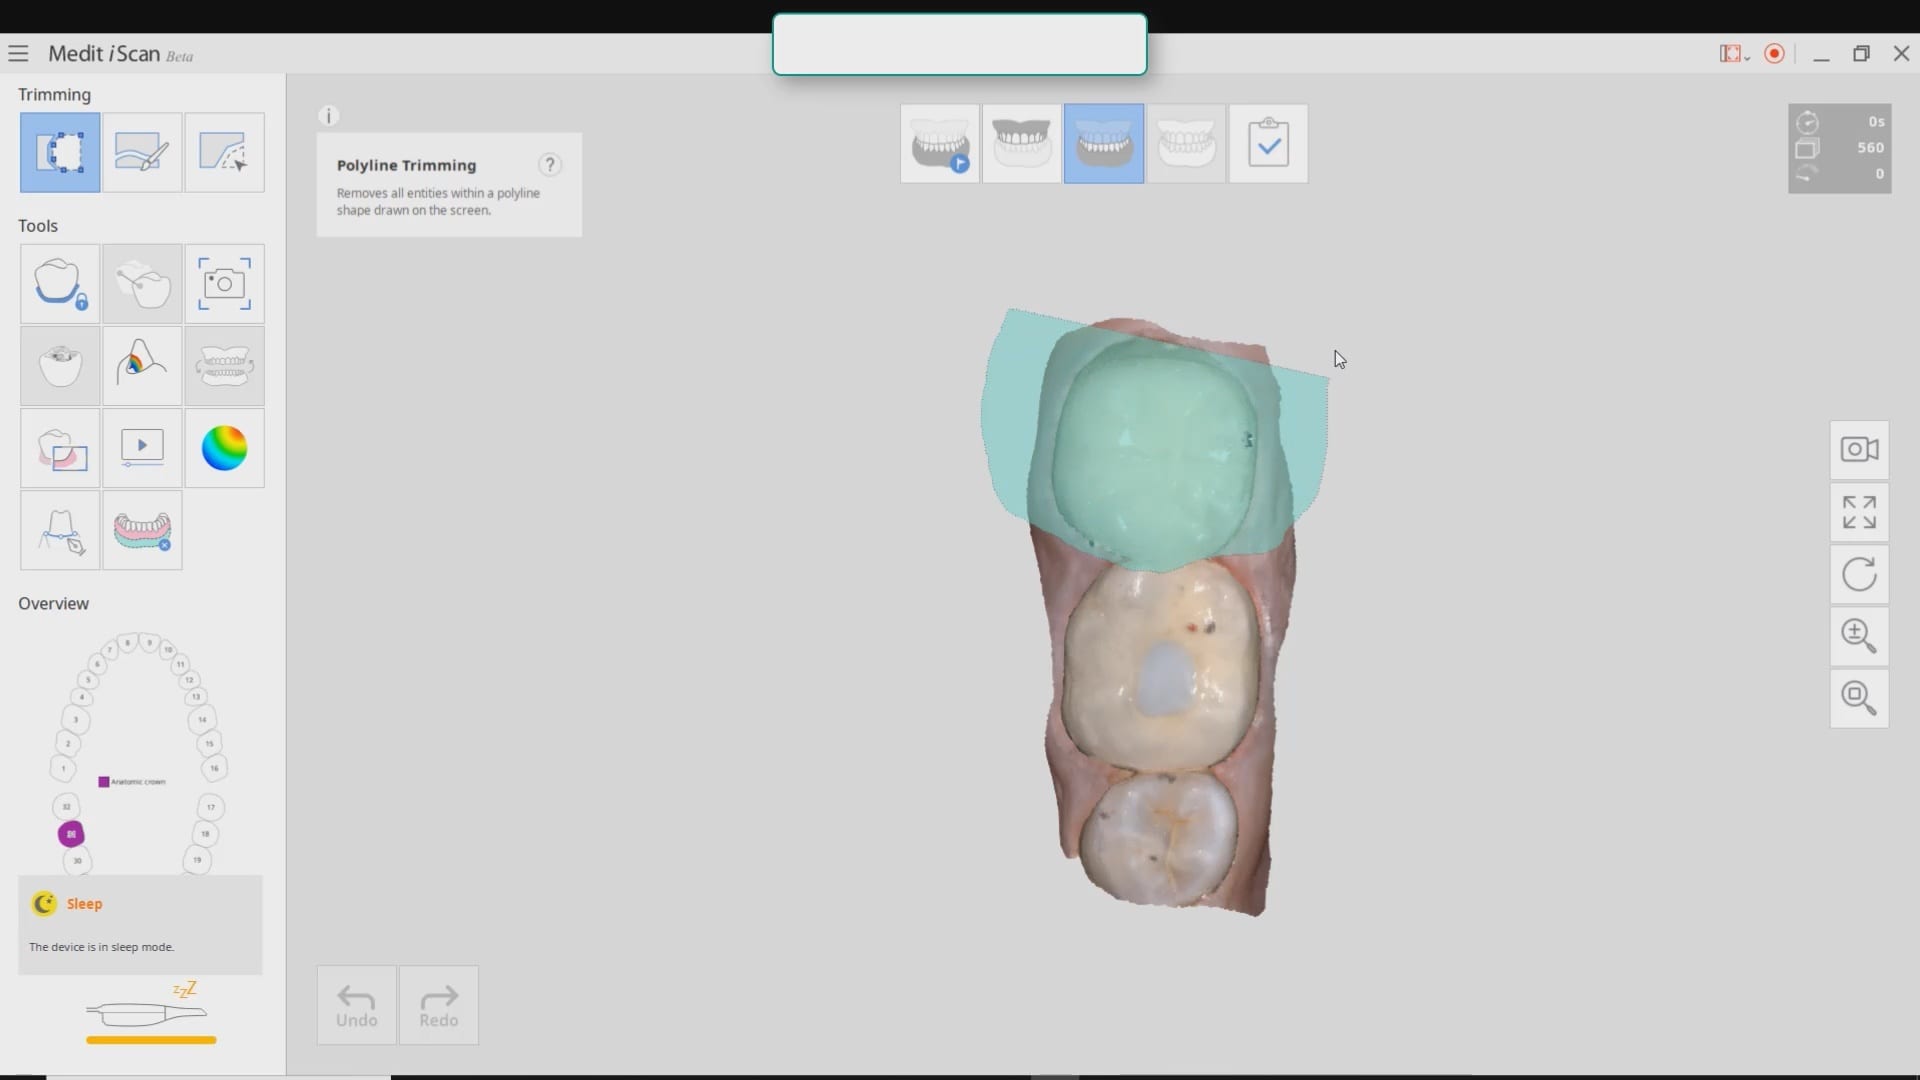
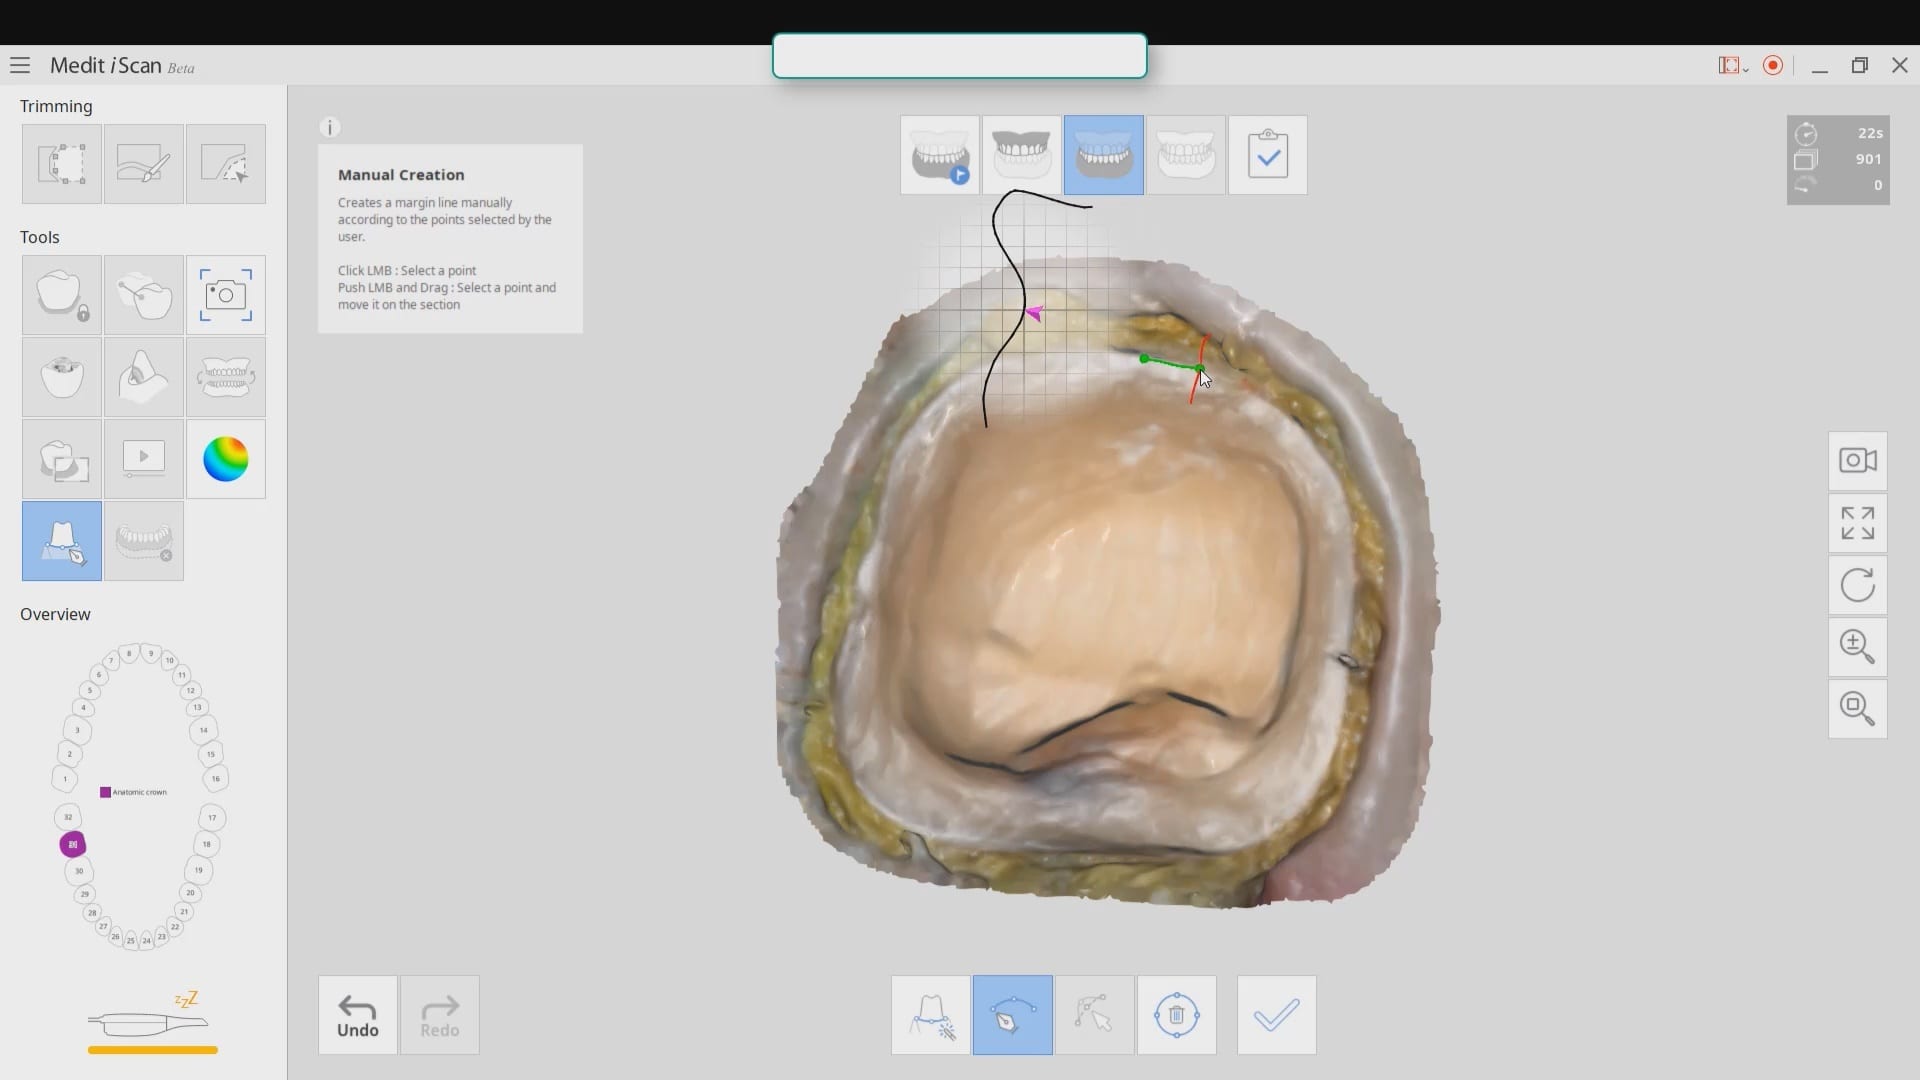
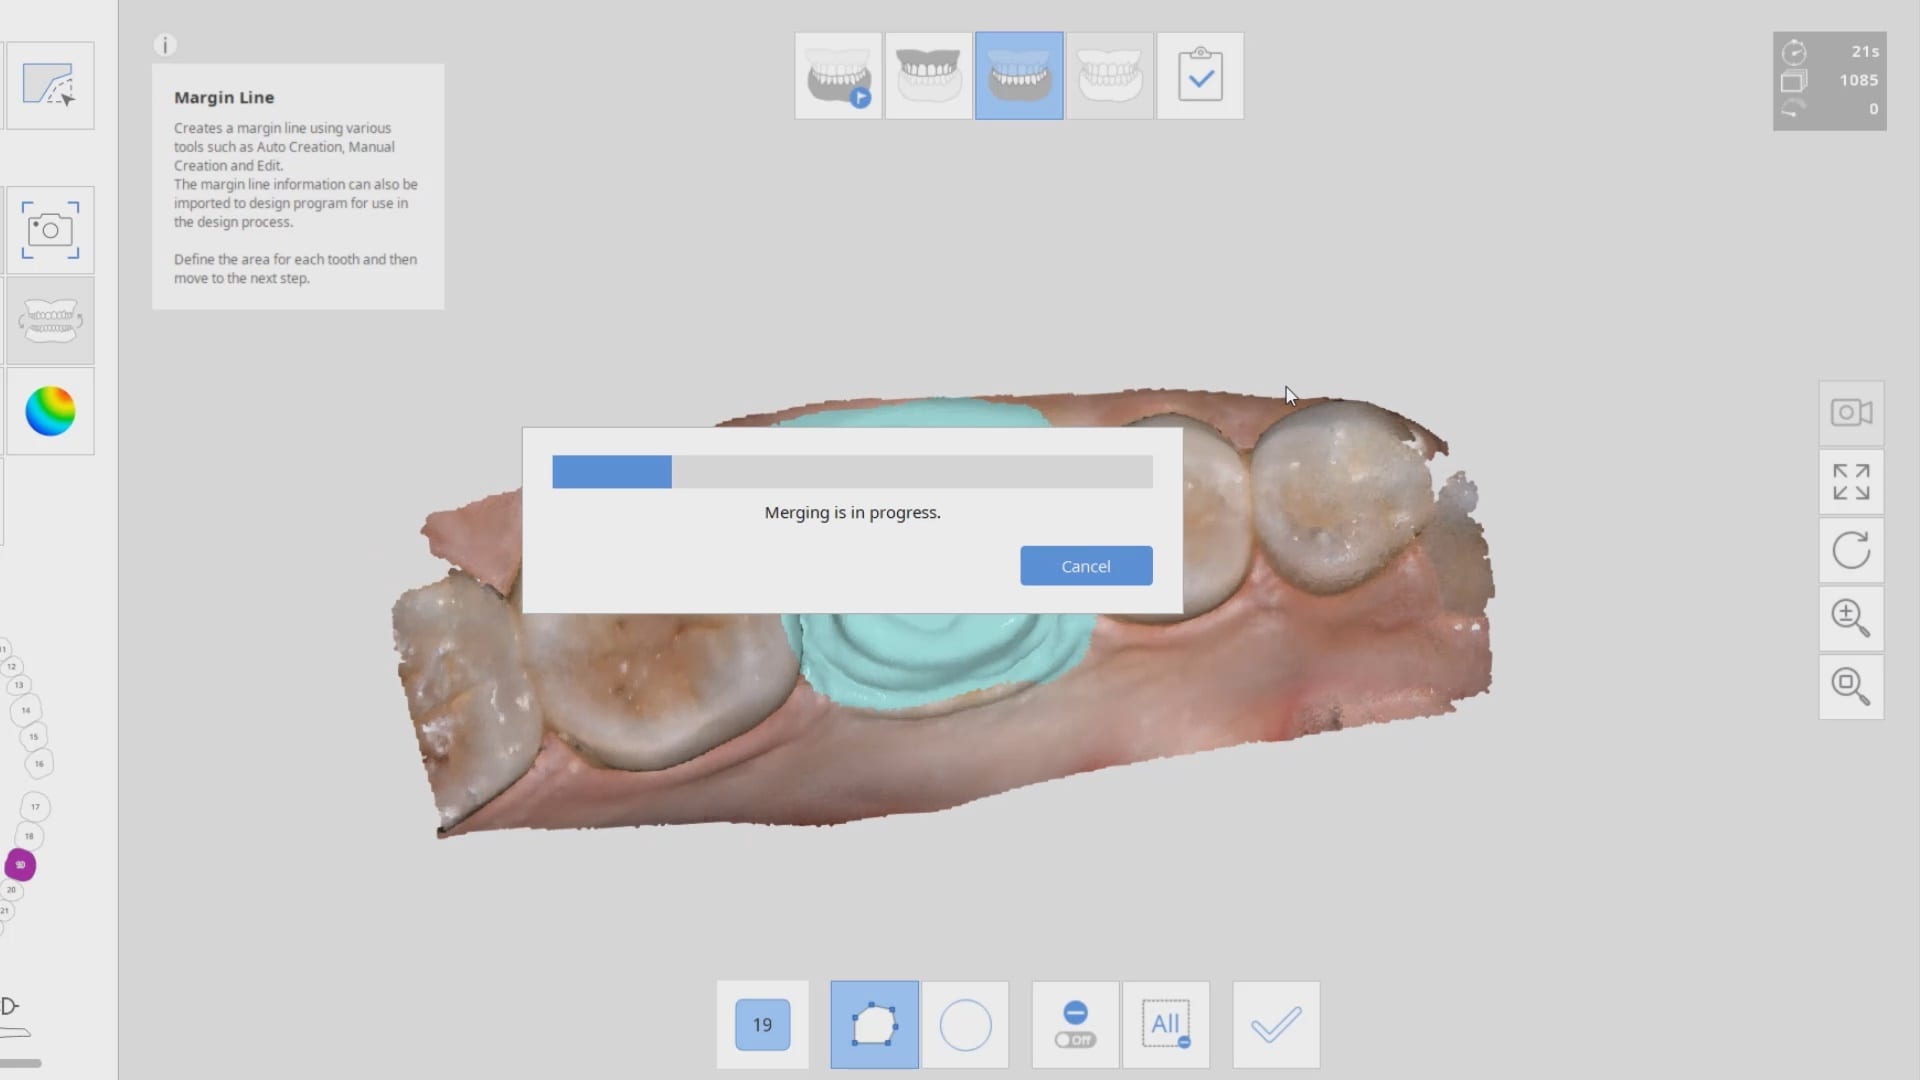
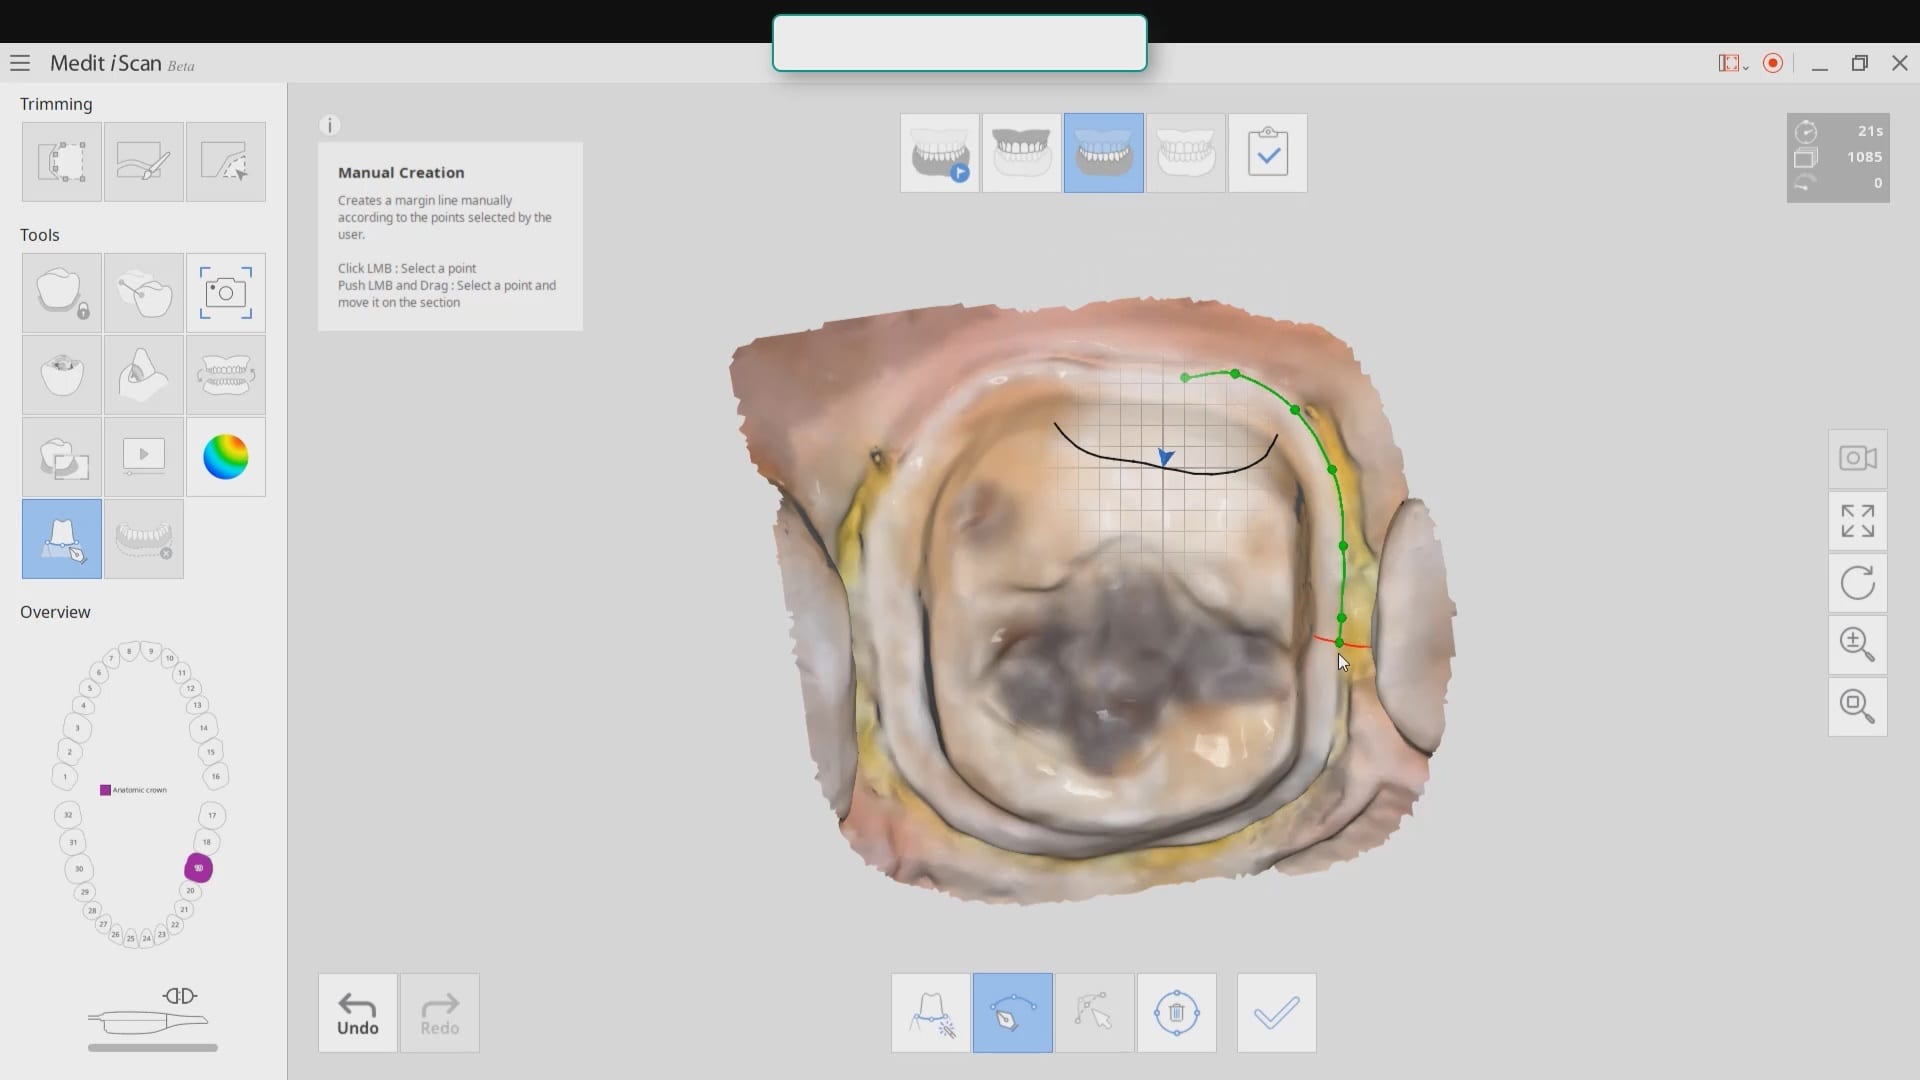
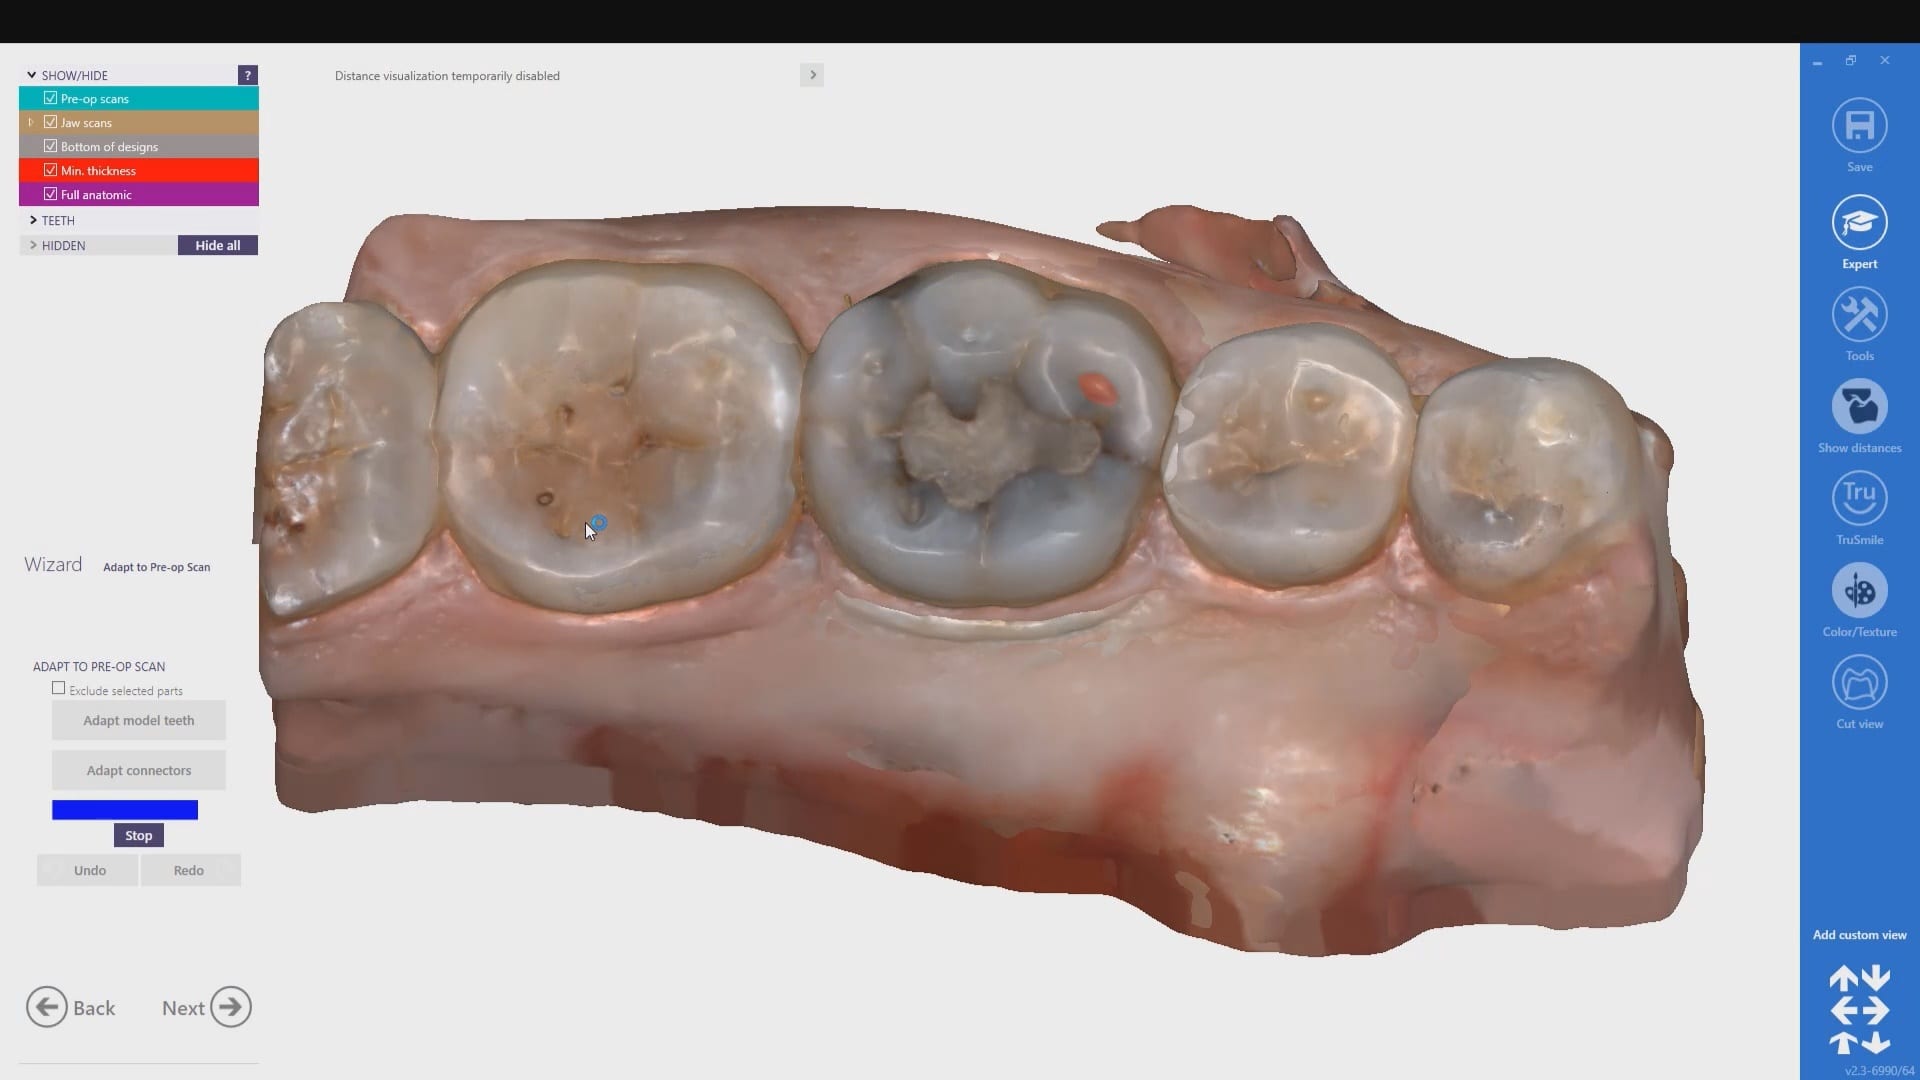
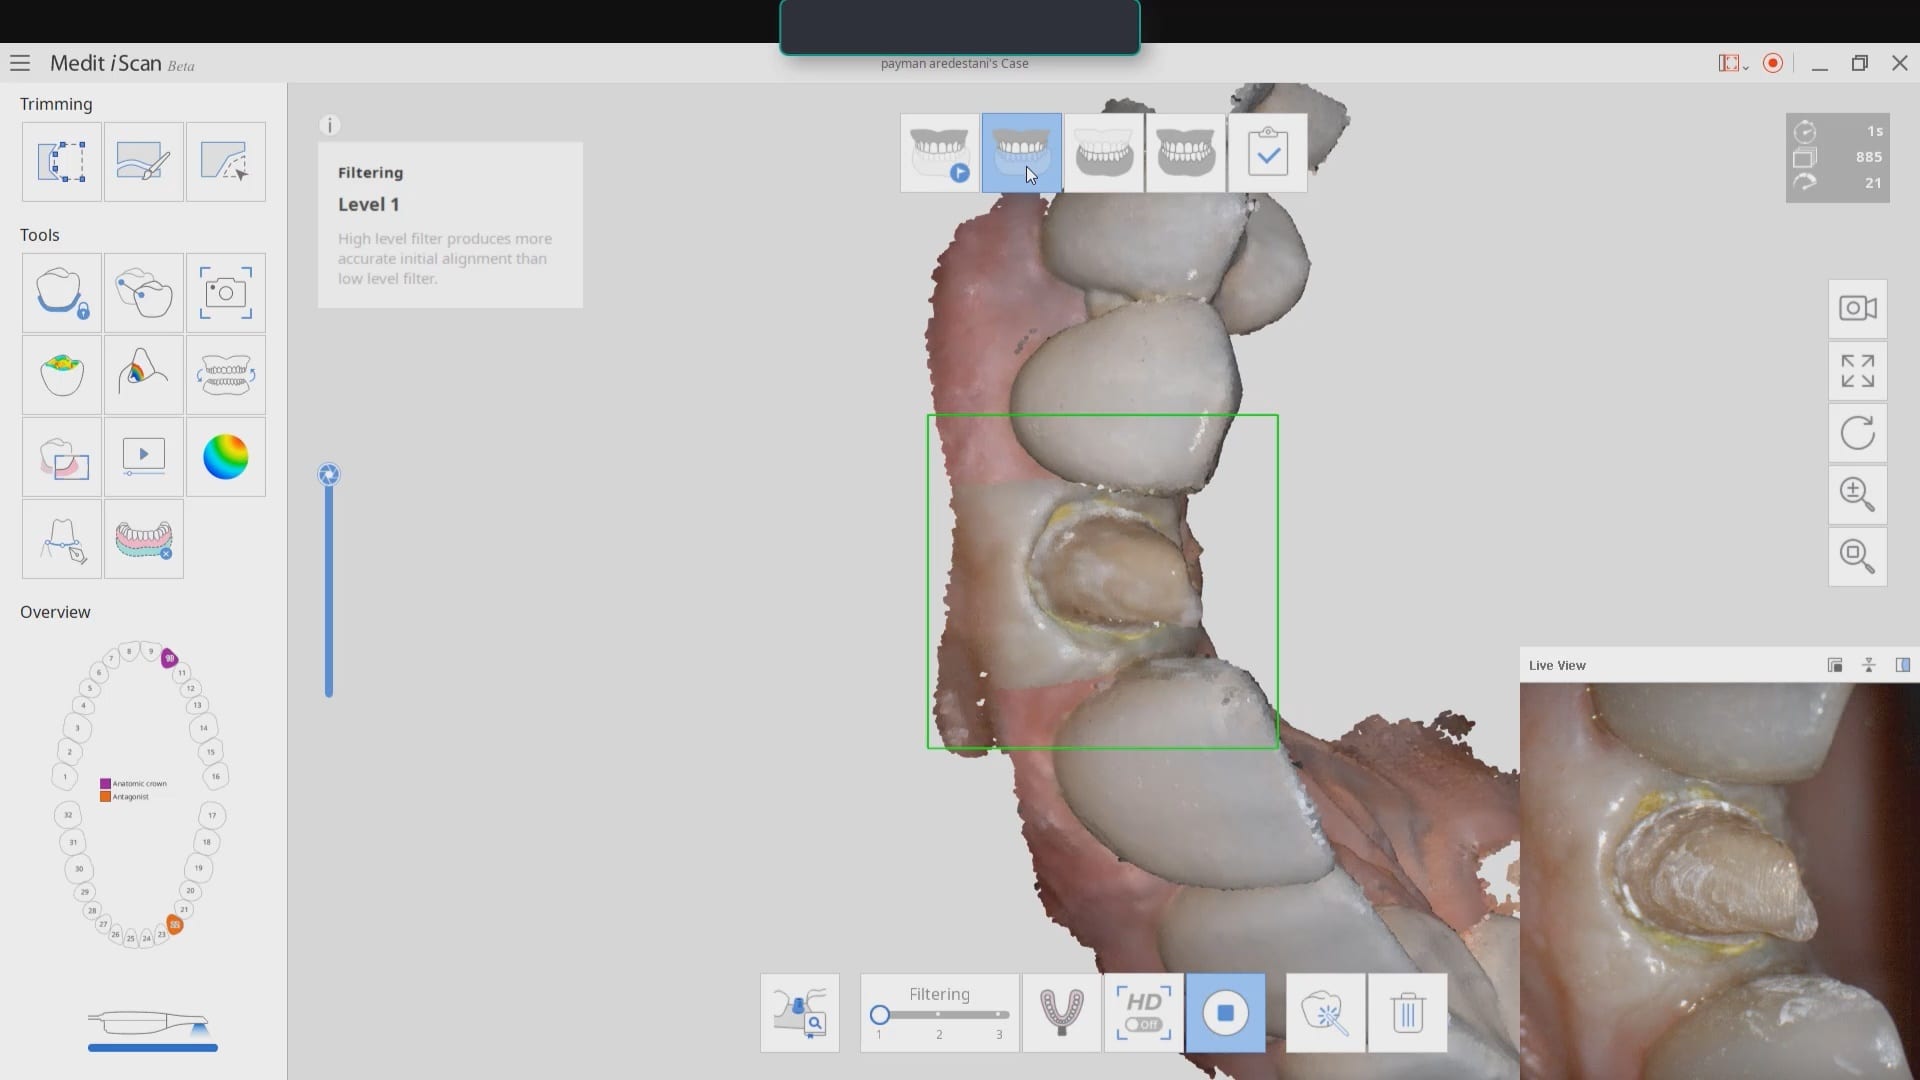
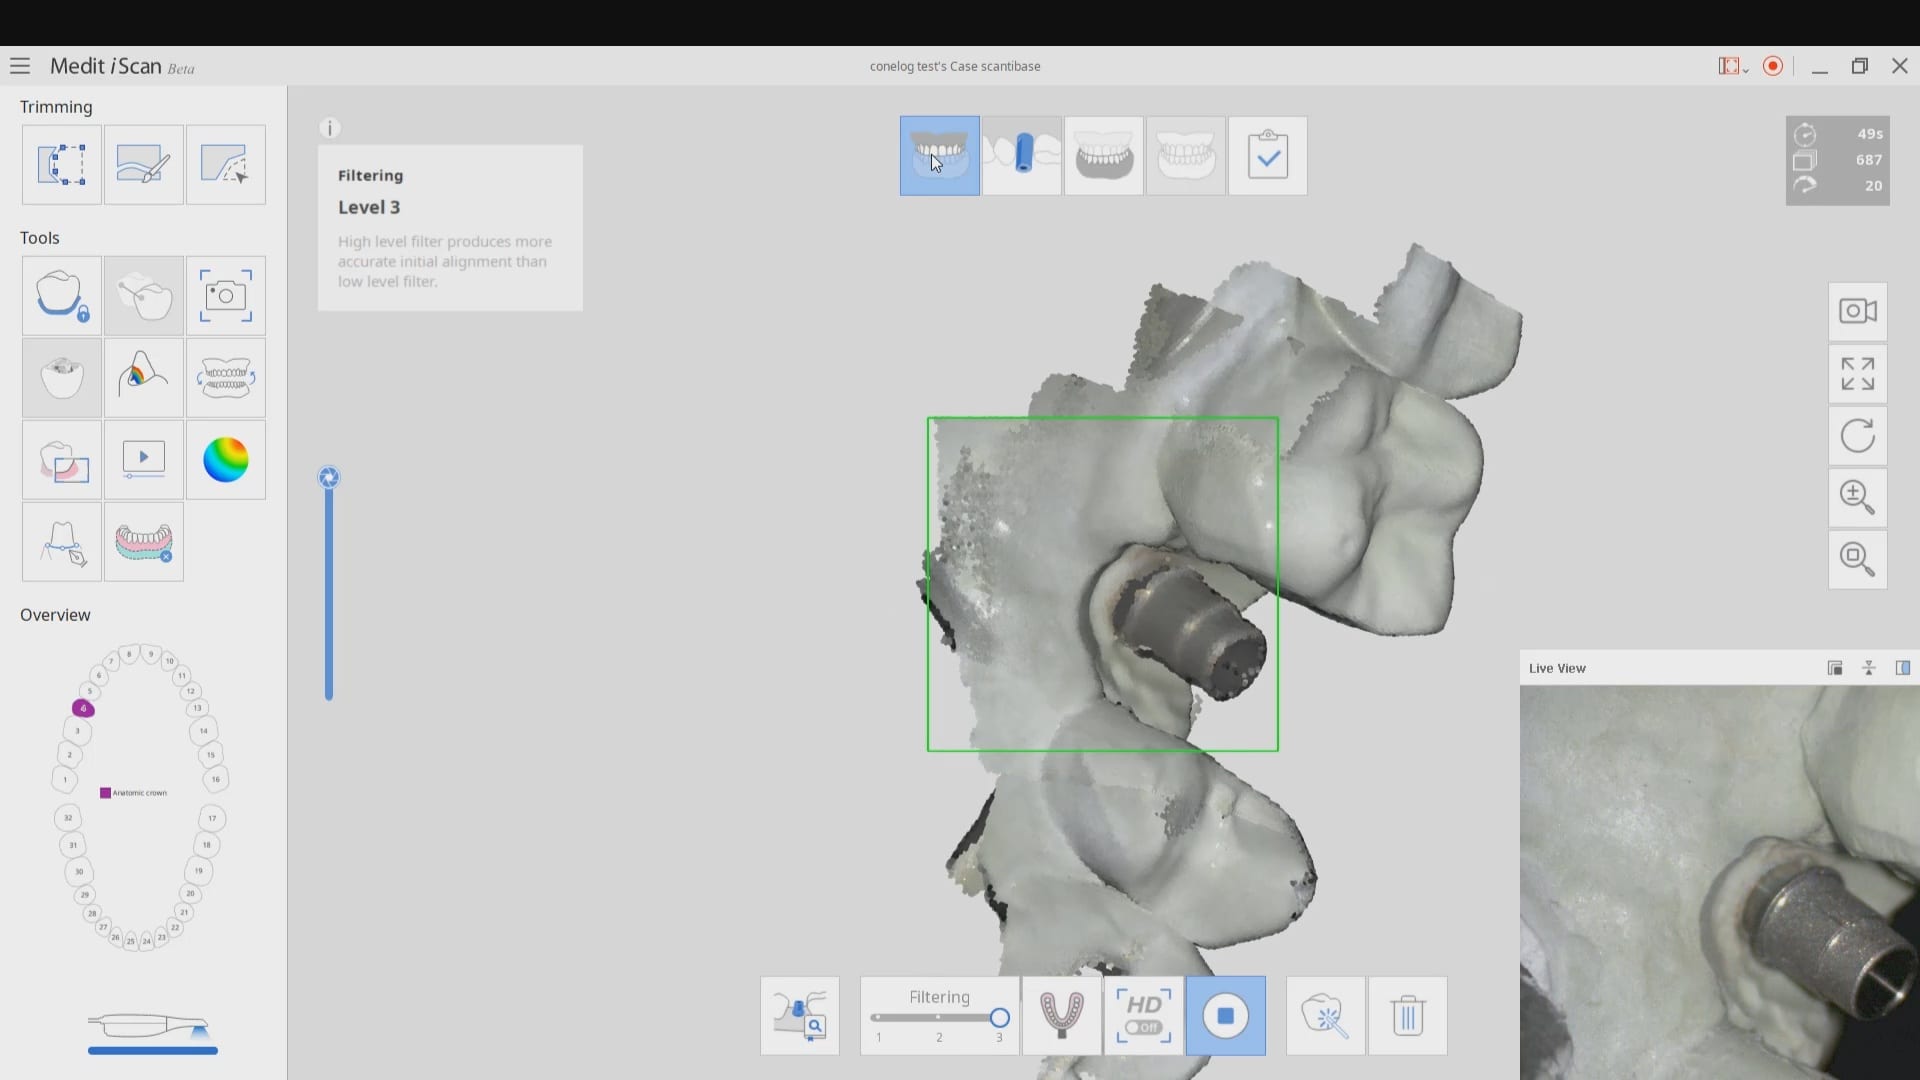
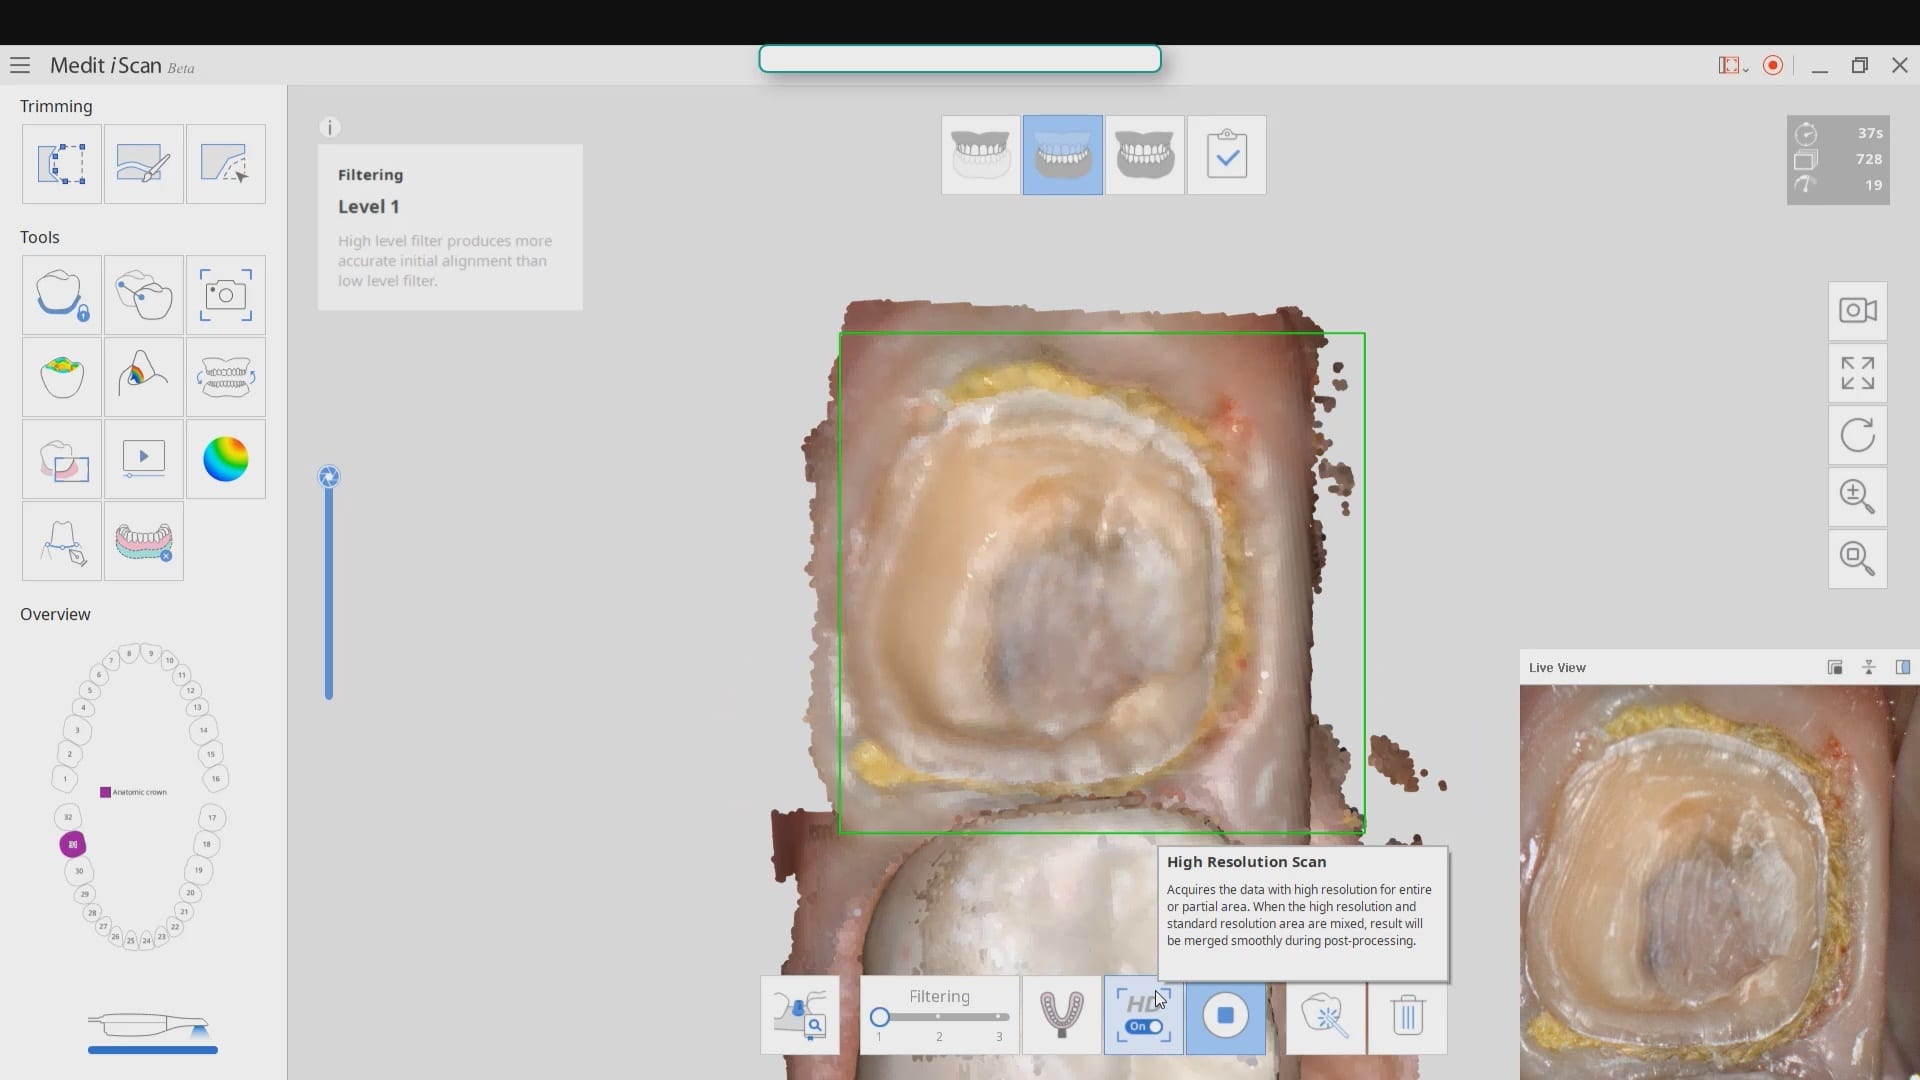
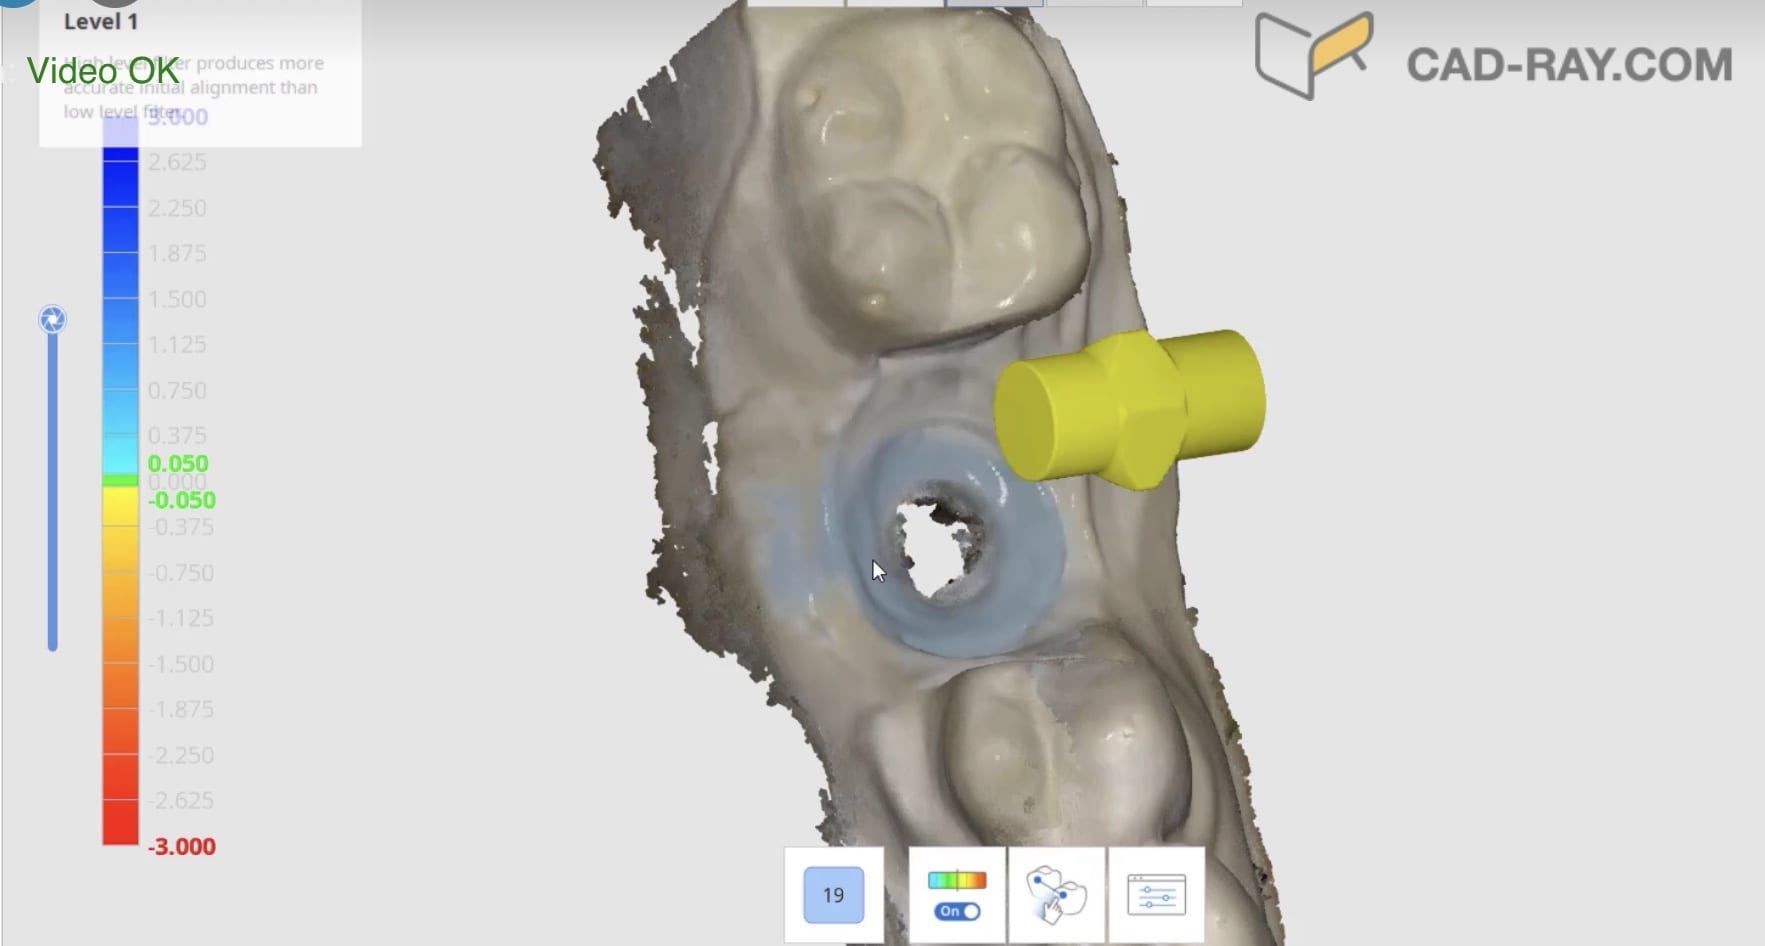
While placing the margin in the native imaging software, it was noted that some tissue was obscuring the margin on the lingual side. The area was isolated both clinically and in the software. It was cropped out and filled in with ‘good data’ after proper protection of the adjacent teeth and margins so that we did not obscure their geometry.

video
play-rounded-fill

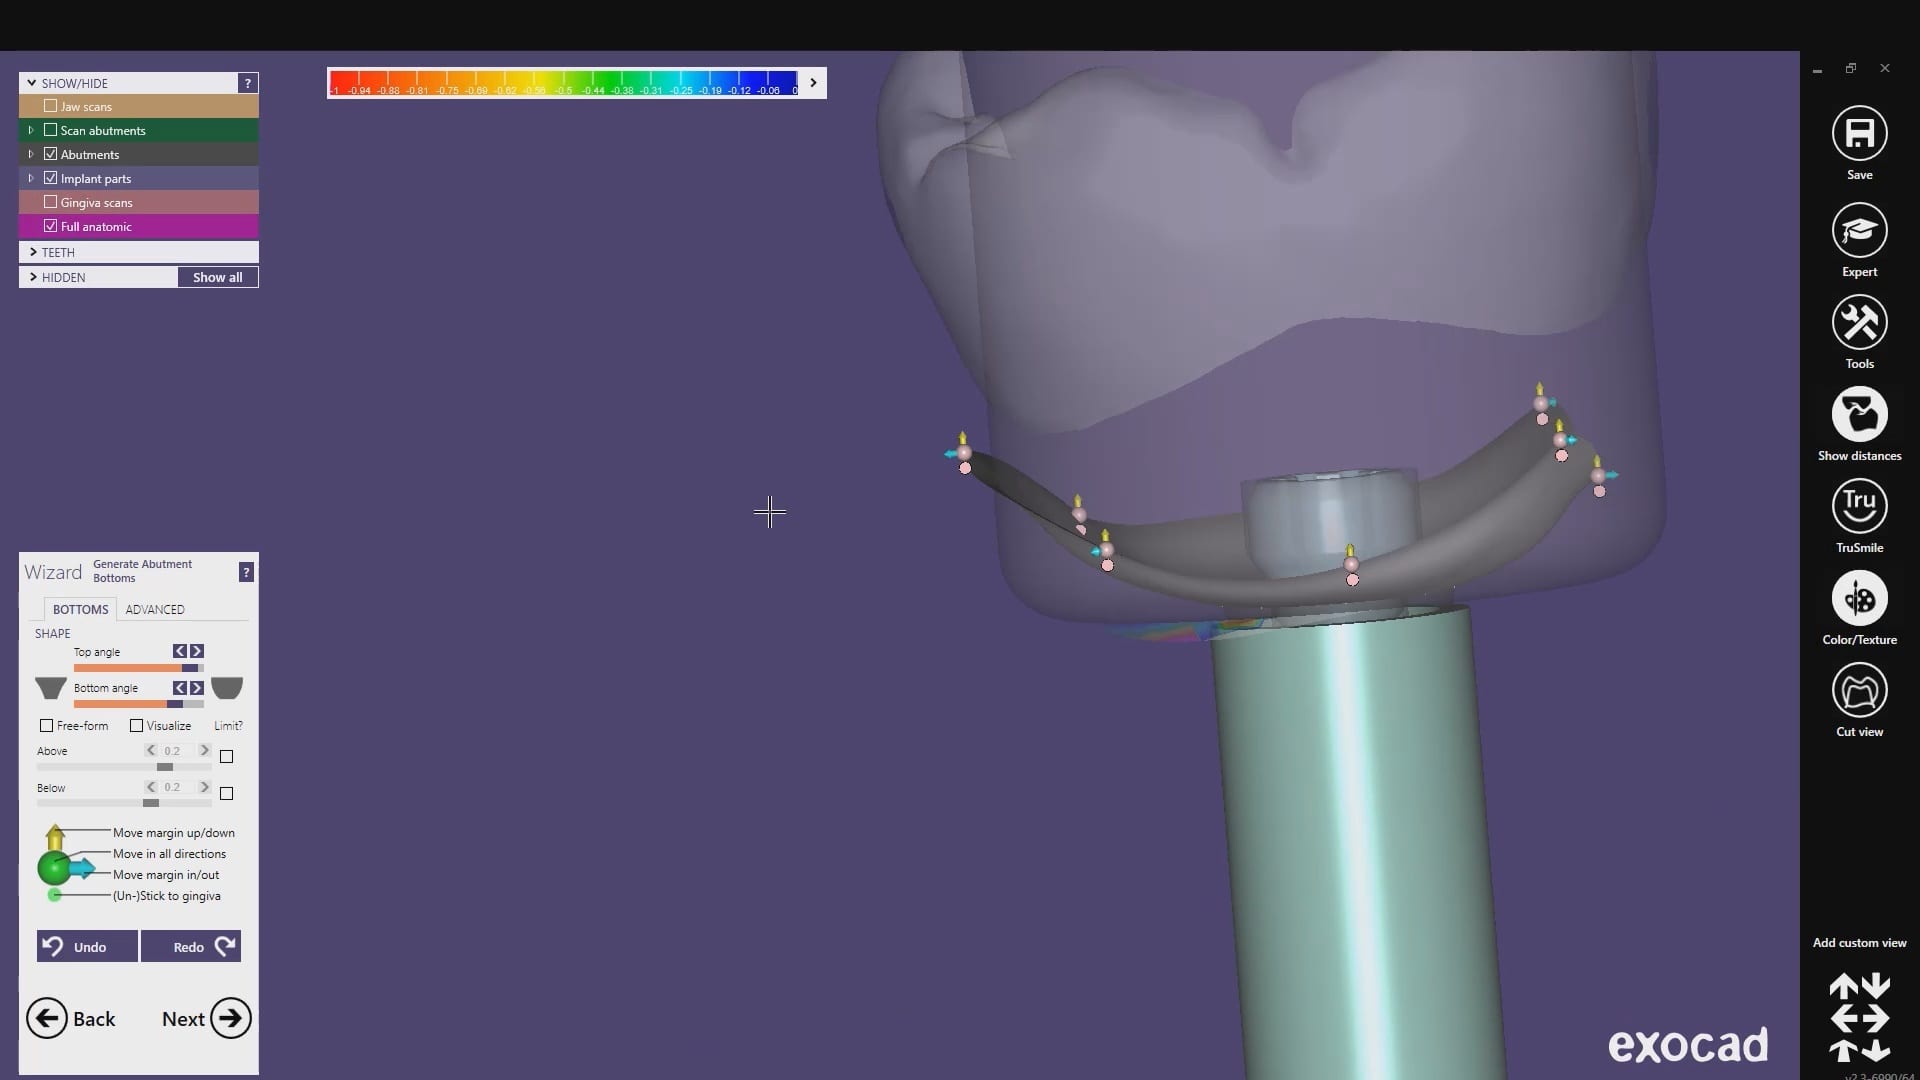
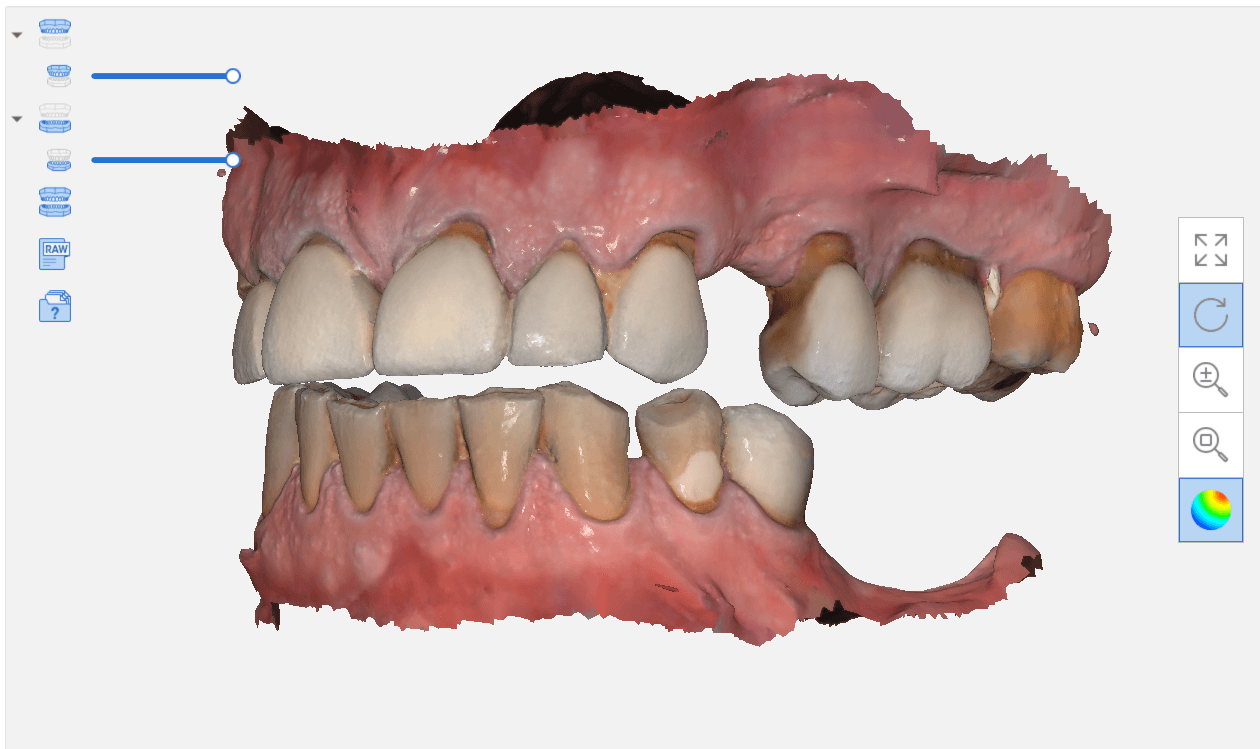
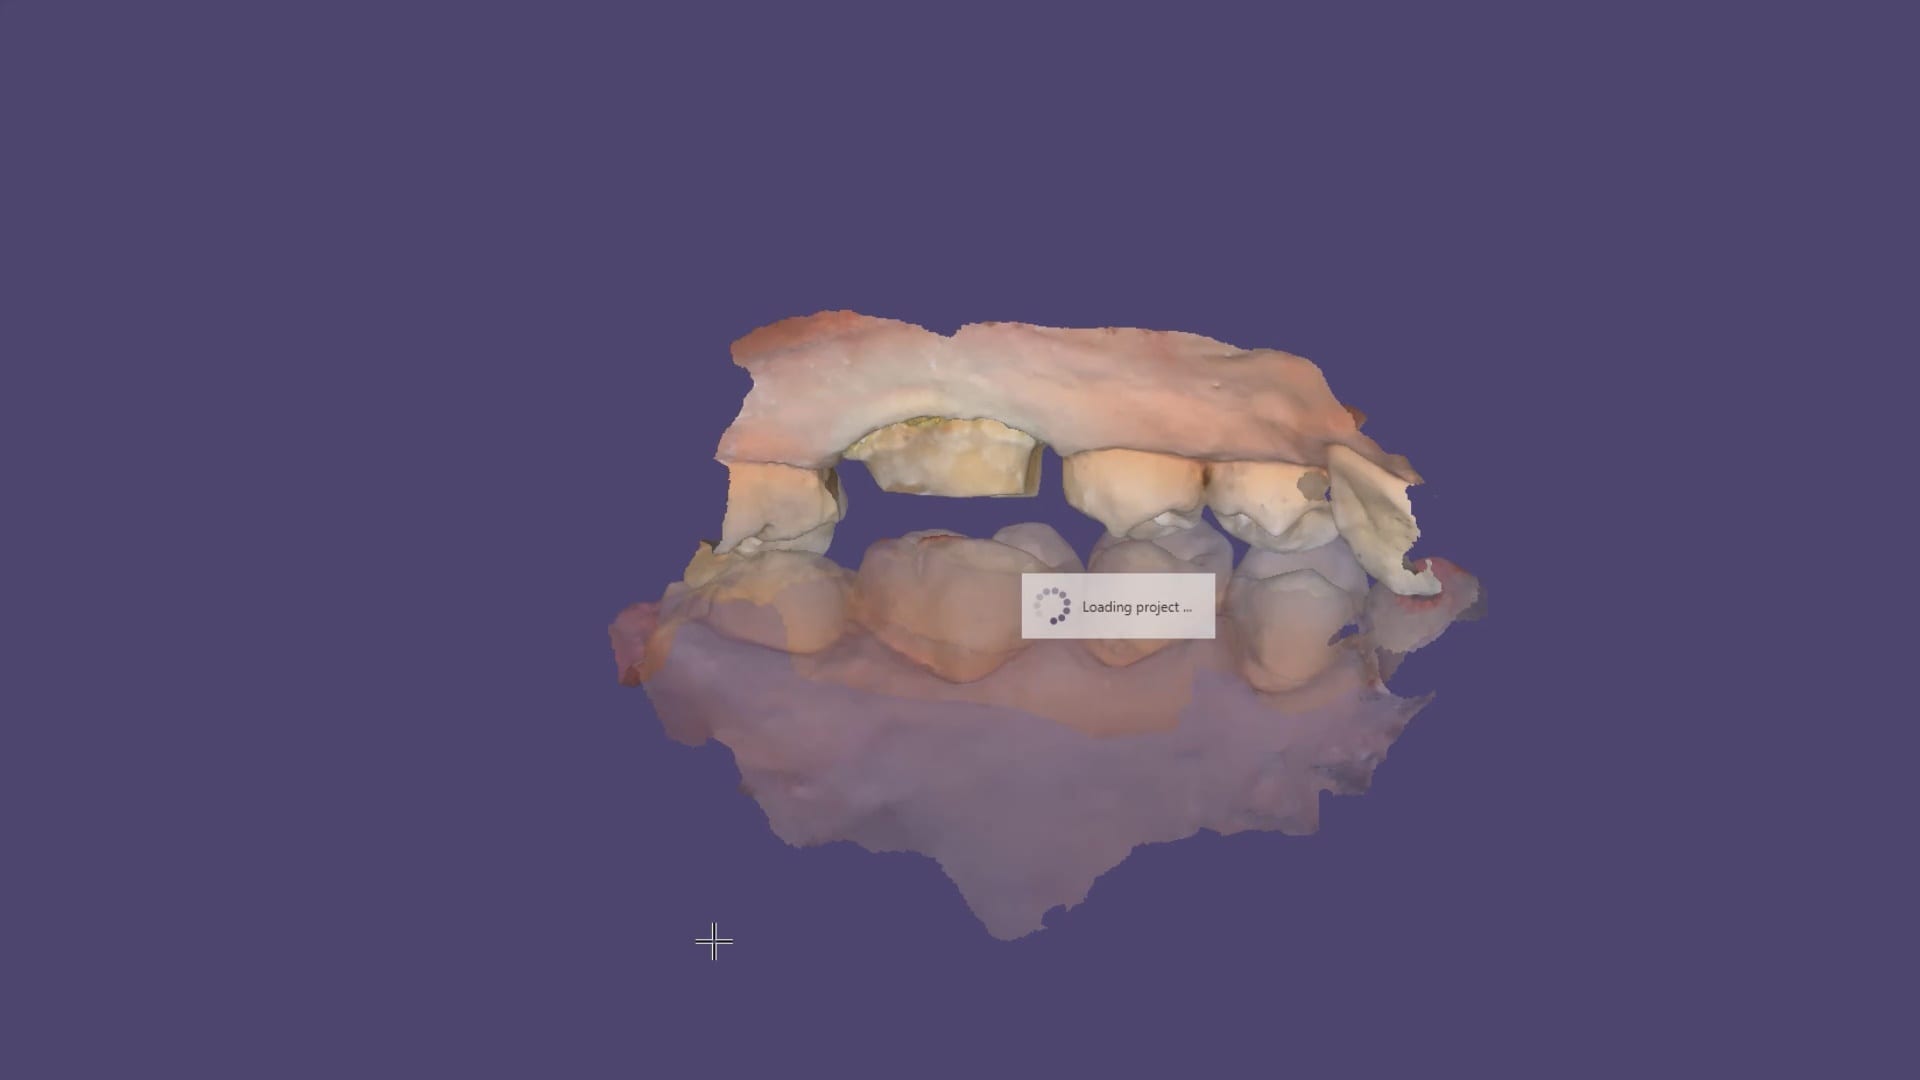
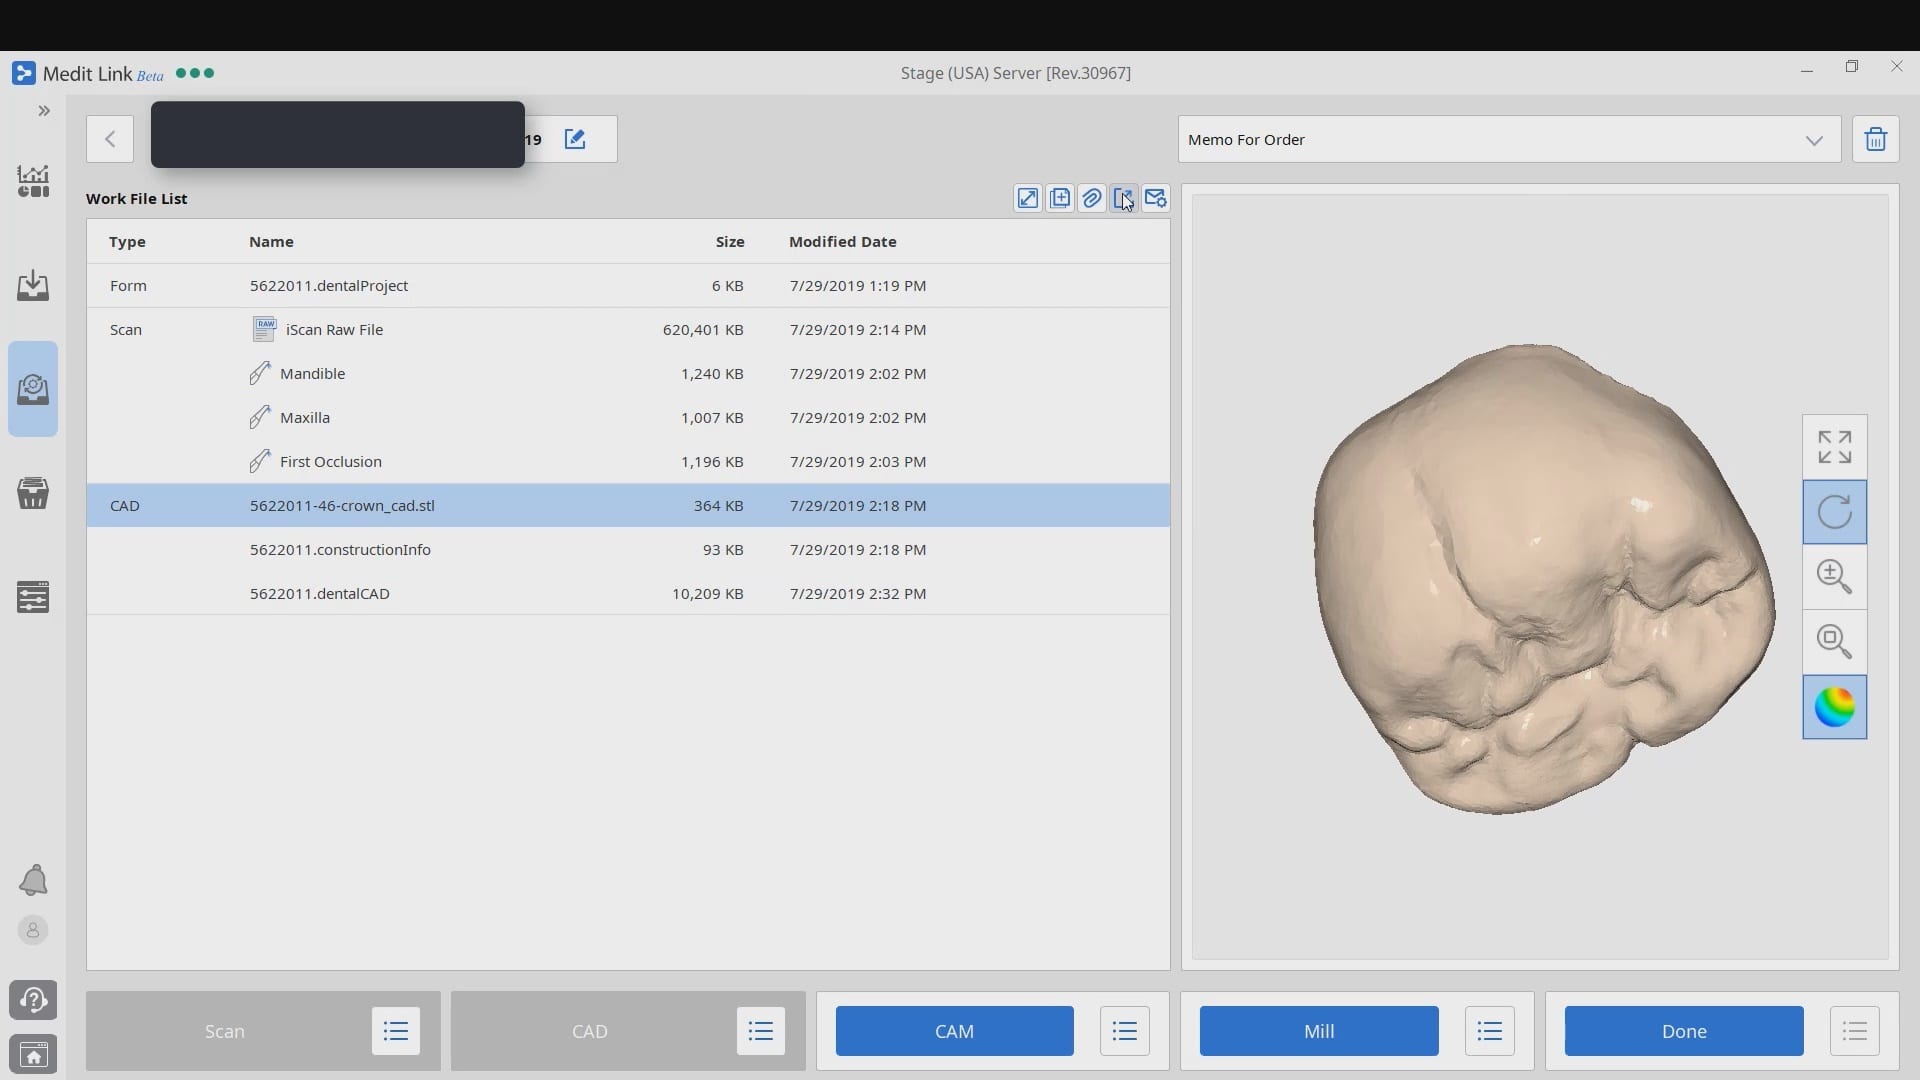
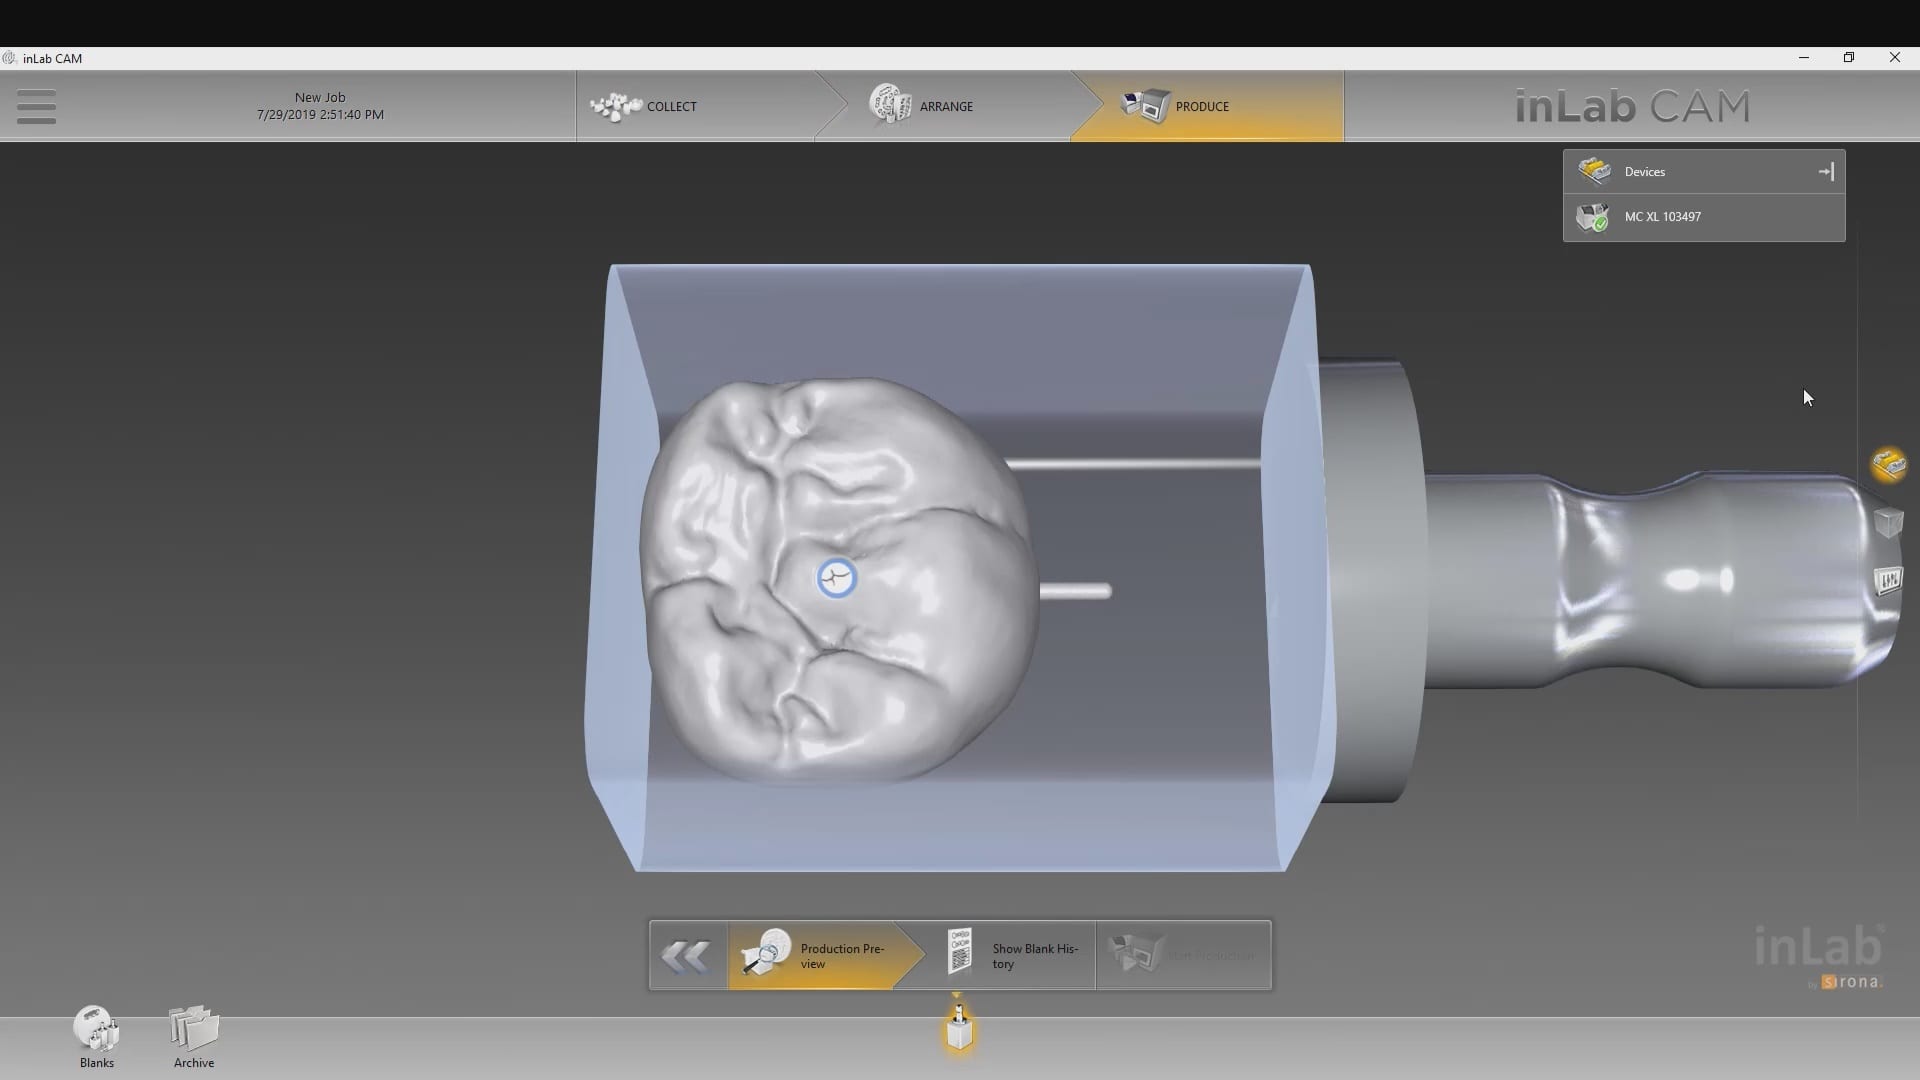
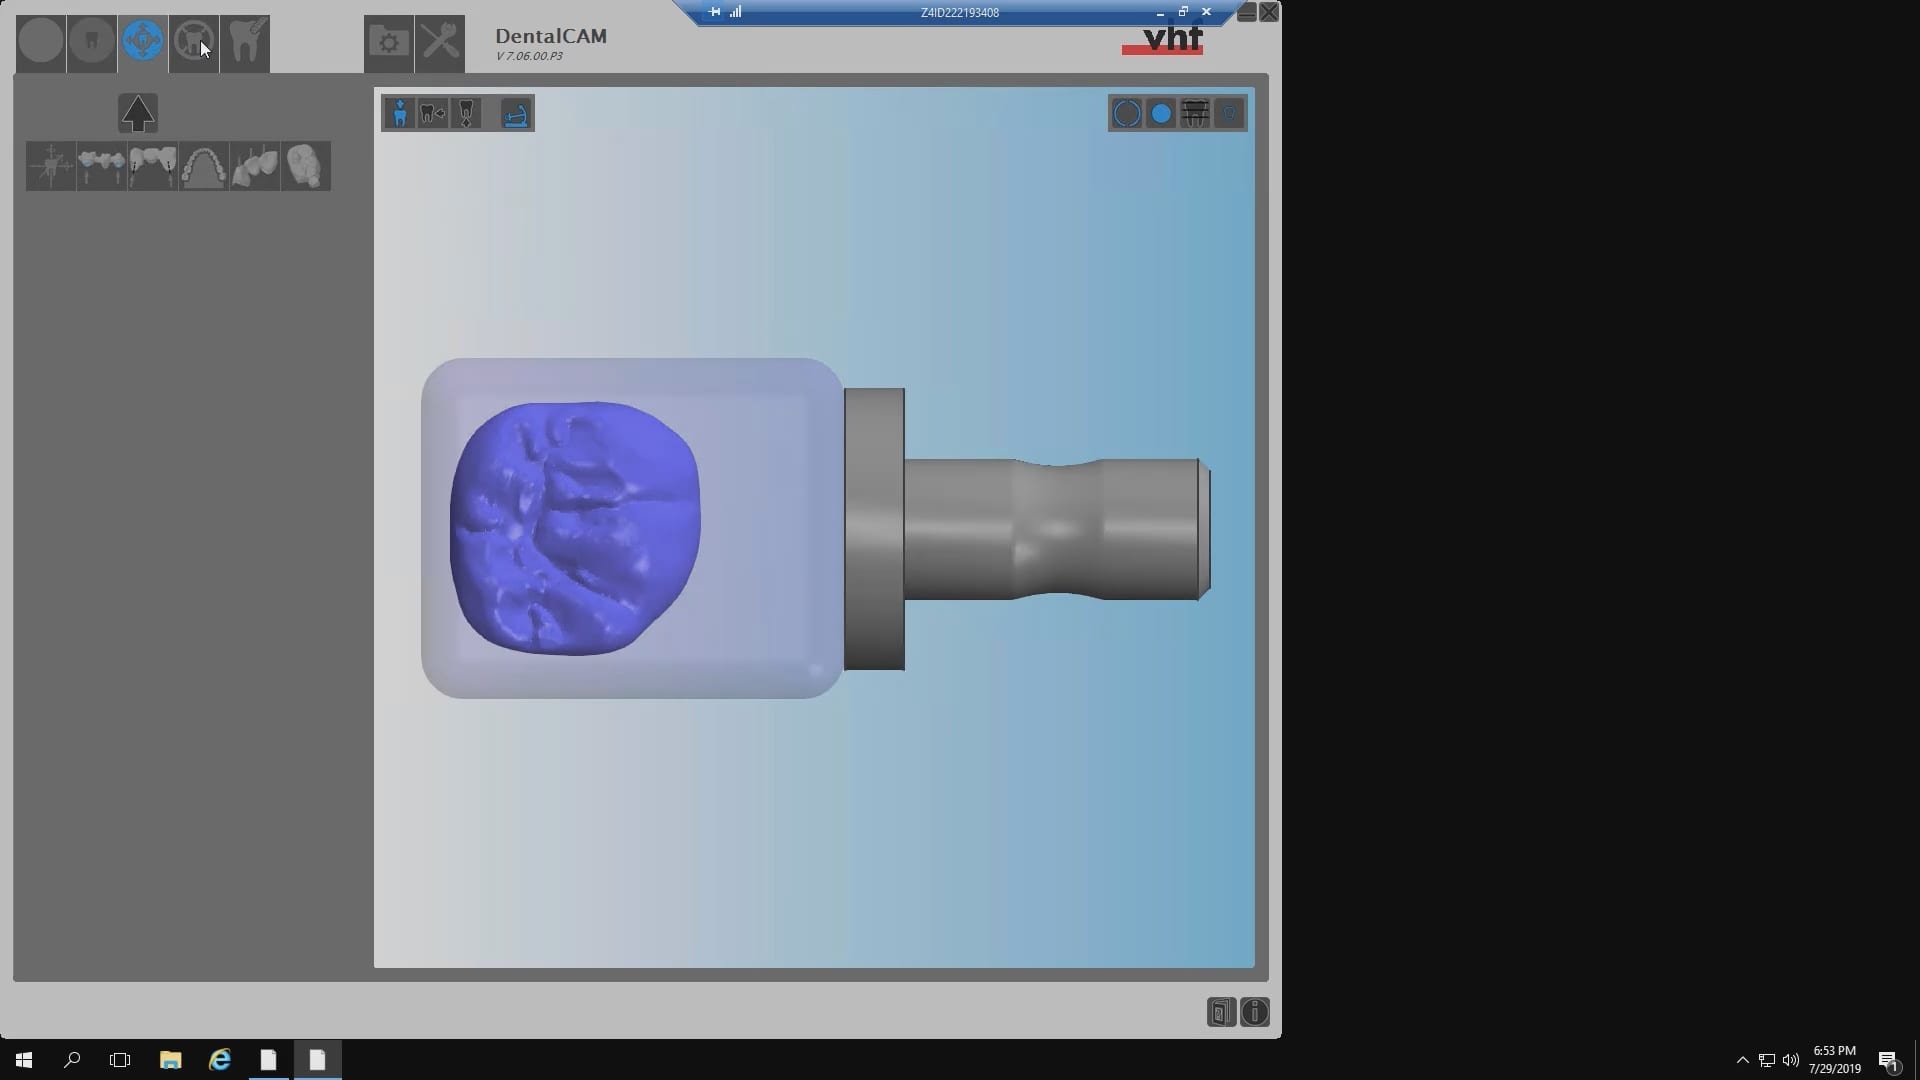
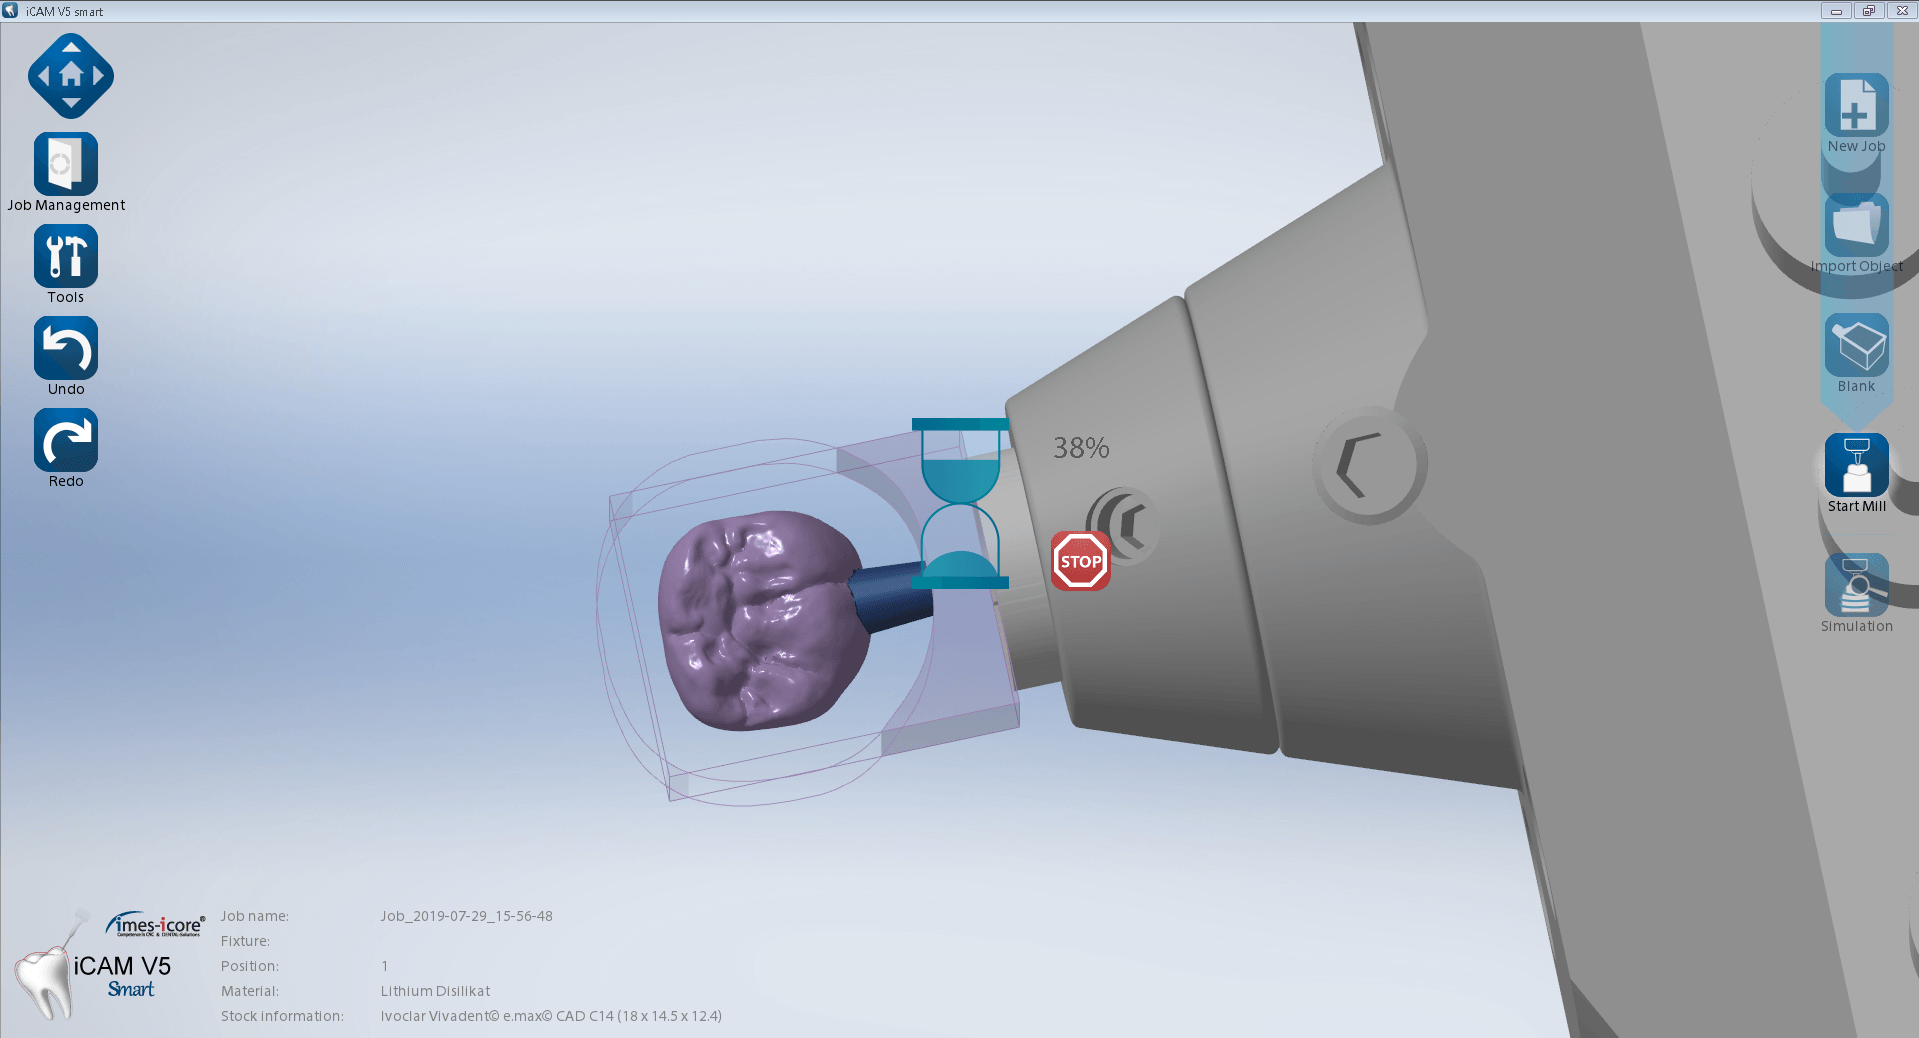
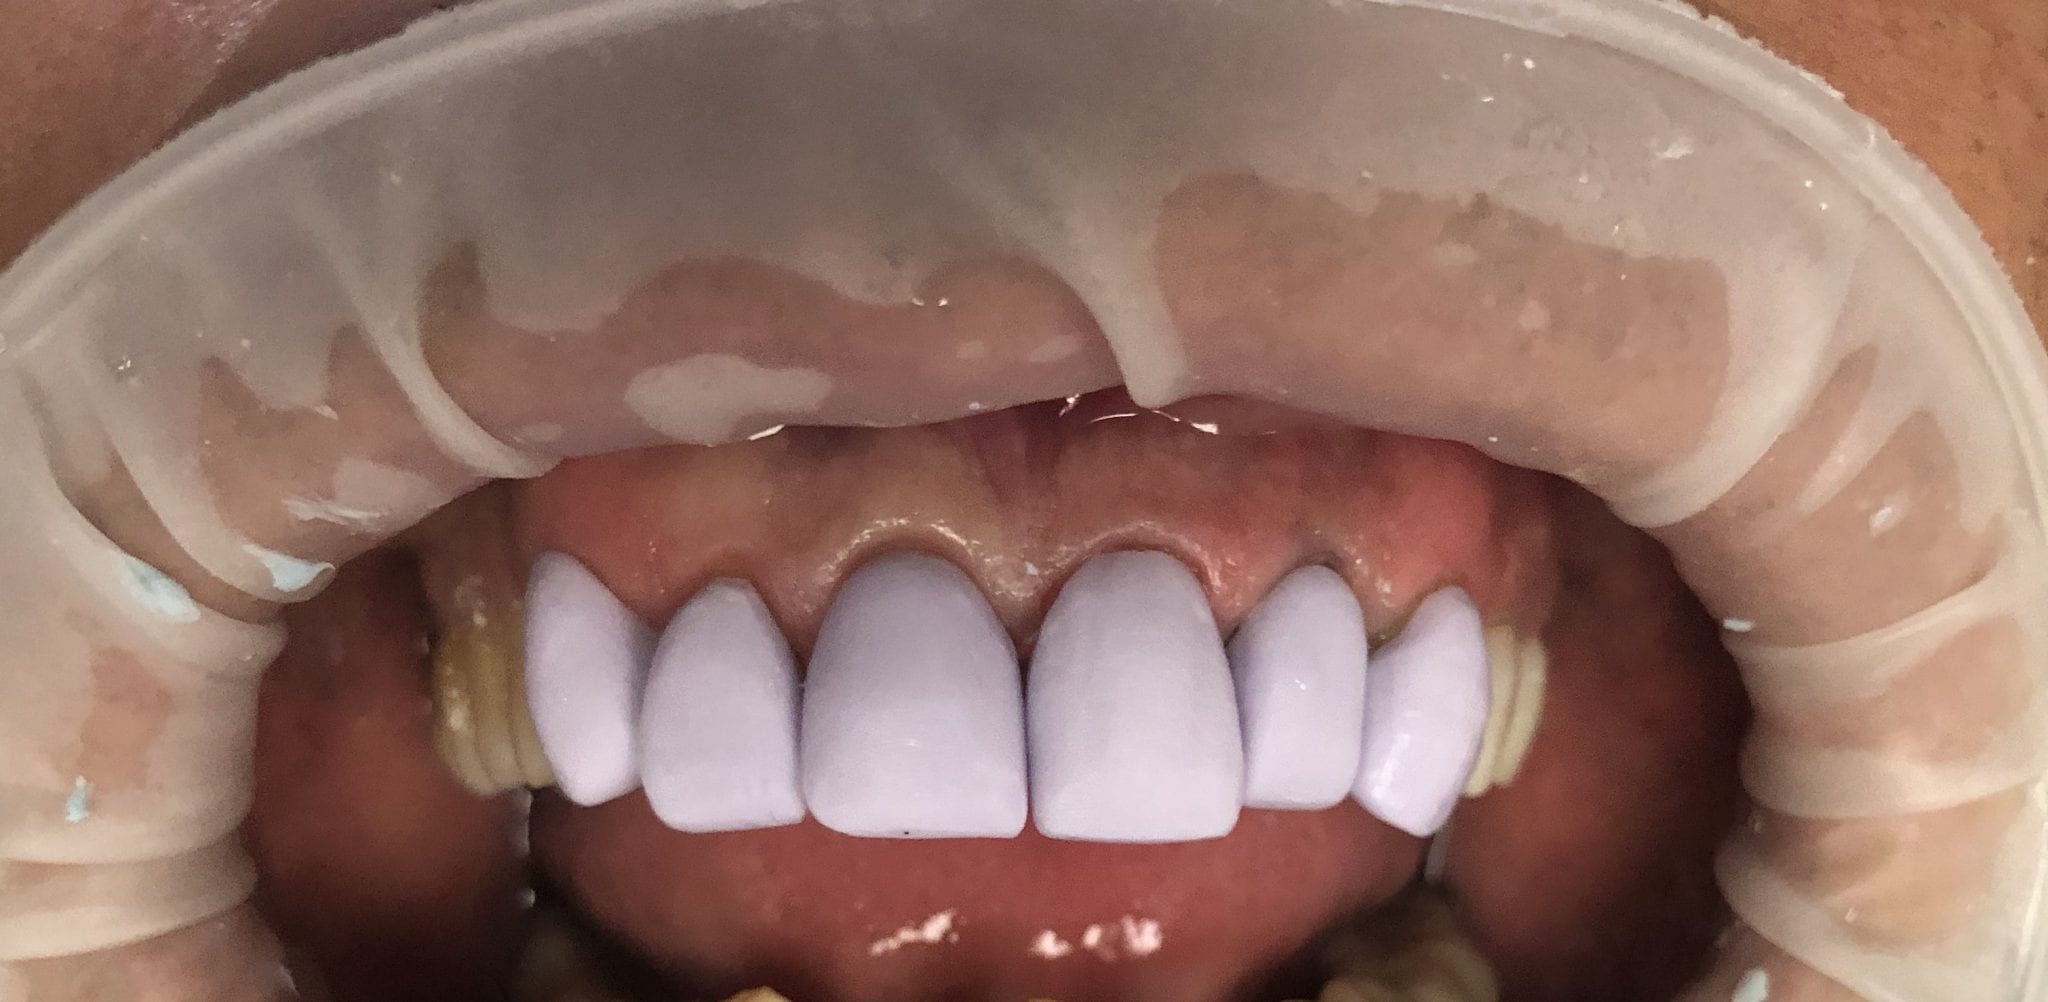
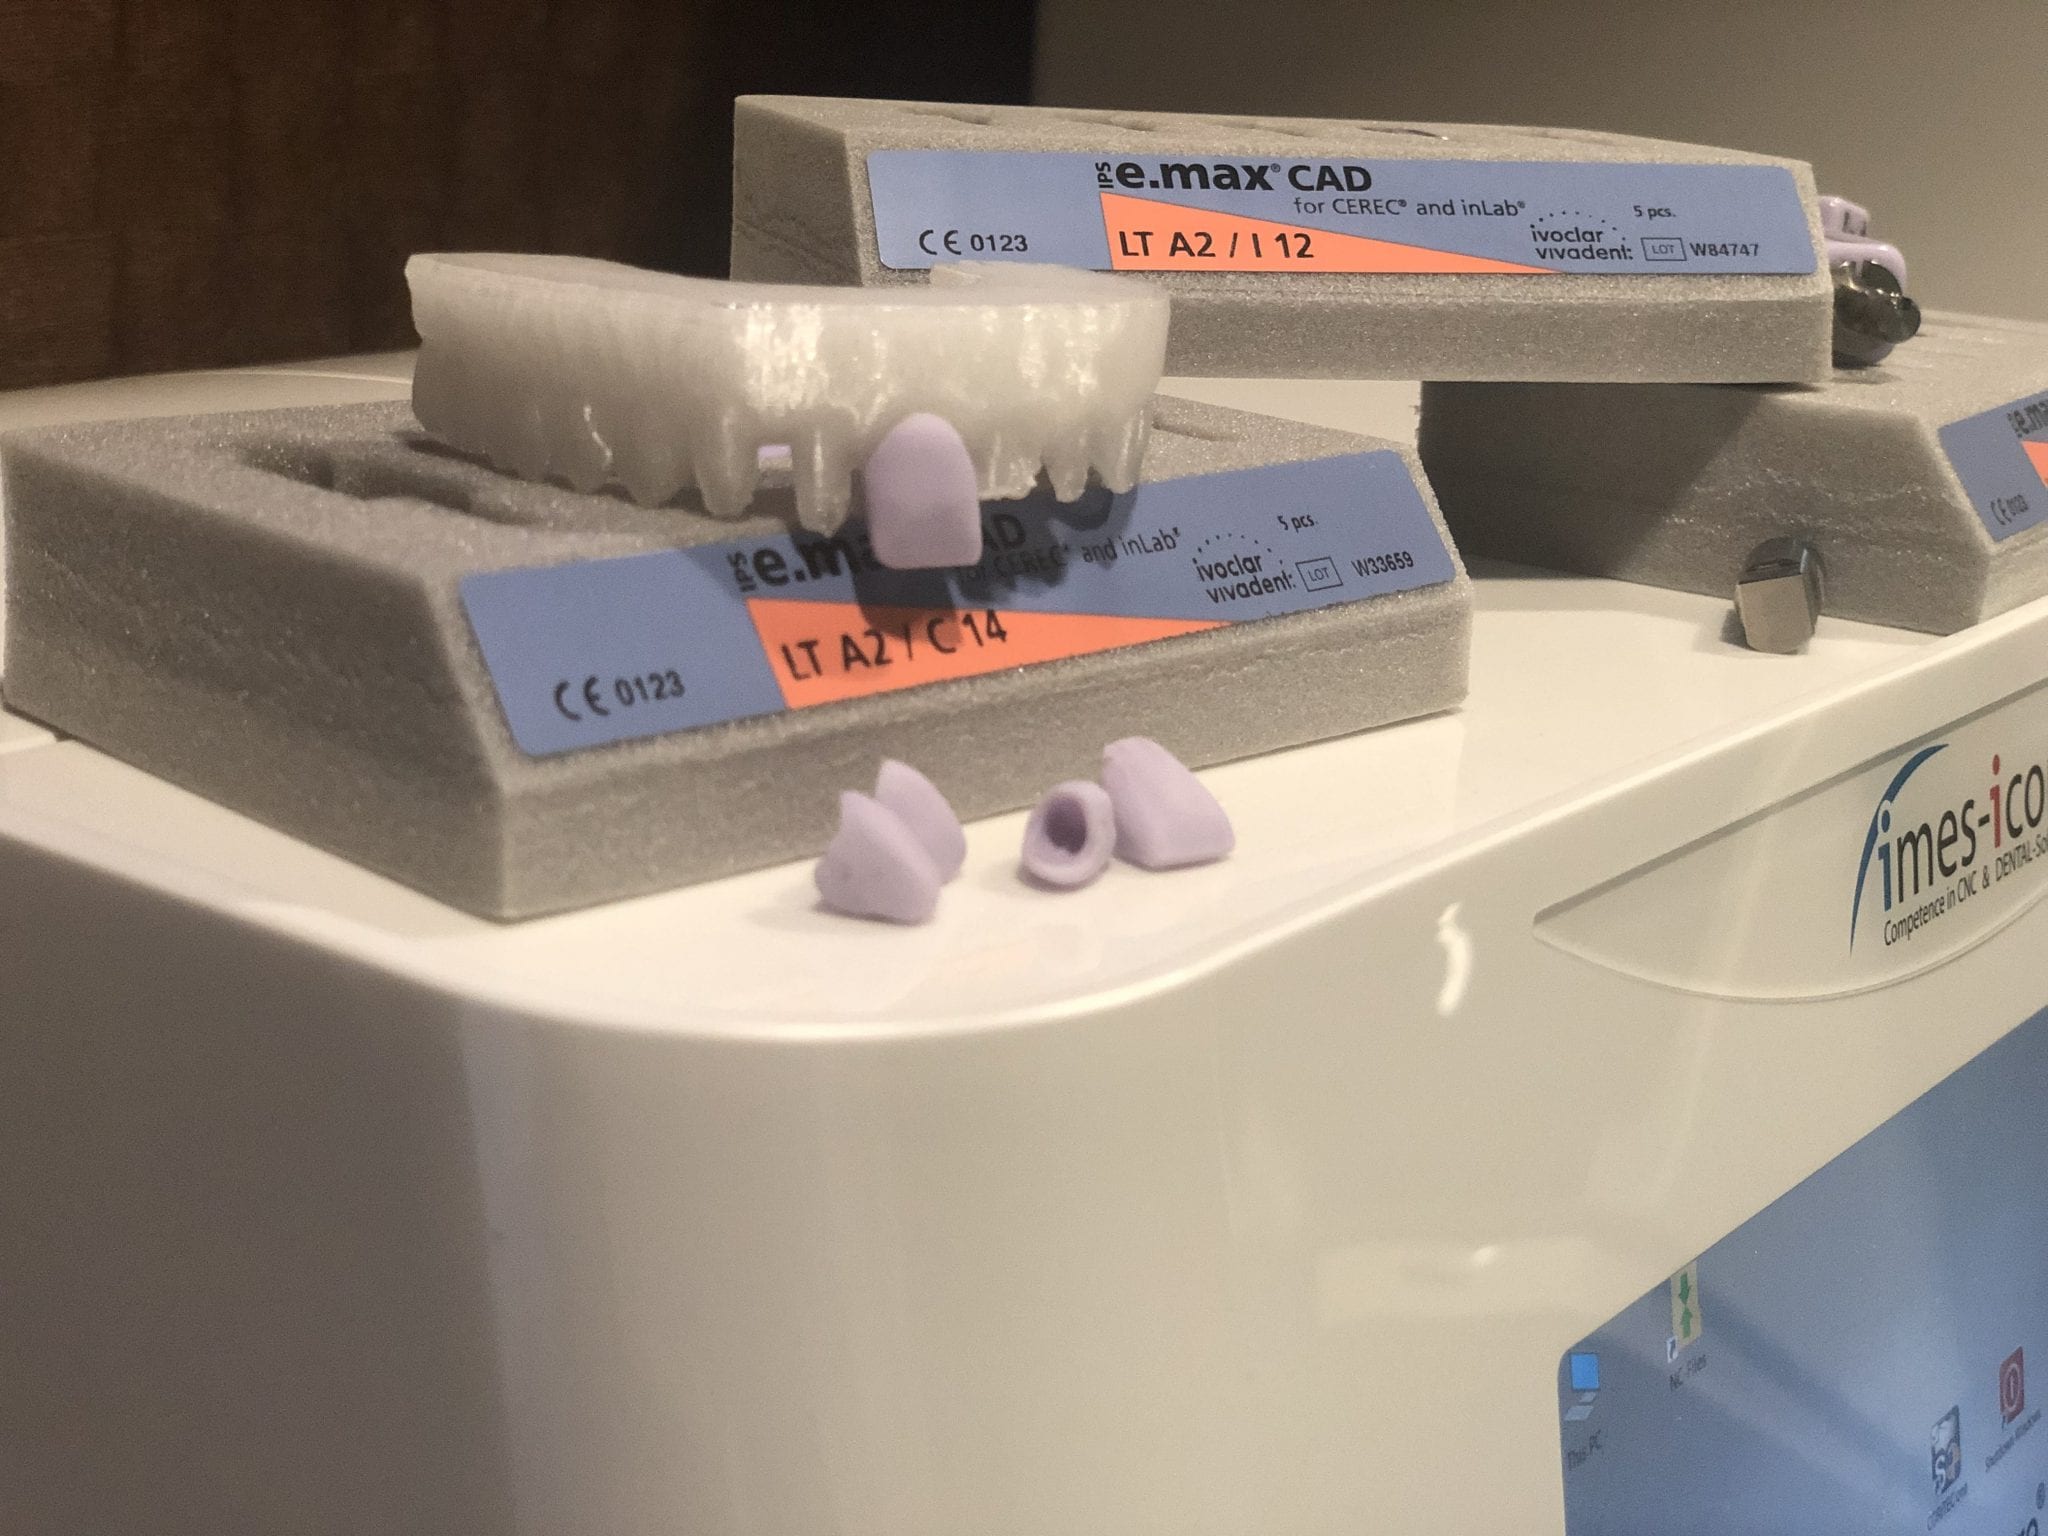
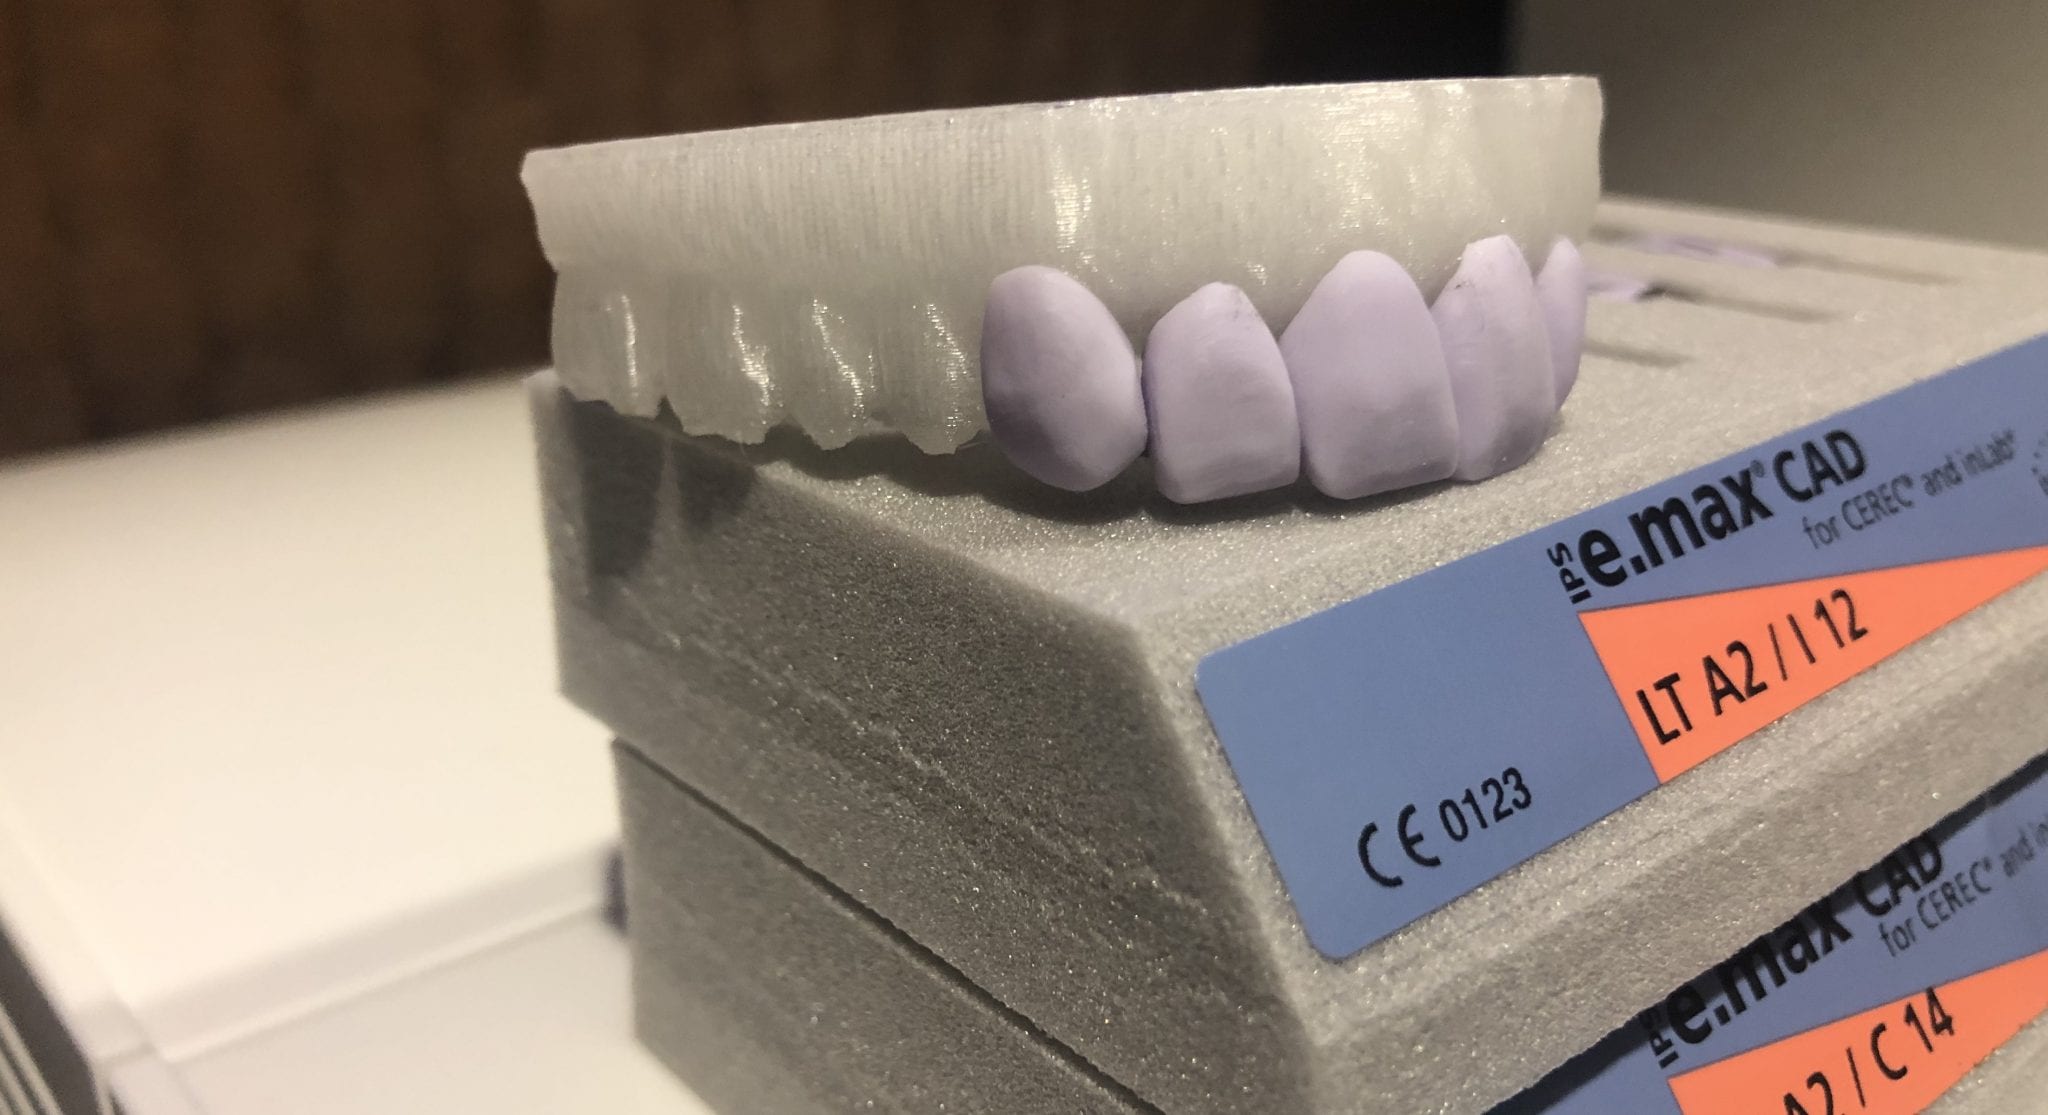
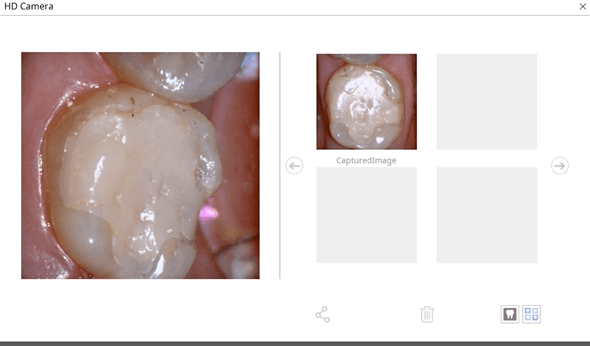
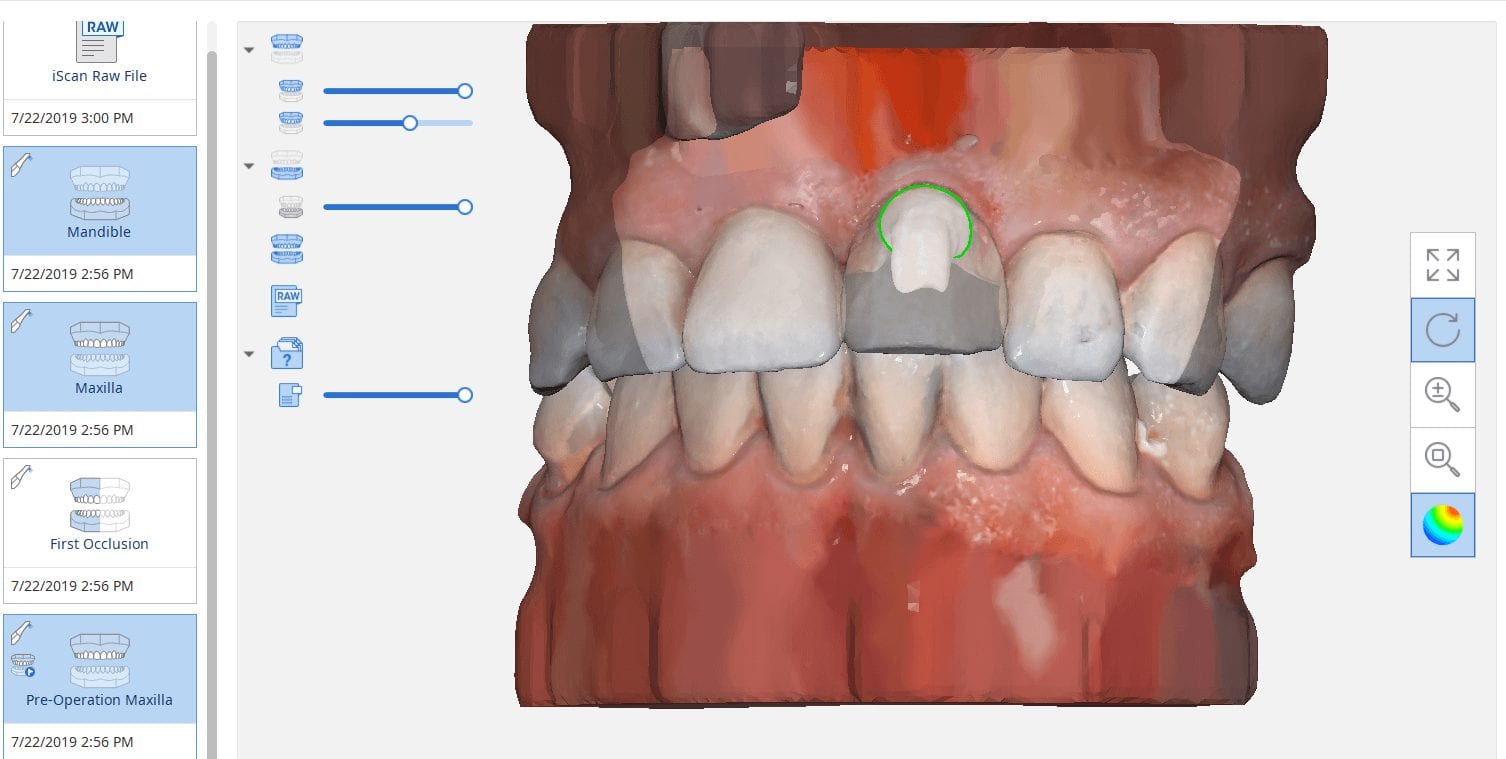
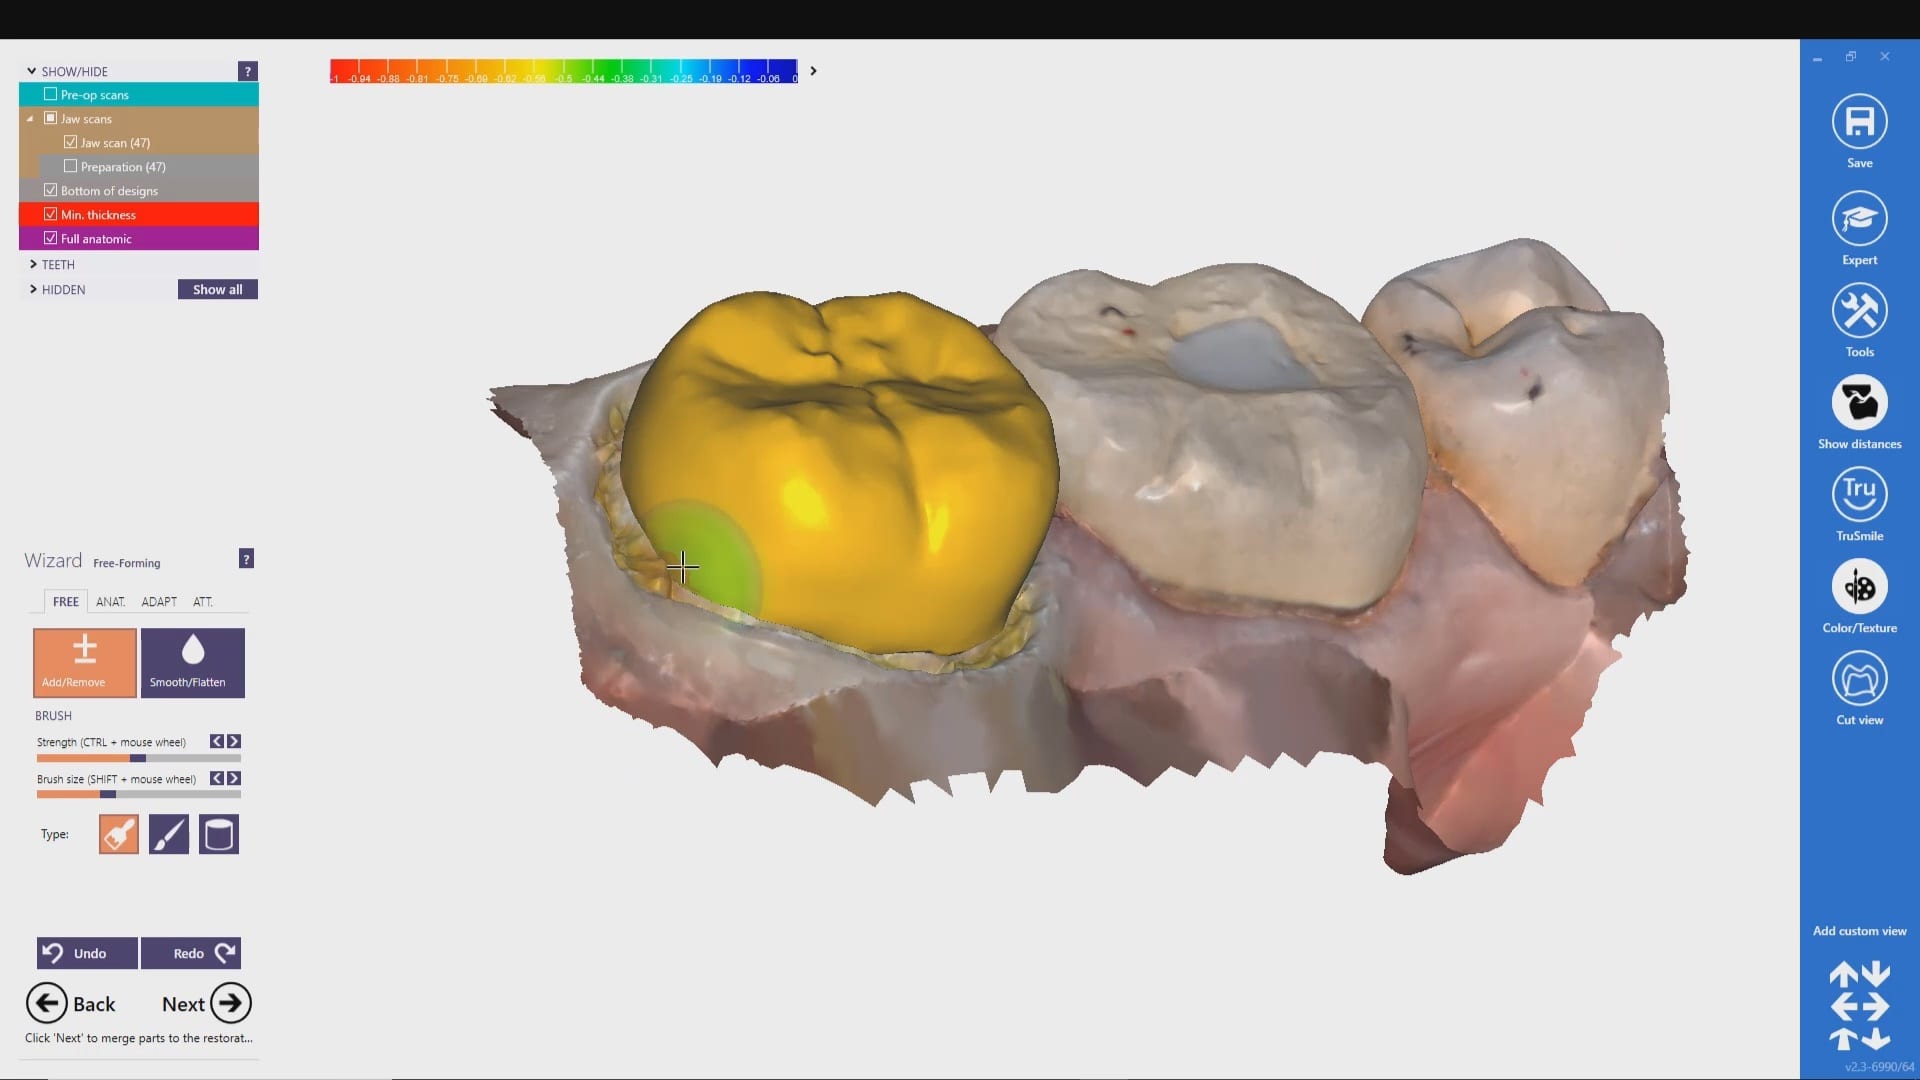
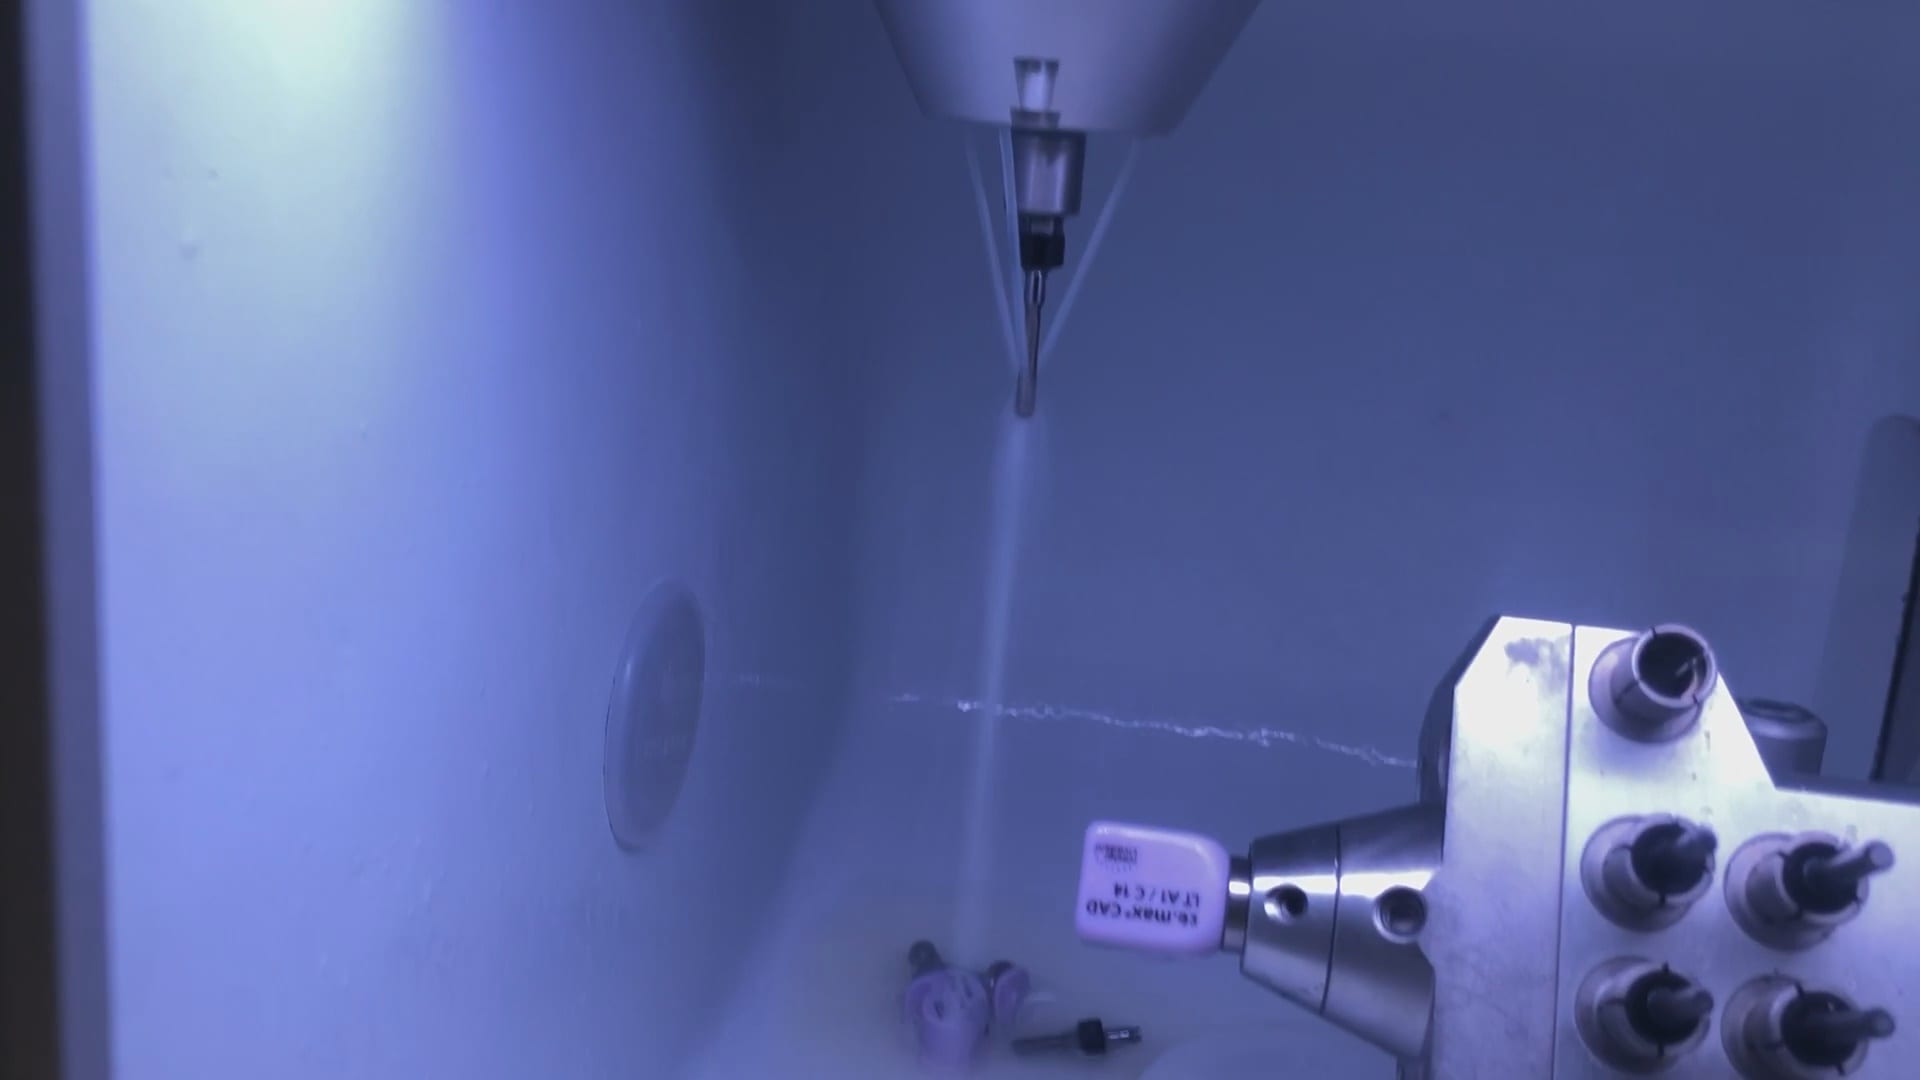
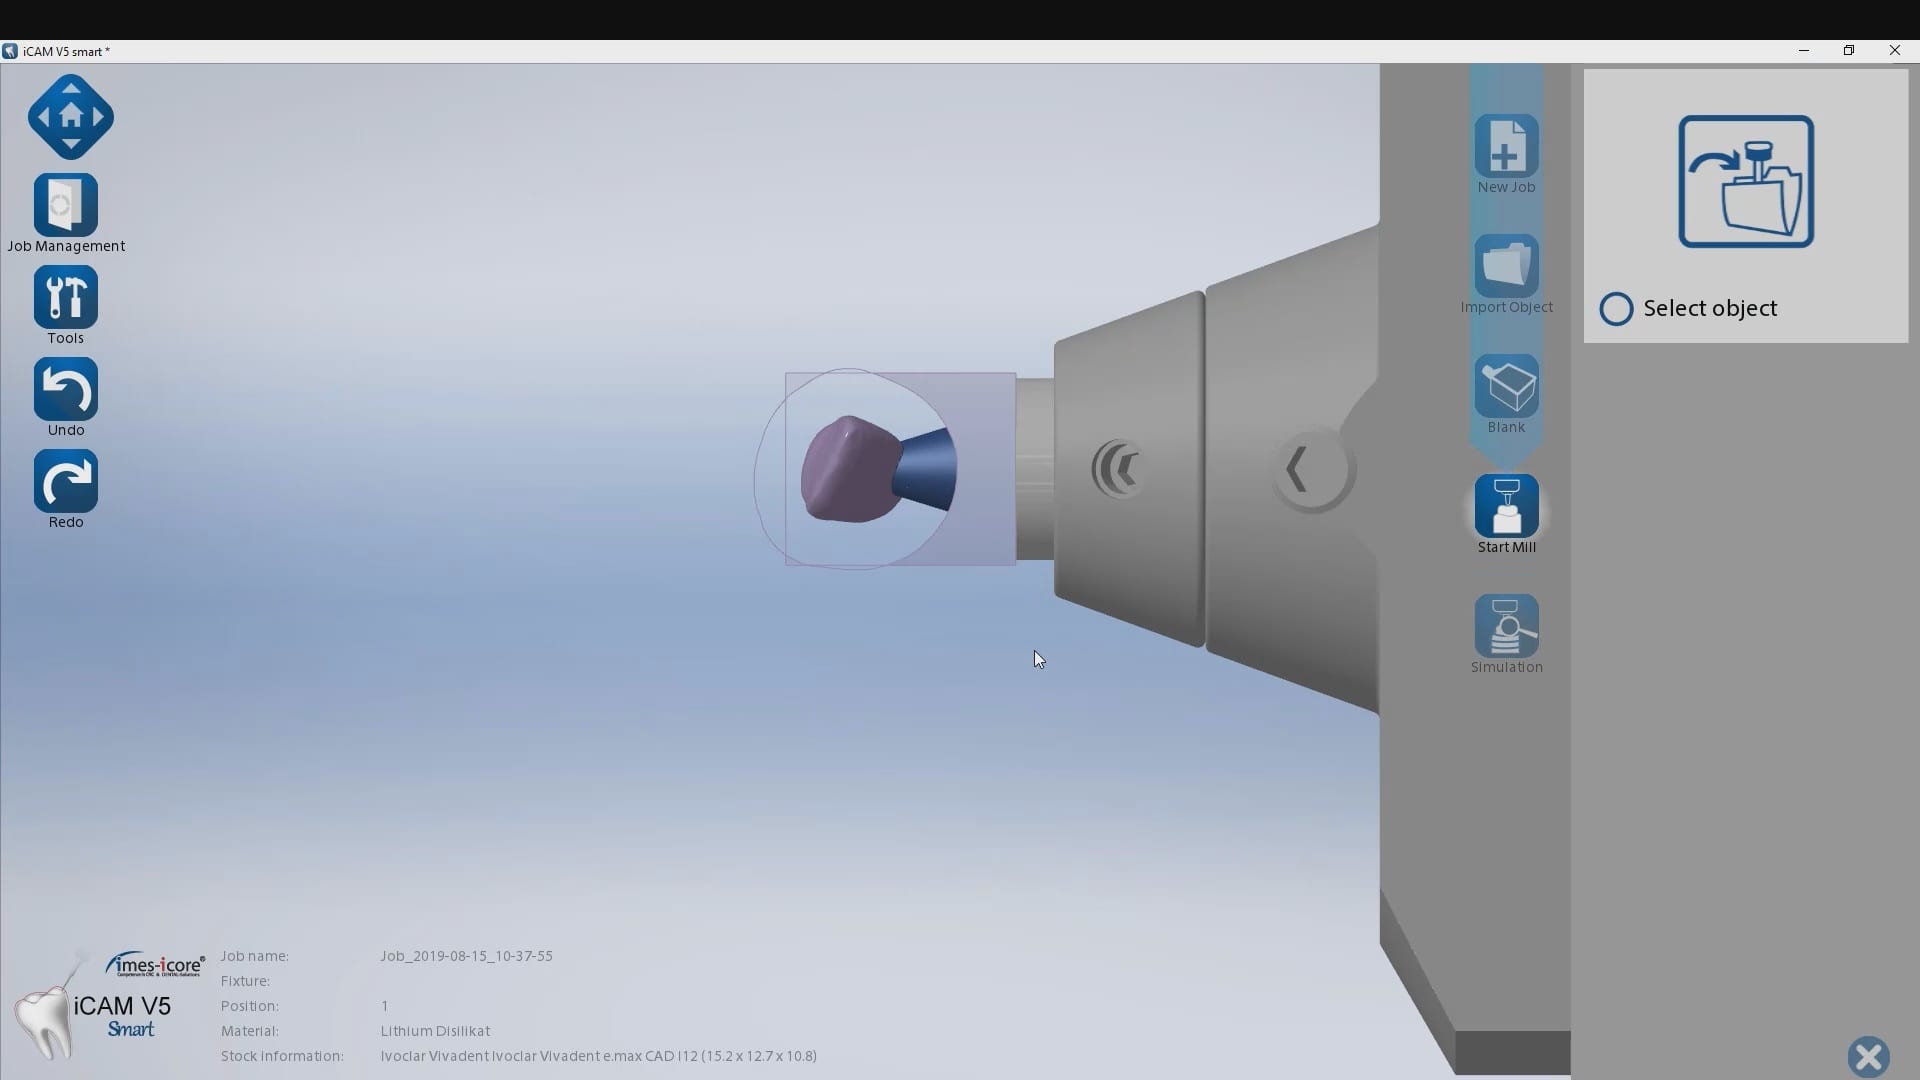
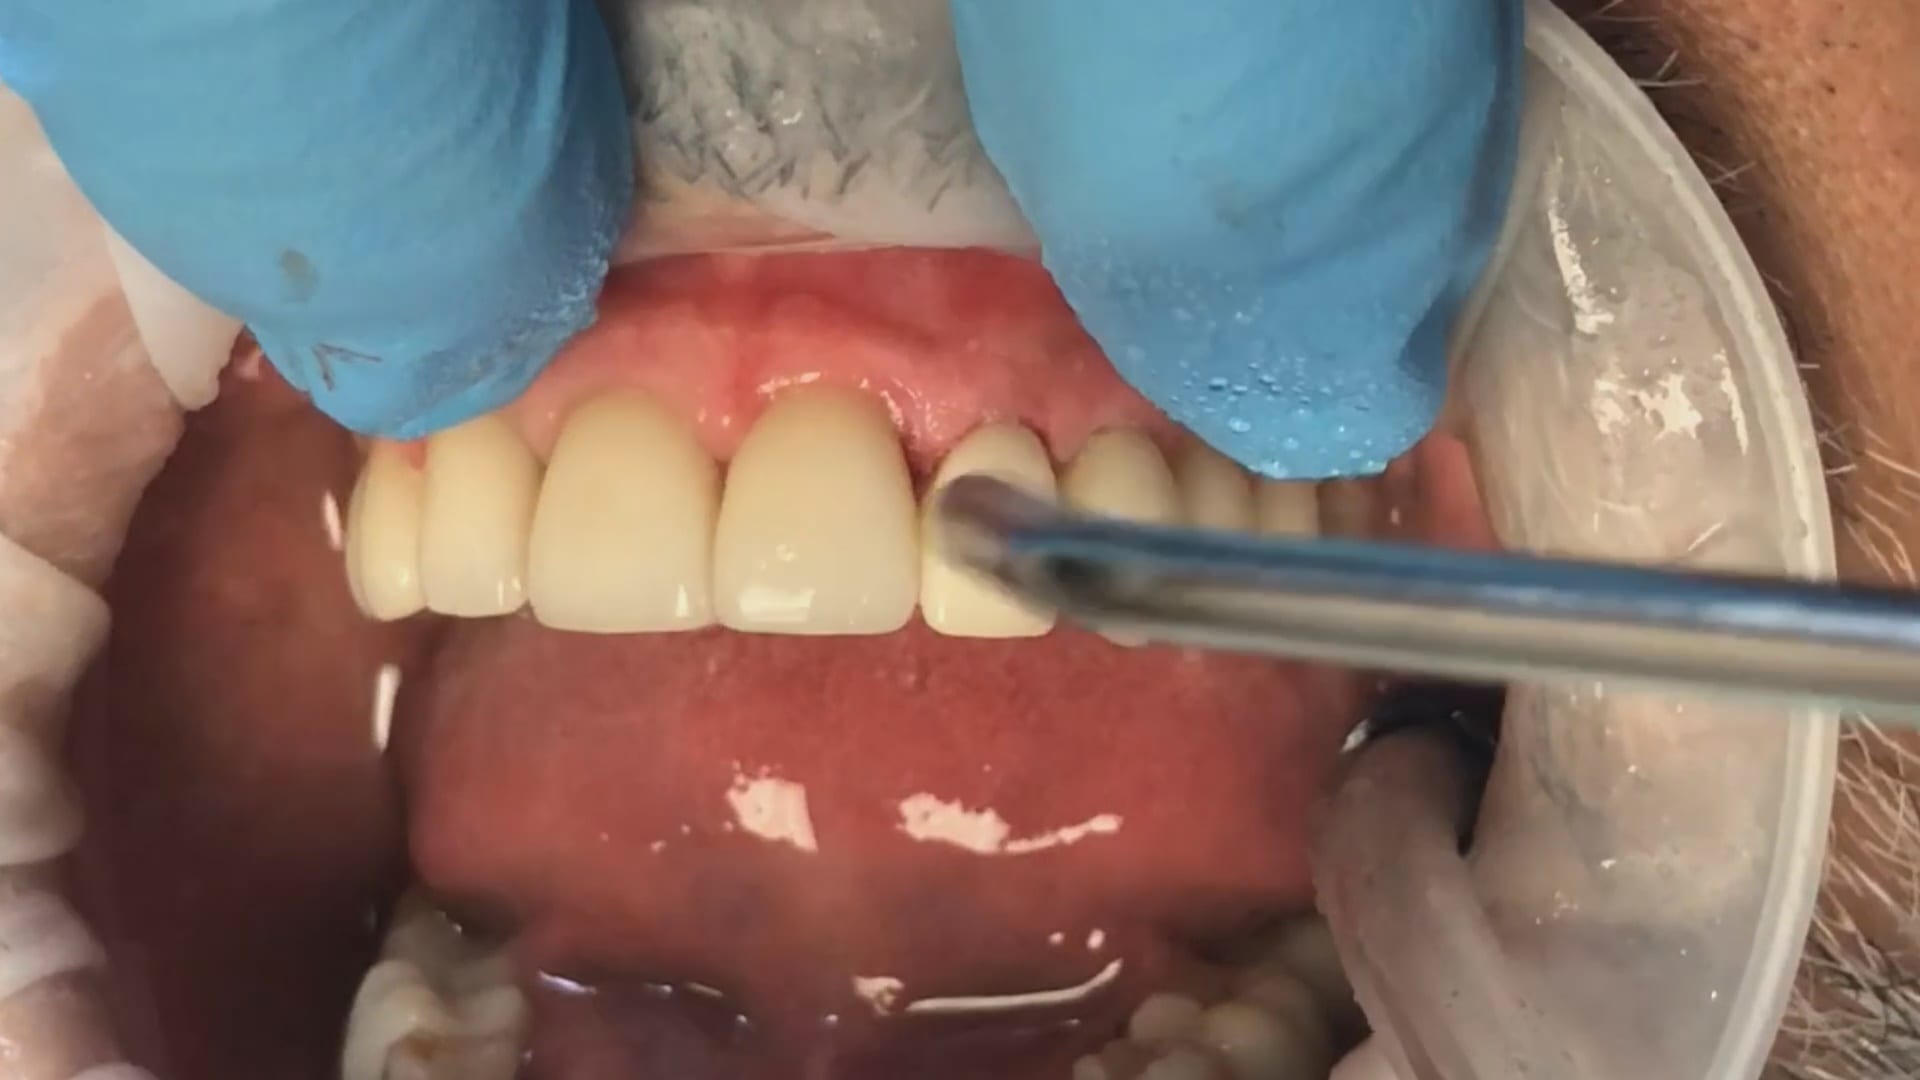
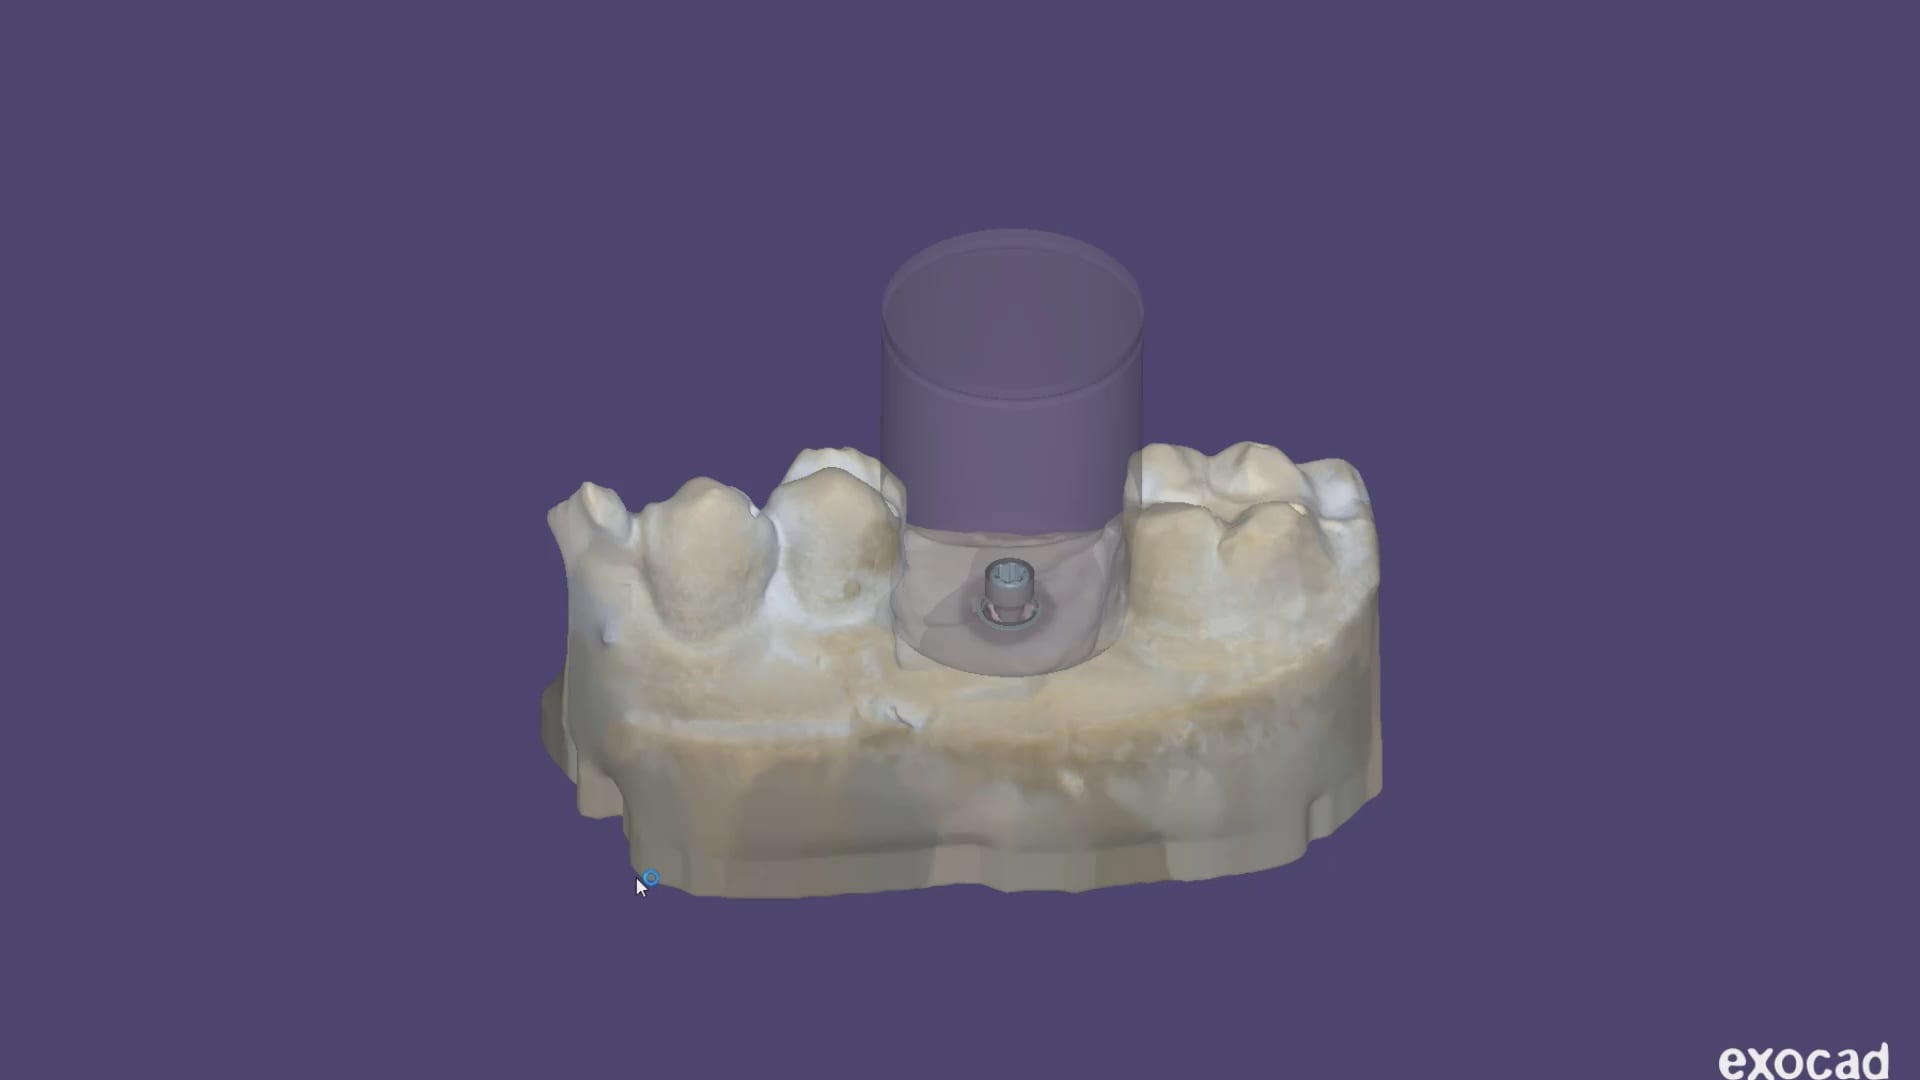
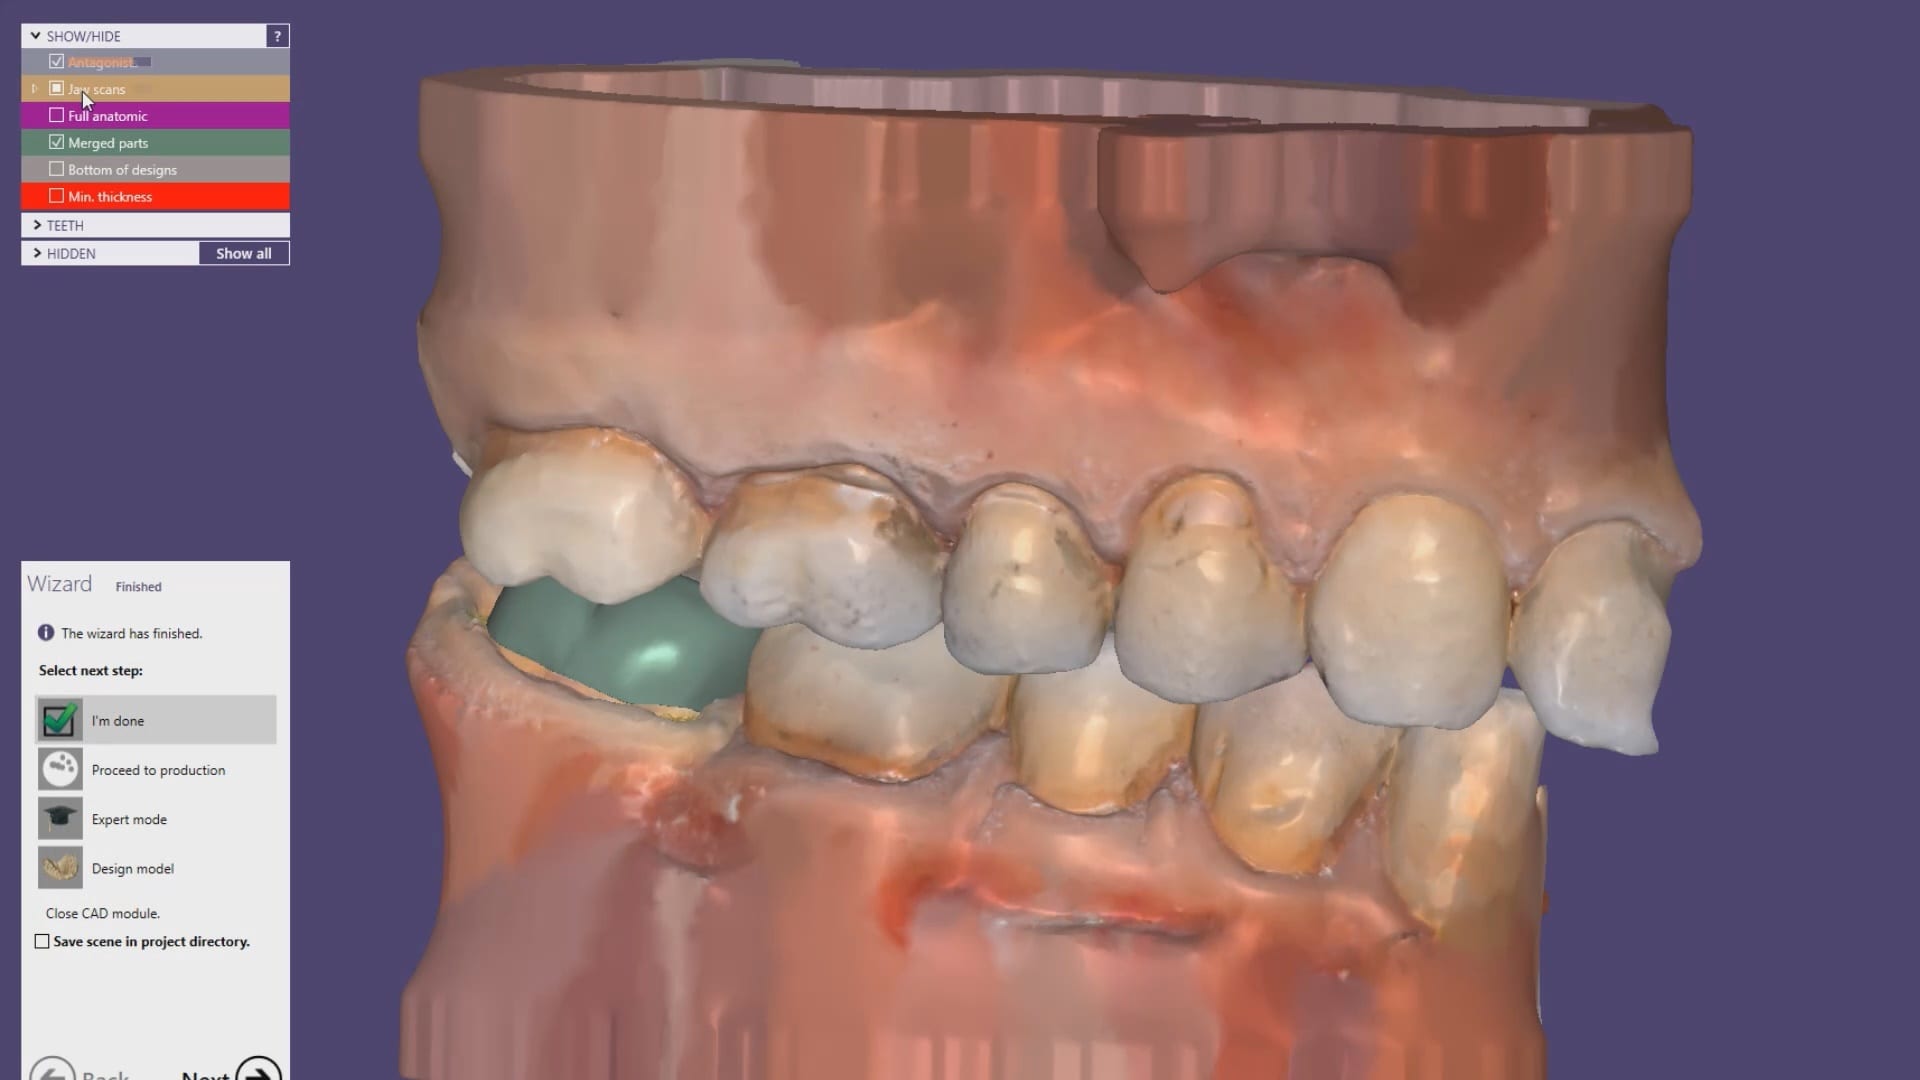
Once the margins are identified and the case is processed it is automatically imported into exocad for design and then sent to the Imes Icore CORiTEC Once for manufacturing. The emax restoration was tried in and then delivered after crystalization.

video
play-rounded-fill

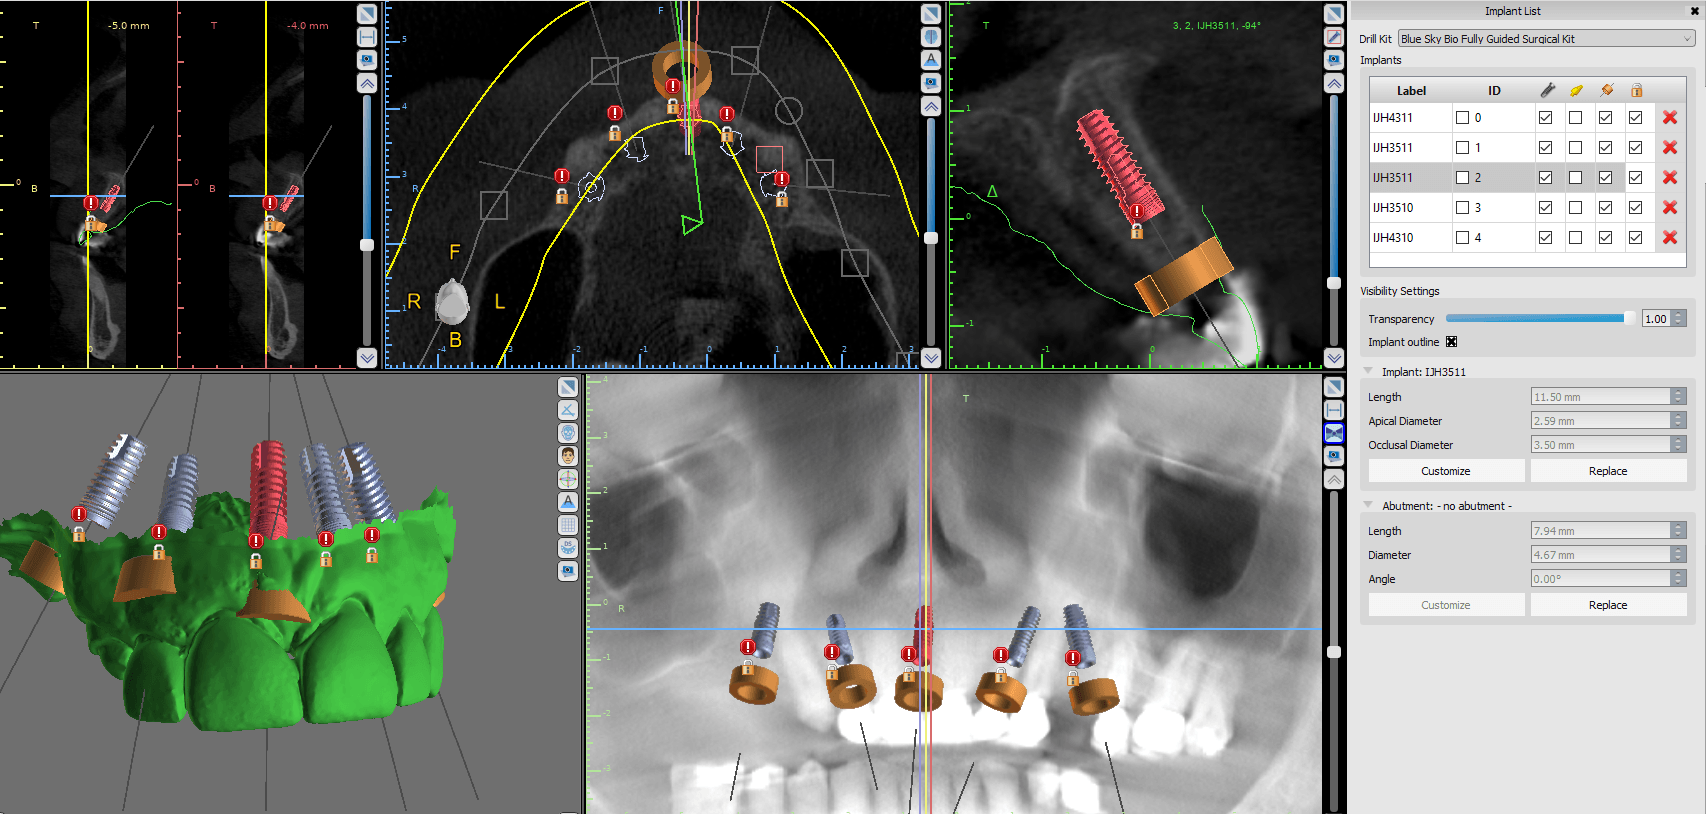
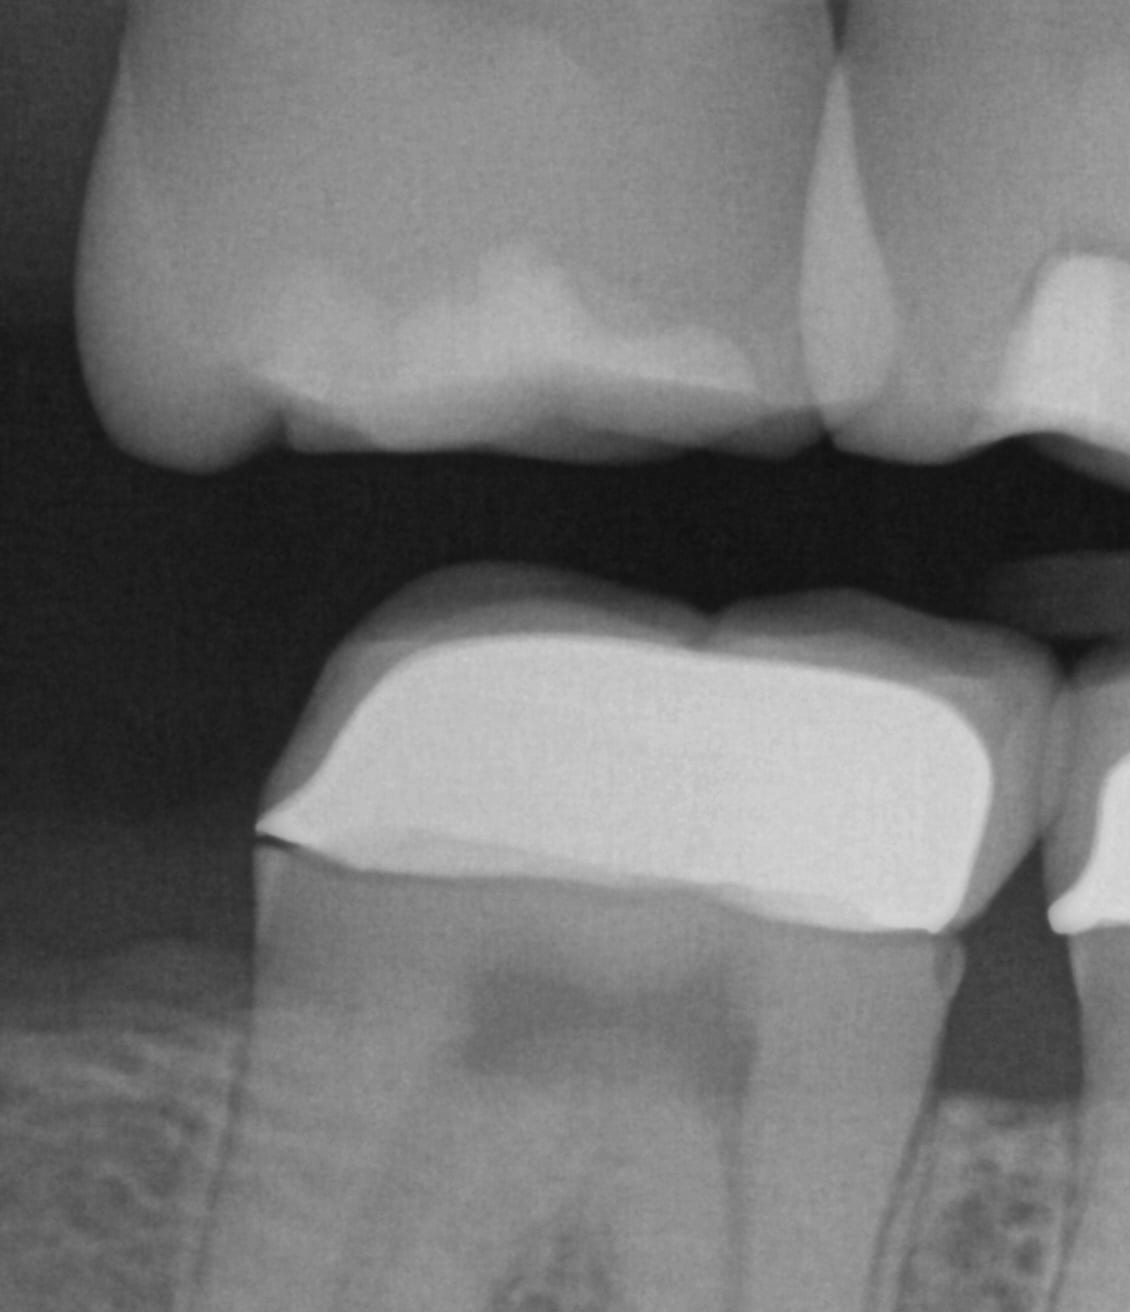
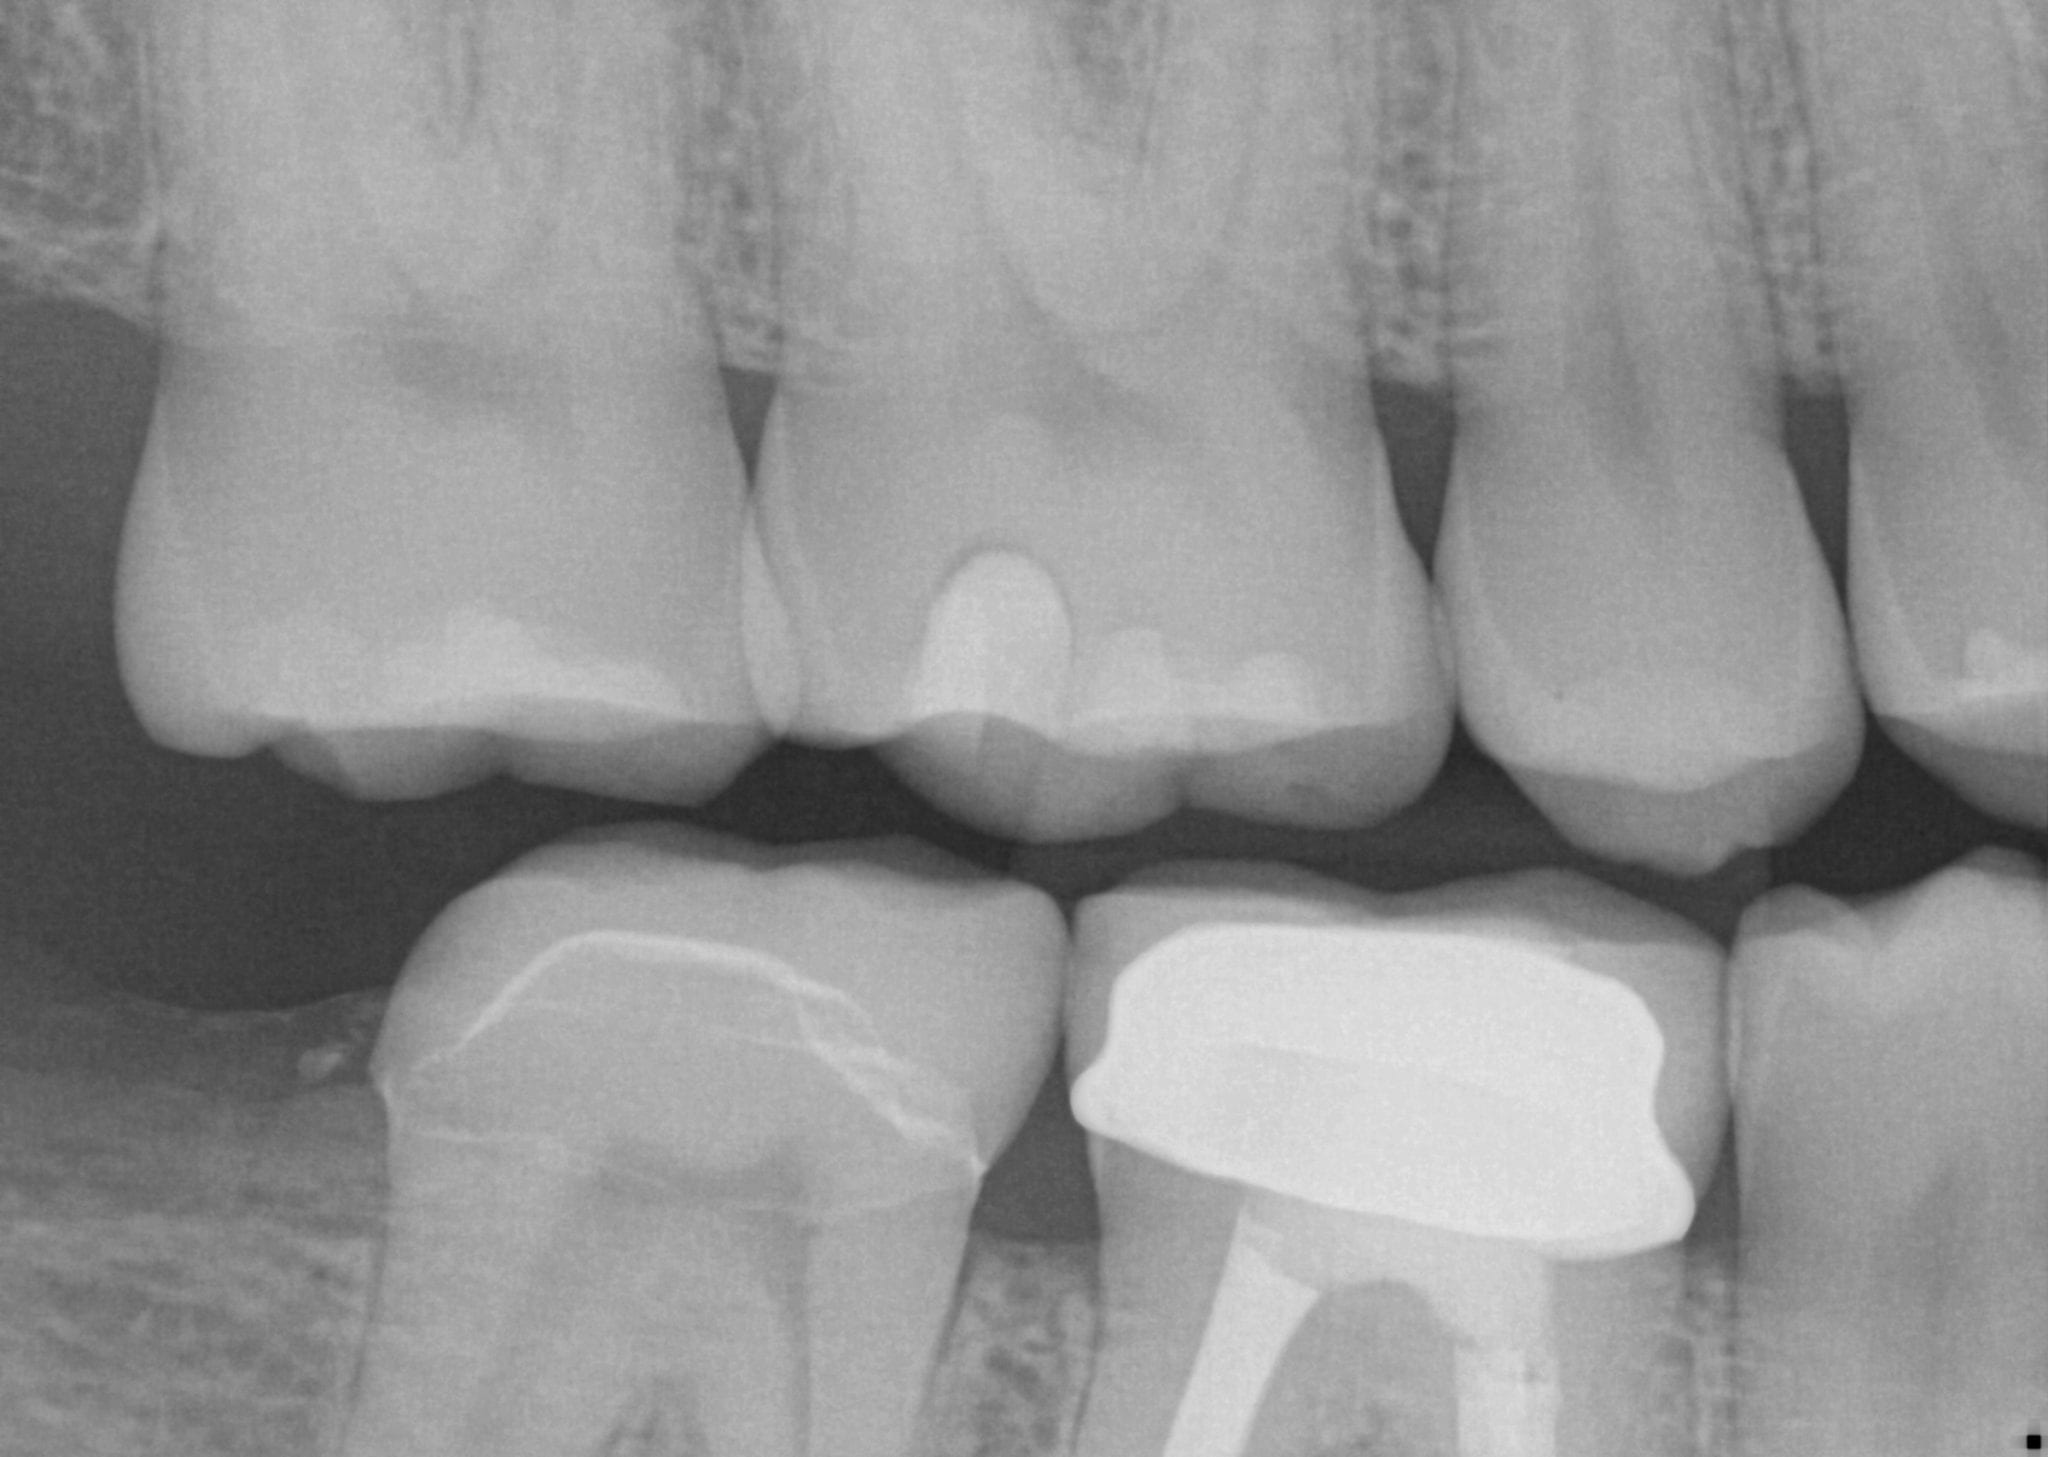
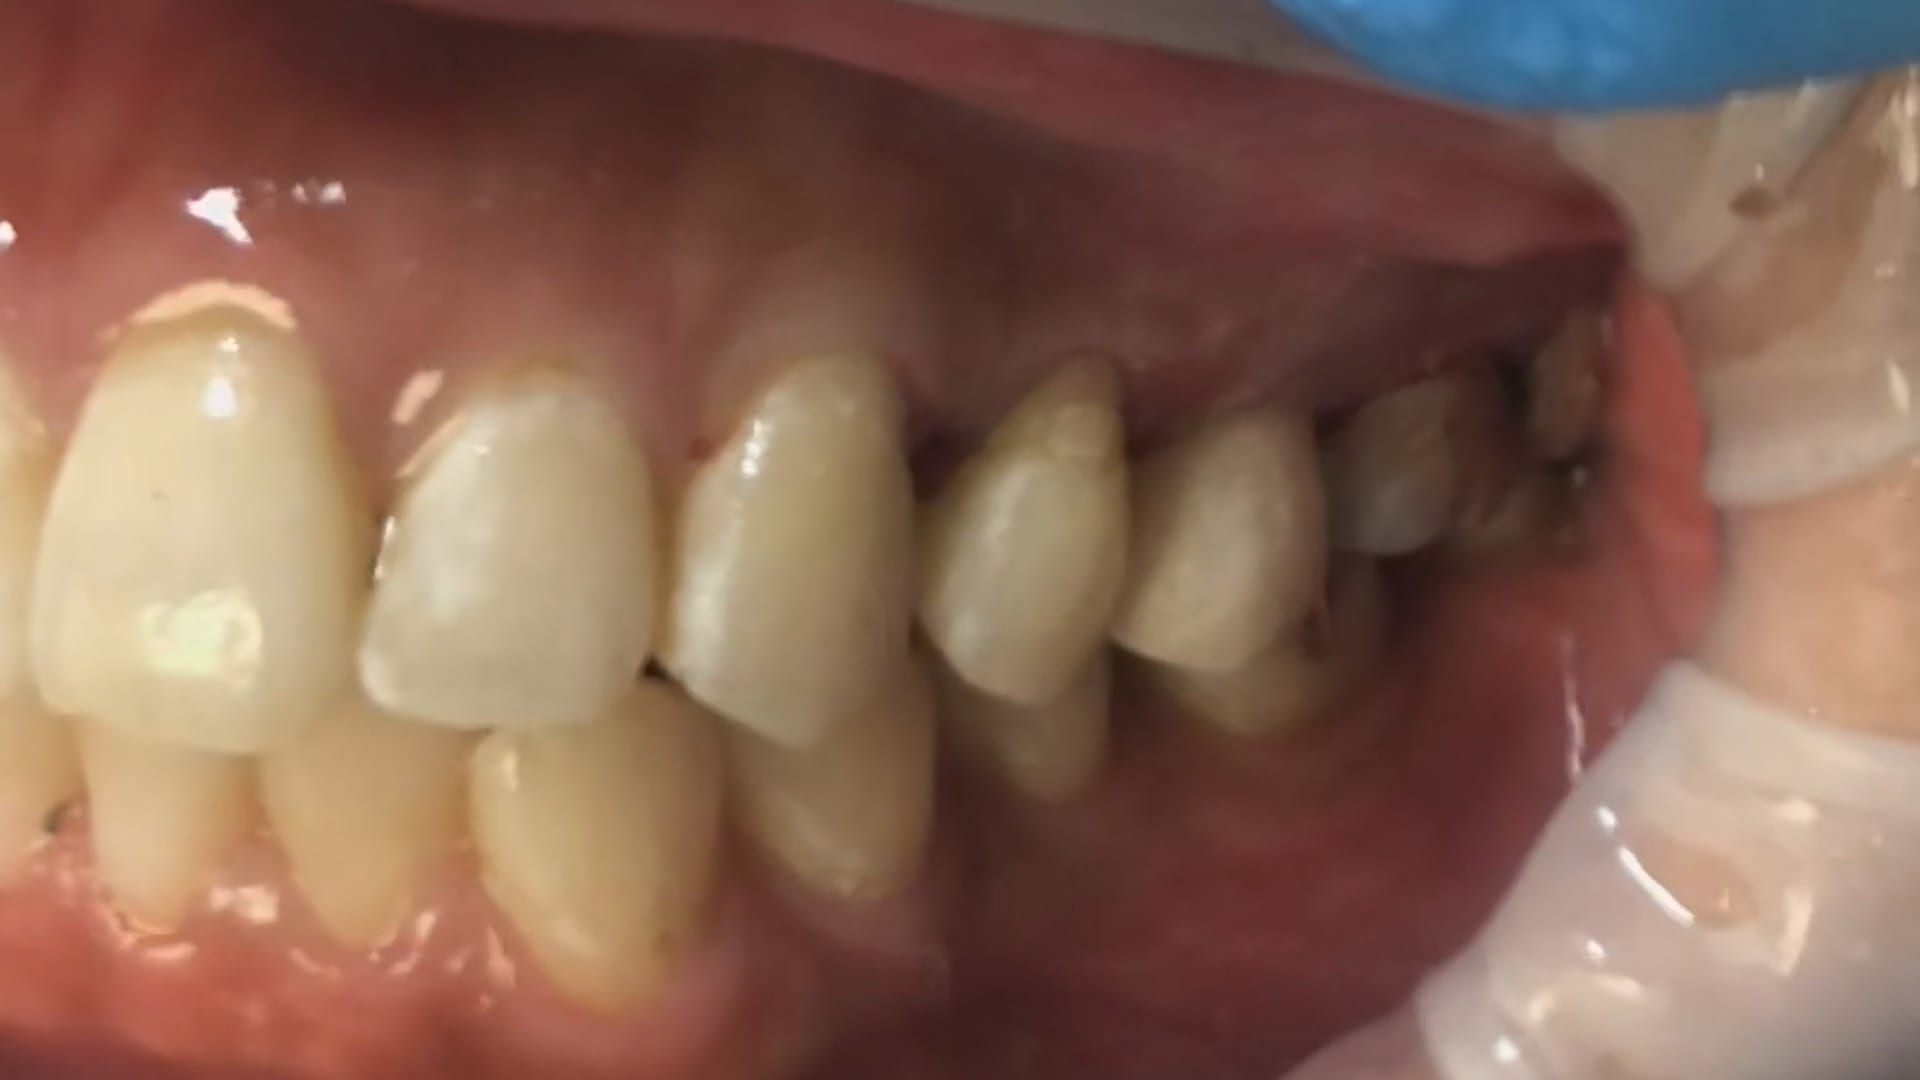
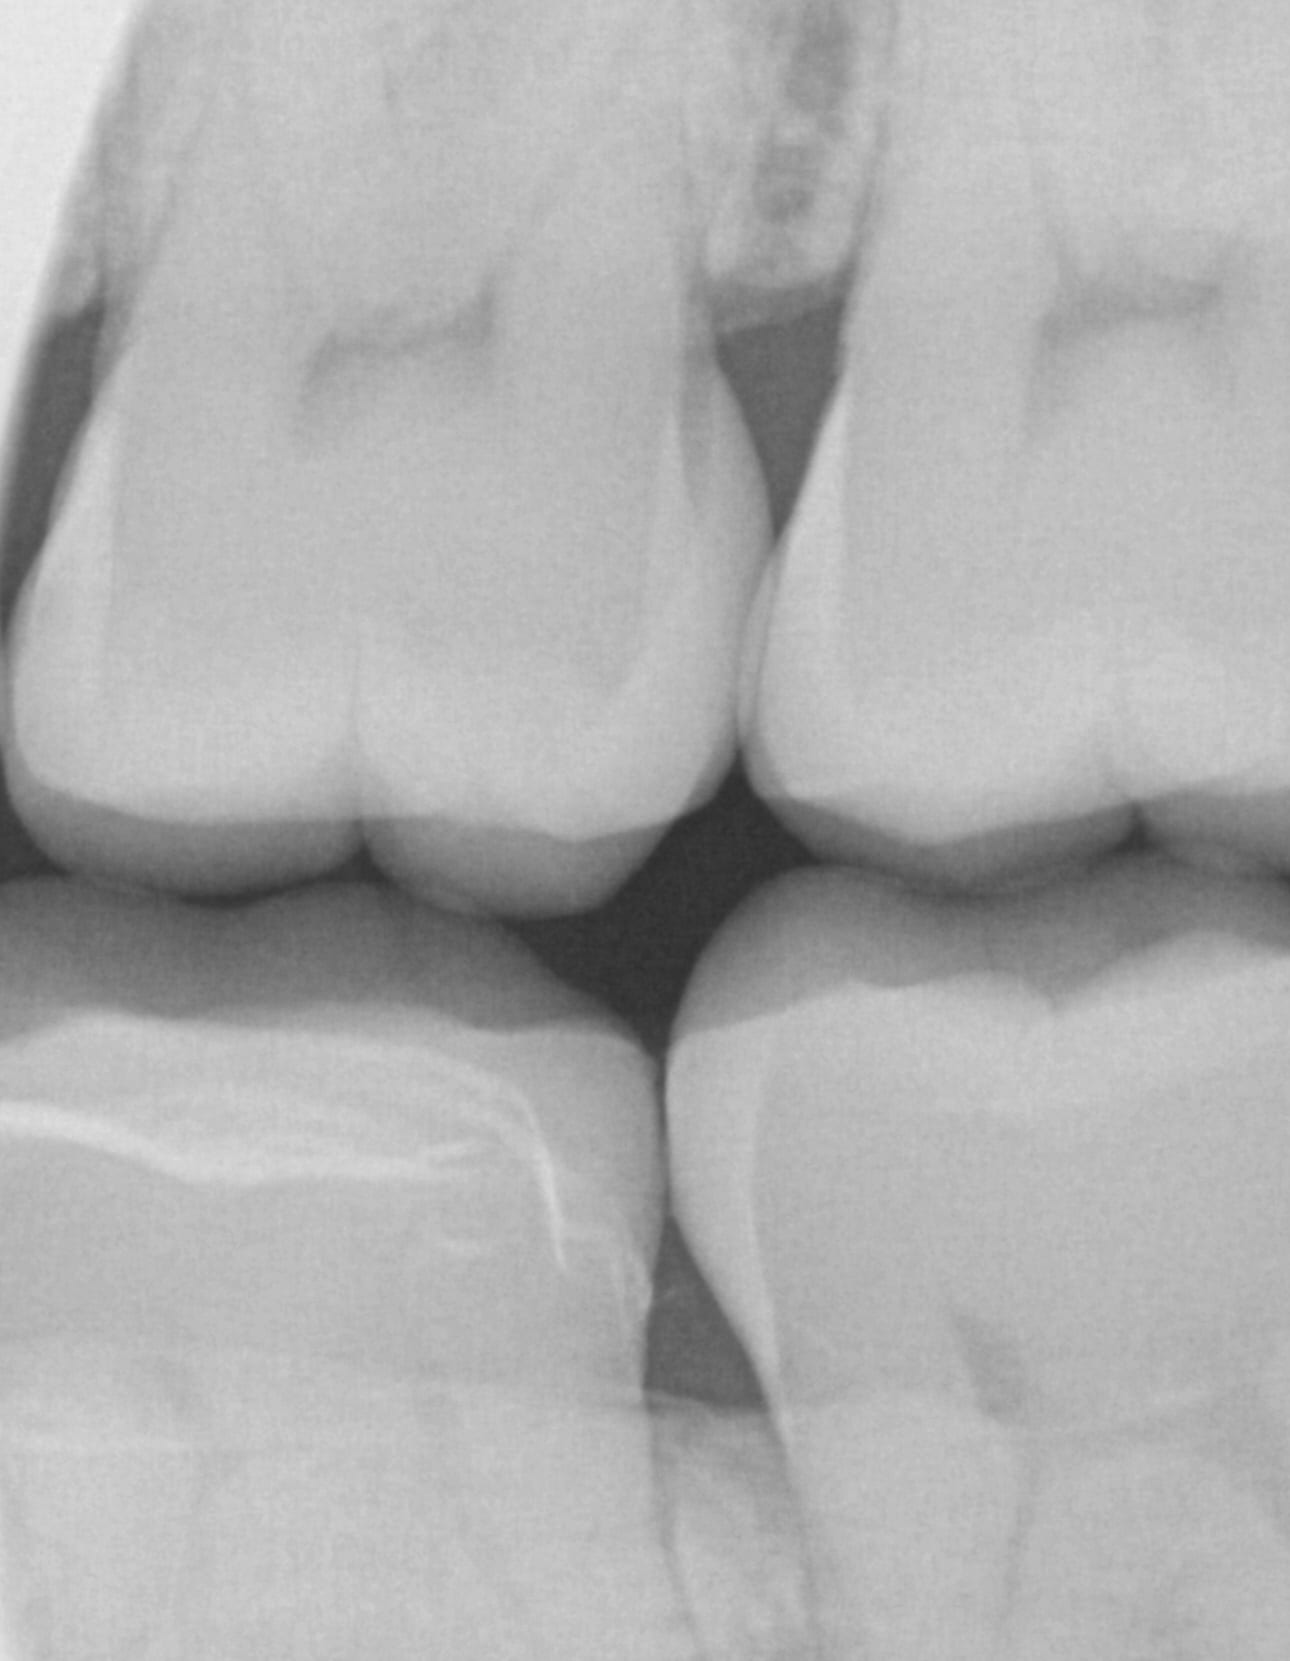
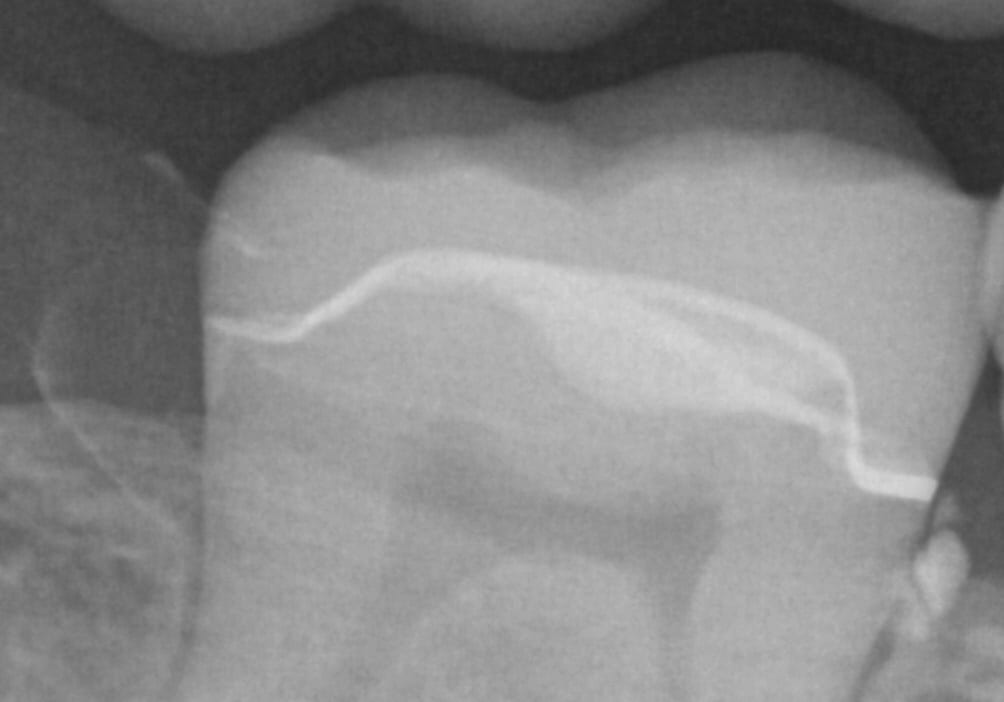
Immediate Post-Op X-Ray taken to verify seat and no excess resin cement

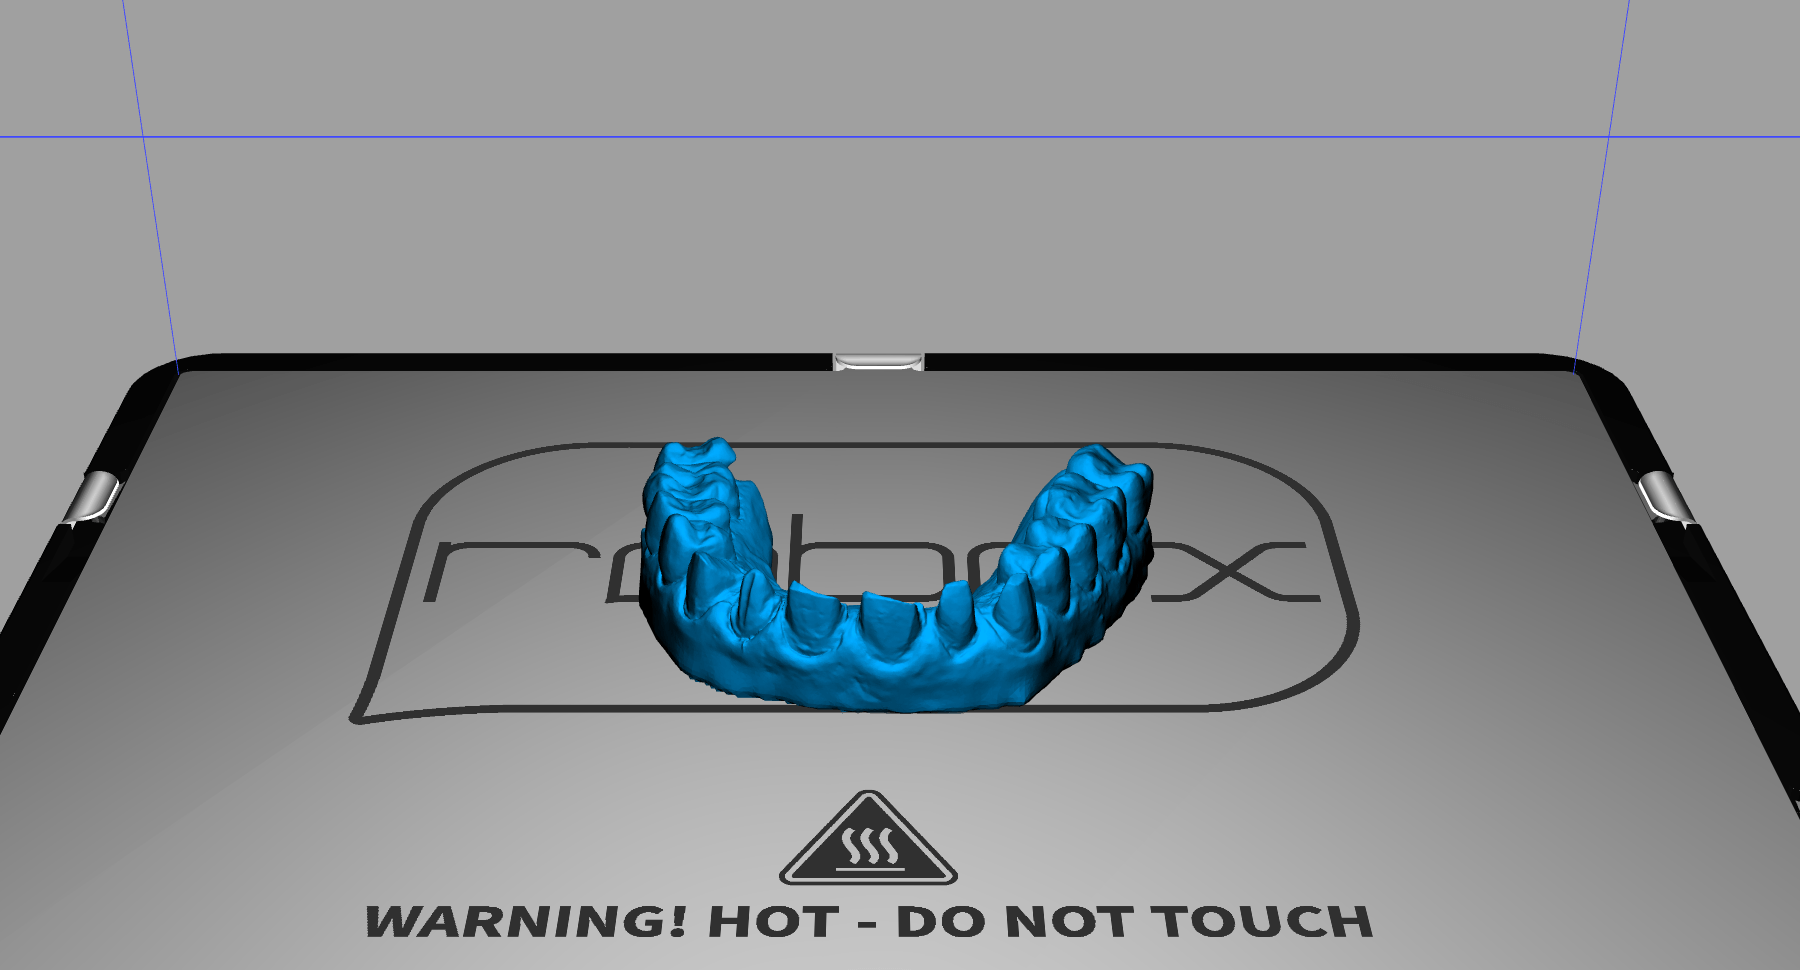
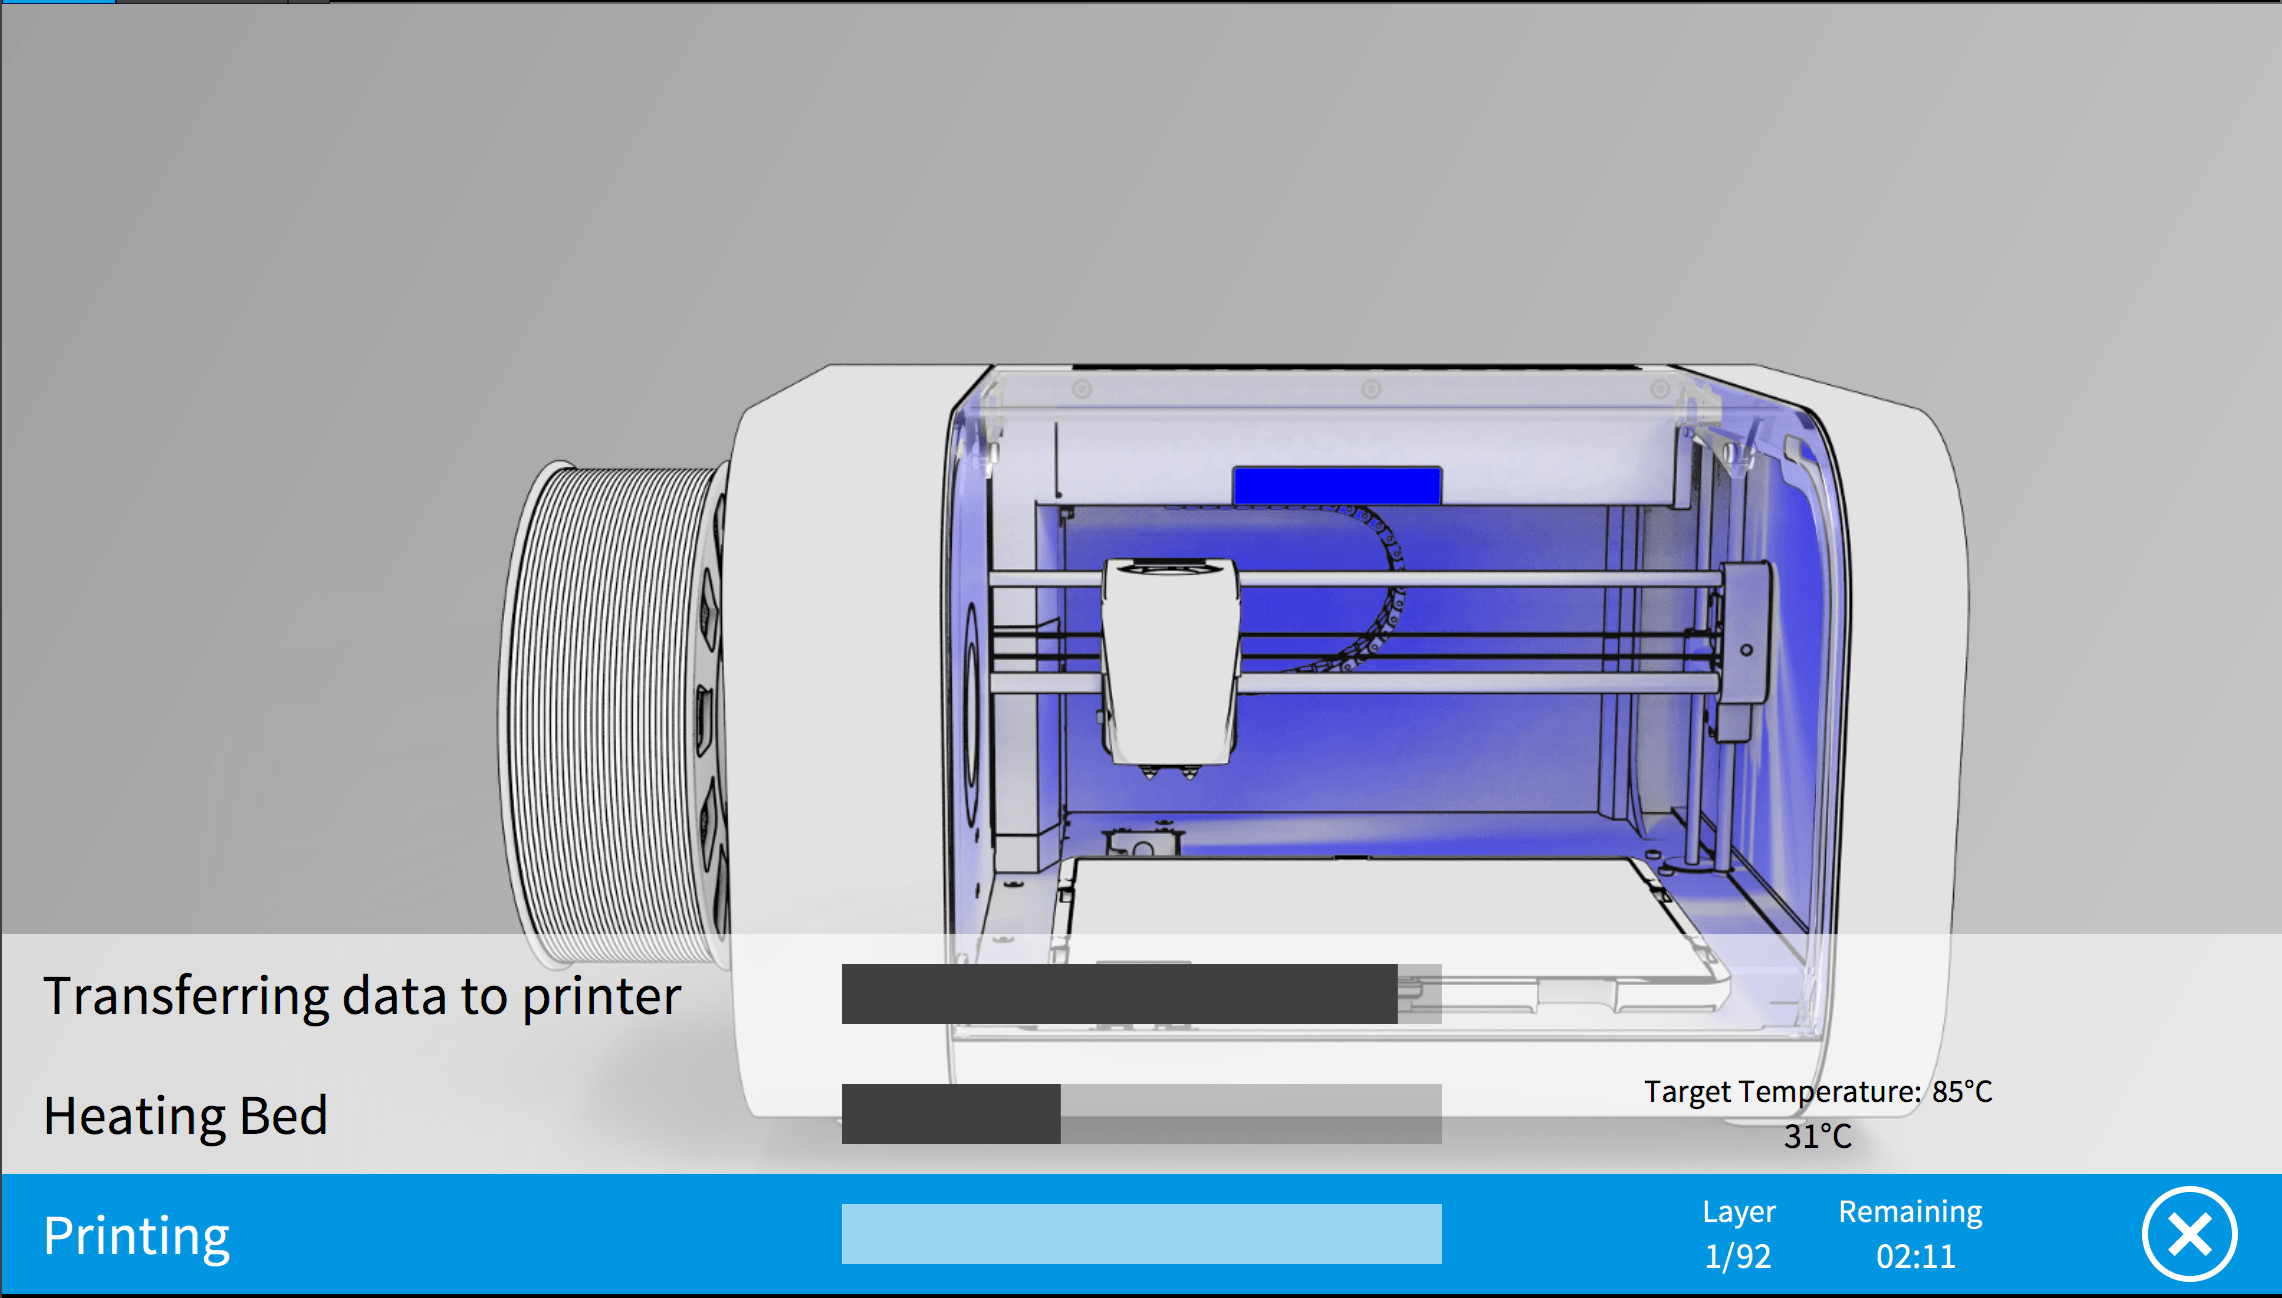
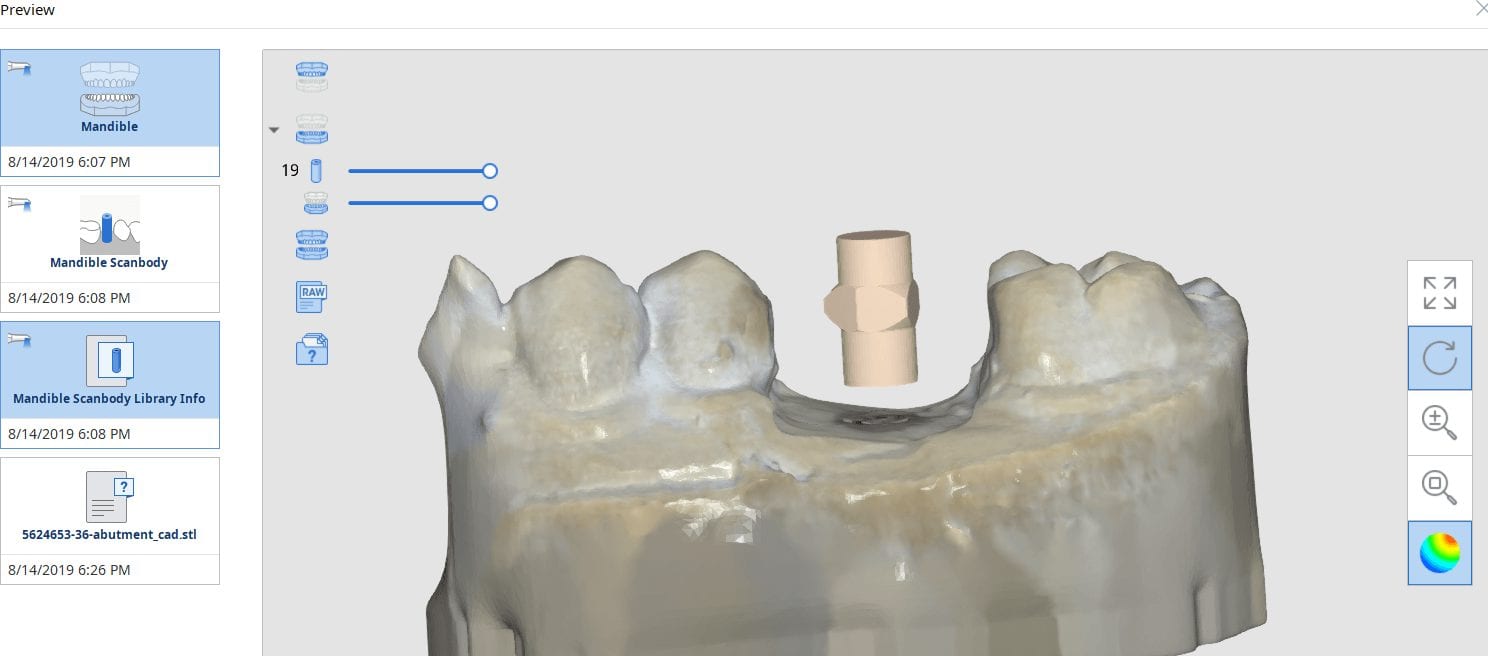
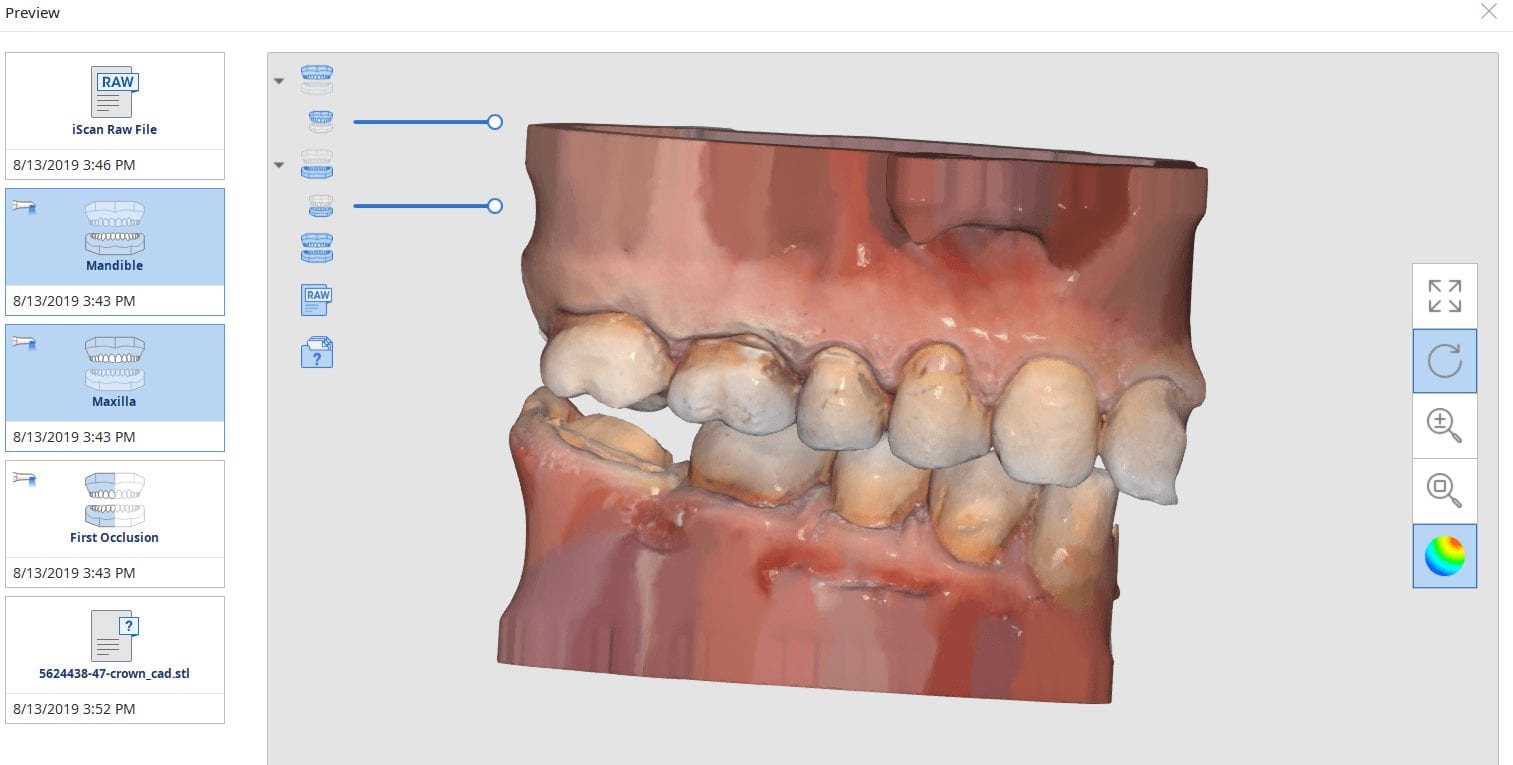
Click Image to Download the OBJ Files And design Along


Posted on Leave a comment

Placing Margin In Medit’s Native Software and Directly Importing The Coordinates Into exocad

medit 2.1 software marking margins

On September 5, 2019 Medit will officially launch the 2.1 software that will allow dentists to mark their own margins before sending to the lab.  Since most images captured from models are inherently large in file size, you can selectively focus on the area where the raw images are taken.  You highlight the area and you process the data sets as shown in the first video.

video
play-rounded-fill
Isolate area for margin and process limited data

Once the area is identified, you can utilize the margin marking tool.  You have many aids to help with margins, including the ability to visualize the transition from one plane to another, along with colors in the models.

video
play-rounded-fill
draw margin line

In this preview, you can see which models were rendered: the lower pre-op, the lower prepped arch, and the coordinates of the margin line.

video
play-rounded-fill
margin line drawn in Medit i500 native scanning software

Once you have captured this detail you can click on the cad software and continue with design or submit it to your lab so they can proceed with the design and fabrication.

video
play-rounded-fill
launch into exocad and proceed with design

Click On Image to Download The Case And  Import Into Exocad

Posted on Leave a comment

Premolar Anatomic Copy Case with Medit i500, exocad, and imes icore eMax Milled Restoration

medit i500 manage crown replacement on second upper molar

In this article, we demonstrate how to manage a crown replacement on a second upper premolar with the Medit i500, exocad, and the imes icore CORiTEC ONE milling machine.  The pre-existing crown was over 2 decades old and the recession revealed a supra-gingival margin.  Furthermore, there was no room to improve the anatomy or its outline form as it was in occlusion with the opposing dentition.

A powerful design technique is the copy of the pre-existing crown. Images of the pre-op are taken while the patient is numb and its contours are copied onto the final design of the restoration.  This process usually takes a minute or so, after which we milled a size 12 emax block restoration.

video
play-rounded-fill
imaging sequence of a second premolar wit medit i500

Posted on Leave a comment

Instant Designs In Copy Mode and Cement Spacer Settings

In this particular case, we are restoring a lower left molar with a full coverage crown. The pre-existing condition has multiple fracture lines and the patient currently wears a retainer. The pre-op optical impression is taken while the patient is reaching anesthesia. Once enough reduction has been achieved, the preparation is captured and an immediate proposal is rendered that replicates the pre-op condition perfectly.

Note how the settings for the start of the adhesive gap influence the cement line that you see on the post-op bitewing after immediate delivery, even though it was milled with the CEREC MCXL.

copy mode- instant proposal
play-rounded-fill

copy mode- instant proposal

Posted on Leave a comment

Automatic Scanbody Detection and Auto-Import Into Exocad and Immediate Fixture Identification

A new feature coming to Medit i500 is the automatic detection of scanbodies while you are imaging. In this clinical case, two implants are placed in the lower left quadrant in a fully guided fashion. Spacing limitations and proximity to vital anatomy did not allow for proper parallelism. This can create all kinds of headaches with analog dentistry where the trays can inadvertently lock in the mouth of distort upon poor up.

With the digital approach, you can scan the gingiva, the arch with easy access to adjacent contacts, and then the scanbodies themselves. What is great is that you do not disturb the primary stability you just achieved by placing physical forces on freshly placed implants.

play-rounded-fill

Once the images are captured and the scanbodies are identified, we launch exocad and the data is not only automatically imported into the Computer Aided Design Software, it also plots the fixtures in the correct position and identifies their location and timing so you can proceed with the design of the custom abutment and / or tibase restoration.

video
play-rounded-fill
auto-import of scanbodies into exocad and immediate identification of implant analogs
Posted on Leave a comment

Digital Copy Milling (Anatomic Wax Up) Vs. Scan Pre-Op Model

In CAD-Ray’s version of exocad, we have dramatically reduced the steps necessary to get a final proposal with copying a pre-op, mock up, or wax-up. We’ve configured the wizzard to walk you through the steps of defining your path of draw after margin placement, trimming away material you don’t want your proposal “to touch” and giving instant proposals.

There is one difference you need to be aware of in design modes; Anatomic Crown vs. Anatomic Wax up. When designing a crown, you can choose to include the pre-existing model in the equation. When you select “YES” to “Scan Pre-Op Model?” you tell the design software to incorporate that into the equation, but you will get a free form proposal and then you adapt it to the pre-op model. Alternatively you can choose Anantomic Wax Up and you will design an restoration in under a minute that is to your liking.

Digital Copy Milling Vs. Scan Pre-Op Model
play-rounded-fill
Posted on Leave a comment

Anterior Copy Crown With Medit i500 Direct Import Into CAD for Design and Mill with CEREC MCXL and CORiTEC ONE

medit i500 direc timport into cad for design and mill with cerec mcxl vs coritec one

In this article, we feature an upper left lateral crown that needed to be replaced due to recurrent decay.  While the patient was getting numb, we defined the job description in the Medit i500 software and imaged the pre-existing crown, the opposing and the bite.  We digitally cropped out the tooth to be prepared and proceeded with crown removal. Once the margins were refined and the tissue was displaced, we imaged the preparation in HD mode and processed the case.

Crown Replacement Due To Recurrent Decay with Medit i500
play-rounded-fill

Once the digital models were rendered, we launched the integrated CAD software that automatically imported the pre-op, the opposing, the prep model, and the bite. Their relationship is preserved in the CAD software and no modifications were necessary.  You have two ways to copy the pre-op; one way is to program the CAD software so it replicates the pre-op perfectly while the other gives you a raw proposal that you can then choose to adapt to pre-existing situation.

video
play-rounded-fill
Direct Import of Models into CAD Software for Design and Mill

Once the case is designed in the CAD software, you can then take it to any CAM and Milling Machine to produce a restoration. Here we milled an emax restoration with the CEREC MCXL and the imes icore CORiTEC ONE at the same time so we can compare the final results.  The CEREC milling machine produced a restoration faster by about 90 seconds but the final results of the margins by the CORiTEC Machine was far superior.  Also, the CAM software, Millbox in this situation, allows us to choose a third drill that is 0.6 mm in diameter.  This increases milling time but results in less overmilling than the 1.2 mm burrs that milll the intaglio of the CEREC Machine.


Nesting to Mill To imes icore CORiTEC One
play-rounded-fill


Hacked Margins by CEREC
play-rounded-fill

Immediate post op 

video
play-rounded-fill
Posted on Leave a comment

Artificial Intelligence in Medit i500 Automatically Identifies Implant Location into Imports into CAD Software

artificial intelligence medit i500 identifies location of your scanbody and automatically launches that information into CAD software

Please, take a seat, you should not be standing while you watch this.

Artificial intelligence by Medit i500 now identifies the location of your scanbody but it also automatically launches all that proper information into CAD software for instant abutment designs. Make sure to watch both videos.  Enjoy.

Medit's i500 Artifical Intelligence Identifies Implant Fixture
play-rounded-fill
Posted on Leave a comment

Managing Second Molars And Clearance

protocol to reduce surprises and post op adjustmenst second molar restoration

Few things in dentistry that can be as frustrating as seating a second molar restoration, whether you are doing same day dentistry or having a lab made prosthesis delivered.  Here is a protocol we recommend that you follow to dramatically reduce surprises and post op adjustments.  In this particular clinical case a zirconia crown debonded and we elected to fabricate an in-office emax restoration.  The sequence is as follows:

  • While the patient is anesthetized and you are waiting for the onset of anesthesia, capture the opposing impression and the arch models.  Trim away the prep digitally and then proceed to the buccal bite capture
  • Do NOT capture the bite until you verify clearance.  In the sequences of videos that follow, watch how we use the Medit i500 to capture digital pictures of the clearance
  • Once we verify clearance, we image the bite.   You have the option at this point to see how well your occlusal stamps match the digital stamps if you want to.  A large deviation may mean the jaw settled or the patient moved during the bite capture.  Note that unlike conventional dentistry, you capture the bite here BEFORE the prep is finalized
  • Once you achieve isolation you can finalize the prep and retract the tissue and capture the prep.  We elected to capture the preparation in HD mode
  • The case is then immediately imported into the CAD software for design and fabrication
video
play-rounded-fill
second molar case set up in medit link
video
play-rounded-fill
Emax at Delivery

Immediate post op x-rays were taken to verify seat and aid in resin cement removal.  The excess cement was removed after the x-rays were taken

Posted on Leave a comment

The Significance of A.I.S.C. (Artificial Intelligence Scanbody Completion) For The Layperson

When we 3D scan the surface of an object, we plot geometric figures (usually triangles) on the surface of that object which is usually round or has some other geometric shape.   A satellite beam hitting the surface of the earth is a good way to visualize the scanning process as the photo illustrates.

As you span across long distances, a meshwork of triangles are plotted together to accurately represent the topography of the object.  You can start “veering off track” and forming models that are inaccurate representations of that object if you don’t properly form this framework.  There are many variables that can introduce these errors including simple matters like speed of scanning.

Now, with this dental artificial intelligence program, the software can digitally plot and drop known shapes on top of attachments or devices we place in the mouth. Color mapping can let us know if we are staying accurate, on path, or introducing errors and deviations!

Now imagine if you have 6 objects sticking out of a flat plane that this AI program readily recognizes. Identifying these landmarks is the first step, but the bigger significance is that we can scan from object 1 > 2 > 3 > 4 > 6, and when we continuously to image backwards from object 6 to object 1, and our color coding remains the same, we are guaranteed scan accuracy.

People go to 2 extra years of schooling to do accurate work in complex cases, most of which will be replaced with software algorithms like this.  This is a serious and significant advancement in dentistry, particularly in implant dentistry. Here’s a video that detail how we use it to restore dental implants.

Video 1 - Setting Up the Medit i500 For The "Scanbody Drop"
play-rounded-fill
Introducing "Implant ScanBody Drop" by Medit


Posted on Leave a comment

Digital Scanbody Drop By Medit i500

medit i500 scan body drop

In the following three videos we walk you through the steps of how the digital “scanbody drop” works to identify the location of an implant fixture. In the demonstration videos, we highlight this upcoming feature and how you an integrate the CAD software for implant designs and restorations. In the final video, we demonstrate how you can take the construction files to the milling machine of your choice and mill out the abutment and/or suprastructure.

Video 1 - Setting Up the Medit i500 For The "Scanbody Drop"
play-rounded-fill
Introducing "Implant ScanBody Drop" by Medit
Posted on Leave a comment

EZ Medit Scan to CAD Design to 3 Different Milling Machines

In this case demonstration, we show how you can image in the Medit i500 and follow the most logical steps and sequences to produce a restoration.  You capture the preparation, the opposing and bite and once the models are rendered, you can launch the CAD software of your choice.  The lower right molar was endontically retreated and the porcelain fused to ceramic crown needed to be replaced as it was overcontoured and impinging on the soft tissue. After the crown was removed, the preparation was refined and impressions were taken.  The remaining cotton / cavit / gutta percha was removed right before placement, a NX3 by Kerr was used, which is both build up material and a resin cement.  The space between the intaglio of the crown and the pulp chamber was retrofilled at seating time and a final x-ray was taken to make sure there was no excess resin left behind.

Here, we utilize exocad.  Once we click on the CAD software button, the software is launched and the models are imported automatically.

video
play-rounded-fill

Once the case is designed, meditlink walks you through the next step which is to nest the restoration and to mill it with whatever milling machine you choose to utilize. Here, we used the CEREC MCXL, the Z4 from VHF, and the imes icore CORiTEC one.

video
play-rounded-fill

Nest and mill with CEREC MCXL

video
play-rounded-fill

Nest and mill in Zed 4 from VHF

video
play-rounded-fill

Nest and mill in imes icore CORiTEC One.

Here, you can watch how all three machines come to a grinding halt as we pushed the amps on the surge protector and power to the units.

Immediate post op x-rays to verify seat and to make sure all excess resin cement was removed.

Posted on Leave a comment

Six Anterior Units Scanned with Medit i500 to Produce eMax Restorations on Printed Models

medit i500 scans six anterior units
play-rounded-fill
video
play-rounded-fill

video
play-rounded-fill
video
play-rounded-fill
video
play-rounded-fill

Posted on Leave a comment

What are the Dental Project Files in exocad and Medit i500 Lab Software?

cam to cad files

When you start a case in exocad or in Meditlink, you have to define a project or define the job by entering a prescription.  A dentalproject file is created that has all the pertinent data, like the type of restoration, the shade, the material, parameter settings,etc..

video
play-rounded-fill
exocad file types

After the case is designed a dental cad project file is formed, along with the stl file of the restoration, accompanied by the construction information.  Once the construction file is formed, the case can be import it into CAM software like cerec inlab.  It carries a lot of information like the margin line.

Some CAM software can process simple redirections without the need for any other pertinent information from the construction file, while others require it. Some are so specific that a simple typo or wrong character will lead to mis-production.

In the case of cerec inlab, it’s best to have the construction file accompany the stl of the restorations, although there are numerous work-arounds in case you don’t. Once processed, the restoration is taken to the Mcxl milling machine.

Why are we so focused on teaching this concept ? Because it is critical for milling metal abutment where you have to keep track of an object that is cylindrical and symmetric in shape.  The code in these files will dictate the indexing of the connections and how these abutments are milled.

Posted on Leave a comment

First Molar Crown With Medit i500 Version 2.1 Beta, Design In exocad, And Milled With Imes Icore Cortitec One

margin market medit i500 2.1

Case Set Up

In this video we showcase the set up page of the Medit i500 Lab Version for software version 2.1, where you define the job description, enter parameters, designate the opposing and proceed to the next step where you launch the imaging software.

video
play-rounded-fill


Pre-Op Documentation for Full Cuspal Coverage

This footage was taken to document the undermined cusps and the justification for full cuspal coverage

video
play-rounded-fill

Captured Impressions While Patient Was Reaching Anesthesia
While the patient was reaching anesthesia, the opposing arch was captured along with the preparation model. The area to be prepared was cropped out and once enough reduction was achieved the bite was captured.  We highly recommend that you verify reduction and adequate clearance before you capture the final preparation. This way, you have one last ditched effort to verified you will have adequate thickness to your restorative material.

video
play-rounded-fill

Impression of Preparation after Reduction was Verified

video
play-rounded-fill

Margins Placed in Native Imaging Software

video
play-rounded-fill

Separate Design in exocad

video
play-rounded-fill

Post Op

play-rounded-fill
Immediate Post Op
Posted on Leave a comment

Marking Margins in Medit i500 Before Sending a Case to a Lab or CAD Software Like exocad

marking margins in medit i500 iscan software

The new Medit i500 software will feature the ability to mark margins in the imaging step before you import the case into a CAD software or send it to the lab. In this article we showcase a case where a 12 year old implant crown needed replacement. The pre-op images were captured, along with the opposing and the bite.

play-rounded-fill

After the area was anesthetized and the crown was removed, expasyl was used to achieve hemostasis and tissue retraction. The margins of the abutment were imaged. Note how we used a feature in the Medit scanner to change the scan light from blue to white, which allows you to pick up red (blood and tissue) that is normally difficult to capture.

play-rounded-fill

Once the margins were captured, we activated the margination tool. You highlight the area you want to address and the meshwork is calculated and processed locally, where you can then designate your margins that are exported to CAD software along with the jaw model, the opposing, the pre-op and the bite.

play-rounded-fill

This is a preview of the models that you can export and send to a lab or take directly to design software for chairside milling.

play-rounded-fill

Alternatively, the traditional way would be to not place the margins in the native Medit software and to place it in the CAD software itself. As you can see both options are very viable and you do not lose any resolution of the scanned data between the imaging program or the design software.

play-rounded-fill
Posted on Leave a comment

Capturing Multiple Occlusal Relationships for the Maxilla and the Mandible with the Medit i500

capturing multiple bites medit iscan software

There are multiple ways one can capture the bite for a patient. In this clinical case, we focus on the easiest way to capture two bites (one in maximum intercuspation and the other in an opened vertical dimension and in protrusive for a sleep apnea oral appliance).

The Medit iScan software allows you to capture two bites. Most people treat them as “Left Bite” and “Right Bite”, but the software doesn’t care if you follow this guideline. You can capture full arch bites in maximum intercuspation in one catalog box and then capture a full arch bite in the open / protrusive position in the second bite.

The next step is to clone or duplicate the case, where you set the first desired bite and process the case manually in maximum intercuspation and then in the second cloned case, you manually set the bite to the different occlusal scheme. As our users advance in their experience and knowledge level, they clone the same case multiple times so that they don’t have to re-image the upper and lower jaws multiple times and just capture different bites in all the different case files.

Our super advanced users image multiple bites in any folder they want, process it, and use that digital model to related the jaws together to any position they want in a CAD software like exocad.

play-rounded-fill
play-rounded-fill
Posted on Leave a comment

Launch exocad Direct from Medit i500 for Custom Abutment Design from an NT-Trading And Mill With The CORiTEC ONE

digital design exocad direct from medit i500 for custom abutment design

The Medit i500 intra-oral scanner has two different software programs to operate, one is of which is geared towards clinical dentistry and the other is geared towards laboratories. Our advanced users are encouraged to use the lab version as it has a lot more functionality. One of them is to directly link to exocad software.

In this particular preview we show you the interface where you can launch the iScan program and define the work order and set all the parameters for your restorations.

play-rounded-fill

Once all the settings are chosen, you launch the Medit scanner and image the case. Here, we defined the custom abutment for the crown and the opposing, which activated the catalog box for the antagonist, the arch, the scanbody, and the buccal bite. All respective images were captured.

play-rounded-fill

The models were then processed and exocad was launched for the design of the custom abutment and crown.

play-rounded-fill

Once the implant type is identified then you can design the abutment and crown with great control, where you can contour the underbelly of the abutment to help provide tissue support.

play-rounded-fill

The design and the construction file is taken to the milling machine. Here, we used the CORiTEC ONE to mill the titanium abutment and then the Lithium Disilicate crown. You can see the great internal adaptation when the crown and the abutment are flipped around completely and the abutment does not fall out.

play-rounded-fill
play-rounded-fill