Posted on Leave a comment

Cracked Tooth Treated with Medit i500 and emax Milled With Z4 by VHF

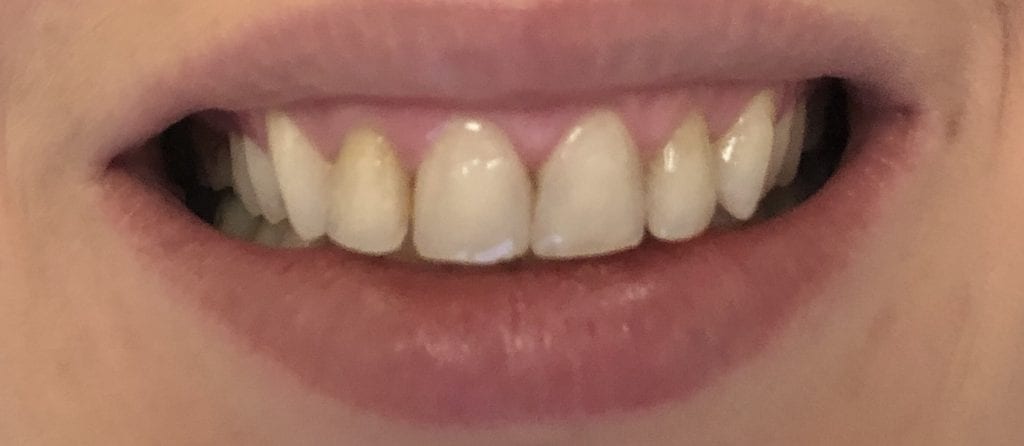
The following case demonstrates how a symptomatic cracked tooth was treated with an emax restoration that was fabricated / seated during the same appointment as it was prepared. The patient had a heavy gag reflex and the preparation and access were difficult. The medit i500 was utilized and the restoration was designed with CAD-Ray’s design software, powered by exocad, and then milled with the Z4 milling machine by VHF

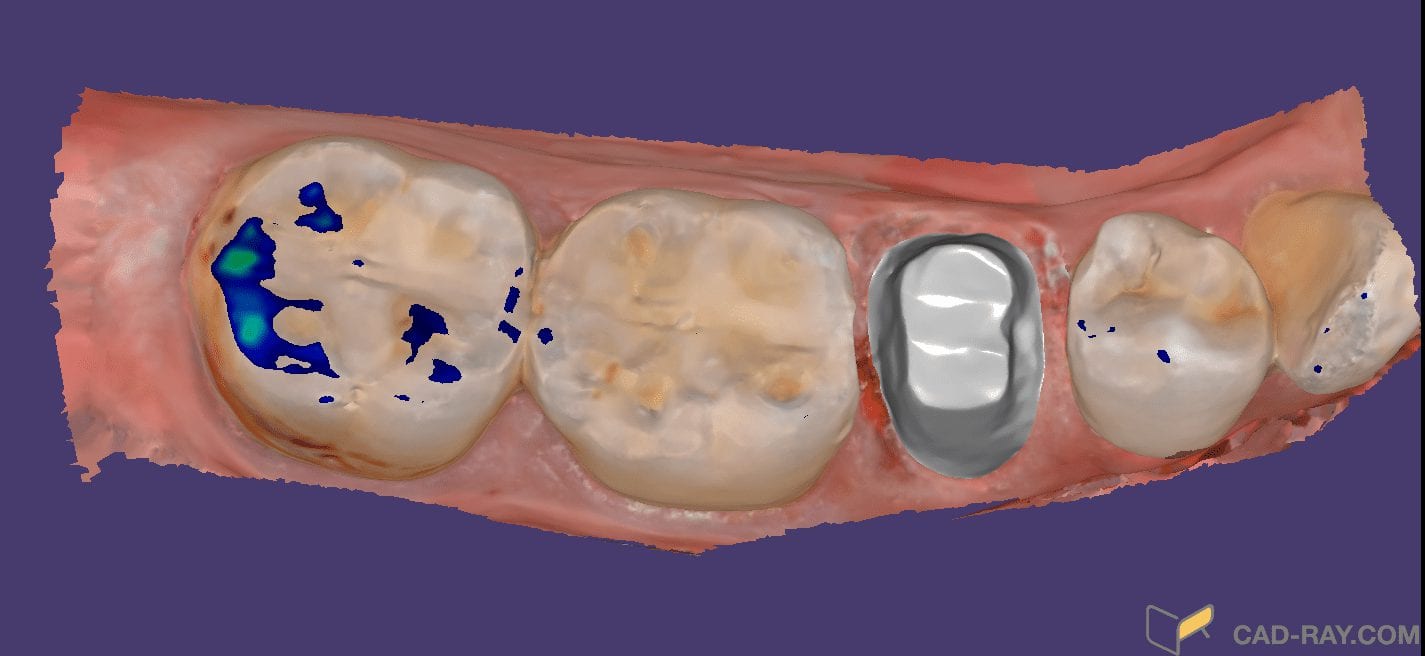
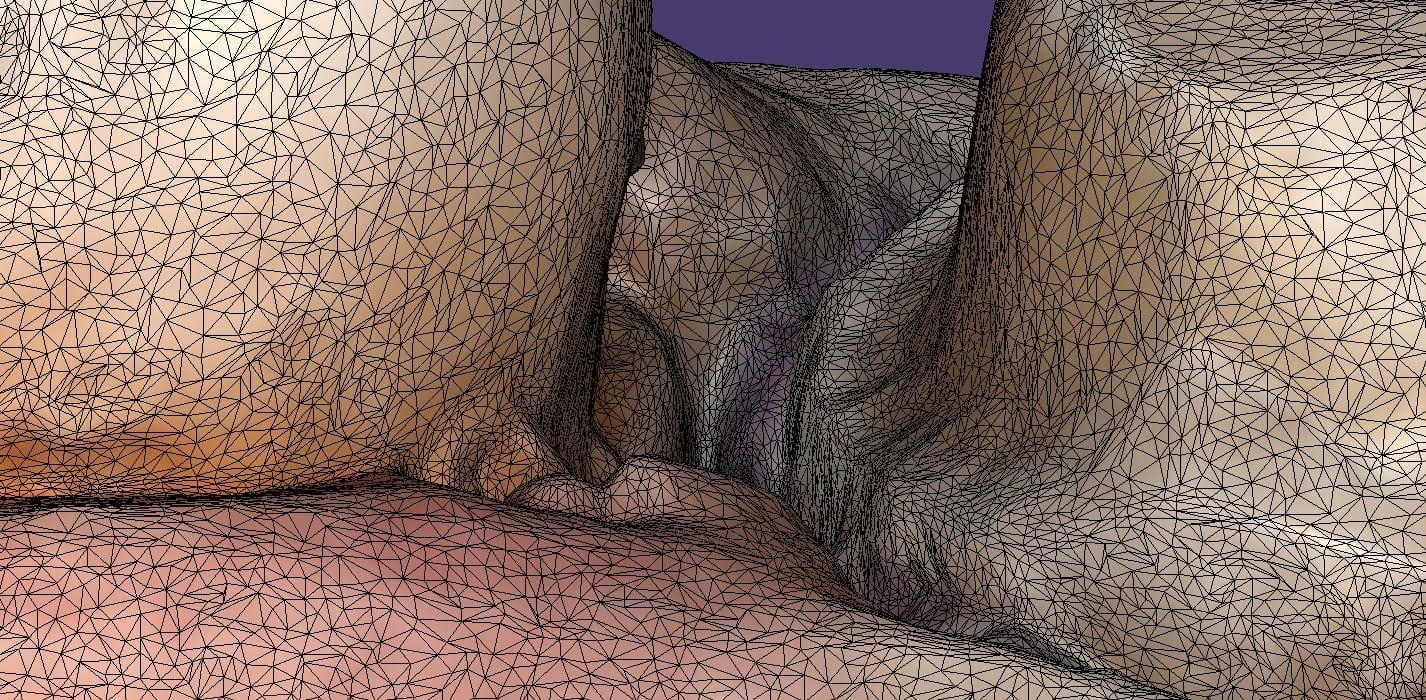
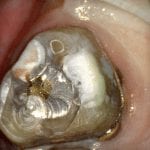
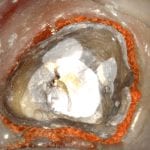
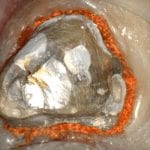
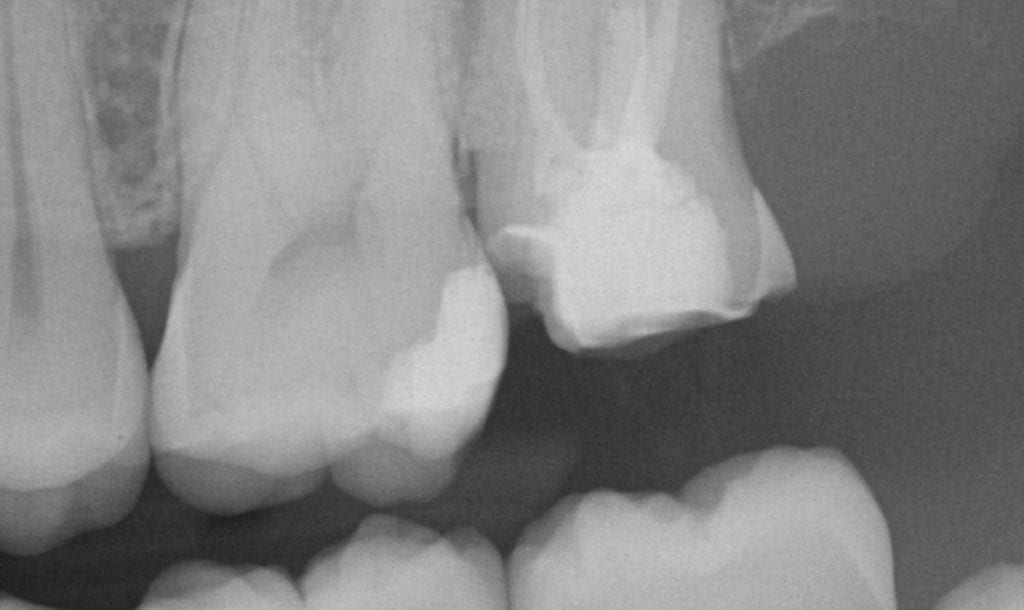
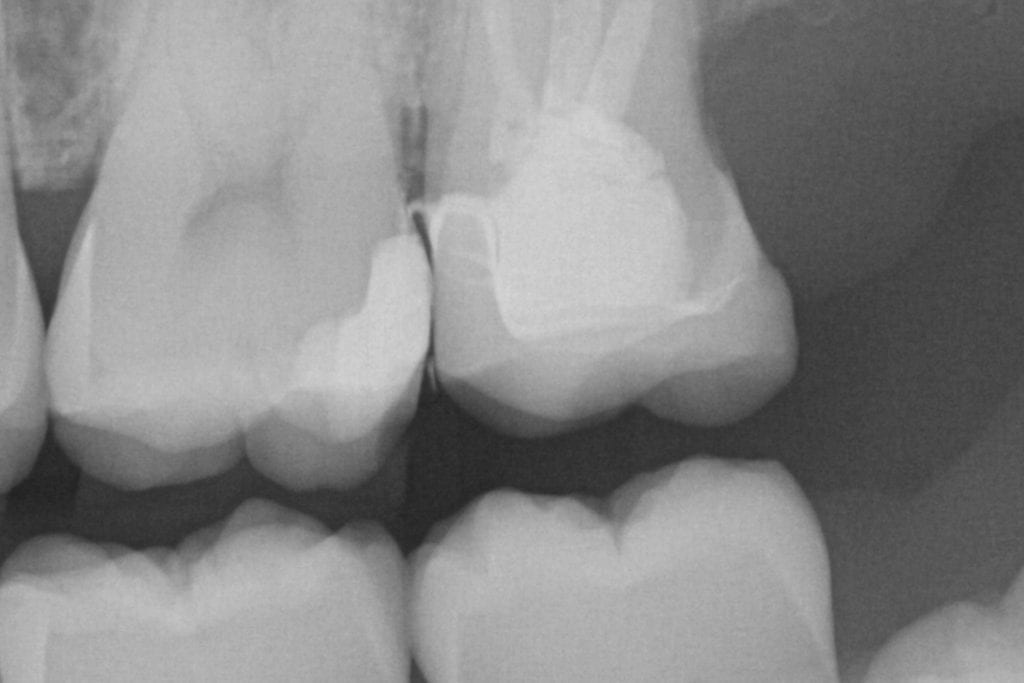
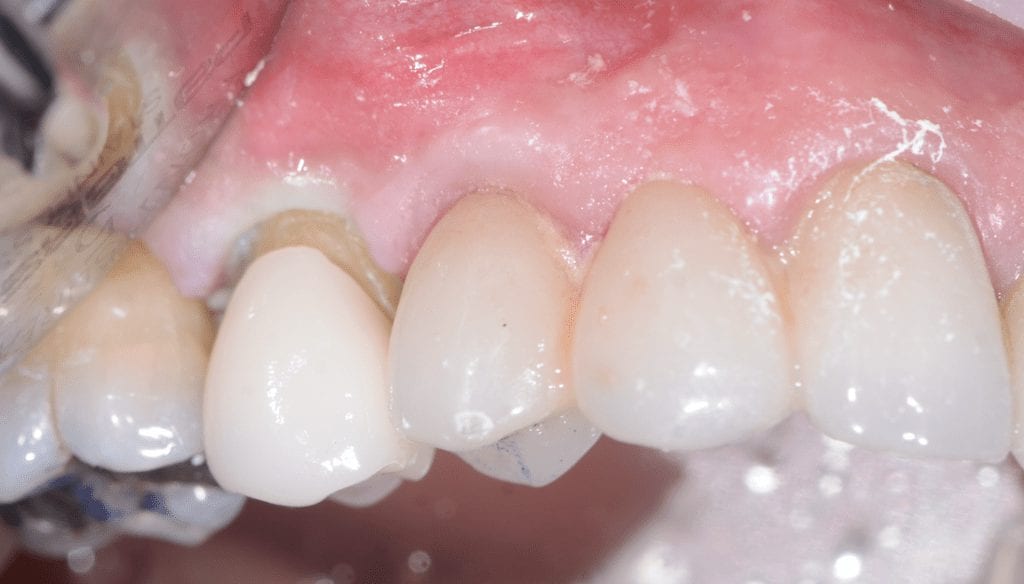
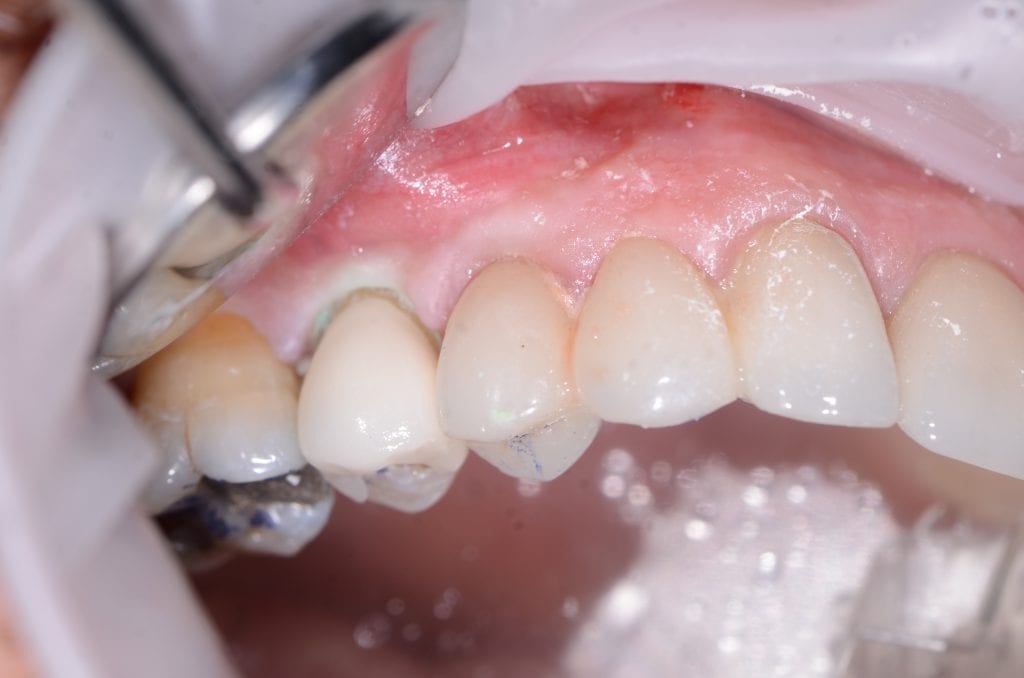
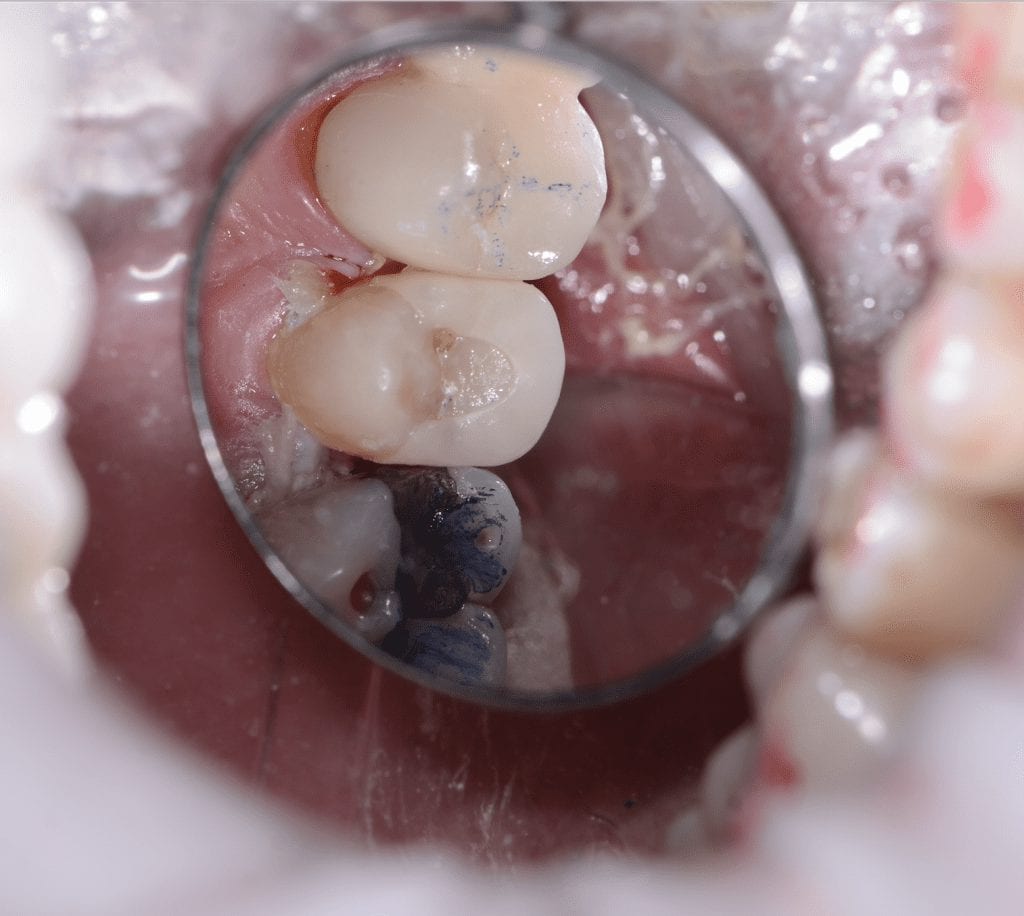
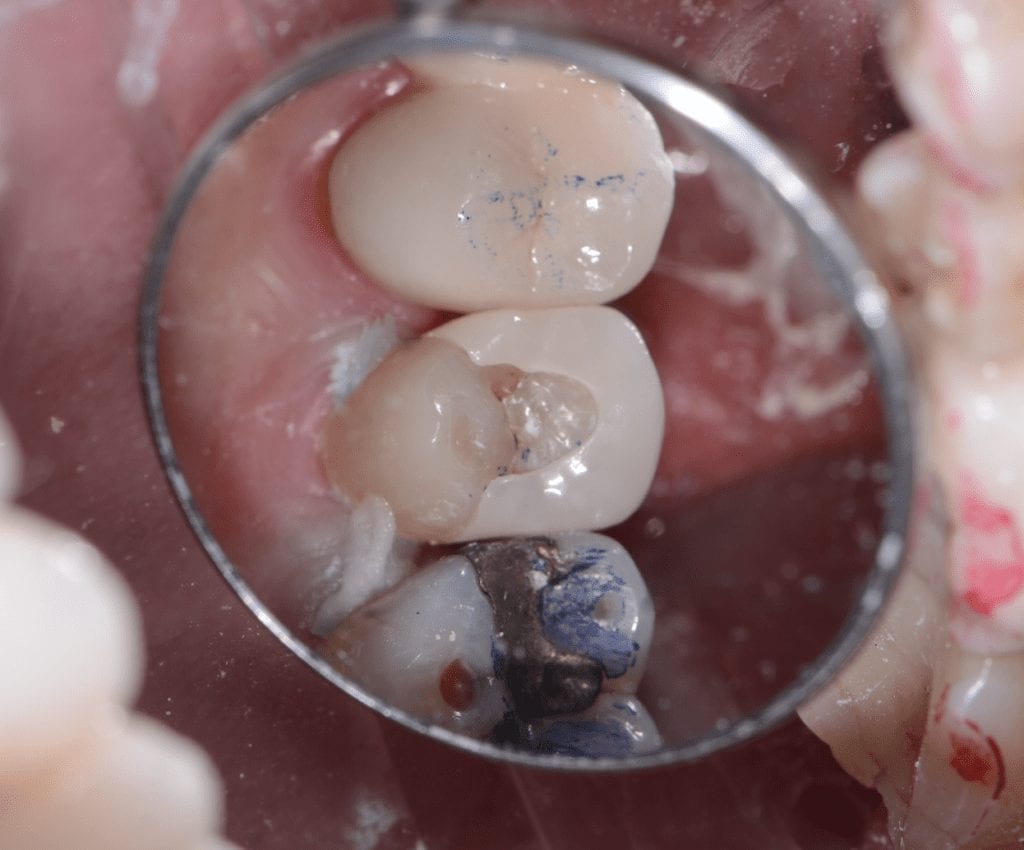
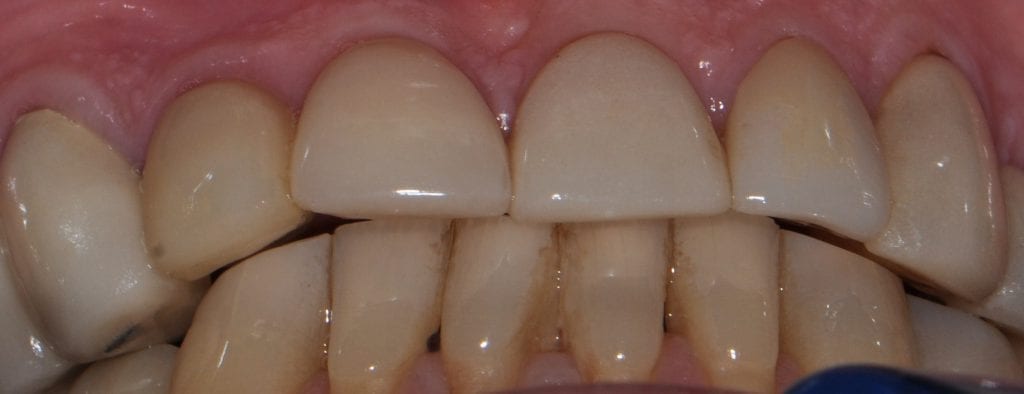
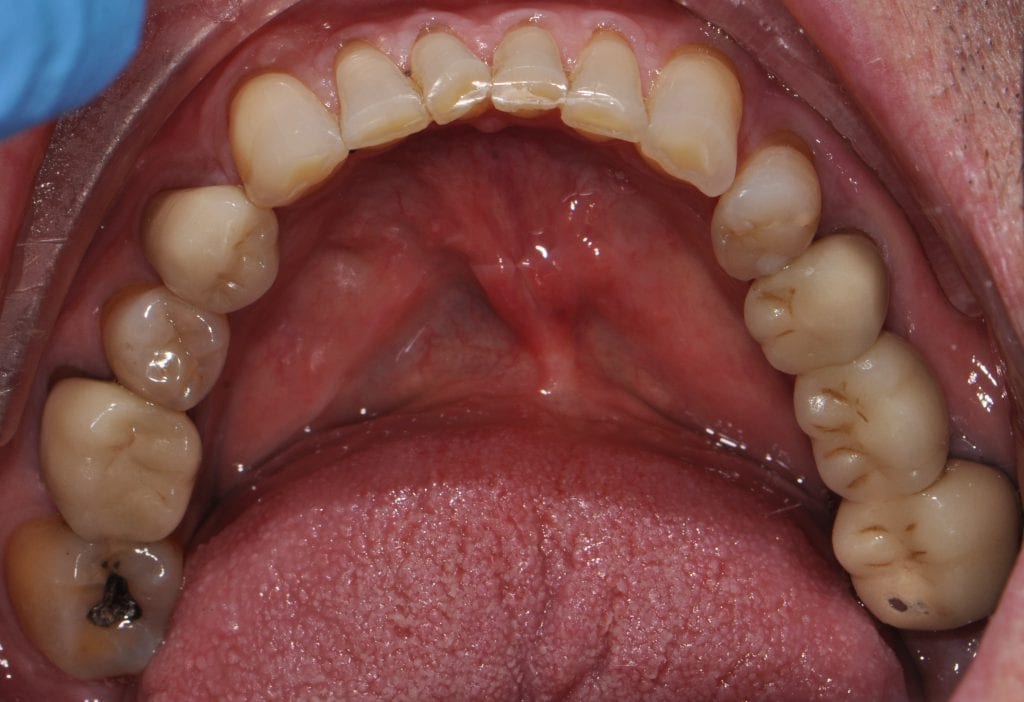
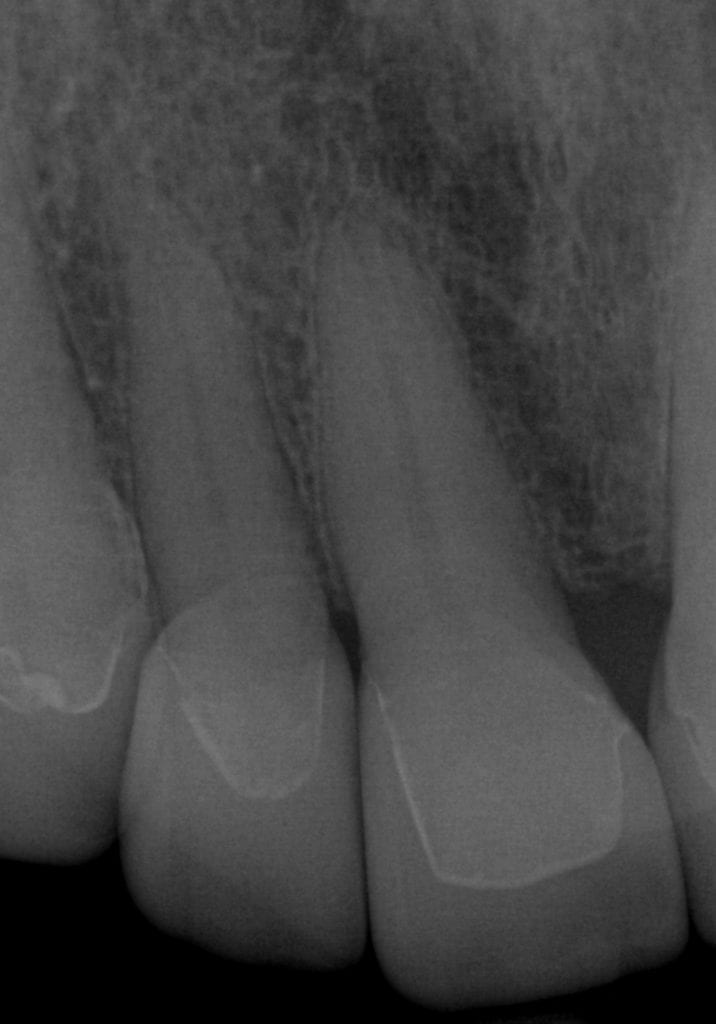
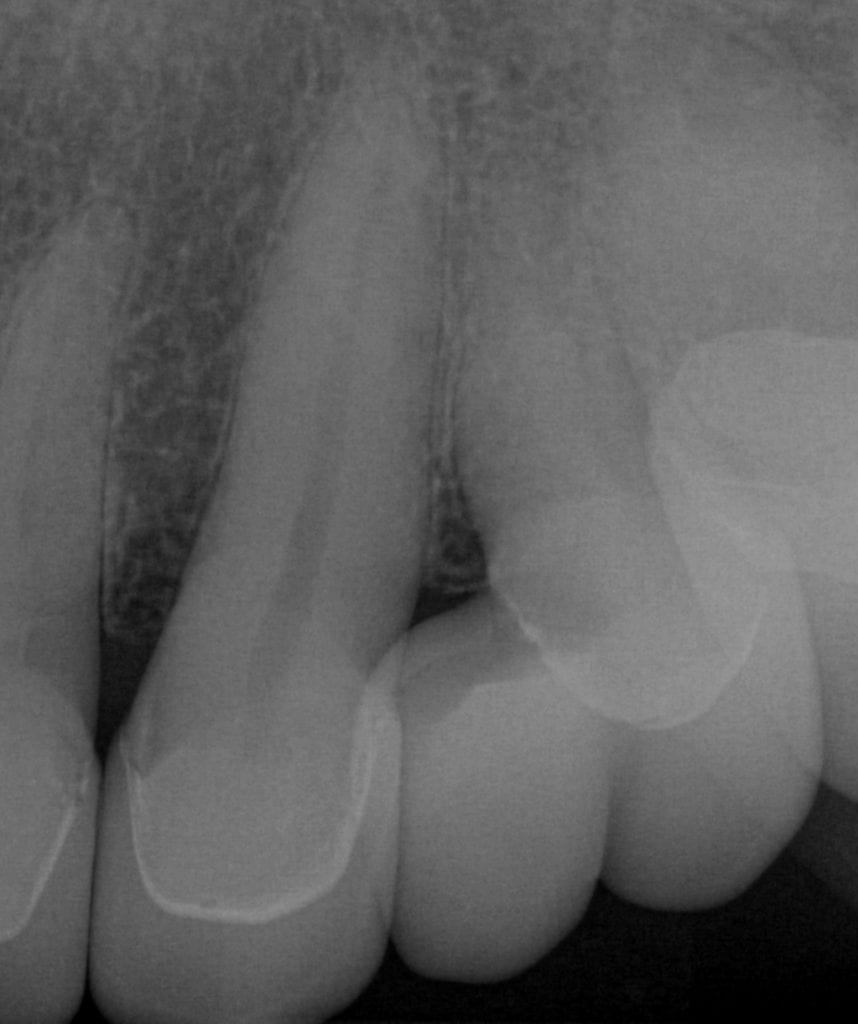
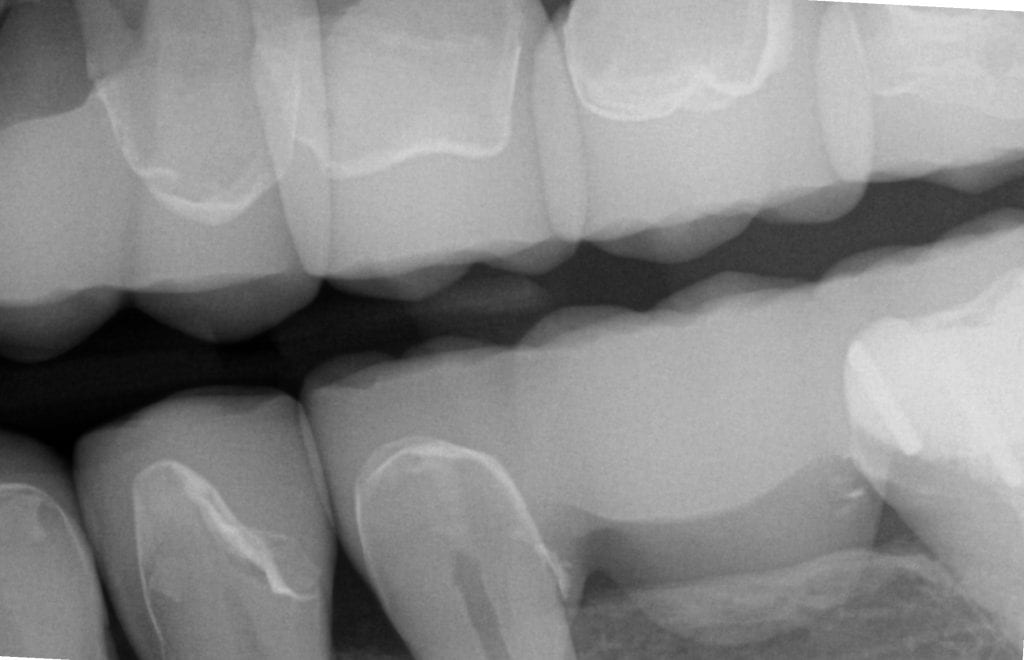
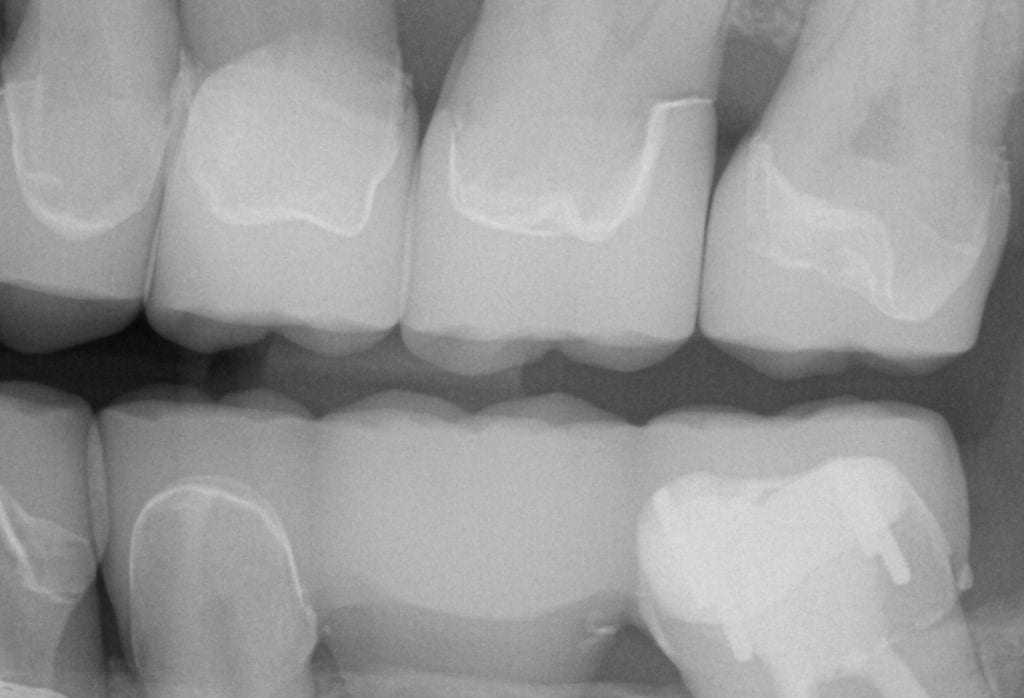
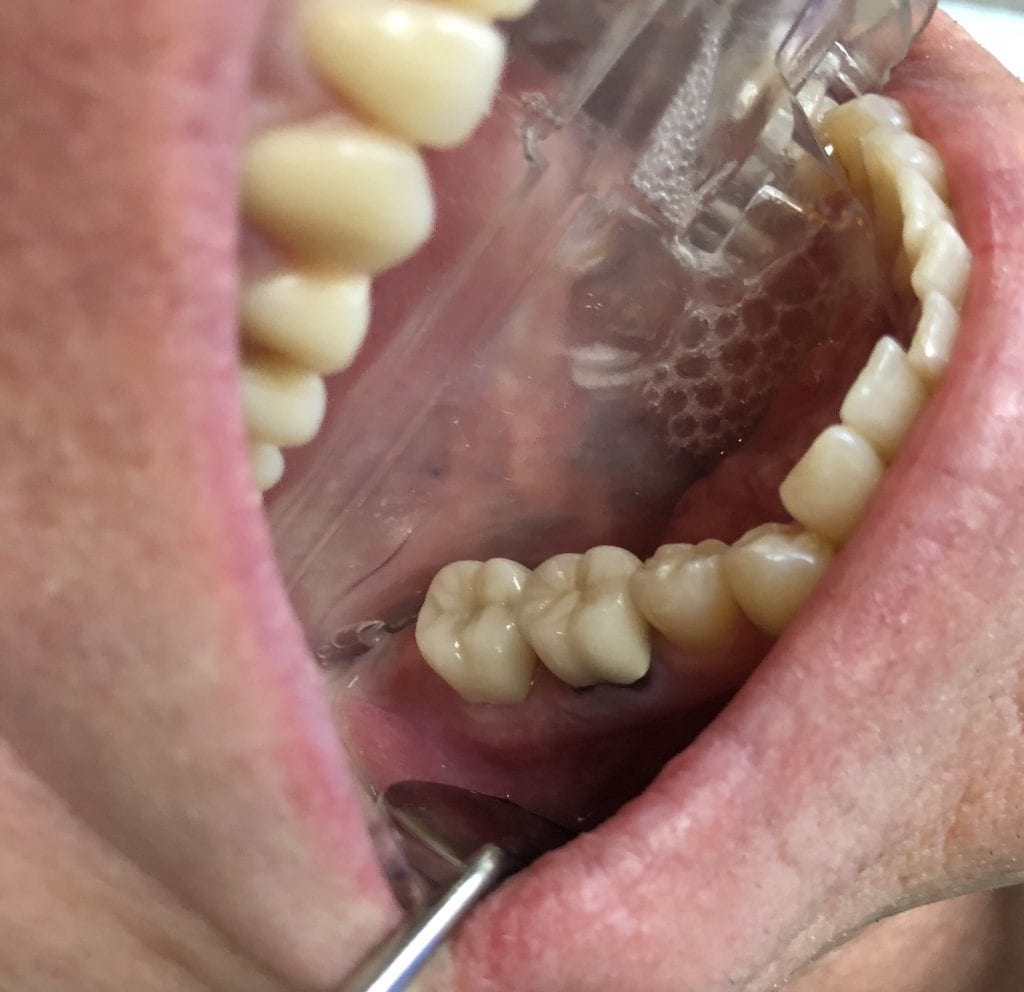
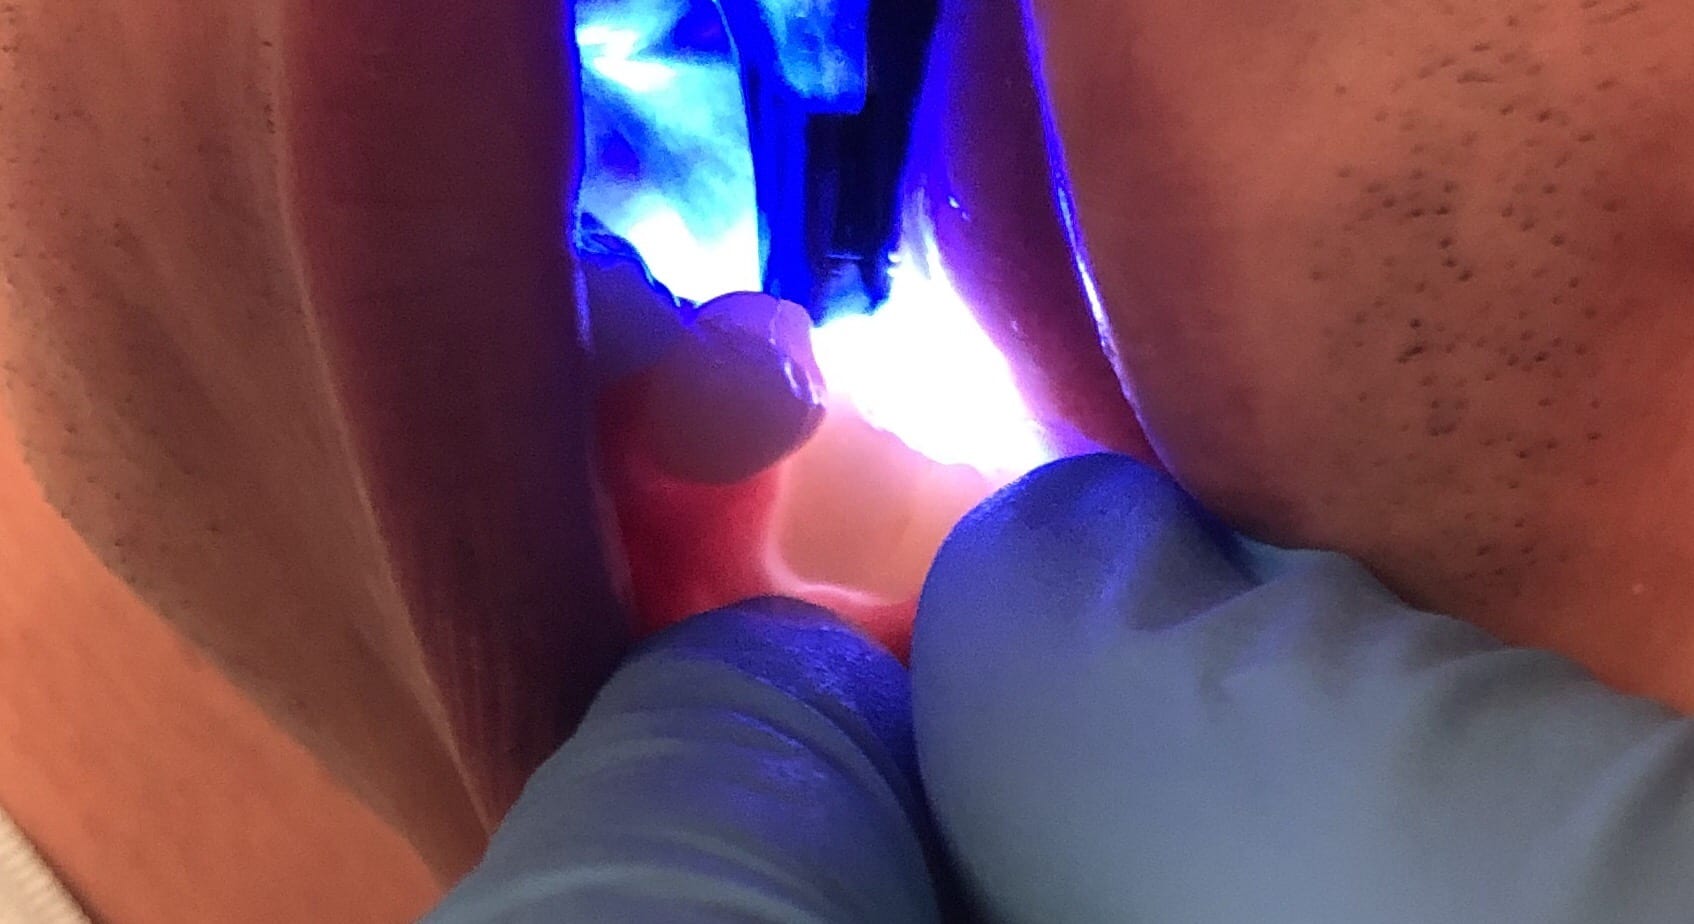
In this pre-op of video, trans-illumination was utilized to highlight the lack of light propagation at the crack line. Moreover, the patient was percussion sensitive on the lingual cusps for over 5 days where he initially developed symptoms

play-rounded-fill

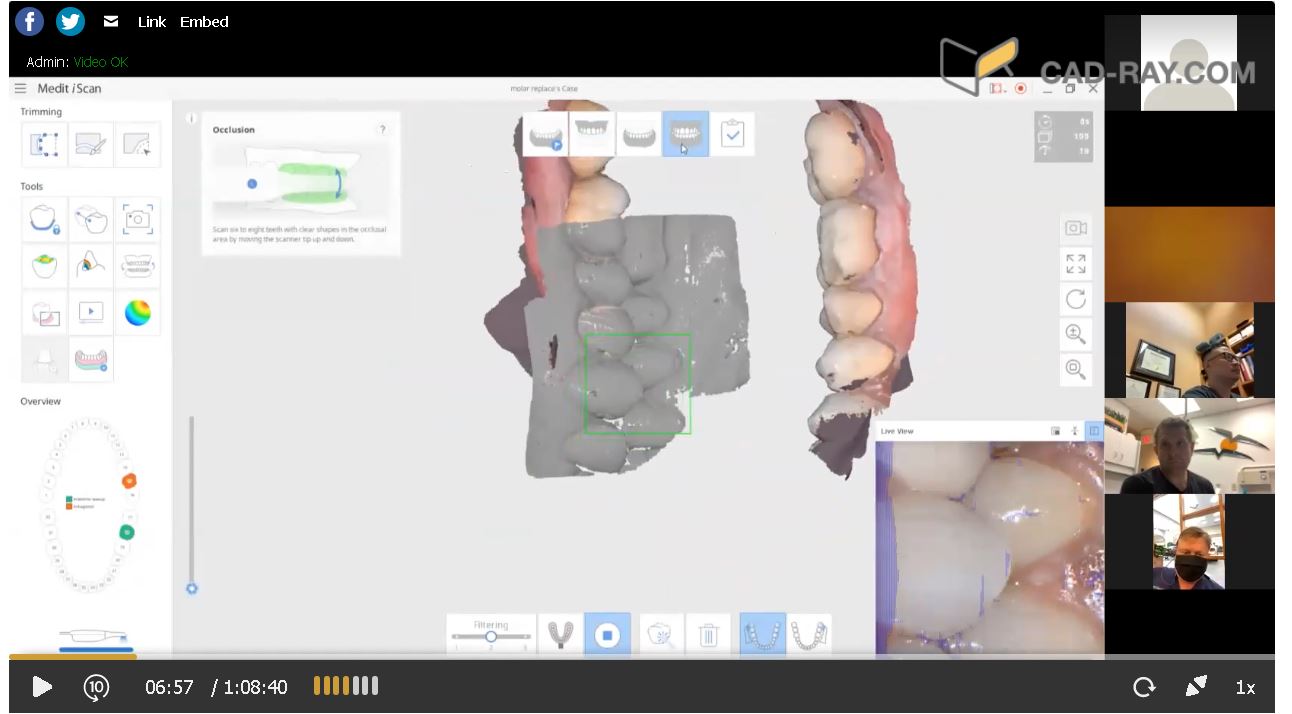
The Medit i500 software was launched while the patient was anesthetized. The appropriate job definition was defined where we identified that a pre-op scan would be taken. We also identified the spacer parameters and the marked the opposing dentition. All of these items define the image catalog that will be launched when we capture the optical impression (there will be a preparation model, a pre-op model, the opposing, and minimally one bite registration)

play-rounded-fill

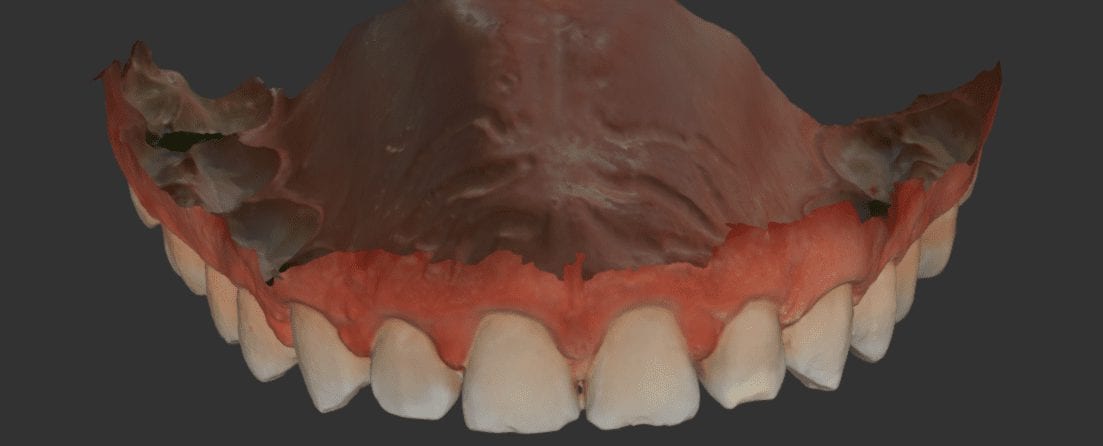
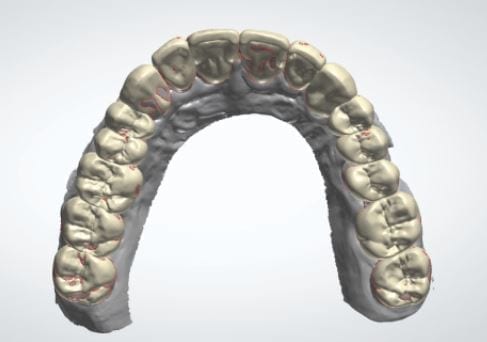
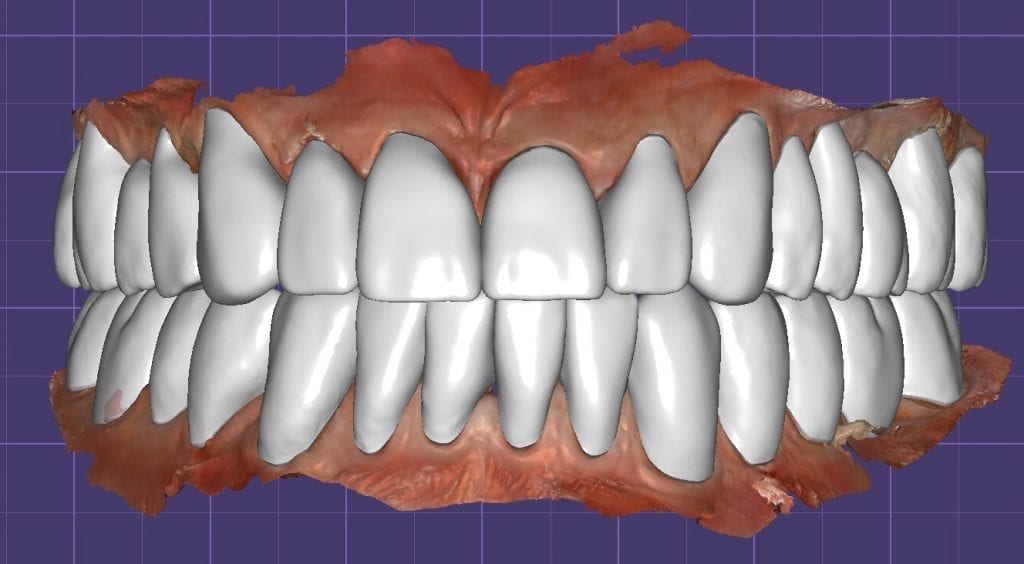
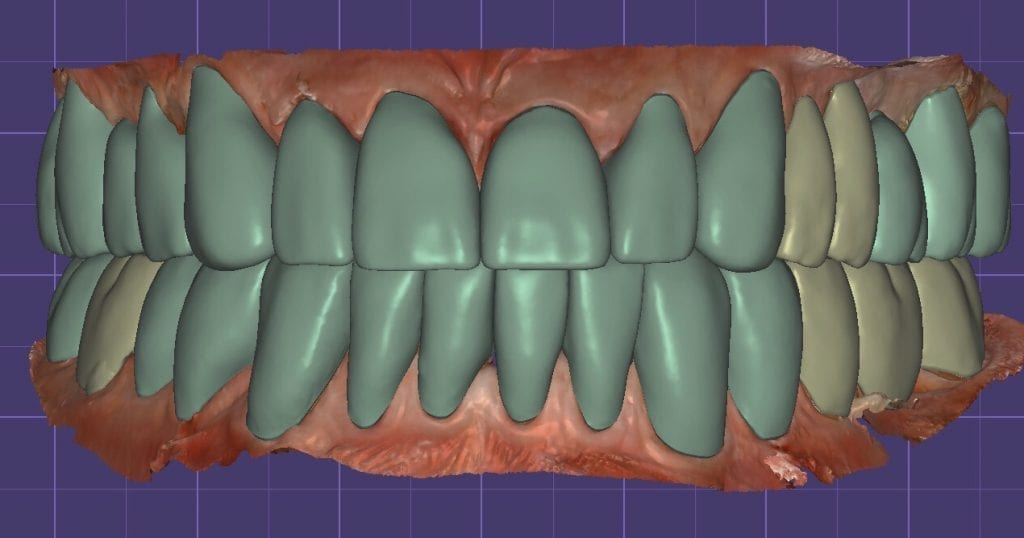
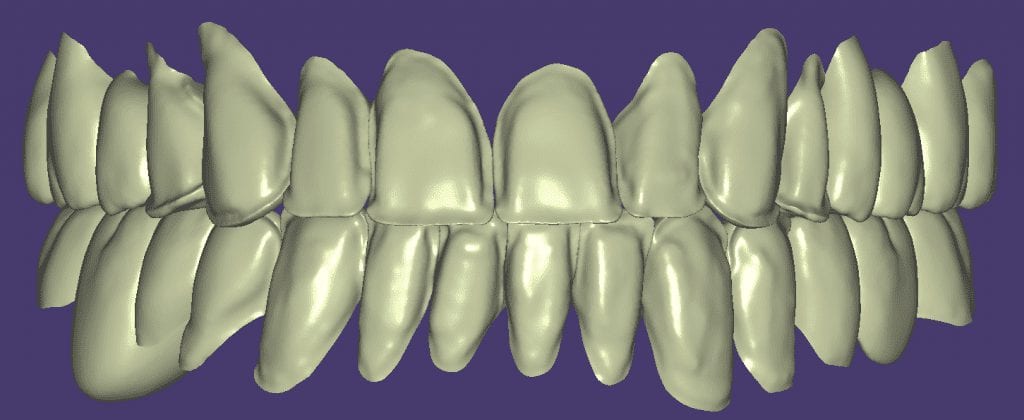
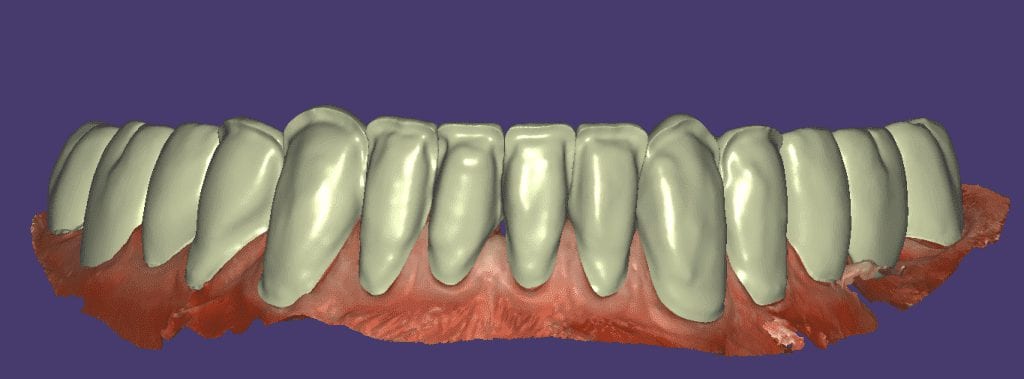
While anesthetic was taking affect, salt on the tongue was used to suppress the gag reflex, and the opposing arch was imaged. Then the lower arch was scanned and the bite was captured. The software then was set to the mandibular arch where the tooth in question was cropped out of the equation.

play-rounded-fill

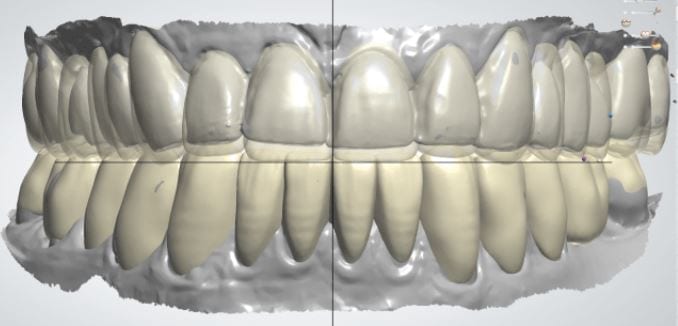
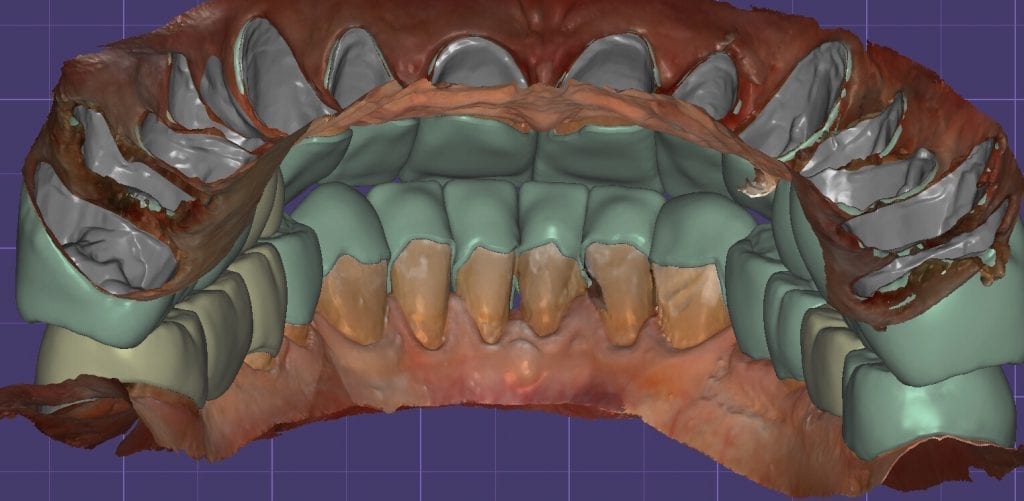
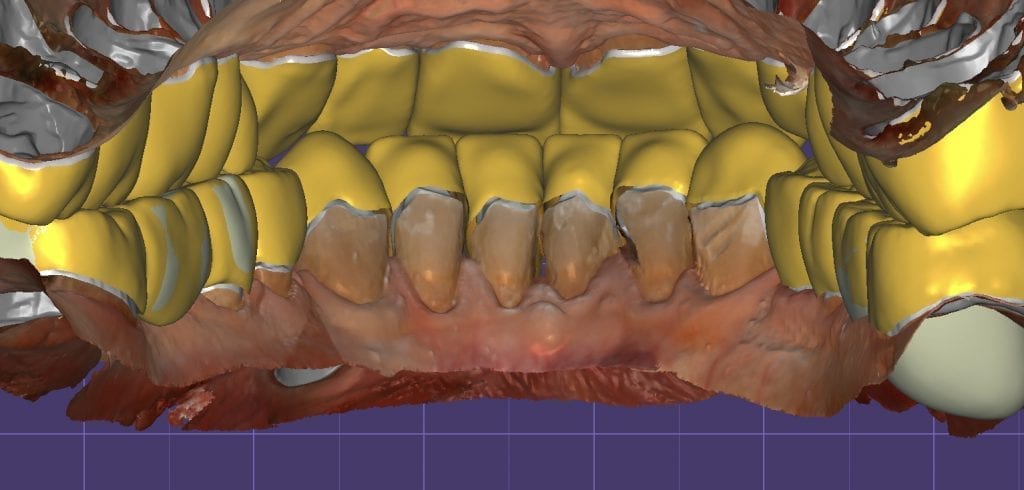
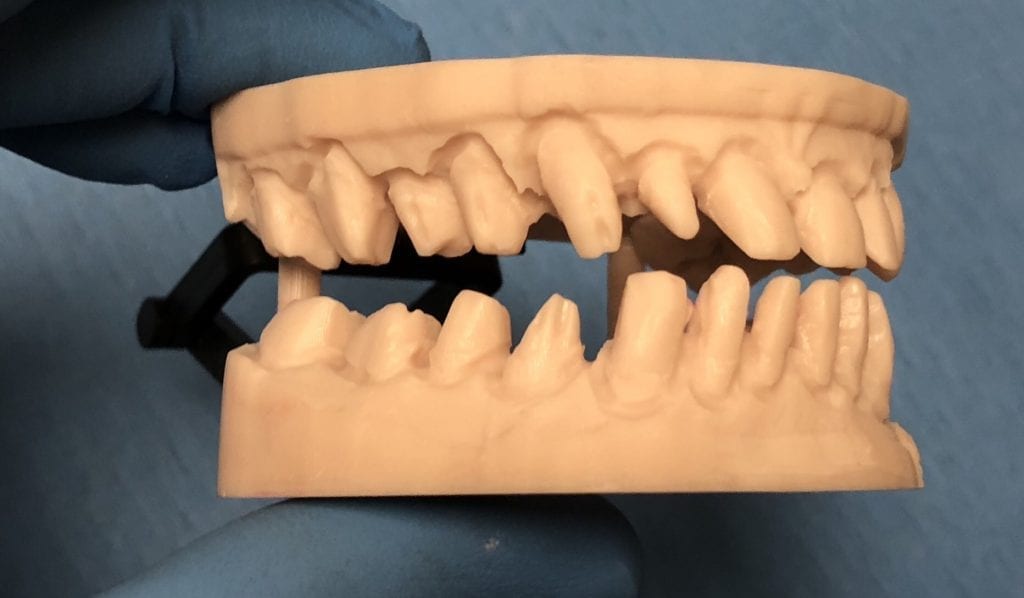
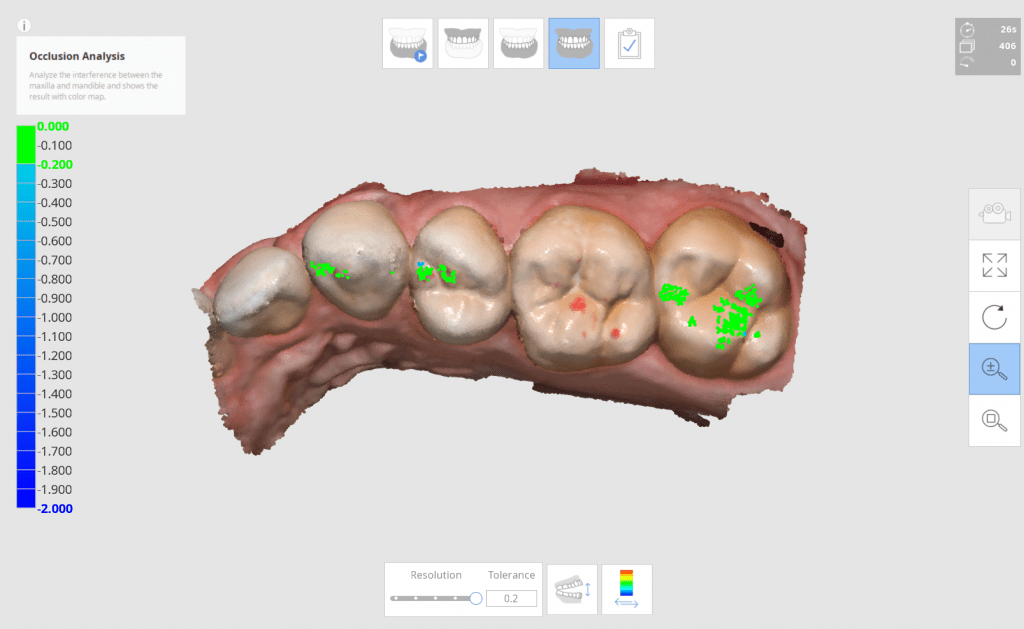
A great benefit to this approach is that you can analyze if you have taken the bite registration correctly before you even image the preparation. Sine the medit i500 can capture color, you can can the patient bite down on articulating paper and pick up the color renderings while imaging. You can then compare the digital occlusal stamps to the ones left behind by articulating paper. This is a great way to gauge if you or the patient has introduced errors in the capturing the correct occlusal relationship between the upper arch and the lower arch

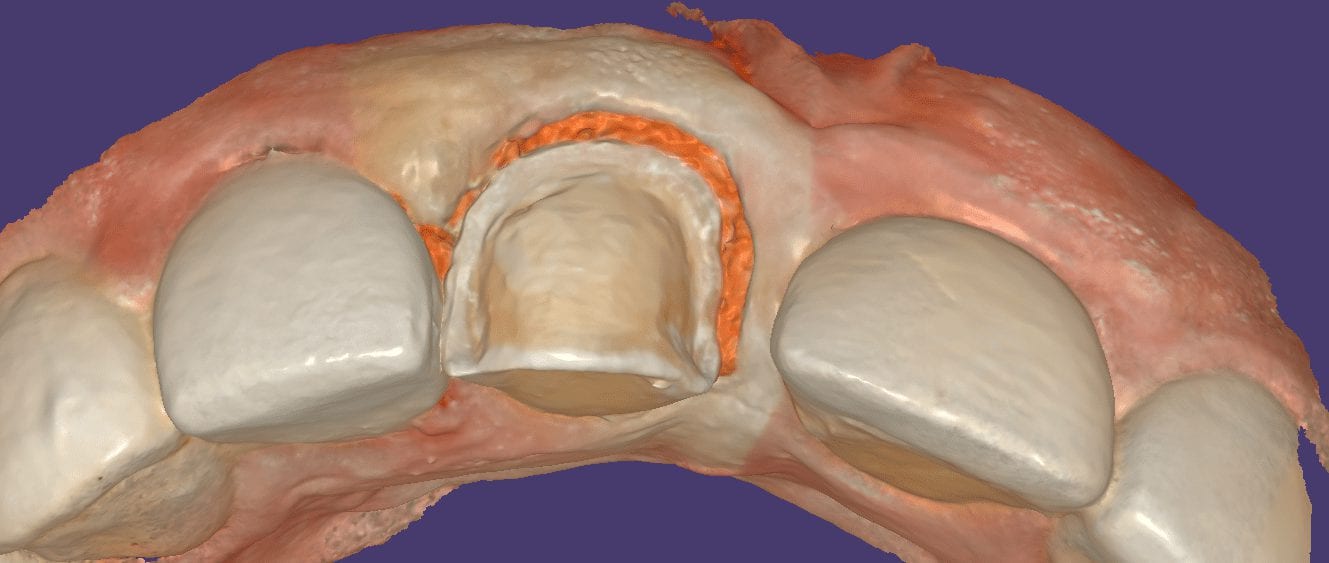
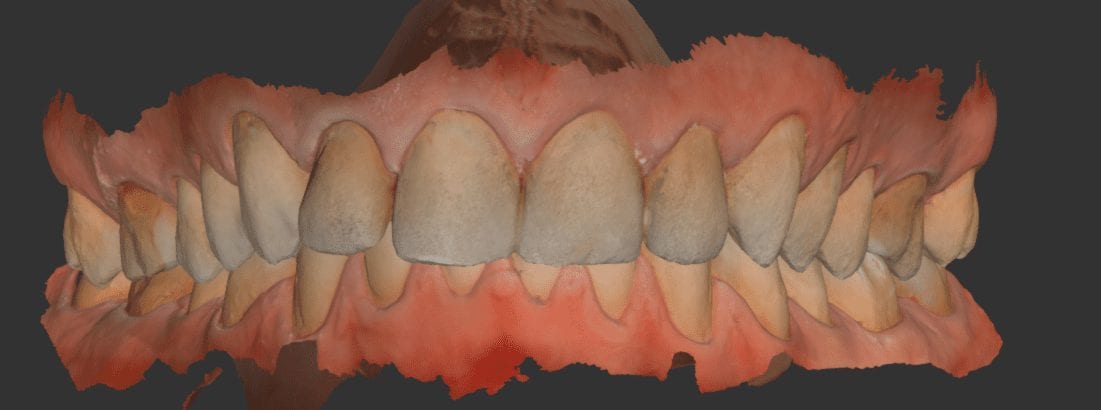
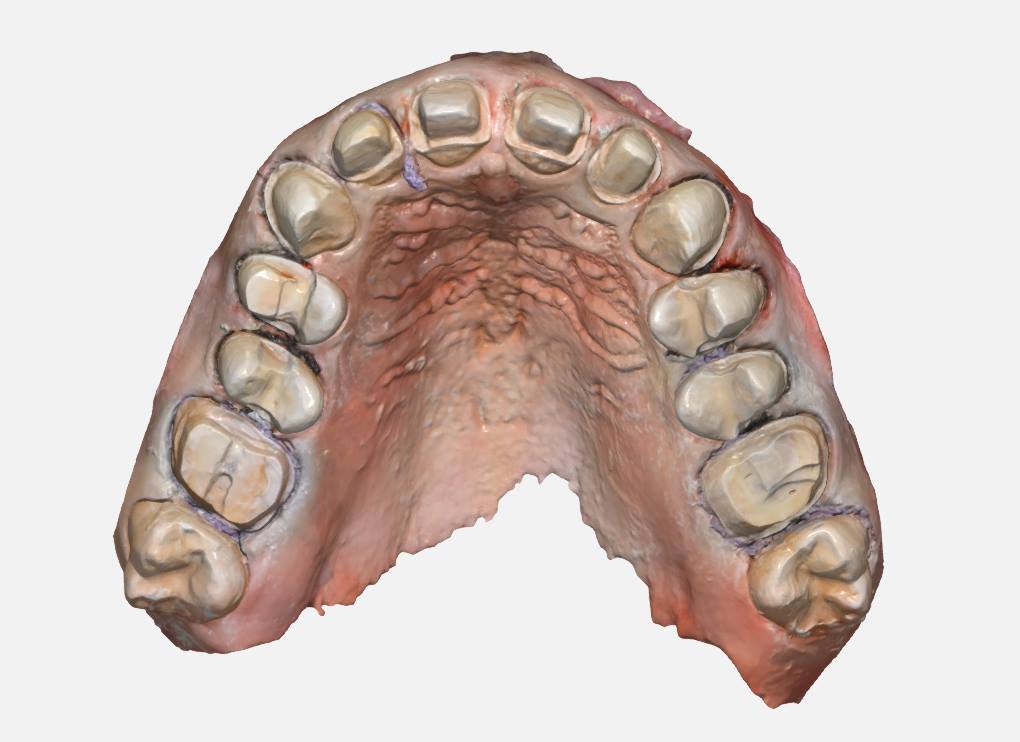
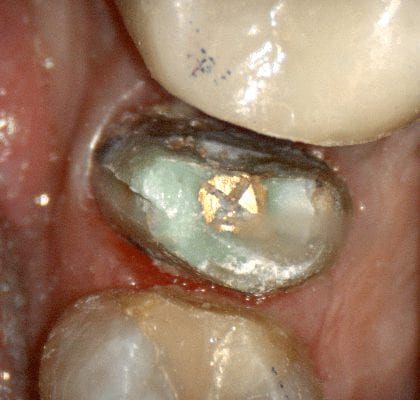
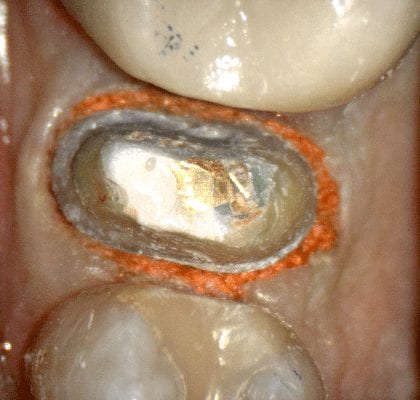
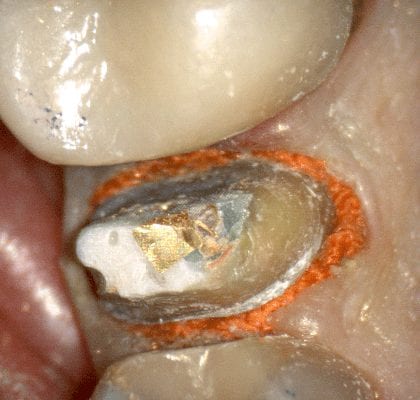
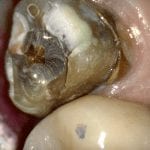
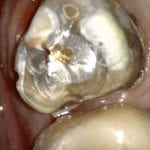
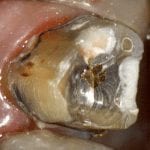
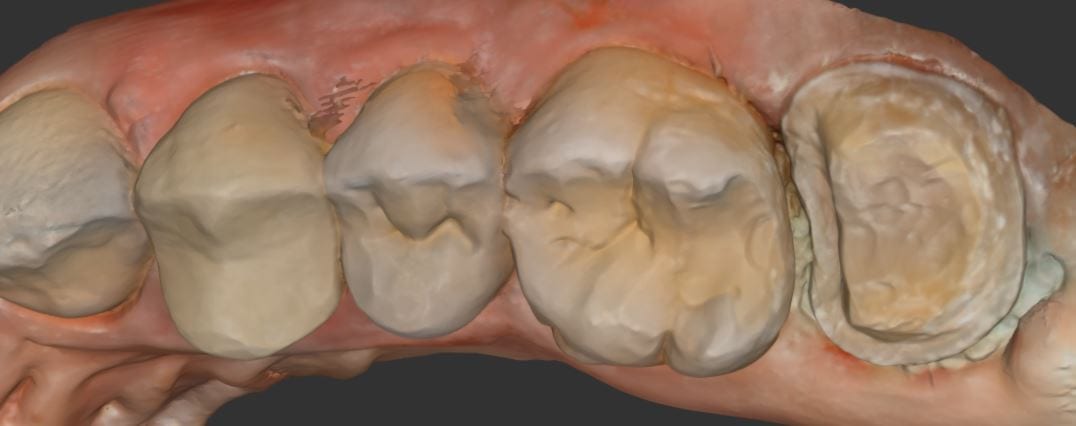
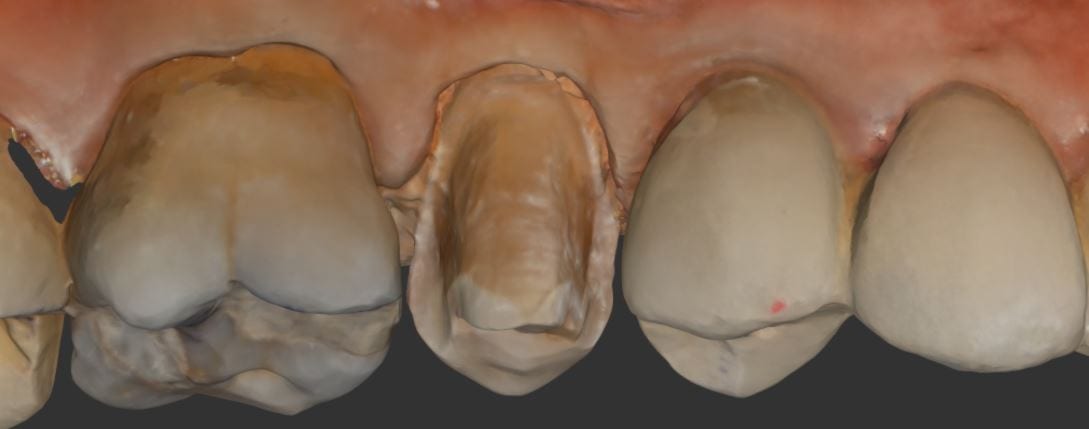
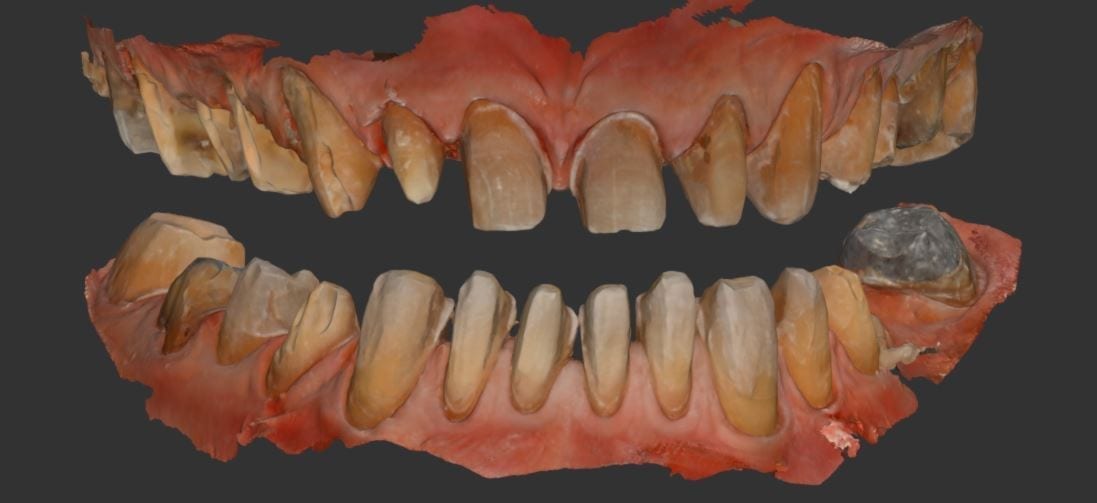
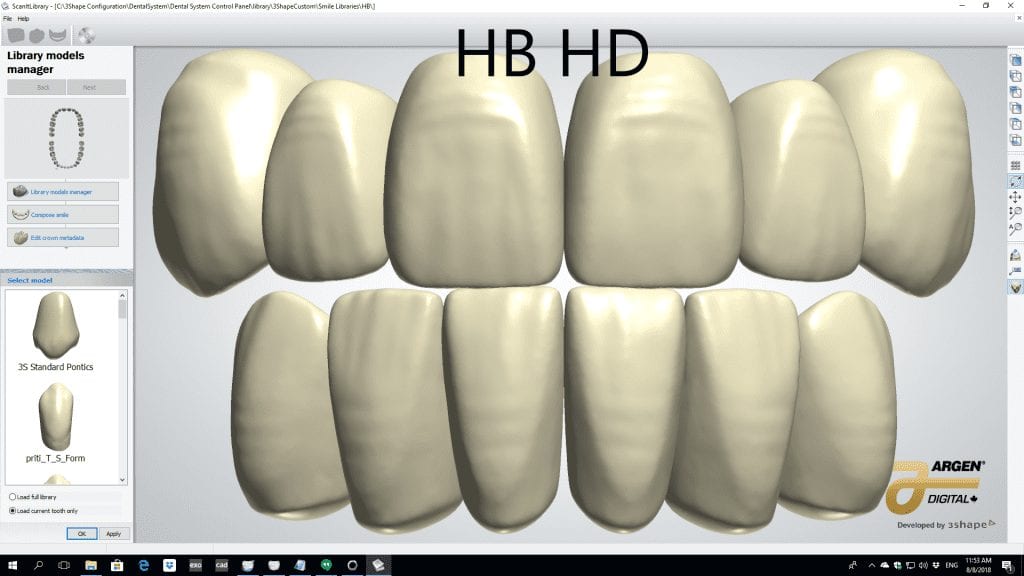
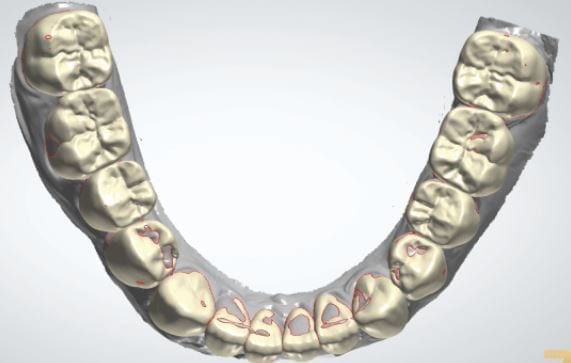
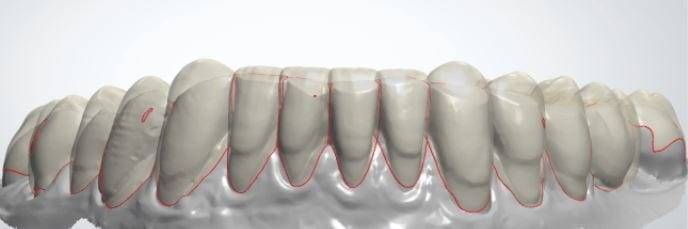
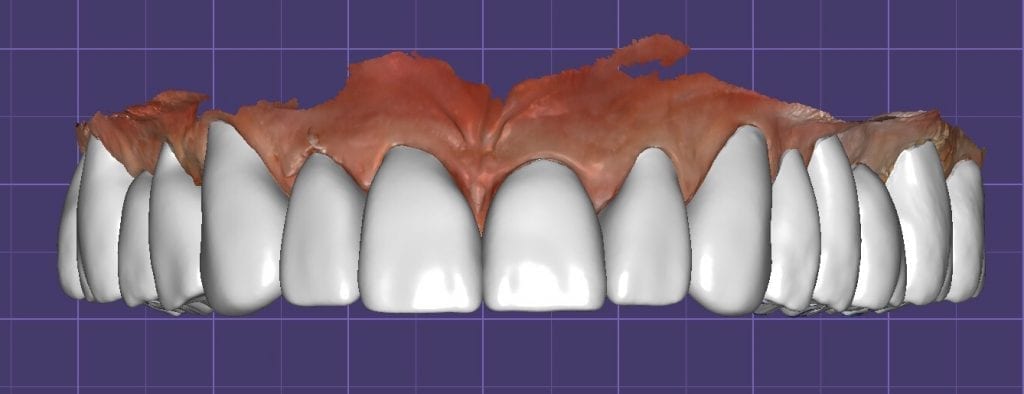
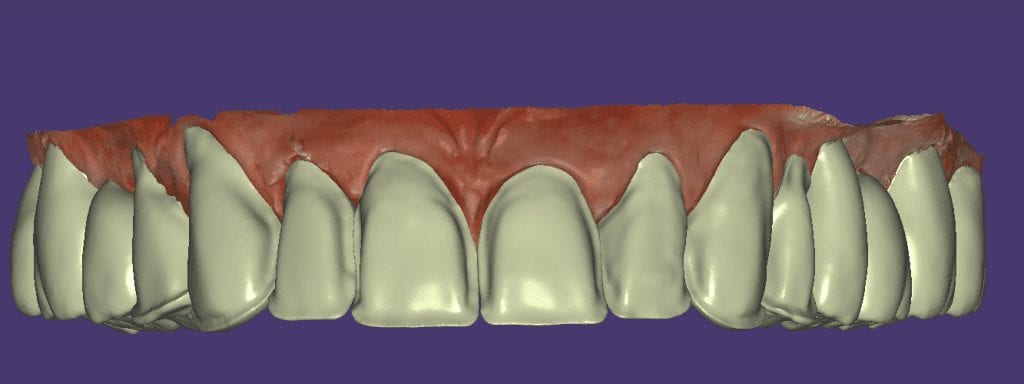
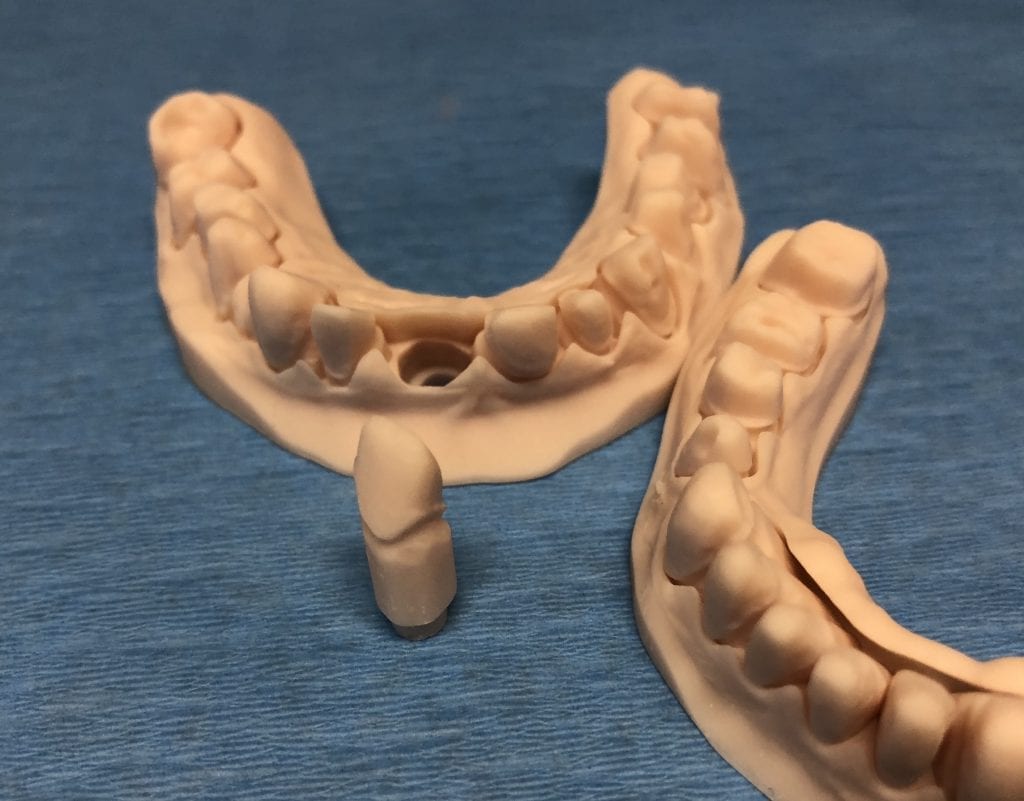
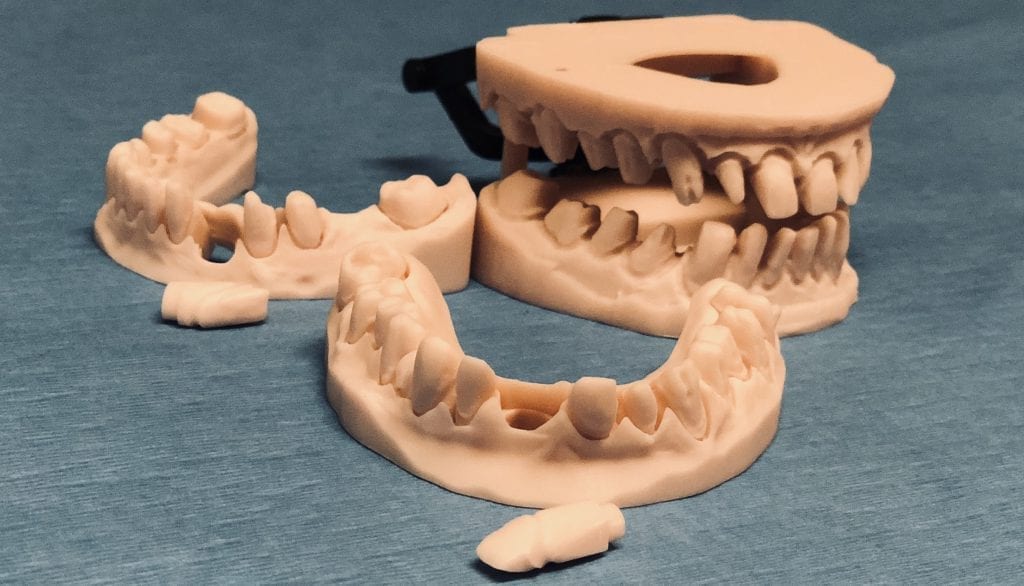
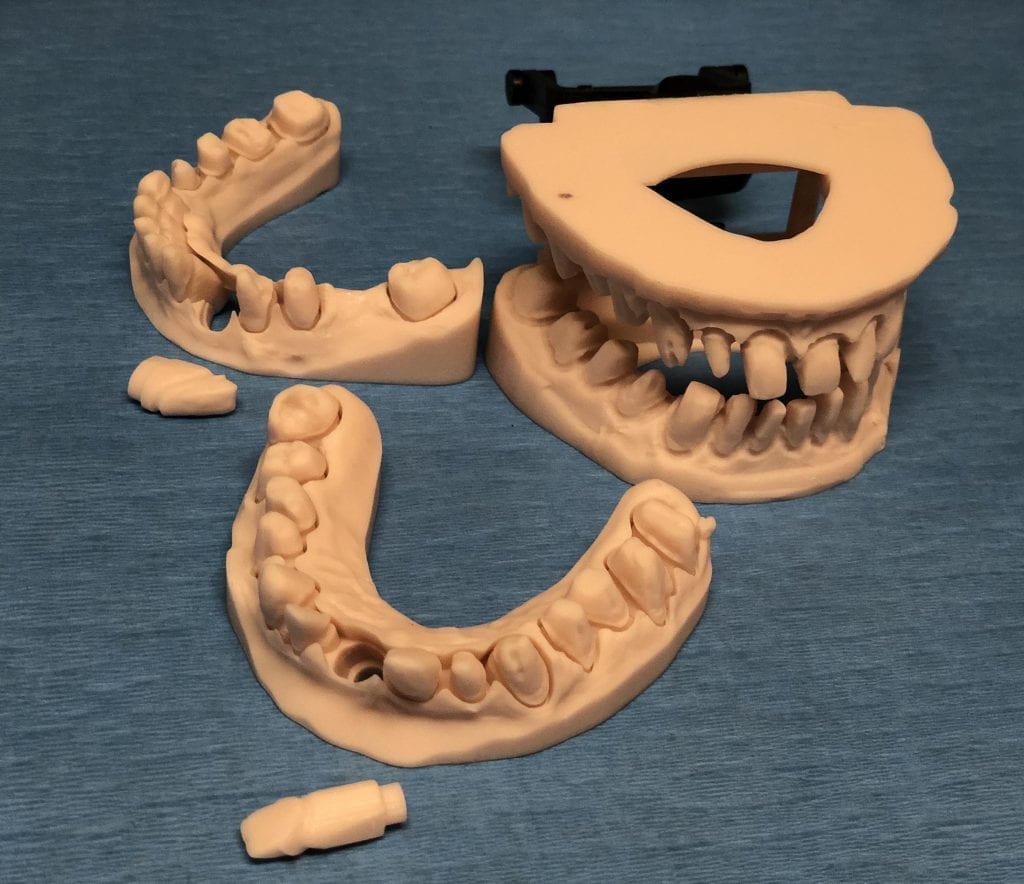
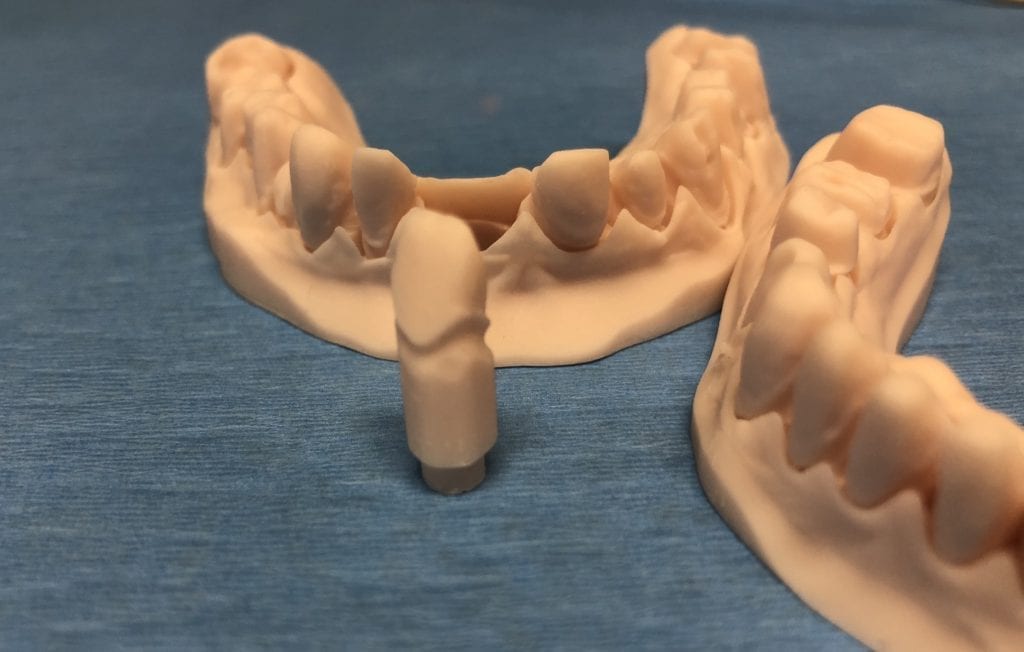
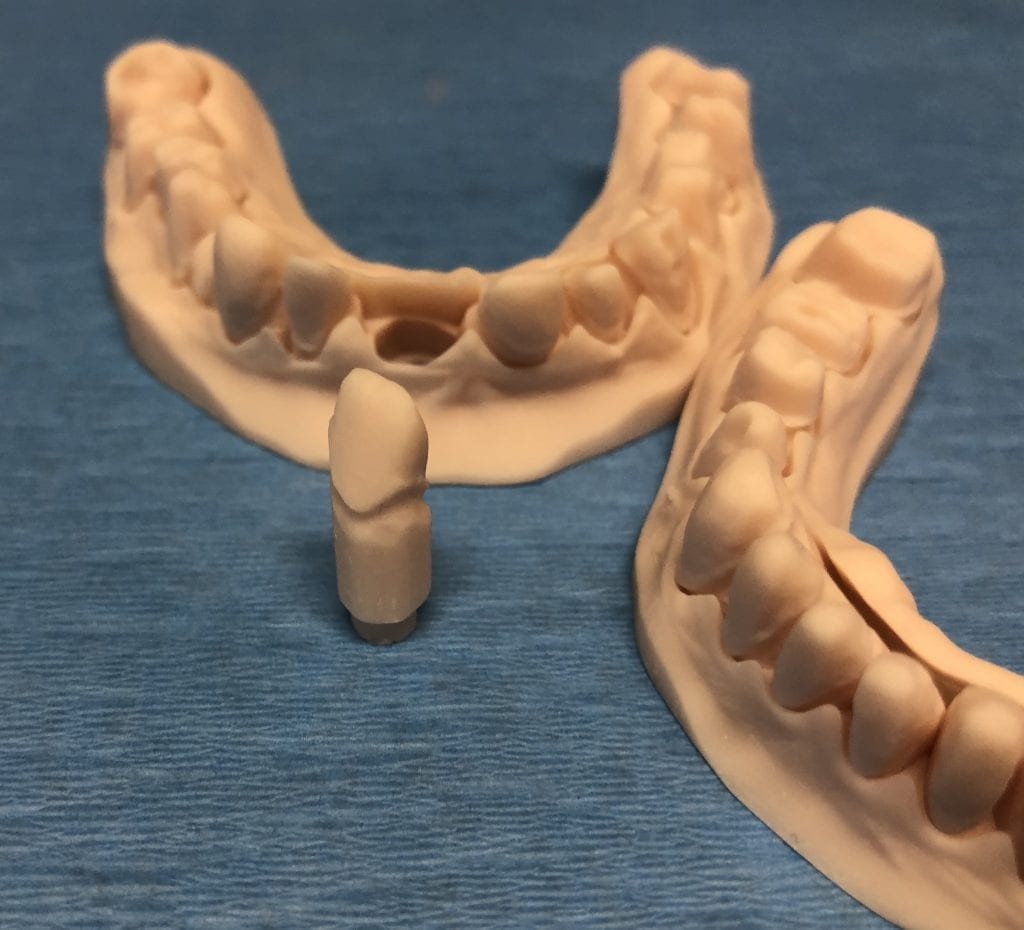
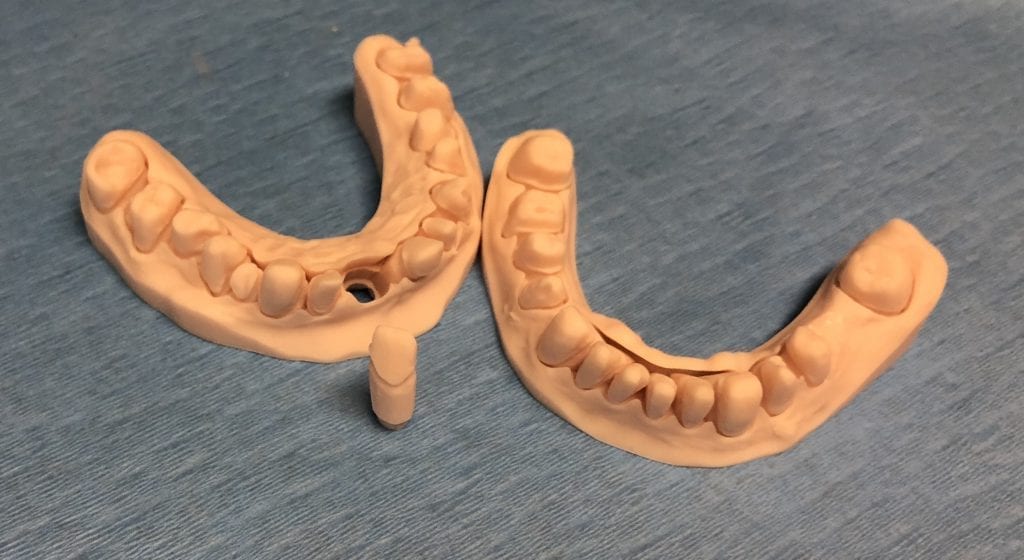
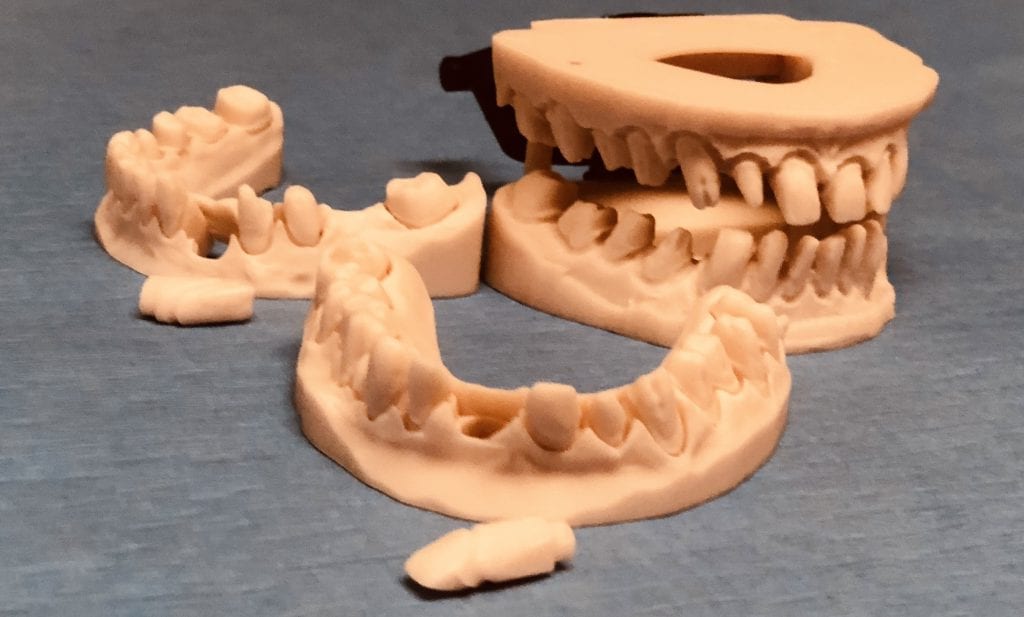
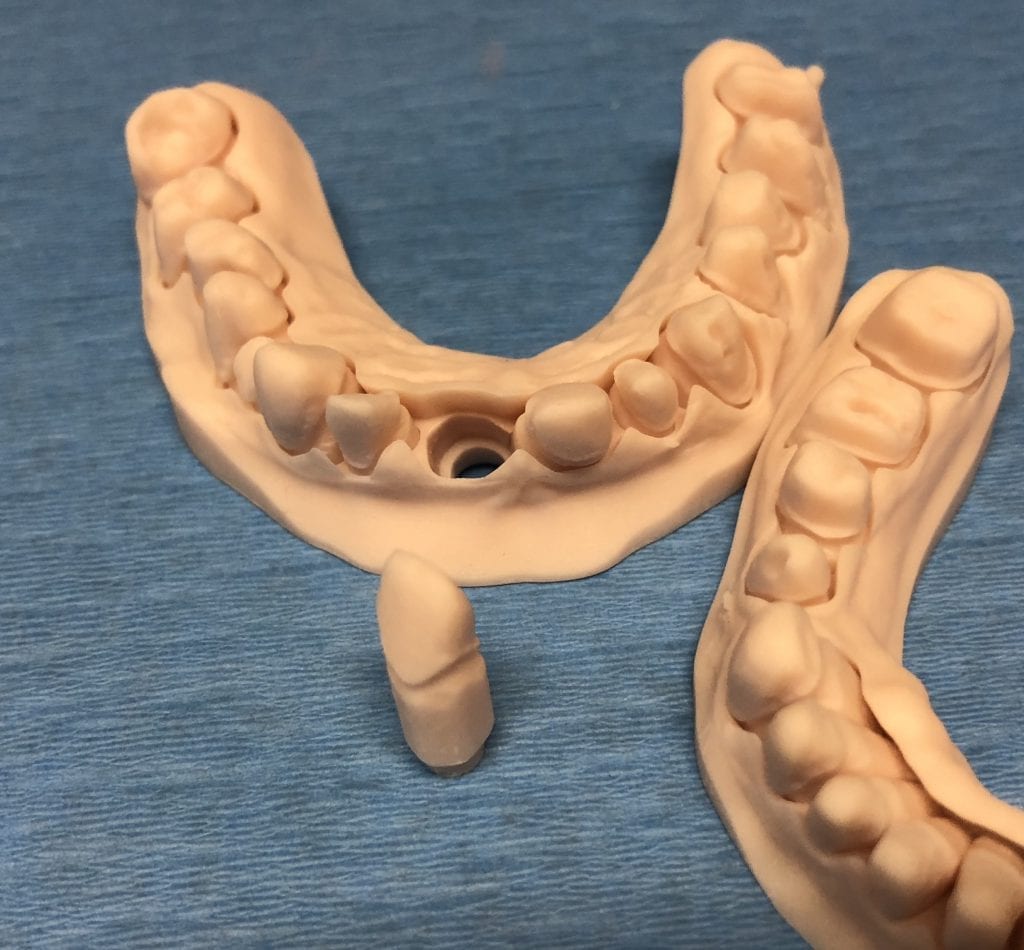
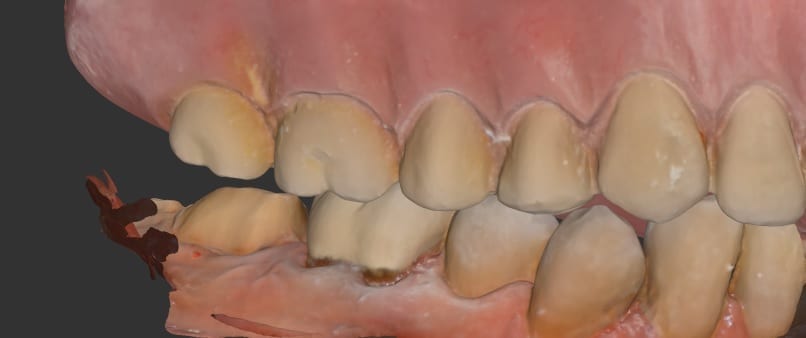
Since the patient was very sensitive while taking impressions of the tongue, the model of the preparation was built in multiple segments and steps. With the medit i500, the initial part of the preparation was imaged, certain areas were cropped out, then the tip of the camera was used to displace the tongue so the lingual margins could be captured. The image itself was capture in the local HD mode. The attached video demonstrates how areas were protected with the software so that we did not inadvertently introduce errors to areas that already had accurate data captured

play-rounded-fill

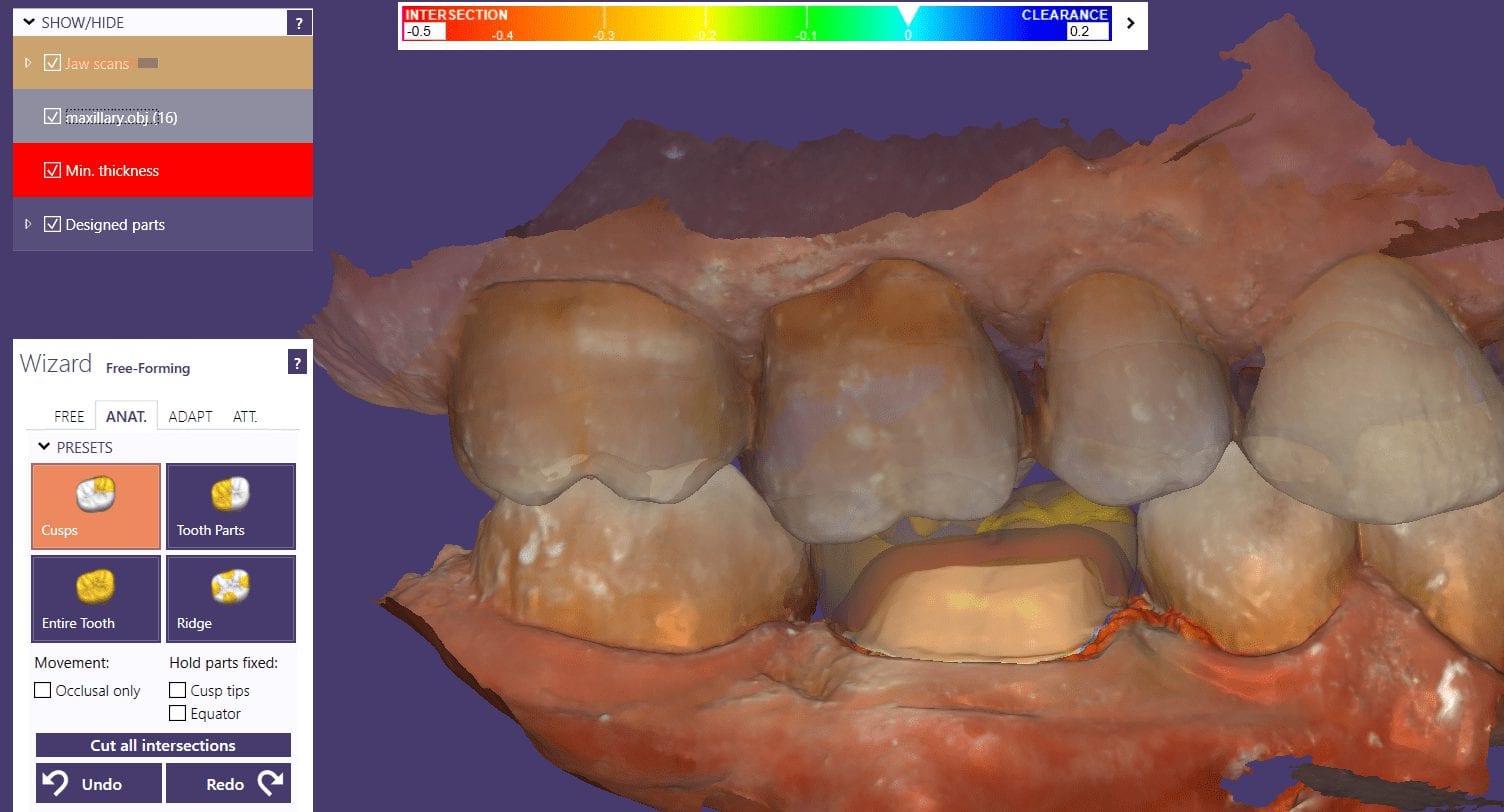
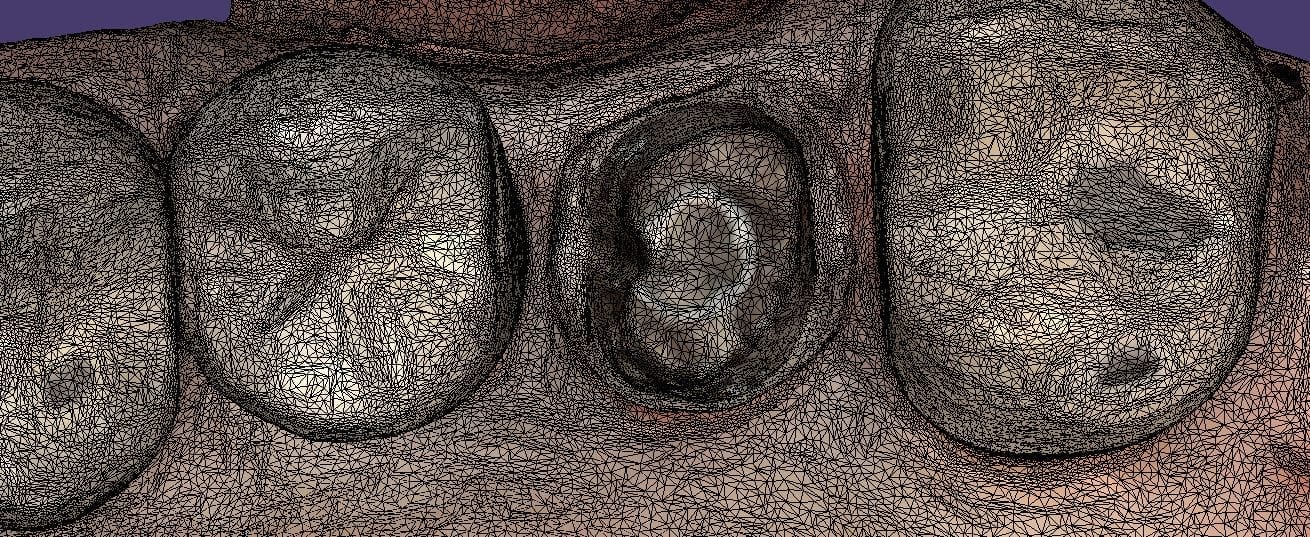
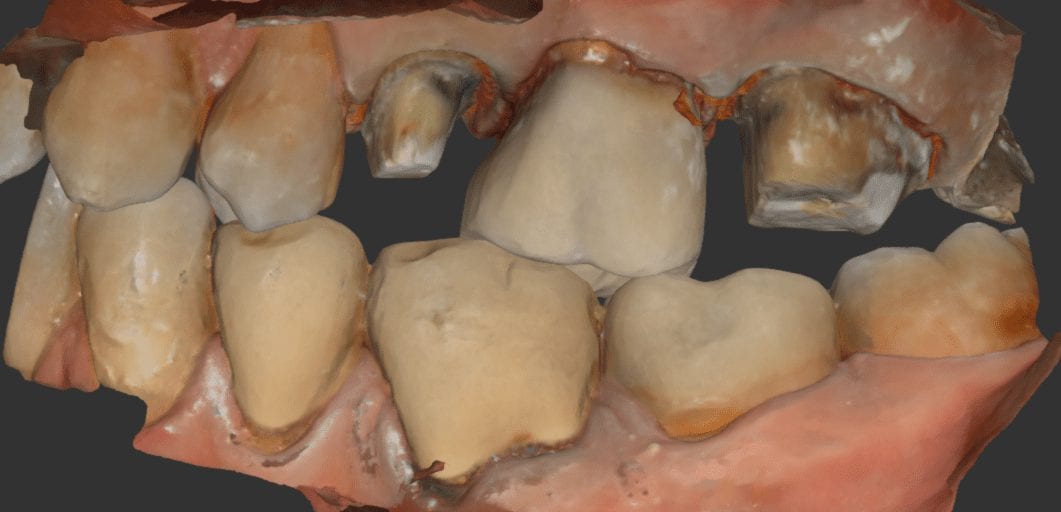
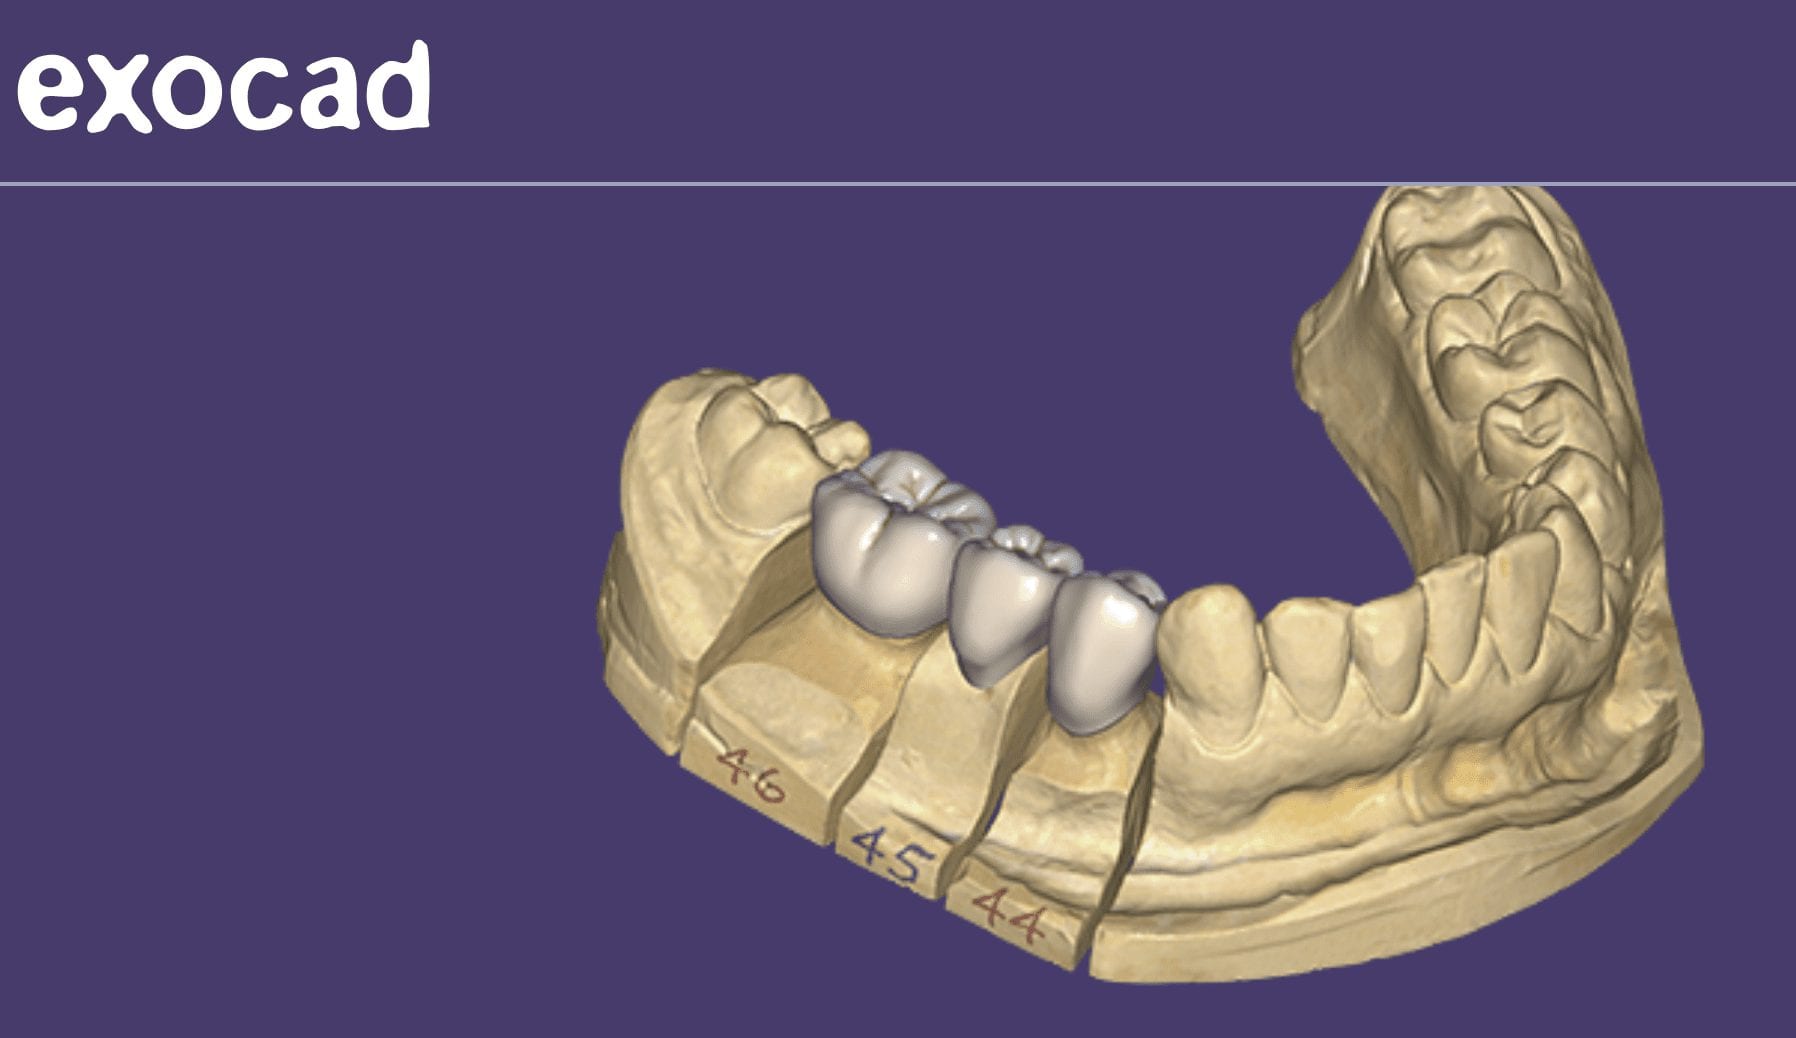
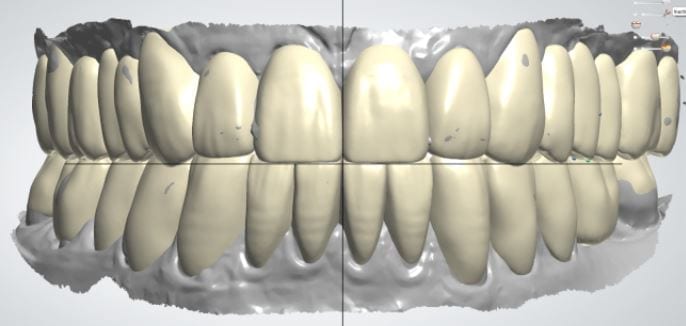
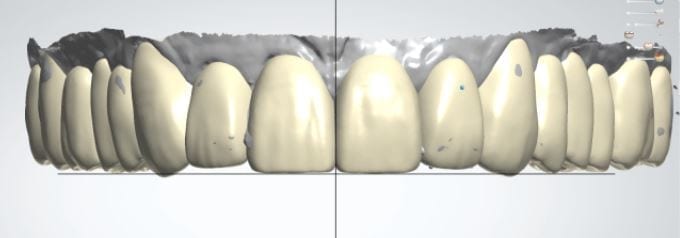
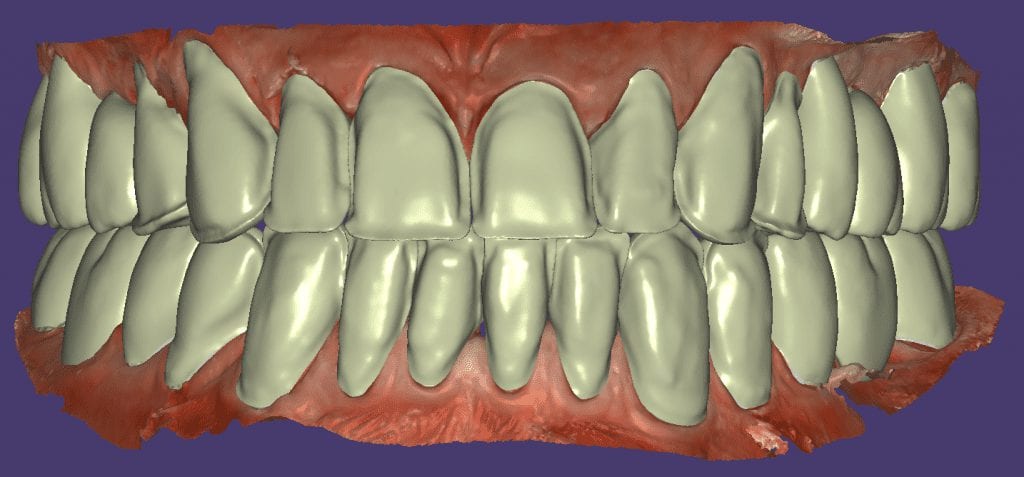
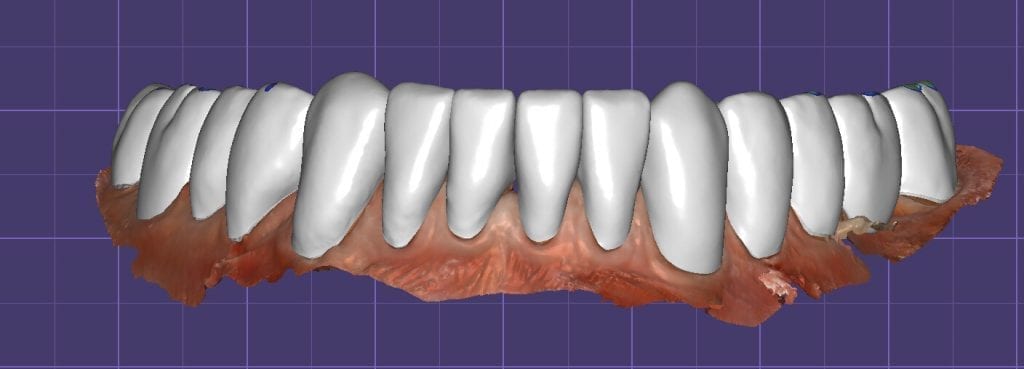
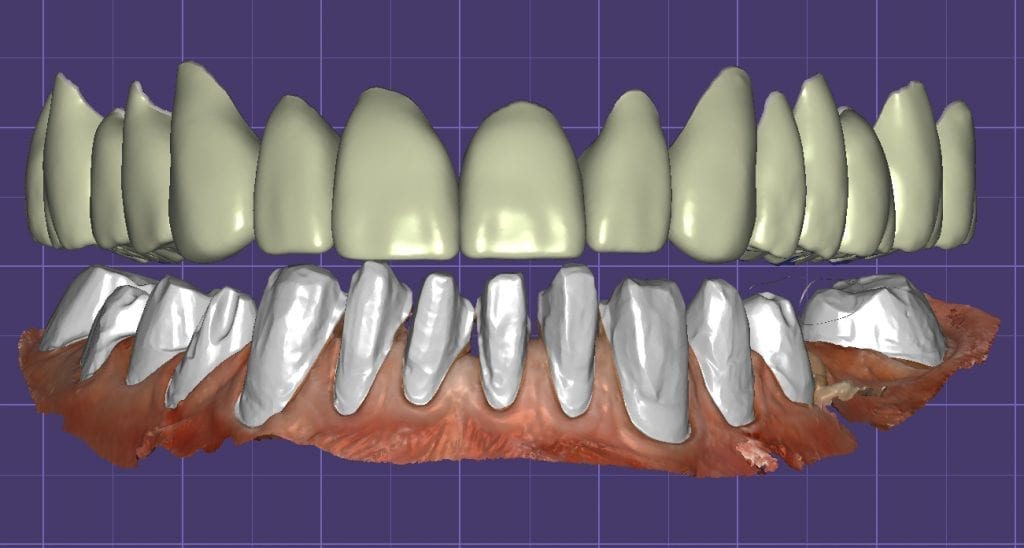
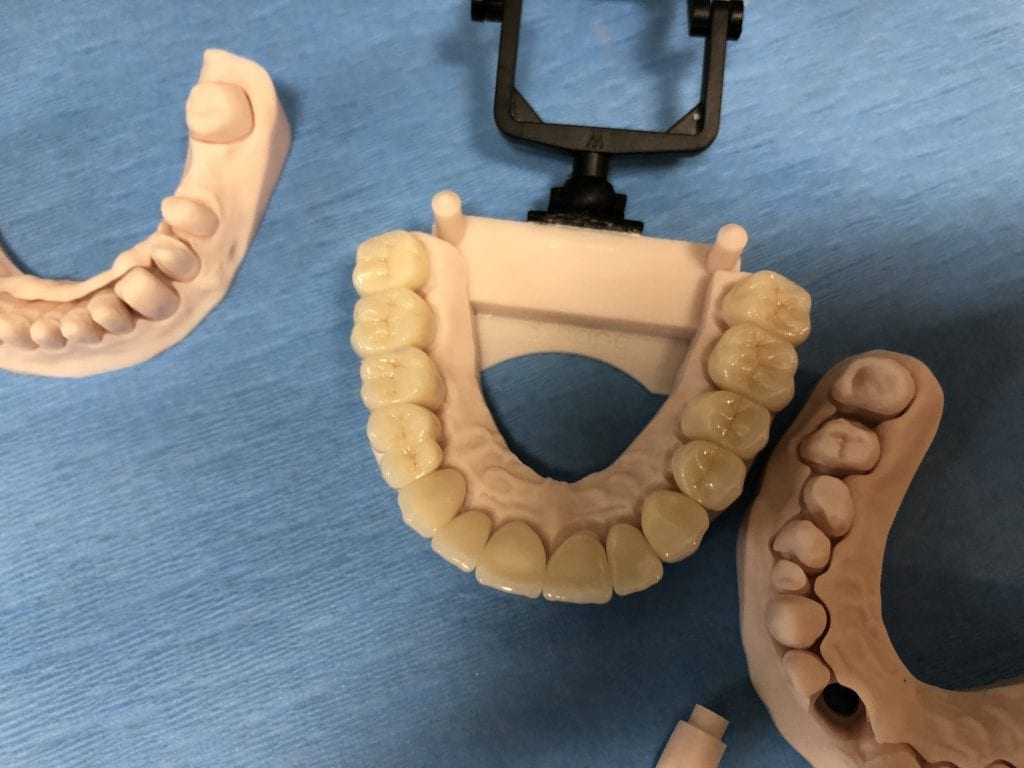
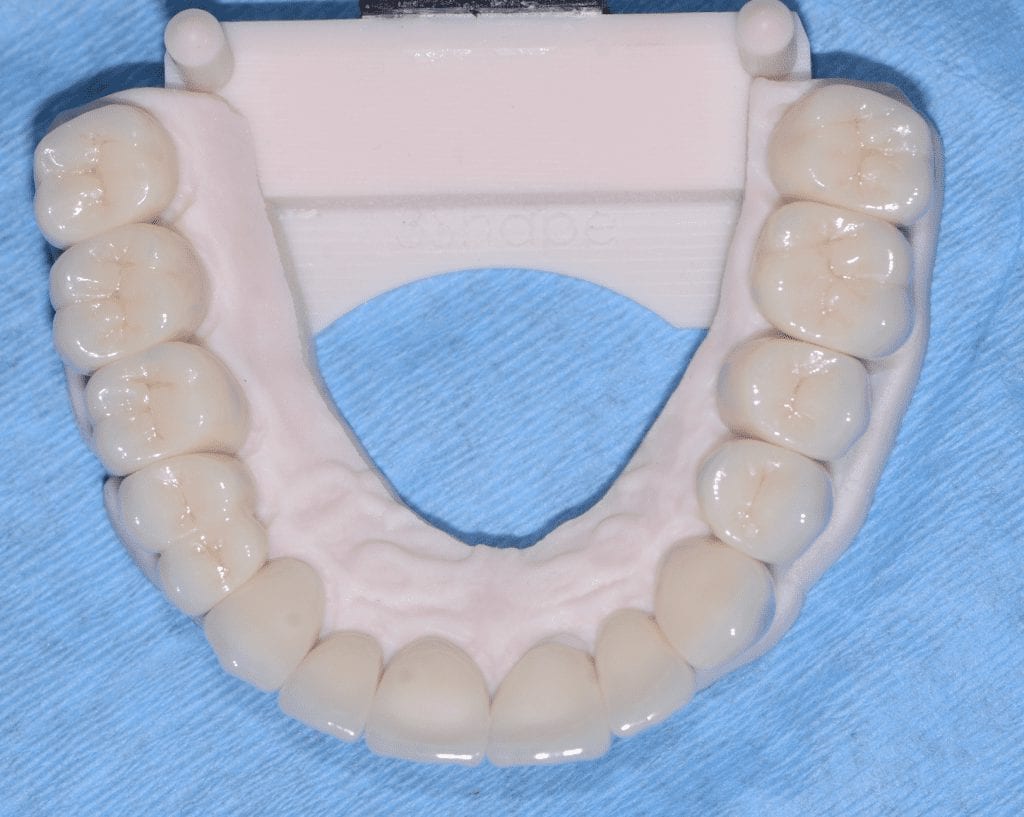
Once the image was captured, it was processed and directly launched into CAD software. the pre-existing condition was replicated in the design of the crown and minor adjustments were made to its morphology while taking the opposing dentition into consideration

play-rounded-fill

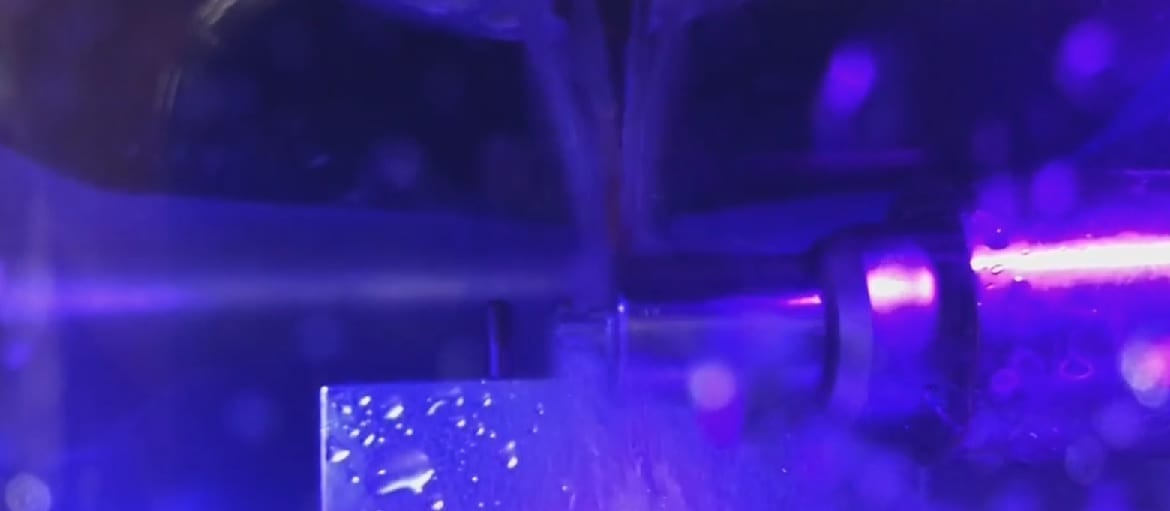
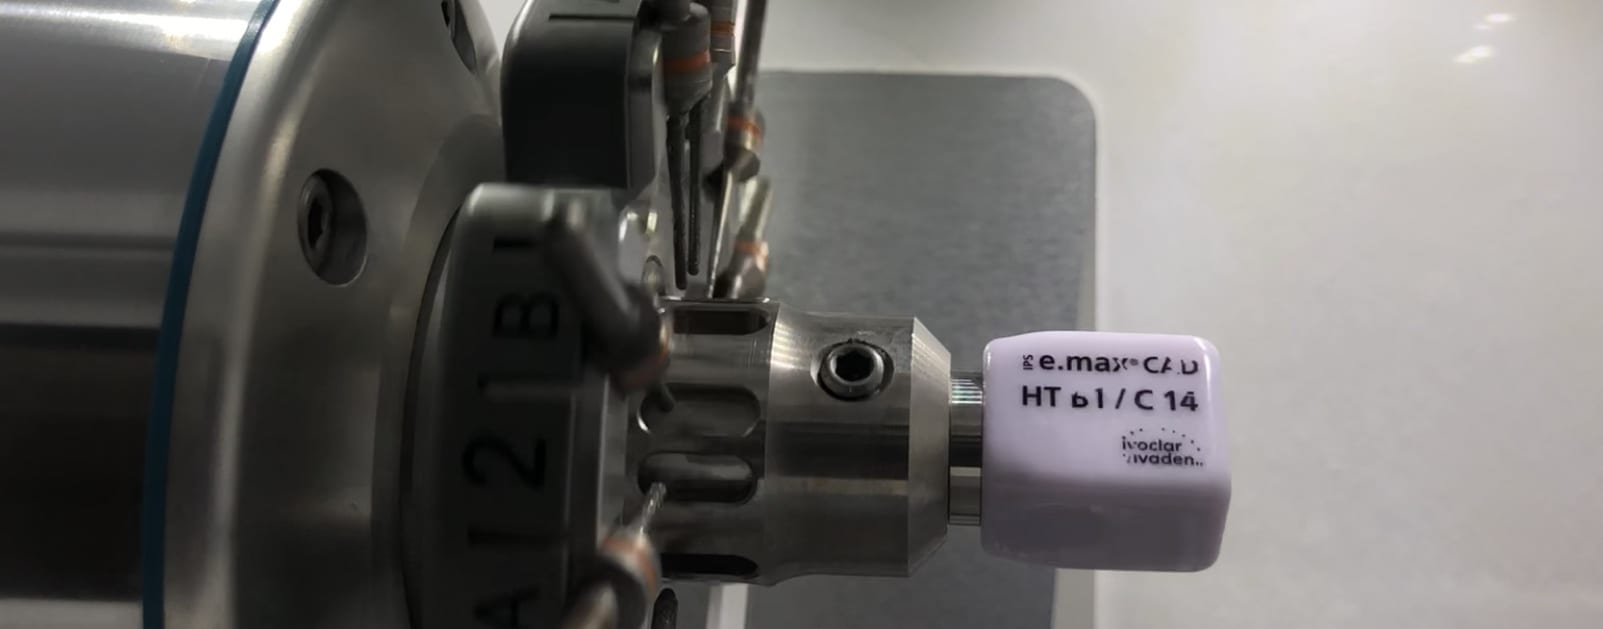
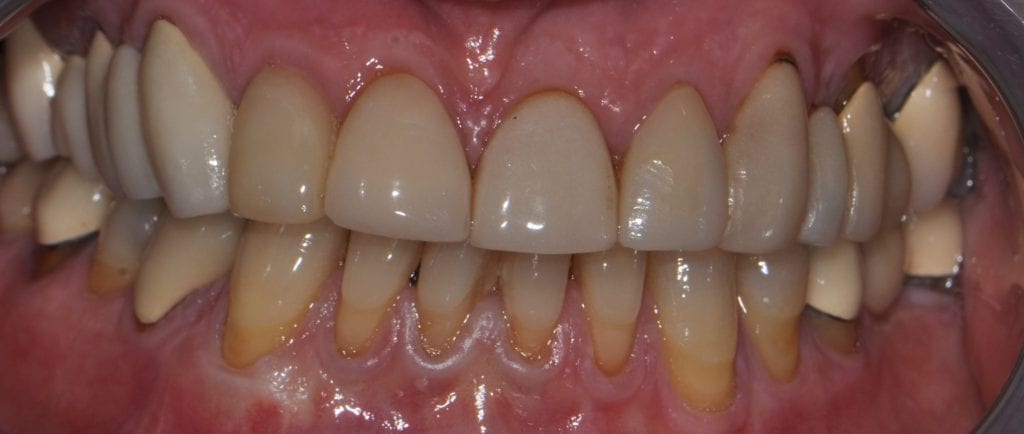
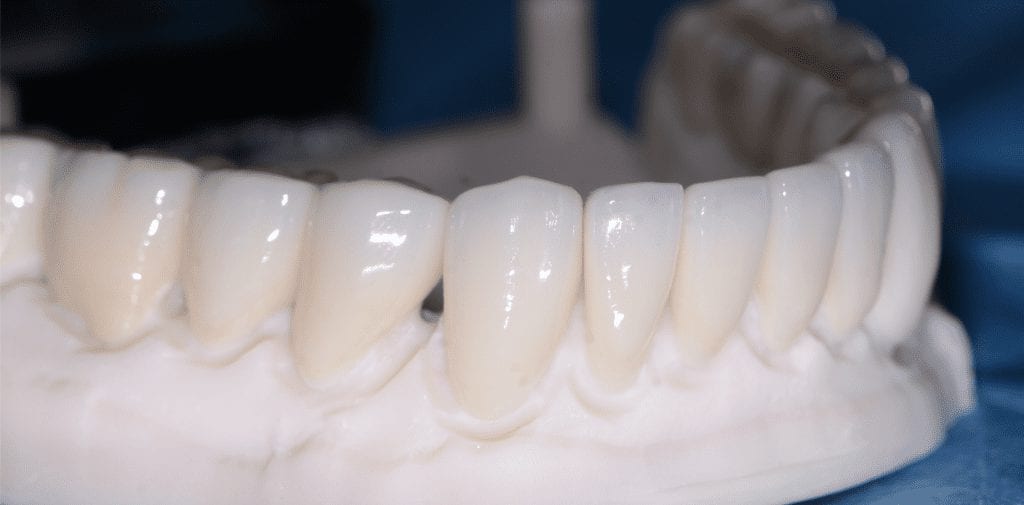
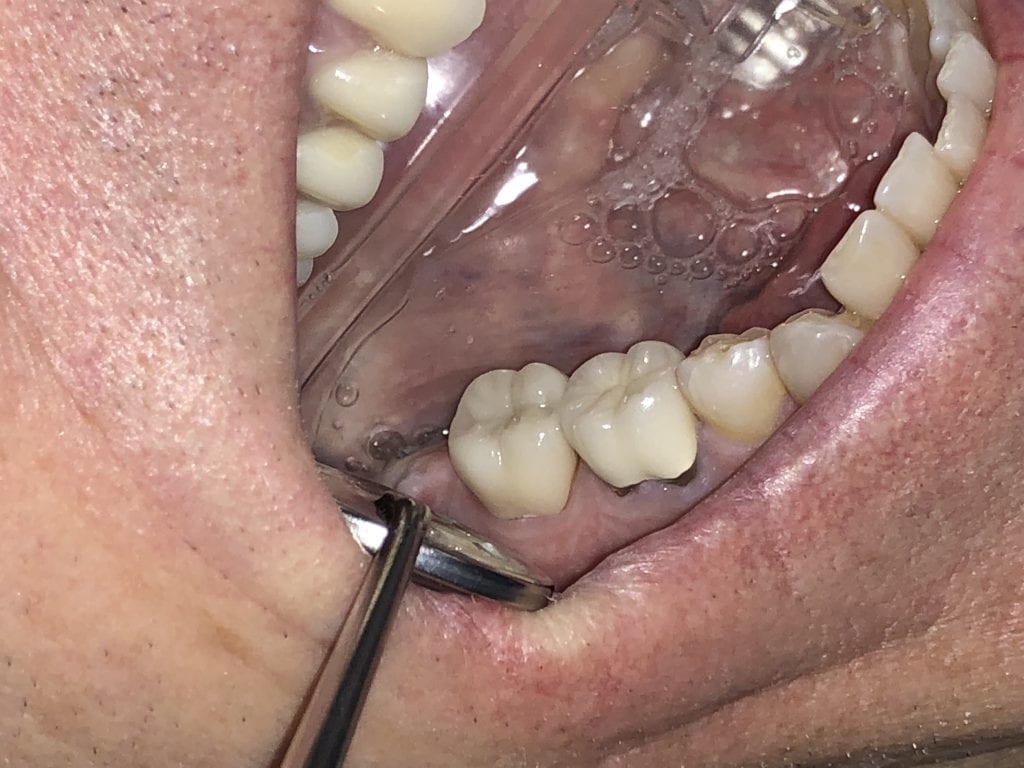
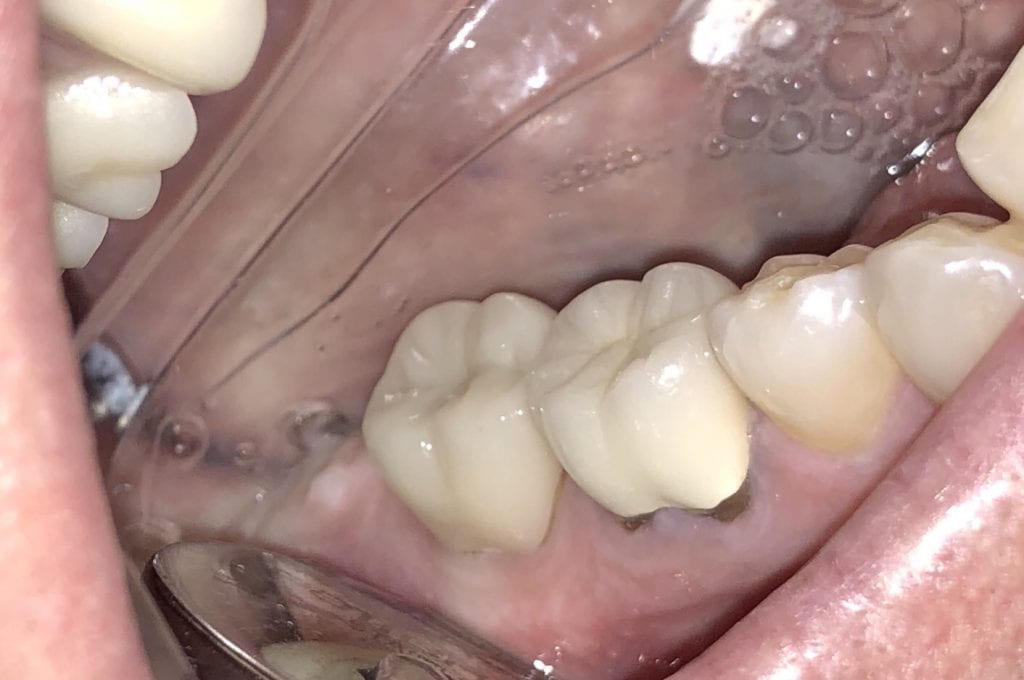
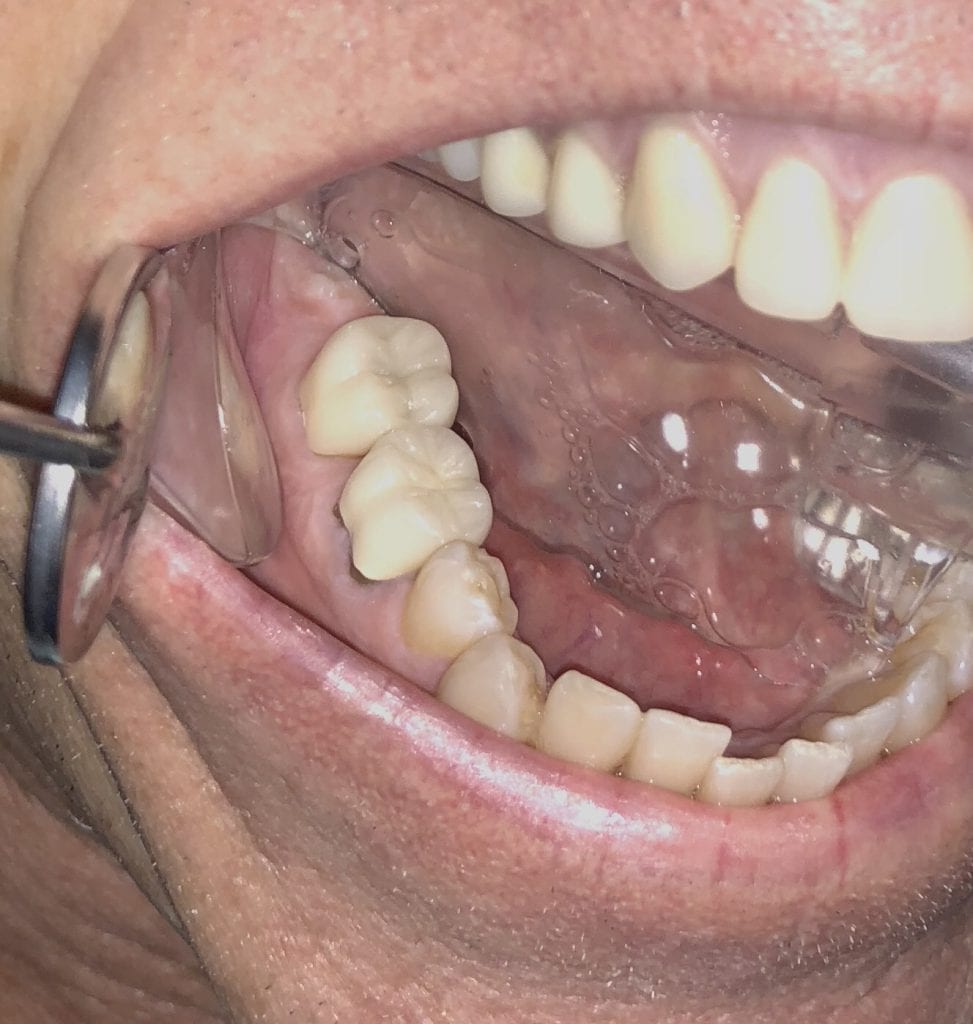
Once the restoration was designed it was automatically transmitted to the milling machine for fabrication. After it was milled, the restoration was checked for fit and contacts while in its blue stage and then crystalized in an oven. Once cooled it was seated with resin cement.

play-rounded-fill
play-rounded-fill
play-rounded-fill

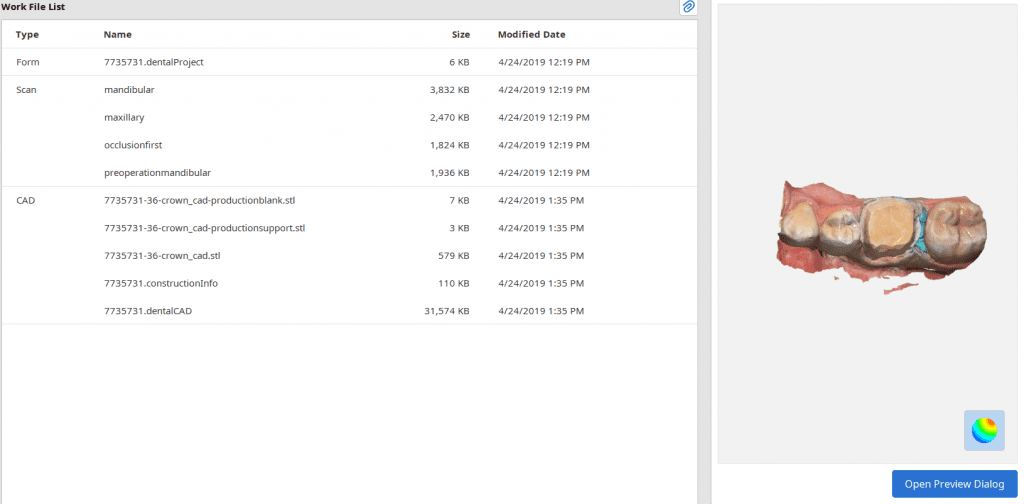
The Meditlink software has a Work File List that is maintained after you have finished your design. It hold the arches, the occlusion, the restoration stil file and the dentalCAD file that you can relaunch to either continue with a previous design or launch a whole new design

Posted on

Video Replay of a First Time Medit User

We had the pleasure of demonstrating the Medit i500 to a doctor today who happened to have a crown prep on the schedule. He had used an intra-oral scanner previously so it did not take much effort for him to use the device.

We first started by capturing the pre-existing condition. Then we captured the opposing arch. Both were captured in just a minute. We then captured the bite and put the camera aside. After the preparation was made, hemostasis was achieved and the doctor only had to impress the prepped tooth at this step, making the procedure very quick and easy.

A new feature in the meditlink software allows us to play back the video of how the arches were captured. You can get a very good sense of how things can work for you if you are looking to integrate into intra-oral into your practice. Contact us for a demo with an agent!

play-rounded-fill
Posted on Leave a comment

Local HD Scanning and Copy Case Coming Soon to the Medit Clinical Theater Near You

A couple of great new features are coming to Medit V2.0 really soon. One is the ability to capture the pre-existing situation in one catalog box and the prepped arch in the other.

In this video you can see how the initial maxilla is captured in the first catalog box. Once that is done, the appropriate arch is selected and the model appears in the respective arch. You simple crop out the area where the preparation belongs and start imaging to fill in the space with the prepped arch.

play-rounded-fill

The great part of this program is that the imaging of the preparation does not start until the software recognizes the adjacent landmarks. It is imperative that the same “stitching abutments” exist in both models. As a bonus, you can click on localized HD mode for the preparation where the detail is captured in high-resolution.

play-rounded-fill

When you capture both the pre-op and the preparation model in this manner, it is an easy workflow in the CAD software to render the restoration. Since the models are related to each other, you can command the program to adapt the restoration to the teeth (or pre-op condition). For best results, you must trim the pre-existing condition in manner so that the only remaining area is above the margin circumferentially.

To achieve that, simple trim the pre-existing condition with the edit tool in the software. If the pre-op is in great condition, you will not have to do any adjustments. One over-riding feature that always prevails is the minimum thickness around the margins.

With the localized High Resolution mode in Medit v2.0 you can speed up processing time but not compromise resolution that allows for great fitting restorations, as you can see in the try-in step of this emax 3/4 crown

play-rounded-fill
Posted on Leave a comment

Good Initial Proposals in exocad Design Software

When imaging a preparation, all you really need for a restoration to “fit’ is the contact area of the adjacent teeth (above the height of contour) and the opposing occlusal surface.

But the more you feed the computer aided design software the less work you have to do in the design of the restoration. For example, in the video below, you can see how the software automatically recognizes the adjacent teeth and a great initial proposal is rendered.

However, if you don’t capture all the data in the adjacent teeth, you will have to manually plot the adjacent teeth and spend more time in the design steps.

With exocad, the first step is to align the orientation of the arch so that the occlusal surface is directly facing you. Once the prepped arch and the opposing models are imported, then you place the margins.
With the color OBJ files from the Medit i500 it is very easy to identify the margin based on color and geometry. Once the margins are placed, the next step in the wizard is to calculate the initial proposal.
This video demonstrates how the CAD software recognizes the adjacent teeth and renders a great initial proposal
Posted on Leave a comment

Smile Design and Makeover with Medit i500 and exocad

Download the OBJ files and import them into smile design software and do a virtual wax up for a real case

This patient has had crown lengthening procedure performed on all the teeth in her smile line, greatly increased the tooth structure visible in this video. Her chief complaint was a gummy smile and now she is ready to “fill in the buccal corridor”
play-rounded-fill
play-rounded-fill
Posted on Leave a comment

Fundamentals of Intra-Oral Scanners

Here are fundamental principles every dentist should understand about intra-oral scanners, how we can introduce errors, how to manage them, follow proper scan strategies, maintain accuracy across the arch and lots of other nuggets

Every ios hates moving parts (tongue and cheek)
Every ios hates dark areas like the oropharynx, black triangles, etc…
Every ios hates liquids (blood on the margins)
Every ios can “get off track” and form double images
Every ios struggles with highly reflective surfaces like emax, zirconia, and shinny metal.

The principles shown in the video address every one of these factors and how you can control them and get accurate arch scans in just a minute with the medit i500

I have tried virtually every ios out there and they all struggle with my mouth full of emax. the focal length of the medit from -1.5 mm to 17 mm is the largest variation on the market, and the way the medit handles highly reflective surfaces also outperforms every other ios.

In January, it will be in turbo boost mode when new software is released.

Posted on Leave a comment

Automation vs Flexibility and Control with the VHF Software- Your Choice!

The following two videos showcase a demonstration by VHF at the Greater New York Meeting in 2018. The software from VHF comes with a DentalCAM part and a DentalCNC app. You can nest your restoration in exocad and integrate with the milling machine, or you can nest and mill directly with the VHF software.

The VHF Z4 milling machine comes with an on-board computer. This video shows how we have remote desktop ed into the Z4 to launch the software for nesting and milling.

play-rounded-fill


The biggest advantage of nesting with VHF and milling is that they happen simultaneously. If you nest in exocad, the math has to be done in that software and then transferred to the milling machine, but if you do it all in VHF, the milling process starts before the nesting algorithm is finished.

Posted on Leave a comment

Metal Abutment Scan + Full Arch Scan + PFM Metal Margins Handled Like a Champ

Full arch scan, metal abutment, ceramics, lots of reflective surfaces all captured in under 90 seconds with no powder. just have to hit the metal at different angles and focal lengths, retract the lips and tongue and dry and you will fly with your ios

[videopress iGPf740m permalink=”false” hd=”true” loop=”true” autoplay=”true”]

play-rounded-fill

Posted on Leave a comment

First Molar Crown Margins by Medit i500 and exocad

This is a first molar crown that was replaced with an in-office milled eMax restoration.  The adjacent second molar had recurrent decay under the existing class 2 restoration.  That was removed and replaced and pre-existing crown was also removed.

The preparation was refined and the recurrent decay was removed. Once hemostasis was achieved and the tissue was retracted the area was scanned with the medit i500.  The crown was designed to full contour and milled chairside.  After it was chrystalized, it was bonded into place with Nx3 resin cement.  The excess was removed and an immediate post-op bitewing was taken to verify that no excess cement was left behind.

Pre-Op

This video shows the design of a crown after the impression was taken where vivid colors of the retraction cord, the sulcus, the preparation, and the details of the adjacent tooth can be visualized.

[videopress 25yUA1tp permalink=”false” hd=”true”]

Immediate Post-Op

Download the case files in OBJ Format

Posted on Leave a comment

Margins by Medit and exocad by a CAD-Ray user

It i sometimes confusing to some doctors when looking at bitewings shot at specific angles that make the margin look like it has filled in with resin, or the the margin is “raised” with composite material.  When looking at a sloping margin, where you have a deep chamfer or finish line, instead of a shoulder margin, when you take a bitewing immediate post-op X-ray, the flow of the margin line is superimposed on itself due to the two dimensional image.

Clinically, if you look at the margin design, you will appreciate the anatomy of the prep and how that can lead to this effect.


play-rounded-fill


Posted on Leave a comment

Two Crowns One Milling Machine

This is a lesson in chairside efficiency for all CAD/CAM users. Traditionally, you would be forced to prep two teeth and impress them both at same time, but with digital dentistry, you can break the case up and do it in segments, as if they are two separate patients involved.

In this particular case, the restorations were designed, milled, and seated in a single appointment.  To speed things along, only the second premolar was addressed; it was prepared, imaged, designed and milled.  While milling, the second molar was prepared.

After the tryin, they were chrystalized and seated at the same time.  Leveraging preparation time with mill time of multiple units can greatly increase efficiency at chairside.  See the following videos to pick up on all the details of the case.

play-rounded-fill

CASE SET UP FOR PREMOLAR SCAN IN MEDIT

play-rounded-fill

REMAINING TOOTH STRUCTURE AFTER REMOVAL OF PREVIOUS RESTORATION AND PREPARATION REFINEMENT

PREMOLAR DESIGN IN EXOCAD

play-rounded-fill

REMAINING TOOTH STRUCTURE AFTER PREVIOUS CROWN REMOVED AND THE PREPARATION REFINEMENT

CASE SET UP FOR MOLAR IN MEDIT

play-rounded-fill

MOLAR DESIGN IN EXOCAD

play-rounded-fill


TRY-IN OF EMAX PREMOLAR

[videopress MTQFpe1W]

TRY-IN OF EMAX MOLAR

[videopress wAMZhynC]

SEAT OF PREMOLAR AND MOLAR EMAX CROWNS

[videopress j0dIUGzW]

IMMEDIATE POST OP X-RAYS

Posted on Leave a comment

Clinical Reasons to use Digital Impressions

There are many clinical advantages to taking digital impressions over traditional ones. Some of these concepts you may not appreciate until you are a user.

We break these down into the following categories:

  • digital impressions / models can be edited
  • digital impressions can be captured independent of time comstraints
  • Sequencing of image acquisition is irrelevant
  • Occlusion and contacts require minimal effort and give predictable results


EDITING IMPRESSIONS AND MODELS


INDEPENDENT OF TIME


SEQUENCING FREEDOM


PREDICATABLE CONTACTS AND OCCLUSION

For single unit restorations, all you need to really capture, besides the margins, are the contacts of the adjacent teeth and the occlusal surface of the opposing teeth that will make contact with the restoration.

With traditional impressions, to get predictable results, you should capture both arches completely so when the lab pours up the models, they can properly tripod the casts for accurate relationships between upper and lower arches.  With digital impressions, you can just capture the immediate teeth adjacent to your prep and the opposing and get a very predictable result.  Now, the more data you capture with the digital impressions, the more it will help with designing the restorations.  For example, you can better align the cusp tips in relation to the arch form.

In this video, you can see how there are some “holes” in the model, but they play no role in the final result and its is unnecessary to capture them.  You certainly can if you wish, but the point is that capturing the bite is so much easier for single units with digital than it is for traditional impressions

[videopress OZuTKEUo permalink=”false” hd=”true” loop=”true” autoplay=”true”]

Posted on Leave a comment

What Milling Machine Works with the Medit i500?

This a very common question we get at CAD-Ray.com and it reflects on how little dentists understand about digital impressions and CAD/CAM in general.

“Digital Ready”

It reminds me of a dental conference I want to, fresh out of school, placing orders for our  start-up practice.  As we went to the X-Ray equipment section, one of the first things the representative said to us was that their machines are “Digital Ready”!  We all had good laugh explaining to the rep that the machine had nothing to do with digital X-Rays, the sensors did!

We feel the same way with digital impressions and CAD/CAM platforms when people talk about integration and making sure one “product talks to the another ” and how it all needs to be developed by the same single manufacturer. It’s loaded with a lot of inaccuracies and misrepresentations.

The reality is that every system has its flaws and can have just as much trouble talking to a machine manufactured by the same company! As dentists, we are much smarter with our decision processes now, but it is still a buyer-be-ware landscape.

Here are some basics you should appreciate before committing to a high ticket item. It’s imperative to understand that imaging has little to no impact on milling. These are completely independent processes- let us explain:

You can image (take an intra-oral scan) with system A. Then you can take the data from system A and take it to CAD software of system B.  A lot can go wrong here at this step alone. Simple examples include;

  • The patient name doesn’t come along with the data.
  • Incorrect data may come across with incorrect information- you can have the occlusal relationship look perfect in system A but when it goes to CAD, the bite can be off.
  • You mark your margins in A, but they are distorted in cad software. So you have to make sure this works.

Keep in mind that this can even happen if you stay within a “System A” or “complete system”.  Luckily a lot of this is ironed out already with legacy and legitimate products and competent practitioners.  Now comes the design step. You have a few choices; exocad and 3shape being the leaders.  If exocad does the margin placement and the final restoration from start to finish, a lot of errors are eliminated.

After the design process, comes the nesting and manufacturing. At this step, the milling machine has NO idea what iOS you have used. It’s just data for a restoration that it needs to process.  Ar this most vulnerable step, we need to make sure the CAM software for a particular machine can interpret the design software that did the nesting.  A lot happens here;

[videopress yOHyMMVp permalink=”false” hd=”true” loop=”true” autoplay=”true”]

  • How’s the restoration positioned in block?
  • What size block / puck?
  • What materials? What speed? What detail?
  • What are sizes of burs in mill, etc…

Then comes the consideration for your milling needs.

  • You can mill soft ceramics for 15,000$
  • For a little more, you can wet mill emax
  • Cross the 30k barrier with and you can cut zirconia (we do NOT recommend in office zirconia- dumbest thing you can do)
  • Closer to 40k and you can do in house metal custom abutments.
  • Over 40k you can mill roundhouse bridges and you are as much a labtech as a dentist.

The trickiest part of all this is the last step. Making sure the mill has the right cam to talk to design software. This can be a nightmare if you don’t do your homework.

So, with the Medit iOS you can mill to any machine. You can even take it to cerec inlab software and Jump through a lot of hoops to mill with CEREC chair side milling machine. Not worth the headache!

The CEREC chairside mill remains the fastest carver of emax restorations, but it can come at a cost – you need to bulk out the margins so they don’t break off at mill.


Posted on Leave a comment

Crisp Margins that Pop Out!

It was a long struggle to find margins with the Omnicam and after 4 years it was sold. The margin definition and resolution never reached an acceptable level. After seeing margins from high resolution scans by the Medit and defining them in exocad, it completely validated that we shouldn’t settle for anything less than the highest standard. This is an scan performed on a upper second molar with tough access, replacing a failing crown.

play-rounded-fill

Download STL
Download OBJ
Download PLY

play-rounded-fill


play-rounded-fill


LAST X-RAY IS IMMEDIATE POST OP- EXCESS CEMENT WAS REMOVED AFTER FILM CHECK

Posted on Leave a comment

Premolar Onlay Captured in High Resolution Mode

This article demonstrate how a case be set up while the patient is being anesthetized. While waiting for it to take effect, your team can scan the opposing arch, the arch to be prepared, and even the buccal bite. You can see how that is set up in first video. Notice how we crop out the tooth to be prepared so that the software doesn’t get confused between the preop and prep stages.

[videopress ZvGLVAM6 permalink=”false” hd=”true”]

Once the tooth is prepared, the premolar is imaged back into the arch form in high resolution mode. This mode comes in handy for picking up the enamel that is exposed at the cavosurface margins. Some intra-oral imaging systems struggle with picking up the detail in these situations.

play-rounded-fill

You can see how clearly discernible the margins are in this preview. Feel free to download the case data at the end of the article. Please note that areas that are not critical for the restoration design were essentially ignore as they play no significant role in the desired outcome.

play-rounded-fill

Download STL
Download OBJ
Download PLY


Posted on Leave a comment

exocad DentalCAD and exocad Chairside (CS)

What is Exocad?

  • Exocad is a powerful software that can import any STL, OBJ, or PLY file from any digital impression system, design a restoration, and fabricate it by outputting to either a milling or printing machine.  This is a very simplified explanation and CAD-Ray will guide you through the process.

What is the difference between Exocad DentalCAD and Exocad Chairside (C.S) ?

  • Exocad DentalCAD is utilized by over 35,000 users worldwide and is a very powerful software that allows you to design and fabricate a wide range of restorations, ranging from single units to bars and removable dentures.  It may be overkill or intimidating to a dentist or for chair-side, so the alternative is the C.S. platform.  Be aware that the DentalCAD system has many add-on modules that the C.S. version does not, as you can see in the attached table

Add-On Module Exocad DentalCADExocad Chairside (C.S.)
Bite Splint ModuleYesYes
Provisional ModuleYesYes
TruSmile TechnologyYesYes
Custom abutmentsYesComing Soon
Screw-retained bridgesYesNo
Standard barsYesNo
Complex barsYesNo
Create physical modelsYesNo
Bite Splint ModuleYesNo
Full denturesYesNo
Partial framework designYesNo
Virtual ArticulatorYesNo
Smile DesignYesNo
Jaw Motion ImportYesNo
DICOM ViewerYesNO


What are the pricing and software options for Exocad DentalCAD?

SOFTWARECAD-FLEX CAD-PERMANENT
Price$2600$5000
PERPETUAL Yearly Maintenance Fee$1500N/A
Software still functions if you opt out, but no new features will be added
OPTIONAL Yearly Fee for UpdatesN/A
Software stops functioning without yearly fee.
$1200
For continuous software updates
Implant Restorative Module$500 / Year (Perpetual)
FDA regulations mandate yearly updates
$ 1200 one time purchase with yearly optional $450 updates
Provisional Module$250 / year (Perpetual)$600 one time purchase with yearly optional $150 updates
Bite Splint Module$350 / year (Perpetual)$ 1200 one time purchase with yearly optional $450 updates
Implant PlanningComing SoonComing Soon


What are the pricing and software options for Exocad Chairside C.S.?

[wc_product_slider show_type=”category” category_id=”66″ filter_type=”” number_products=”6″ skin_type=”widget” widget_effect=”fade” card_effect=”fade” slider_auto_scroll=”yes” effect_delay=”1″ effect_timeout=”4″ effect_speed=”2″ image_size=”woocommerce_thumbnail” align=”none” width=”90″ width_type=”%” margin_top=”10″ margin_bottom=”10″ margin_left=”10″ margin_right=”10″]

Posted on Leave a comment

Full Mouth Reconstruction with Medit i500

To see this case presented in webinar fashion click on the image and enter the members area for much greater detail and information


Pre-existing restorations that warranted replacement with an increase in vertical dimension.

Pre-existing restorations that warranted replacement with an increase in vertical dimension. The upper and lower arch were captured with the medit I500 and articulated together with enough clearance to accommodate new restorations and to restore the patient to an ideal tooth position.

play-rounded-fill

This video shows how the vertical dimension was captured with cotton rolls blocking out the tongue and the dark oro-pharynx, which usually spell trouble for an IOS

play-rounded-fill


The digital models were then imported into a third party software where a library of tooth morphologies are available for the clinician to choose from.

Once the appropriate library is chosen, the digital wax ups are performed. In the subsequent photos you can see the transparent overlay of the wax-ups to the original position of the existing dentition


Once the case is designed to the ideal vertical dimension then multiple shells can be fabricated for treatment. The wax up model can be uniformly reduced by .5mmm’s circumferentially and a temporary shell can be designed. Once the teeth are prepared, these shells can be relined and seated onto the preps.

play-rounded-fill

PREP AND TEMPS

play-rounded-fill


How was this done? Watch this video of how the case was imaged over a 4 hour time span in multiple segments

play-rounded-fill


FIRST VERTICAL DIMENSION
The initial vertical dimension was greater than desired and the tooth shape was too bulky in appearance.

[videopress C0MfqBiS]

ADJUSTED TEMPORARIES AND NEW VERTICAL DIMENSION
Over the course of a few appointments, the vertical dimension was reduced and the temporaries were adjusted to the patient’s desires. The new upper and lower arch were captured with the Medit i500 and the jaws were related to each other.

play-rounded-fill


This was then imported into exocad where the prepped arches from a few weeks prior were force matched to the new bite

[videopress Zj7XsYG4]

After the upper jaw was related to the temps, the same was done with the lower arch. Great care was taken to make sure the arches were properly related to each other throughout the process

[videopress ObPk1CAK]

CASE DESIGNS

The case was designed by CADENT BESSA, and the models were printed by Burbank Dental Lab with Carbon Printers. There restorations were milled and cut back and layered by Burbank Dental Lab

IMAGES OF PRINTED MODELS


[videopress vWPj7dBI permalink=”false” hd=”true” loop=”true” autoplay=”true”]

IMMEDIATE POST-OP PHOTOS AND VIDEO WITH IPHONE CAMERA


play-rounded-fill

ONE WEEK POST-OP RADIOGRAPHS / CEMENT CHECK

[videopress b4O5j3Pq permalink=”false” hd=”true” loop=”true” autoplay=”true”]


Posted on Leave a comment

Second Molar Emax with Medit i500

This simple second molar restoration was imaged with the Medit i500.  There was no retraction used  and the lab worked with the OBJ file to render an eMax restoration.  The fit to the margins was perfect and the occlusion and contacts were not adjusted.  The benefit of digital impressions is the dramatic reduction in redos!


[videopress sbdHkZfF permalink=”false” hd=”true” loop=”true” autoplay=”true”]


Restorations fabricate by: