


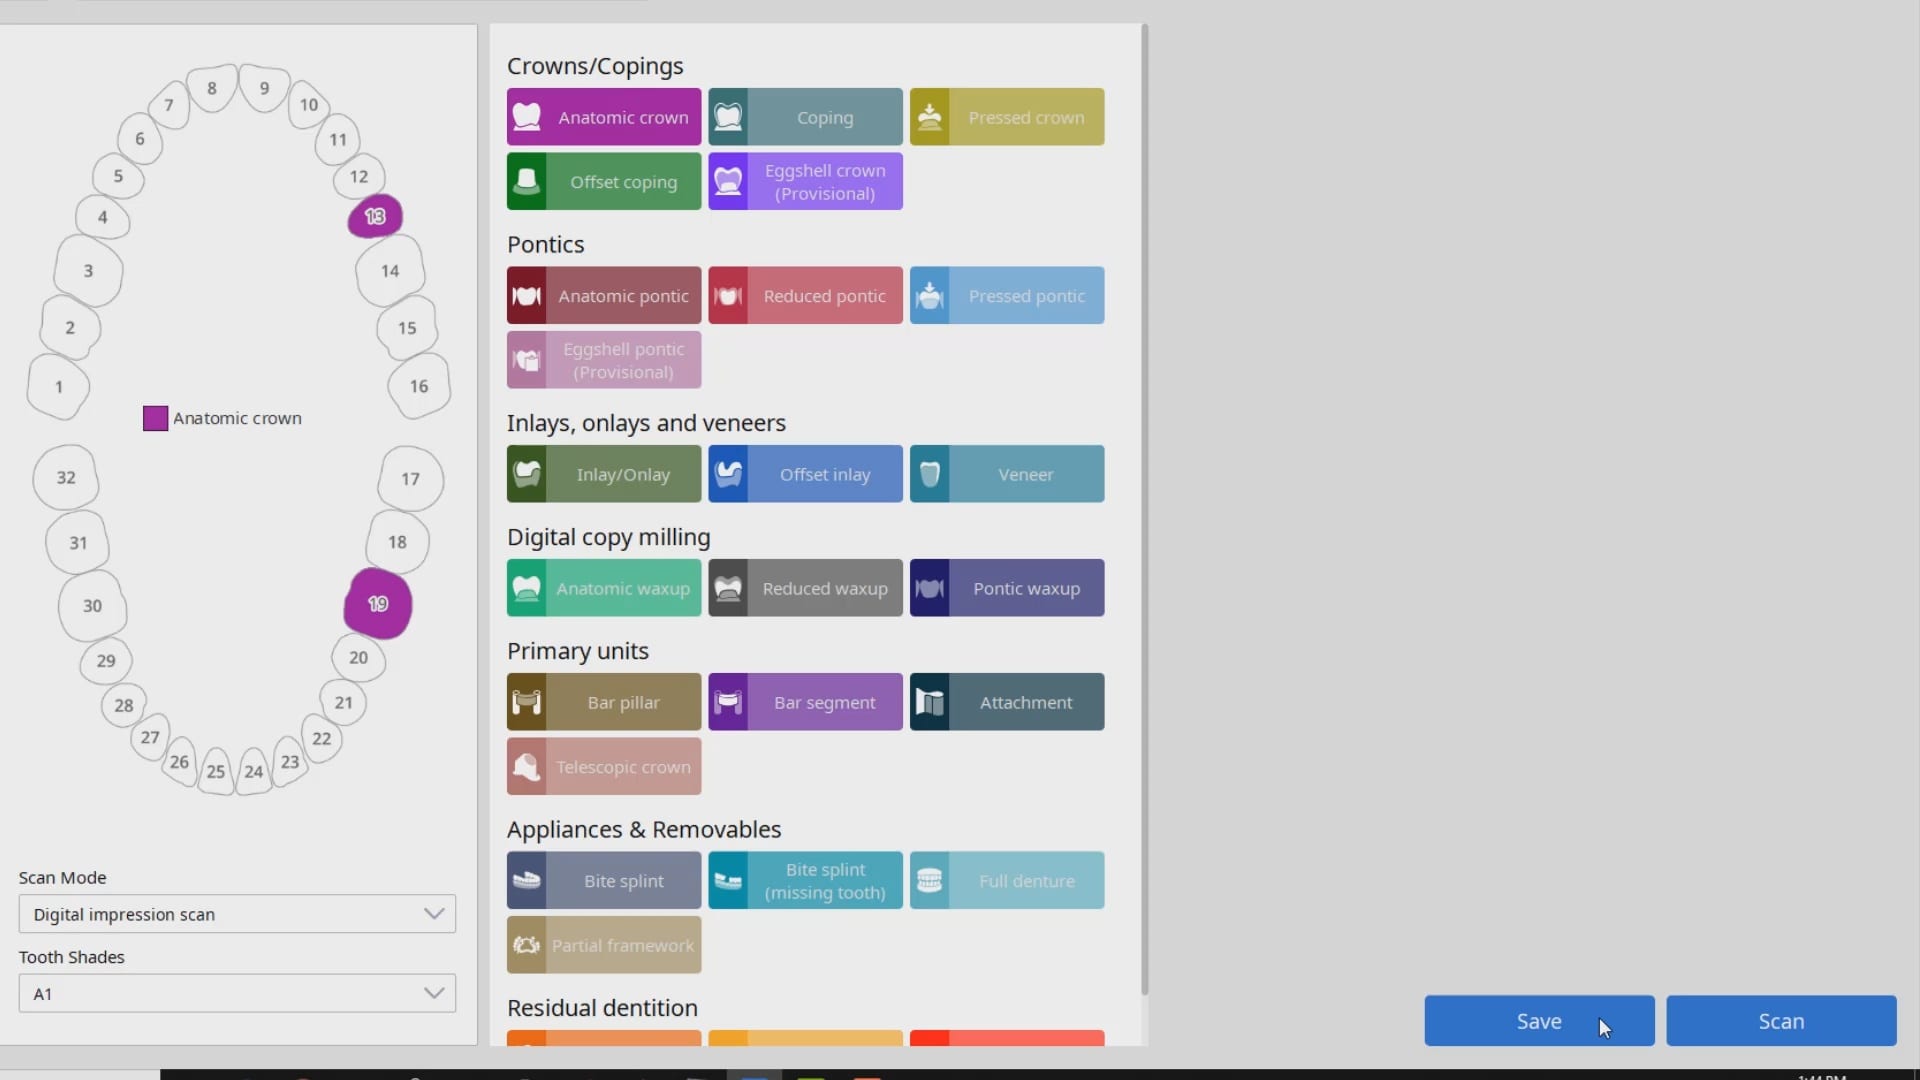
In this article we demonstrate how two separate implants are placed with guided surgery and then scanbodies are used immediately after placement to capture the location of the fixtures. While the patient is healing for the next 4-5 months, an upper tibase restoration will be fabricated with a lower custom titanium abutment. Digital impressions were taken with the Medit i500 for implant planning and Blueskybio software was used for the two surgical stents. Two 4.3 mm biomax implants were placed
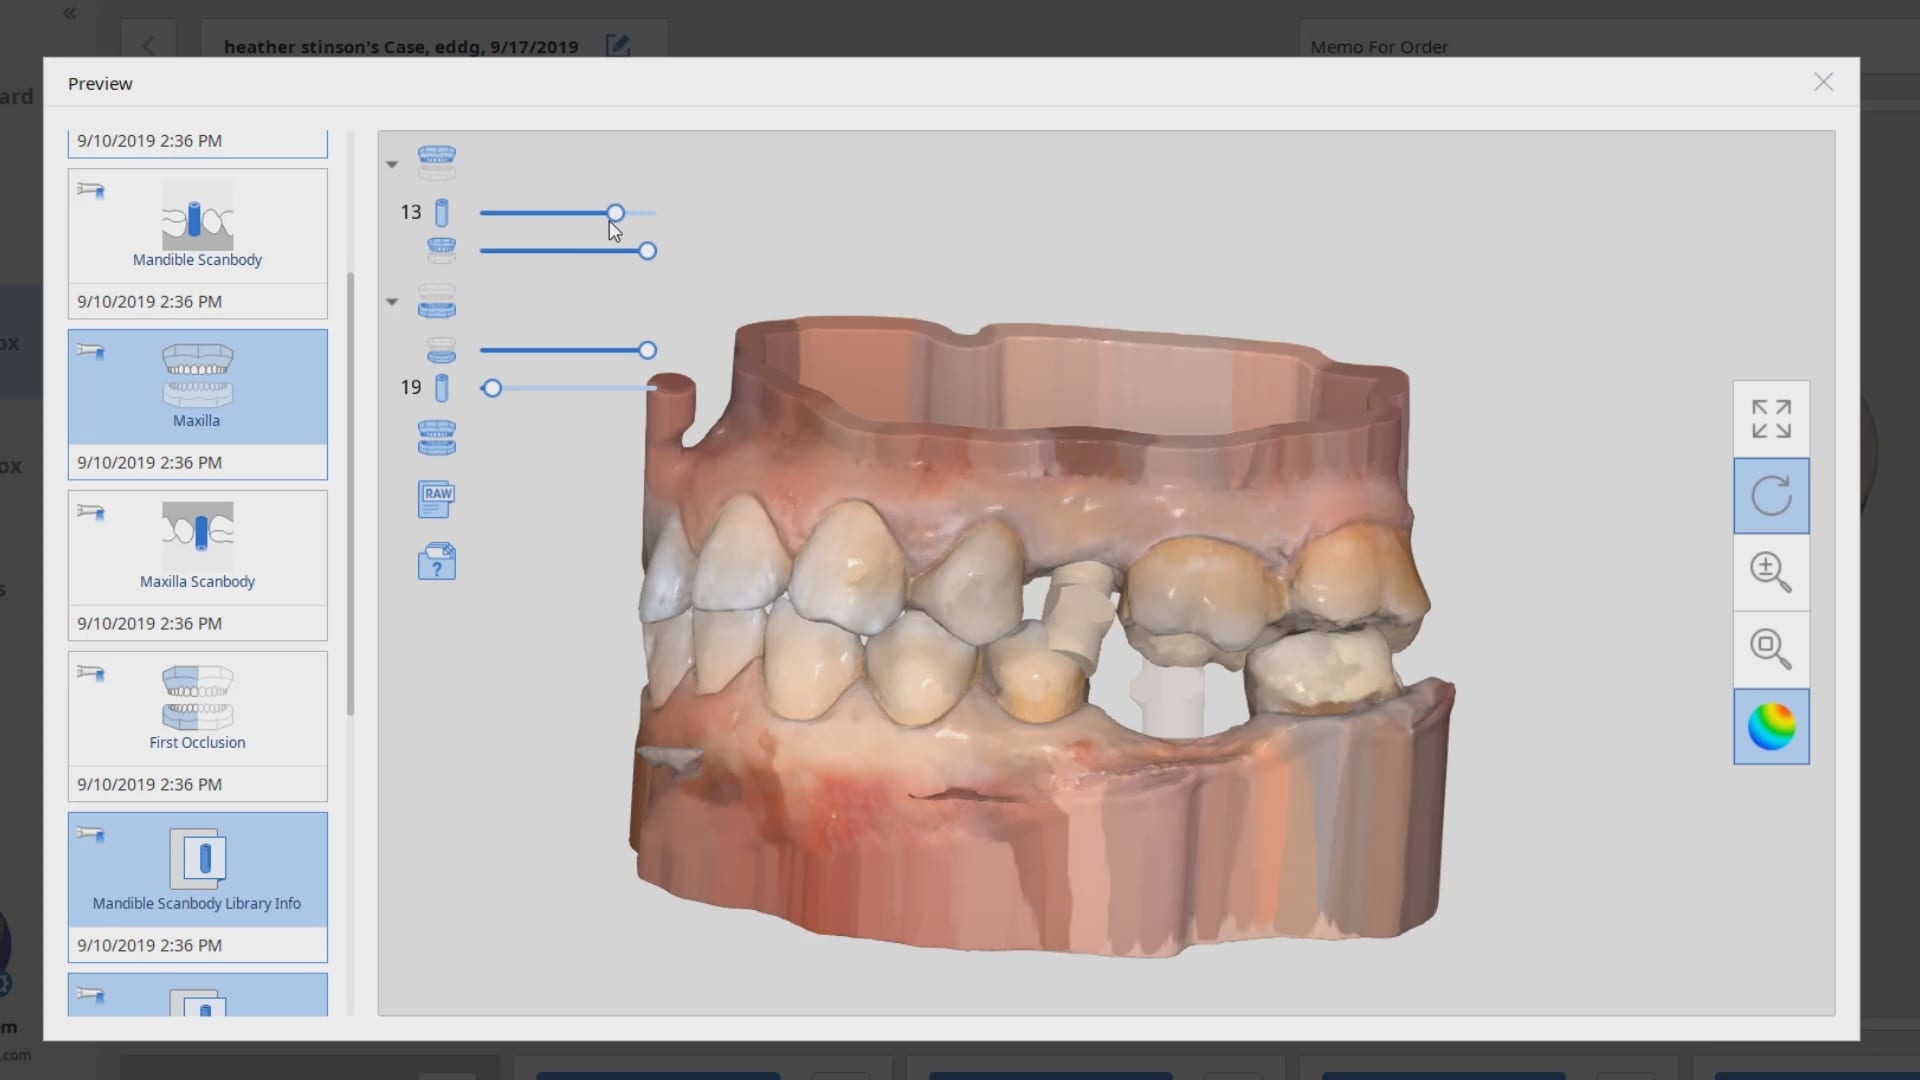
While the patient was anesthetized, the edentulous arches on the patient’s left side were imaged. The bite was also taken, which ignores any information that is present in the scanbody catalogs. It is important to understand this as a new user because usually, the scanbodies are taller than the occlusal heights of the adjacent teeth. If these were captured in the wrong catalog boxes, the upper and lower jaw alignment could be mal-aligned

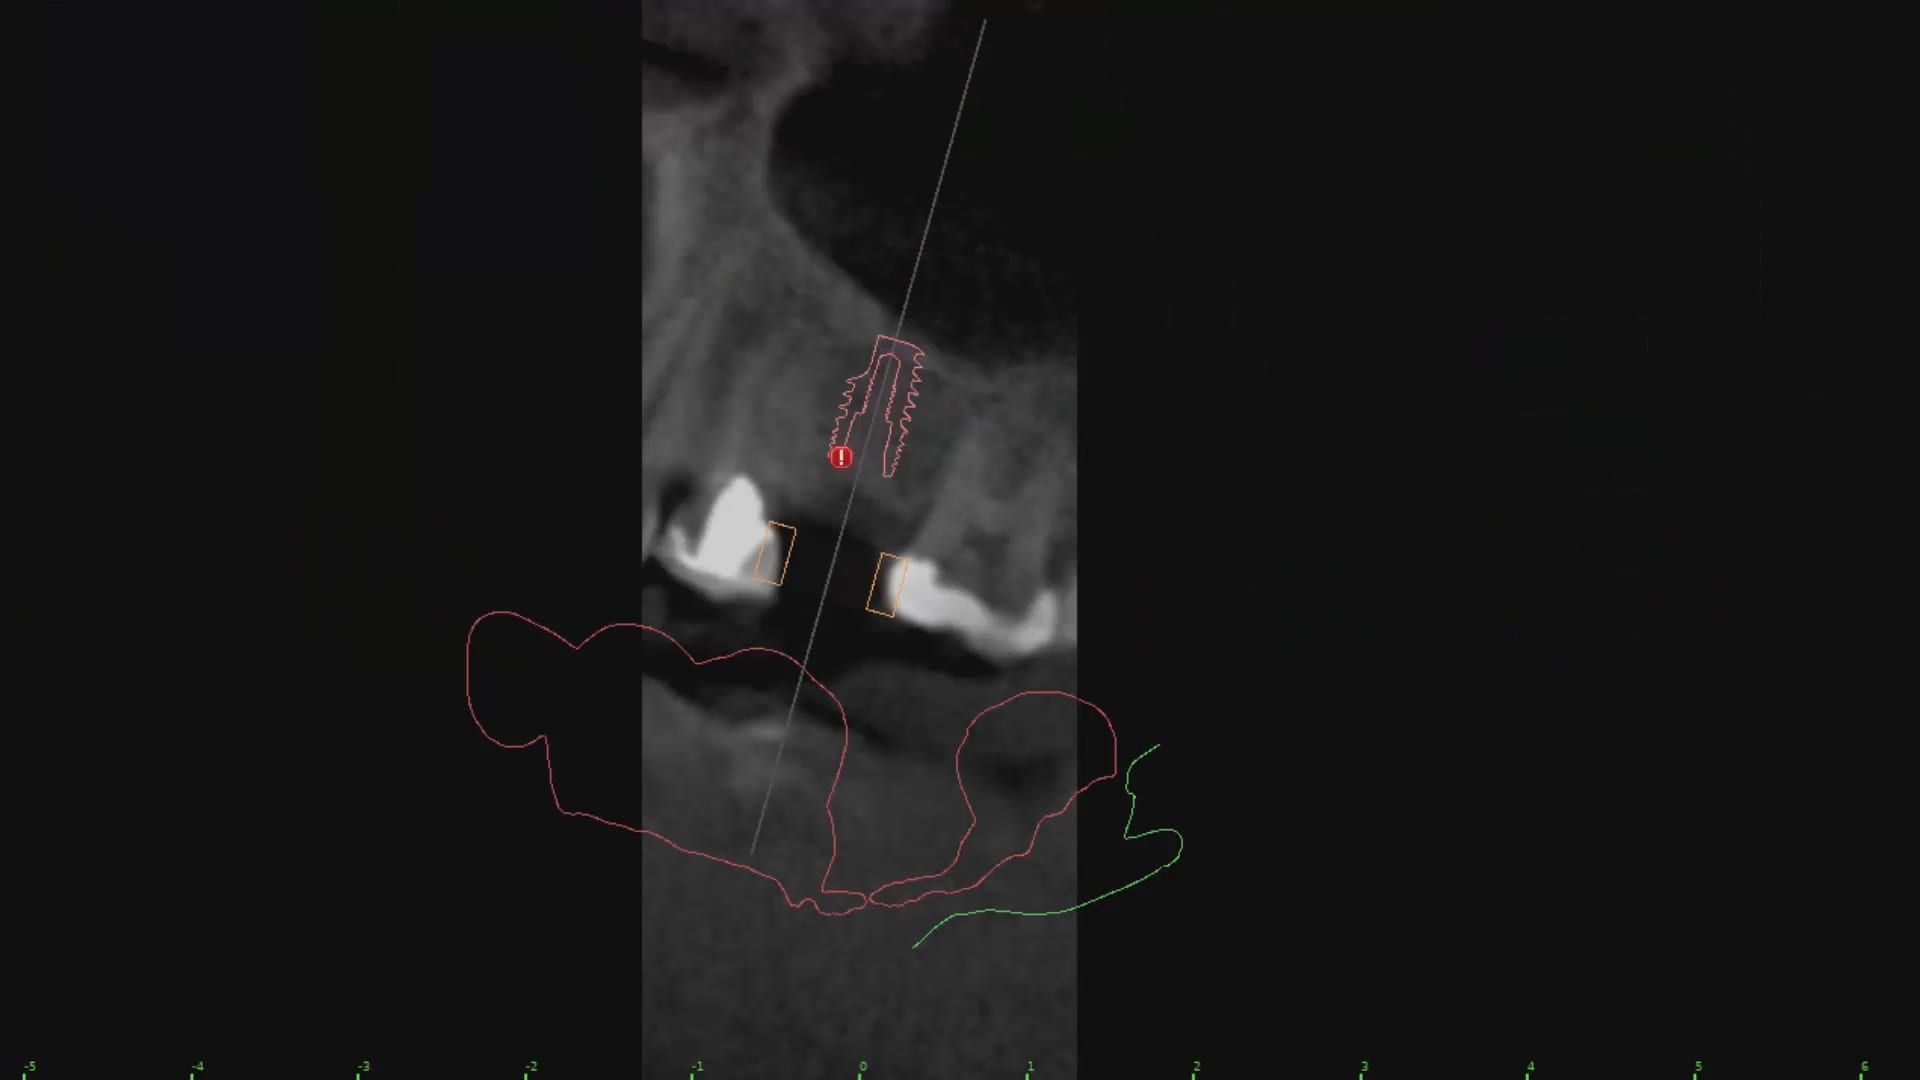
After sufficient anesthesia is achieved, the two surgical stents were seated and verified for fit. It is up to the clinician’s discretion to either lay a flap to access the area or to do the surgery flapless. Since the implant designs showed ample bone, and the fixtures were going to be placed sub-crestal, a tissue punch technique was used here as the area will granulate in. At uncovery, a flap can be used to advance the tissue to the buccal to enhance keratinized tissue appearance
One of the greatest benefits of digital dentistry is that you can capture parts of a model independent of time and sequence. In this particular situation, we opted to capture the scanbody for the upper arch even before the lower arch received the implant.
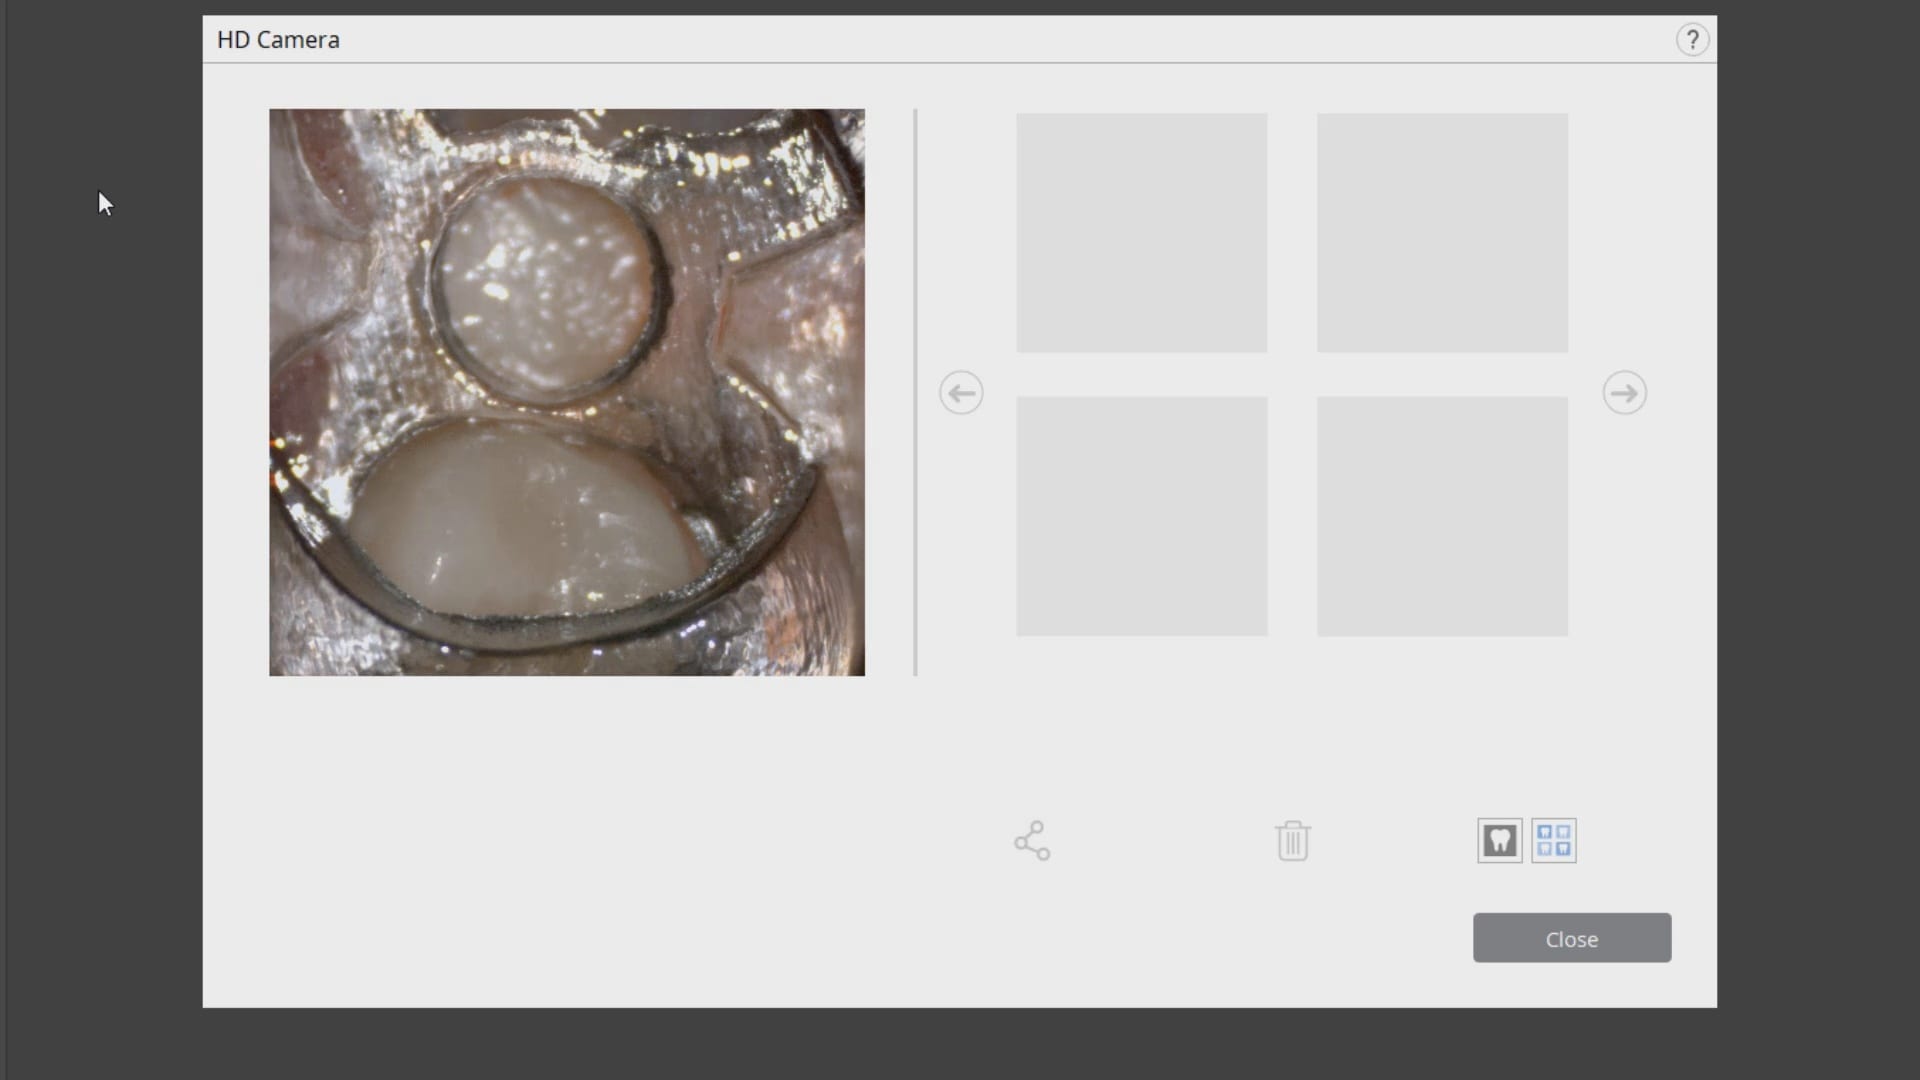
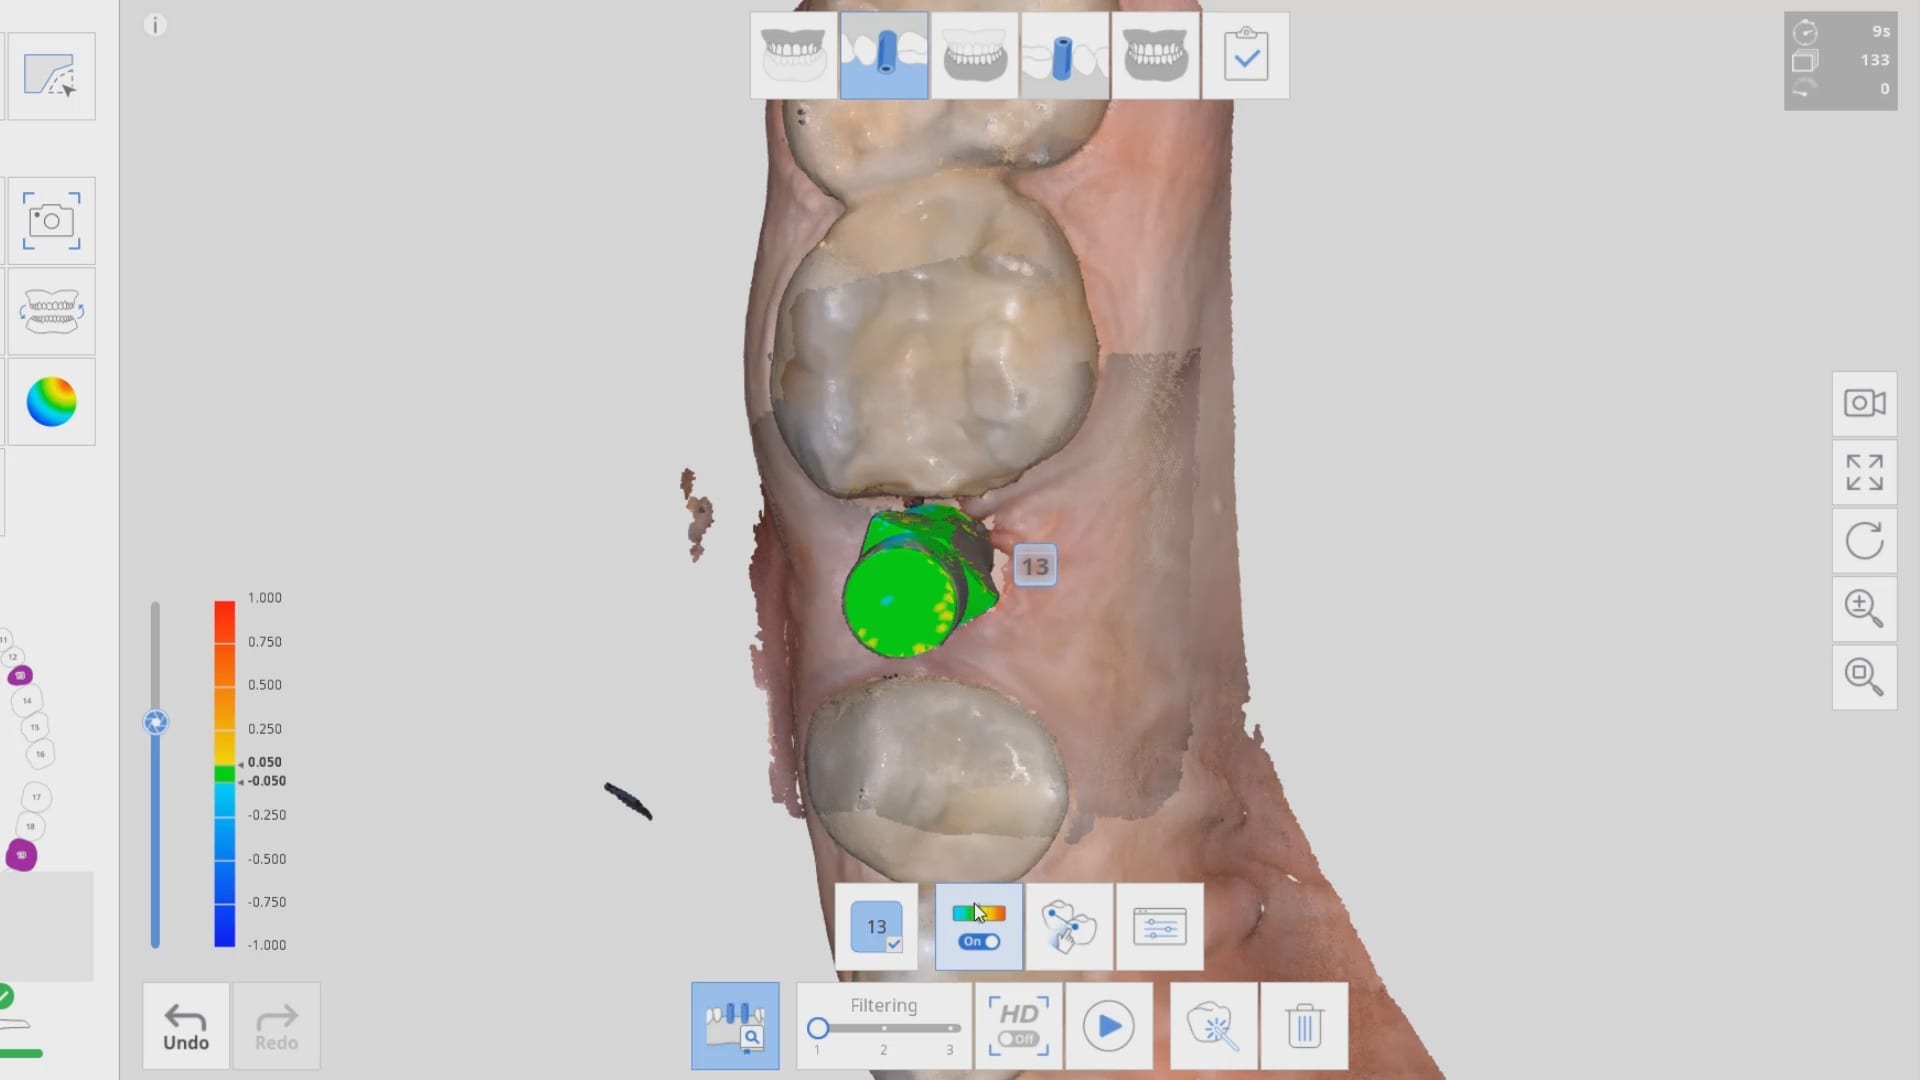
We utilized Medit i500’s Artificial Intelligence to spot and mark the scanbodies. Once these data points are plotted and synchronize with what appears intra-oral, you no longer have to worry about distortion or artifact in the scanbody itself. Color coding is a good indication of an accurate identification of the DESS scanbodies.
The significance of these identified scanbodies is that you can directly import them into the cad software and the fixture locations are readily identified and the design process can proceed.