I just bought the new Medit i700. I placed the order on Friday, it shipped on Monday, and it arrived on Tuesday. So far it has been a great experience. They also provide a lot of quality videos for learning to use the scanner. - 5/05/2021
Infinite Smiles
Can not say enough great things about Cad-Ray. Purchase an intraoral scanner from them and have had to have their support team help out a couple of times. They are top notch! I will be purchasing all of my tech they offer through them - 7/07/2022
Kirk Arritt (fldnstrm)
Whatever digital workflow addition you want to add to your dental practice look no further than Cad-Ray. Top notch support and training. - 1/29/2023
Meridien Dental
Got my Medit scanner from here. Purchase went very smoothly. Best part is the on going support. Cad-ray team is great with training and ongoing help if your scanner has hiccups here and there with various updates. - 12/11/2023
Milton Ruiz
Best customer service I have ever experienced from any company I have worked with! They alway answer the phone and are ready to help with whatever question you may have. Love that I do not have to press 500 buttons to get to a live person. Bought my...read moreBest customer service I have ever experienced from any company I have worked with! They alway answer the phone and are ready to help with whatever question you may have. Love that I do not have to press 500 buttons to get to a live person. Bought my Medit from them and could not be happier with decision!read less - 12/20/2022
Stephanie O'Rourke
I am fairly new to scanning with my Medit I700. I am loving this in my business. It has had its challenges at times but the best part is the accessibility and support from Frank DeLuca. He has been instrumental in helping me when I have a patient in...read moreI am fairly new to scanning with my Medit I700. I am loving this in my business. It has had its challenges at times but the best part is the accessibility and support from Frank DeLuca. He has been instrumental in helping me when I have a patient in the chair and need assistance. I couldn't be more grateful for his help. Thanks, Frank!read less - 12/16/2021
Deryck Pham
best customer service on the planet. very easy to use. and always fine tuning to make the user experience better. - 6/16/2020
Arielle Forbes
Just got my Medit IOS delivered last week and the service from Jon was great! I had a ton of questions before placing the order and he happily answered. This is the type of customer support many dental suppliers are missing. Great company to work wit...read moreJust got my Medit IOS delivered last week and the service from Jon was great! I had a ton of questions before placing the order and he happily answered. This is the type of customer support many dental suppliers are missing. Great company to work with.read less - 6/19/2020
John Pisacane
I purchased my Medit scanner after the ADA meeting in 2018. I did it primarily on the personal recommendation of Armen Mirzayan, the owner of Cad-Ray. I have known Armen for over 15 years (we both were CEREC trainers) and he has always been unbeli...read moreI purchased my Medit scanner after the ADA meeting in 2018. I did it primarily on the personal recommendation of Armen Mirzayan, the owner of Cad-Ray. I have known Armen for over 15 years (we both were CEREC trainers) and he has always been unbelievably knowledgeable about dental technology and was always moving on the cutting edge.
When you see Armen's daily FB posts, it’s obvious that he is constantly pushing the envelope and exploring the limits of the Medit and the processes we use to idealize our push towards completely digital dentistry. Medit owners are fortunate to have Armen finding glitches and pushing for improvements in our scanner.
As far as after sale service, I can’t find a flaw with Cad-Ray. You won’t find a more supportive and dentist-centered company. Armen and Frank do everything to make purchasers happy and back up their sales.
I’ve heard of horror stories when people shopped elsewhere and only positive comments about Cad-Ray.
In summary, buy your Medit and other high tech equipment from Cad-Ray, you will be totally satisfied.
.read less - 10/08/2019
I was on the fence for a few years about getting into intra-oral scanning. I finally did it in the fall of 2019 and haven't looked back. I was hesitant mostly because I didn't want to spend a lot on $$$ on something that I don't end up implementing. ...read moreI was on the fence for a few years about getting into intra-oral scanning. I finally did it in the fall of 2019 and haven't looked back. I was hesitant mostly because I didn't want to spend a lot on $$$ on something that I don't end up implementing. I found that I love scanning, I feel like it has improved my quality of preps and my OCD of being able to verify accuracy. I recommend Cad-ray because they want you to succeed. They are always available. They have been through this process many times, they know what does and doesn't work. My experience is with the Medit i500 IOS.read less - 6/19/2020
Michael Conte
Needed help with scanner updates and Frank is the man! Once he was done the scanner was operating in hyper-drive!!thanks frankoffice of Glenmont Dental - 2/15/2022
Ellen Huang
Armen created series of these very helpful videos. They helped us tremendously in breaking into the new scanner we purchased. No matter you just got into digital dentistry or you are quite experienced with different fields of data acquiring or treatm...read moreArmen created series of these very helpful videos. They helped us tremendously in breaking into the new scanner we purchased. No matter you just got into digital dentistry or you are quite experienced with different fields of data acquiring or treatment planning, you will find those being tremendous help.read less - 5/24/2020
My wife and I practice together and bought our first i500 in August of 2018. This was very early on before Armen had a vast number of technique and online support articles in his blog! Little was publicly known at the time about this new scanner bu...read moreMy wife and I practice together and bought our first i500 in August of 2018. This was very early on before Armen had a vast number of technique and online support articles in his blog! Little was publicly known at the time about this new scanner but I felt confident in my purchase for a few reasons: 1) Armen had validated the product and was standing behind it... I knew of Armen from DentalTown and had many years of public posts to evaluate his character; 2) Limited demos available at the time; 3) some clinical accuracy data out of Europe that required zooming in on a powerpoint presentation that was recorded second-hand via camera phone ha! SO needless to say, I put a lot of eggs in the "Armen is standing behind this product" basket. We have NOT been disappointed. From personalized service from both Frank and Armen, to our vast success and joy using the product and deciding in late 2018 to buy a second Medit i500, I have nothing but good things to say about the product and Cad-Ray. What a bunch of self-less individuals. Armen has offered to remote in and I even took him up on the offer once and he remoted in immediately to take a look at something. Good luck getting service like this from ANYONE else in the industry. Cheers to digital dentistry with the RIGHT partner. Kristian C. Dietz, DDSread less - 3/08/2020
I have had the original iTero, a Trios 3, and a Carestream CS3600. A staff member broke the lens on the Trios and while waiting 3 weeks for an RMA to send it to Poland for six weeks to get it repaired, Carestream was sniffing around and suggested tha...read moreI have had the original iTero, a Trios 3, and a Carestream CS3600. A staff member broke the lens on the Trios and while waiting 3 weeks for an RMA to send it to Poland for six weeks to get it repaired, Carestream was sniffing around and suggested that I trade in my Trios so I did which began a 4 month nightmare with their piece of junk scanner. Absolutely awful customer service from both 3Shape and Carestream. I needed a scanner and had heard great things about it the Medit i500 at the Florida Academy of Coesmetic Dentistry so I got one. It works really well and Medit keeps adding new and useful features and their architecture is completely open. Two weeks ago, my i500 died so I contacted Cad-Ray surrport and I had a new unit in my office 24 hours later! That's absolutely unheard of in the industry!!! Both Cad-Ray and Medit have positioned themselves to be industry giant killers and they're doing it. The i500 is a phenomenal scanner at a phenomenal price point and service and guidance at Cad-Ray is just plain excellent.If you are thinking about getting a scanner, do it! Just contact Cad-Ray and go for it. You will only be happy about your purchase! Highly recommended!read less - 3/09/2021
Tommy Han
Awesome service. Bought a Medit and was able to learn how to use it simply by watching Cad-Ray's support and education videos. Three thumbs up! - 6/16/2020
Faisal Mir
Exceptional customer service! - 4/11/2025
Ryan Anardi
Just ordered my i700 yesterday and it ships today. Customer support has been amazing in answering all my questions completely. Looking forward to my delivery day like a kid at Christmas. - 11/03/2021
We started our journey with CAD-Ray 3 years ago them helping us find a digital scanner that fits our practice needs and have relied on them for our 3D printing needs. They are an excellent company and I highly recommend them for their knowledge and s...read moreWe started our journey with CAD-Ray 3 years ago them helping us find a digital scanner that fits our practice needs and have relied on them for our 3D printing needs. They are an excellent company and I highly recommend them for their knowledge and service they provide. I would buy and dental tech needs from them!read less - 9/07/2022
Matt v
Matt Newman was excellent solving a cable problem.! Quick response and good follow up! - 9/11/2024
Ma. Teresa Santana
Best support and customer service ever! My scanner is long past warranty and they still answer all my questions. When it's time to upgrade I'll be buying from them again. A friend bought same scanner from another vendor and got zero support. I had to...read moreBest support and customer service ever! My scanner is long past warranty and they still answer all my questions. When it's time to upgrade I'll be buying from them again. A friend bought same scanner from another vendor and got zero support. I had to help them. Told her next time buy from Cad Rayread less - 5/10/2024
Nick Boyd
Great people. Very helpful with anything you need. - 6/16/2020
Dath Collins D.D.S.
We have worked with Cad-ray for over three years. There tech support should be modeled as the gold standard for tech support. Let me tell you why. When you call in someone answers the phone and even better than that they solve the problem. Lauren...read moreWe have worked with Cad-ray for over three years. There tech support should be modeled as the gold standard for tech support. Let me tell you why. When you call in someone answers the phone and even better than that they solve the problem. Lauren solved my tech problem in less than 5 minutes! Thank you Cad-ray!!read less - 1/24/2023
Brandon Erickson
I have strong feelings about how great CAD-Ray has been. I purchased a medit i500 scanner from my lap, they wanted to use it for courses which aren't happening now so he didn't want to be sitting with this expensive piece of technology sitting aroun...read moreI have strong feelings about how great CAD-Ray has been. I purchased a medit i500 scanner from my lap, they wanted to use it for courses which aren't happening now so he didn't want to be sitting with this expensive piece of technology sitting around. Before purchasing he and I both talked to the Nobel sales rep who assured me that everything would transfer over just fine. I was concerned about the learning curve and wanted to be sure that I would have tech support. I asked the rep directly and he assured me again that everything would be great and he would come do an in-depth training with me. Long story short, the sales rep had no clue what he was doing and put very little effort in to helping me once the purchase was complete. I asked him over the phone how to do a few things and his response was to call CAD-Ray. They explained that this happens, they would love to help me but asked that I purchase the service package. That was a game changer. Now all of my questions getting answered, their response time is amazing and their understanding of the machine is by far better then the Nobel reps. The scanner is great but combine that with their tech support and I feel like I'm set up for success. If I were to do this again, I would skip the headache of trying to save a little bit of money and purchase it through CAD-Ray. But even with making the mistake, I feel like they have programs and support set up to point me in the right direction.read less - 10/15/2020
Minh Van
I was referred to CAD-Ray by Medit Instagram help service. I have purchased Medit i700 from Laura, I was please to work with her and the whole team. They offered the best customer service and the fast responses, especially Laura. I look forward for t...read moreI was referred to CAD-Ray by Medit Instagram help service. I have purchased Medit i700 from Laura, I was please to work with her and the whole team. They offered the best customer service and the fast responses, especially Laura. I look forward for the next purchase.read less - 12/07/2021
Abhinav Bhatnagar
We have been using the scanner for a few weeks now. It’s been a blast to use and they have made it easy to learn with video tutorials. We have yet to go to the training, but we are excited to continue learning and expanding our digital dentistry. - 6/19/2020
Stephen S
Choosing an digital intraoral scanner these days can be quite a daunting task. When I reached out to CAD-Ray, as was recommended by many colleagues, I was connected to Frank DeLuca, and he made my decision-making process very simple. Upon receiving...read moreChoosing an digital intraoral scanner these days can be quite a daunting task. When I reached out to CAD-Ray, as was recommended by many colleagues, I was connected to Frank DeLuca, and he made my decision-making process very simple. Upon receiving my 3shape Trios 4 scanner, Frank and the entire tech support team/customer service were very helpful every step of the way. Frank makes himself available when he can in order to address all of the questions I have regarding the digital workflow. I highly recommend CAD-Ray. It will make your transition to digital scanning a positive experience.read less - 1/24/2023
Jason Ehtessabian
Fantastic! Scanner went down after a few years, and they had a new one in my office the next morning. Highly recommended. - 8/26/2021
North Bakersfield Dental
Excellent customer service and product!! - 3/16/2022
David Chong
Digital dentistry has changed my work flow for the better and could not imagine going back. So important that I have the support when things don't work as expected. CAD-Ray has been there every step and trust their expertise and knowledge! - 4/20/2022
Peipei Yu
I purchased a Medit scanner in August and I am very happy with the scanner. I was trained on an Omnicam in dental school and used Omnicam for 4 years in my associateship. The speed and quality of the Medit scanner is comparable to a CEREC scanner but...read moreI purchased a Medit scanner in August and I am very happy with the scanner. I was trained on an Omnicam in dental school and used Omnicam for 4 years in my associateship. The speed and quality of the Medit scanner is comparable to a CEREC scanner but you can’t beat the price of the Medit! I would highly recommend this if you are a beginner or pro in digital dentistry!read less - 9/21/2020
Diego Humberto Marquez Rodriguez
I am a very happy customer, the team behind cad ray, is amazing. Ive had small issues, and tech support is always available. I always call for them to help me use new apps, or updates and they stay on the phone with me all thru out, until fixing the ...read moreI am a very happy customer, the team behind cad ray, is amazing. Ive had small issues, and tech support is always available. I always call for them to help me use new apps, or updates and they stay on the phone with me all thru out, until fixing the issue. Andy has helped me several times, and he's a really nice guy too, great attitude, doesn't make me feel dumb when I don't understand. Sometimes it feels like he's part of my office team! Thank you Cad Ray, thank you Andy!read less - 2/01/2023
Ernesto Carmona
When I decided to purchase a digital scanner I decided on user experience. They have provided the best experience I could have asked for, from online support, Facebook support, and in person courses. There is no better team to buy Medit from period...read moreWhen I decided to purchase a digital scanner I decided on user experience. They have provided the best experience I could have asked for, from online support, Facebook support, and in person courses. There is no better team to buy Medit from period. Do yourself a favor and buy from them if you are in the market for an intraoral scanner.read less - 6/16/2020
Artin Sakhaee
The support is even better then the camera itself. I used many other scanners and this is by far the best one. Recommended to many people. Looking to purchase a second one for my practice. The use and results are amazing. No adjustments to the p...read moreThe support is even better then the camera itself. I used many other scanners and this is by far the best one. Recommended to many people. Looking to purchase a second one for my practice. The use and results are amazing. No adjustments to the prosthetics at all.read less - 7/15/2020
larry bybee
We have been using an intra-oral scanner (not a medit) in our practice for 4 years and it was decided that we needed to purchase another scanner due to practice growth. After a thorough review we decided on the Medit i700. Due to the great team at Me...read moreWe have been using an intra-oral scanner (not a medit) in our practice for 4 years and it was decided that we needed to purchase another scanner due to practice growth. After a thorough review we decided on the Medit i700. Due to the great team at Medit I have learned more about scanning 1 week than i received from the other company in 4 years. i700 great price, great scanner and amazing customer service.read less - 12/23/2021
Kent Lysgaard
This company has the best customer support I have ever experienced. I purchased the I700 Intraoral scanner and the transition from impression material to io scanner has been so easy because of Cad-Ray. I highly recommend them. The response to questi...read moreThis company has the best customer support I have ever experienced. I purchased the I700 Intraoral scanner and the transition from impression material to io scanner has been so easy because of Cad-Ray. I highly recommend them. The response to questions/issues is instantaneous even with a patient in the chair they have the capability to go online and help. Absolutely first rate.read less - 4/13/2022
Kelly Betts
Customer service has always been top-notch! I personally worked with Wayne Glassoff and he has been super helpful getting our office up and running with 3D printing and has always been a great resource and highly responsive whenever I need anything o...read moreCustomer service has always been top-notch! I personally worked with Wayne Glassoff and he has been super helpful getting our office up and running with 3D printing and has always been a great resource and highly responsive whenever I need anything or have any questions.read less - 9/24/2022
Rich Hirschinger
I had an issue that was due to the Medit settings. Damien logged on remotely to my laptop, and resolved the issue in a couple of minutes. Fantastic service. Thank you. - 8/27/2021
All Clear
Great experience with CAD-Ray, specifically Damien, with purchasing and customer service with servicing a scanner that needed replacing under warranty. All around excellent service and I will definitely come back for future technology we'll eventuall...read moreGreat experience with CAD-Ray, specifically Damien, with purchasing and customer service with servicing a scanner that needed replacing under warranty. All around excellent service and I will definitely come back for future technology we'll eventually be adding to our practice.read less - 10/23/2024
Blake Ferando
I purchased my medit in April of 2019 from Cad-Ray. The support offered is second to none, and the training videos are some of the best out there. Add to that a great support team that is fast to answer questions and issues, its hard to beat Cad-Ray. - 6/19/2020
Johnny Vredenburg III
Before working with cad-ray, I was hesitant to dive into digital dentistry due to the complexity of it. Working with Laura at cad-ray made all of my concerns go away. She was there to help me with my Exocad software installation, even outside of norm...read moreBefore working with cad-ray, I was hesitant to dive into digital dentistry due to the complexity of it. Working with Laura at cad-ray made all of my concerns go away. She was there to help me with my Exocad software installation, even outside of normal business hours - really hard to come by! I also purchased a Medit i500 and getting that setup and working in my clinic was seamless. I could not have asked for better support while navigating digital dentistry. My next purchase will be a 3D printer, and i know exactly where i will buy it from! Highly recommend these guys.read less - 11/20/2020
Jonathan Mason
I bought a Medit 3 years ago and have had amazing success with both the scanner and the support from Cad-Ray. My scanner recently broke and They were on the phone with my assistant trying to fix the problem, and when it was unfixable, they overnight...read moreI bought a Medit 3 years ago and have had amazing success with both the scanner and the support from Cad-Ray. My scanner recently broke and They were on the phone with my assistant trying to fix the problem, and when it was unfixable, they overnighted a new scanner and helped us set it up. Medit is now available through many dealers, but I would only buy next one from Cad-Ray.read less - 11/03/2022
Scott Terry
Six Stars! On a scale of one to five, I give CAD-Ray six stars. They really are that good. If you are purchasing an intra-oral scanner, I would recommend buying the Medit I-700. It is a dream machine. But, if you want incredible service every time, y...read moreSix Stars! On a scale of one to five, I give CAD-Ray six stars. They really are that good. If you are purchasing an intra-oral scanner, I would recommend buying the Medit I-700. It is a dream machine. But, if you want incredible service every time, you should buy your scanner from Cad-Ray. They have come through with flying colors each time I have contacted them. Their sales team great and their service is amazing. They have volumes of educational videos available, as well. I have worked with Jonathan, Damien, Frank, Armen and Laura. In a time where we are seeing the opposite, CAD-Ray will totally blow you away with the entire experience. I totally appreciate them and their value.read less - 11/01/2021
Emerson Gower
Nothing but great things to say about Cad-Ray! Excellent customer support from Laura after the purchase of our Medit i500 and the cart from Damien. I’ve been very impressed with the Medit in restoring crown and bridge, as well as fixed hybrids, and...read moreNothing but great things to say about Cad-Ray! Excellent customer support from Laura after the purchase of our Medit i500 and the cart from Damien. I’ve been very impressed with the Medit in restoring crown and bridge, as well as fixed hybrids, and learning more of its capabilities each day. We have intentions to buy a second Medit shortly and will definitely be using Cad-ray again.read less - 12/13/2021
Brian Jaques
After weeks of research I purchased the i700 through Nick at cad-ray. My office has never used a scanner before and despite the great pricing, this was still a major purchase for me. Nick was incredibly helpful guiding me through the process while an...read moreAfter weeks of research I purchased the i700 through Nick at cad-ray. My office has never used a scanner before and despite the great pricing, this was still a major purchase for me. Nick was incredibly helpful guiding me through the process while answering my many questions. The customer service was very responsive and my friends who have purchased medit scanner were correct that this is the way to go. 5 Stars!read less - 5/08/2021
Dwayne Bodie
Very happy with my Sprint Ray 3D printer. Frank D. went above and beyond with training my team on how to use it. He offered remote training as a courtesy and followed up to make sure we were ok. Highly recommend! - 1/25/2023
Krupal Chhotu
Finally going digital and Cad-Ray was the place to start. Got the Medit i500 and began scanning right away. Now I am doing digital dentures, making my own surgical stents, etc. The support available is the best. "Frank" is always available! :) - 10/09/2019
Everyone at CAD Ray has been amazing. Glad I chose them for my Medit and Sprint Ray purchase. Our training with Kaila was awesome. Thank you - 1/04/2023
Maggie Sh
I’ve been using Medit 500 since spring of 2021 and really like it. The support system has been very good so far. I just called yesterday and spoke with Frank Deluca, he was very informative and helpful. - 12/07/2021
Chris Kleist
Cad-Ray is the absolute best if you're in the market for digital dental tools. I have purchased two Medit scanners through them. There will be hiccups with any complex piece of machinery, but every time I have needed Cad-Ray, they have been there. I ...read moreCad-Ray is the absolute best if you're in the market for digital dental tools. I have purchased two Medit scanners through them. There will be hiccups with any complex piece of machinery, but every time I have needed Cad-Ray, they have been there. I recently had a scanner go down. I called Cad-Ray tech support and they got me on the phone with Medit immediately. Within a day, a replacement scanner was sitting on my desk. It doesn't get much better than that.read less - 10/03/2024
Steven Oshins
I've been fortunate to have had the opportunity to work with Frank DeLuca this past year. He is always pleasant, willing to help, responsive to my questions and extremely knowledgeable. I highly recommend Frank!! - 12/16/2021
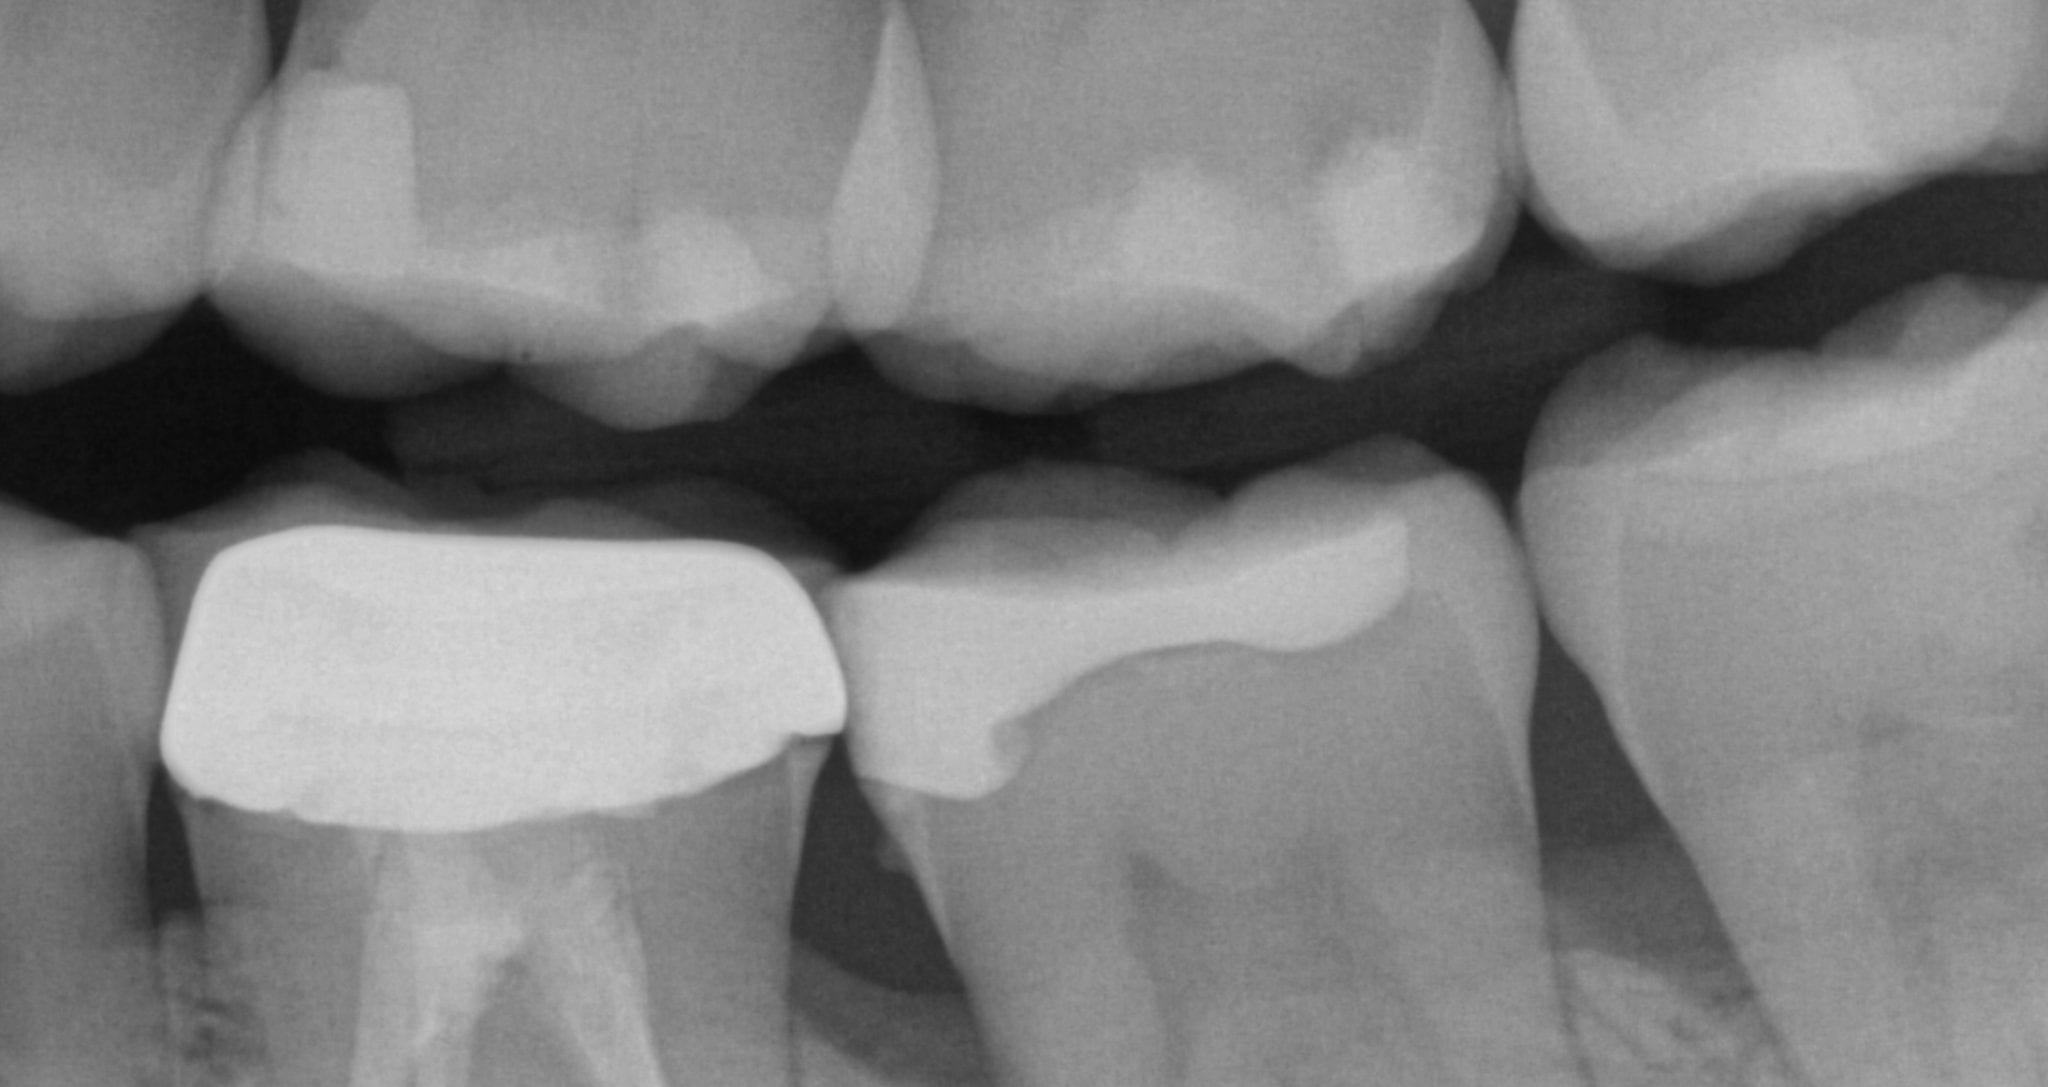
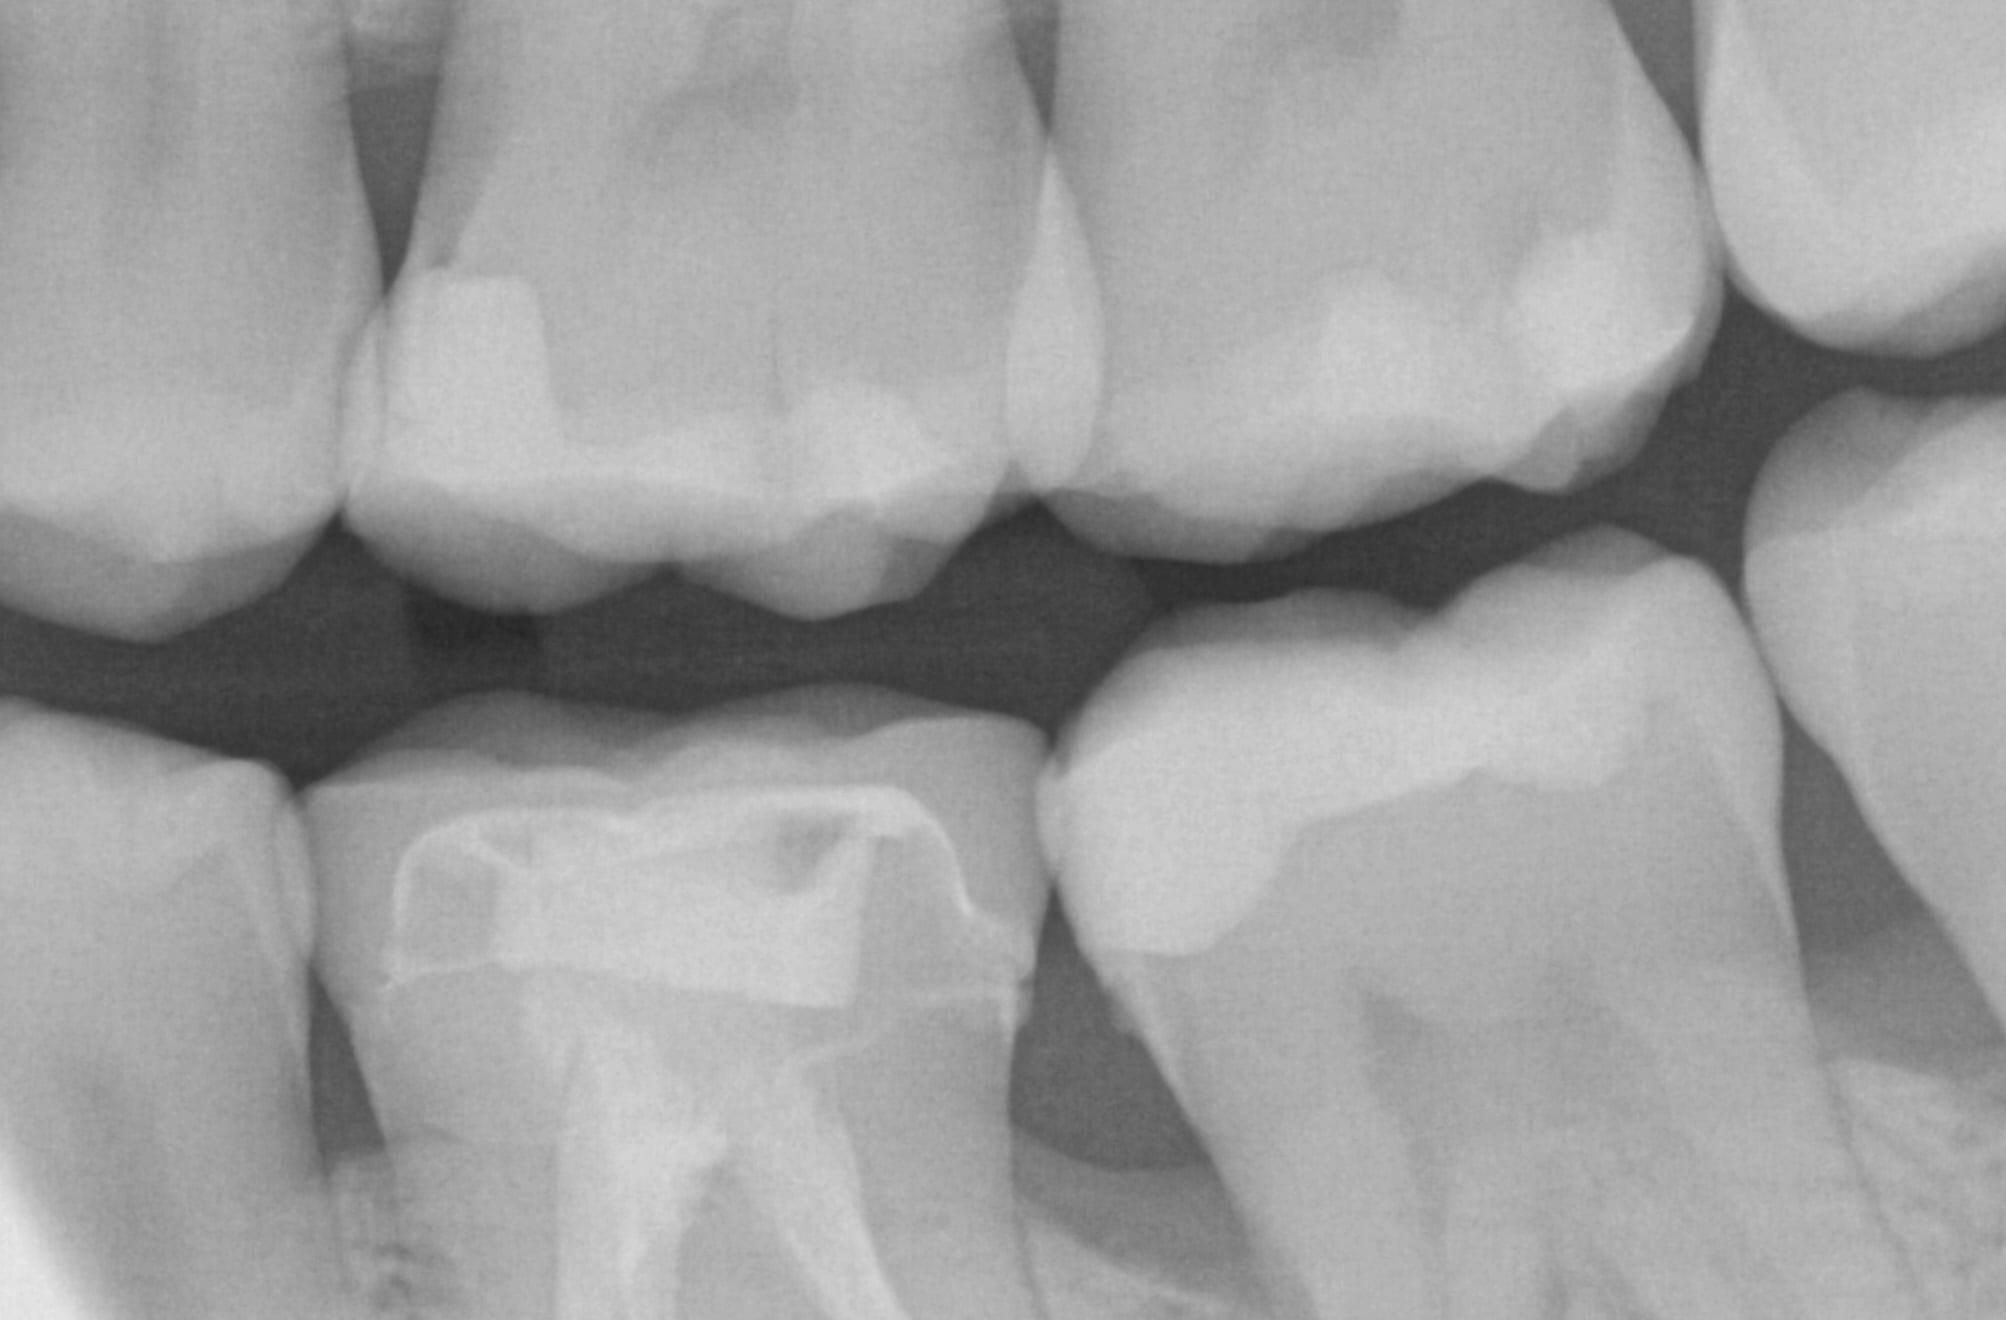
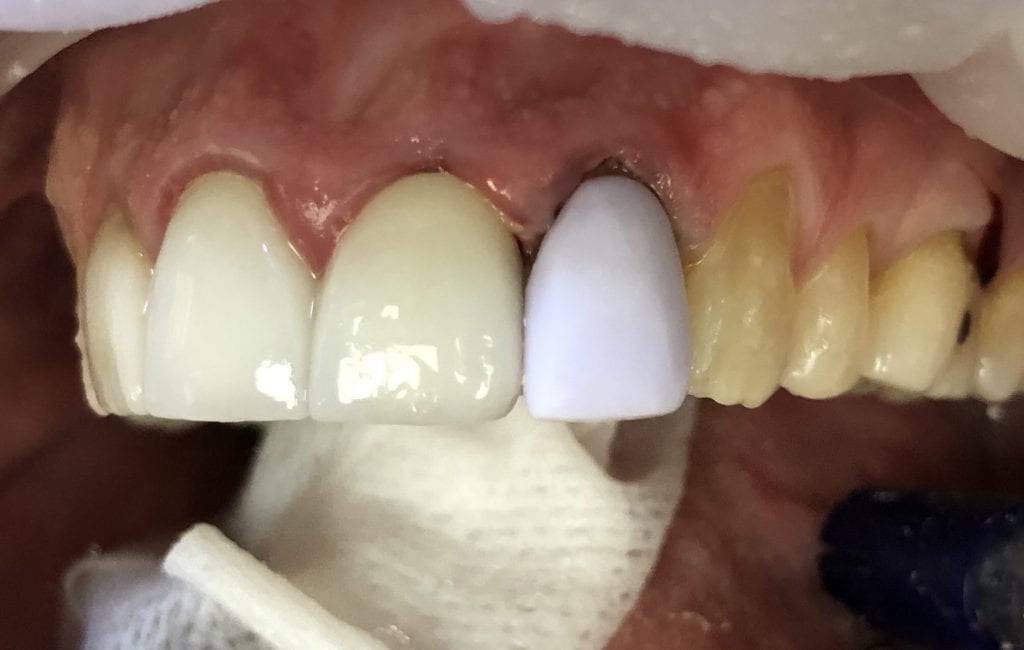
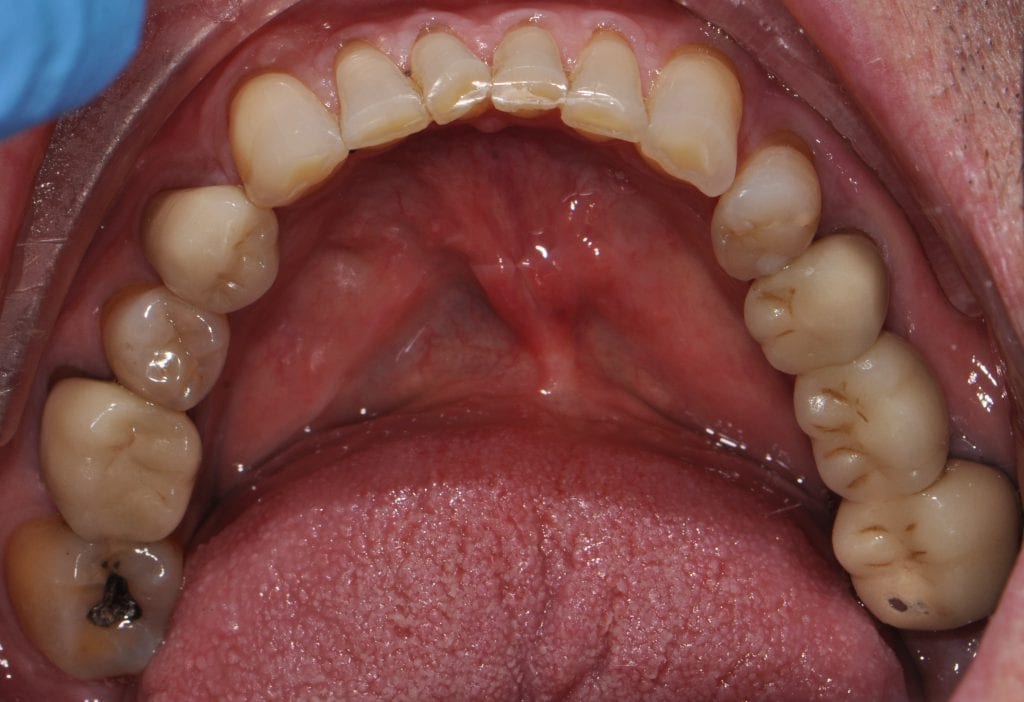
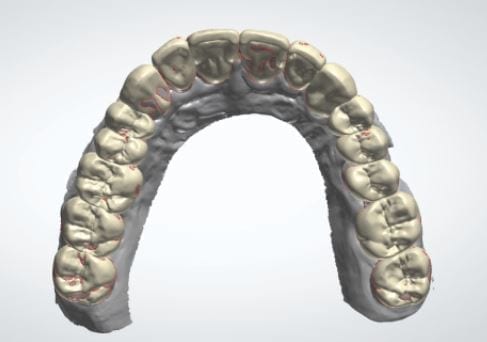
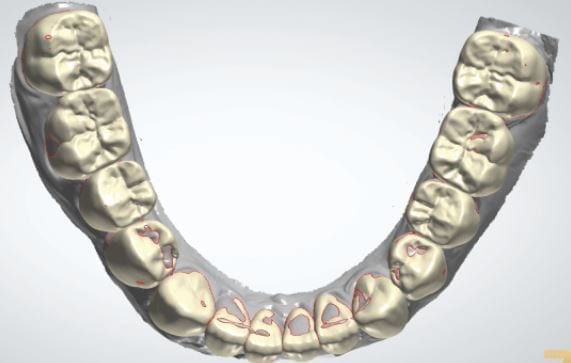
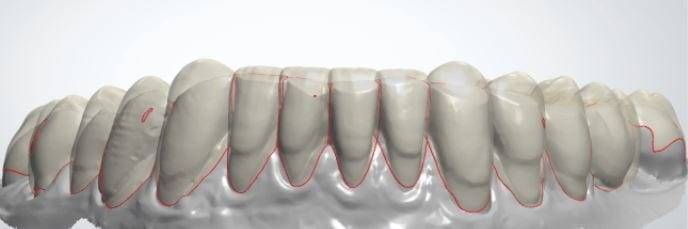
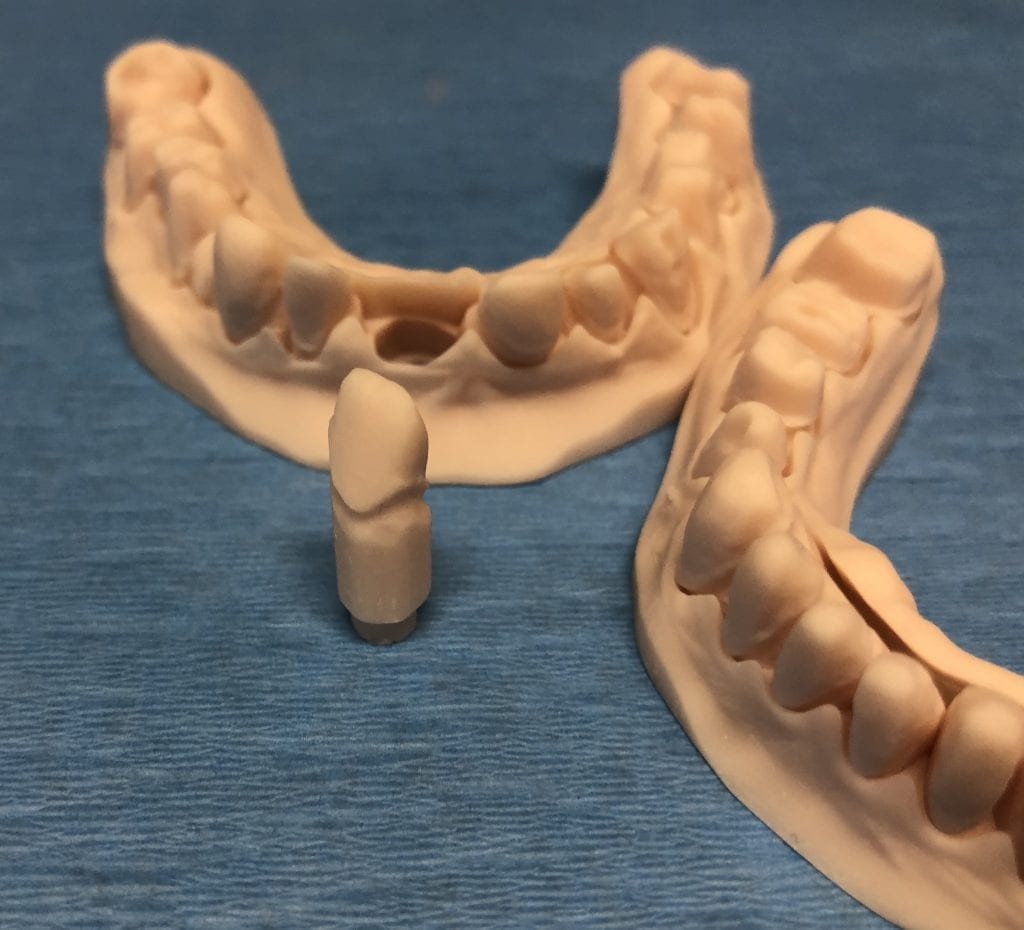
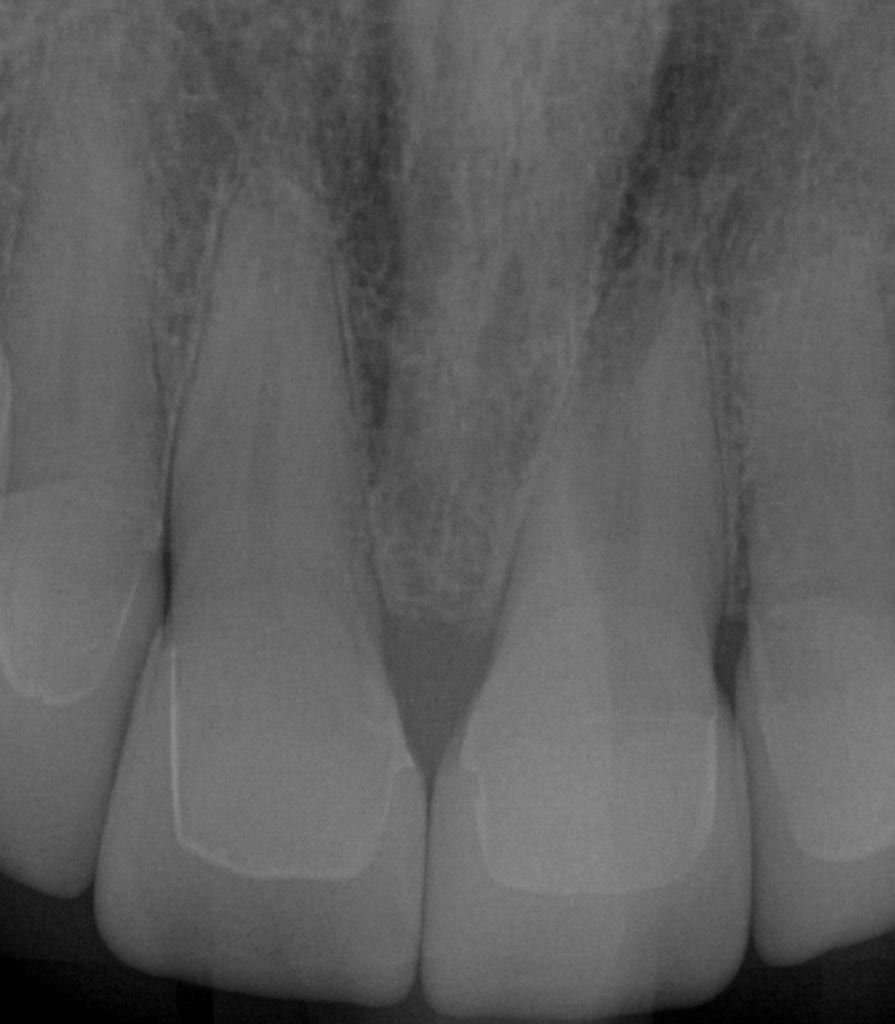
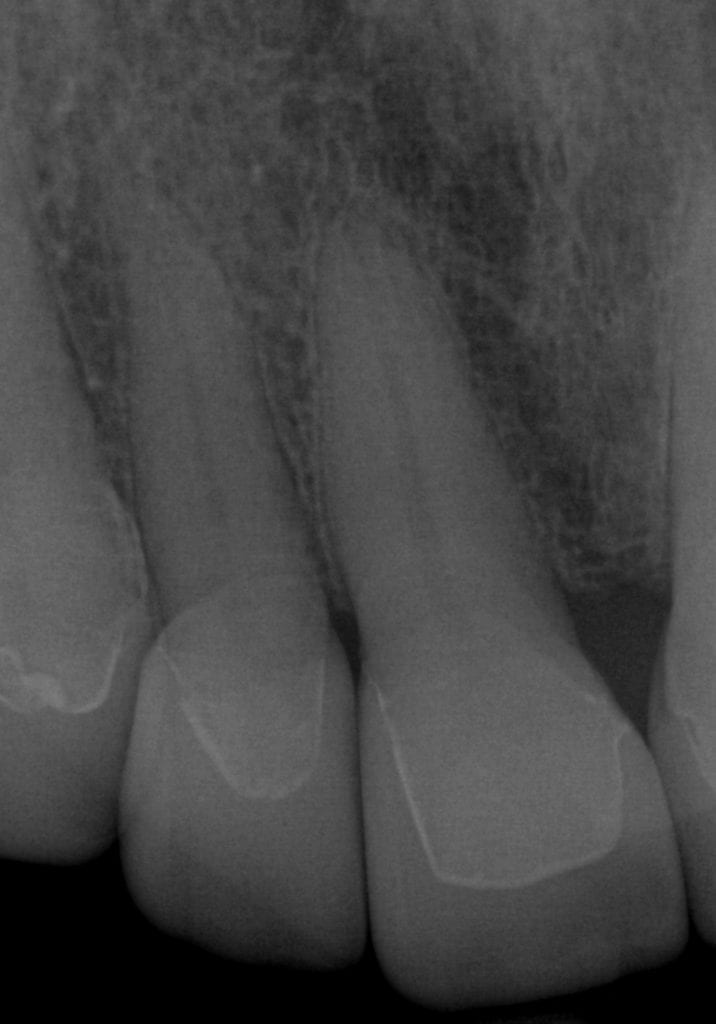
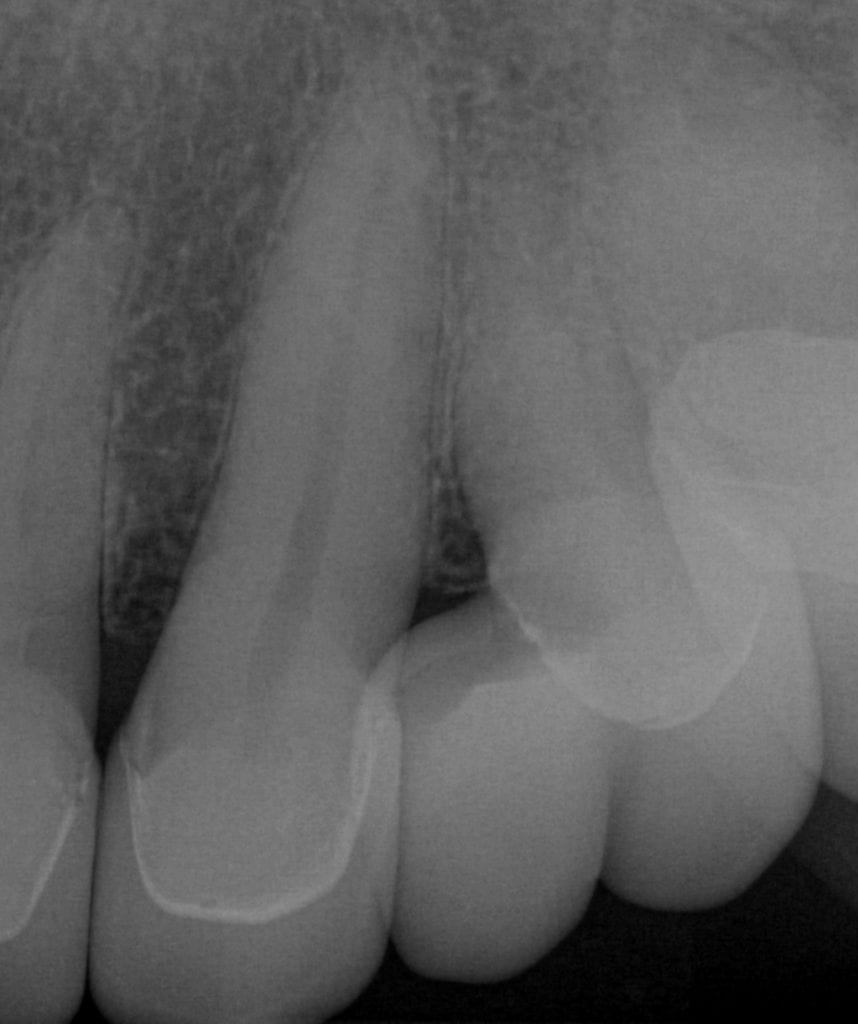
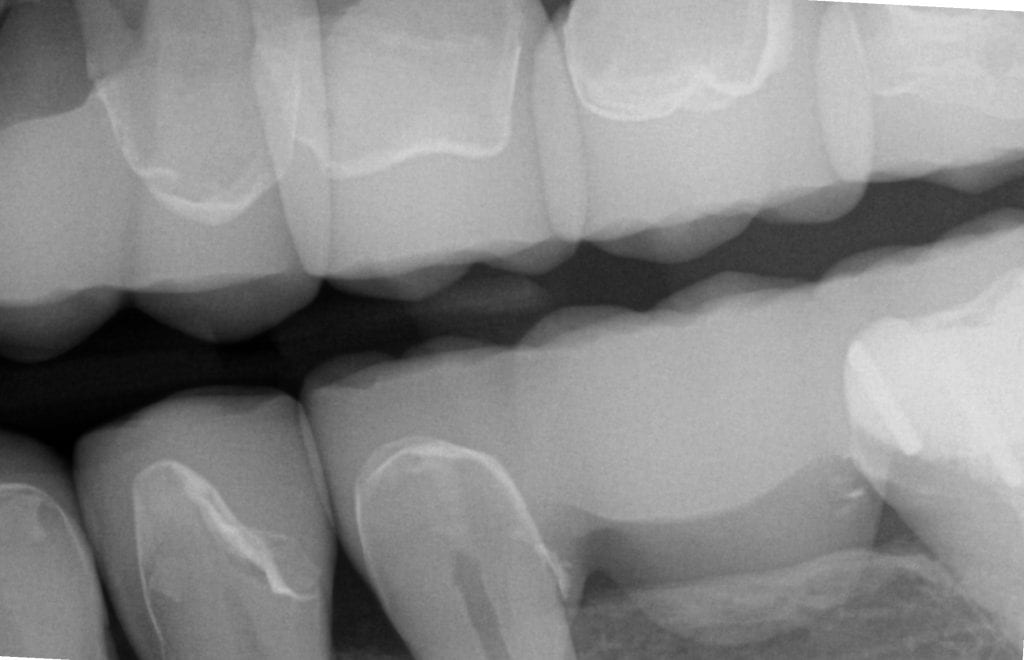
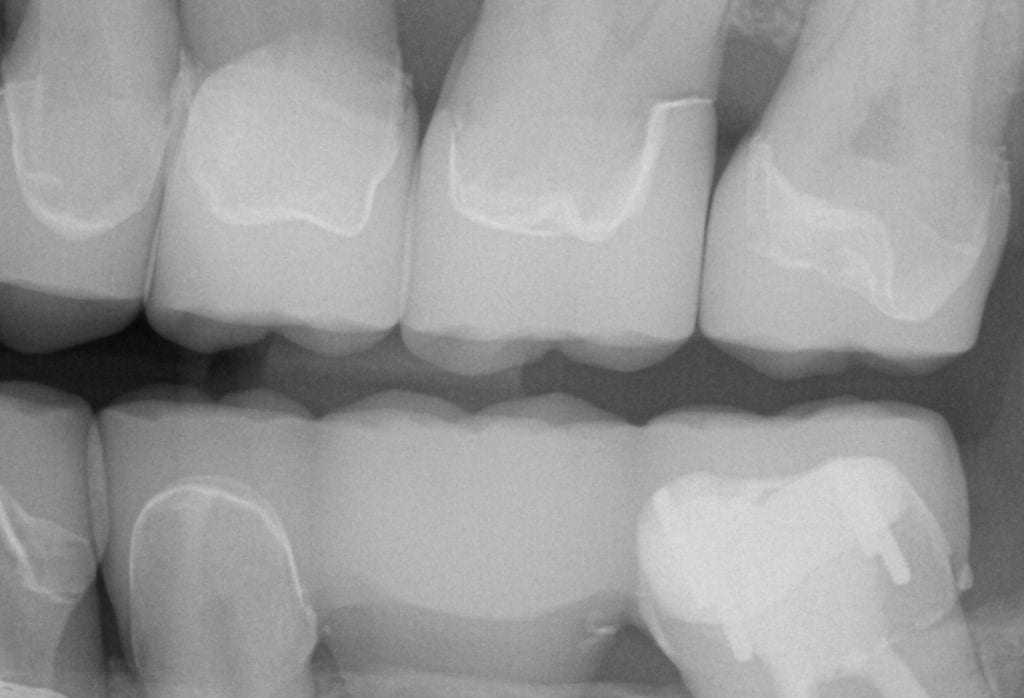
This is a first molar crown that was replaced with an in-office milled eMax restoration. The adjacent second molar had recurrent decay under the existing class 2 restoration. That was removed and replaced and pre-existing crown was also removed.
The preparation was refined and the recurrent decay was removed. Once hemostasis was achieved and the tissue was retracted the area was scanned with the medit i500. The crown was designed to full contour and milled chairside. After it was chrystalized, it was bonded into place with Nx3 resin cement. The excess was removed and an immediate post-op bitewing was taken to verify that no excess cement was left behind.
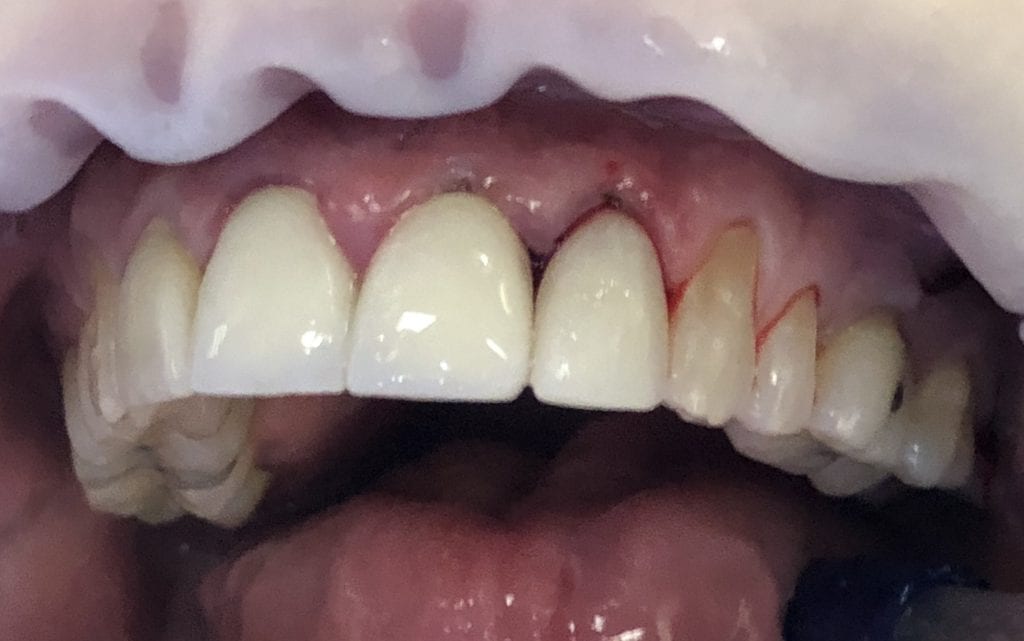
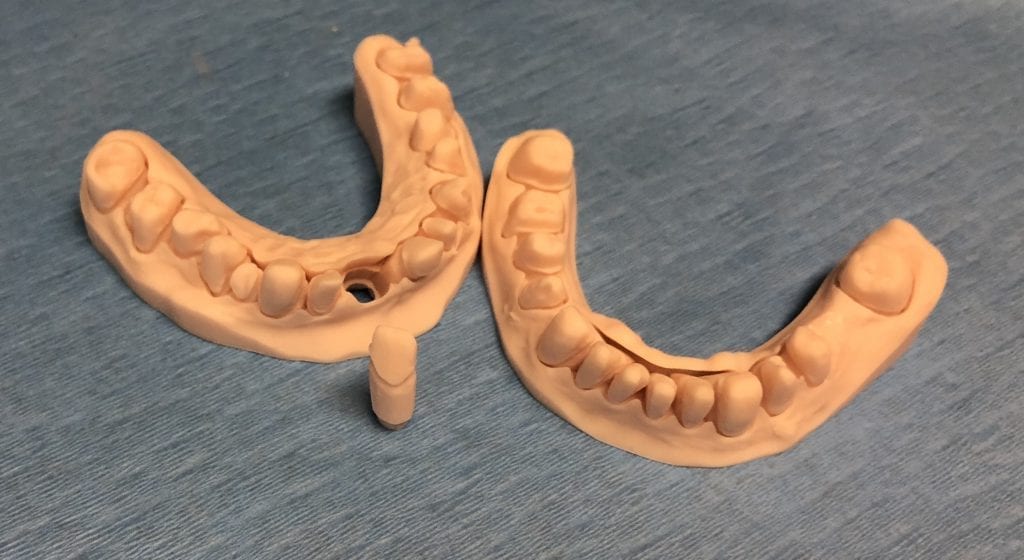
Pre-Op
This video shows the design of a crown after the impression was taken where vivid colors of the retraction cord, the sulcus, the preparation, and the details of the adjacent tooth can be visualized.
[videopress 25yUA1tp permalink=”false” hd=”true”]
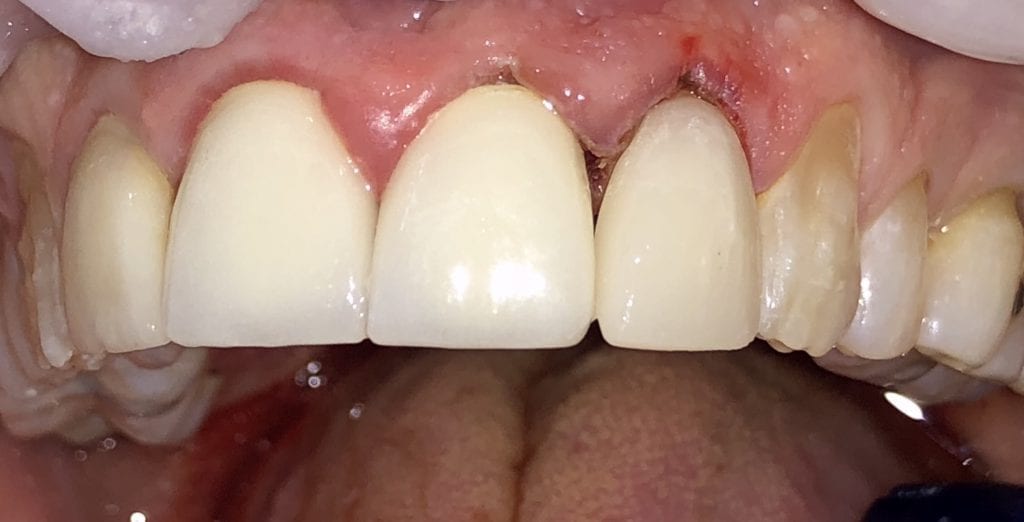
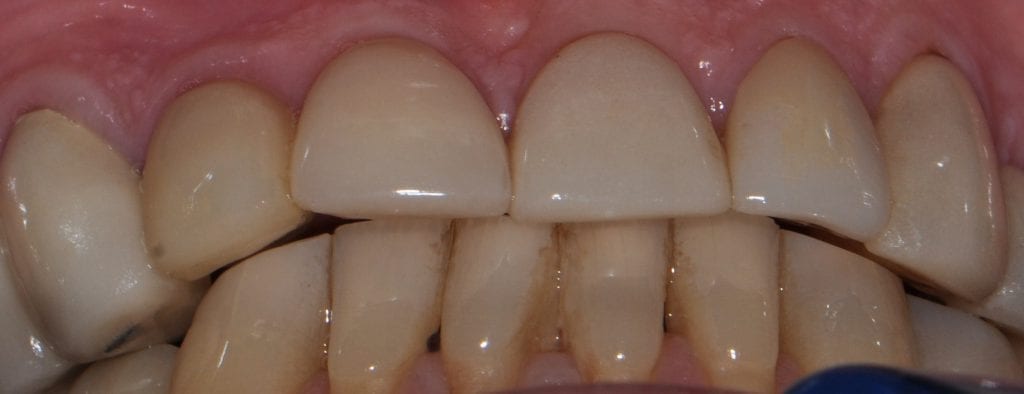
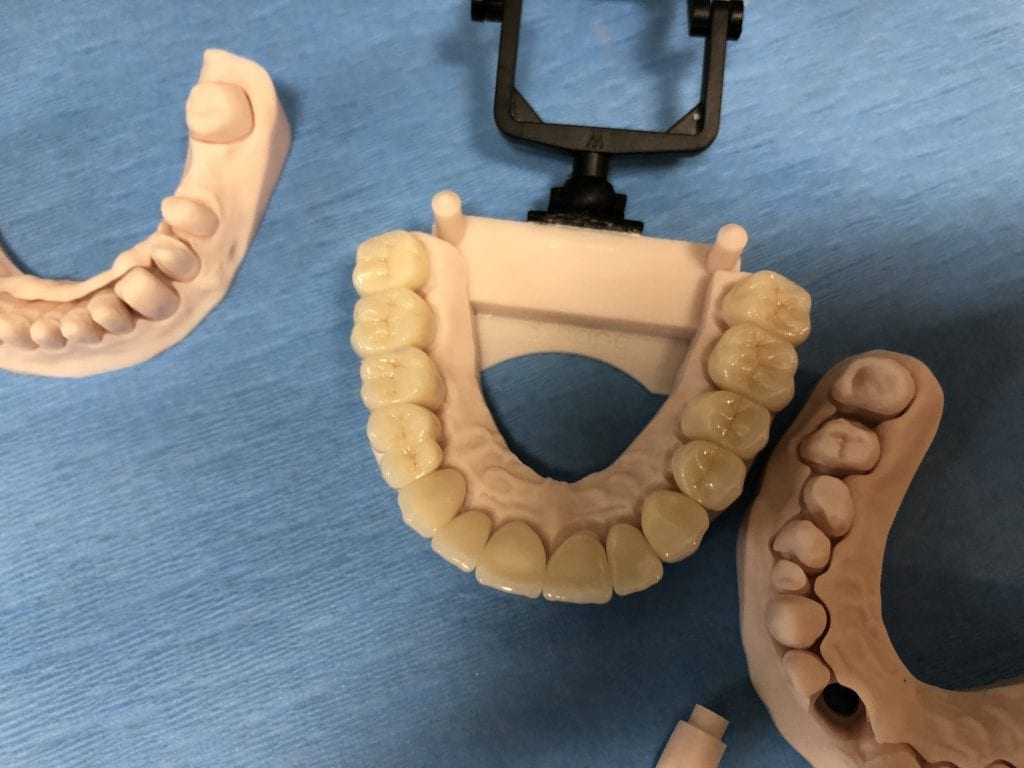
Immediate Post-Op
Download the case files in OBJ Format
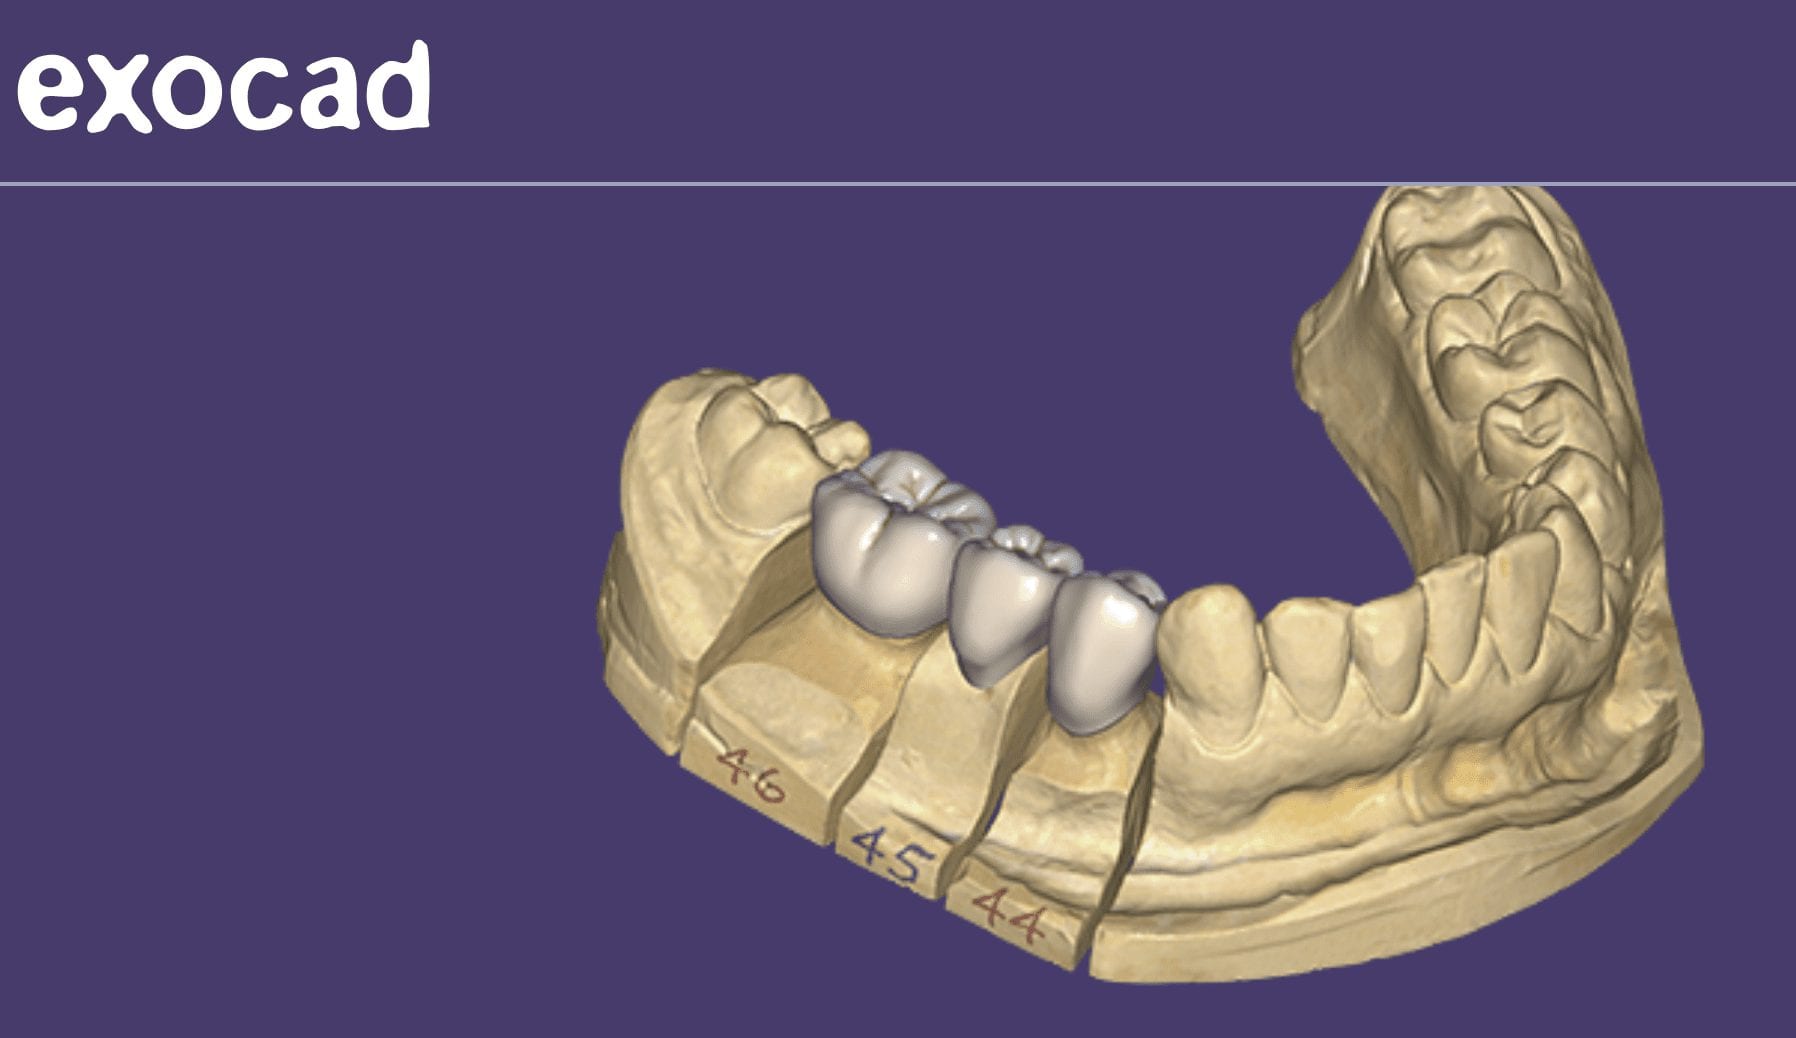
There are so many incredible and robust features to exocad and it is precisely why there are over 35,000 users around the world. There are many distributors to the software, including us, at CAD-Ray.com
We focus mostly on our clients who are generally dentists, and our main goal is to streamline your workflow and make this easy and not intimidating. During our two day hands-on course for new medit i500 owners, we install the software and design four cases in exocad.
Here are some of the top highlights for you to understand. The software is installed and self contained within a folder that you can place anywhere on a computer’s directory. What’s great about this is that your software operates completely independent of the windows operating system. So whenever there is an automatic windoes update, it does not mess with your configurations or settings and you don’t have to deal with firewalls and other technical terms we don’t even comprehend.
Another benefit to this is that you can place this folder on the cloud like dropbox and then you can go to ANY machine- at home, in another operatory, at another office and launch the program there, instead of carrying a laptop around. Since the data can only be accessed by a real license / dongle, there are no concerns about HIPAA violations as it is encrypted and only accessible by the active license. Moreover, one machine can be running Windows 7 and another could be runnng Windows 10, and you wouldn’t know the difference or have to worry about configurations
Also, multiple doctors in multiple locations could be working off the same program on the cloud, as long as they have an active dongle. This really allows for a lot of flexibility in a practice or a group setting.
You can see the basic elements in the folder, which are broken down into a case data storage folder, the CADApp and the DentalDB folders. We’ll explain what these other two folders do below.
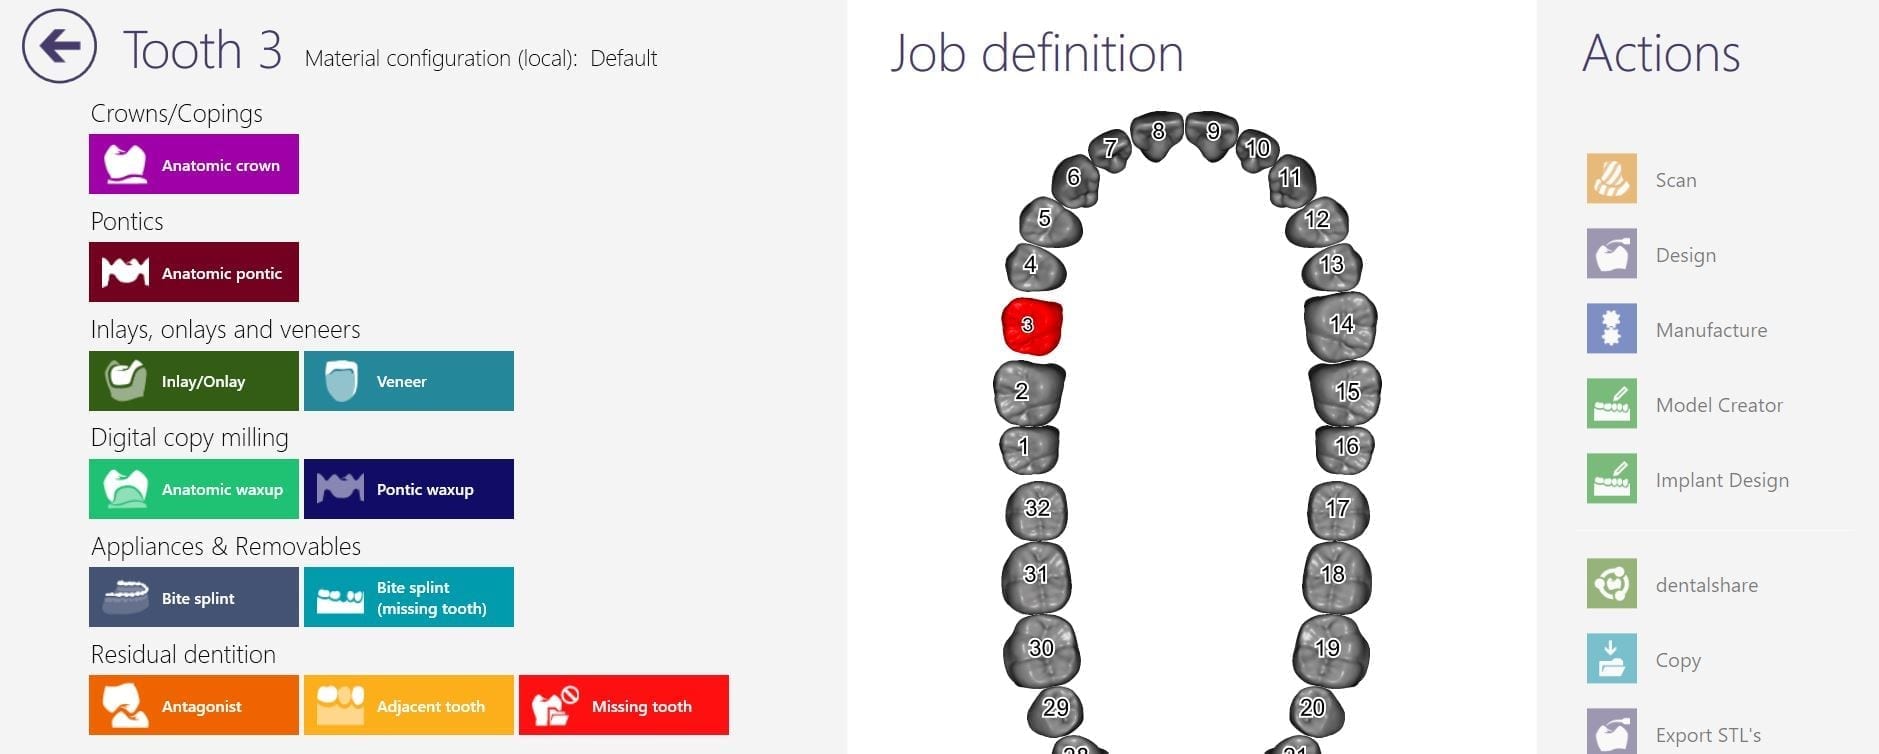
As a distributor, we can custom make our own private label version of exocad. Since we are focused on chairside dentistry, or on dentists, generally, we strip the software down to the essentials. Namely, we’ve programmed it for inlays, onlays, crowns, and veneers. We also include bridges that can fit in 40mm blocks. You can choose to add on other modules like implant planning, implant designs, dentures, etc.. if you choose to.
It is important for you to understand that we provide a fully functional version of this software, and if you want to add more features as your confidence grows, all you have to do is swap out these files called WorkParamsDB.xml
Watch the video that shows you how we have multiple versions of the file. We provide you with many versions of this file that you always have access to and they are all configured differently. In seconds, you can change the look and the feel of the software to your liking, and turn on multiple modules that we hide from the version that we provide. Please note that we only provide support and tutorials for the what we call the Dentist Version of exocad, as opposed to the lab version. If you grow to the point where you want to add the other components, it is very to transition, just recognize that we don’t support the heavy duty version. We certainly can refer you to the right people to learn how to use those extended functions.
[videopress d20fACf8 permalink=”false” hd=”true”]
One more thing for you to get excited about is the WorkParamConfigTool.exe
Now, if you are scared of the mouse and can’t press the “Any Key” button on keyboard, stop reading any further.
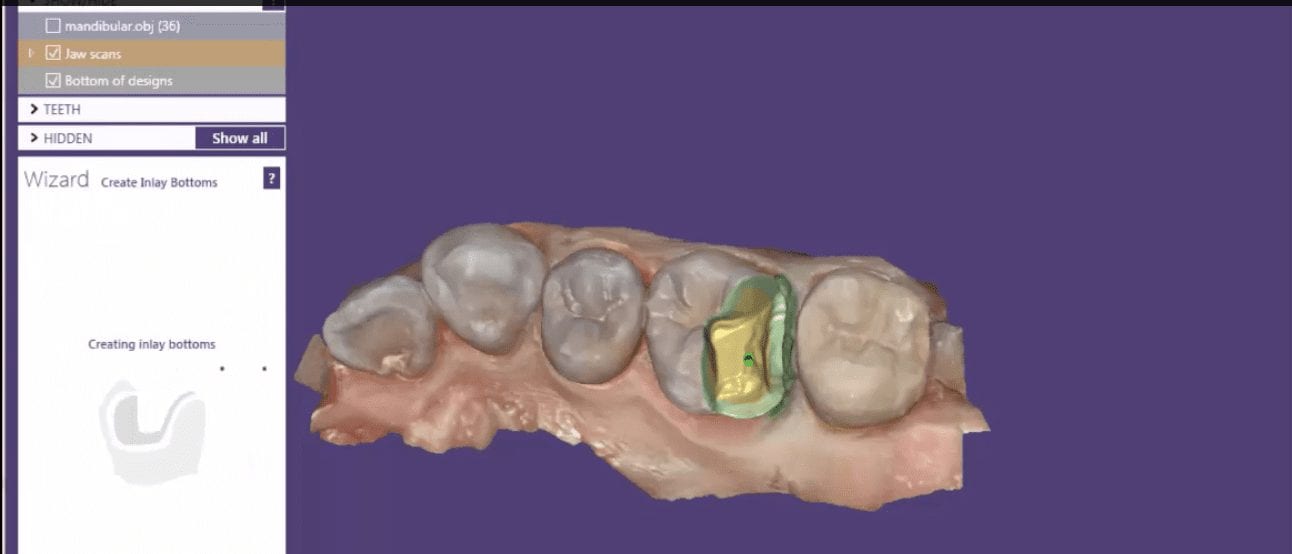
One of the greatest advantages of digital impressions is the ability to copy a pre-existing condition. This has a lot of benefits, one of which is that the patient will not notice a difference in the new restoration vs. the old one. For this to happen with the medit i500, you need an extra image catalog box. Rumor is that this will be available in the near future. Since we only have the upper and lower jaws, and the buccal bite to imagine into (and scanbody catalog boxes), what you can simply do is treat the case as if they are two separate patients.
Create a new patient, and scan the preop condition and save the case. Once processed, you can export the case file in OBJ, PLY, or STL format.
You can then launch a second case, where you take the opposing, the prepared arch, and the buccal bite images. You can download the Korolation OBJ case files and design along. Just remember, in exocad, the upper and lower arches from “patient #2″ will automatically articulate with each other, but you will have to manual import the preop scan and merge the prepped model and the pre-op models.
[videopress RkqfM9CJ permalink=”false” hd=”true”]
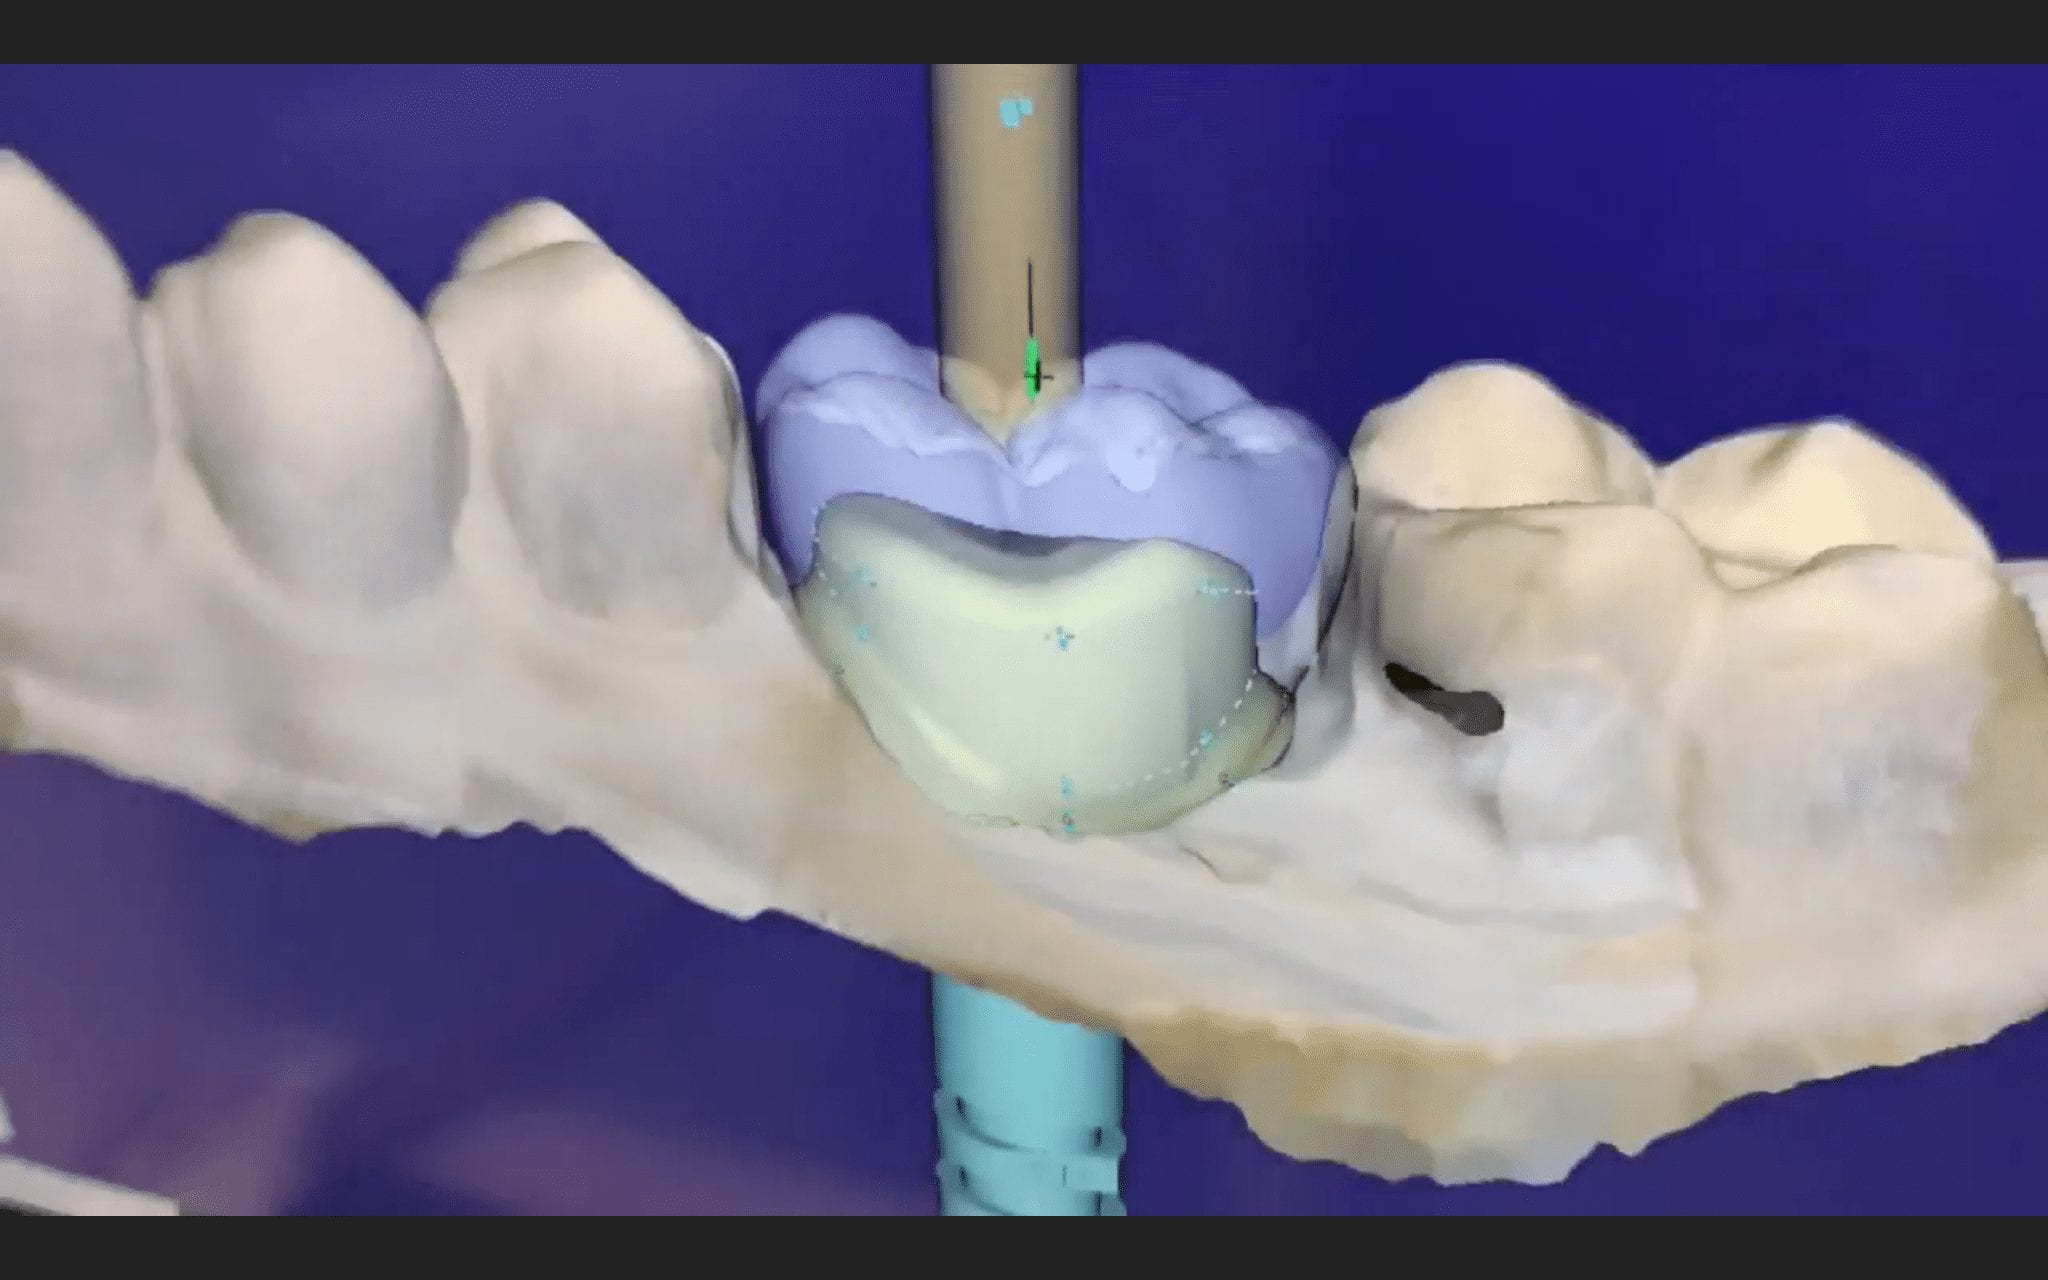
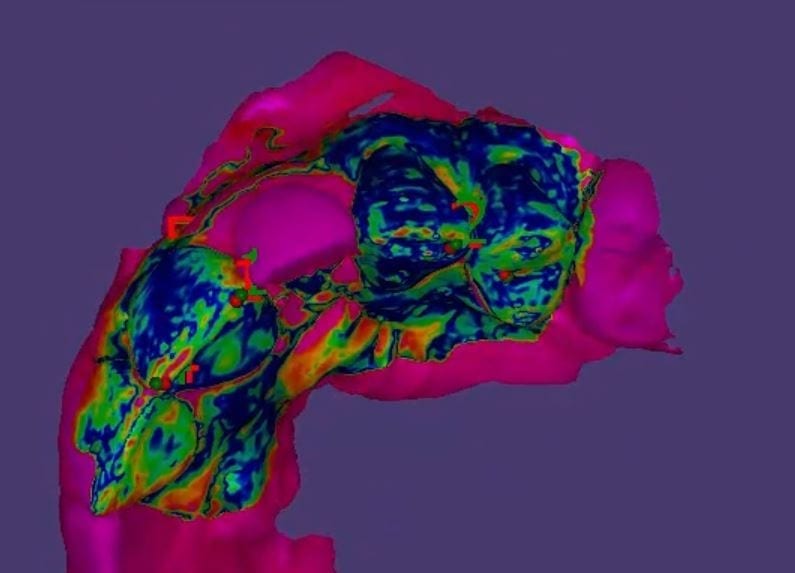
Once you import in the pre-op condition, you can manually relate the models to each other by identifying common landmarks between the two models. After you perform alignment, you can then click on “Best fit matching”. The color scheme in exocad is a great guide in letting you know how well you have articulated the models together.
[videopress U5aJCxQ3]
The more blue you see in the Korolated models, the more reliable your stitch is and you can be assured of greater accuracy in your final restoration.
To see this case presented in webinar fashion click on the image and enter the members area for much greater detail and information
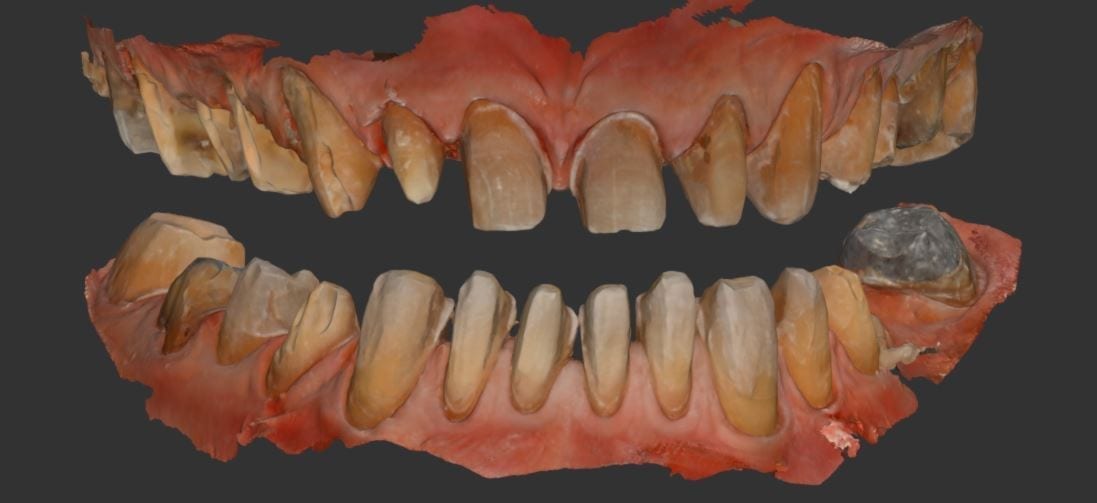
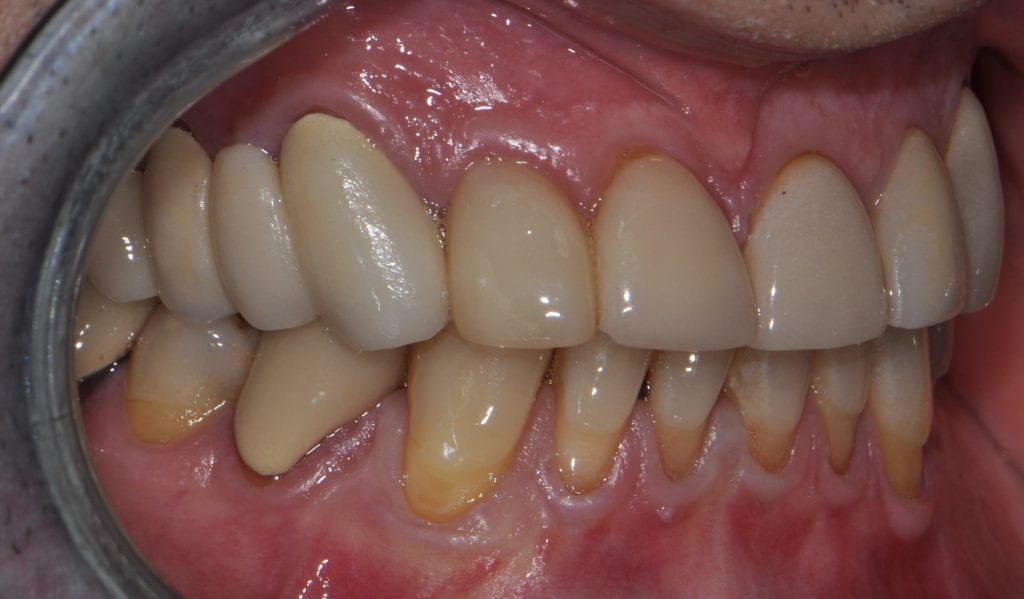
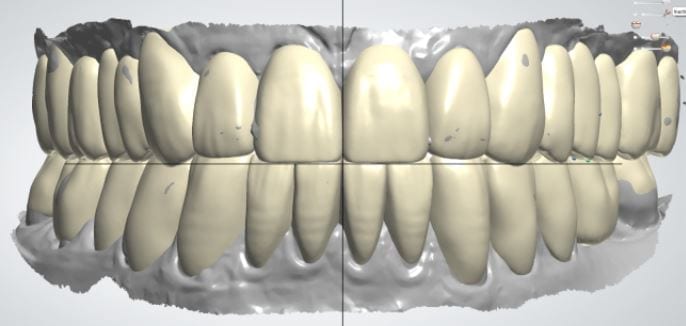
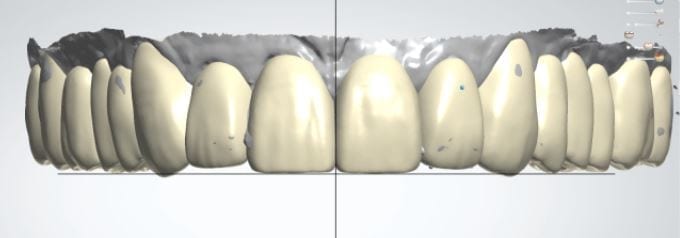
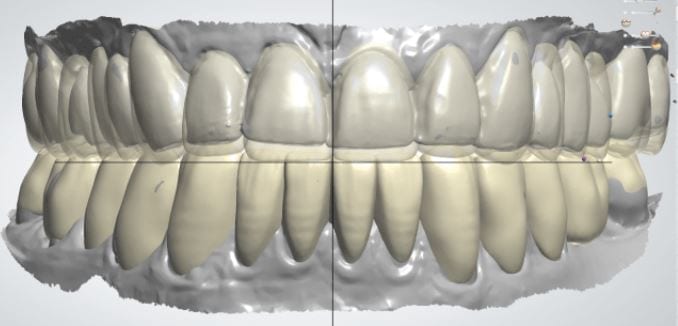
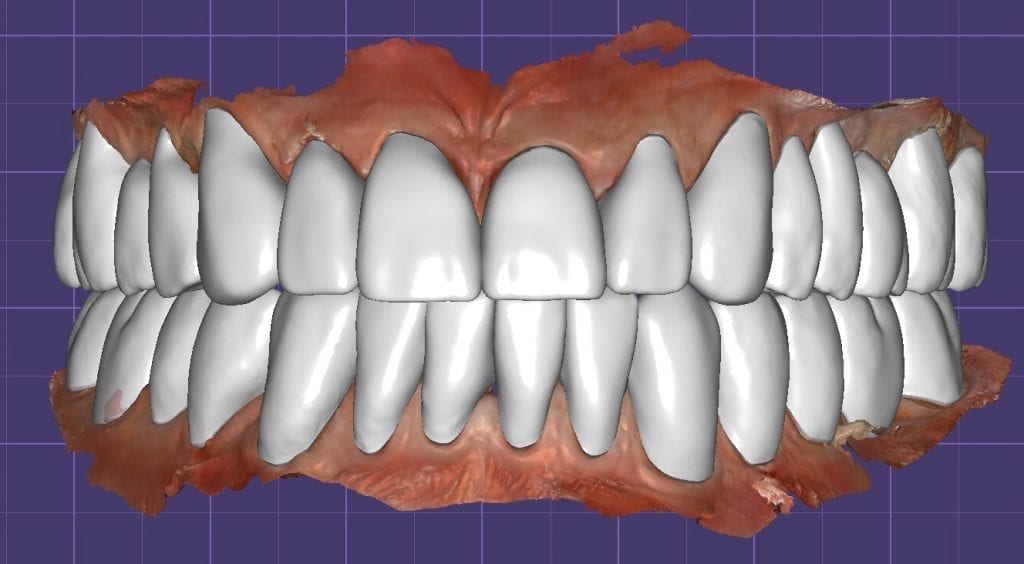
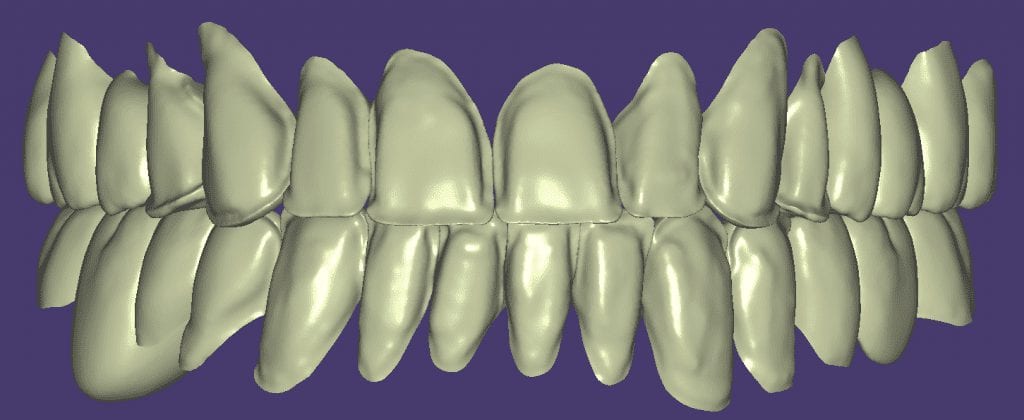
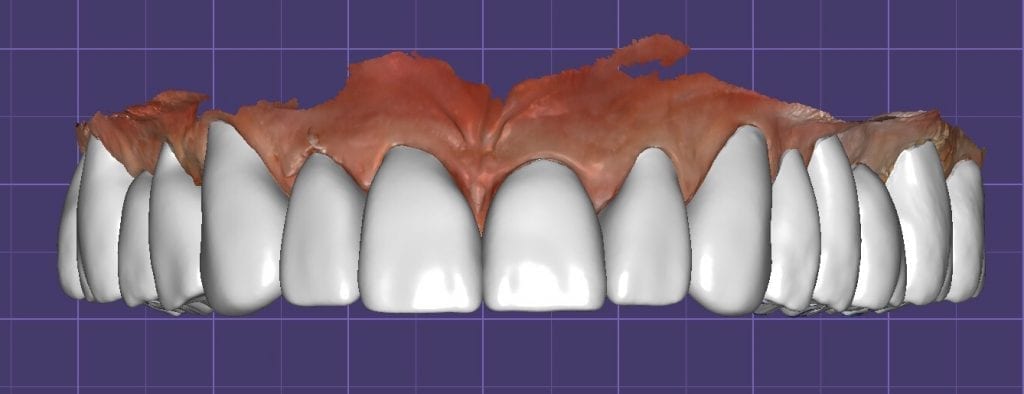
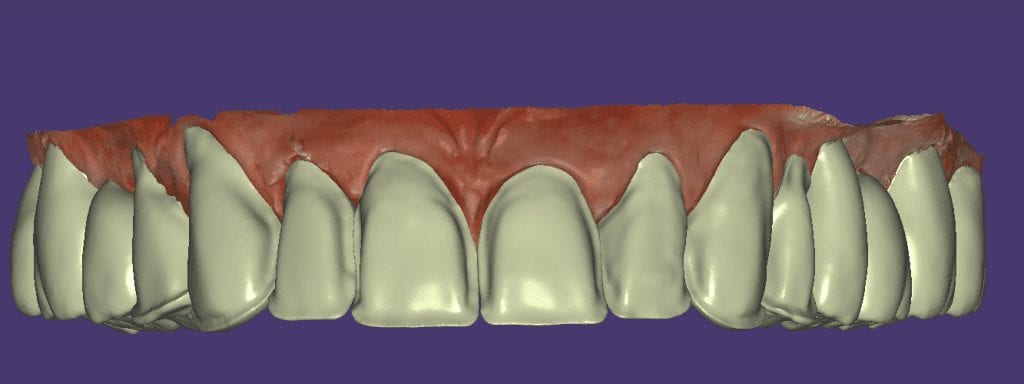
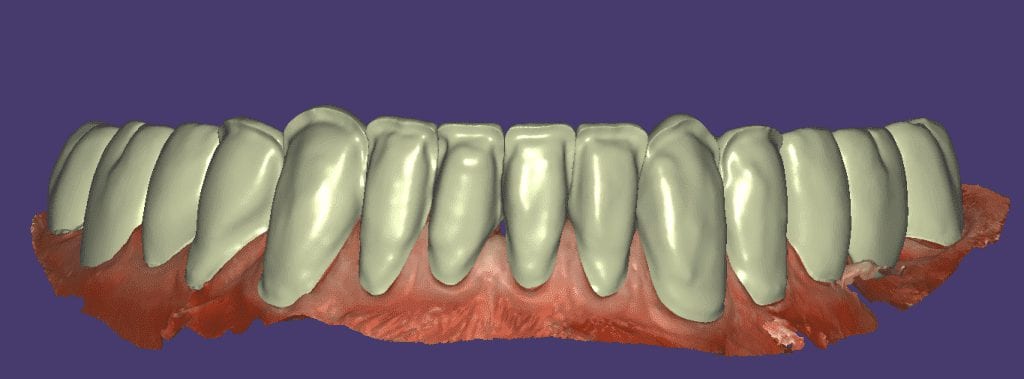
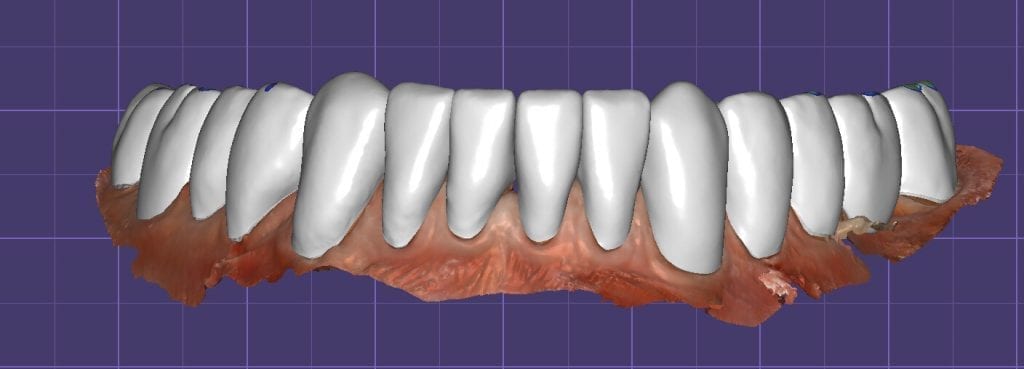
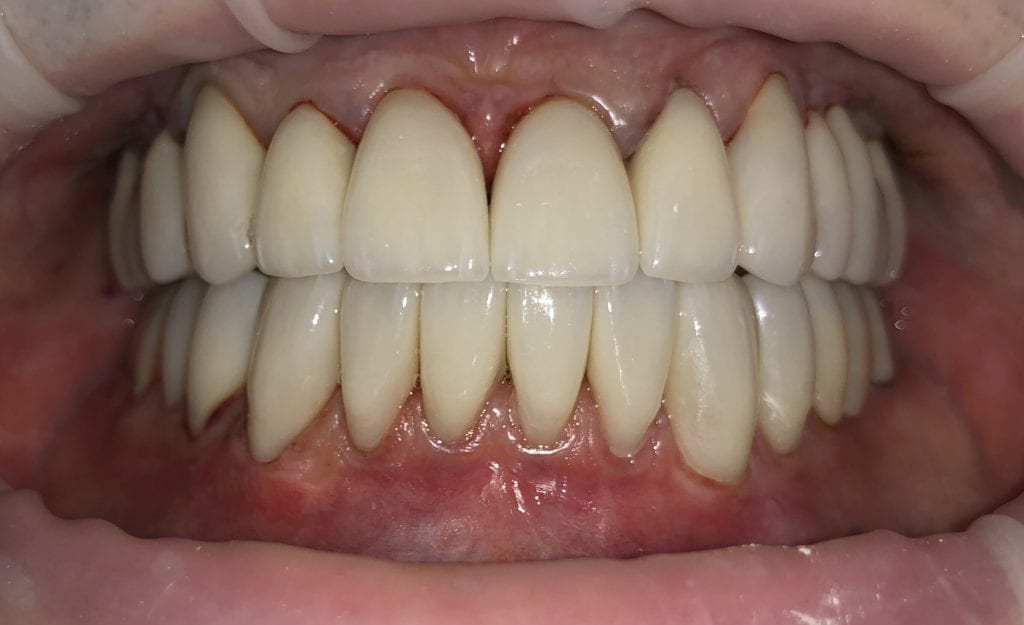
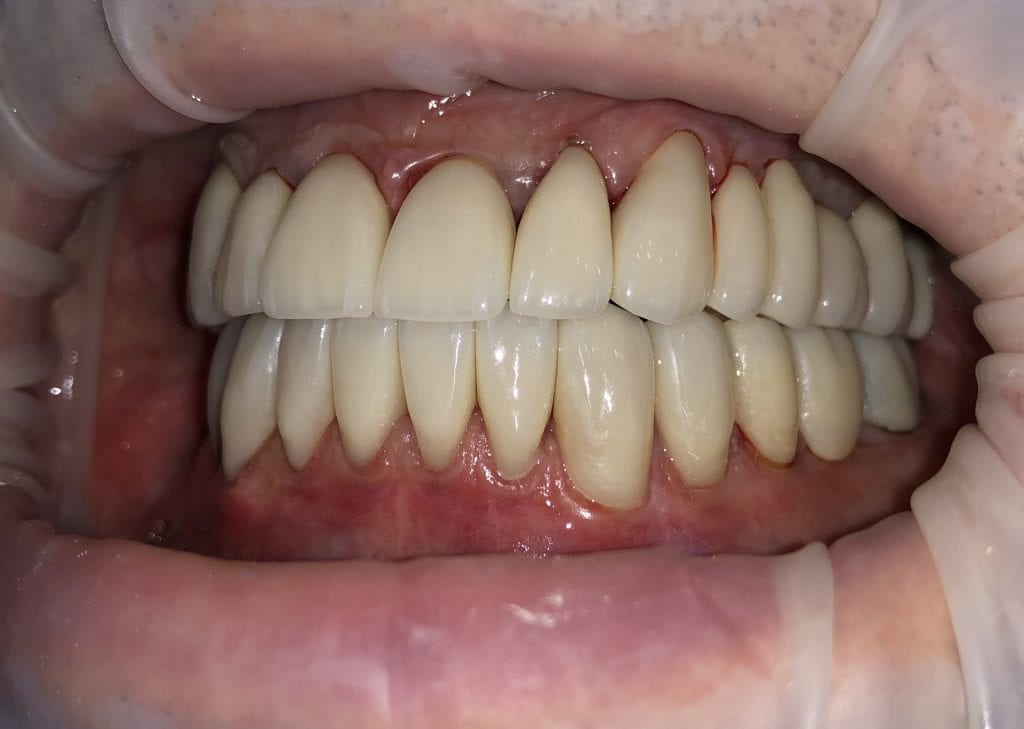
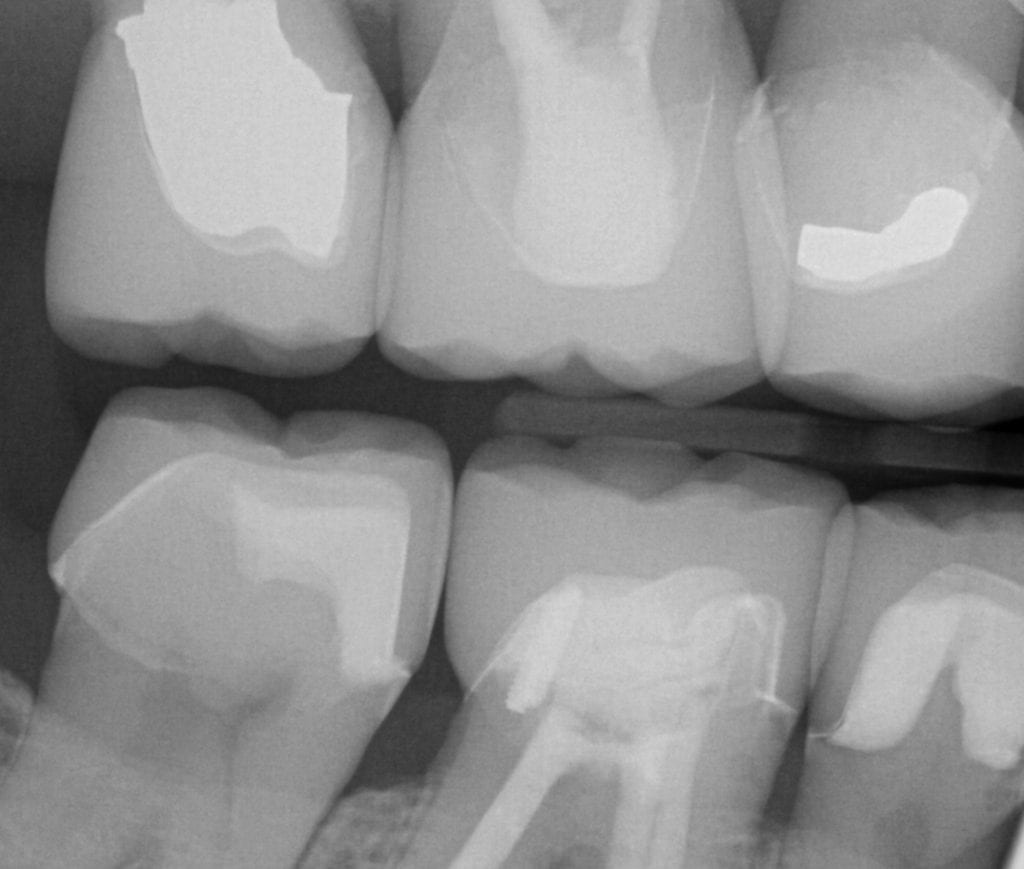
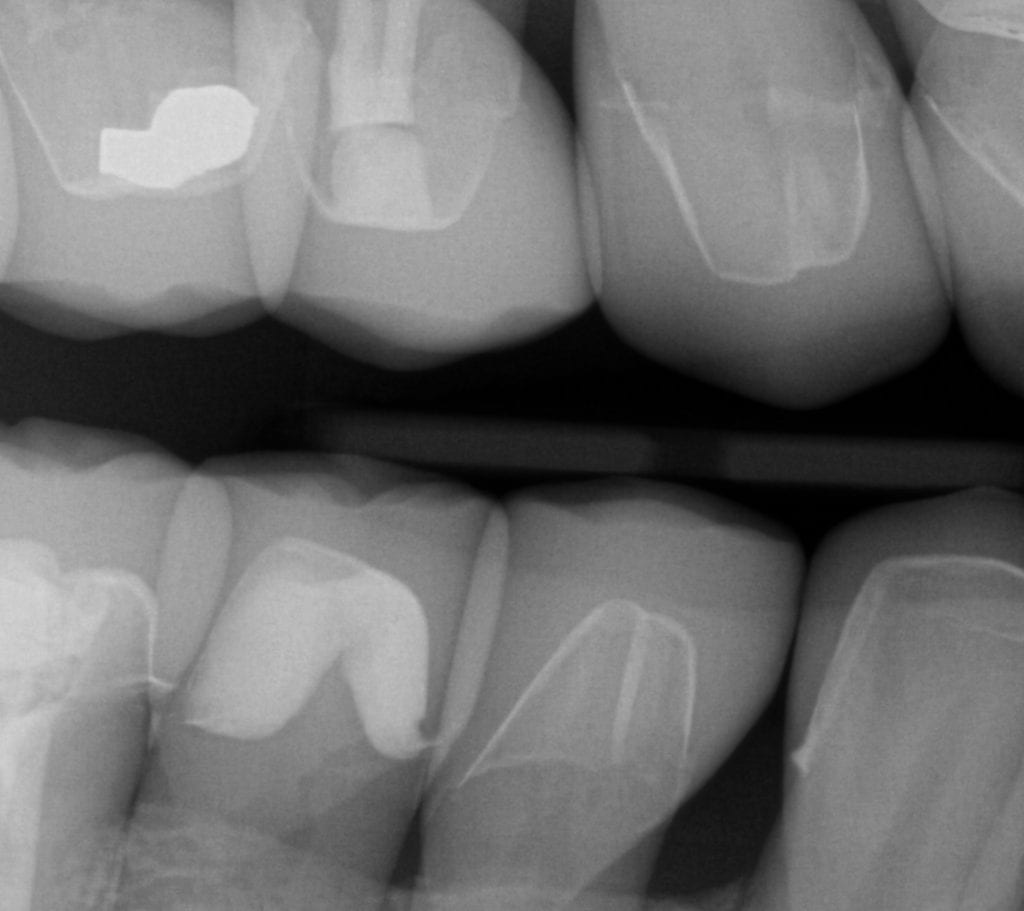
Pre-existing restorations that warranted replacement with an increase in vertical dimension.
Pre-existing restorations that warranted replacement with an increase in vertical dimension. The upper and lower arch were captured with the medit I500 and articulated together with enough clearance to accommodate new restorations and to restore the patient to an ideal tooth position.
This video shows how the vertical dimension was captured with cotton rolls blocking out the tongue and the dark oro-pharynx, which usually spell trouble for an IOS
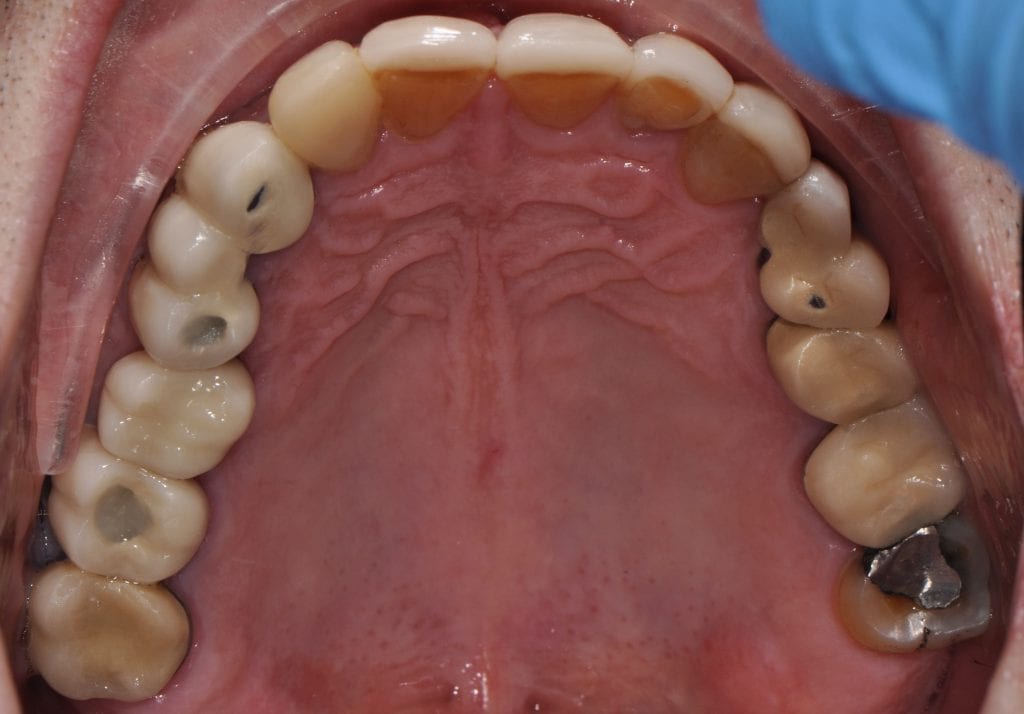
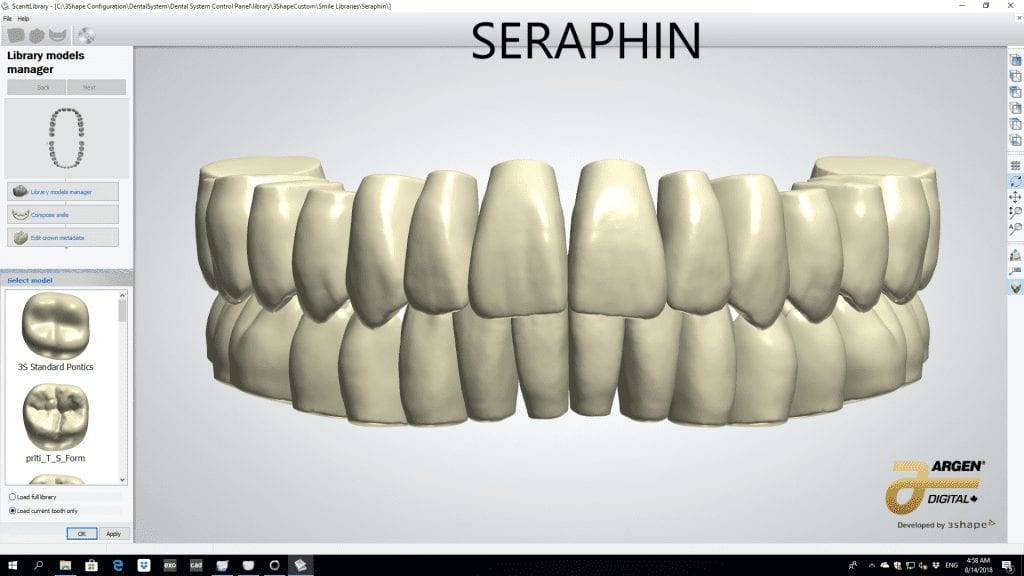
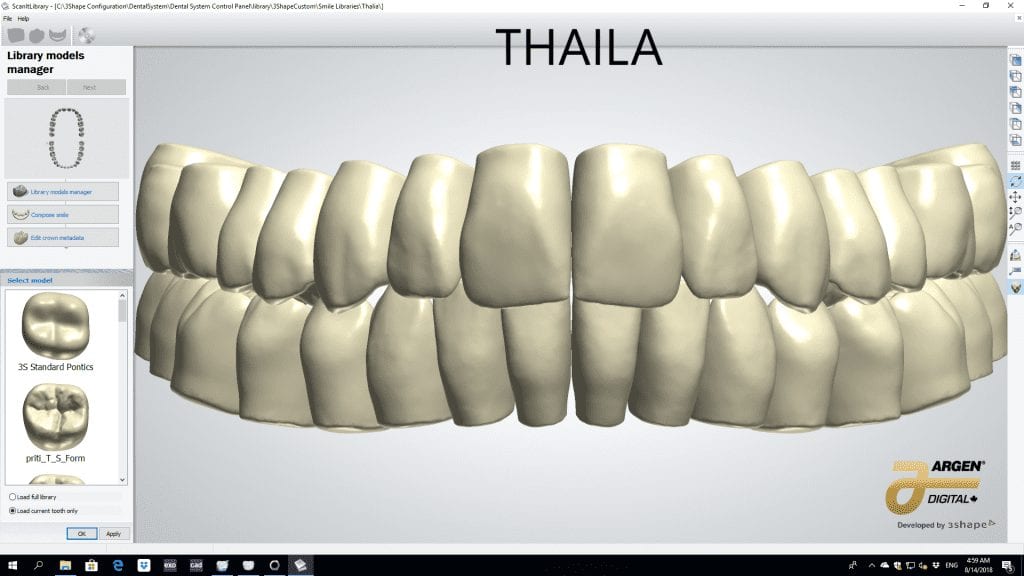
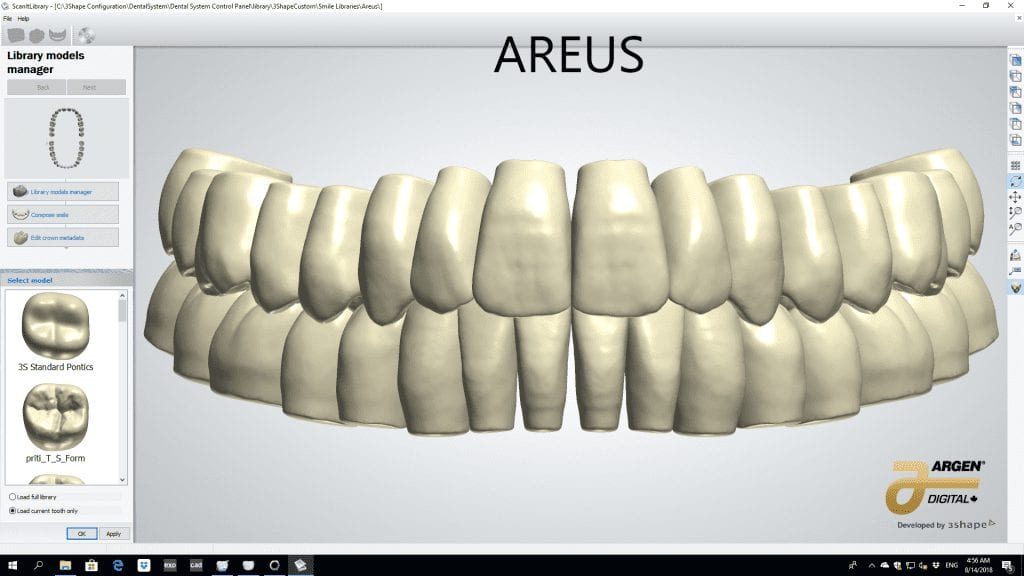
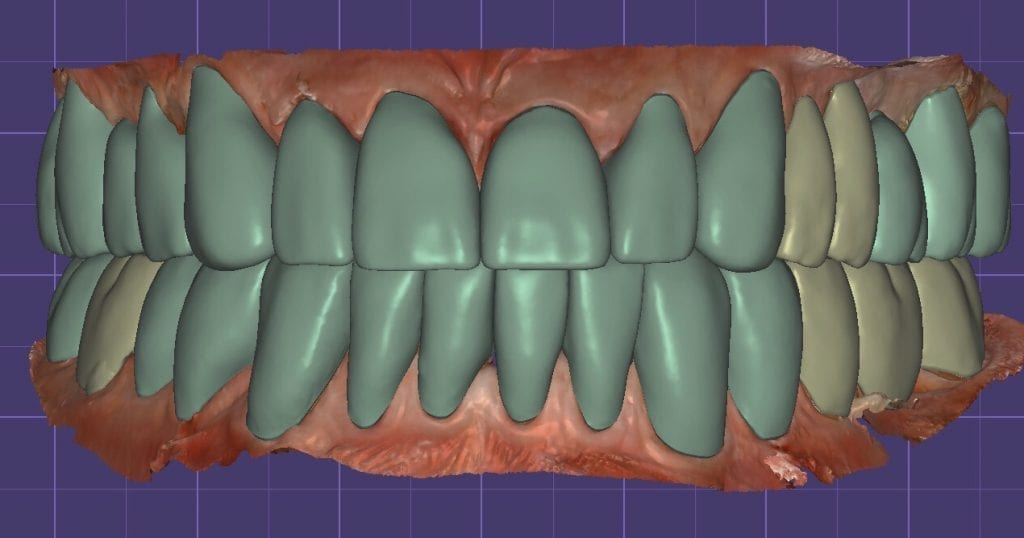
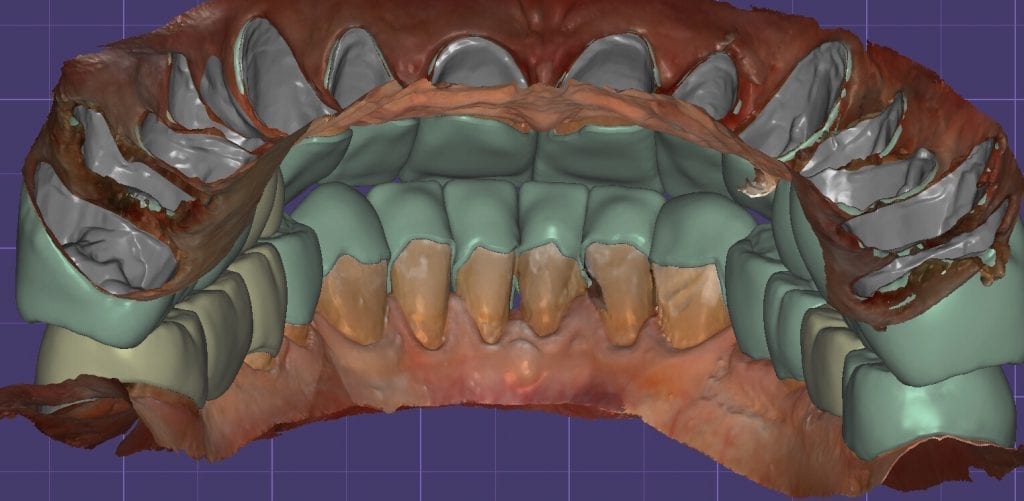
The digital models were then imported into a third party software where a library of tooth morphologies are available for the clinician to choose from.
Once the appropriate library is chosen, the digital wax ups are performed. In the subsequent photos you can see the transparent overlay of the wax-ups to the original position of the existing dentition
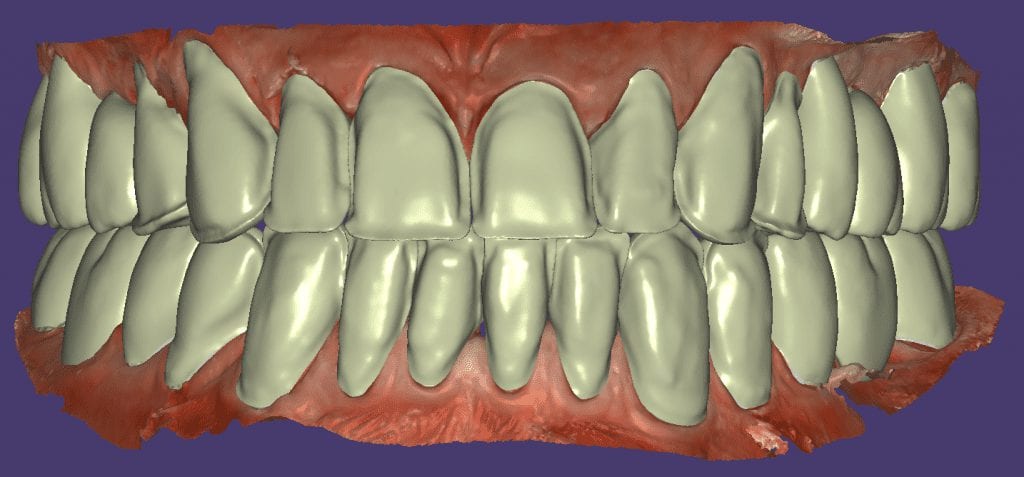
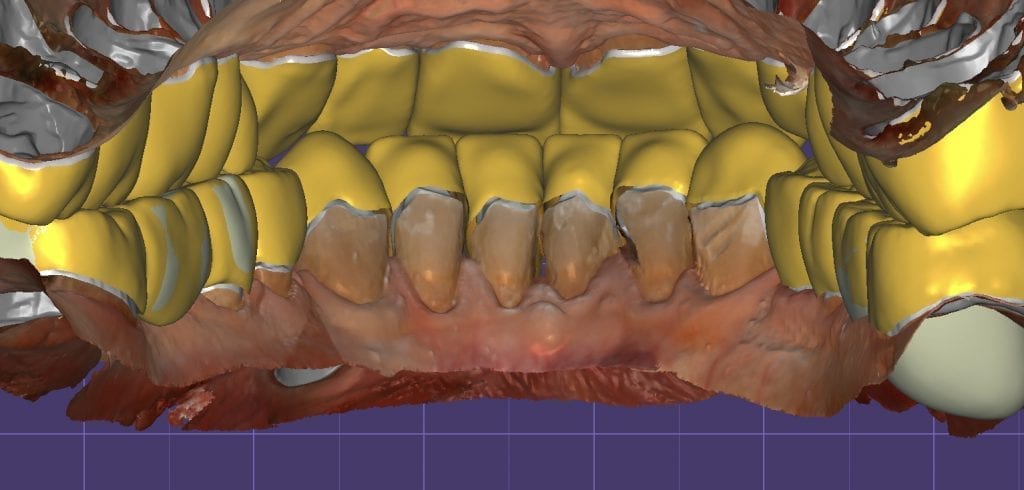
Once the case is designed to the ideal vertical dimension then multiple shells can be fabricated for treatment. The wax up model can be uniformly reduced by .5mmm’s circumferentially and a temporary shell can be designed. Once the teeth are prepared, these shells can be relined and seated onto the preps.
FIRST VERTICAL DIMENSION
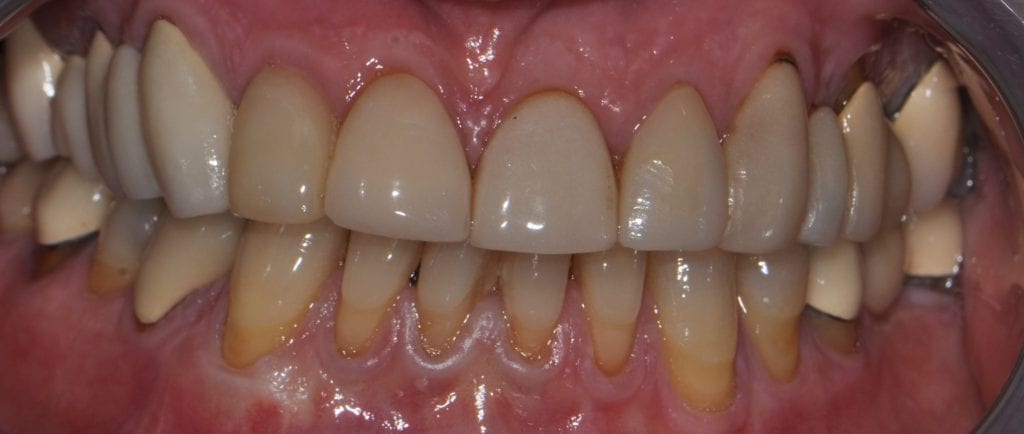
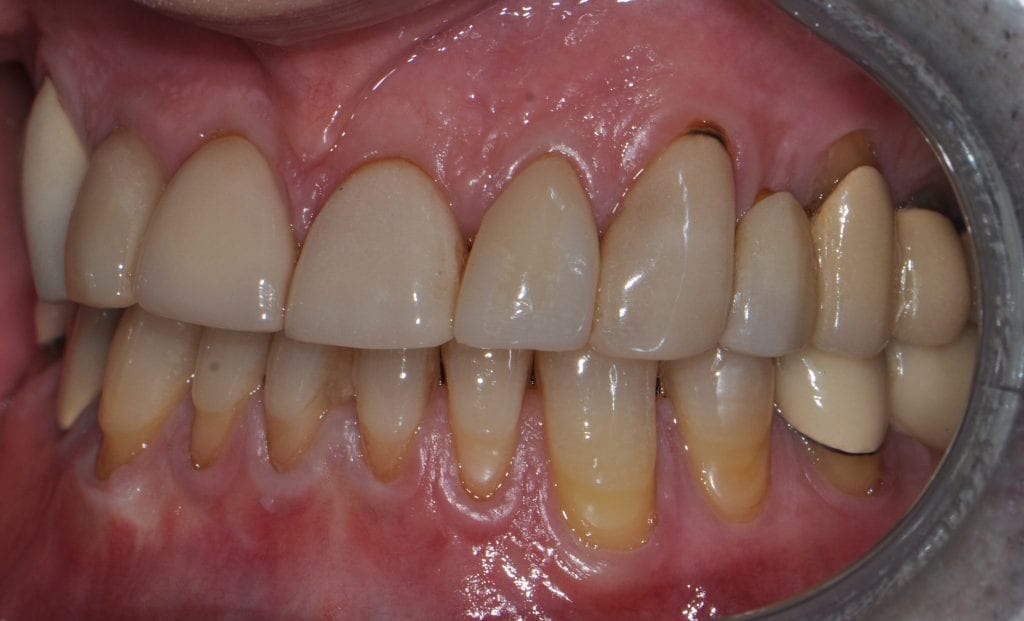
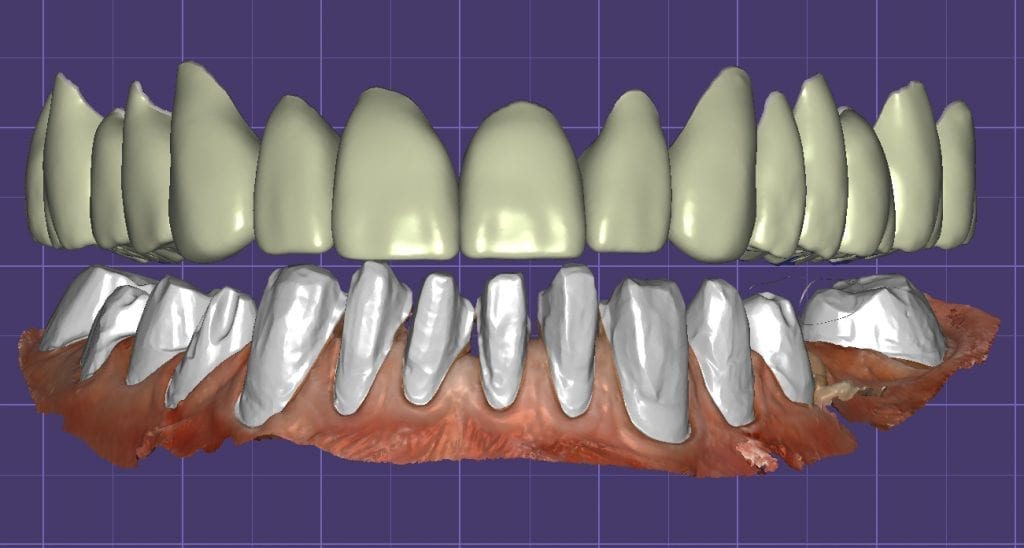
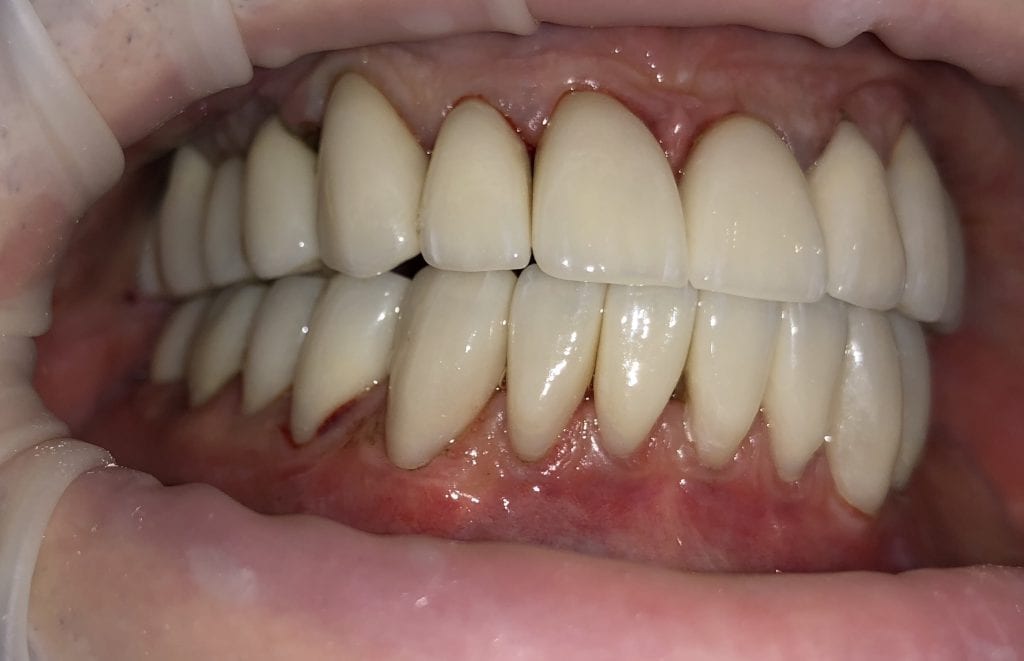
The initial vertical dimension was greater than desired and the tooth shape was too bulky in appearance.
[videopress C0MfqBiS]
ADJUSTED TEMPORARIES AND NEW VERTICAL DIMENSION
Over the course of a few appointments, the vertical dimension was reduced and the temporaries were adjusted to the patient’s desires. The new upper and lower arch were captured with the Medit i500 and the jaws were related to each other.
This was then imported into exocad where the prepped arches from a few weeks prior were force matched to the new bite
[videopress Zj7XsYG4]
After the upper jaw was related to the temps, the same was done with the lower arch. Great care was taken to make sure the arches were properly related to each other throughout the process
[videopress ObPk1CAK]
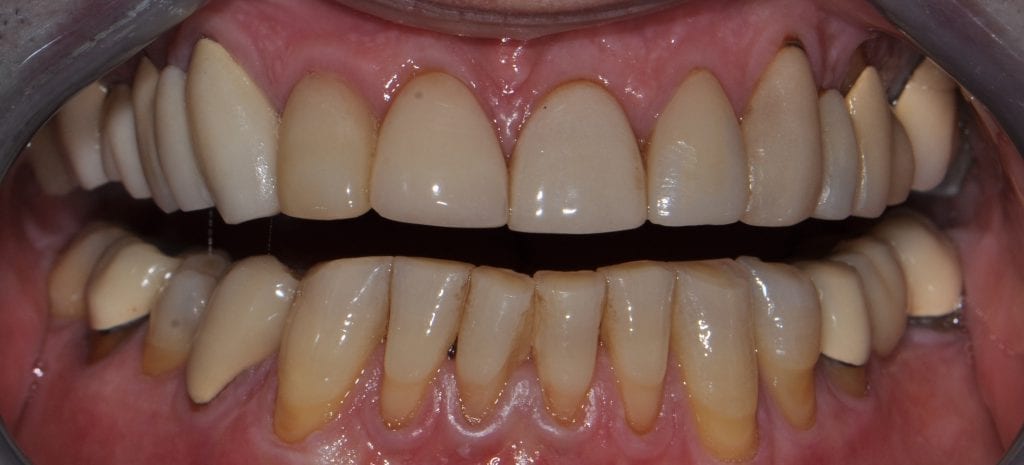
CASE DESIGNS
The case was designed by CADENT BESSA, and the models were printed by Burbank Dental Lab with Carbon Printers. There restorations were milled and cut back and layered by Burbank Dental Lab