


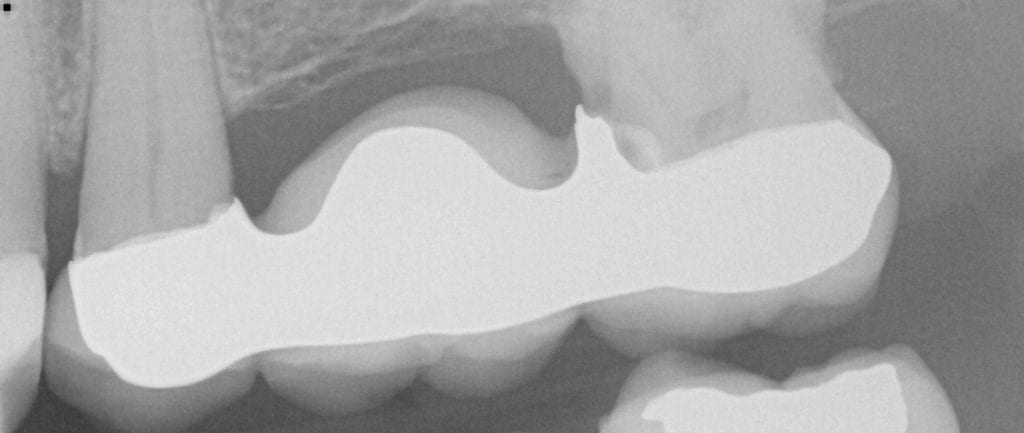
This failing three unit fixed partial denture was replaced with the Medit i500 and the CAD-Ray Design Software. While the patient was getting numb, a physical quadrant impression was made to fabricate a temporary after the removal of the existing bridge
With distal extension case, we advocate that you take a the pre-op scans, the maxillan and mandibular scans, and the first of the buccal bites. After the preparations are done and imaged, we advocate that you take the second bite IN THE SAME area so that you can judge if the jaw has settled once your distal stops were prepared.
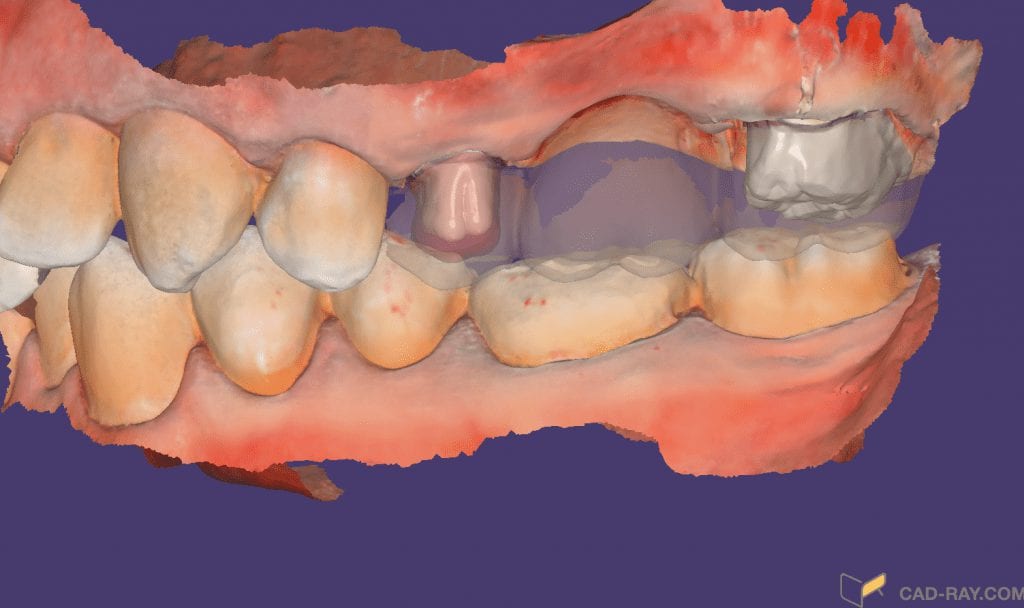
This preview shows how the two bites can aid with aligning the arches accurately and to determine if the jaw settled after the lateral pterygoid muscles releases.
For the sequence of events, you can see how the pre-op scan of the bridge was taken. The same model was then trimmed in the maxillar folder, the lower arch was scanned and the first buccal bite was taken.
After the bridge was removed, the premolar preparation was modified and the margins were exposed with expasyl and cord retraction. The premolar prep was imaged with the medit i500 and the pontic area was also captured
Proper isolation and retraction greatly contribute to ease of access and imaging. Here you can see how the isolite and the optragate are used in conjunction to control the clinical environment
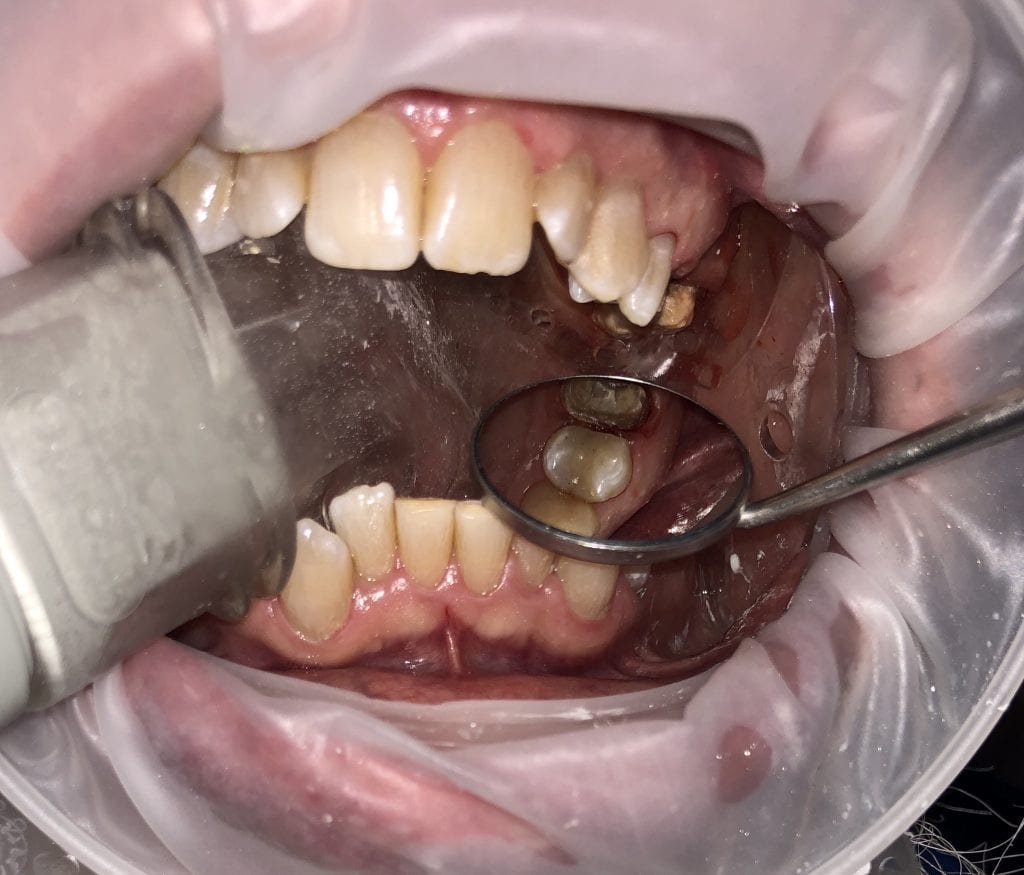
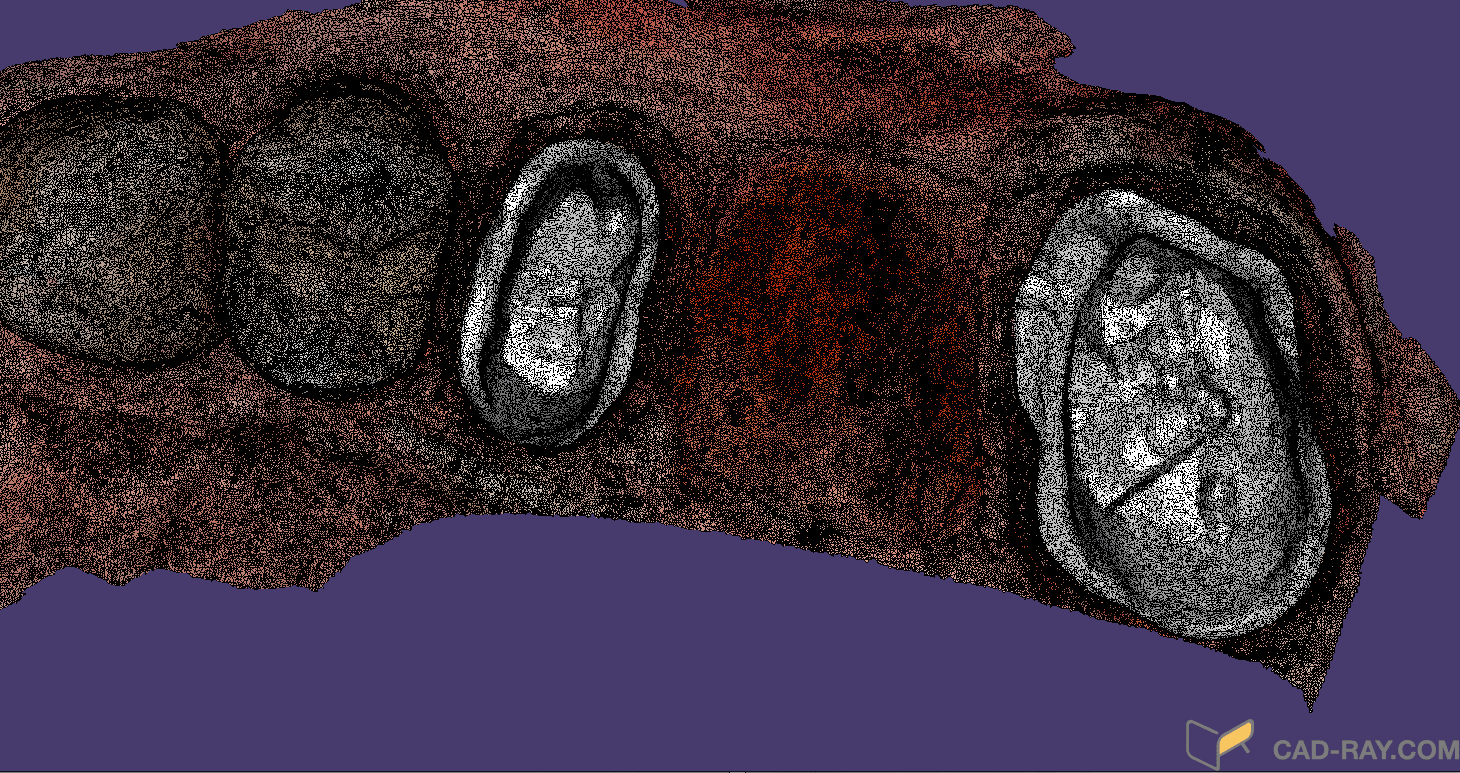
Notice how the red soft tissue is harder to pick up in the scan and the camera mode was changed to white light, as opposed to blue light scanning. Blue light is great at picking up tooth structure, white light is great at picking up red- blood and soft tissue.
Once the premolar area was captured, the imaging was stopped and then the molar crown prep was modified and the model was extended to include the new prepration. The difficult access was address by breaking up the model into sections that are much easier to maintain. The protect mode was used to not “ruin a good impression” elsewhere on the preparation
After the case was processed, the margins were marked and the rough design was proposed and then shared with the lab through the dentalshare network

Download the Case File and Design Along
