Posted on Leave a comment

Proper Implant Placement and Digital Impressions with Scanbodies and Medit i500 Lead to Predictable Results

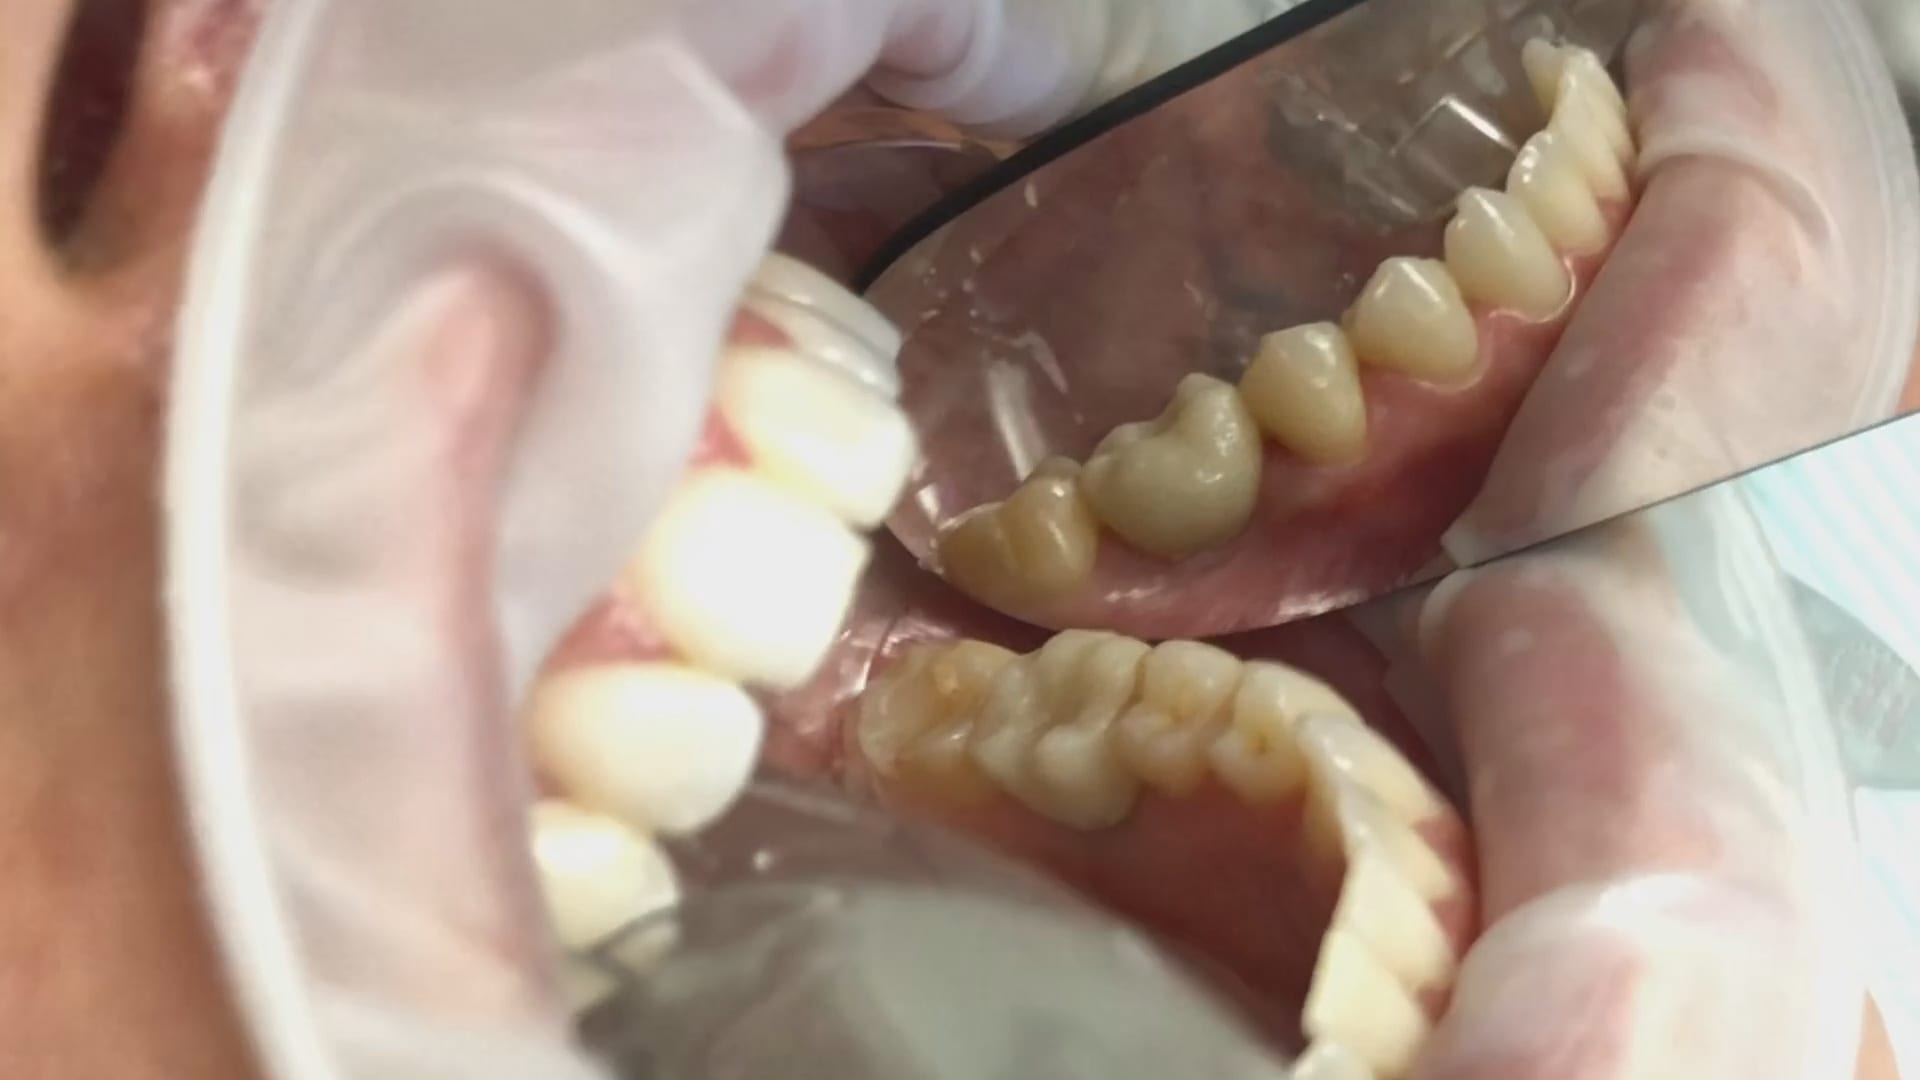
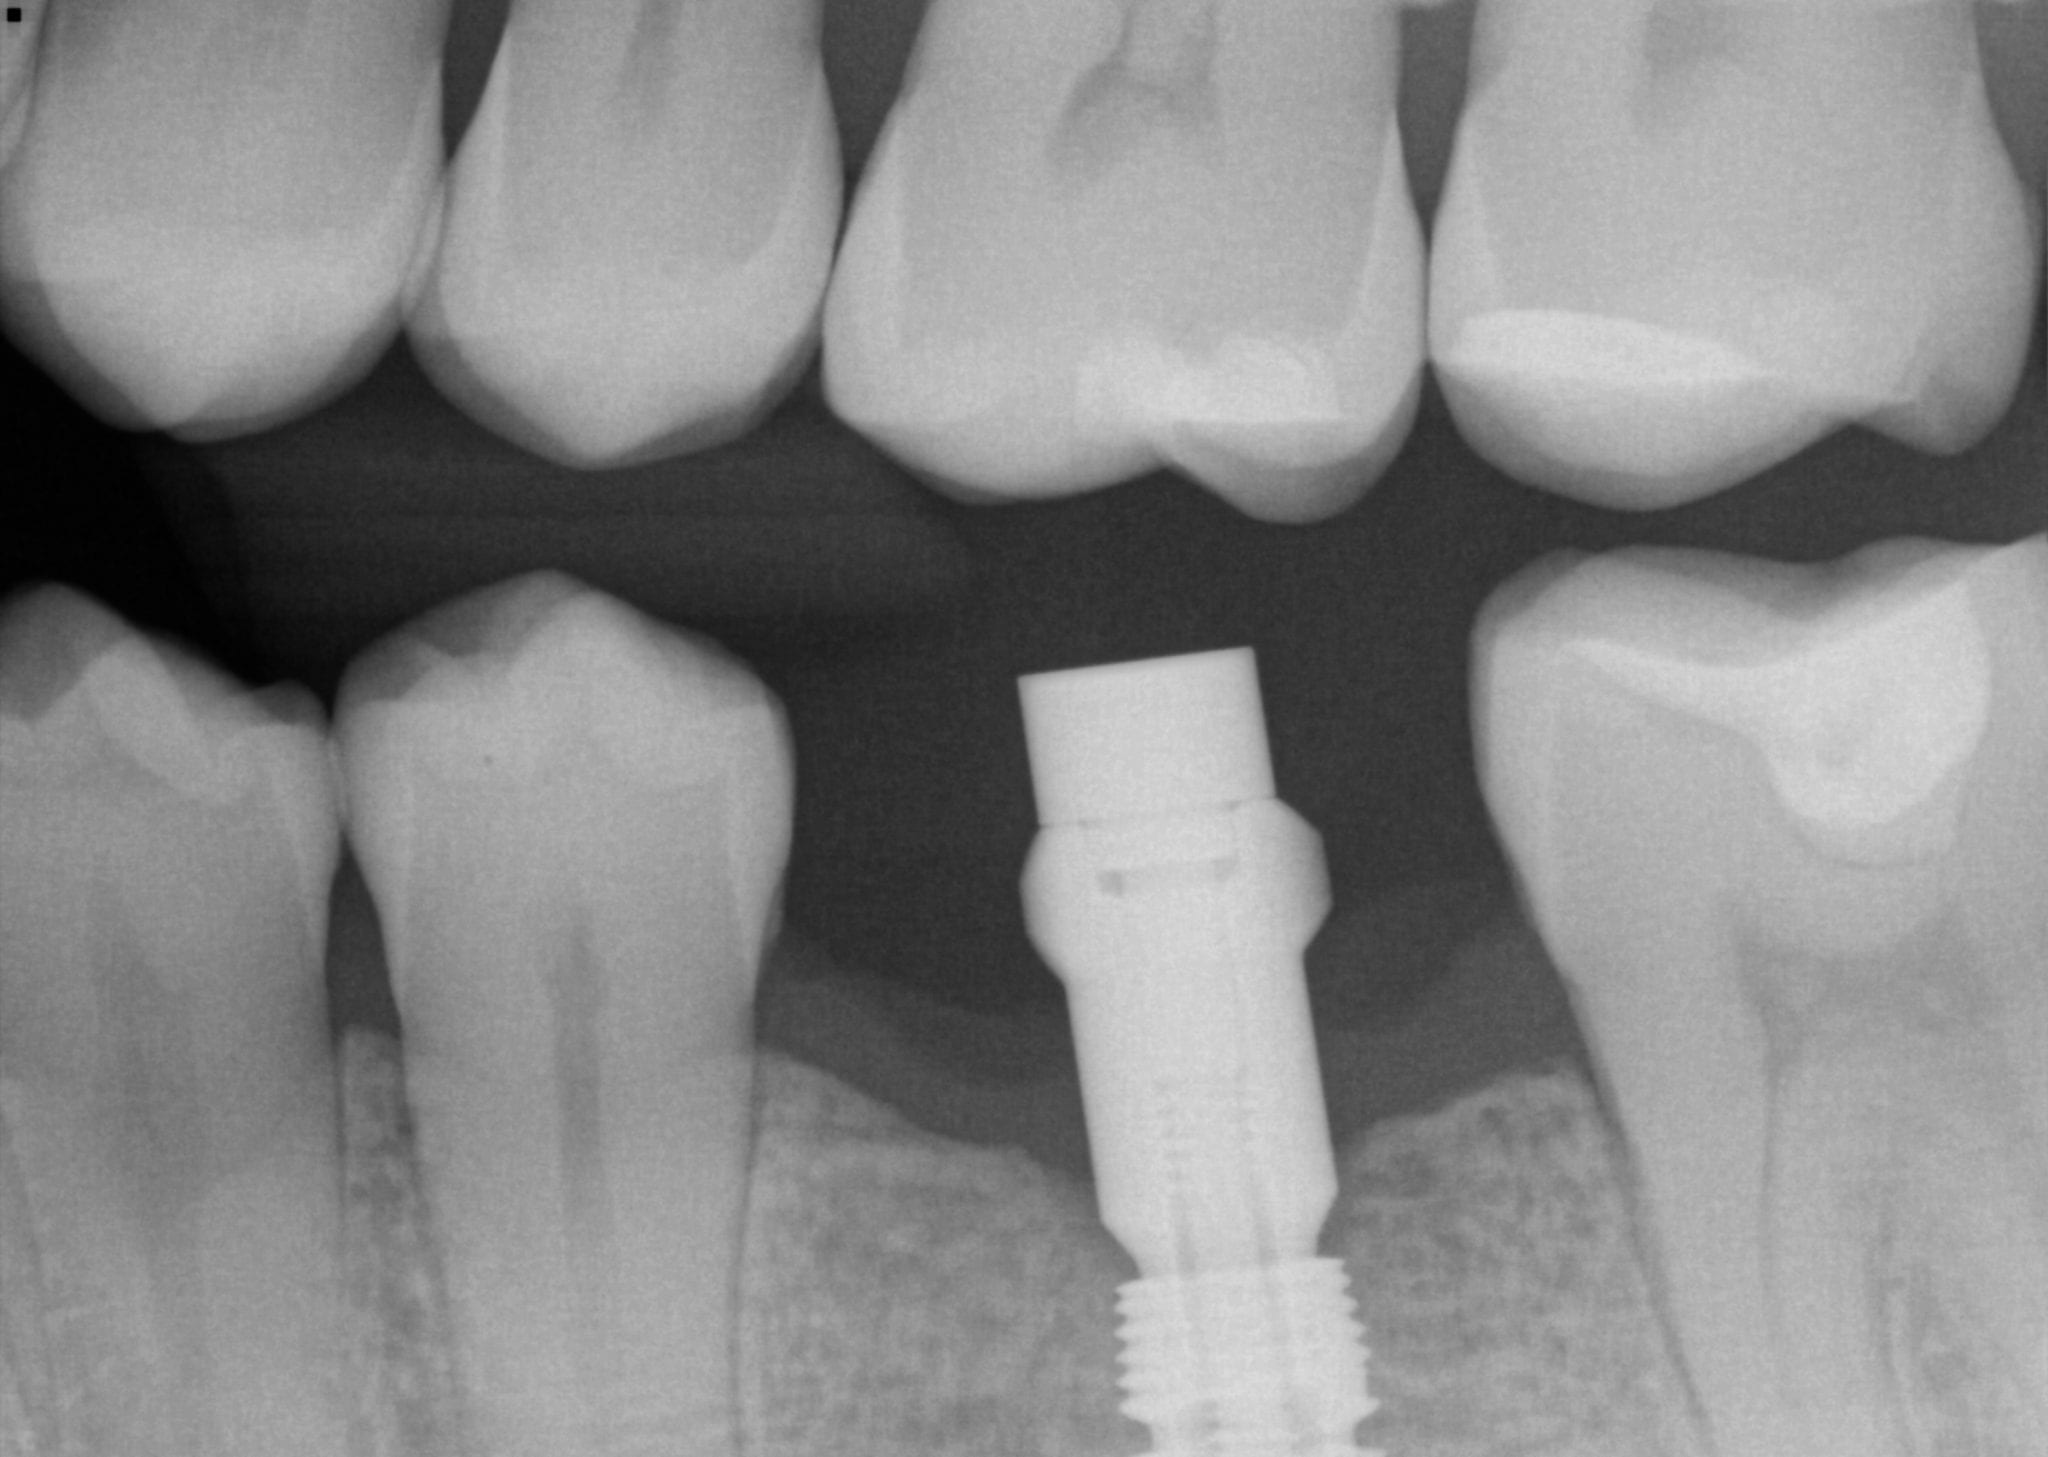
In this video, we show a recall of an implant restored with a scanbody. When the implant was initially placed, a scanbody was seated and an X-ray was taken to verify that it was seated. The titanium scanbody allows for visualization of seat. A peek scanbody does have a metal carrier but it is confusing to some users to verify that it is engaged with the fixture.

The proper placement of this biomax implant, followed by ideal contouring of tissue and bone around the head of the fixture, allowed for enough “running room” to create the desired emergence profile

video
play-rounded-fill
emergence prodile of crown imaged by medit i500
Posted on Leave a comment

How We Milled With a MCXL After Designing in exocad

At any given time, we are milling restorations with 3 or 4 milling machines. Recently, we designed a restoration with the Medit i500 scanner, designed in exocad, and milled with a chairside mcxl cerec milling machine. Here are the steps we took to do this:

  1. Purchased Inlab CAM for 3000 euros and this dongle
  2. Installed the dvd for inlab 18.0 CAM. This was the hardest part because we couldn’t find any machines that still had DVD drives.
  3. Went to this page and download the service patch for inlab 18.2
  4. You may have to install some .net framework files from Microsoft. It’s generally an automated installation
  5. Once installed, make sure to have your milling machine turned on and connected. A lot of the functionality is closed if your machine is not on and connected to the PC with the software.
  6. We had to follow certain steps in sequence to get this to work. We had to activate the license in a pre-installed CEREC software and then move that thumbdrive to the machine where the inlab CAM was going to be installed

You can contact Mr. Milos Gedosev who runs DentalCADCAM in Germany and has earned a great reputation over two decades if you have any questions.