


Category: Medit i500

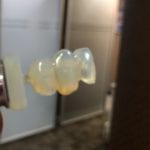
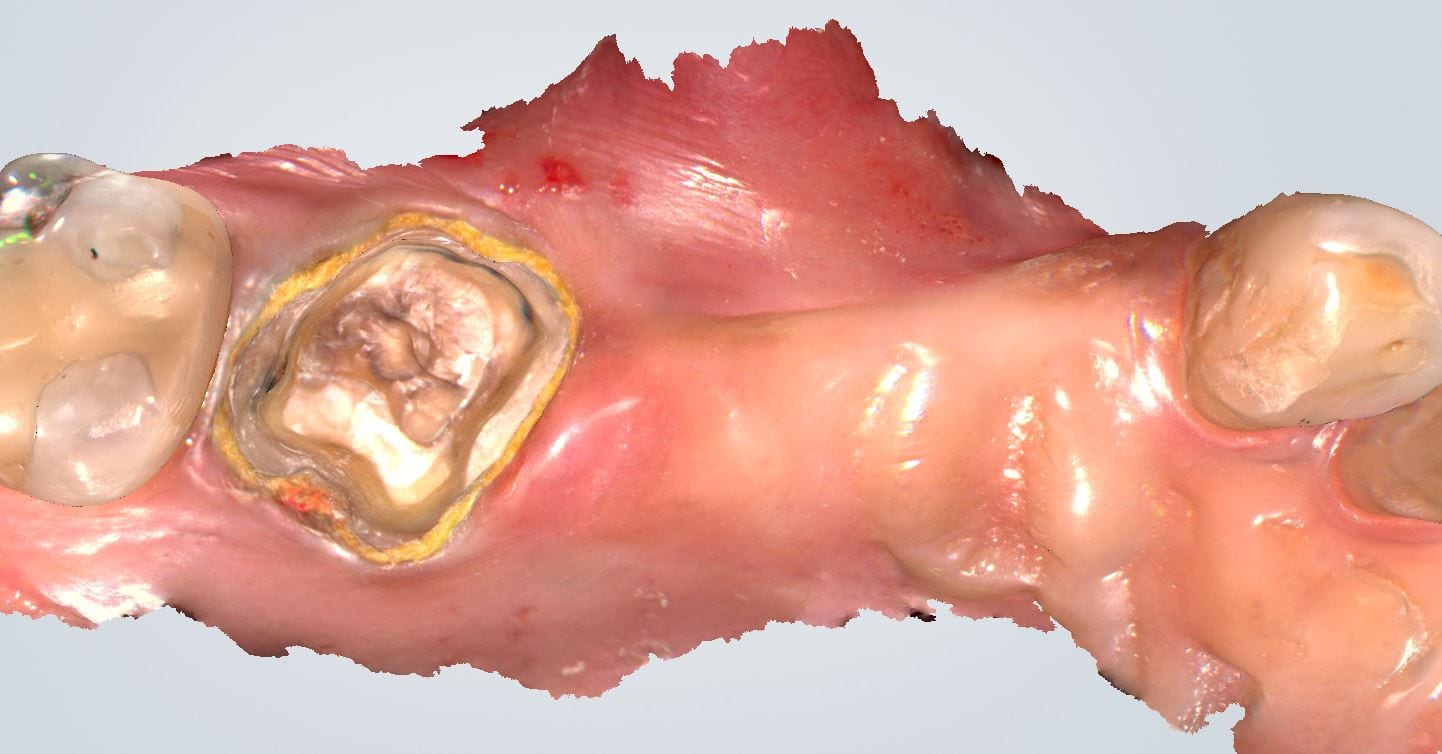
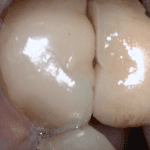
Two distal extension molar crowns and one milling machine for single visit dentistry
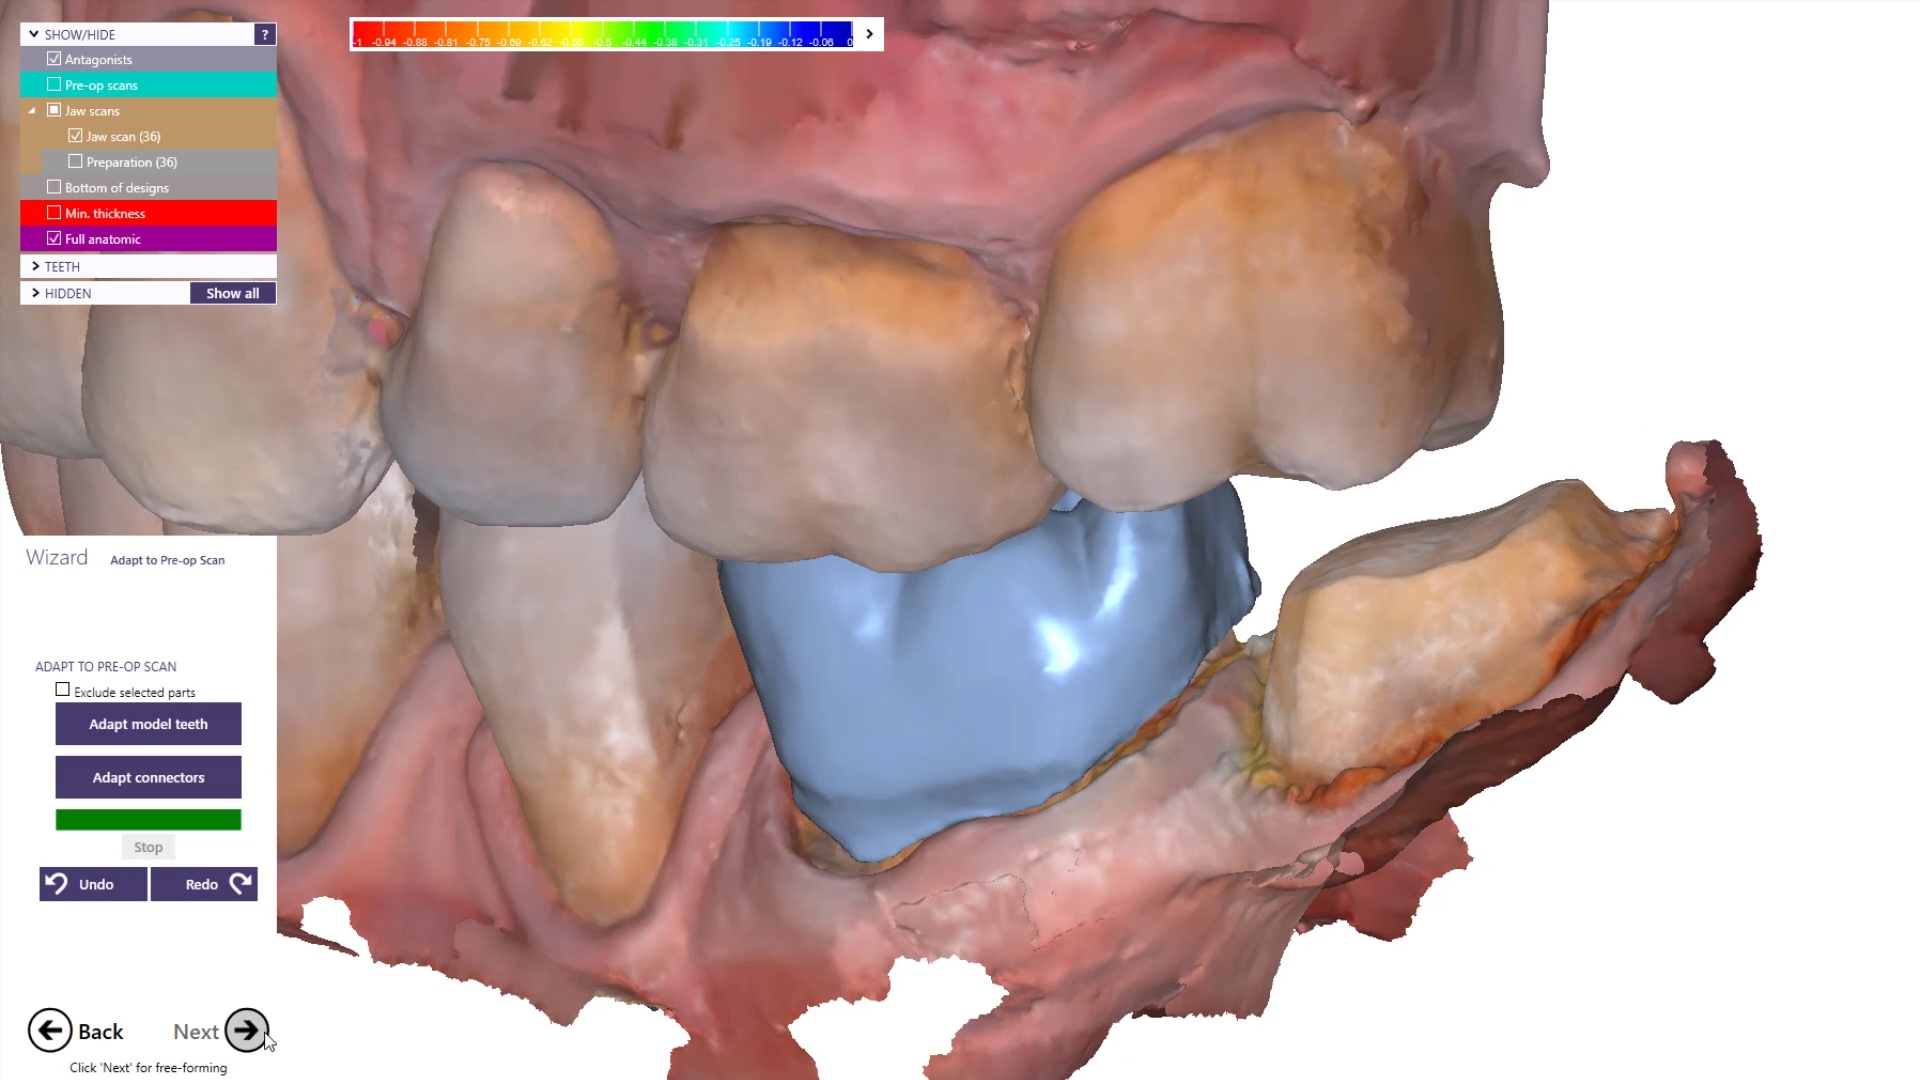
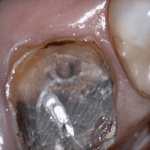
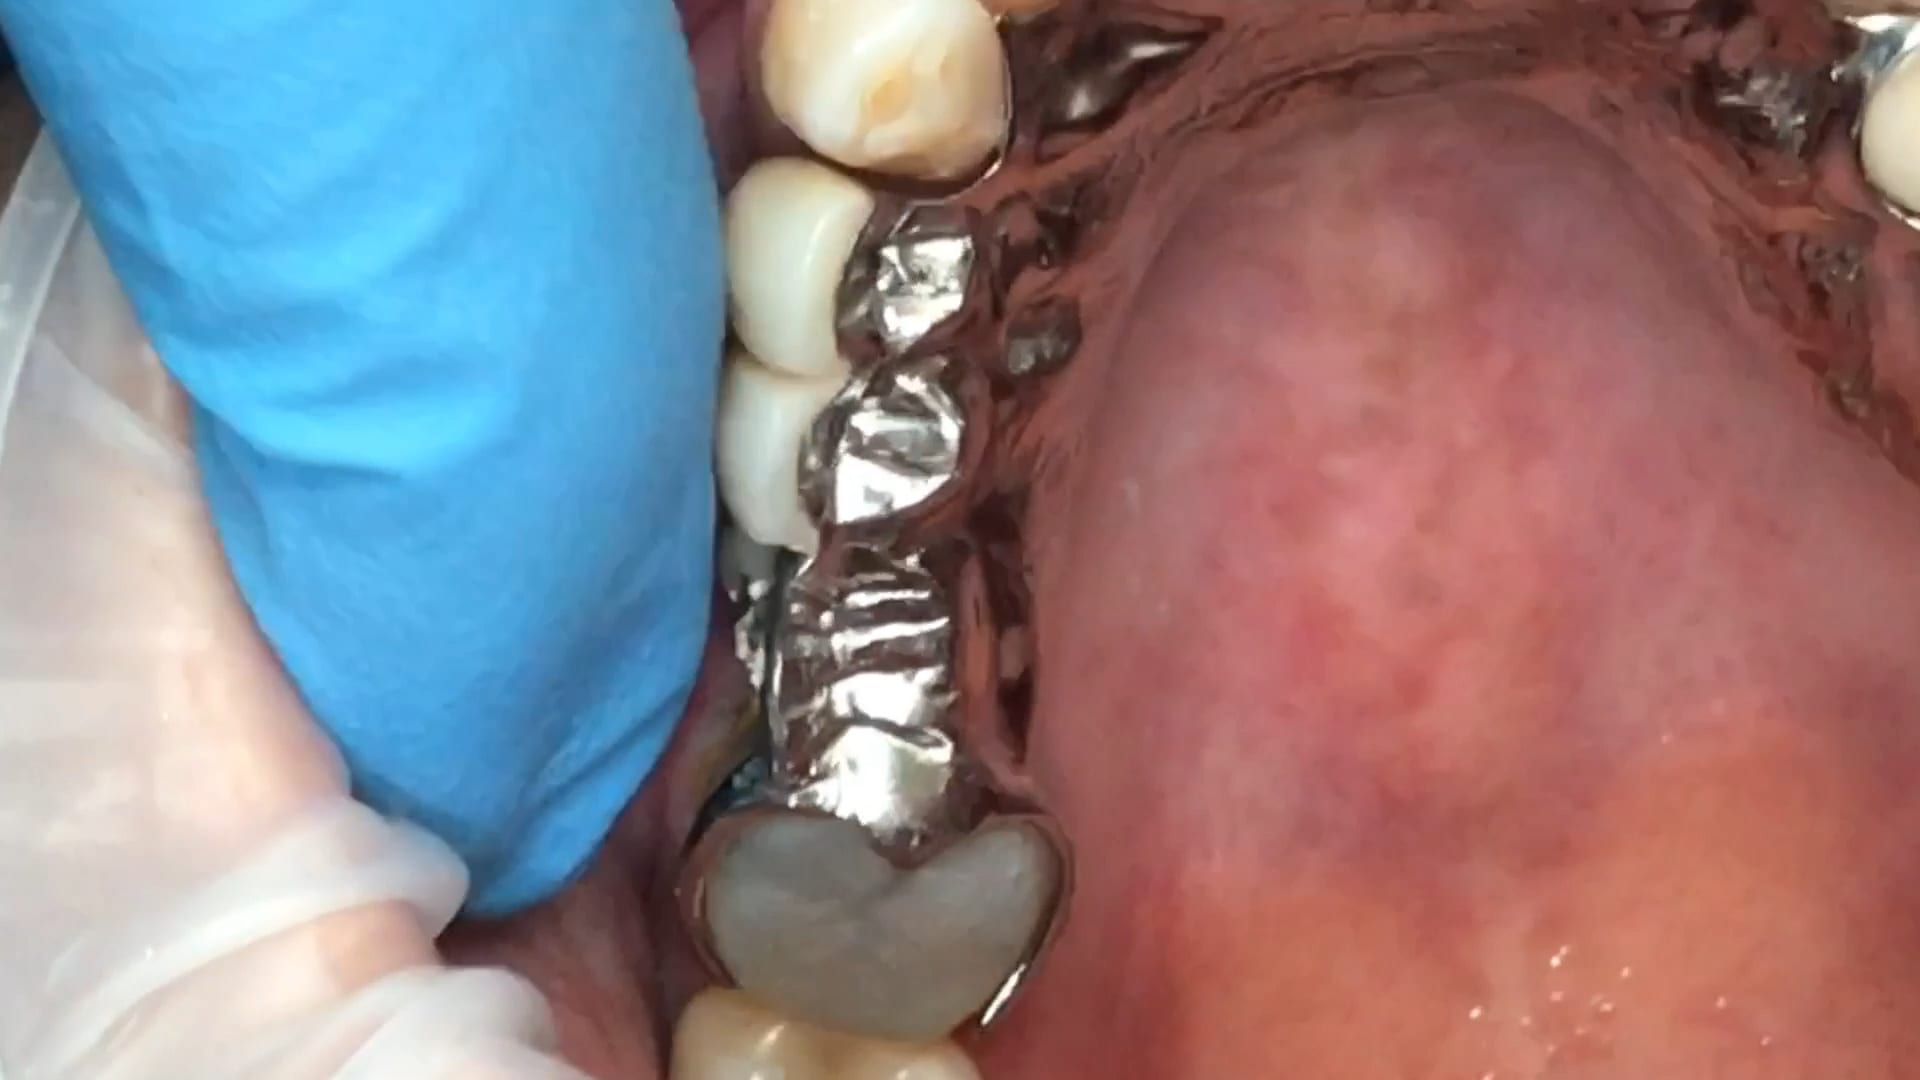
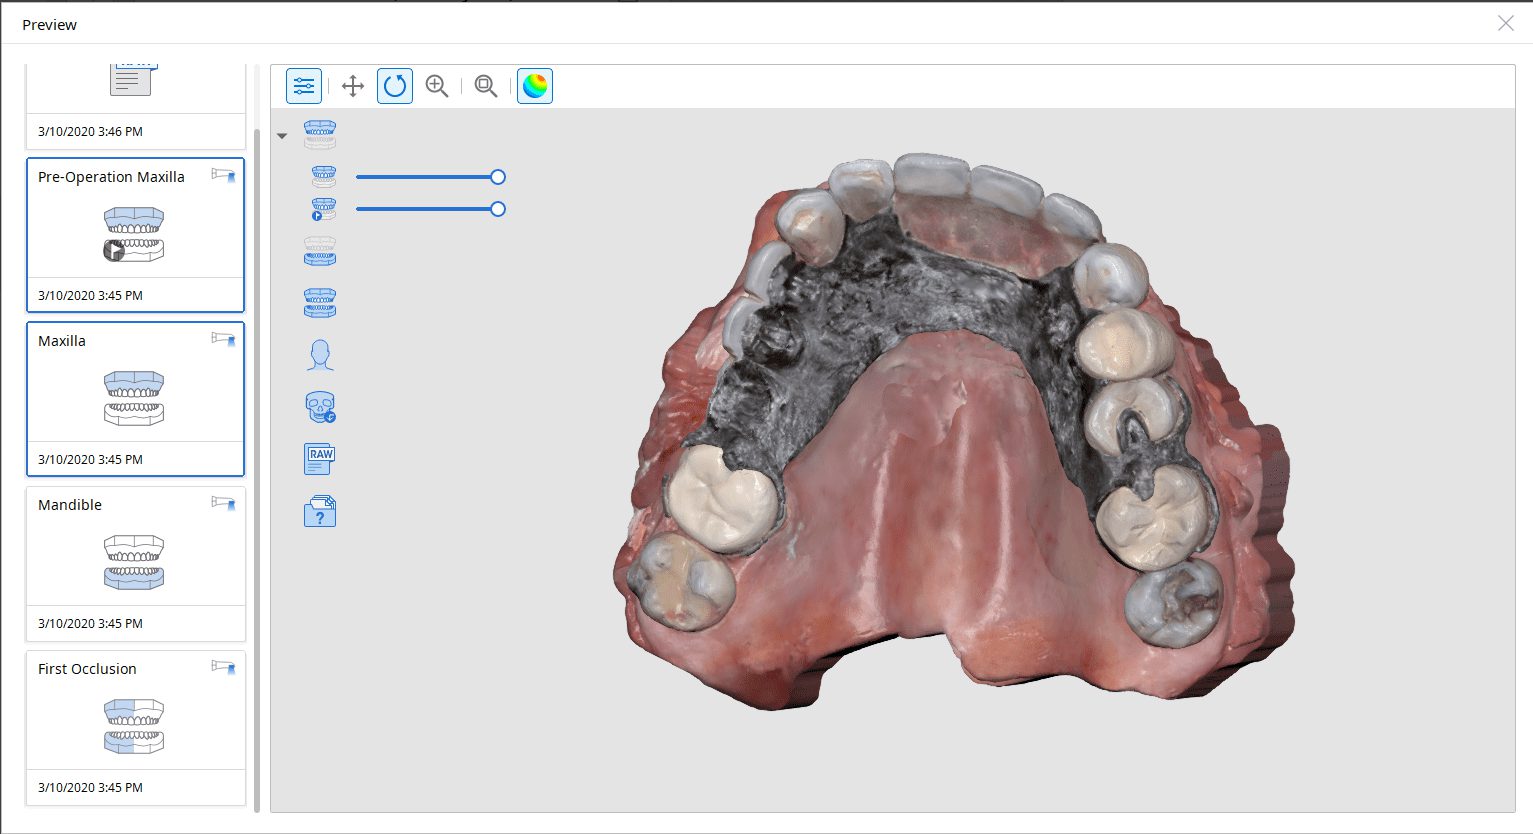
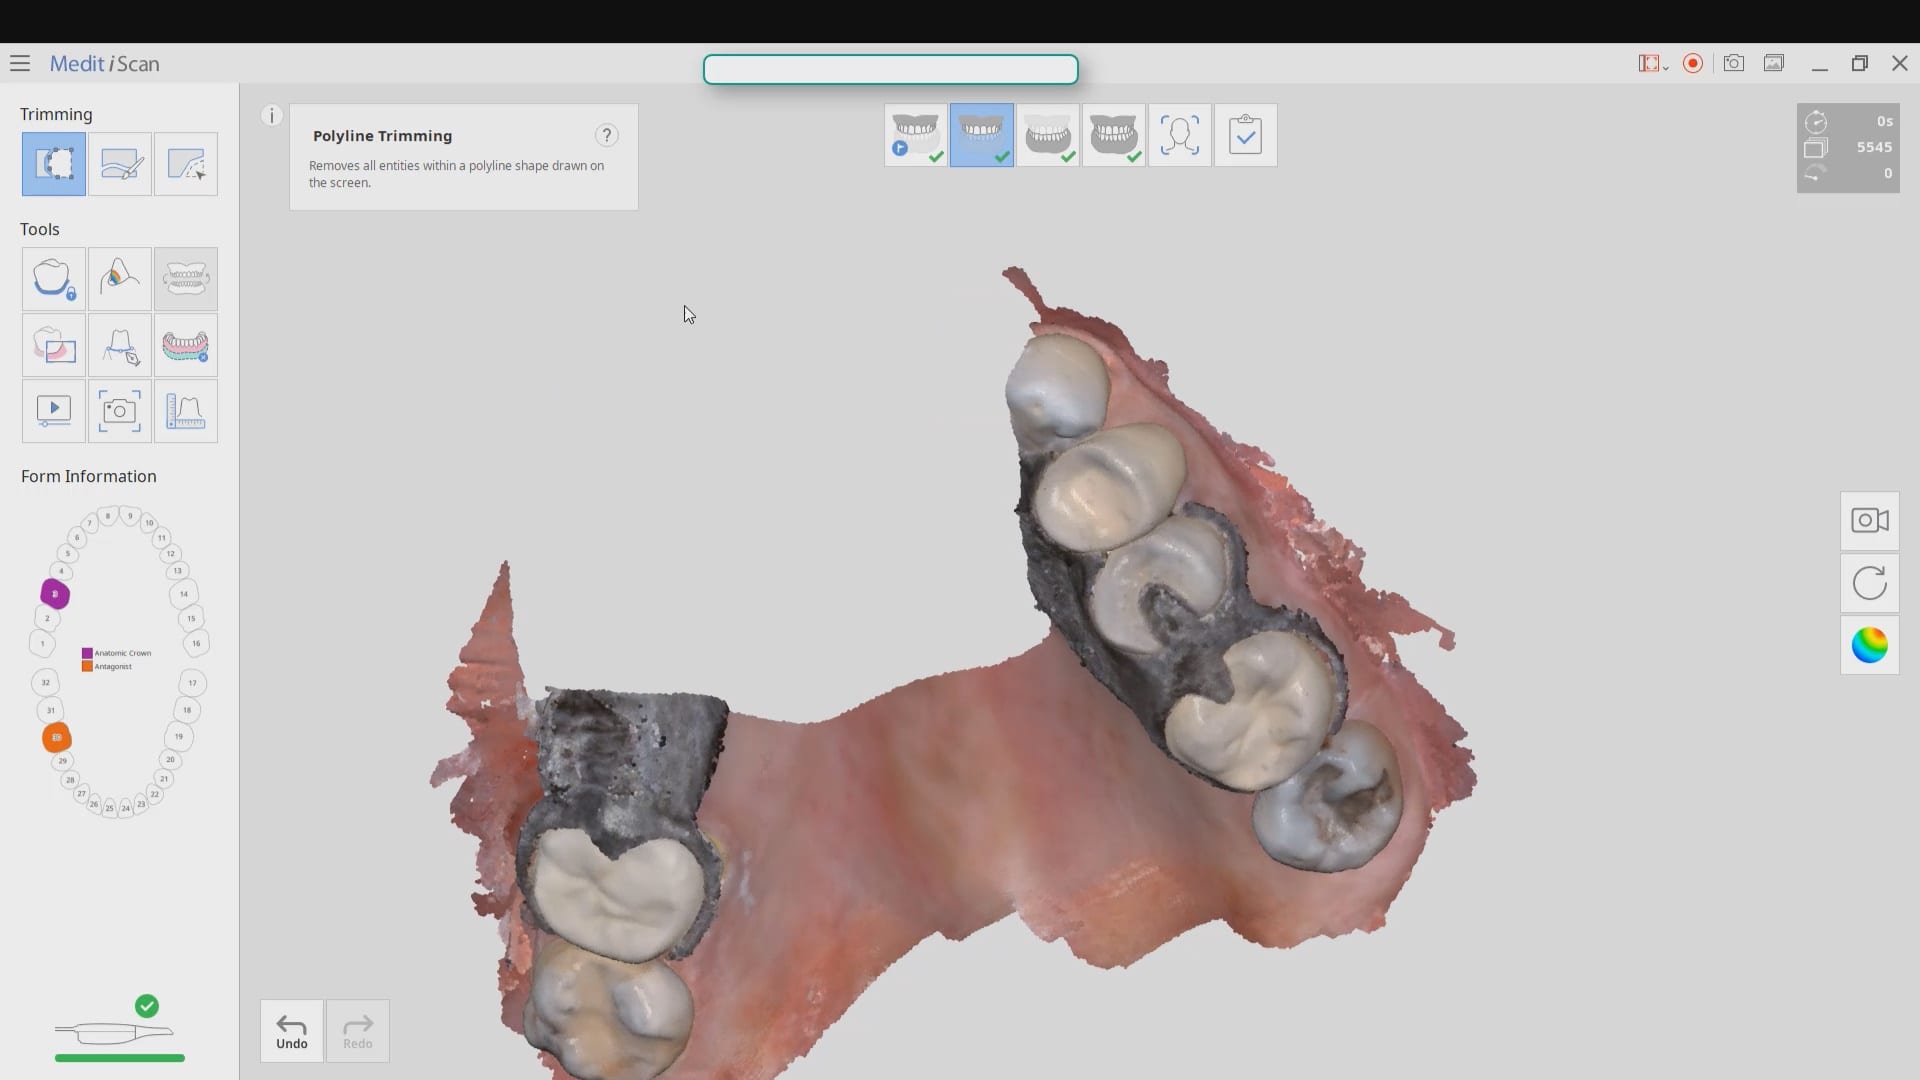
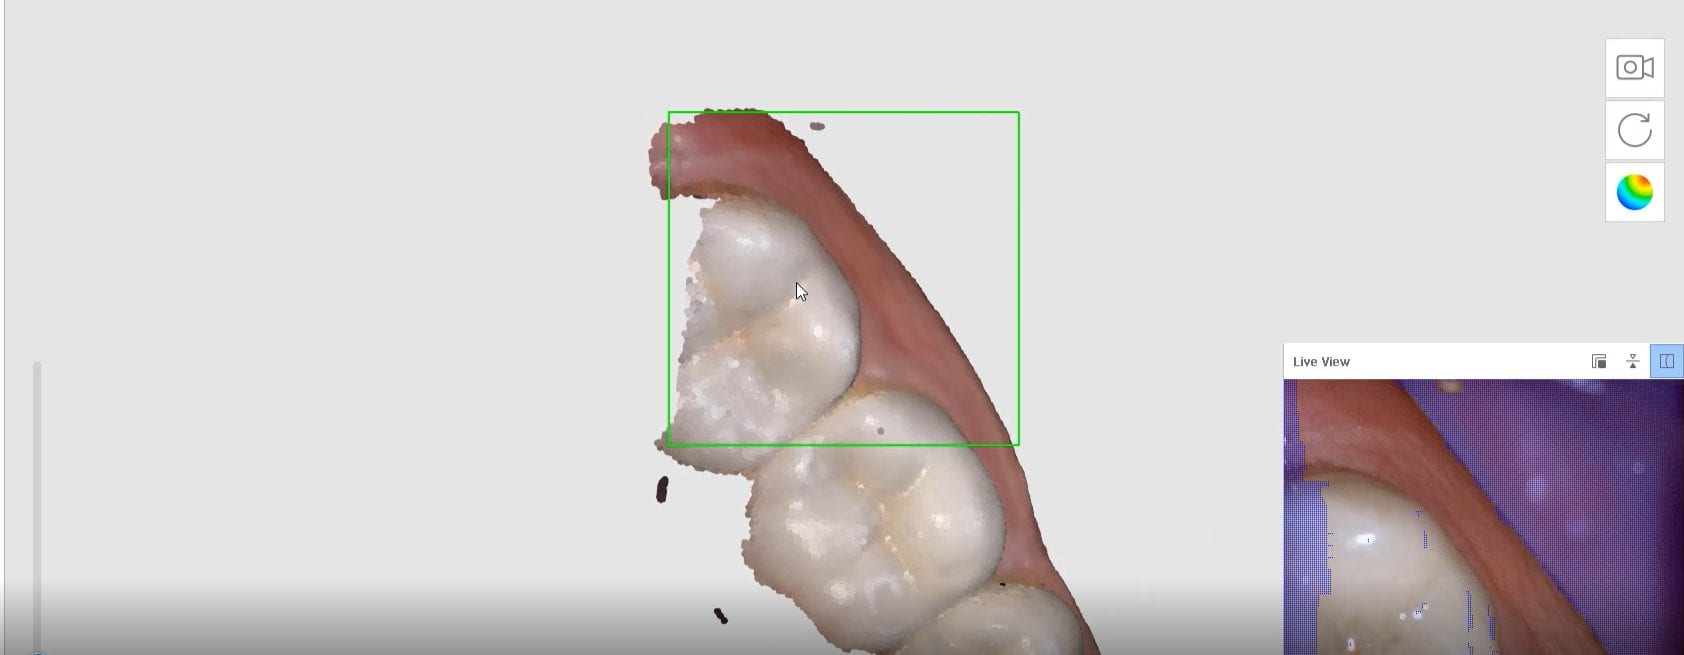
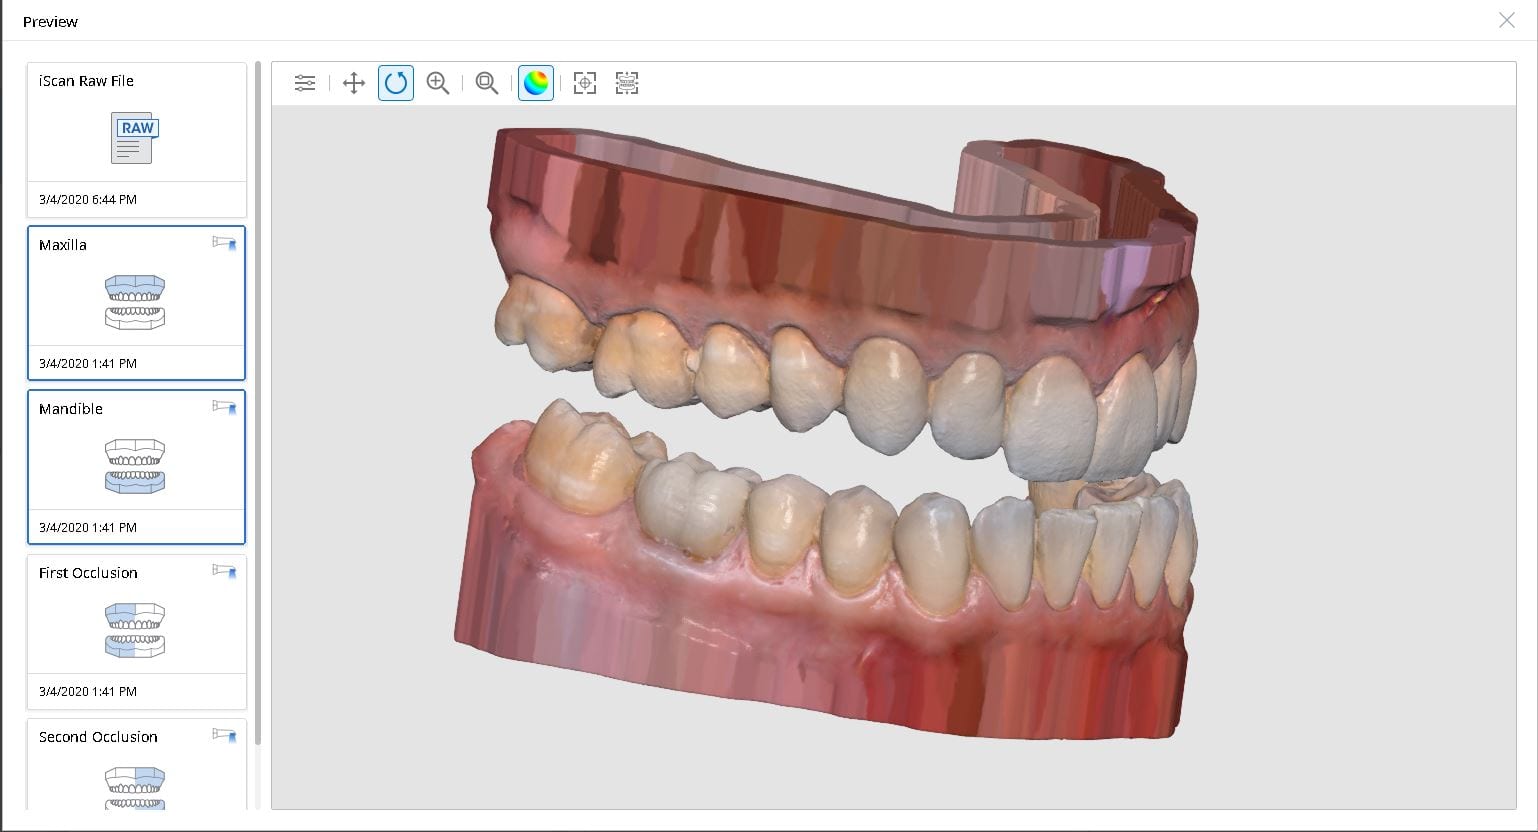
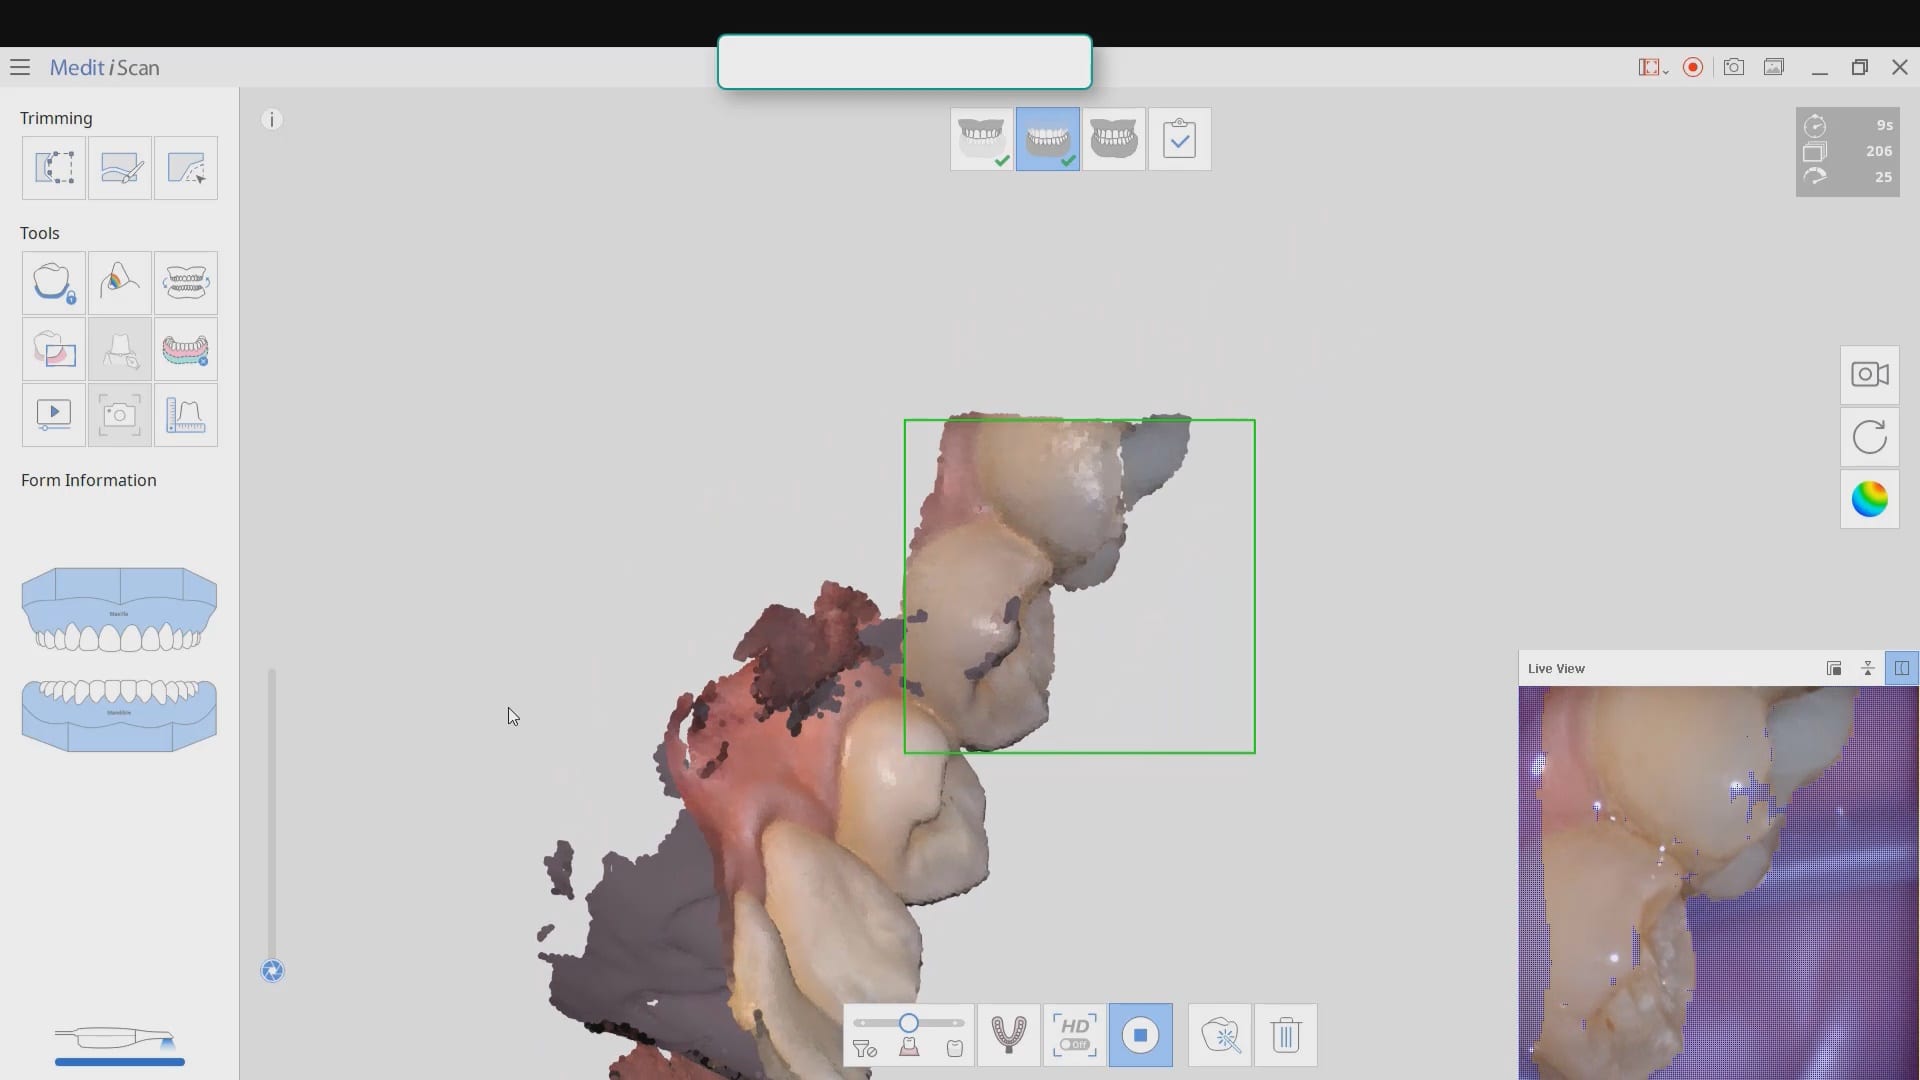
For our advanced users who mill in house or what to speed up their digital impressions we advocate taking advantage of digital dentistry’s unique features that allow you to take impressions over a period of time and segments, building larger models over different sequences and time. In this particular case we have two molars in the lower left quadrant that warranted replacement. The traditional method would be to prep both, isolate both, retract both, and take your final impression, but we will approach this as if there are two separate patients involved
For the second molar, we will take advantage of the anesthesia time and capture the first bite, the opposing, the pre-existing situation and then crop out the preparation area digitally. Once the tooth is prepared, we will check for proper reduction. We will then take the second bite to verify the vertical dimension has not changed.
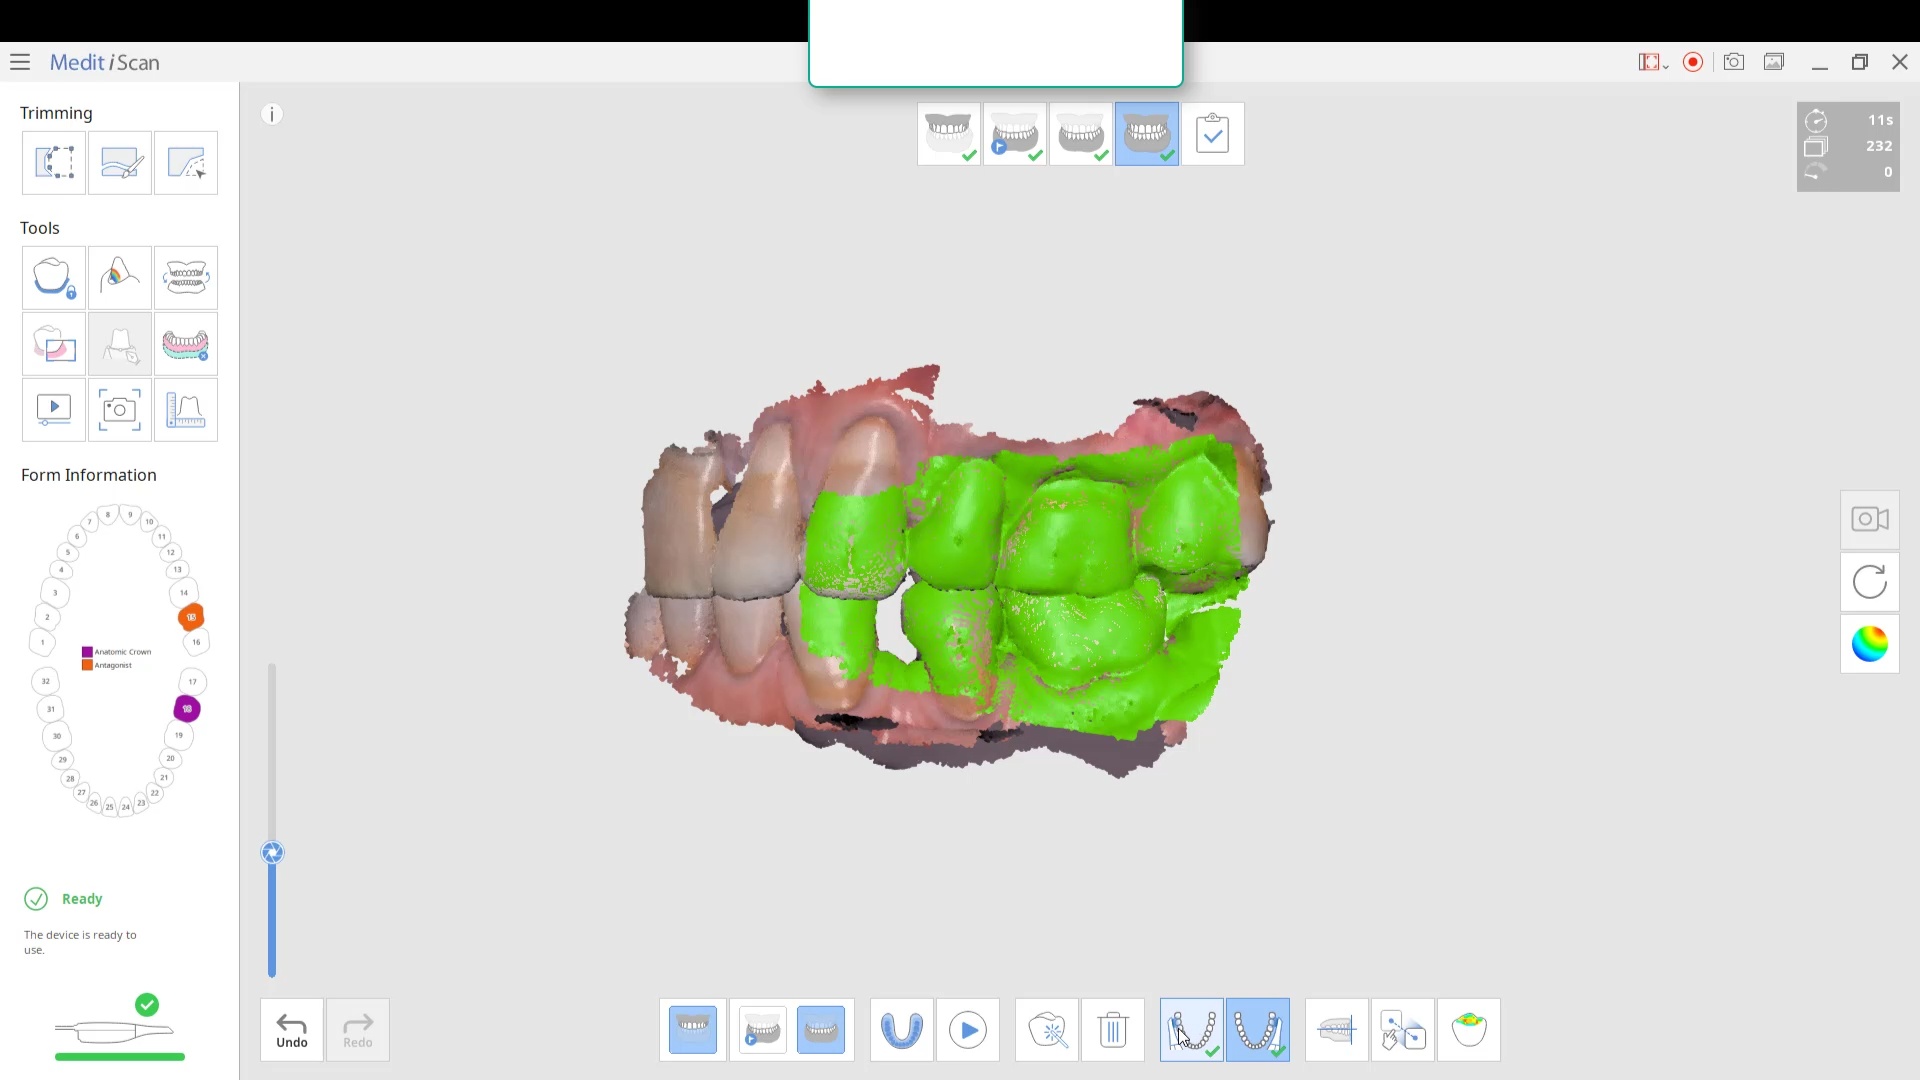
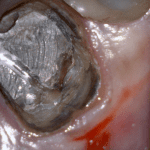
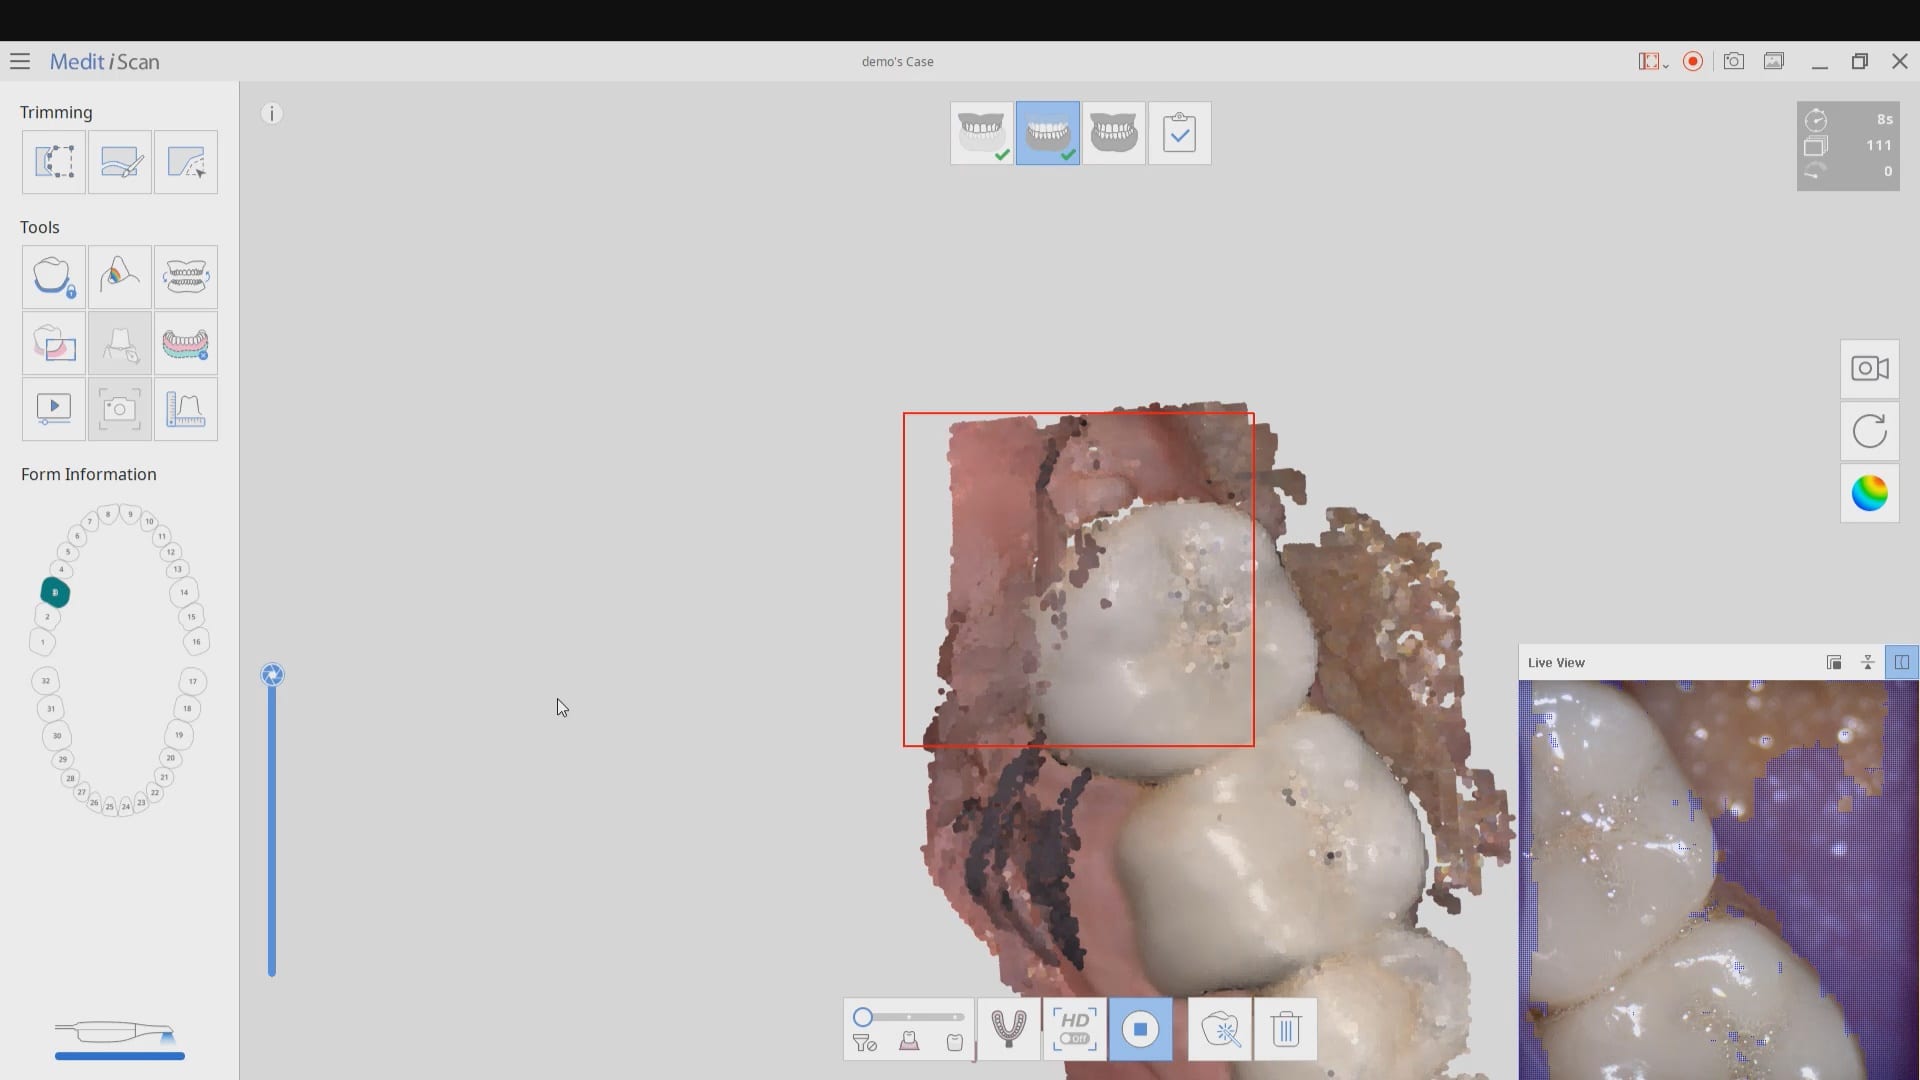
While the second molar is being designed and milled in the first case, we will launch a second window by cloning the first case. All the data remains the same and this time we crop out the first molar digitally and protect the rest of the arch. Once the first molar is isolated, it is digitally captured and then designed and milled.


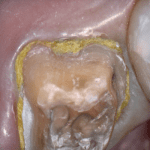
To manage the contact between the two crowns, there are many advanced applications. Here is a simple explanation of how we use the prep model from case 1 as the pre-op model for case two. Since the second molar in case 1 made contact with the distal wall of the first molar, when we design the crown for the first molar in case 2, all we have to do is make sure the distal wall is flush to the pre-op. This guarantees us a contact between the two. There are lots of shortcuts to this puzzle once you get the basics of digital impressions under your belt.
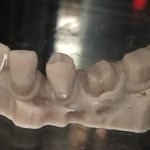
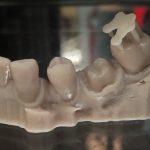
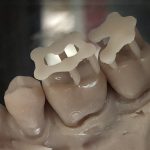
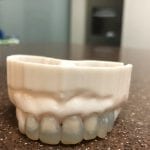
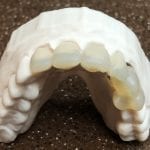
We quickly printed these same models and crowns just for demonstration purposes
Please Share this:

Milling Tibase Crowns to CEREC MCXL with a Medit Scan and exocad design software
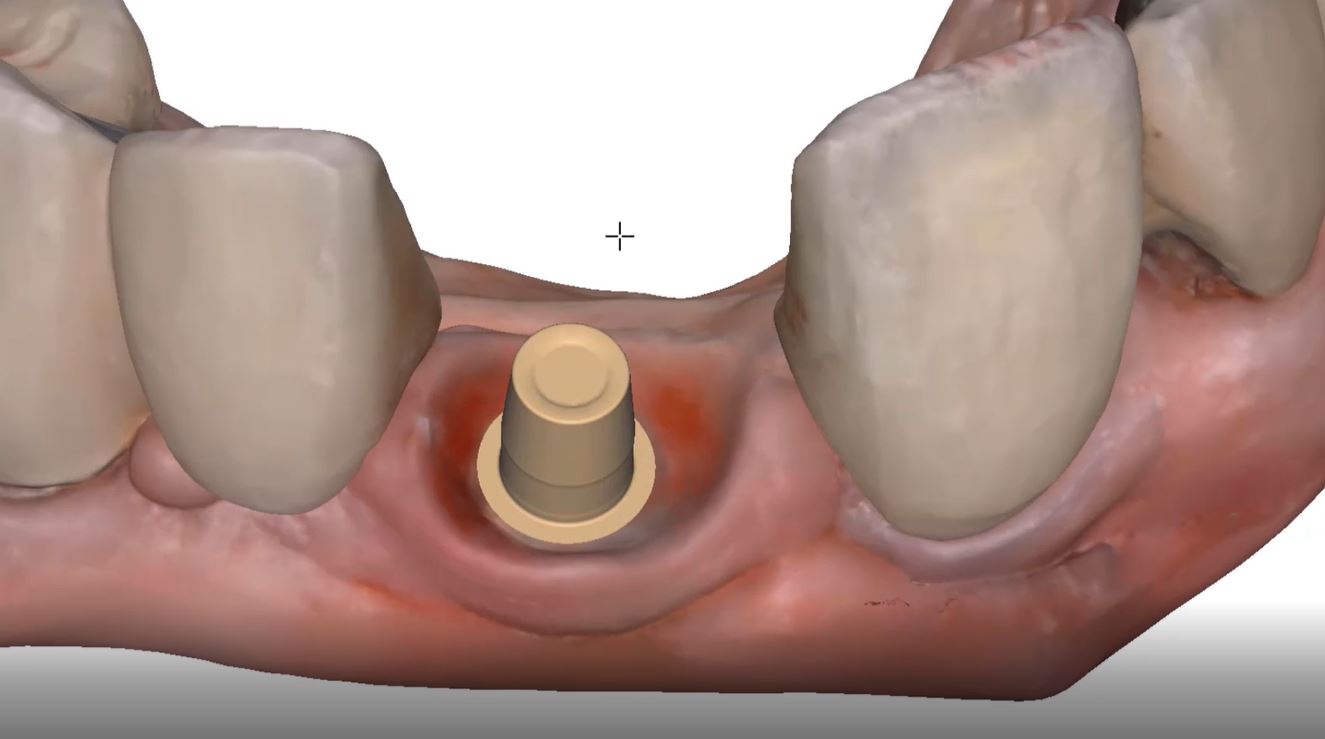
One of the big limitations of CEREC (a registered trademark of denstply sirona) with tibases and implant crowns is that it is limited to very few implant lines and the antirotational notch can just ruin your day as it needs to go into a specific location. You also have to deal with making sure the tibase is seated all the way and the scanbody is properly indexed. The one benefit is that you are dealing with just crown and bridge and you do not need to know implant position or timing at all when doing the design.
In this case, we demonstrate how we utilize the Medit i500 to capture a Tibase from Blueskybio, Biomax NP Conical Connection. Once the tibase is seated, we simply start scanning and then use the artificial intelligent implant suprastructure identification system to identify the location of the tibase. This in essence allows you to capture your margins OUTSIDE the mouth and you don’t have to bother with imaging the tibase, which is highly reflective in the patient’s mouth.
Once processed, you can then modify the tissue digitally and gain access to the tibase margins. You can print the model if you want and manufacture the restoration. In this particular case, we took the design to the CEREC mcxl inlab cam, nested it, and milled it out to demonstrate how we can image with one device from one manufacturer and fabricate a restoration by another company’s manufacturing machine. But the single greatest benefit is that you can place the sprue wherever you want.
IMPORTANT NOTE: The Tibase that you use MUST be wider than the drill milling the intaglio and the sprue must be thick enough to handle the milling process.

Once you understand how the digital workflow goes, you can image with one device, design in another, and then either print or manufacture with yet another device. Here we mill a sectional stent with the cerec that was designed in Blueskybio plan, although printing makes more sense because it is less wear and tear on your drills
PRODUCTS USED IN THIS CASE:
Please Share this:

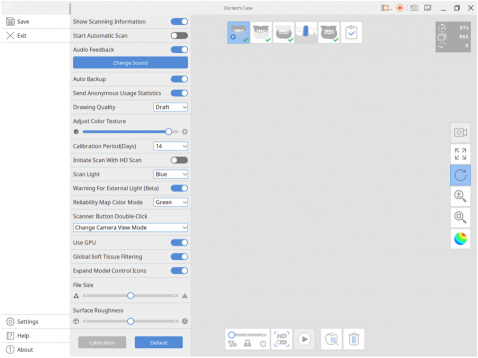
Medit iScan Settings Overview
Please Share this:

How To Offer Digital Clear Aligner Therapy
Do you want to straighten your teeth but don’t want to pay $5000?
This is how most patients think today.
“I want straighter teeth but I don’t want to go through the pains of an uncomfortable/inconvenient experience or ridiculous price tag.”
Of course you as the clinician first needs to first decide if the case presented is a candidate for clear aligners instead of brackets.
Either way, using technology allows dentists and orthodontists to offer the ultimate customer experience and drive costs down.
This also allows freedom of choice for clear aligner brands you want to work with. You can even offer aligners in-house using a 3D printer for ultimate control and cost savings.
If you’re interested in offering clear aligners in-house and branding them as your own, you will need a full CAD/CAM set up. This involves intraoral scanners, orthodontic planning softwares, 3D printers (with wash & cure stations), and suckdown machines.
Please Share this:

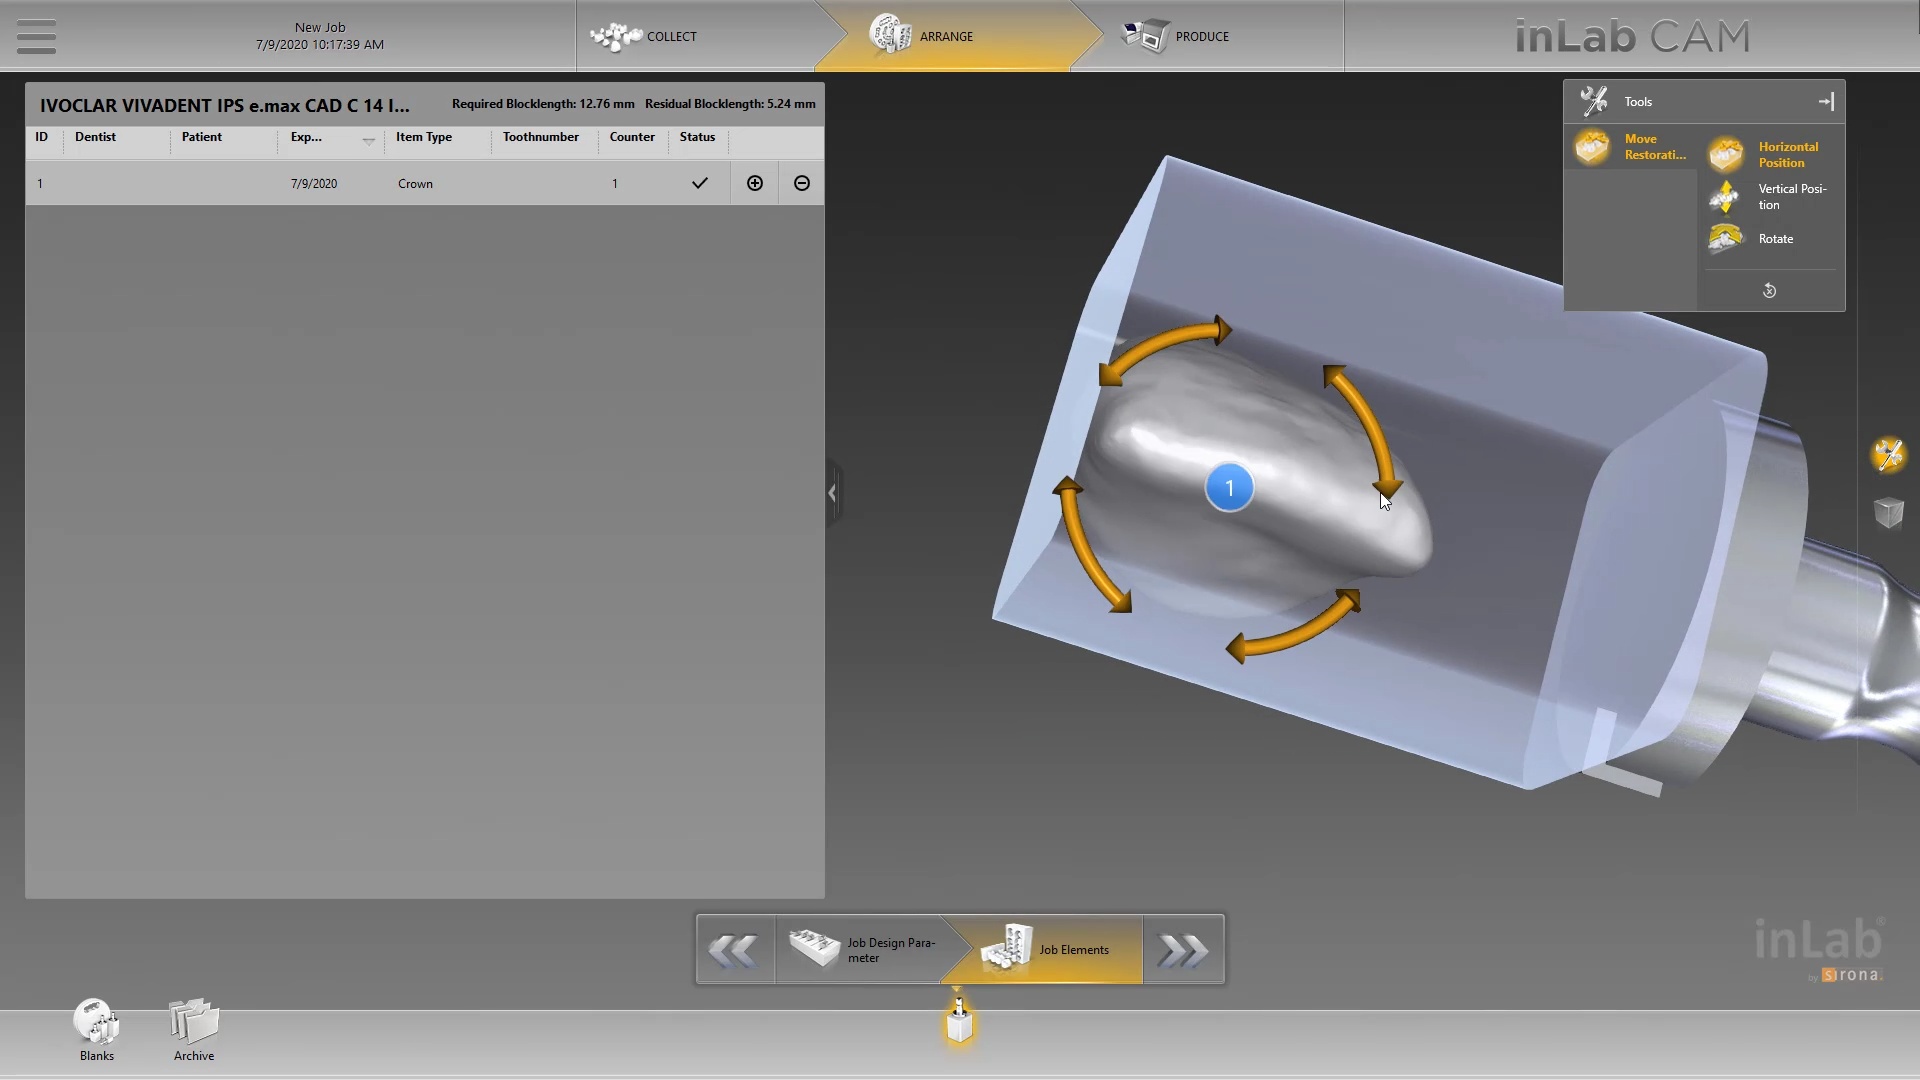
Milling a Bridge with Cerec mcxl (and imes icore coritec and z4 by VHF) from same scan and design
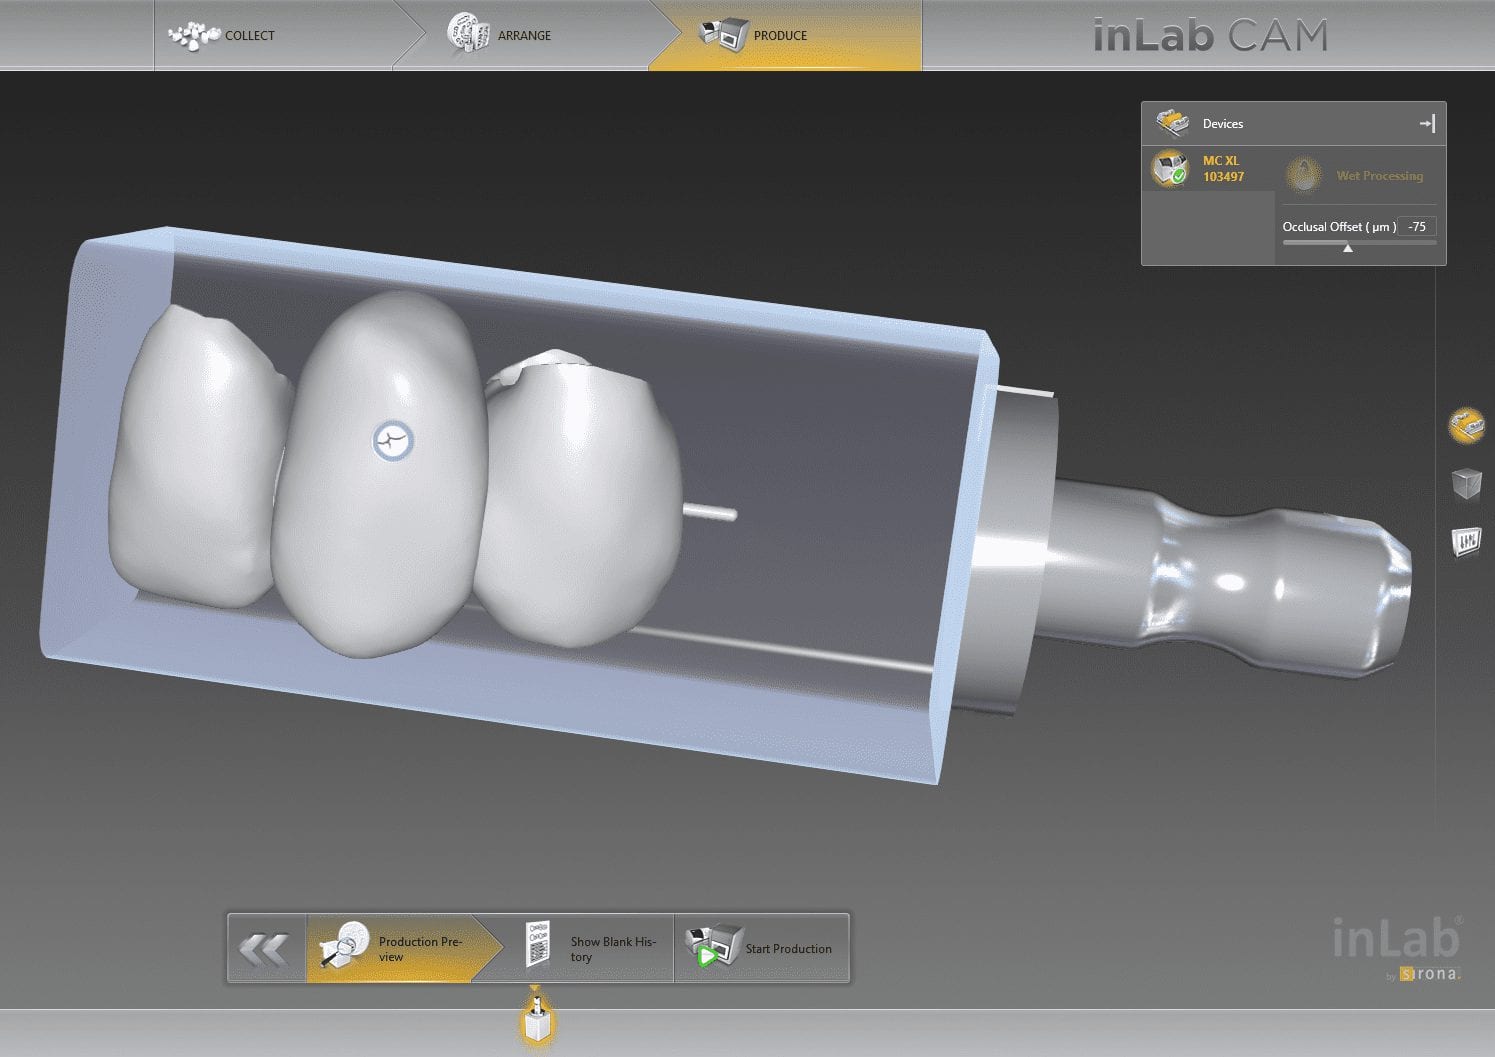
In Digital Dentistry, once you acquire your models accurately, the CAD software doesn’t care where and how you capture them. Once you are done with the design, the cam and the milling machine have no clue what scanner you used.
here we take an intra-oral scan with the medit i500 and design in exocad and send it to 2 different milling machines. One is the CEREC MCXL and the other is the imes icore coritec one.
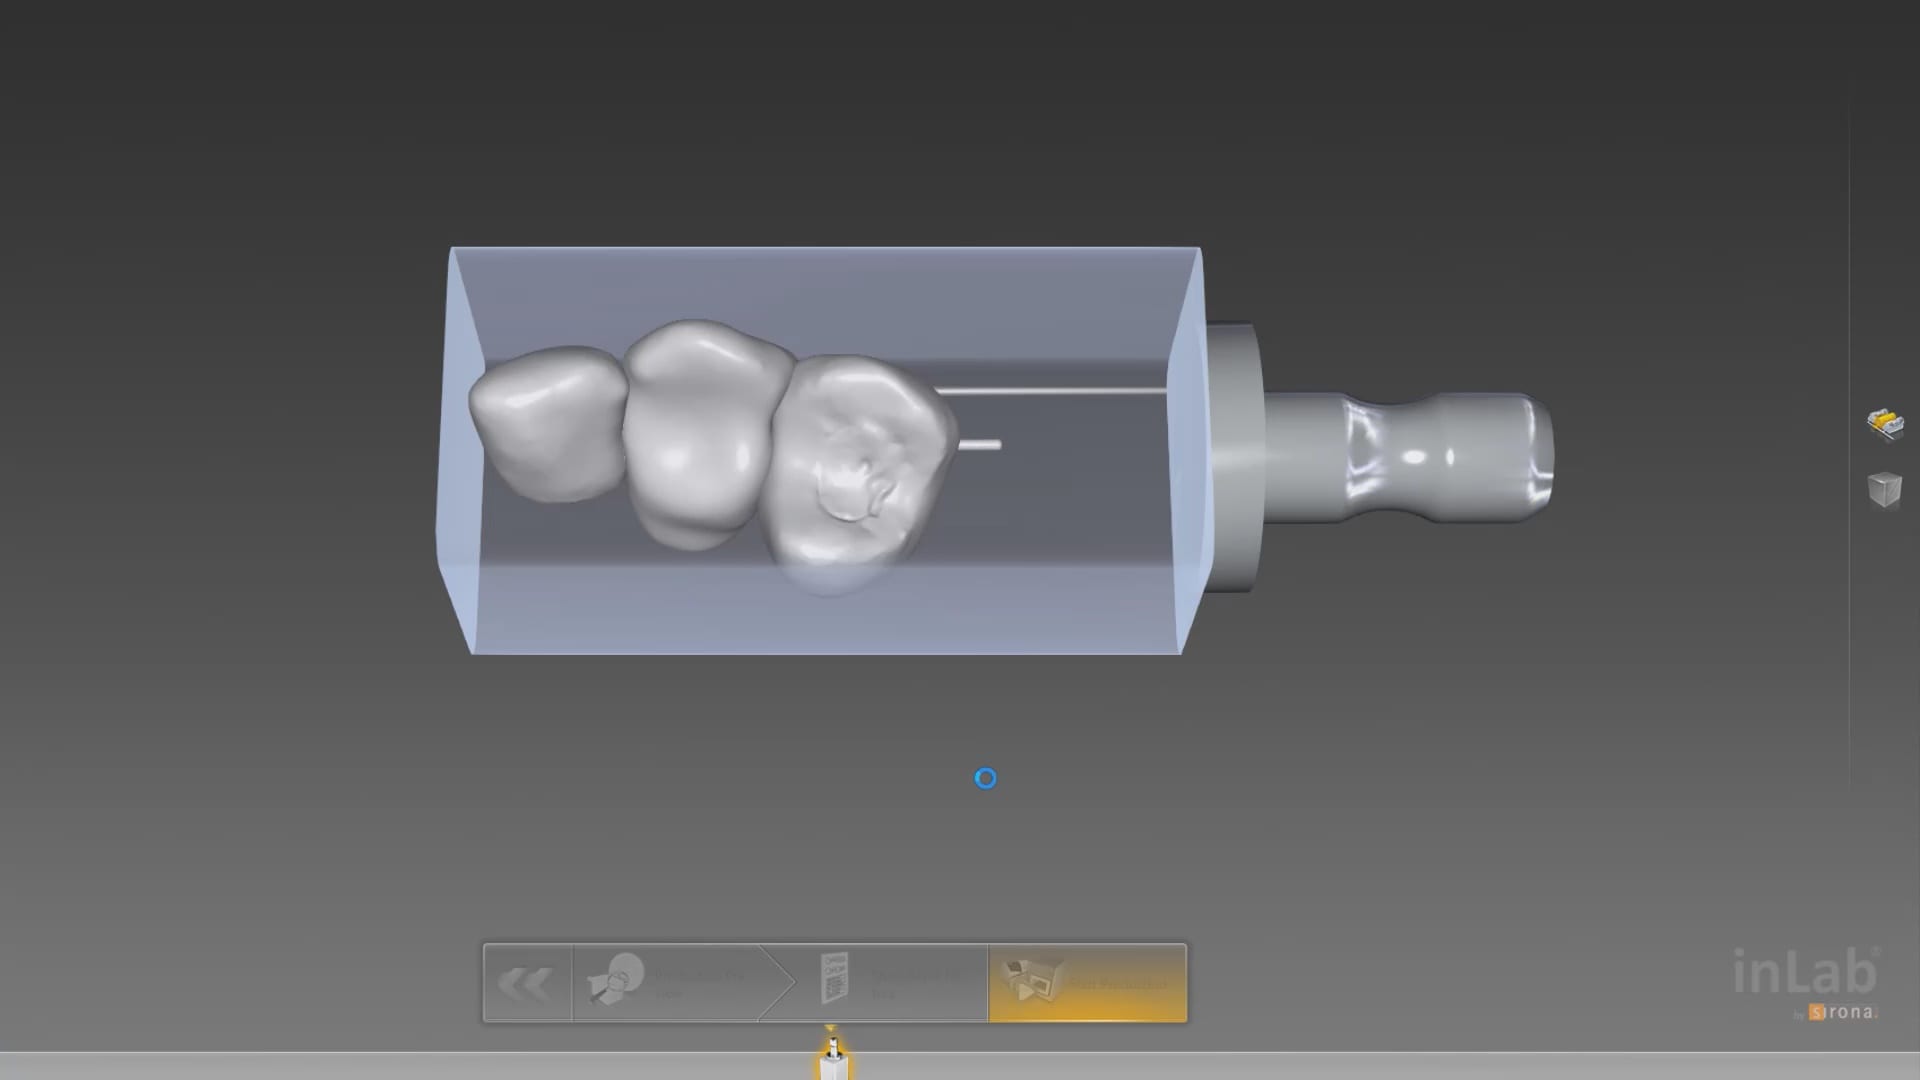
we even milled the bridge with the z4 milling machine by vhf just to show the concept works


Please Note: This page is from dentalcadcamshop.com: 13.03.2020
When it comes to single visit dentistry (procedures in under 90 minutes), CEREC is tough to beat. From the integrated camera, CAD software and mill, CEREC is the most streamlined technology to serve patients in one visit.
Nevertheless, increasingly doctors are expanding their range of indications with CAD/CAM technologies and sometimes we simply want to combine CEREC with other equipment and software manufacturers. But wait, isn’t CEREC a closed system? Yes and no. While nobody would accuse CEREC of being a completely open system, it is possible to export .STL files of CEREC scans which gives us some flexibility to bring CEREC scans into other programs.
But today we are not focusing on exporting CEREC scans, but rather:
1) How can we bring scans from other cameras into CEREC?
Example: I own a 3rd Party Camera and I want to import those scans into CEREC for making crowns, etc.
2) How can we use CEREC to mill CAD objects made from 3rd Party Software?
Example: I own a 3rd Party CAD Software and want to import those into CEREC for milling.
But wait, I thought no 3rd Party files (scans or CAD designs) may be imported into CEREC. How, then, can we unlock the system? The missing piece to the puzzle is the inLab Software! With inLab Software, the CEREC system can be opened up for all kinds of interesting workflows. Here are two workflows CEREC owners constantly ask us about:
1) I own a 3rd Party Camera – How do I mill from my MC XL?

2) I own a 3rd Party CAD Software (e.g. exocad) and I want to mill (e.g. crowns) designed with 3rd Party software and mill them with my MC XL

Please note carefully the Requirements listed above!
– If you want to import a Scan .STL… You will need the inLab SW Interfaces Module, inLab CAD Software (18.0 and above) andthe inLab CAM Software (18.0 and above).
– If you want to import CAD .STL designs for milling… You only need inLab CAM Software (18.0 and above).
– In case you never owned any inLab Software before, or your copy of inLab Software is below 4.X, you will additionally need to order the License Stick (SKU: 6364785) and install the License Stick on the PC or workstation on which you are using the inLab Software (CAD or CAM). Please note this is NOT the same License Stick as you have on your CEREC AC unit!
– In no case can the inLab Software mill on the CEREC MC!
Still have questions? No problem, we are here with answers: Contact us
Good luck everyone and Happy Milling!

Import Scan .STL |
| P
V 18.0 Shop inLab SW Interface Module
|
P
V 19.0
|


Import CAD .STL |
| P
V 18.0
|
P
V 19.0
|
Please Share this:

Shining 3D Aoralscan Sample Meshwork
This case was scanned by two different scanners. Once by the Medit i500 and another time with the Aoralscan. Both the meshes are included so you can compare the two. It was scanned to deliver a case that retrofits a partial denture


Download the case from Shining
Please Share this:

Copy a Partial Denture Onto an Edentulous Arch
As a new user, full arches can be intimidating. In this video, we show how to use the medit i500 to scan the pre-existing partial denture with metal clasps and framework onto the edentulous arch. We feature how to scan the edentulous arch in segments to make it easier to manage and to properly relate the preop to the “prep arch”
Please Share this:

Where not to start with imaging with an intra-oral scanner
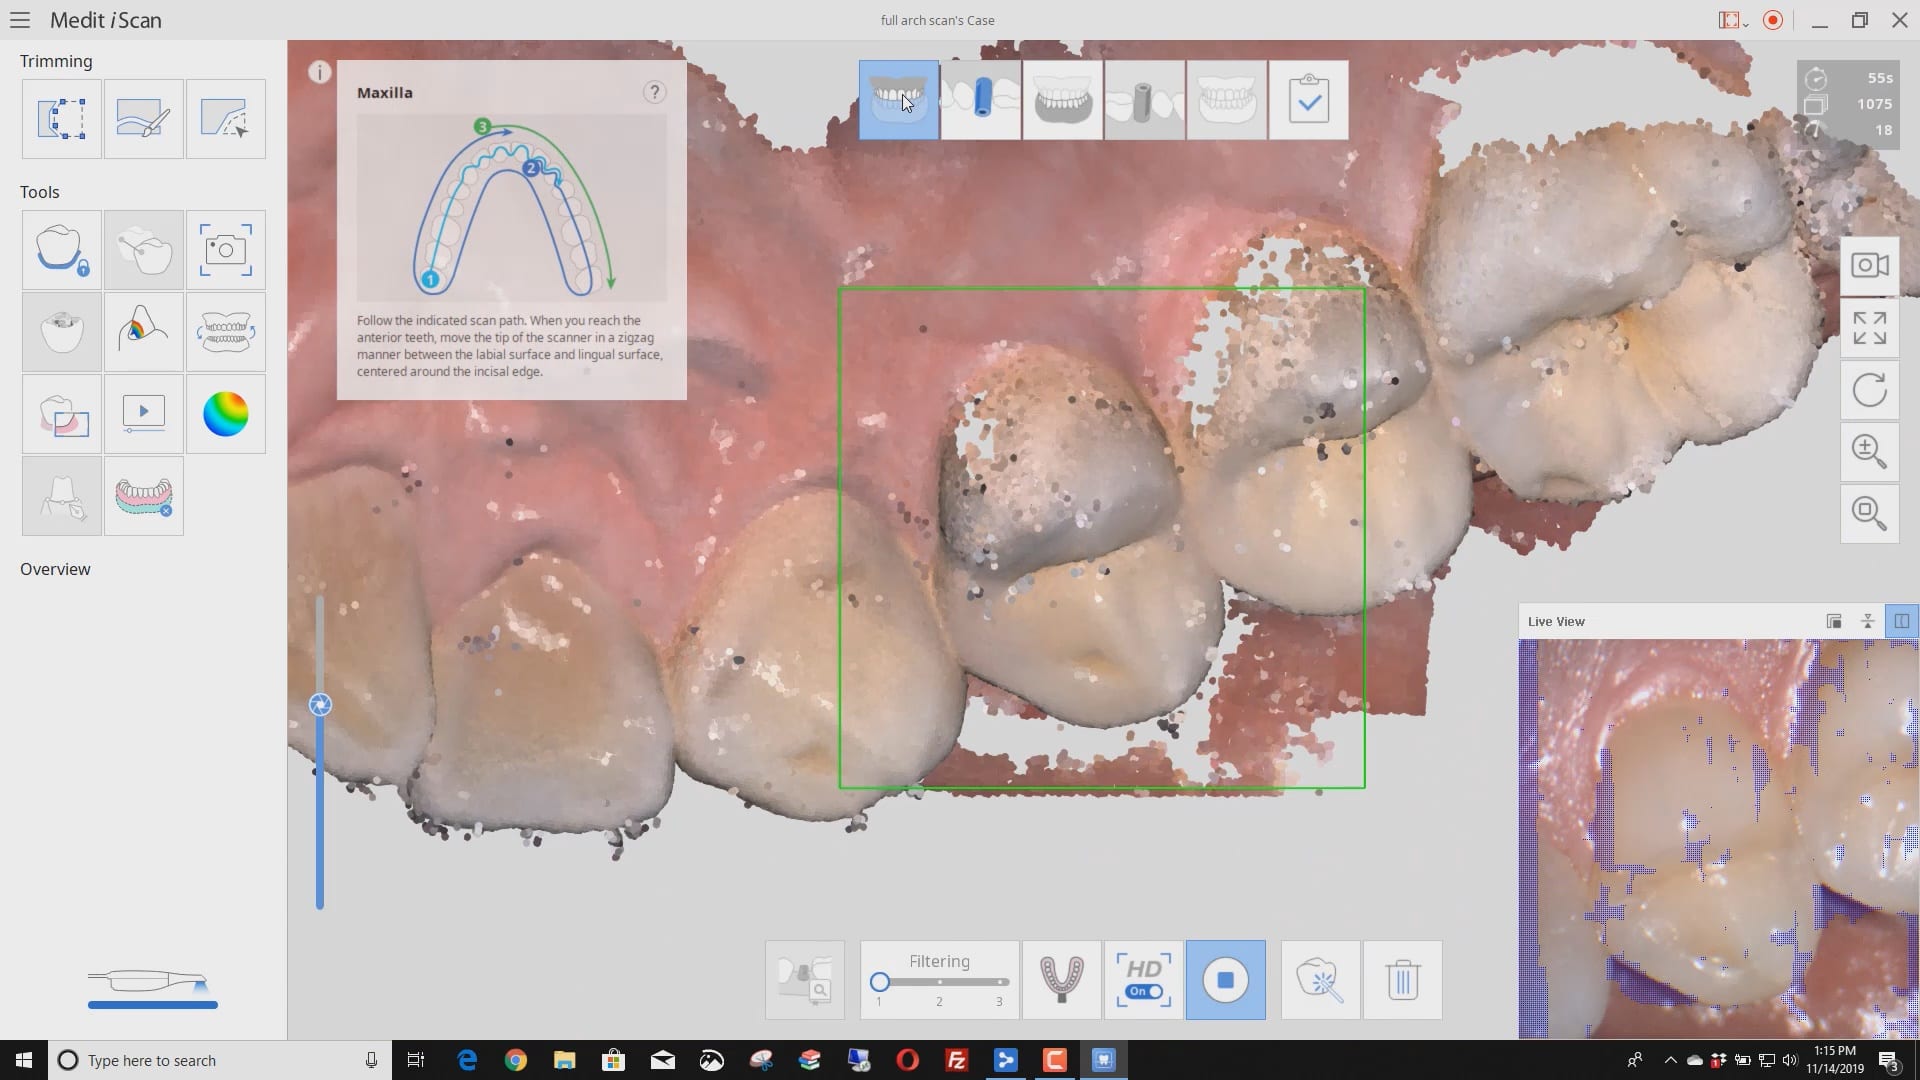
Most manufacturers recommend that you start your imaging at the second molar area, which is the least practical area to start with. The tongue and the lip and saliva are a quick distraction as the scanner does not know what you are trying to image. The incisal edges of lower anterior are also a tough place to start as the incisal translucency lets the light transmit through the enamel instead of reflecting to the cameras.
A good place to start is the second premolar first molar area where you can use the tip of the scanner to displace the tongue. Reducing the focal length to 12 mm’s allows the user to hide hard and soft tissue that can impede the rate of image capture. Watch the deliberate movement of the camera that helps the user manage the area to be captured with relative ease
Please Share this:

Mounting Upper and Lower Jaws for Obstructive Sleep Apnea Devices- Panthera
When scanning for an oral appliance with an intra-oral scanner, you can capture the upper jaw and the lower jaw and the Verical Dimension in protrusive, but if you don’t transfer that information to the lab, there is a good chance they will not properly mount them
There are a lot of software available to you where you can mount and pin the models together so when they are printed, they can use male and female components to align them properly
This video shows how to capture the upper jaw. It is the easier arch to scan as there is no tongue, saliva or a dark oro-pharynx to manage
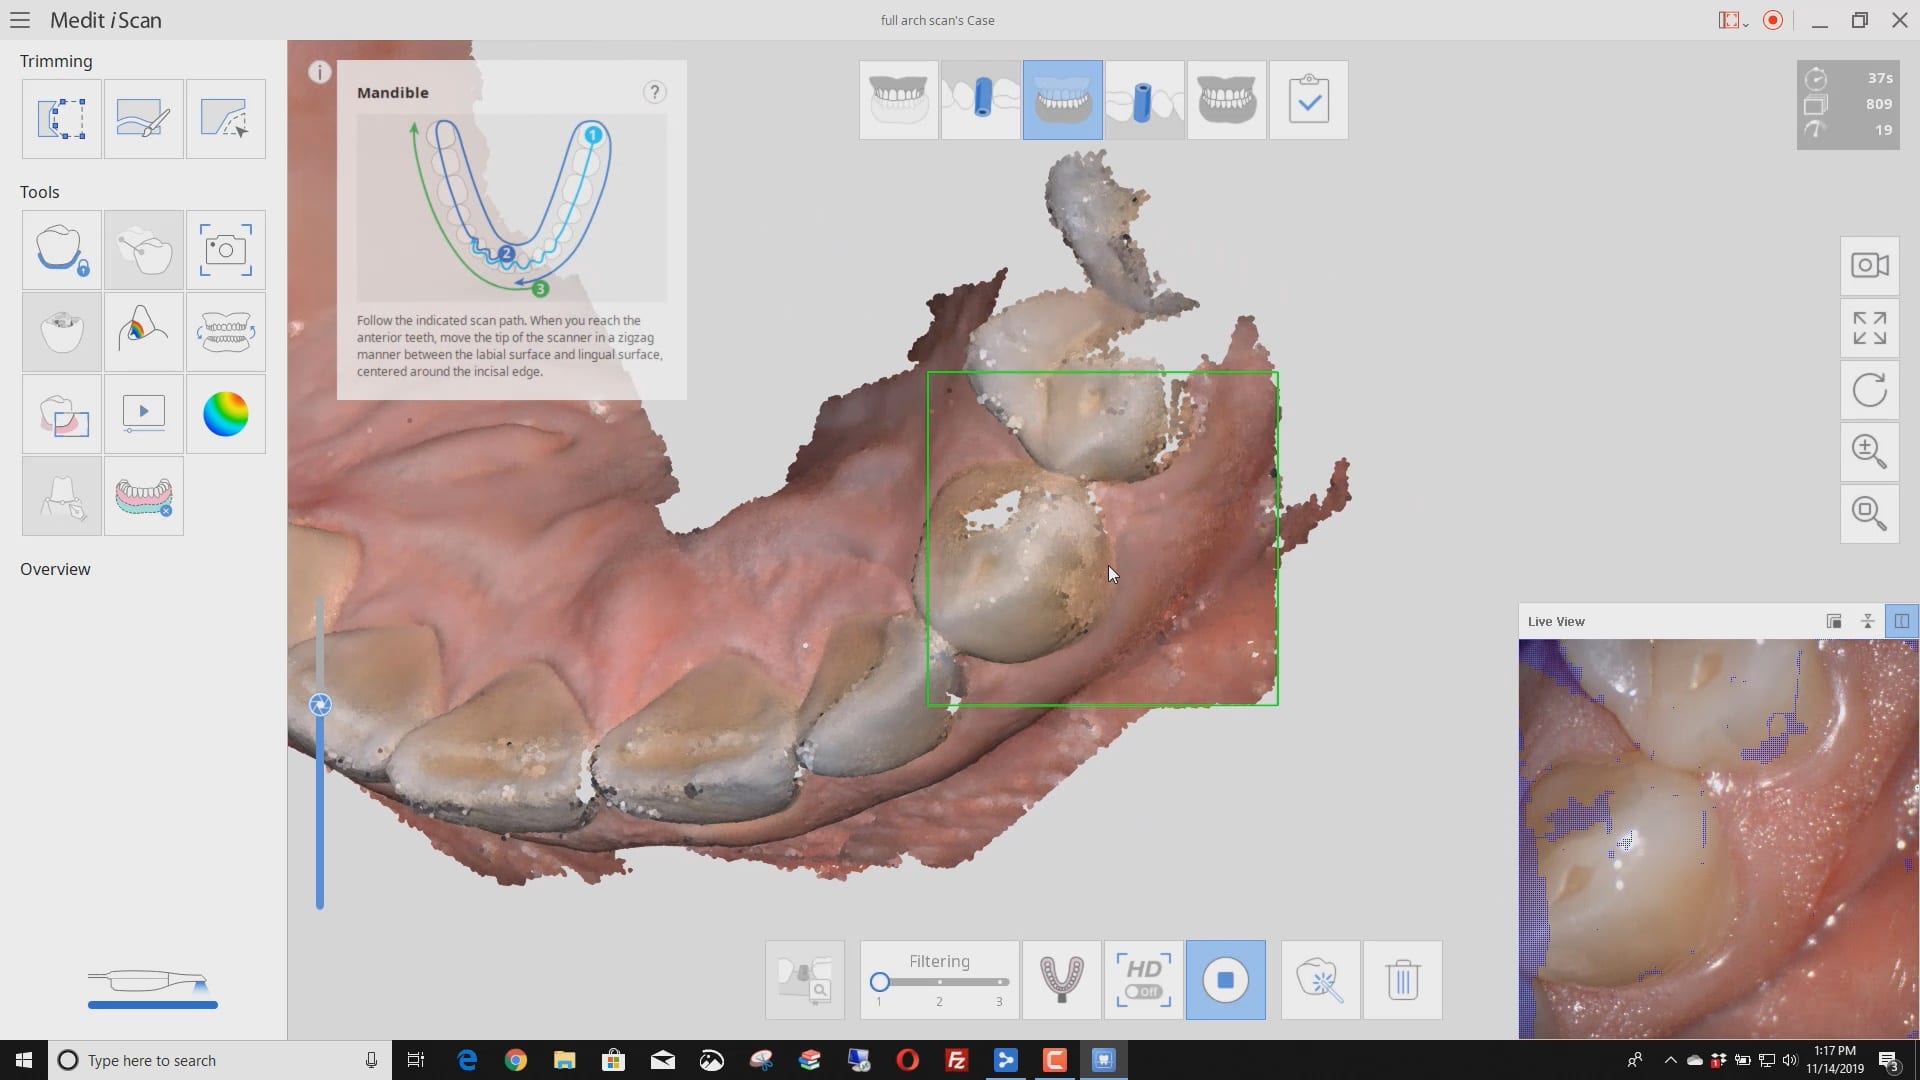
Every type of user should watch this carefully and appreciate where we recommend you start scanning the lower arch. In our courses we go in to great detail on why you should not start in the anterior or the second molars. you instantly set yourself up for trouble. here’s the easiest place to start and to build and accurate model with
Also, as new user, if you are working alone, you can use the optragate to retract the lip and the tip of the camera to displace the tongue. We recommend that you use a focal setting of 12 mm’s. This may slow advanced users down, but for new users, it helps hide distractions for the camera and software and speed you along. If you look in the bottom right corner, anything in purple is what the camera ignores. There are certain elements you want the camera not to see so it doesn’t slow you down
quick little pointer for a new user that shows how to protect areas so that you don’t introduce errors like the tongue getting in your way. the blue models areas that are protected so any future data that lands on it is automatically deleted

Capturing the bite in open and protrusive position
With every 3D software, there are times where the data sets are too large for the software to recognize and merge models to. Once in a while, you may have to help in manual mode. In this case, you can see how the open bite prohibited the models from being articulated properly and we had to use the manual mode to pin the left and right bites
Please Share this:

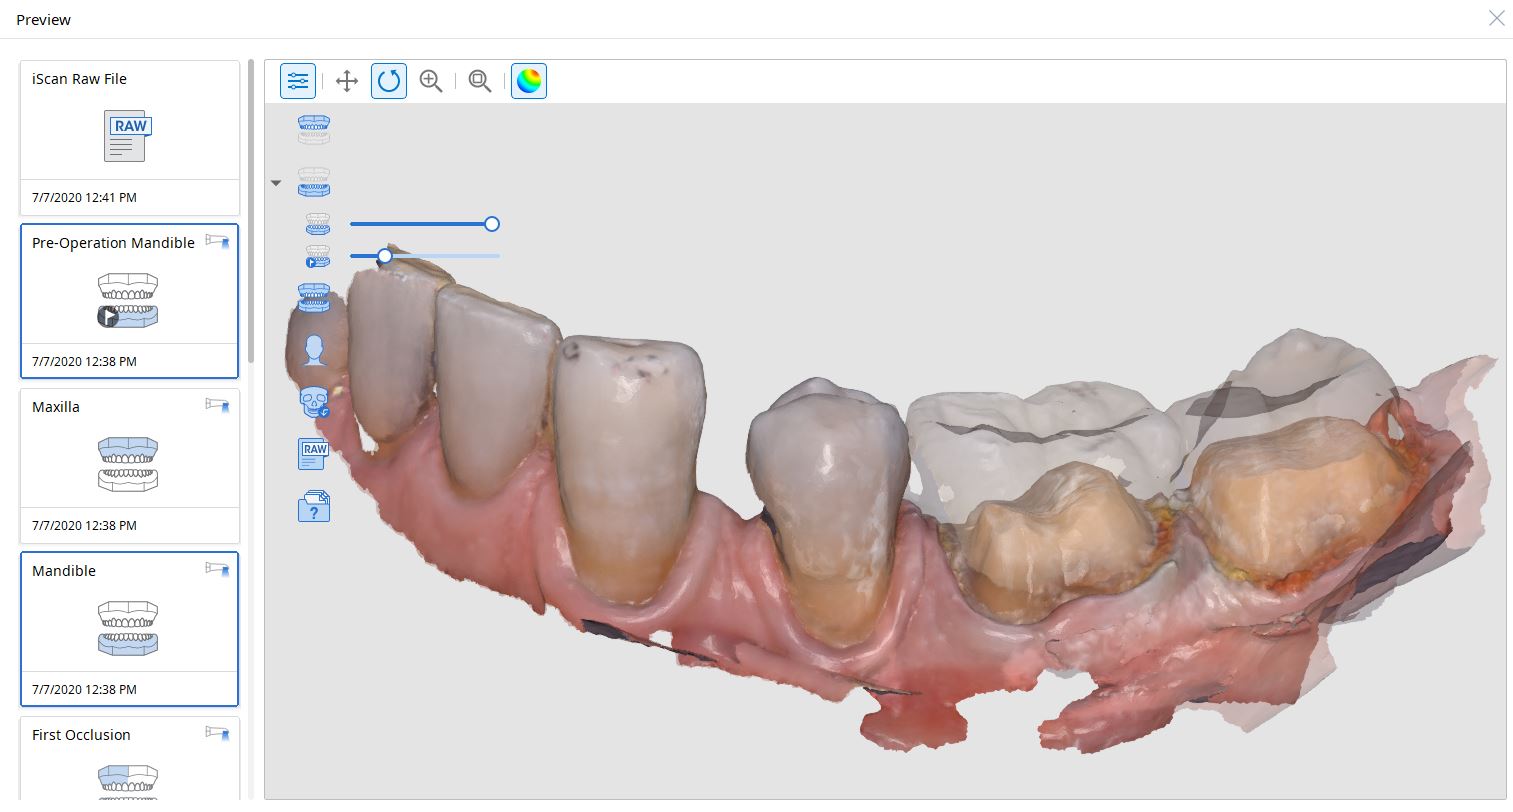
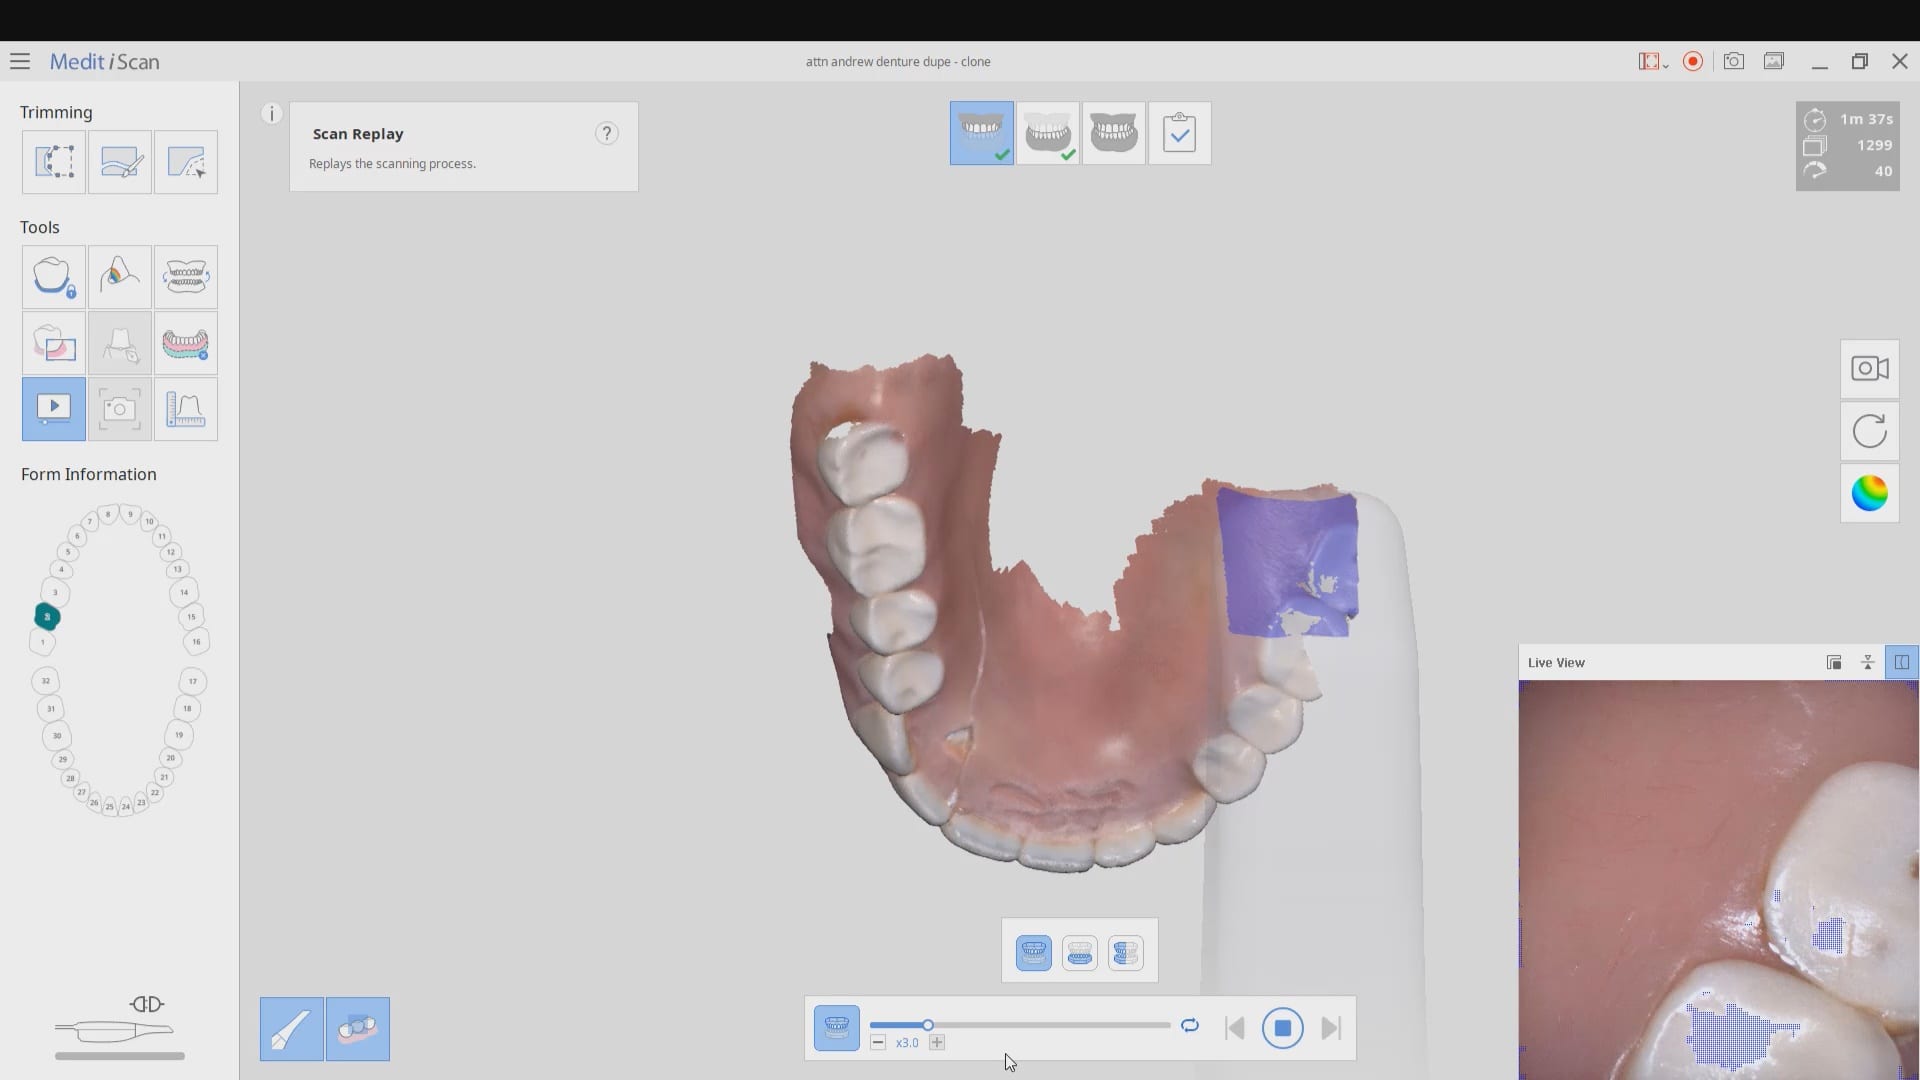
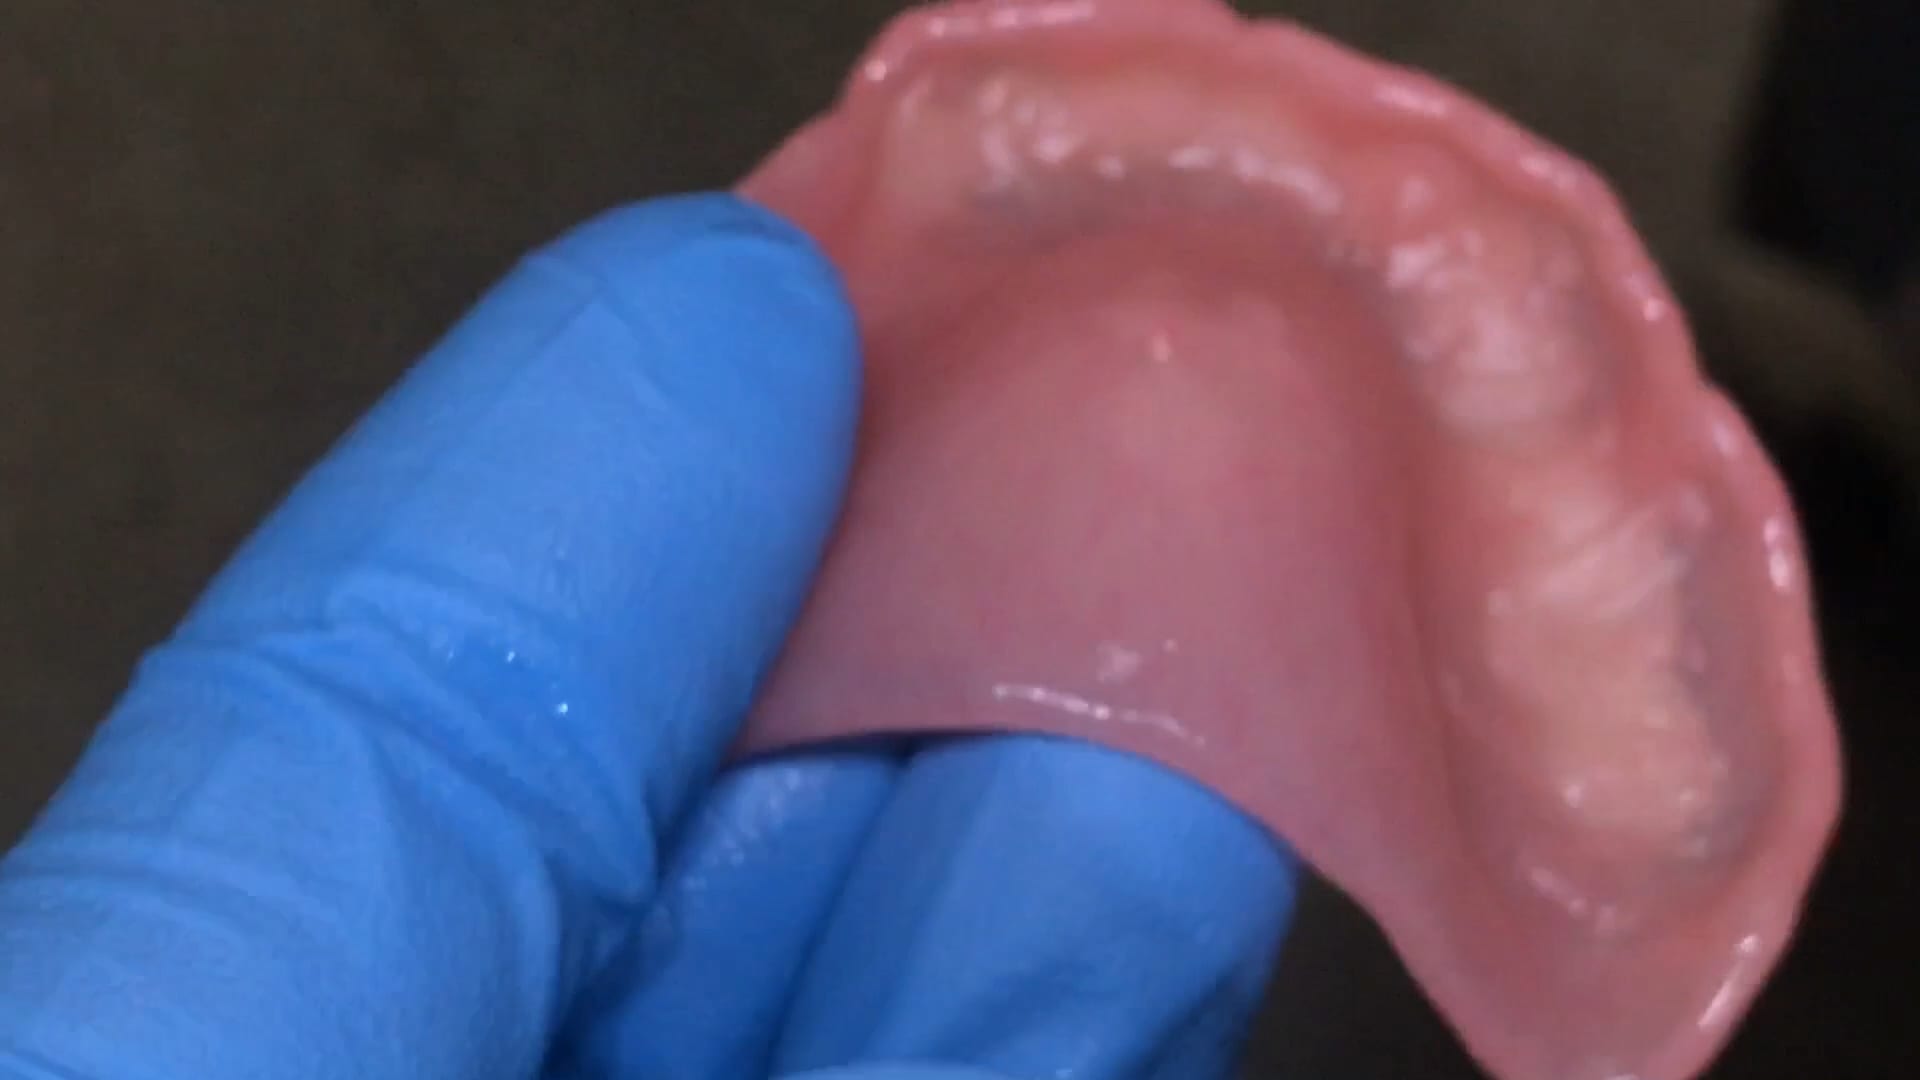
Digital Denture Duplication
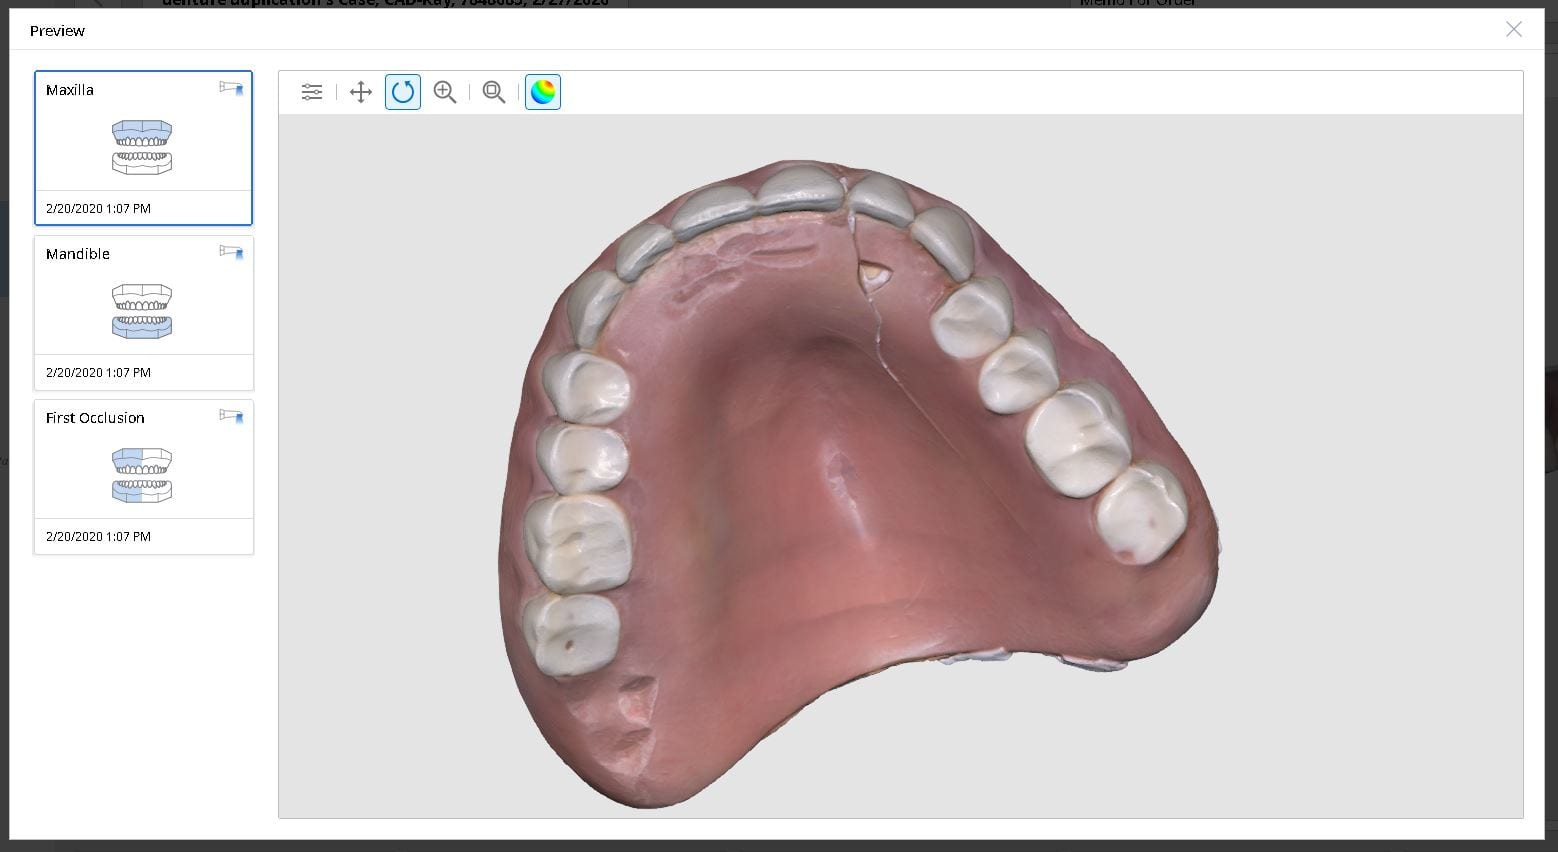
Medit i500 was used to scan and duplicated a fractured denture. It was originally scanned in the patient’s mouth to capture the opposing and the bite and then submitted to the lab for fabrication
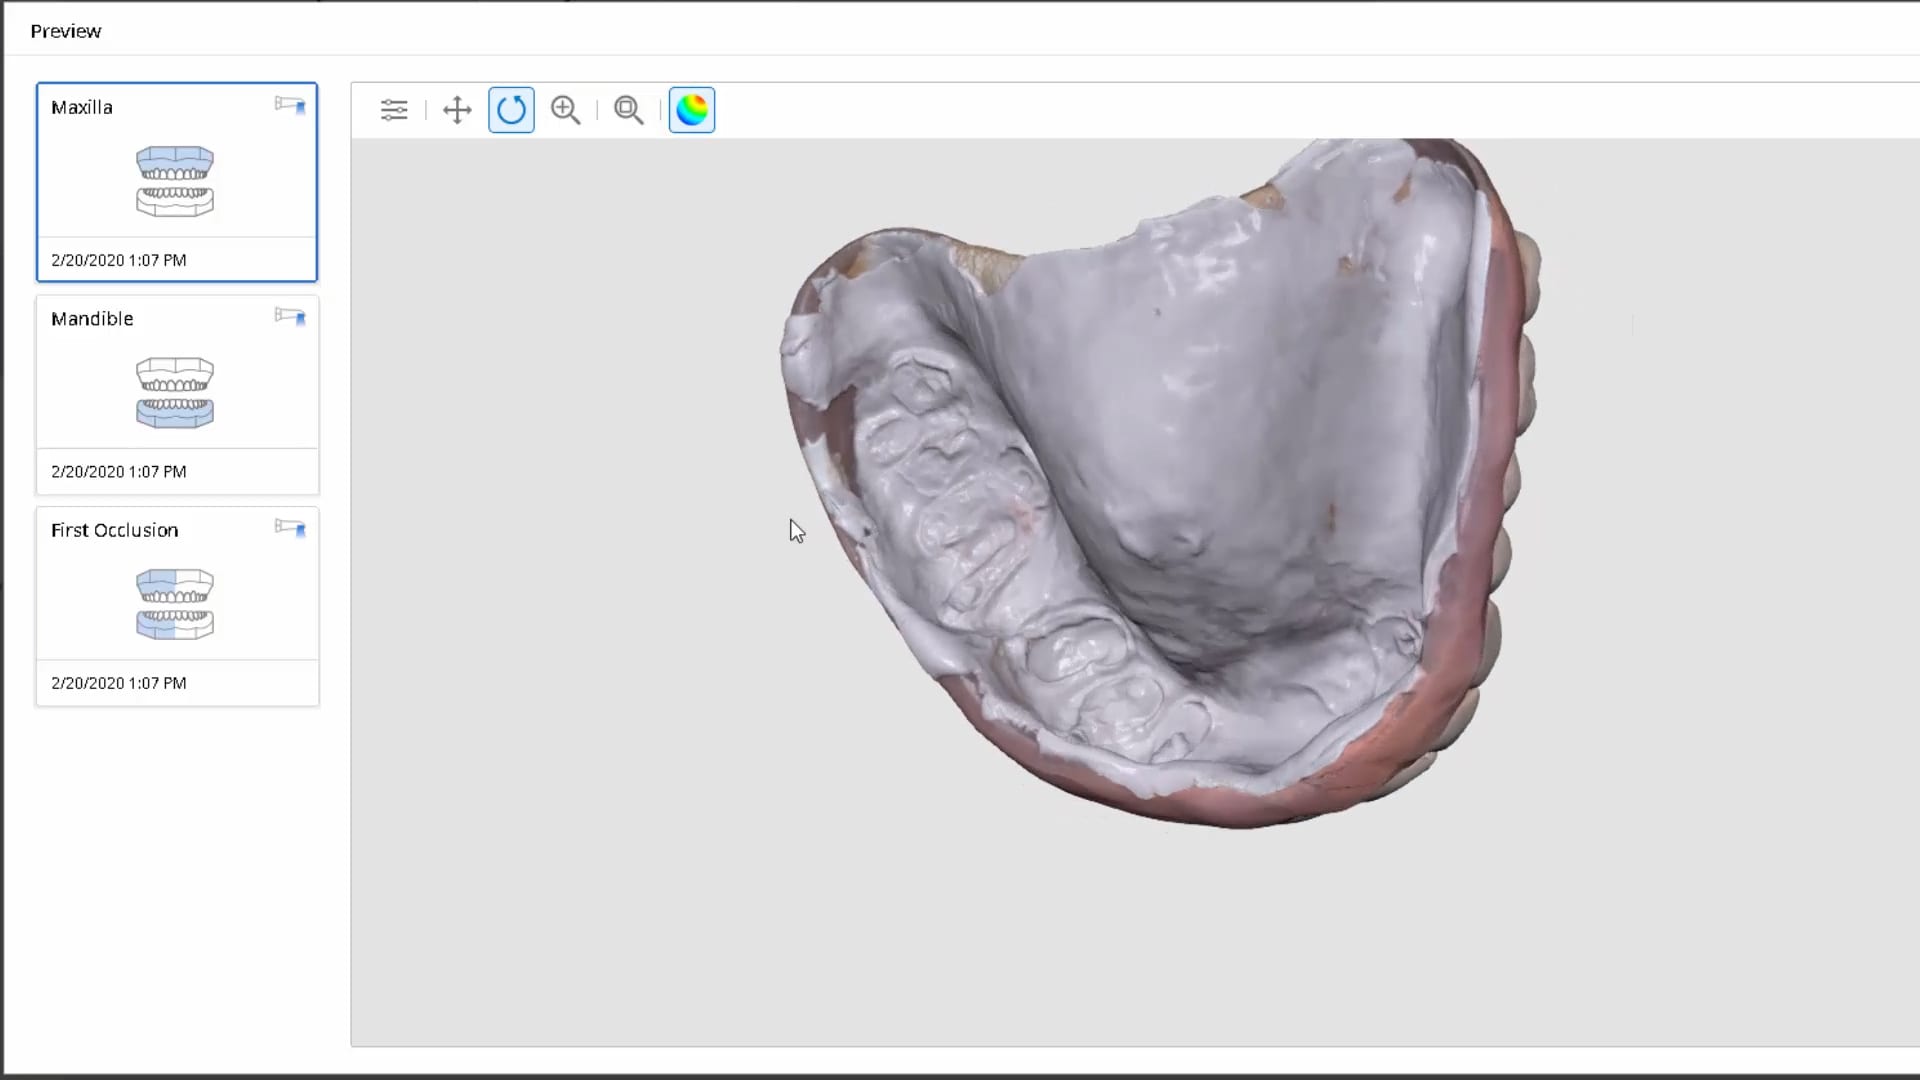
In this video we review with the instant replay feature of the medit i500 on how to scan a denture and not introduce double images or errors in the model. We first scan the occlusale surfaces of the denture intra-orally (this does not really matter as the software doesn’t know any differently), we then image the opposing, and then bite. We then remove the relined upper broken denture and continue the imaging to capture the intaglio
Please Share this:

Same Visit Workflow With Meditlink

Please Share this:

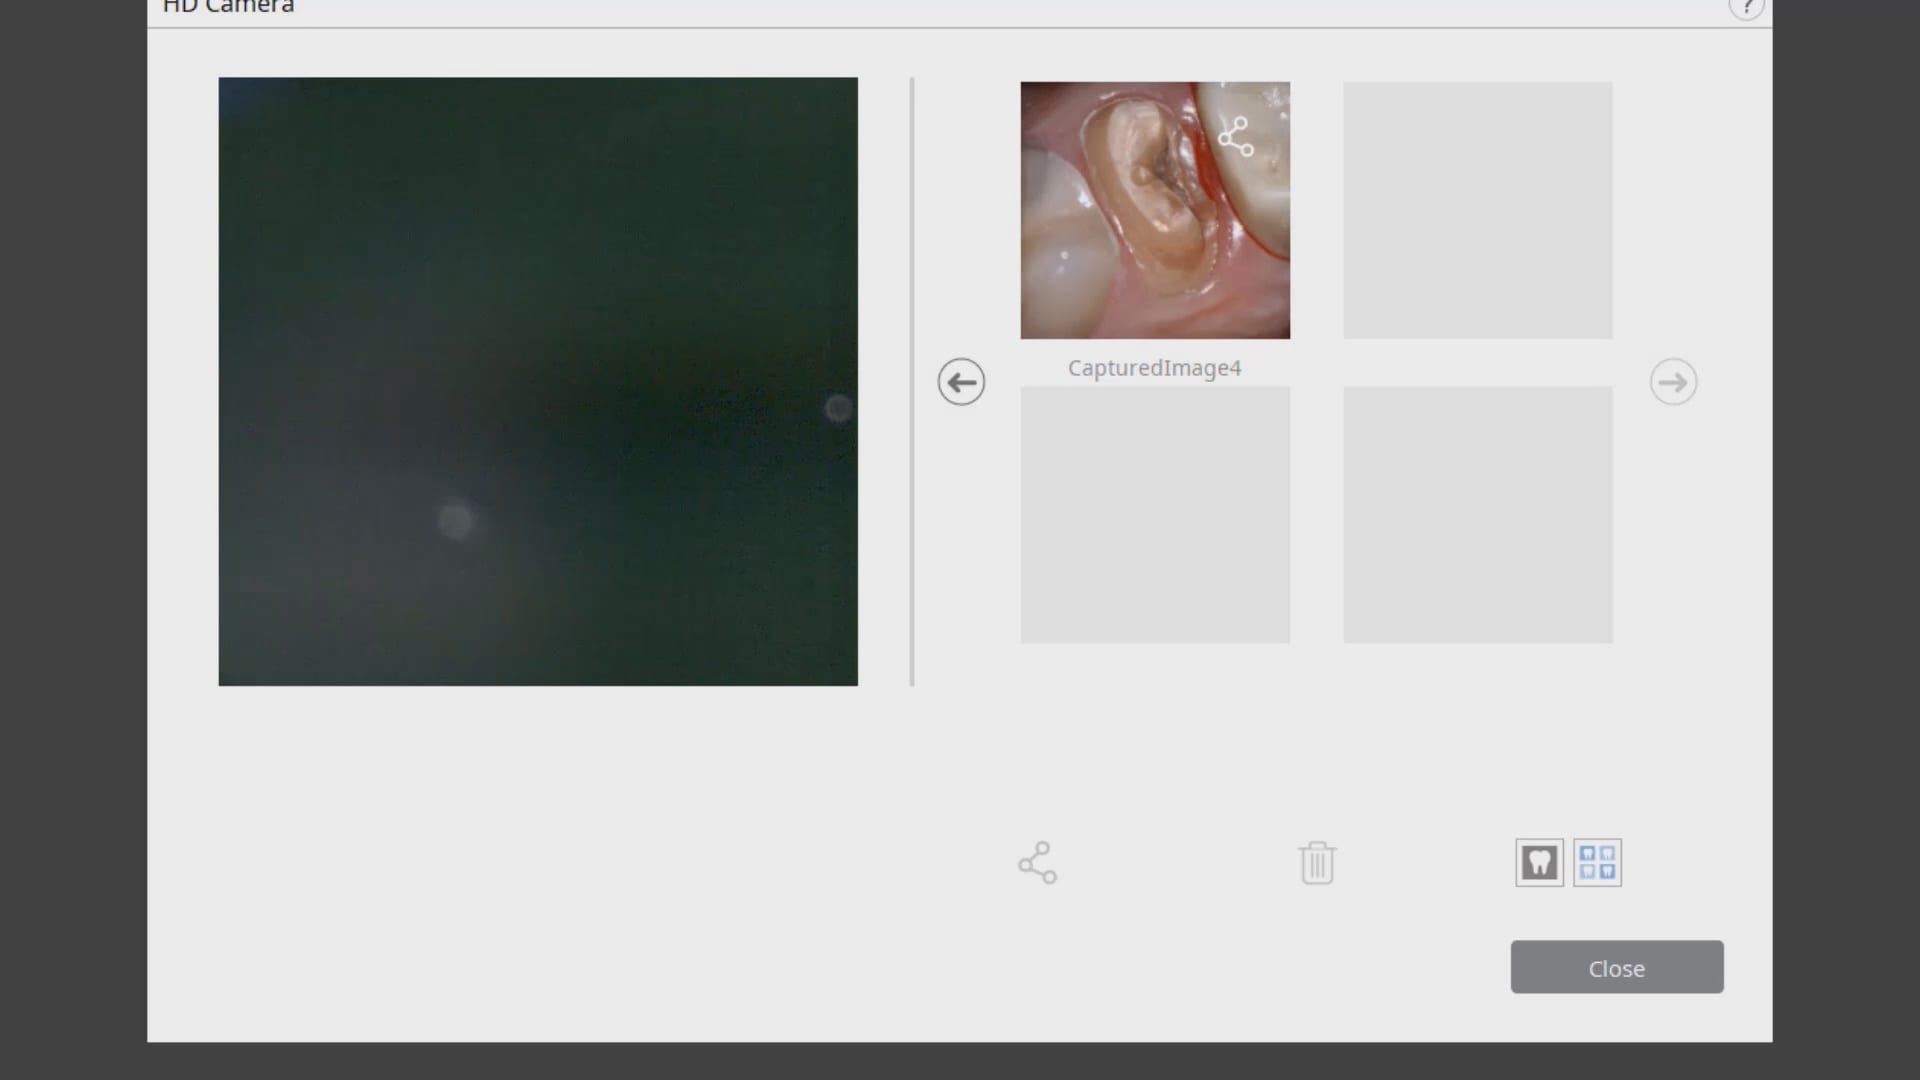
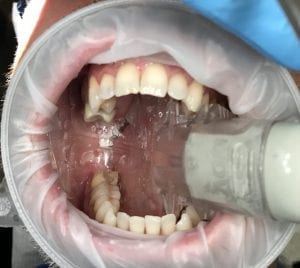
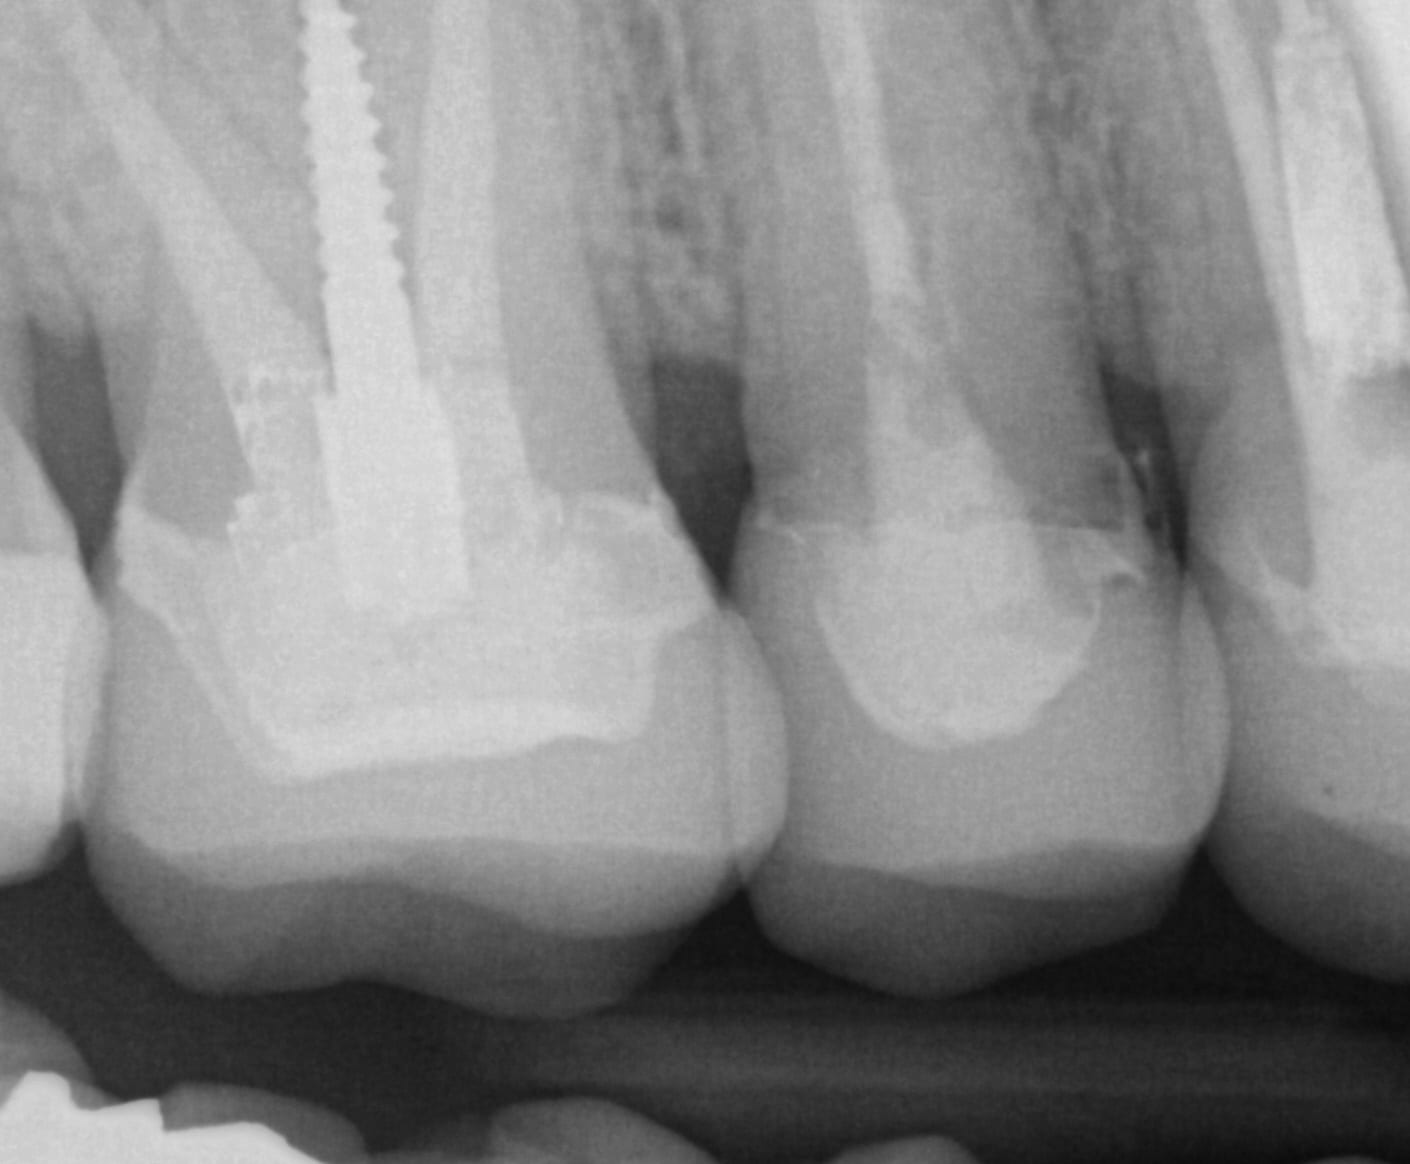
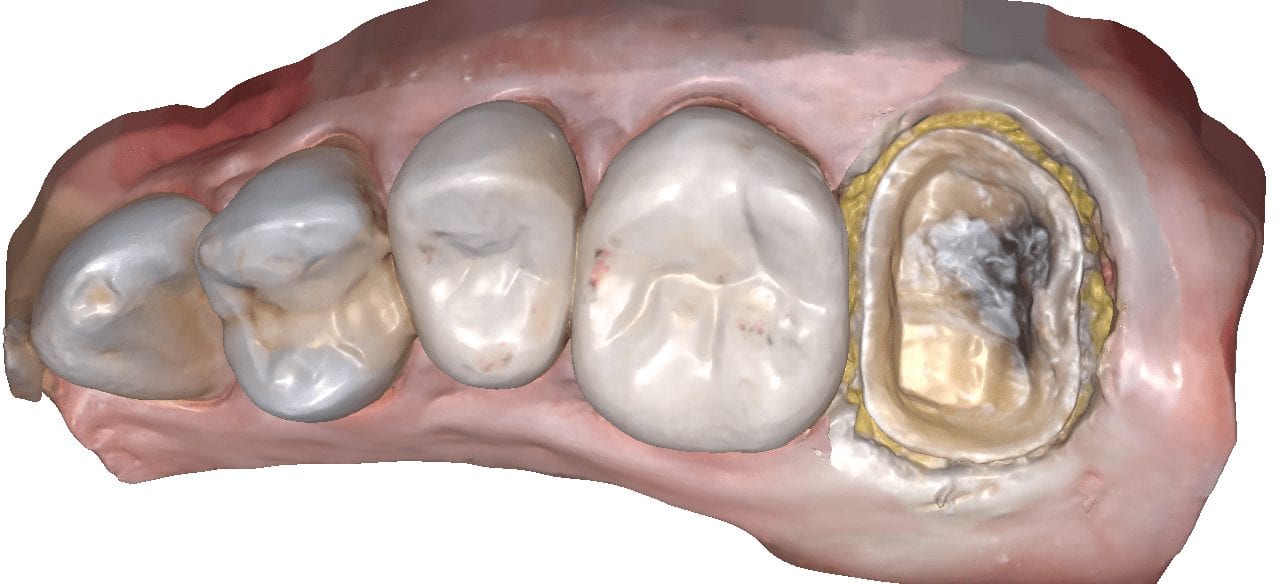
Replacing a PFM With Reccurent Decay with Medit i500 Version 2.2
Please Share this:

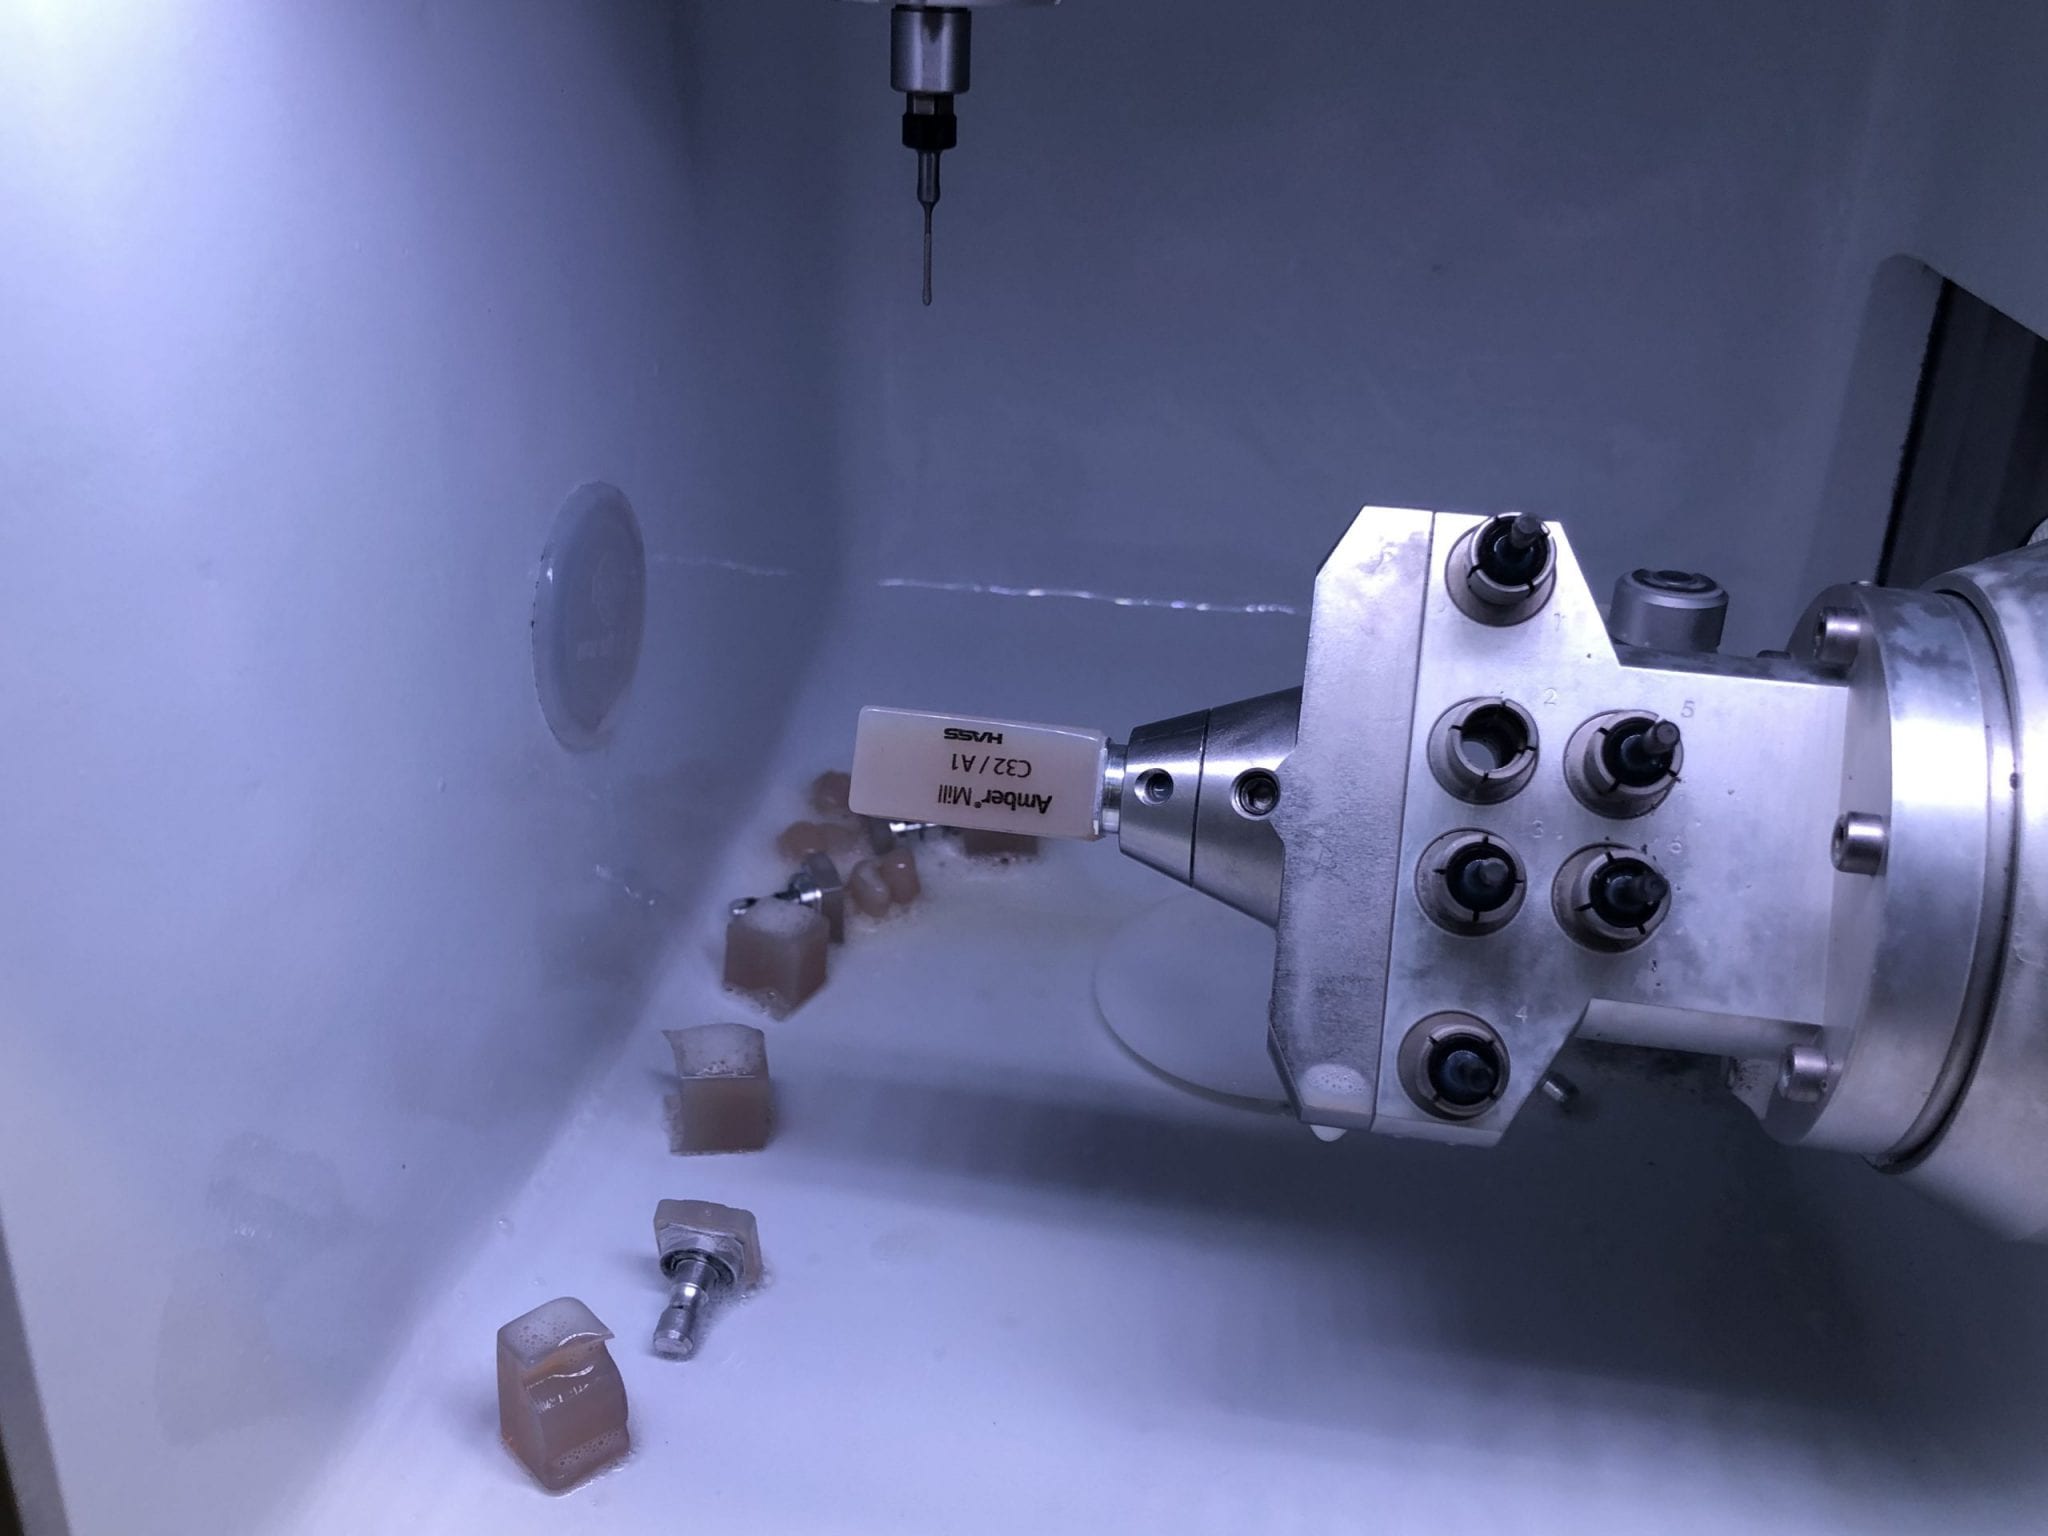
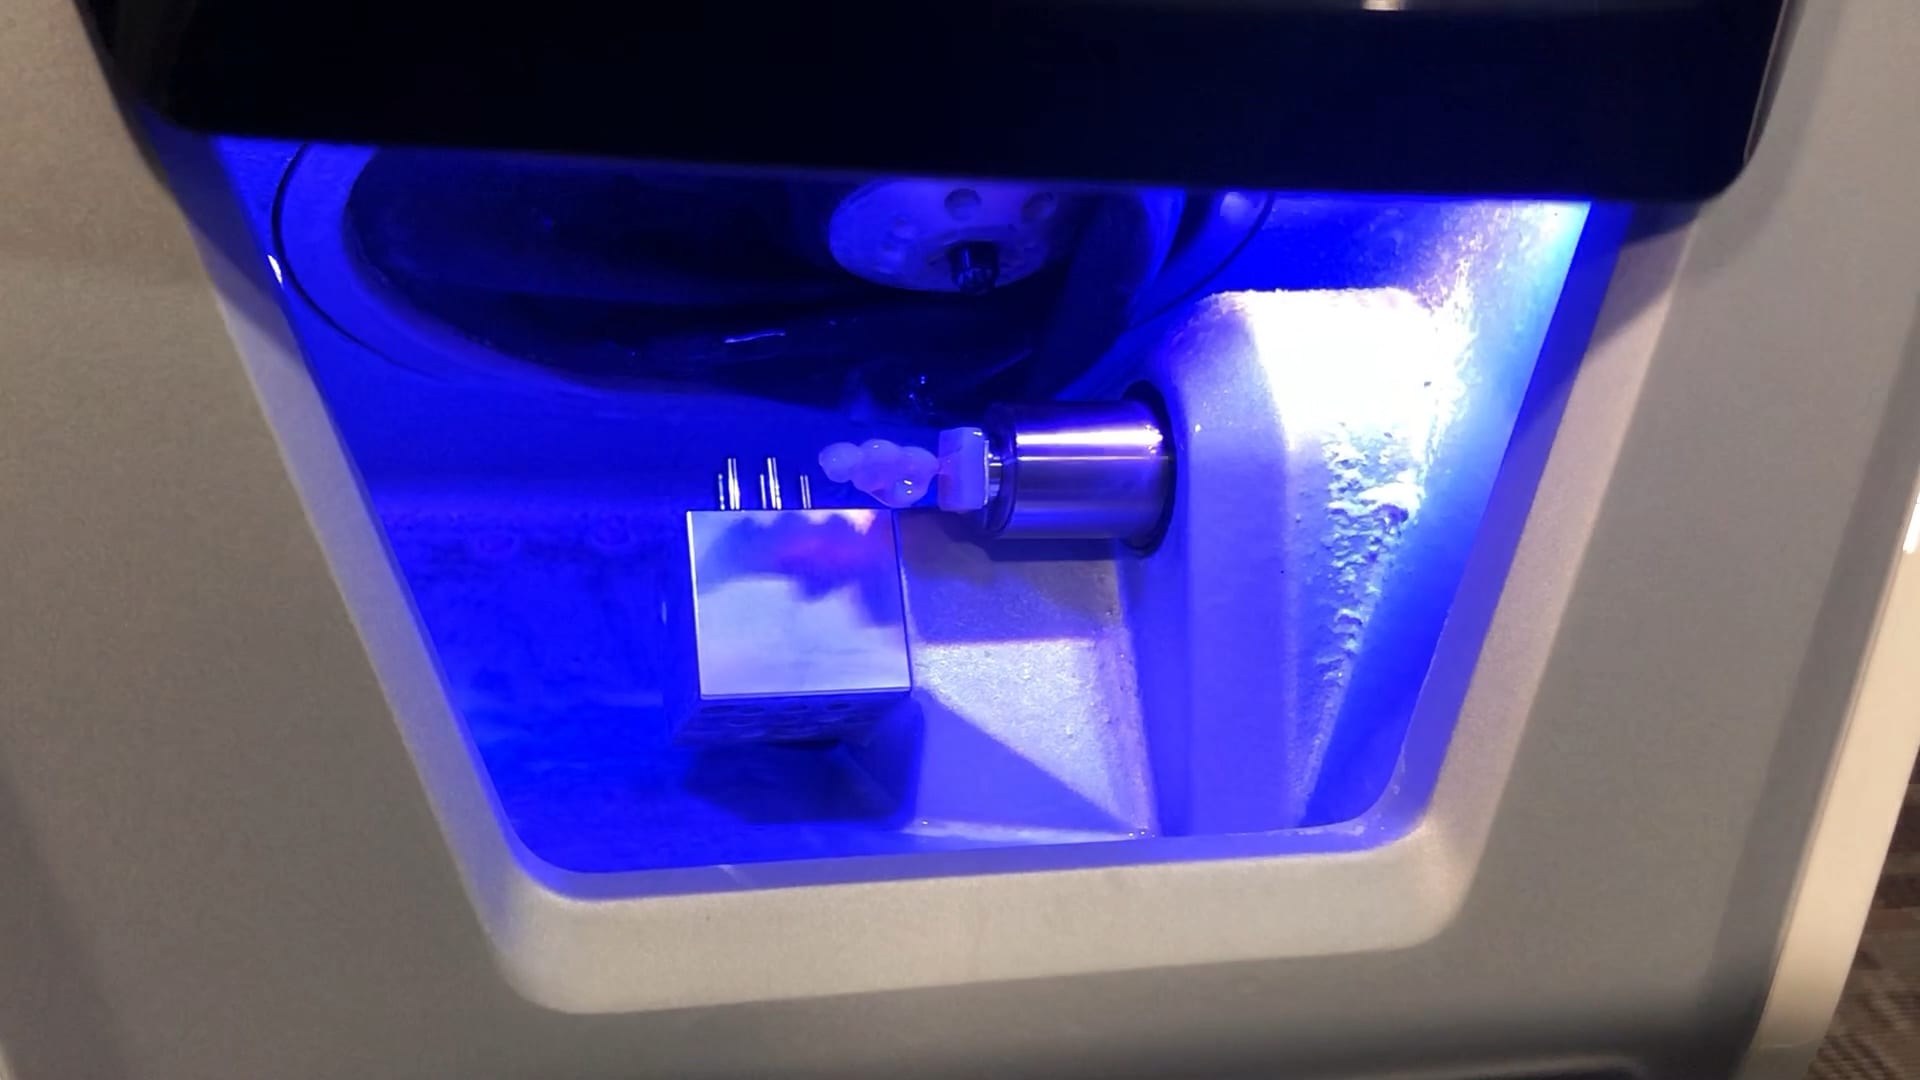
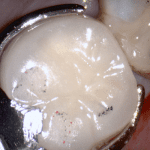
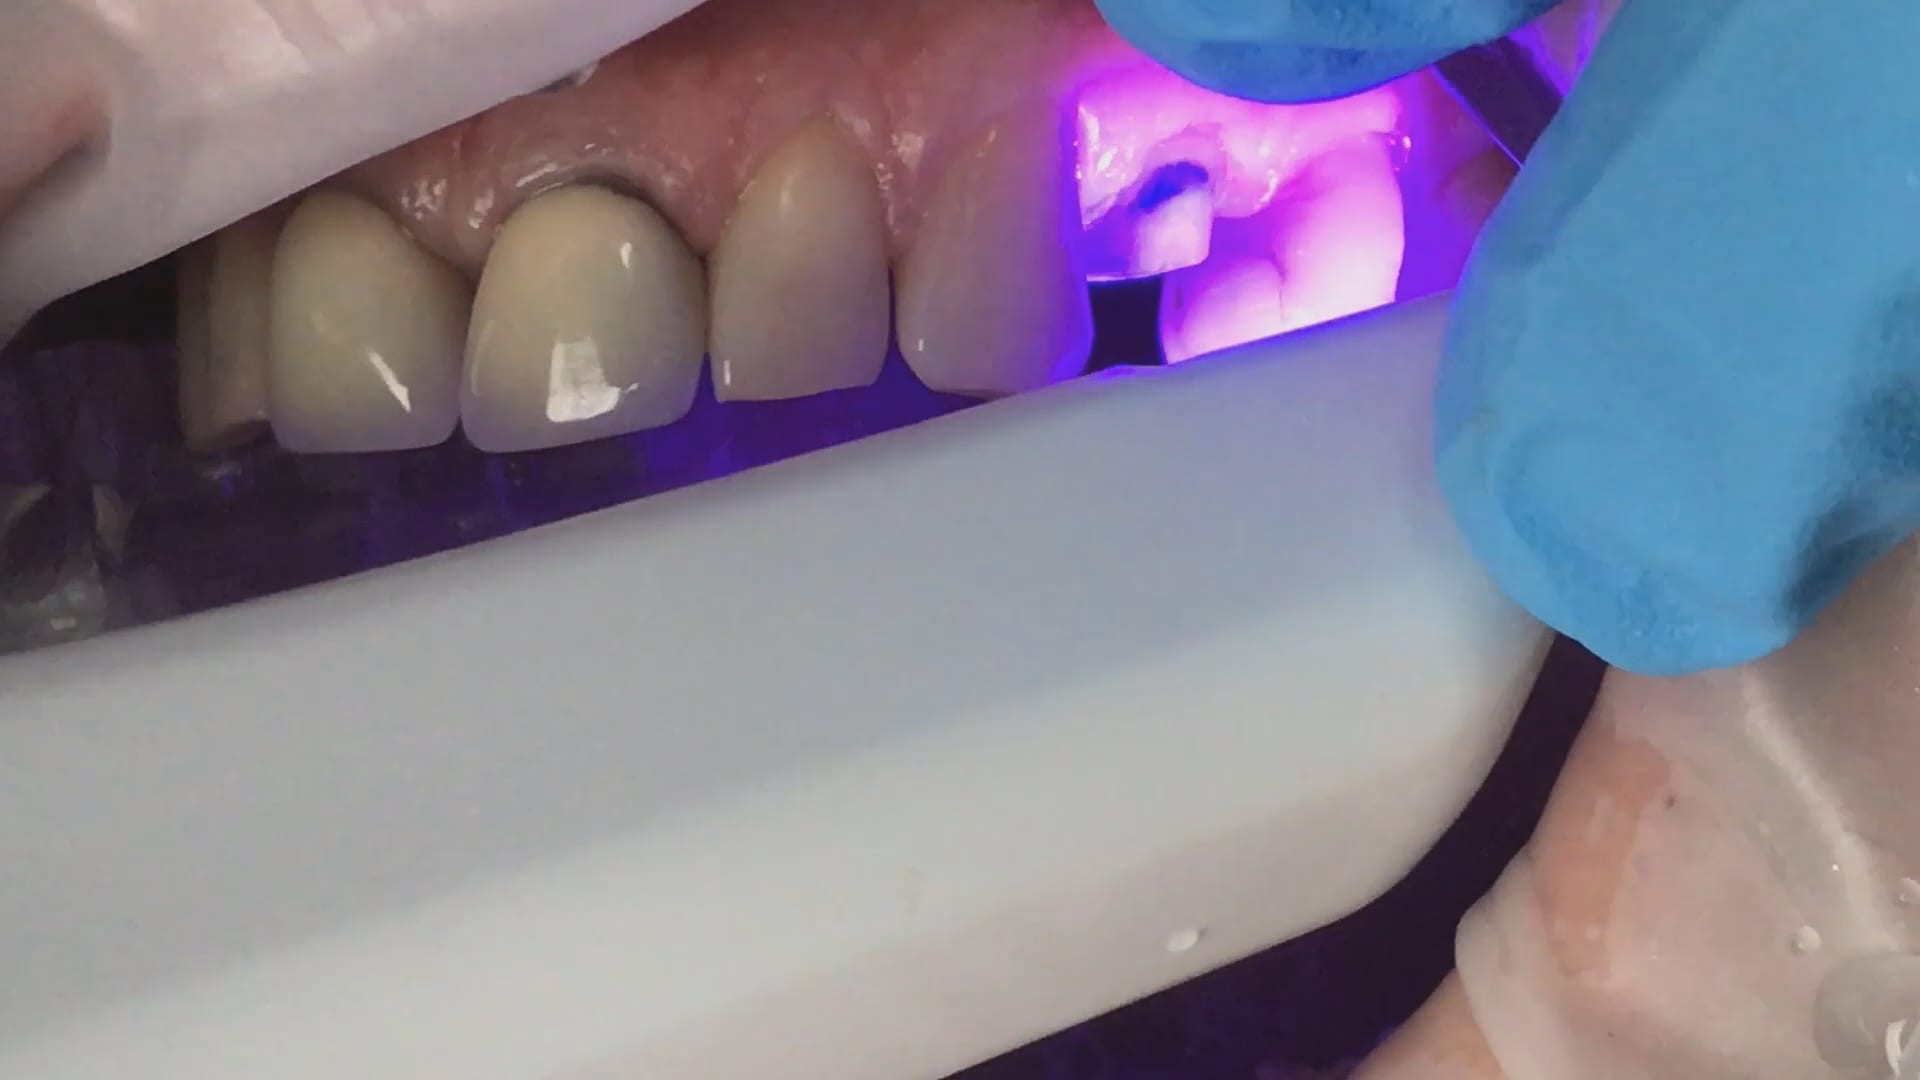
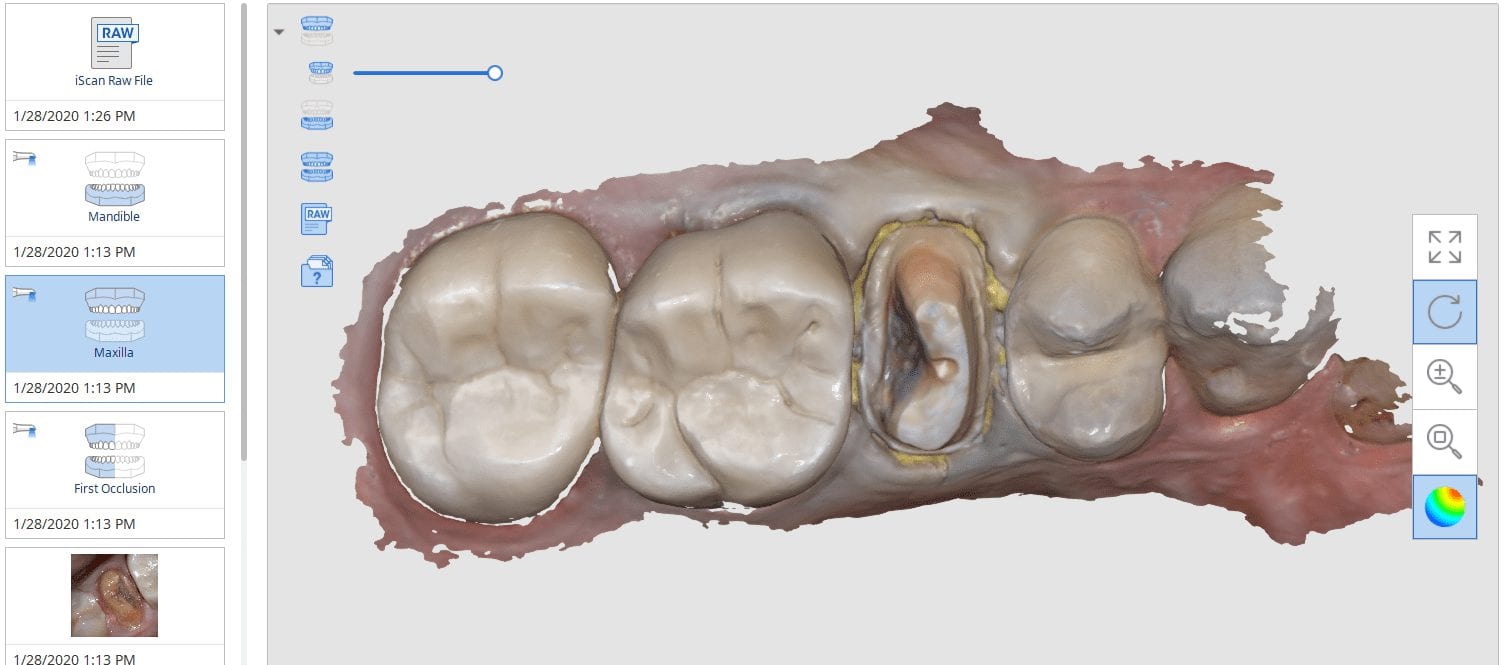
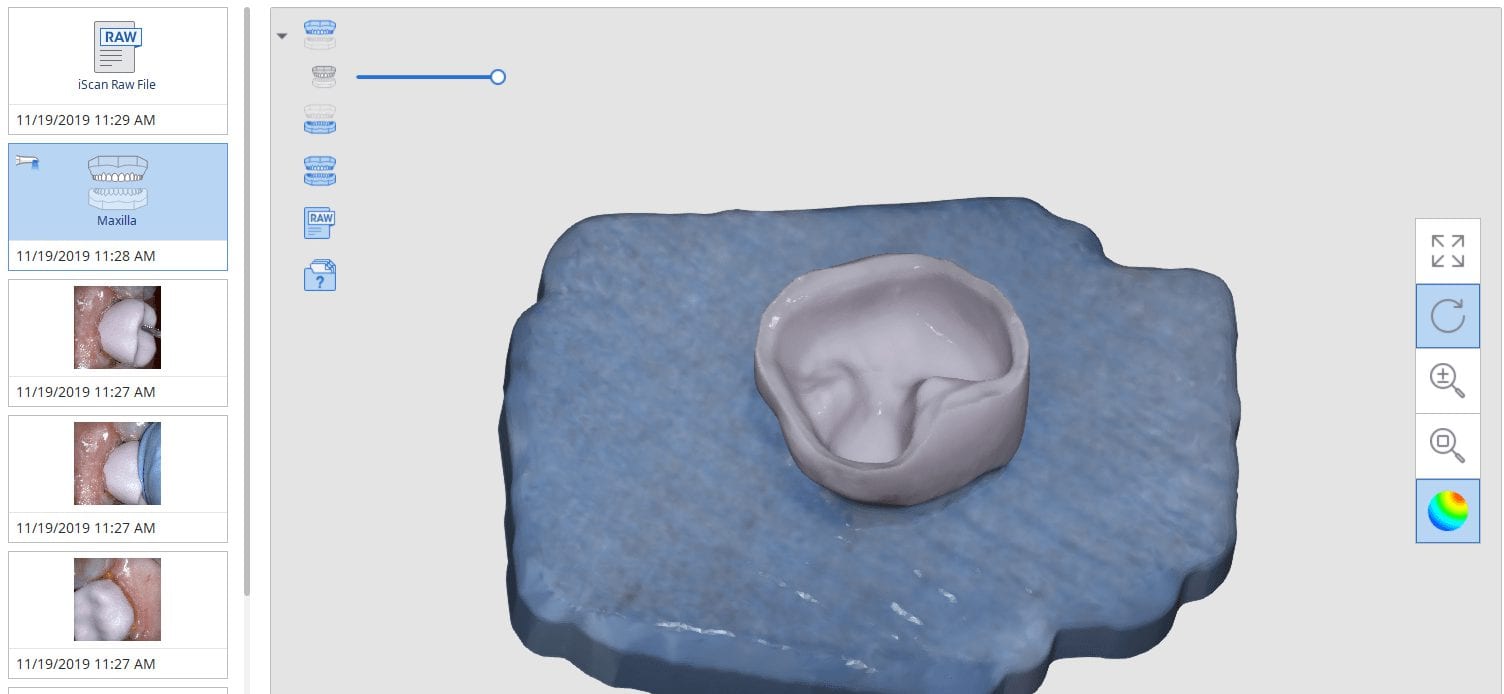
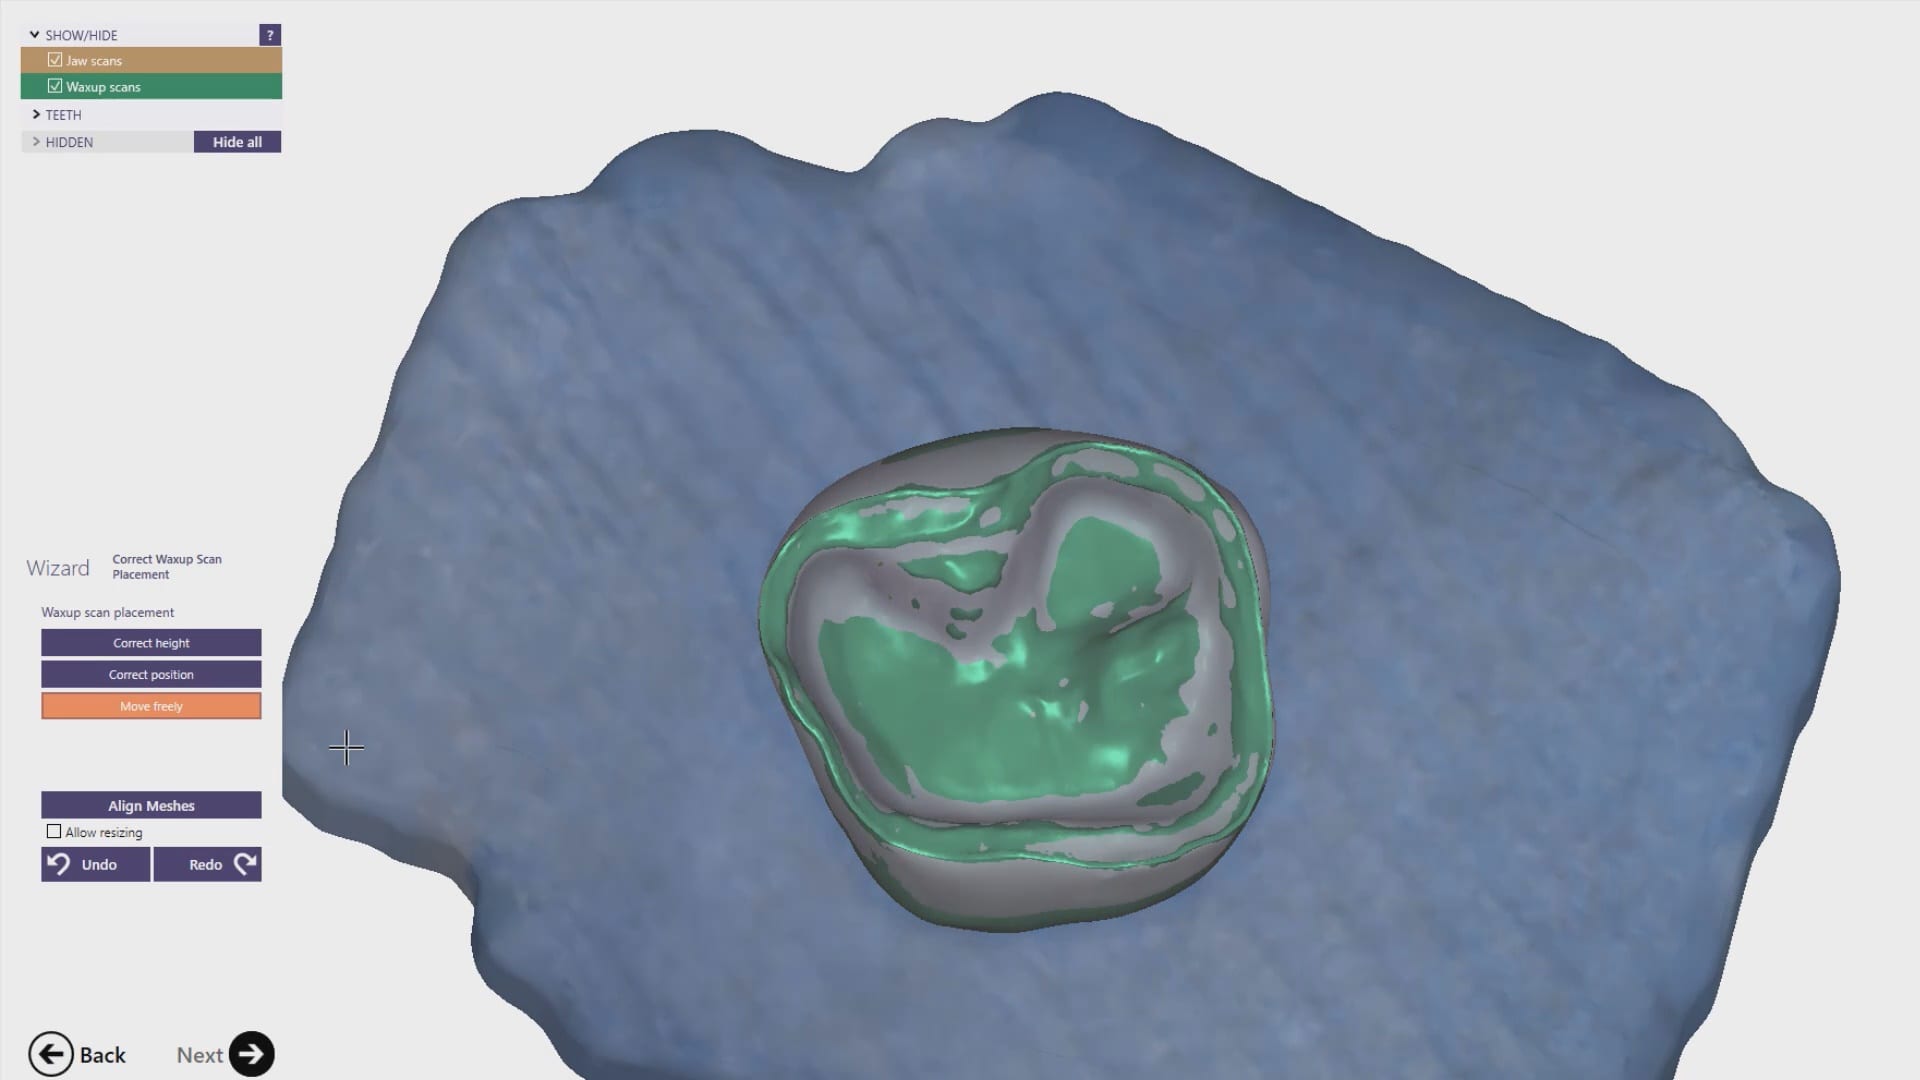
Premolar Crown with Medit i500, Meditlink, exocad, Amber Mill Block, Coritec One by Imes Icore, and Millbox CAM Software
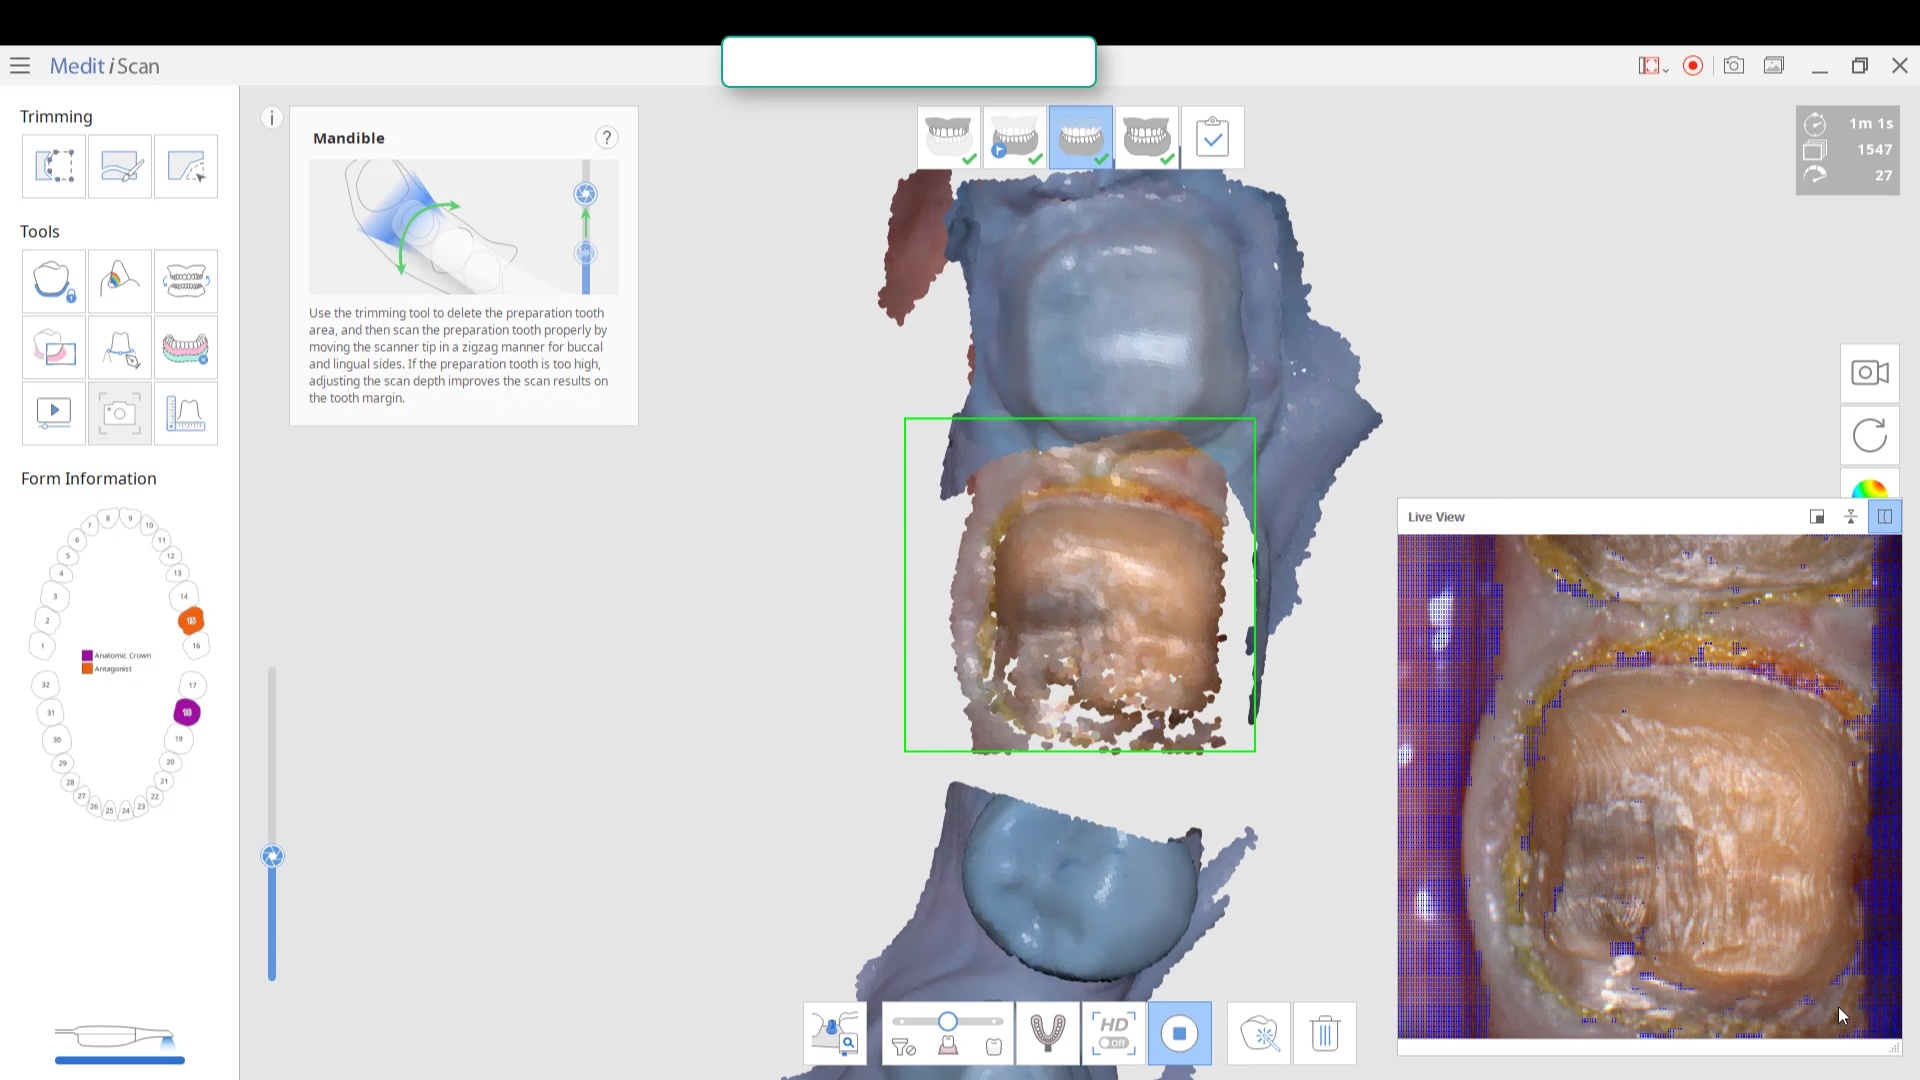
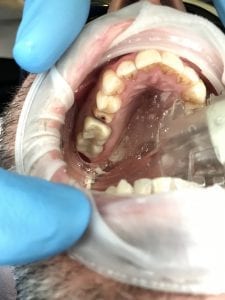
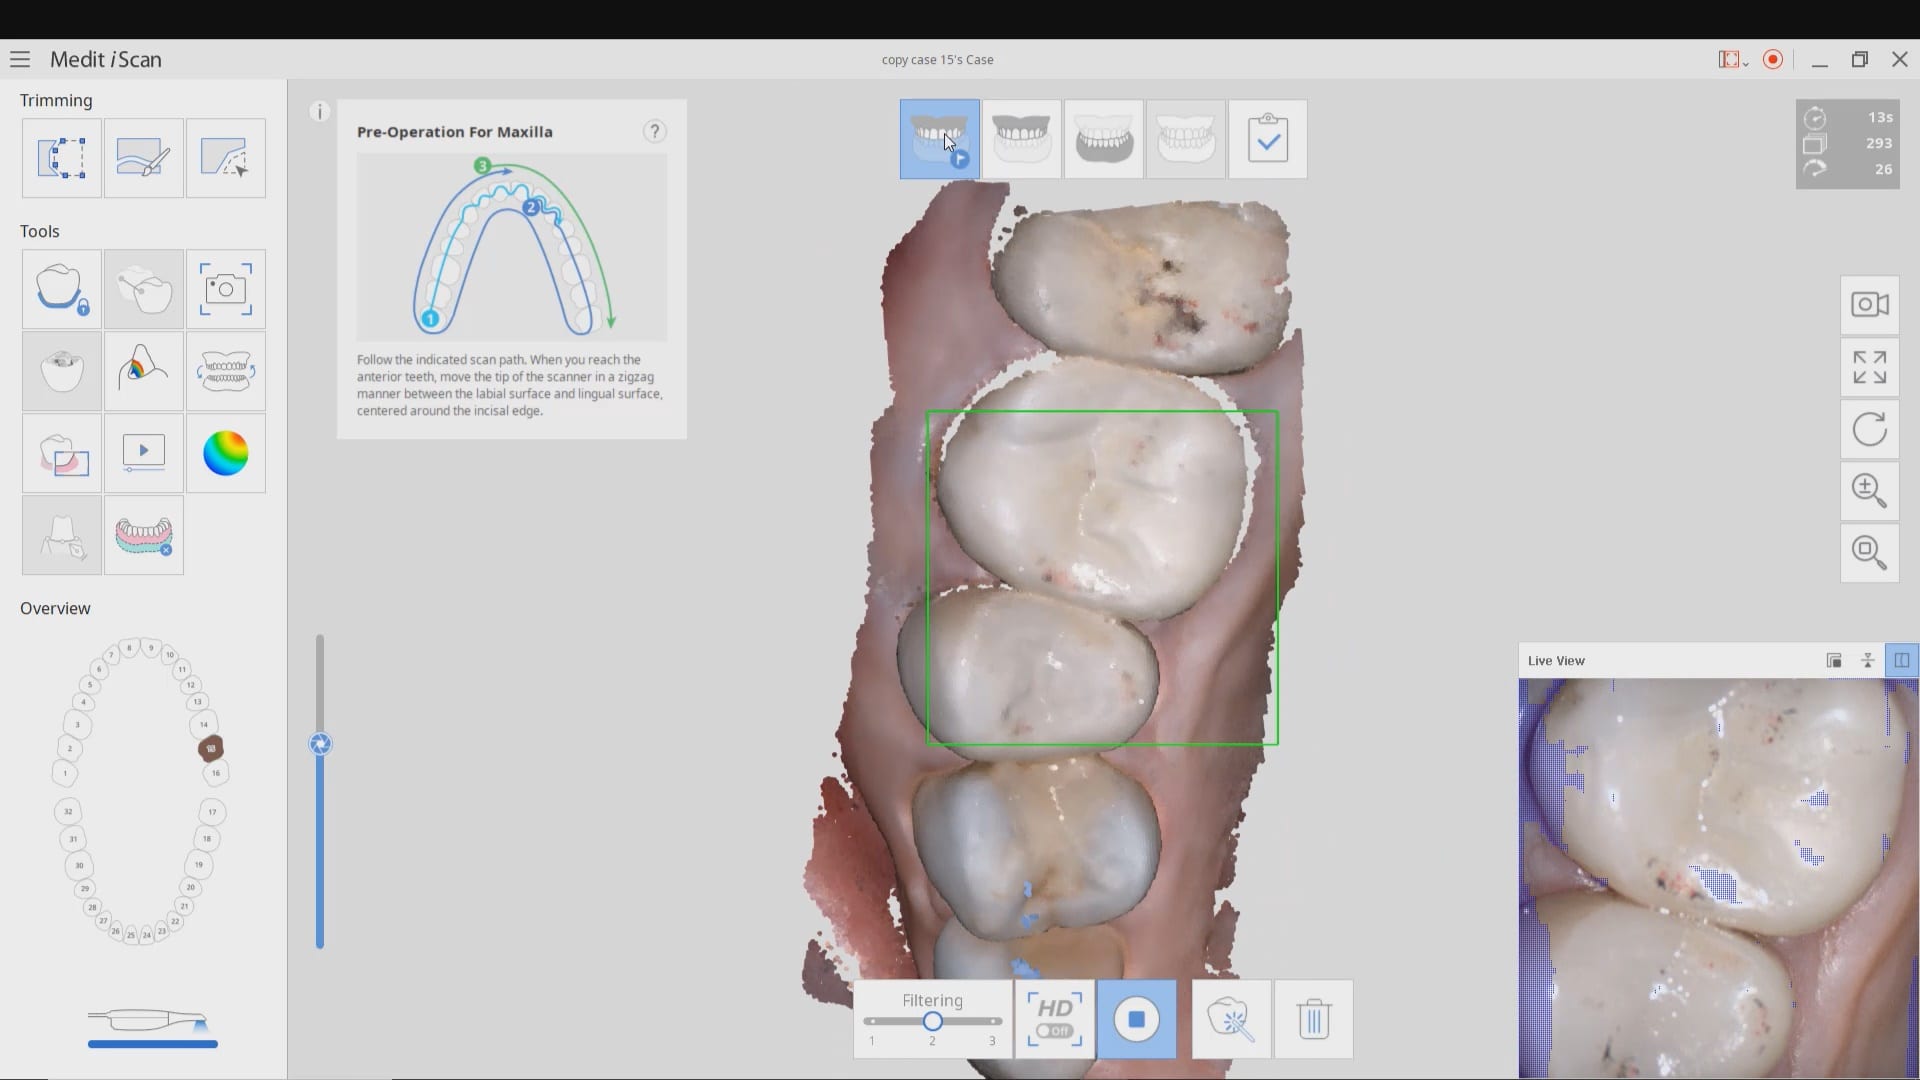
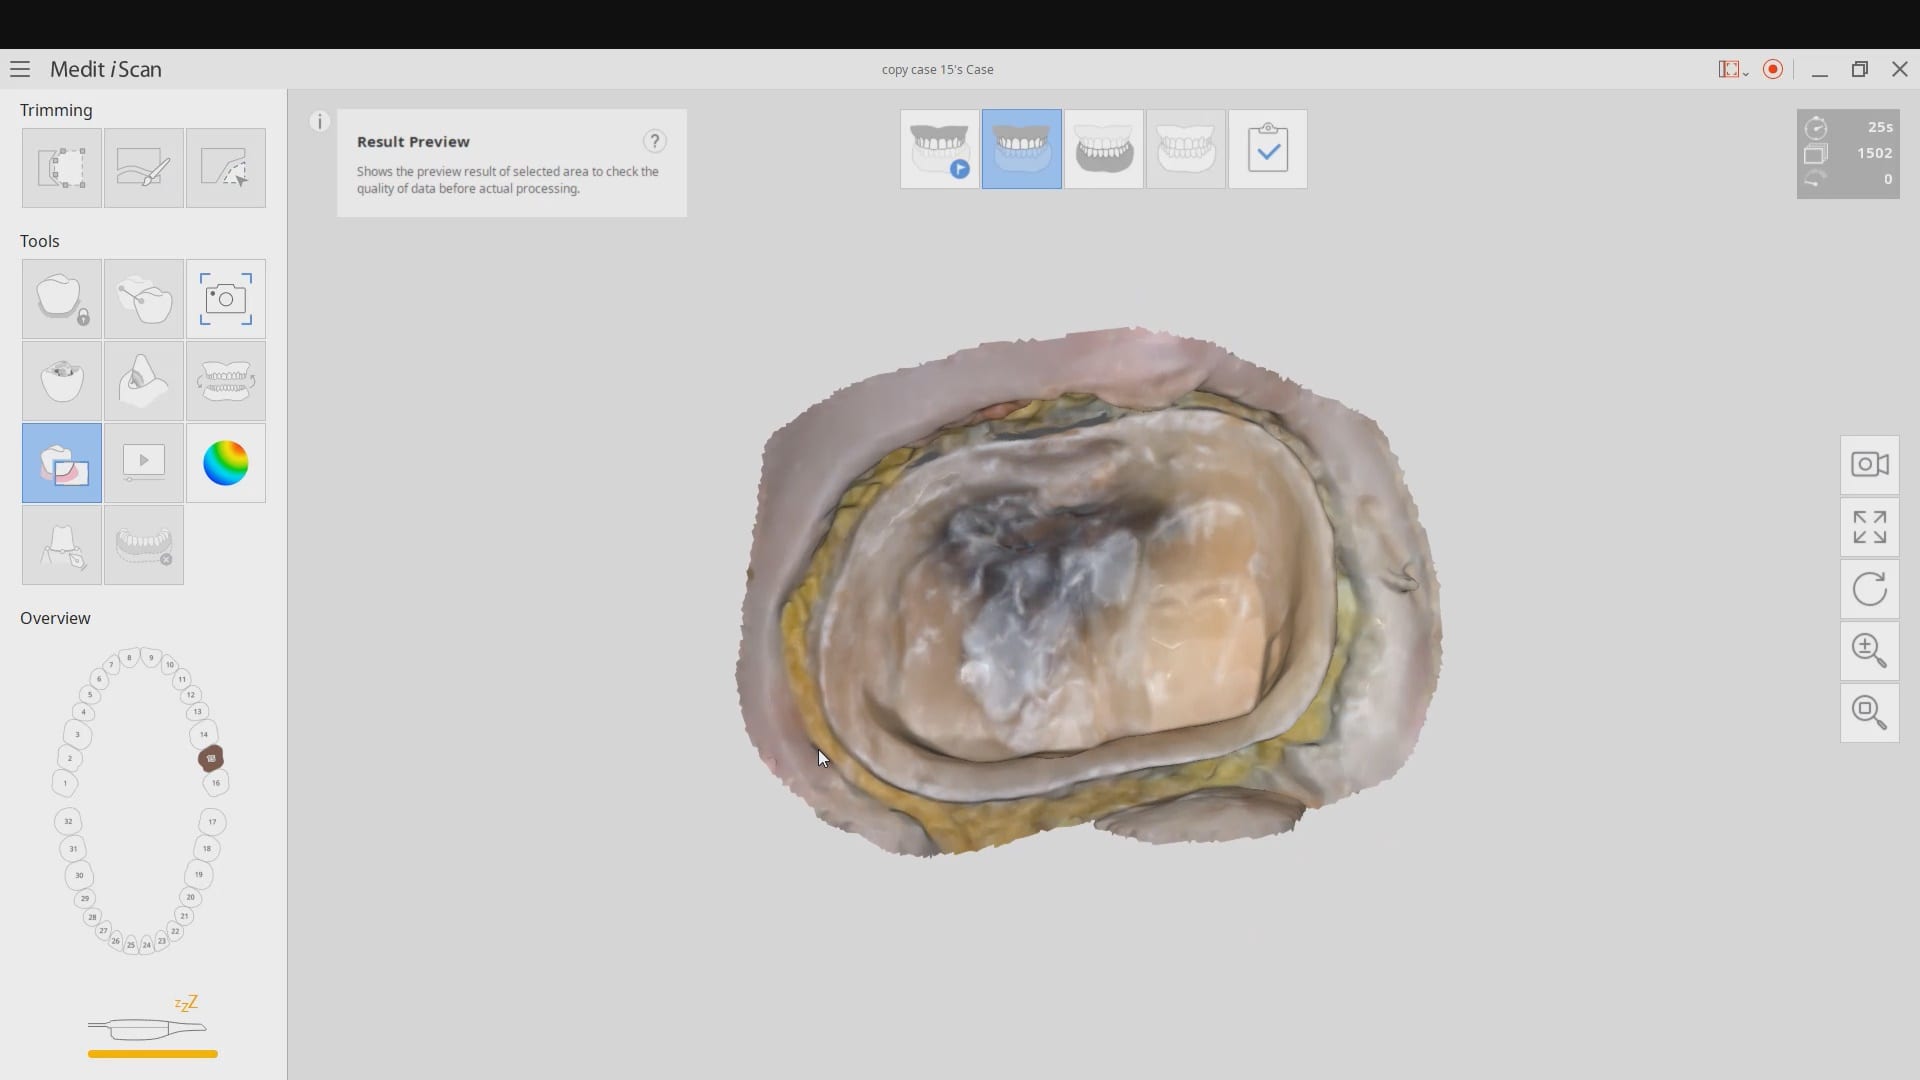
In this clinical case a patient lost a pre-existing crown. The remaining tooth structure had recurrent decay and a new crown was warranted.
After anesthesia was administered, the clearance from opposing dentition was assessed. The preparation was reduced to accommodate the necessary thickness of the material.
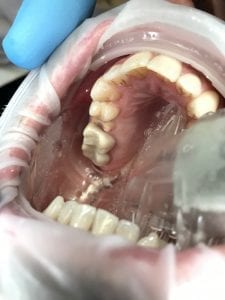
Once adequate clearance was achieved an Optragate was placed and an isolite was used to isolate the area. The preparation was scanned and then the lower arch was captured. The buccal bite was then taken to along the arches together
With Meditlink software, you have the option of designing the case yourself or sending it off to your partnered lab. The following video shows what happens to your case once the lab downloads the case
In this particular case, we designed our own crown and milled it with the coritec one milling machine
Once the amber lithium disilicate material was milled, its for was verified clinically. The crown was then crystallized and seated with NX3 resin cement
Please Share this:

Using Photogrammetry to Validate the Accuracy of the Medit i500
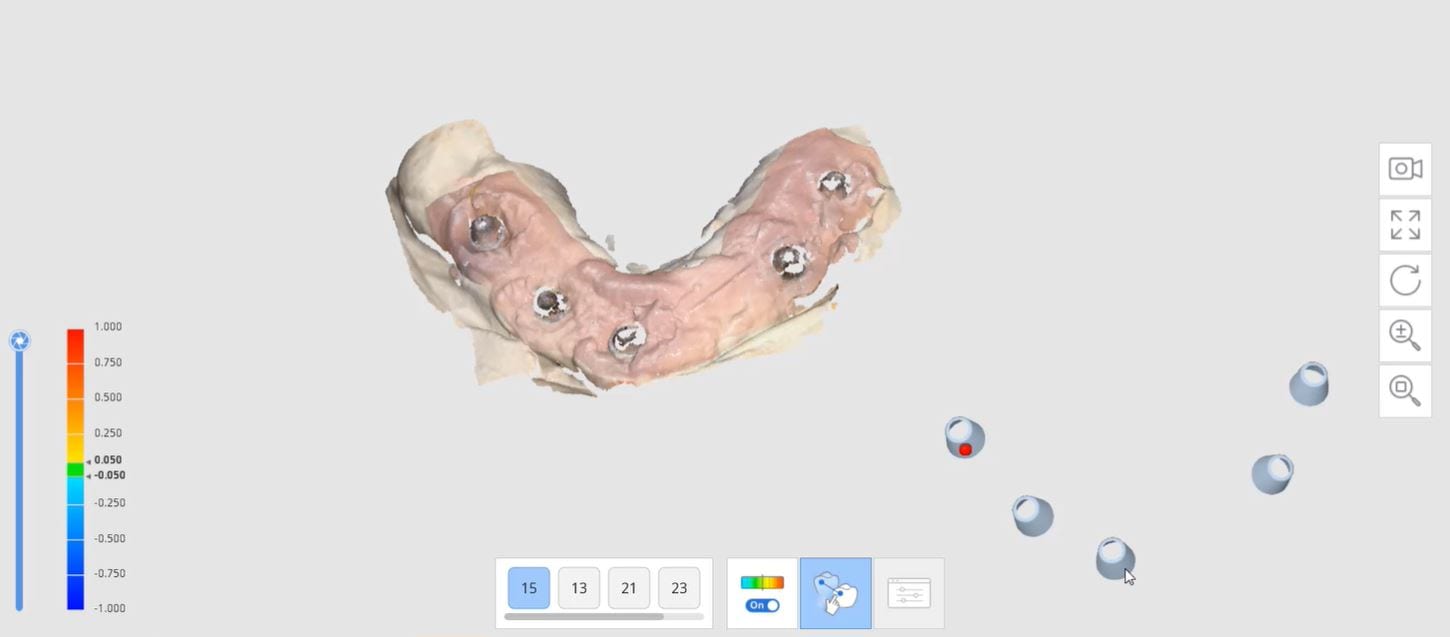
Photogammetry has set the highest standard for full arch accuracy in digital dentistry for edentulous patients with multiple implant fixtures. An easy scan in under 15 seconds captures enough detail on scanbodies that help the software capture the location of the fixtures. Conversely, Intra-Oral Scanners (IOS) do not garner support for most of the literature that is currently published in dental journals. Scan paths can dictate the outcome of 3D model and determine how correctly it replicates the intra-oral condition. The same scan can render a variety of results and models based on the user and the direction the scans are taken. Simply stated, the user is control over the final product.
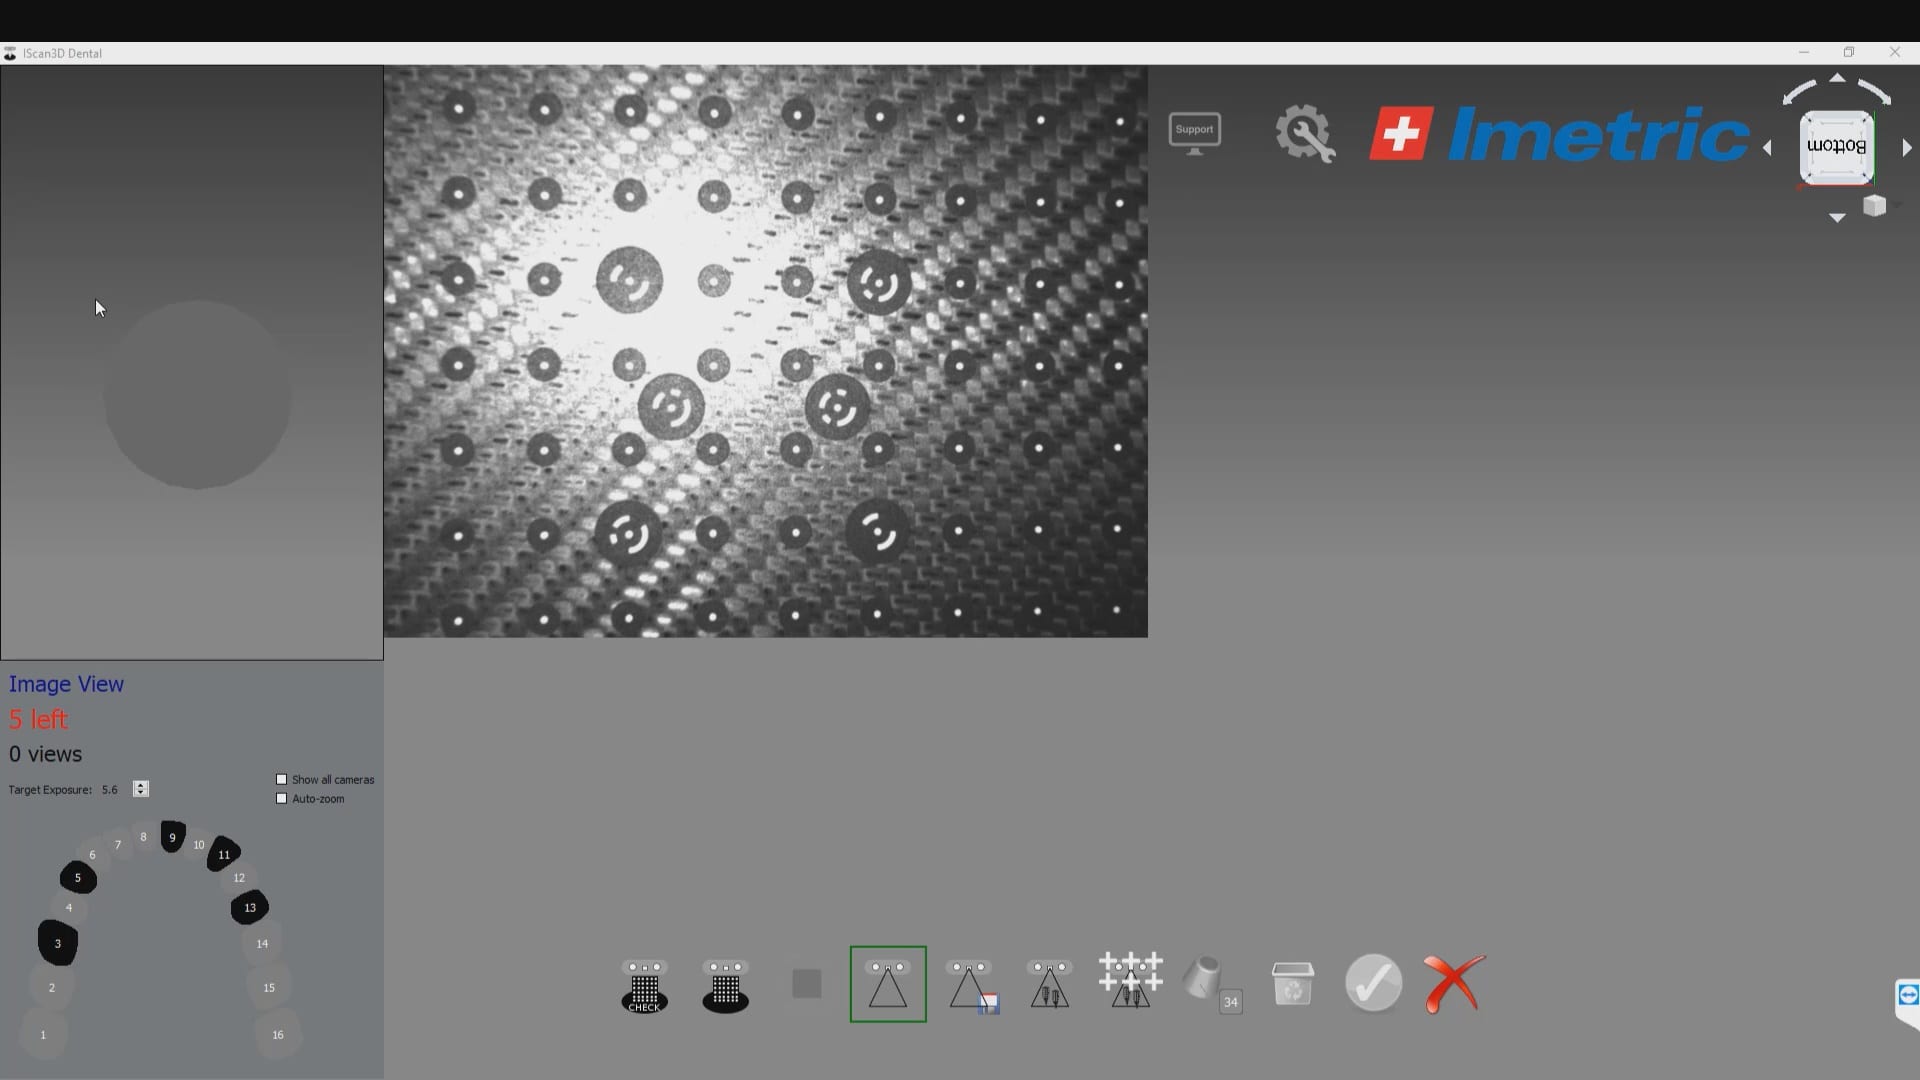
To use the ICam 4D scanner you must first calibrate the machine with a plate immediately prior to the intra-oral scan capture. There are specific reference points that the camera and software recognizes and after you capture about a dozen landmarks, you are ready for an intra-oral scan
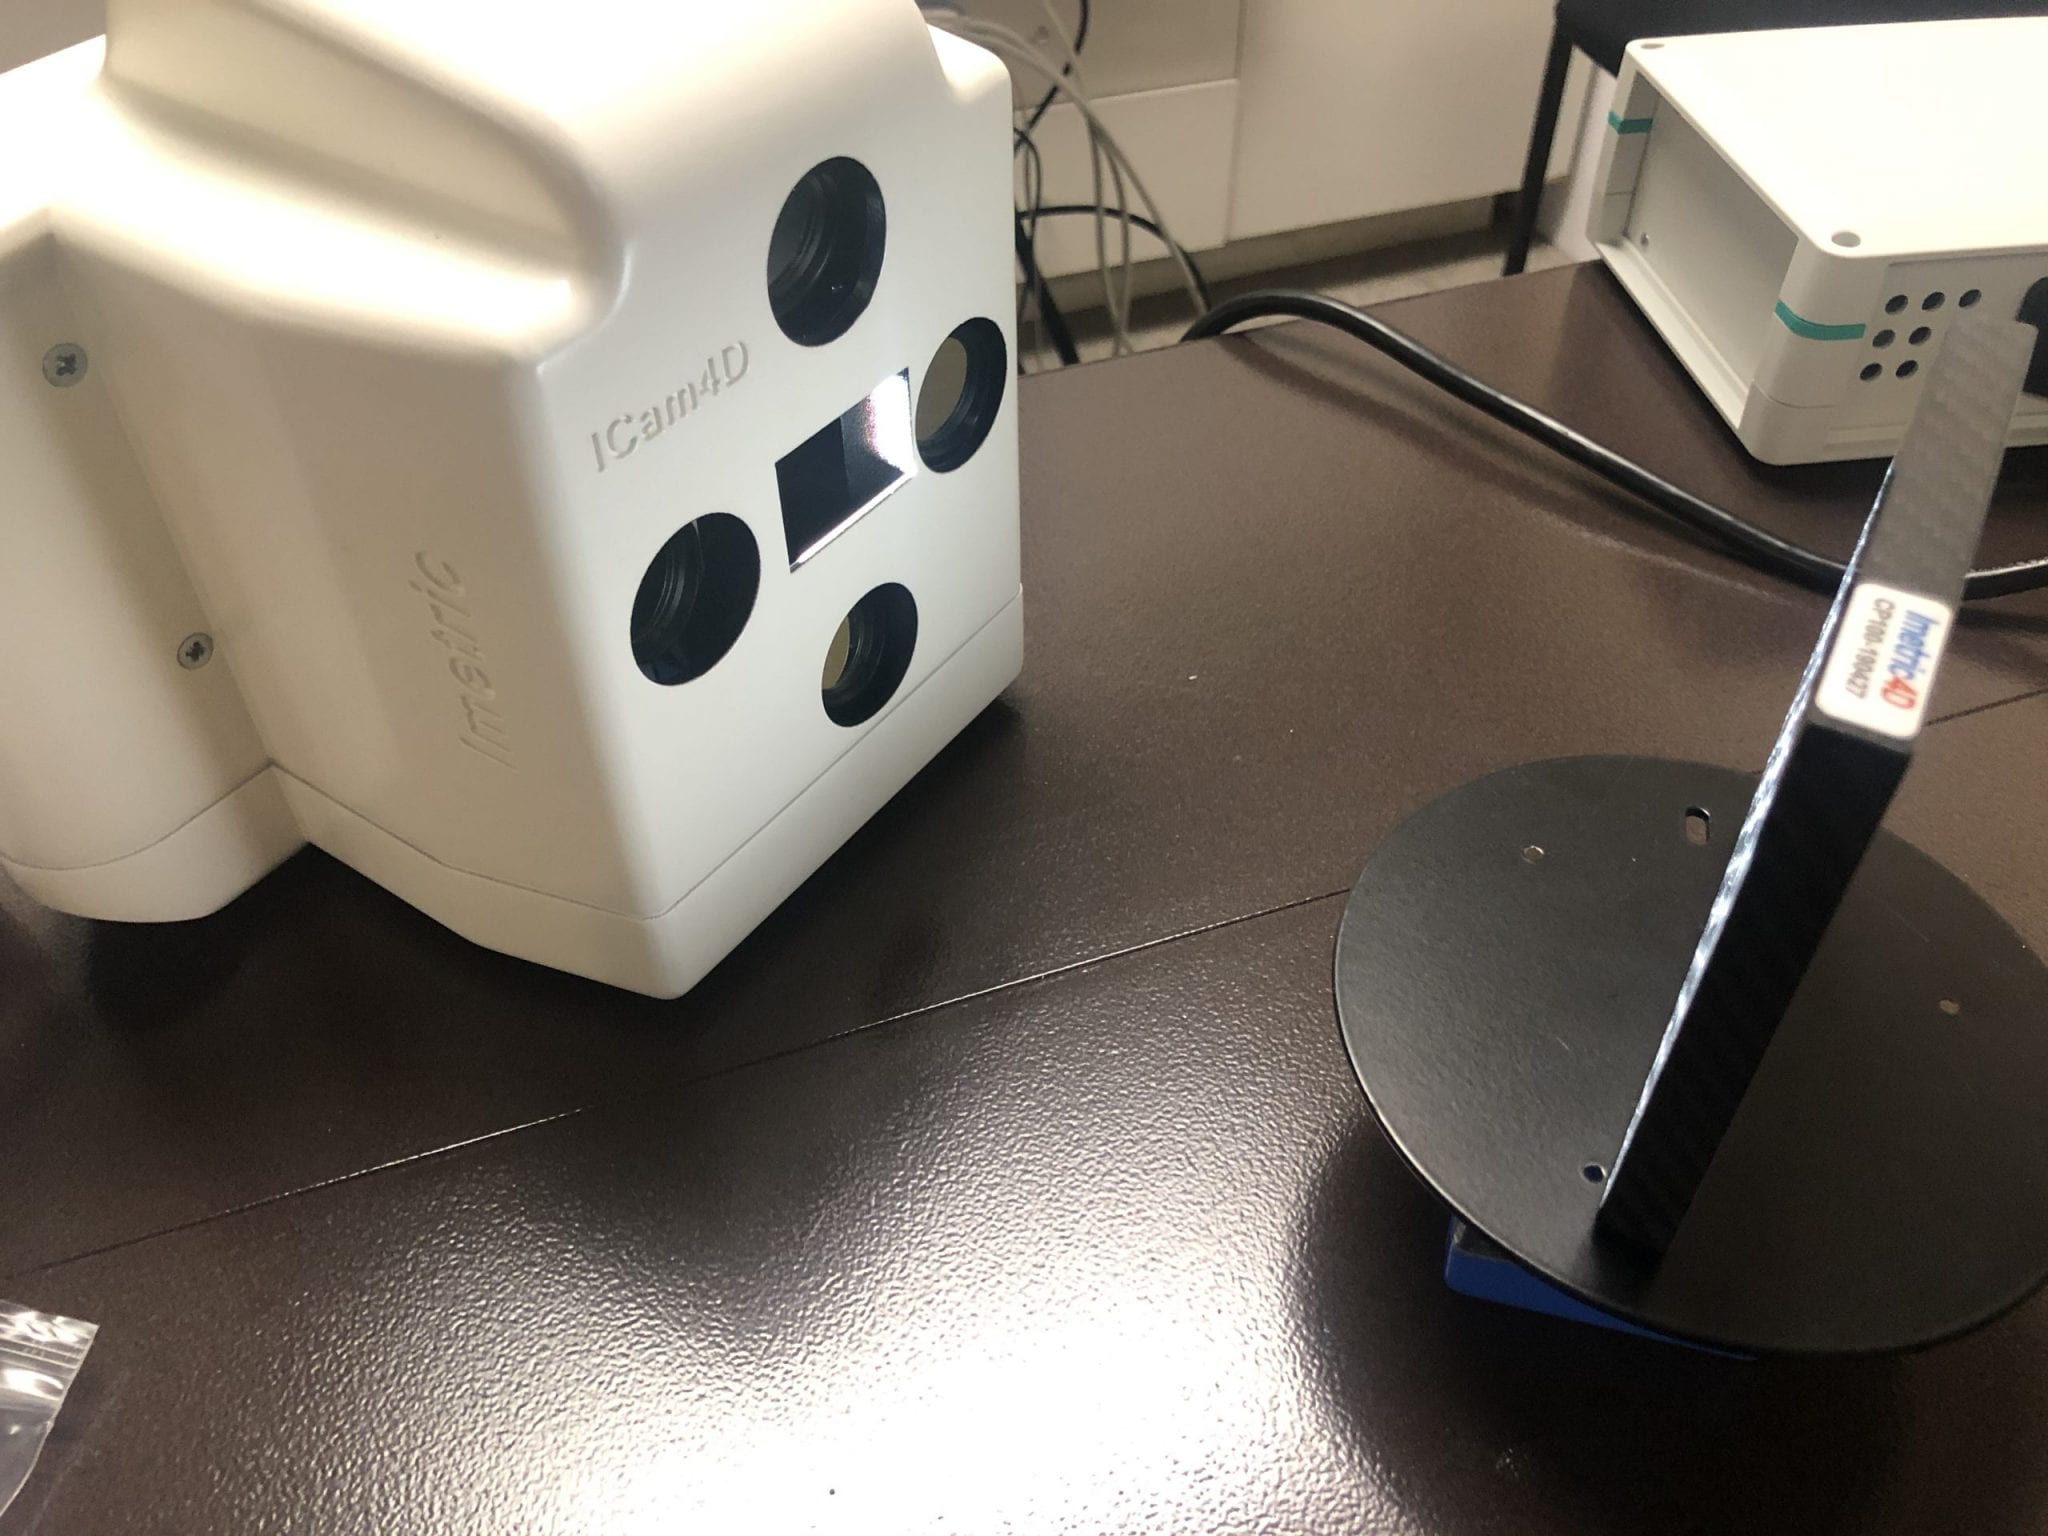
Calibration of the ICam 4D Photogammetry Machine
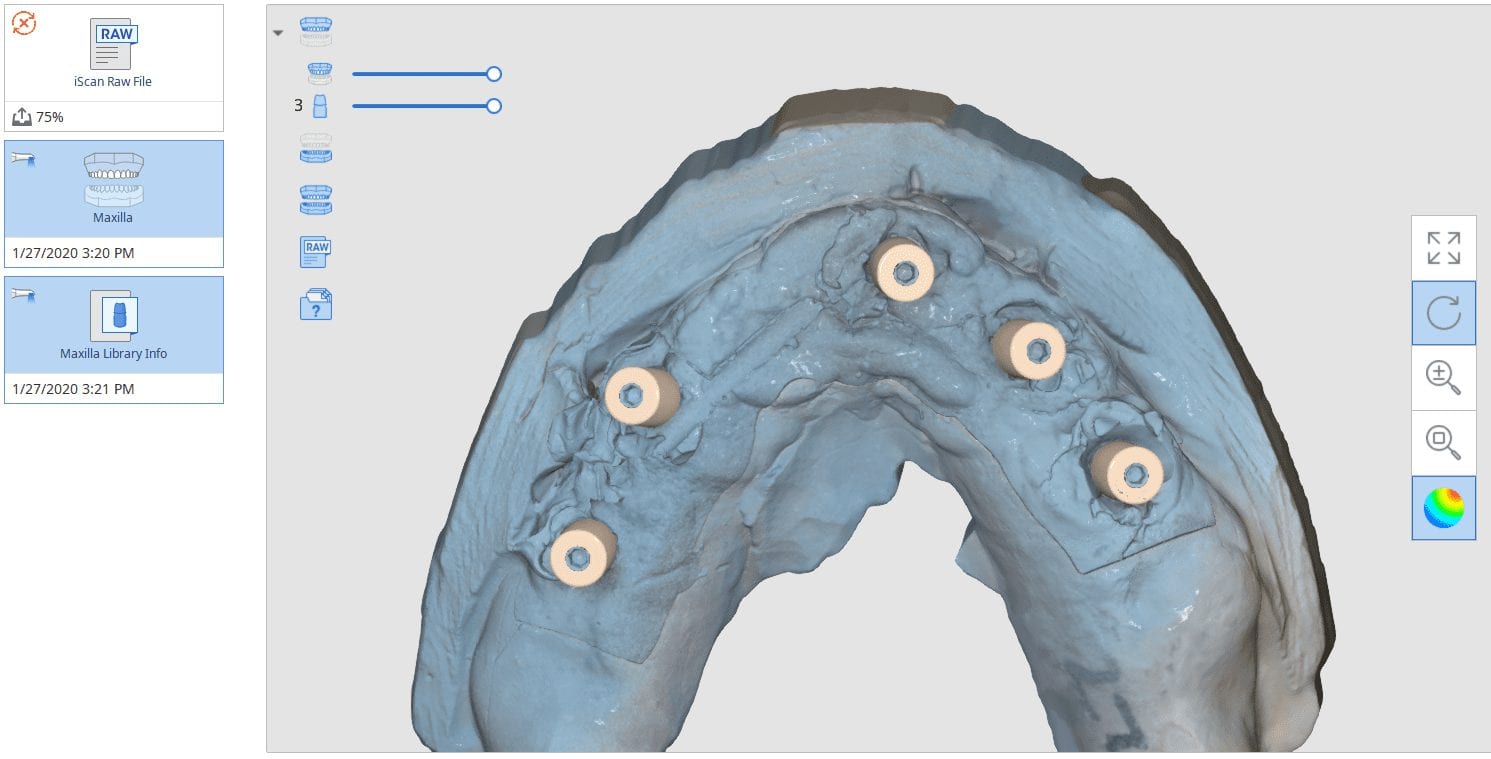
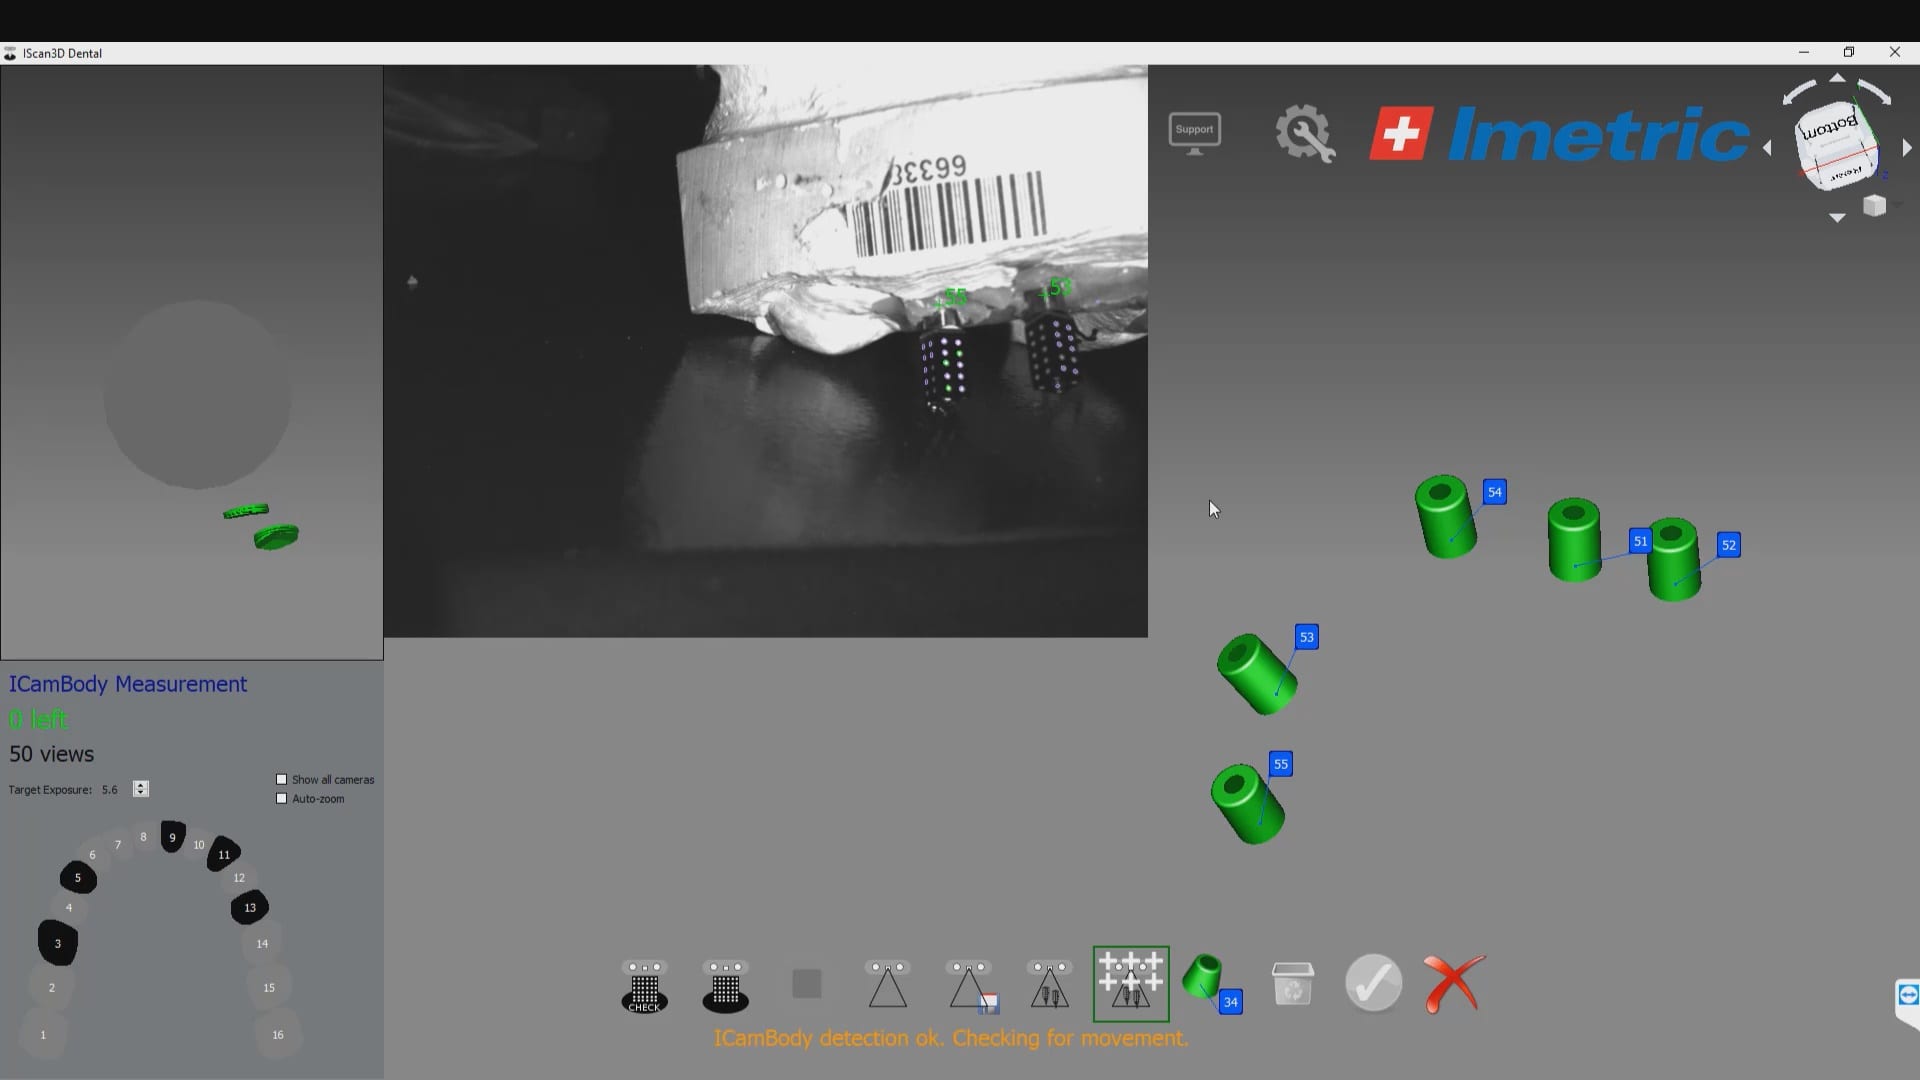
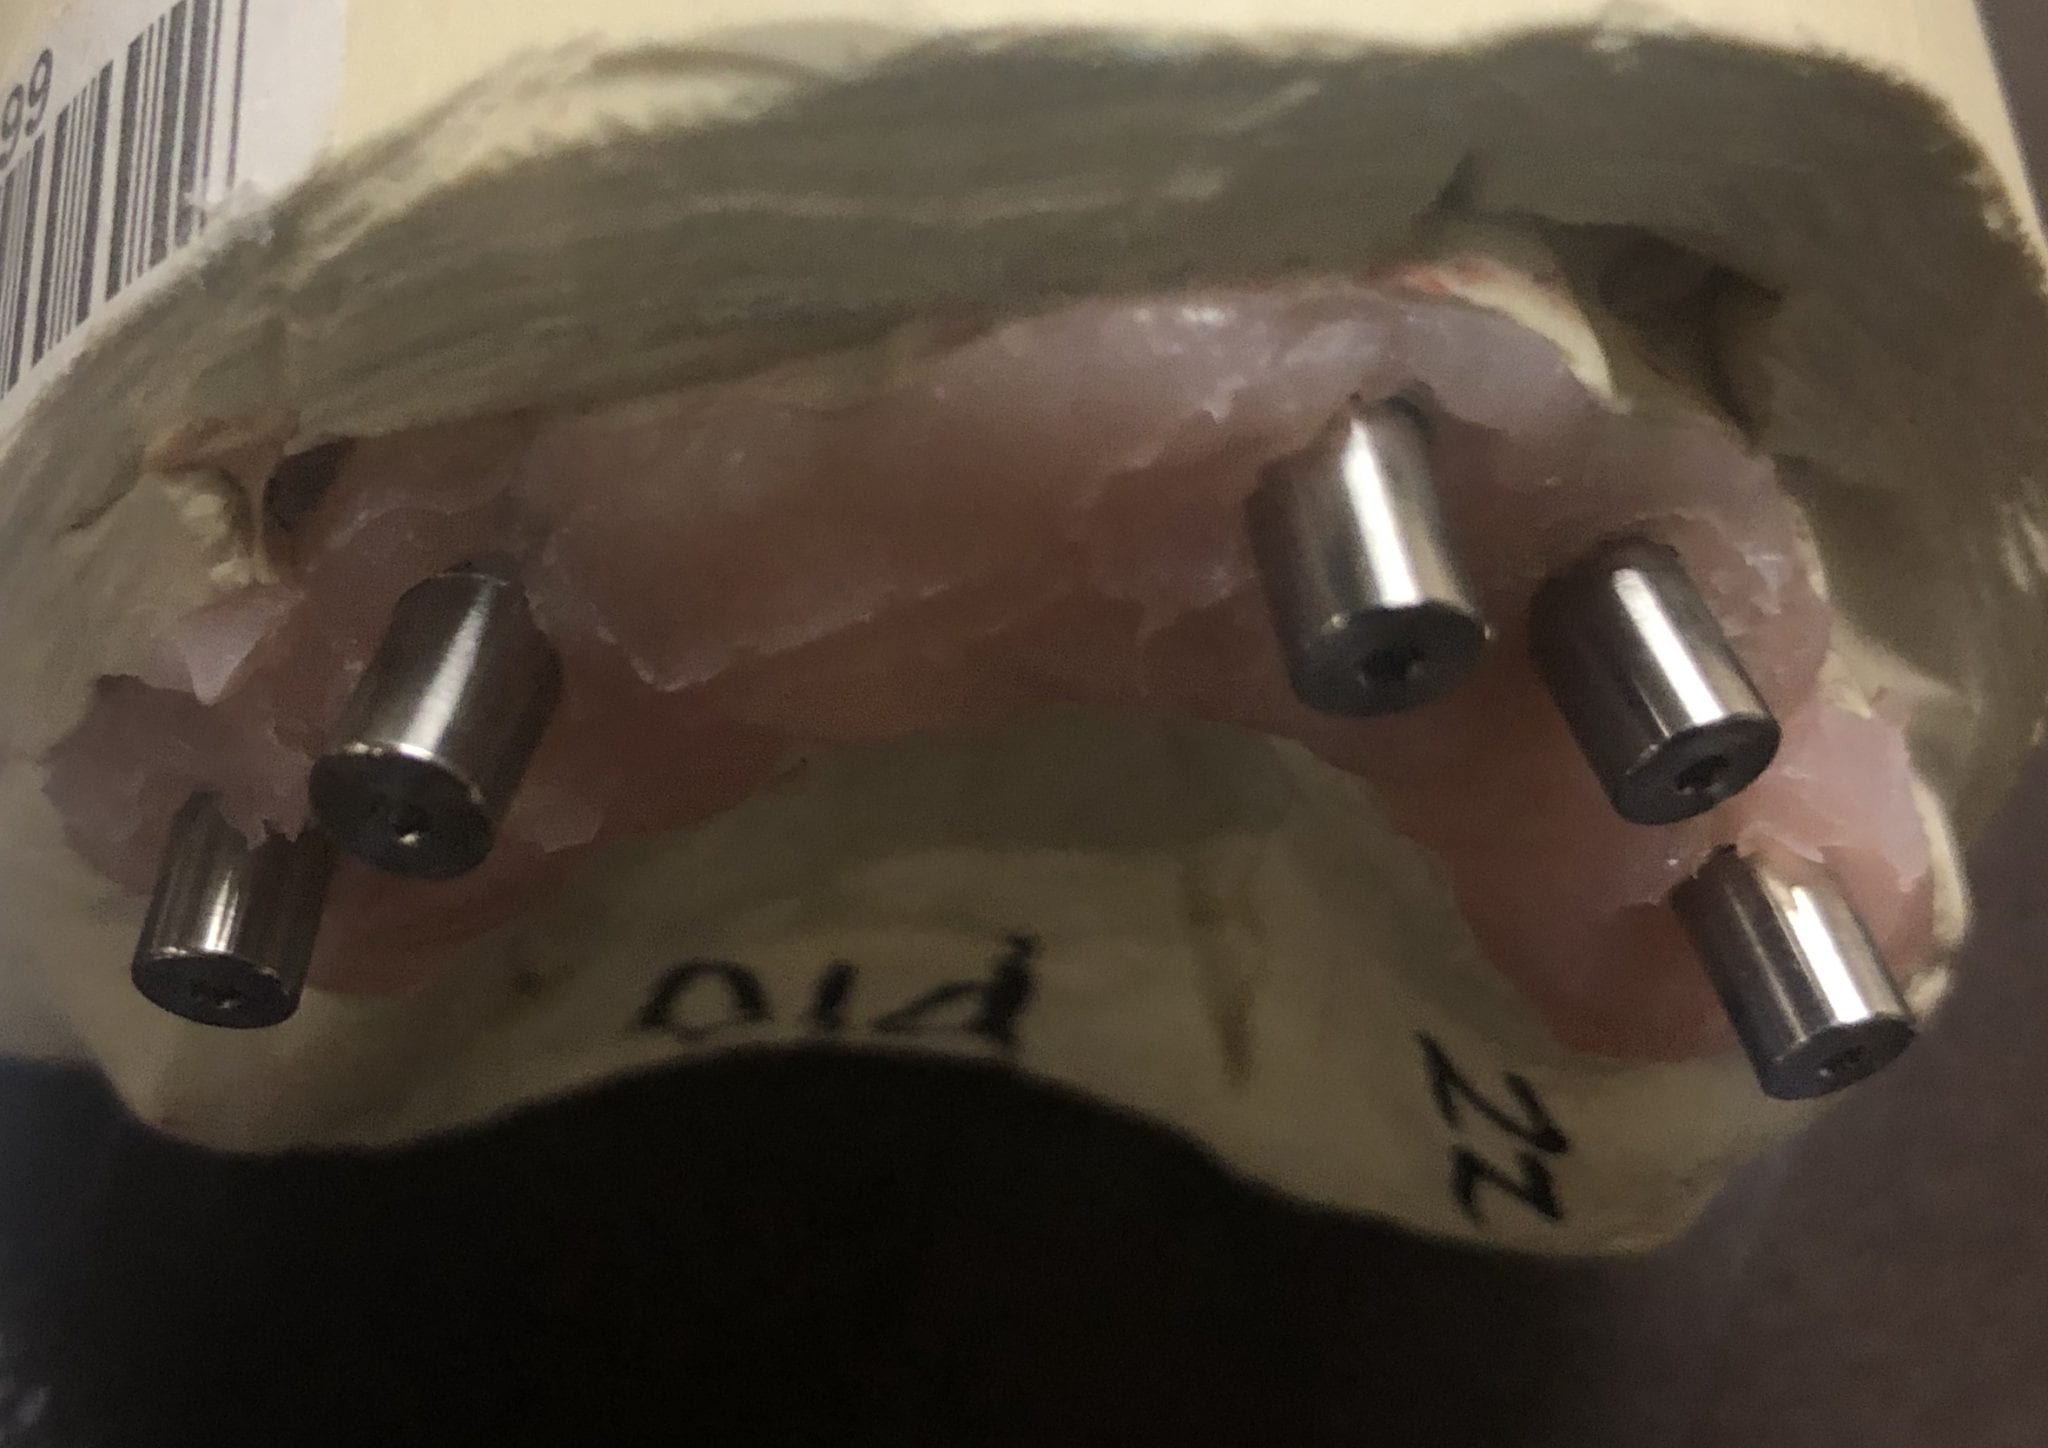
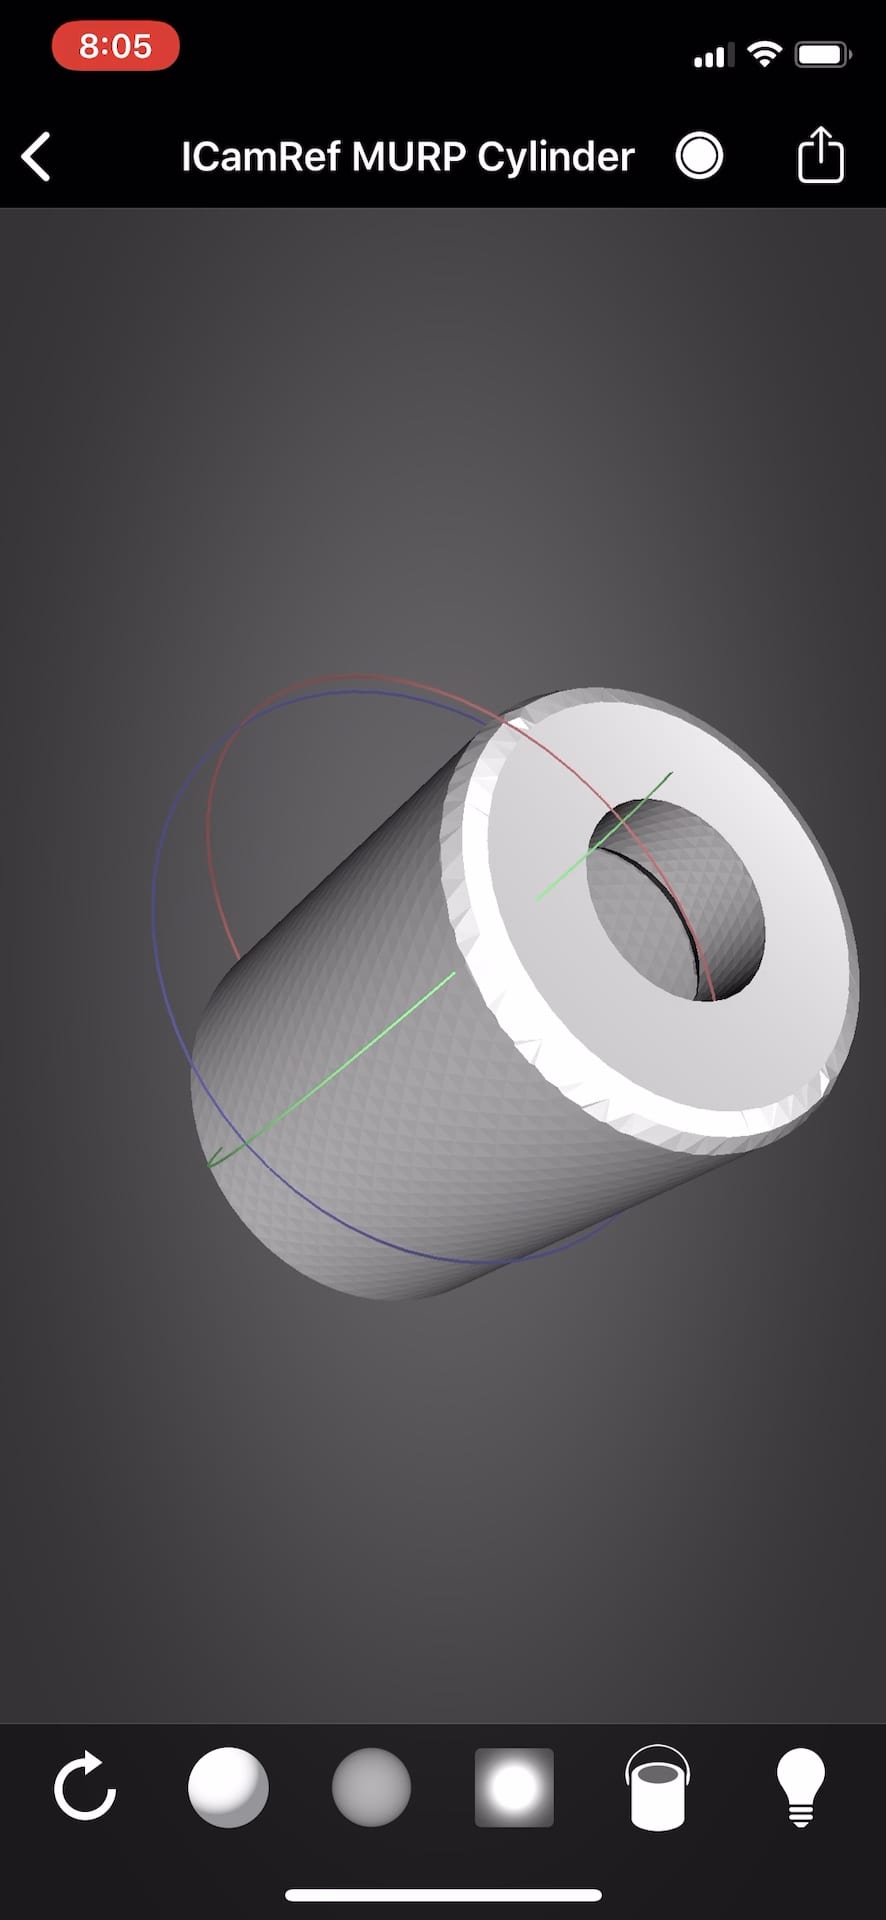
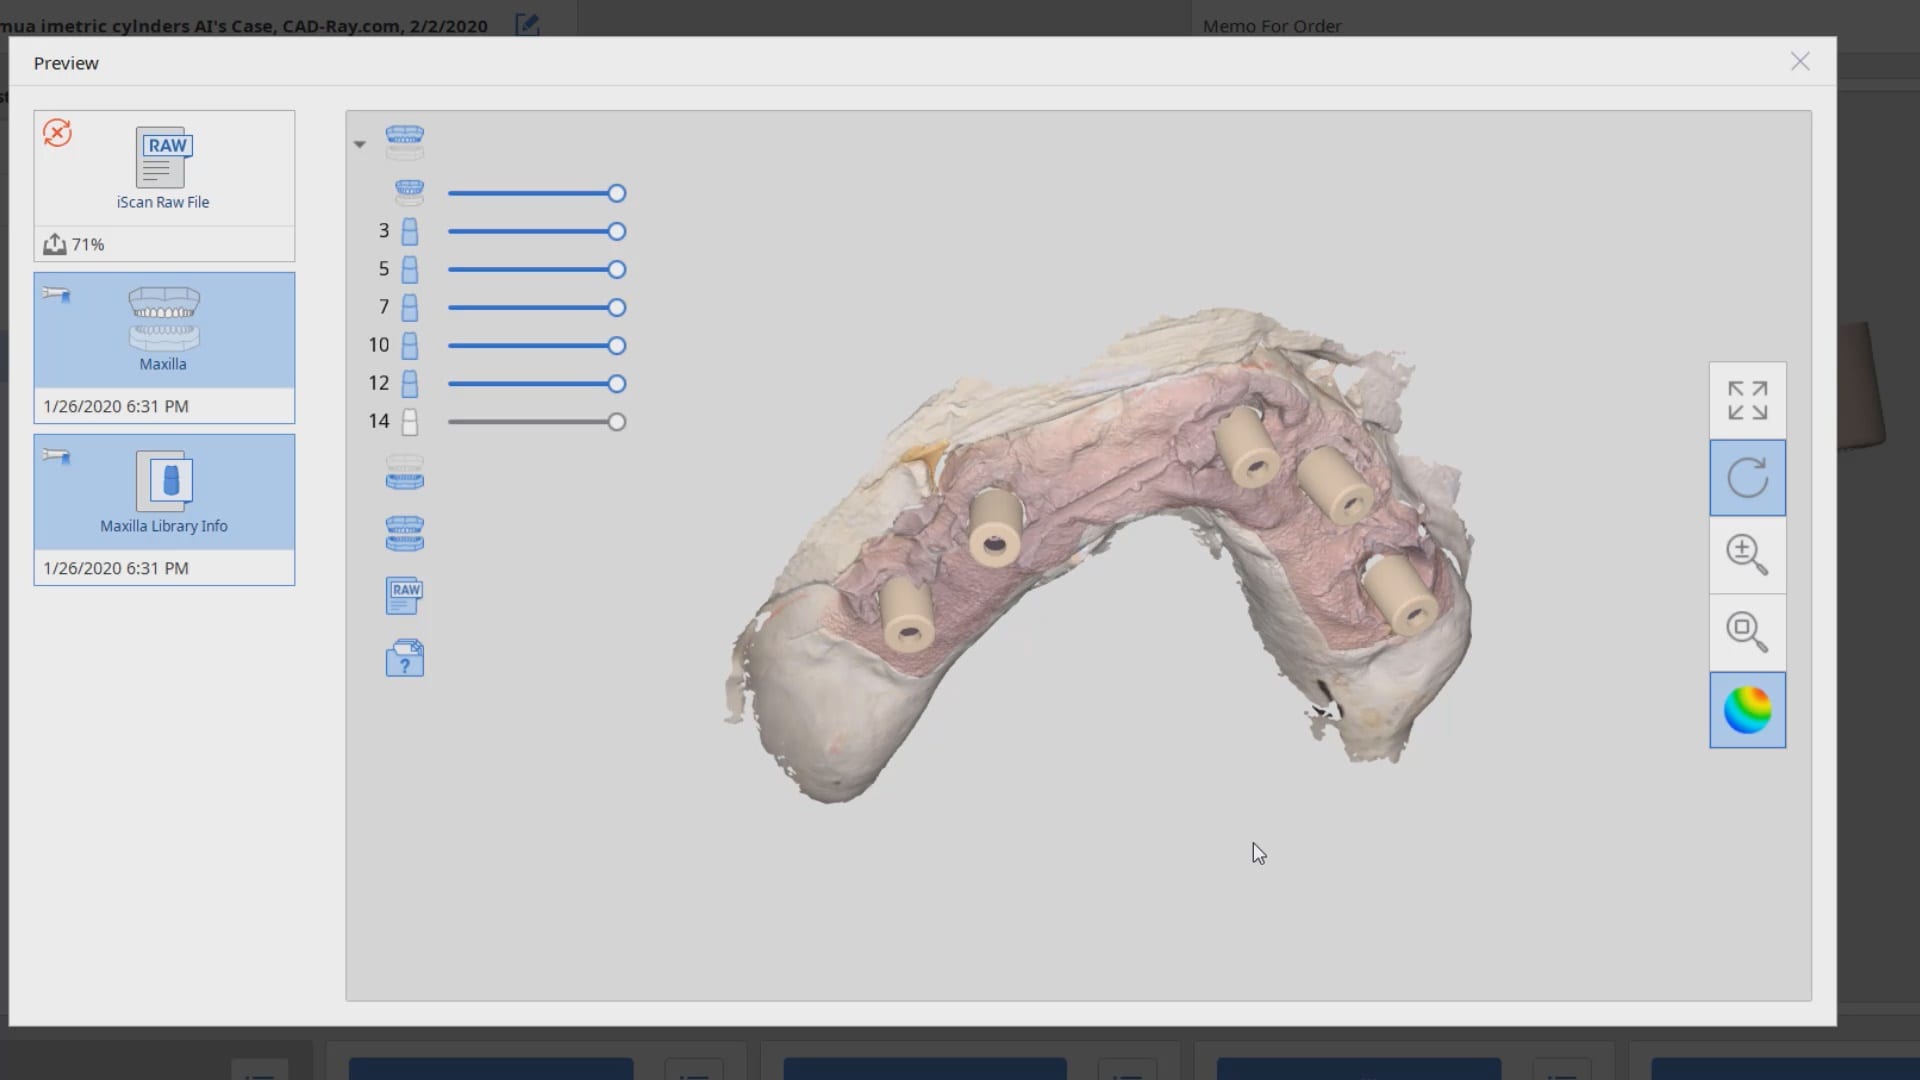
After the camera is calibrated, the patient, or in this demonstration case, the model with Multi-Unit Abutment analogs is mounted with ICam Reference Bodies that are shaped like dominos. They can attach to the multiunit abutment or directly to the implant fixture (available soon in the USA).
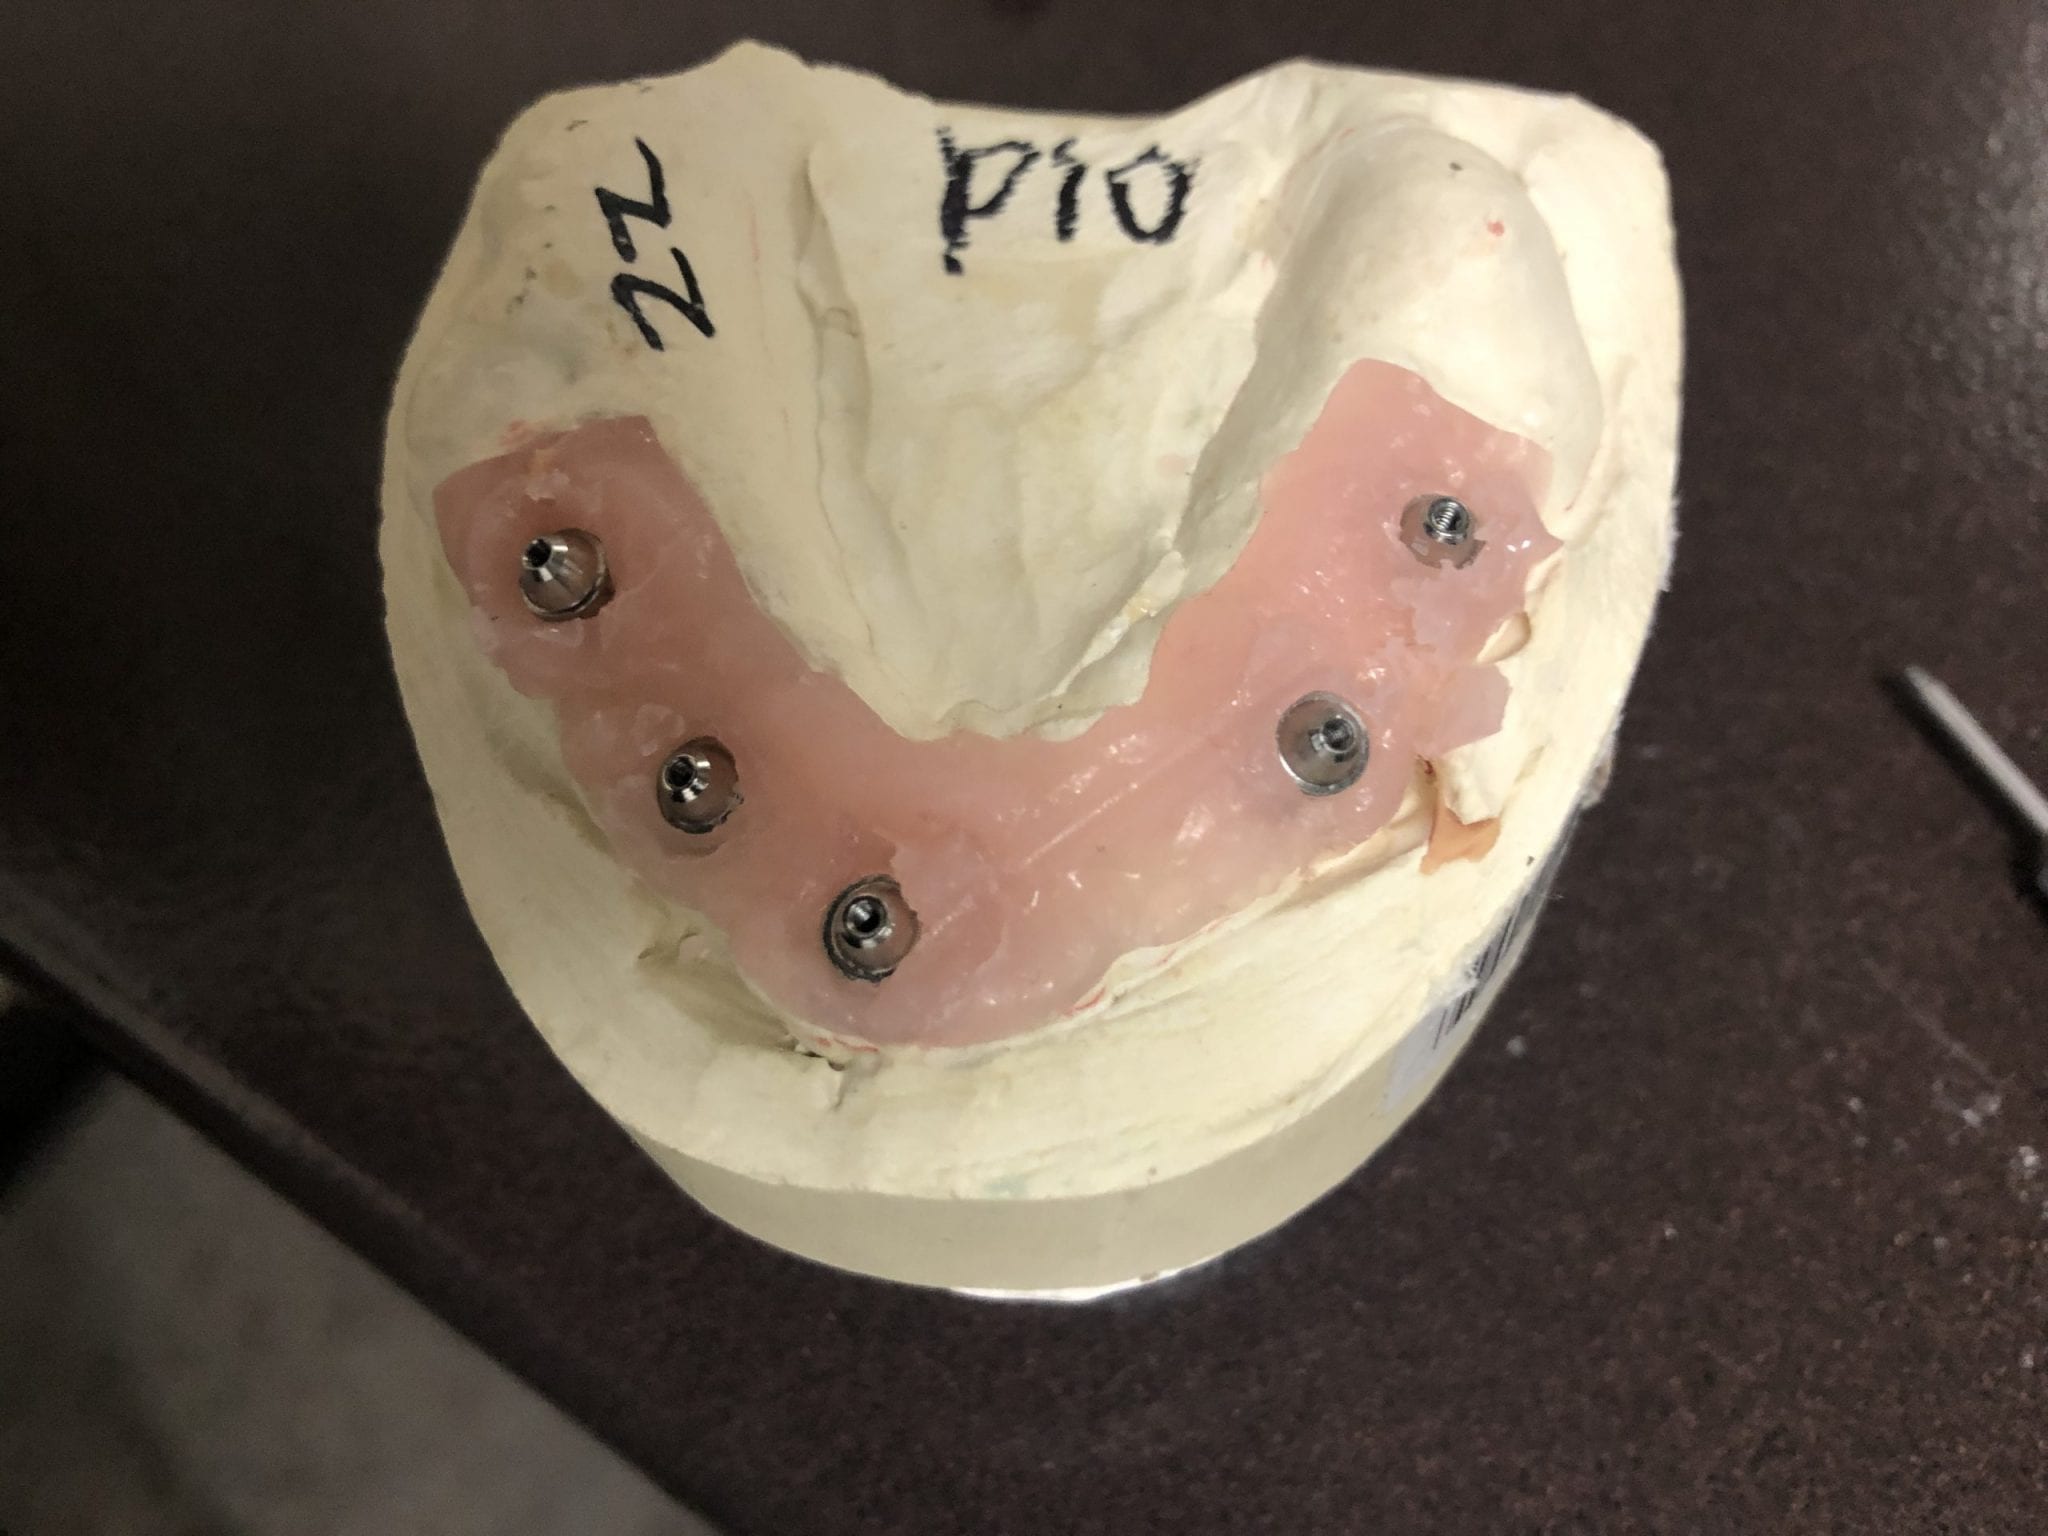
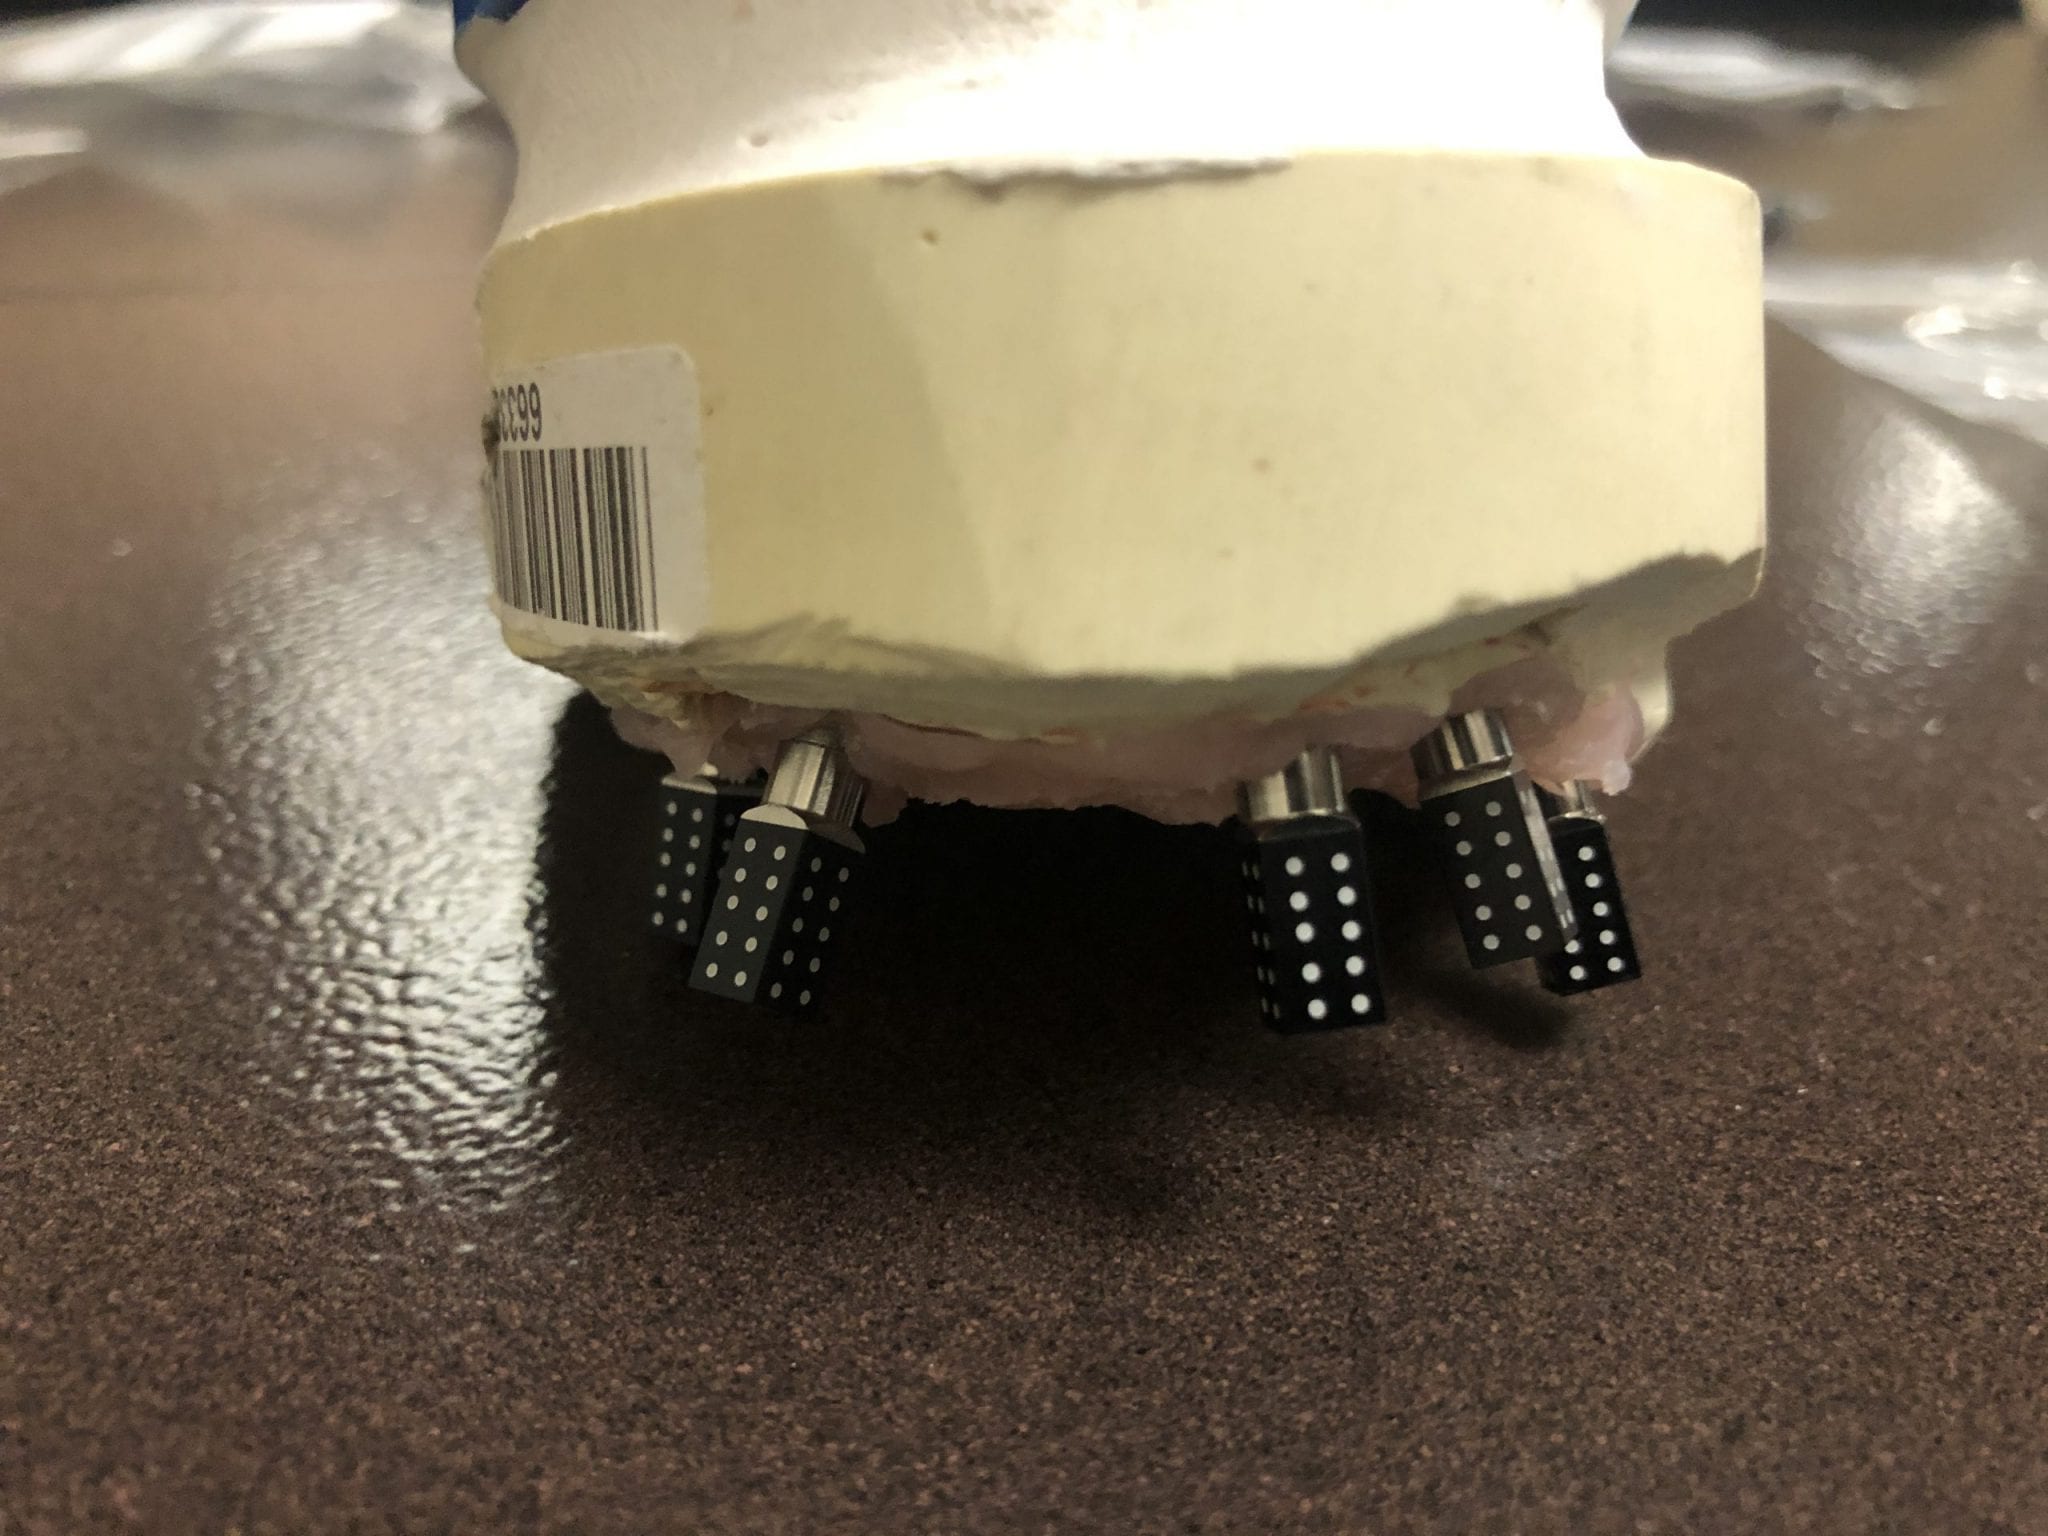
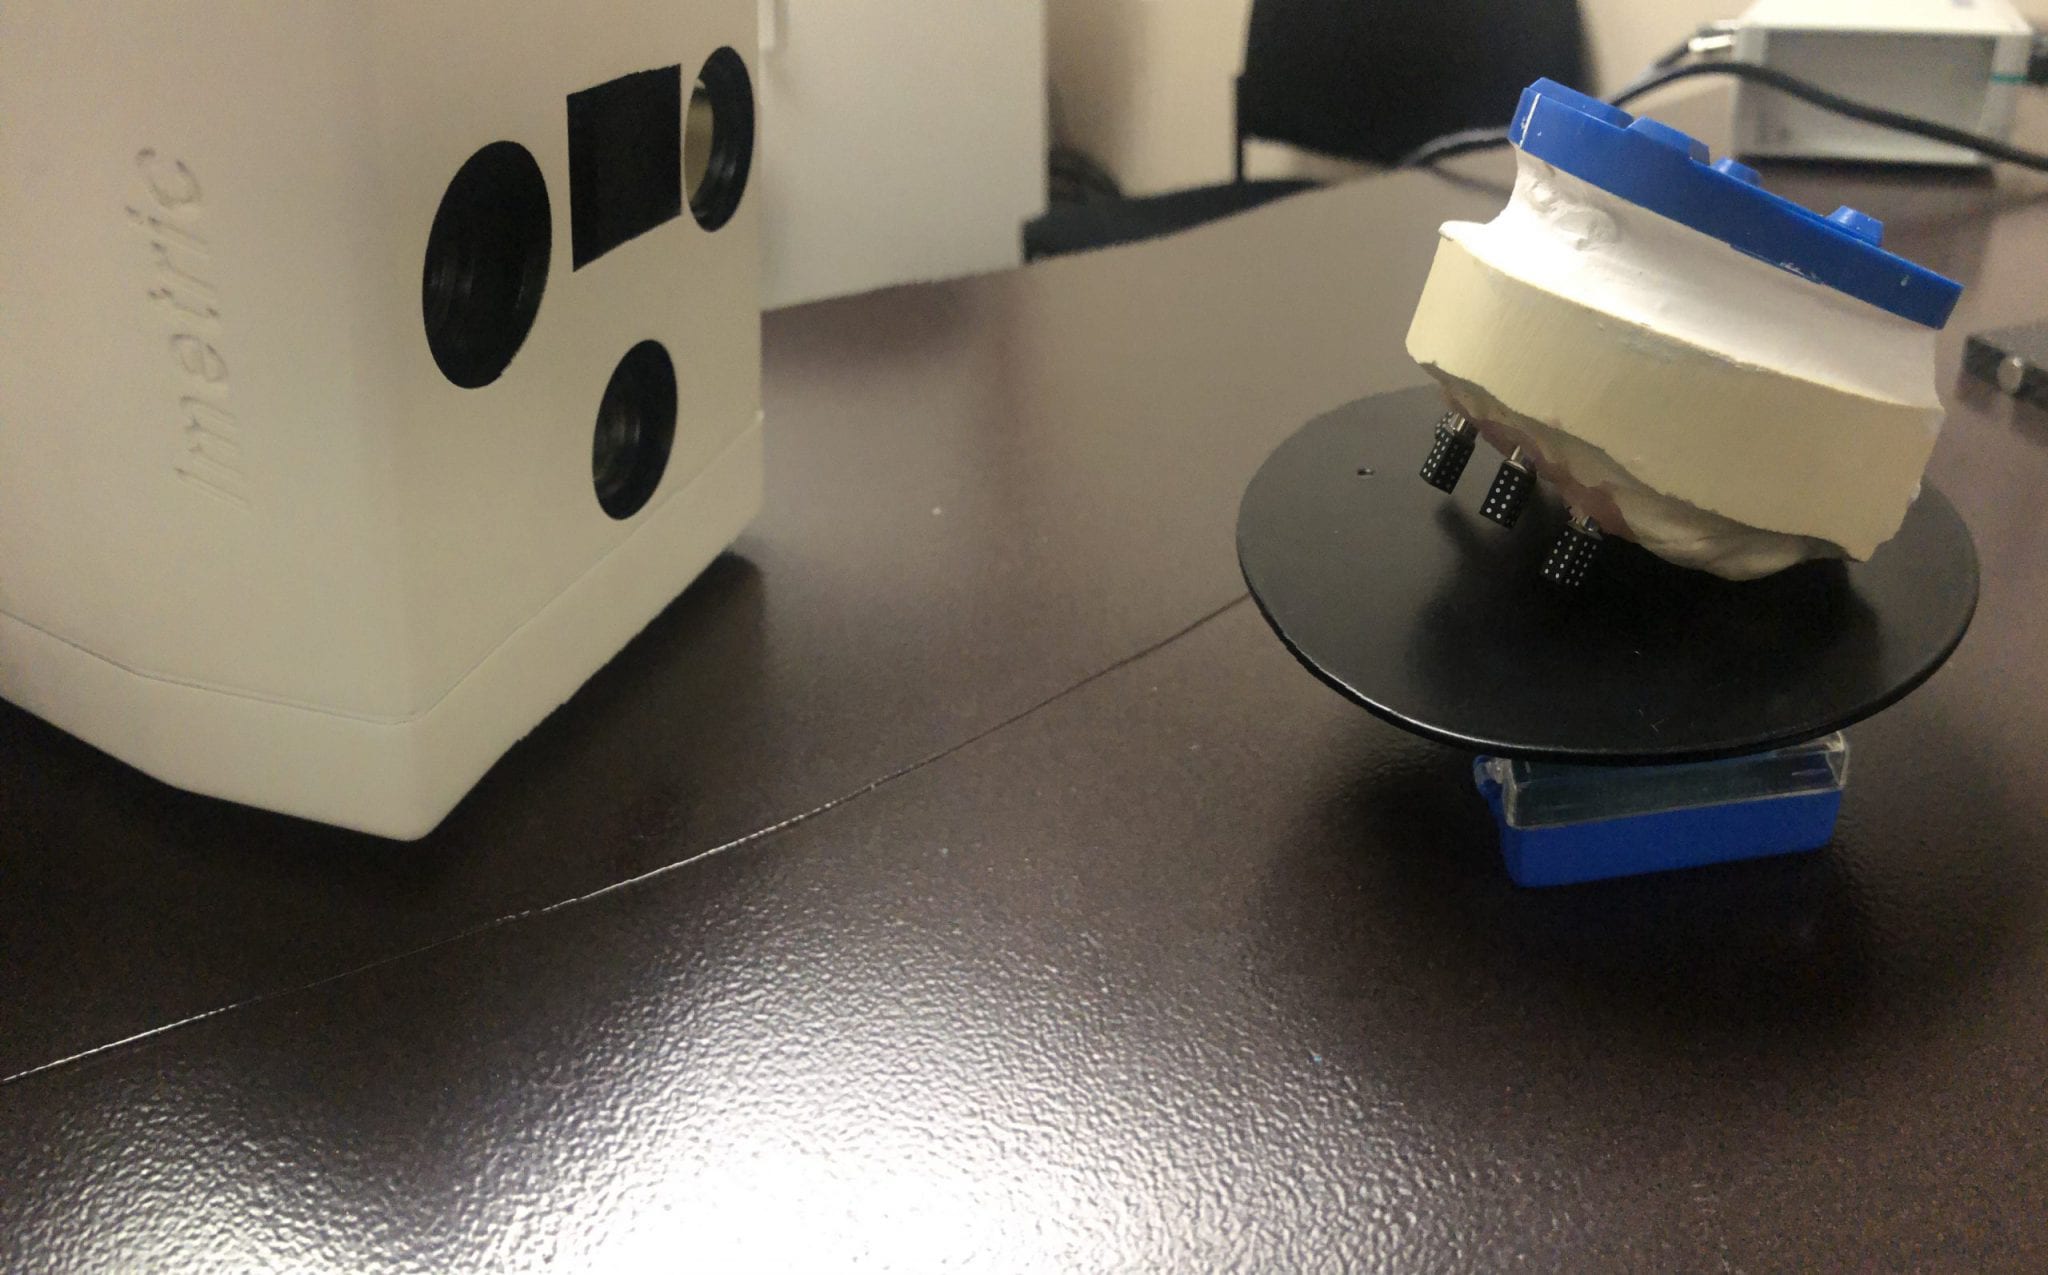
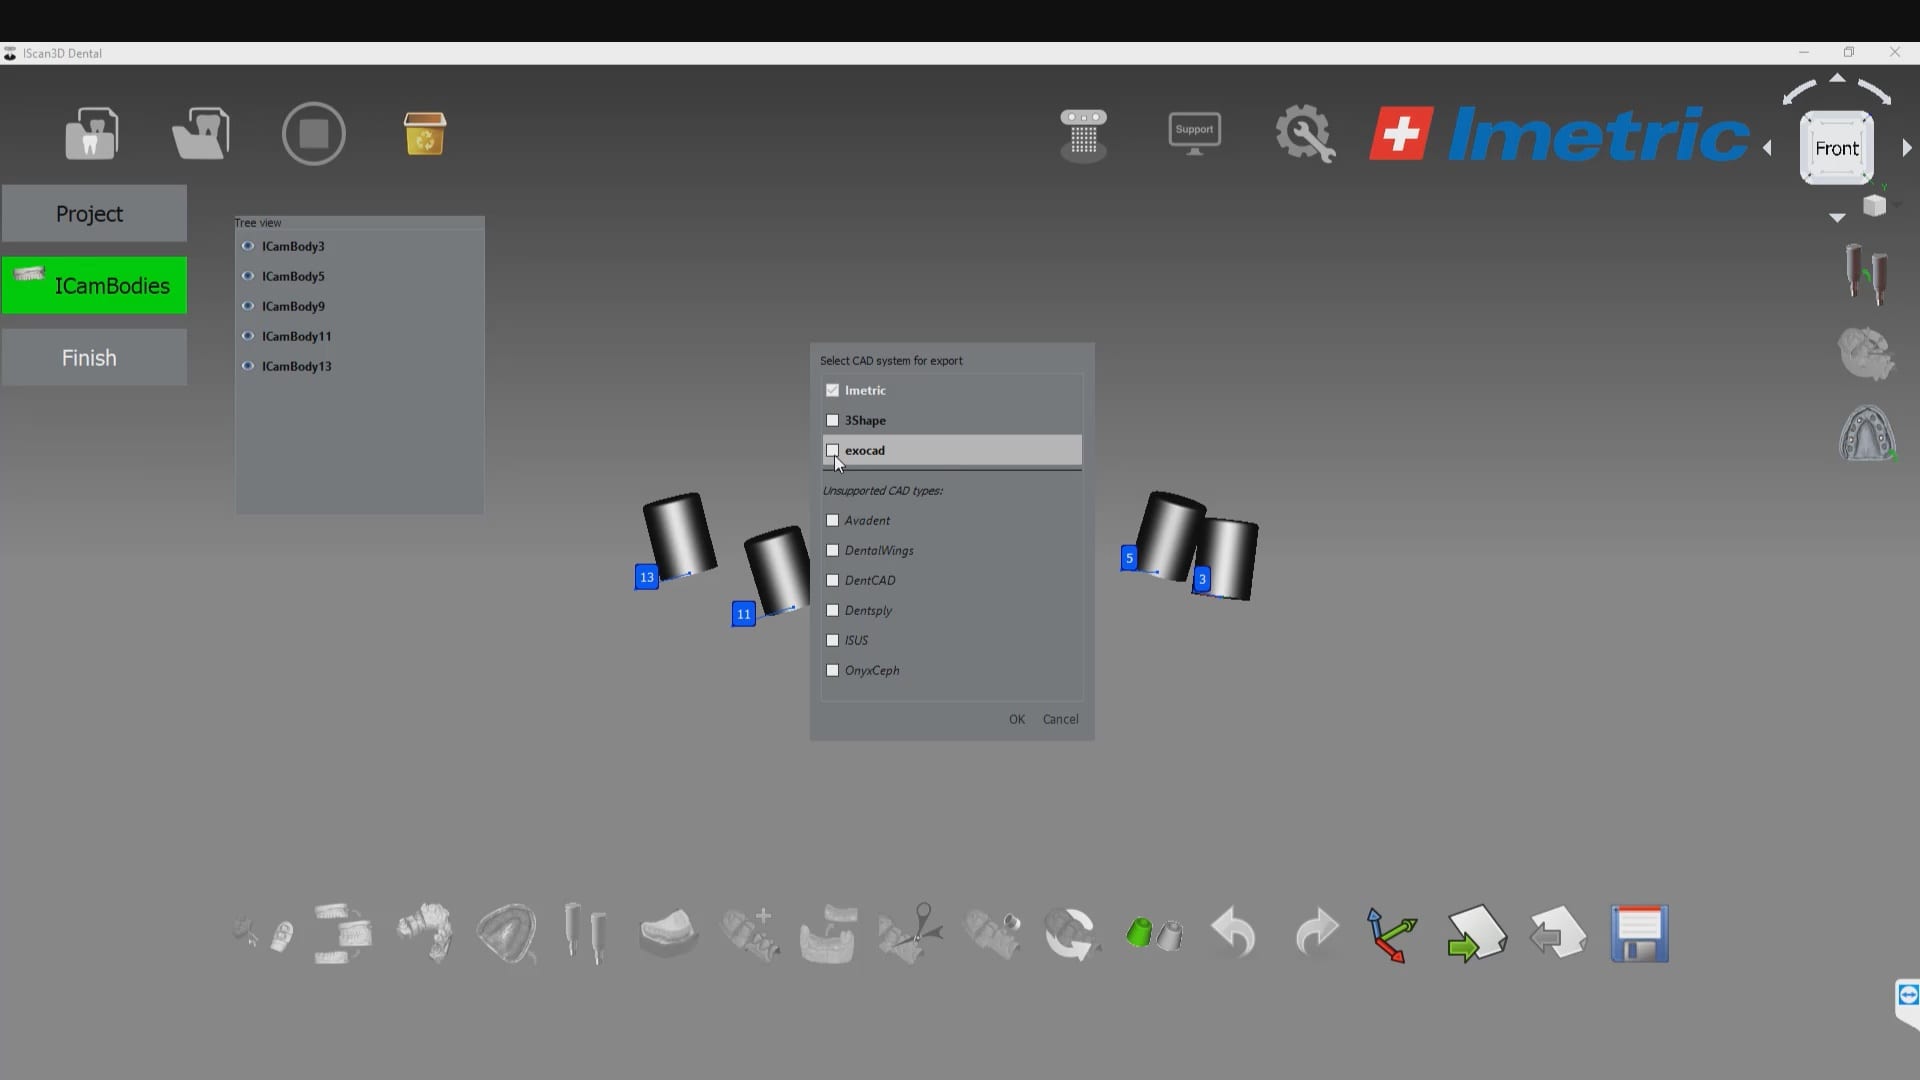
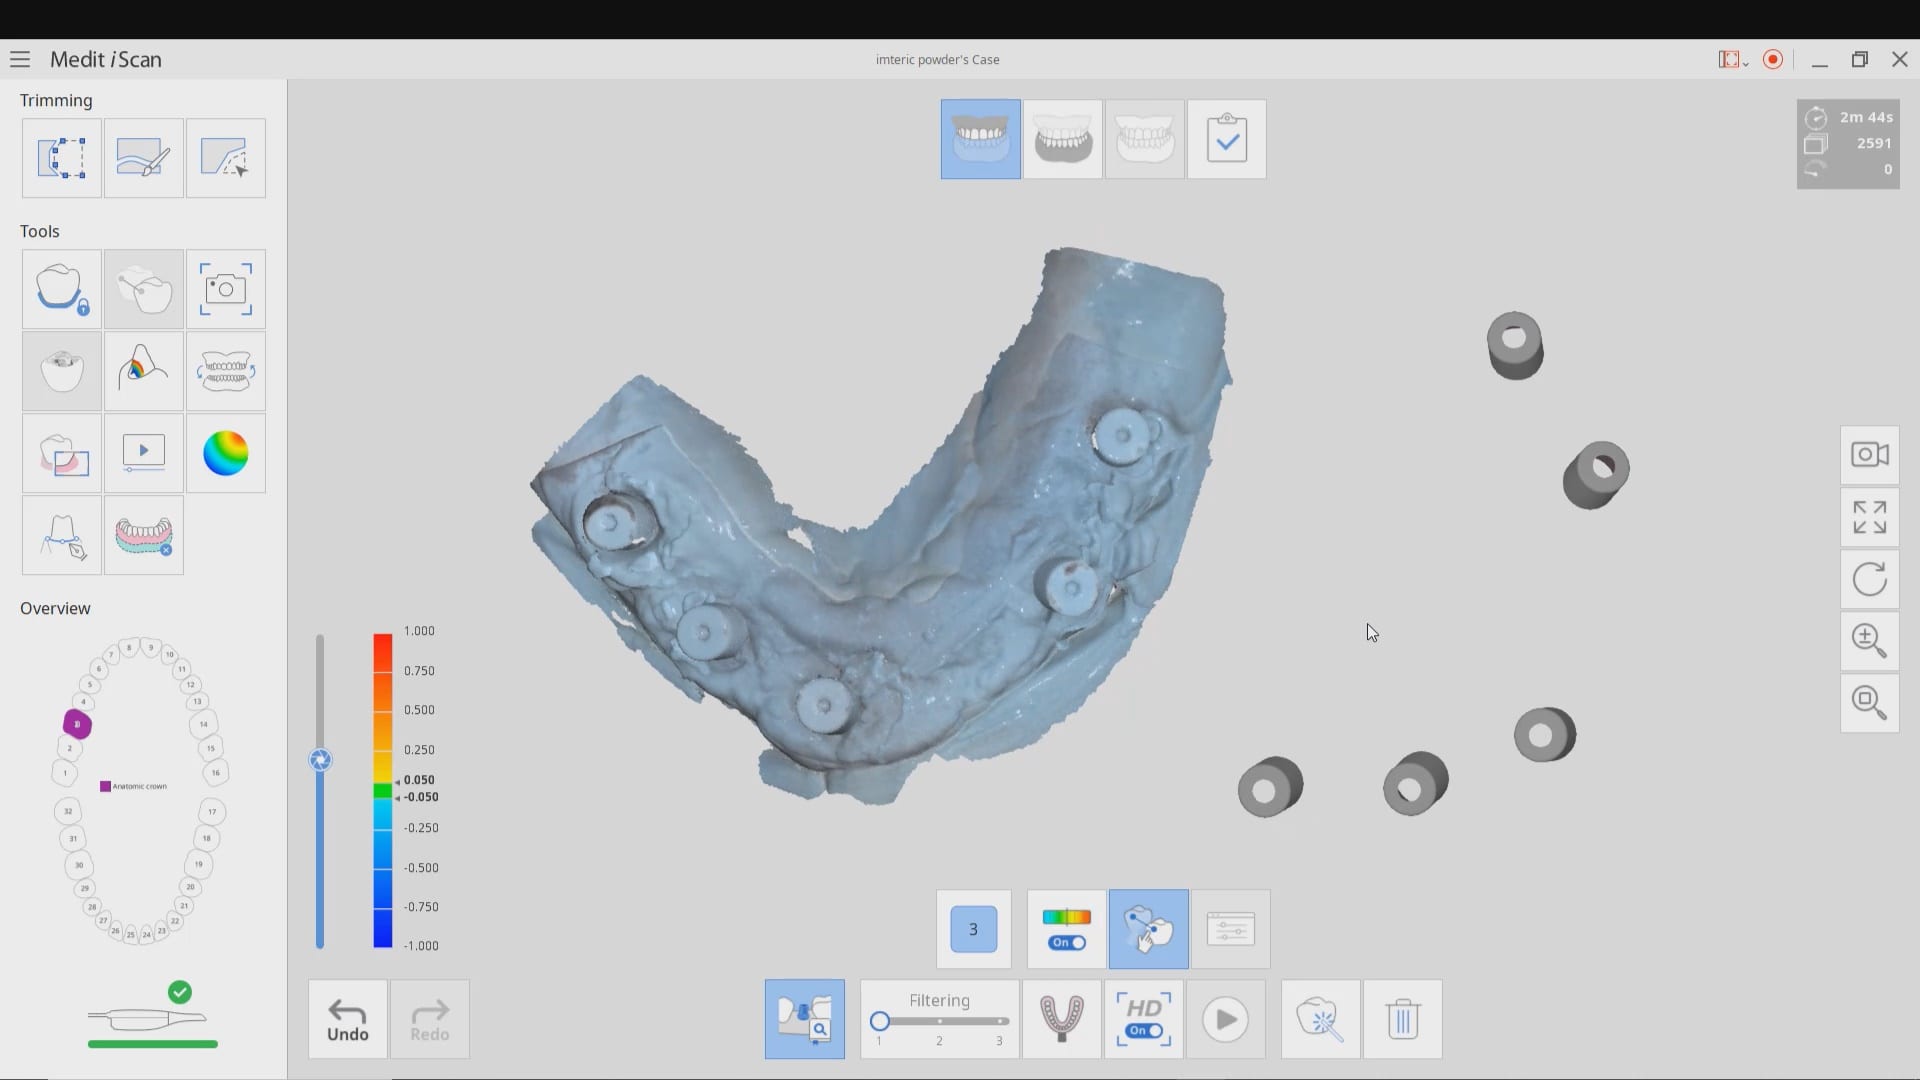
The markers are captured by the device in the software with multiple identification marks, ideally 10 marks on each scan post. This data is then exported as an stl file that has all the locations of each cylinder preserved. This whole process just takes minutes. Most people just utilize this device for full arch impressions so they can bypass the verification jig for large cases. Here, we use it to assess the accuracy of the medit i500 ios to provide cross arch accuracy if doctors follow our protocols for imaging, which utilizes the reliability map as a guide for imaging. When then utilize the Artificial Intelligent Implant Suprastructure Identification Software to merge and evaluate the accuracy of the ios scan.
There are a lot of ways one can introduce errors into a full arch scan with any ios, but the medit’s powerful features that include the reliability map and the AI tool separate it from all other scans that do not allow you to assess the accuracy of your scan while you are imaging. You can only do so with the fabrication of a verification jig
Please Share this:

Imetric ICam 4D Photogrammetry Meets the Artificial Intelligence Implant Suprastructure By Medit i500

Please Share this:

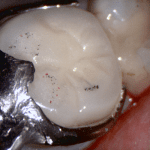
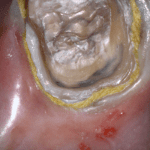
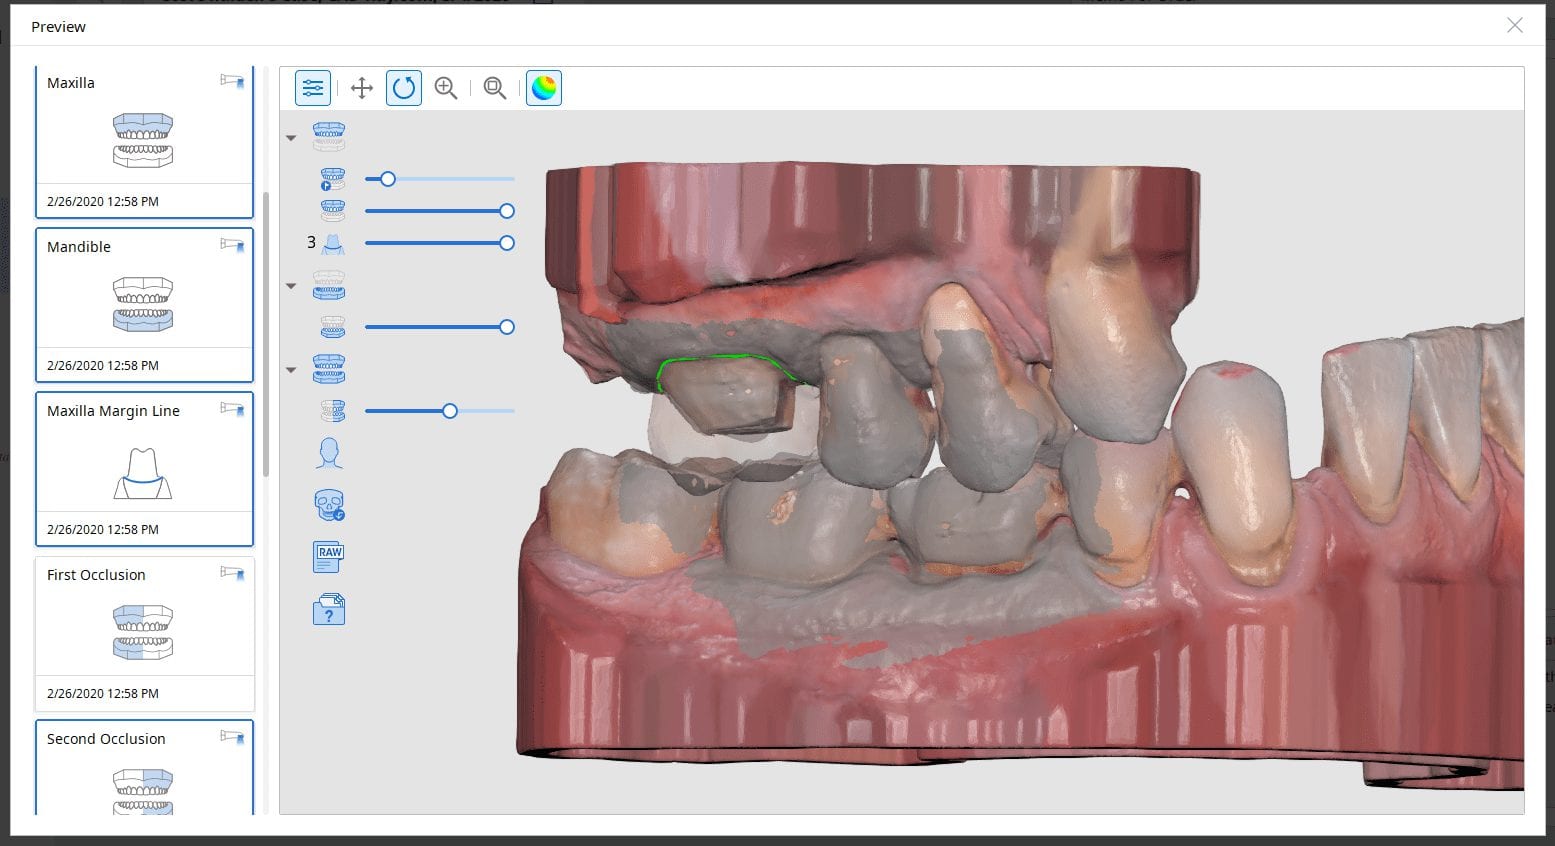
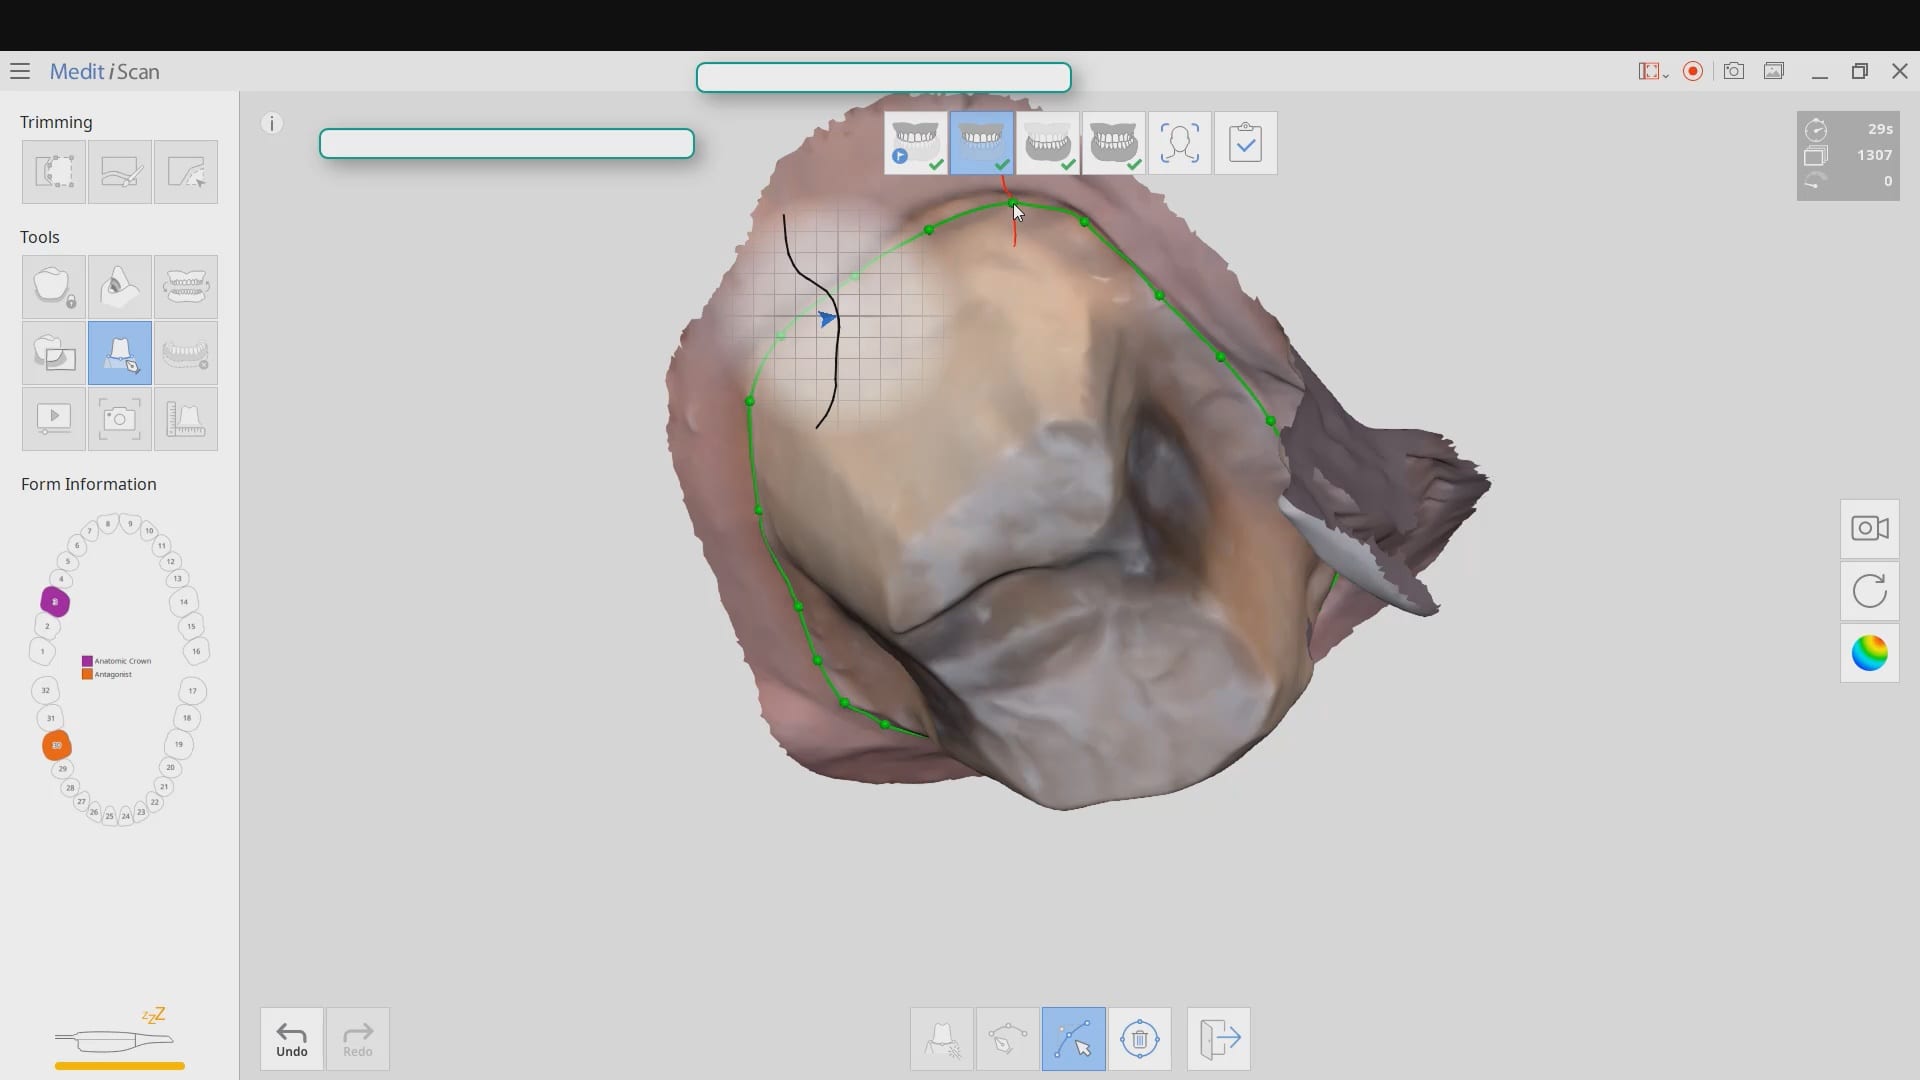
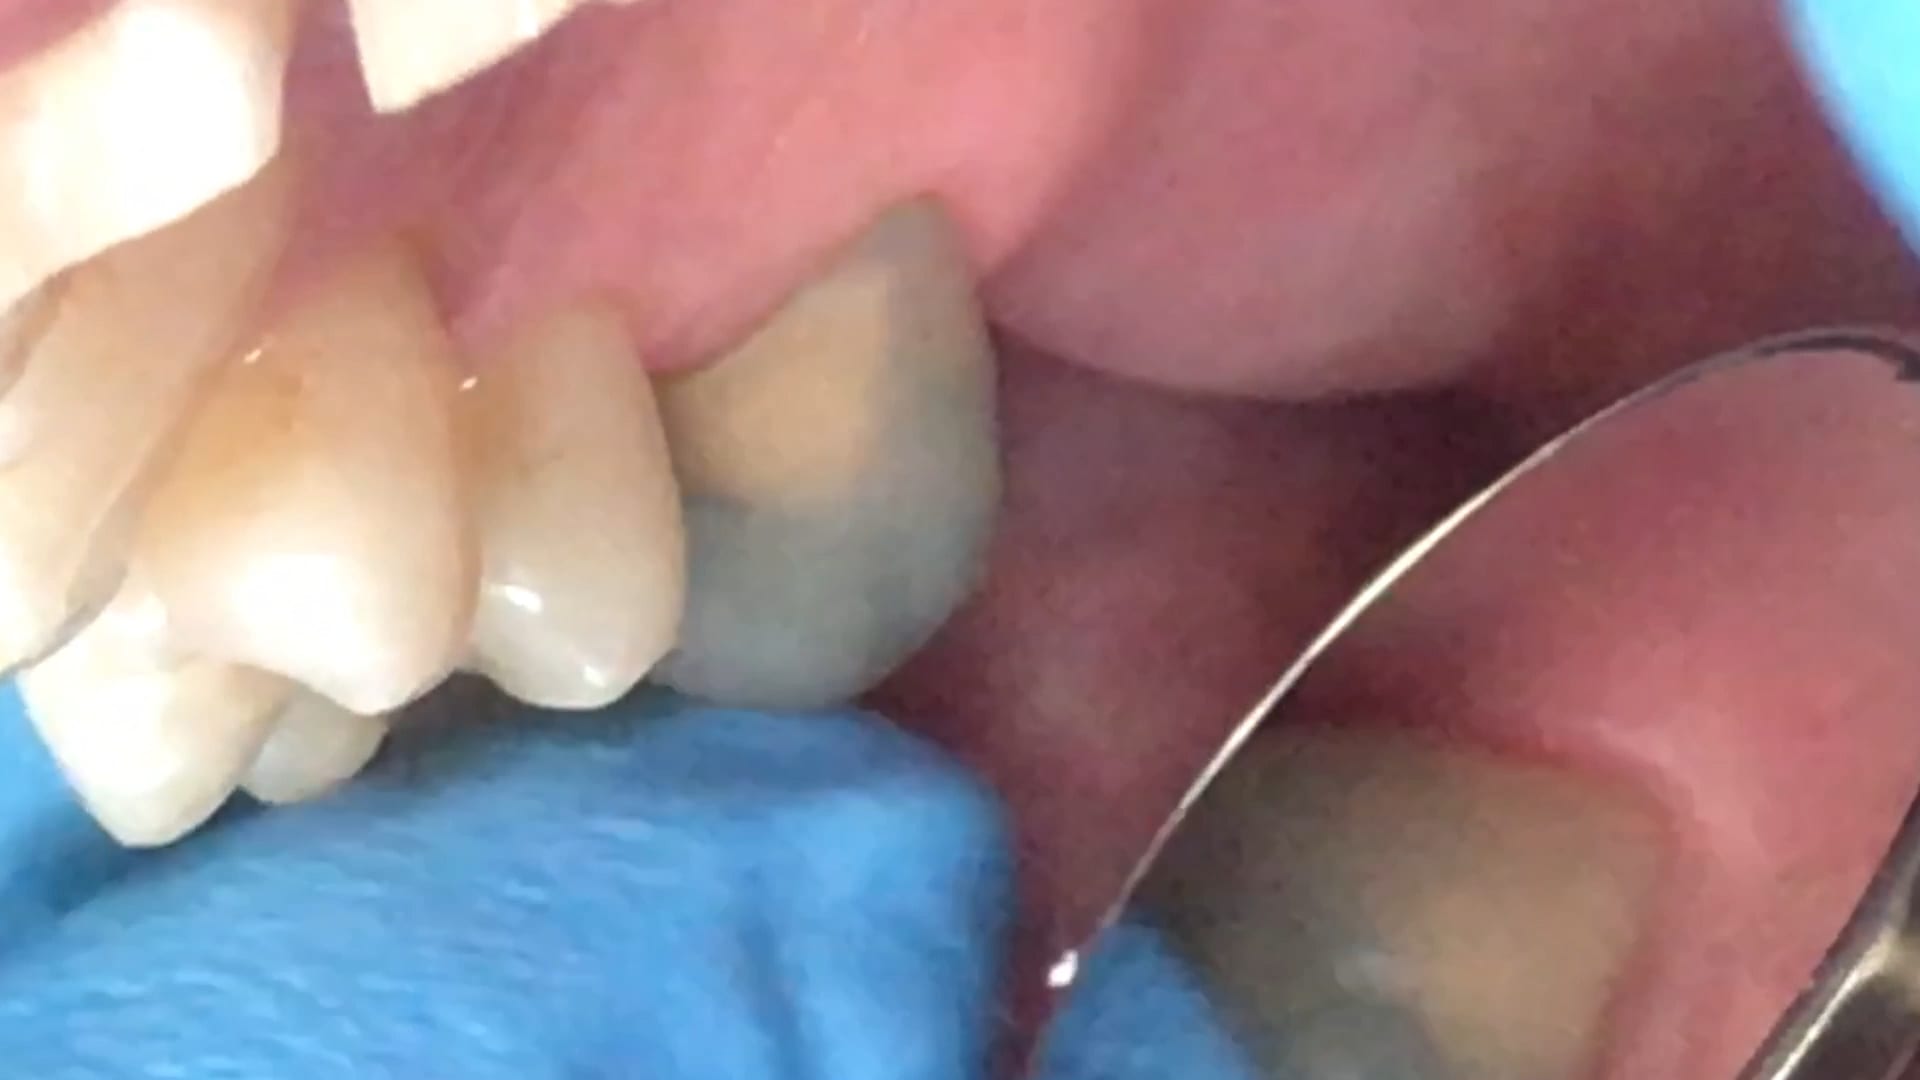
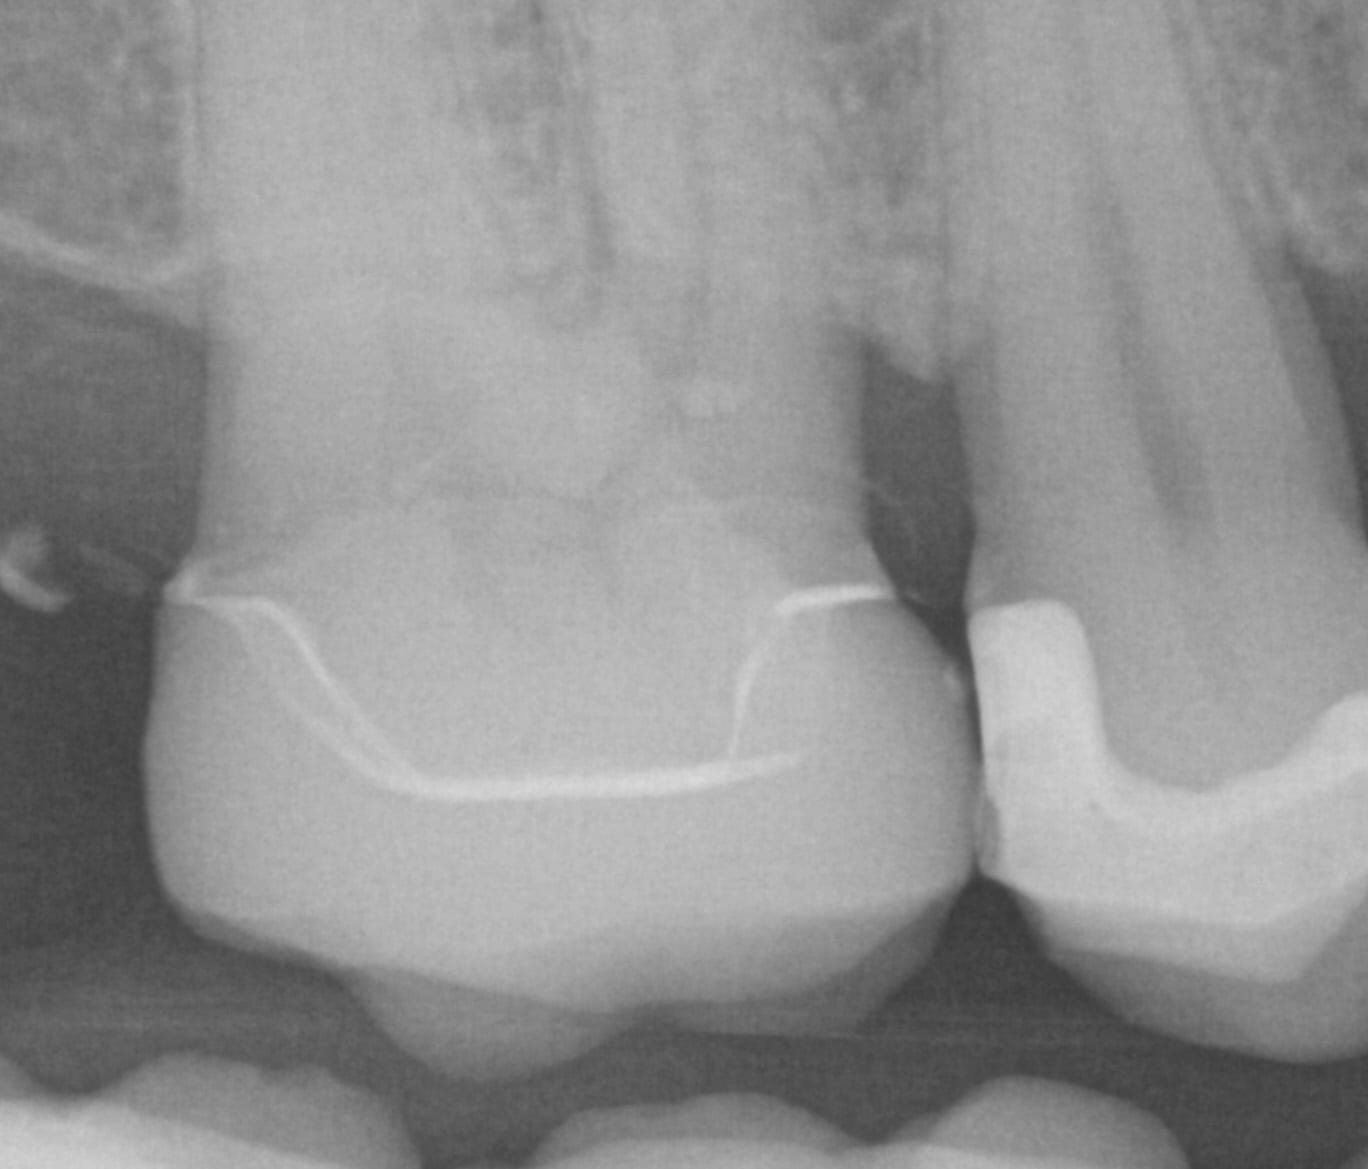
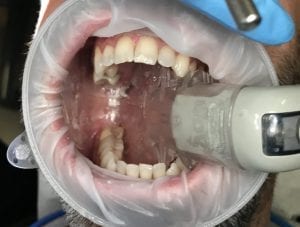
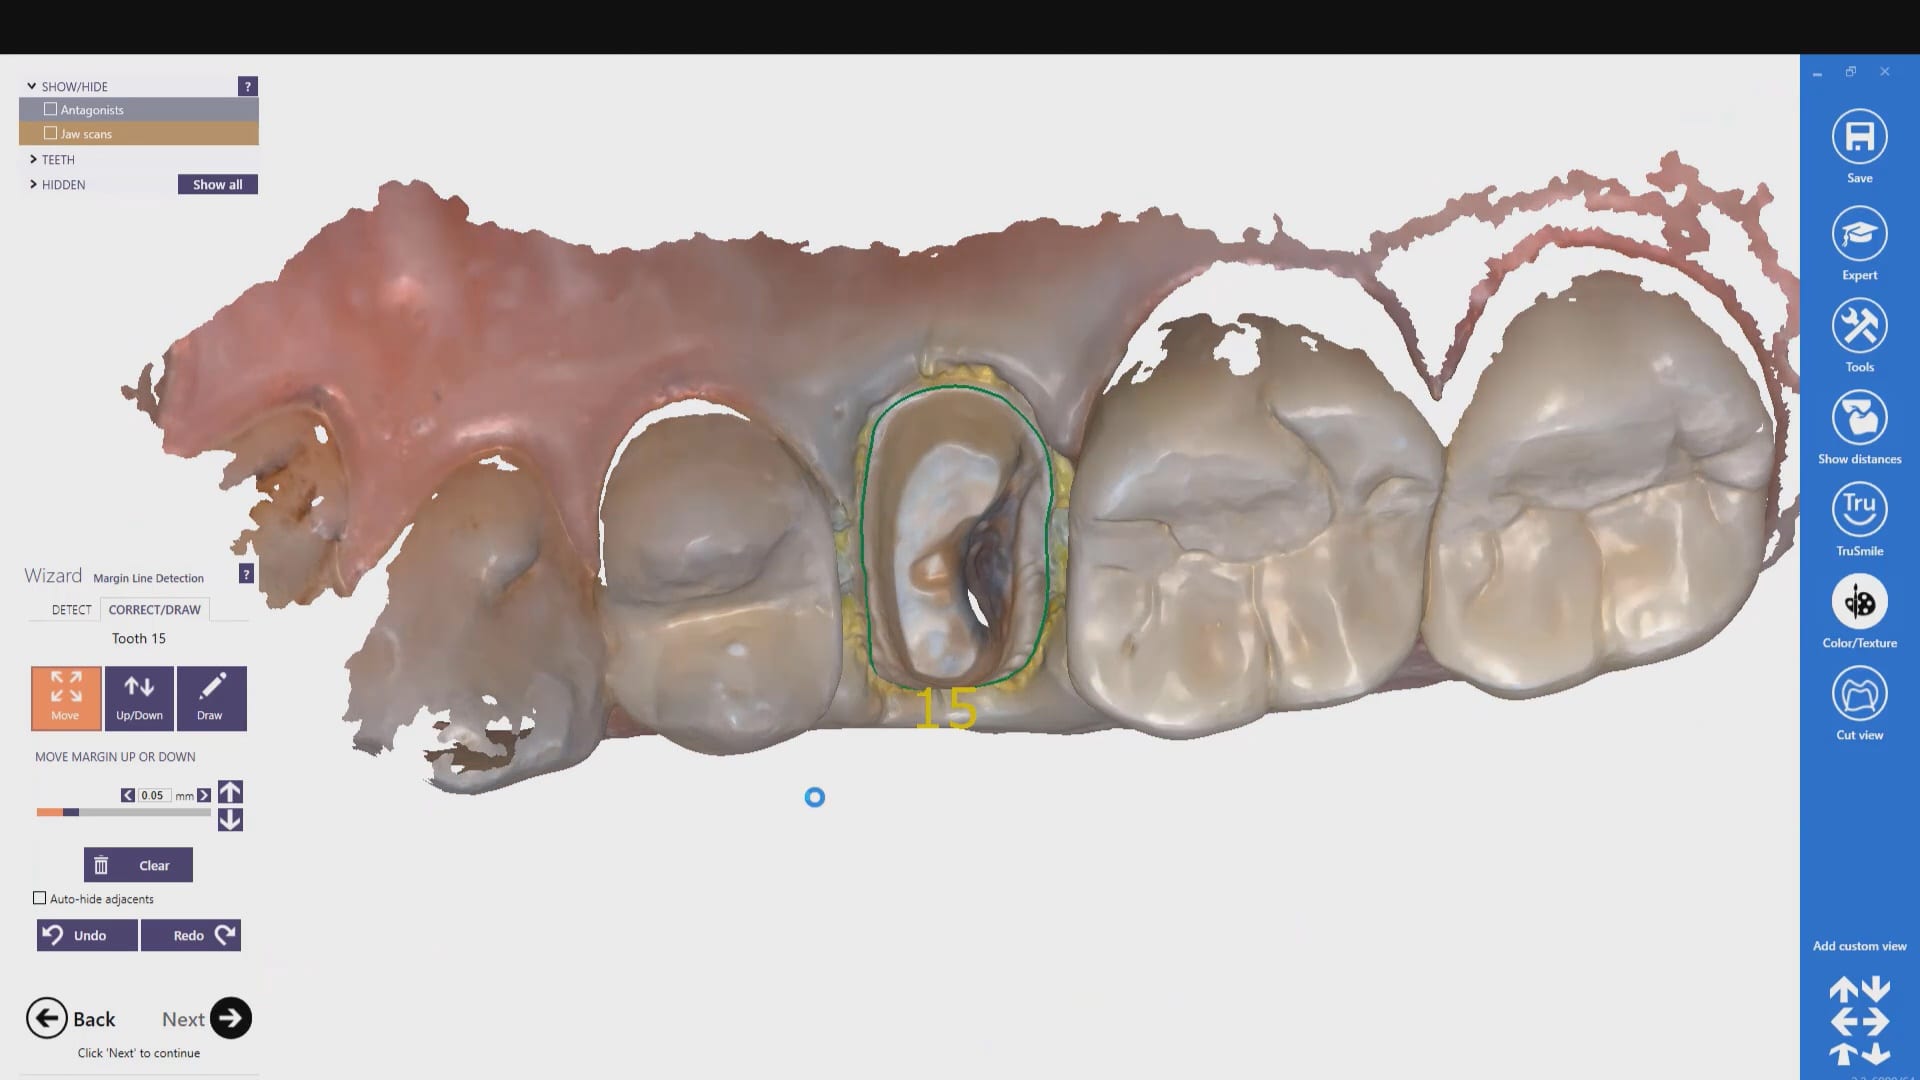
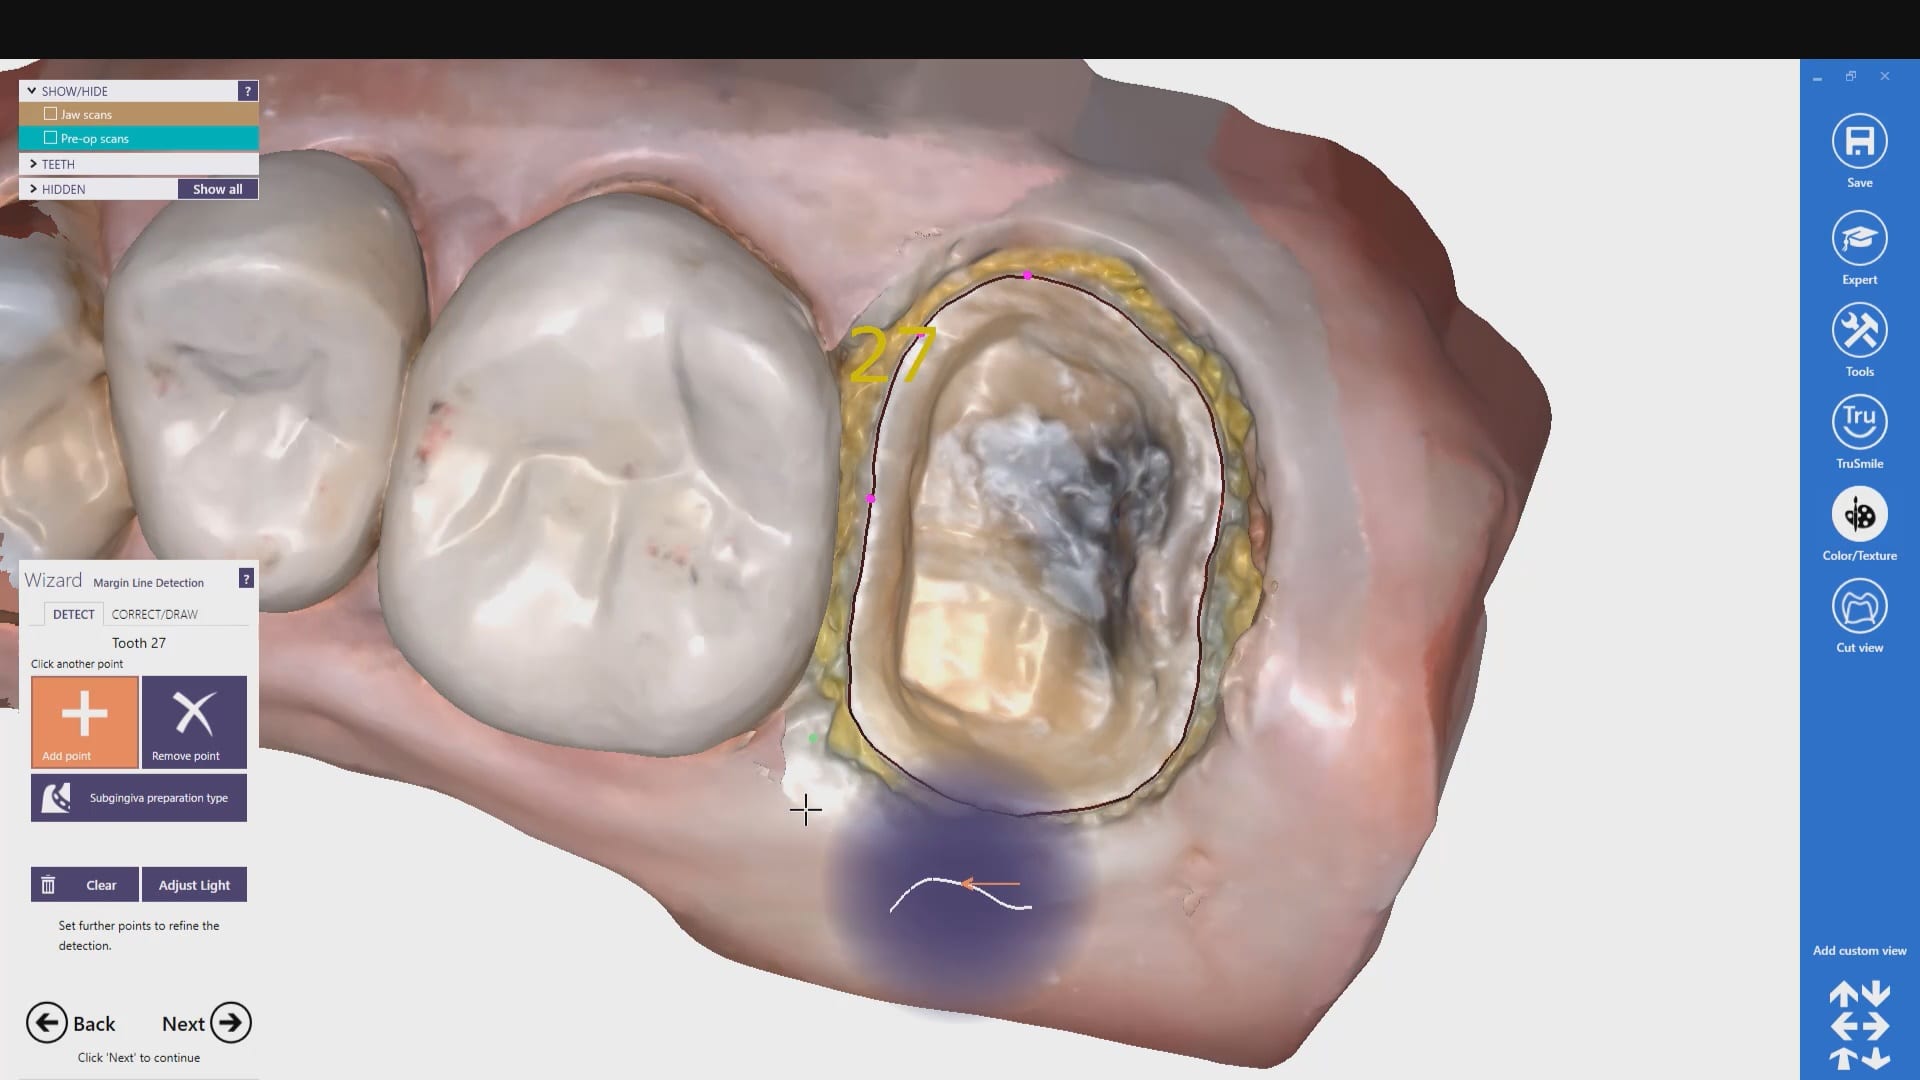
Proper Retraction and Isolation Leads to Great Marginal Fit
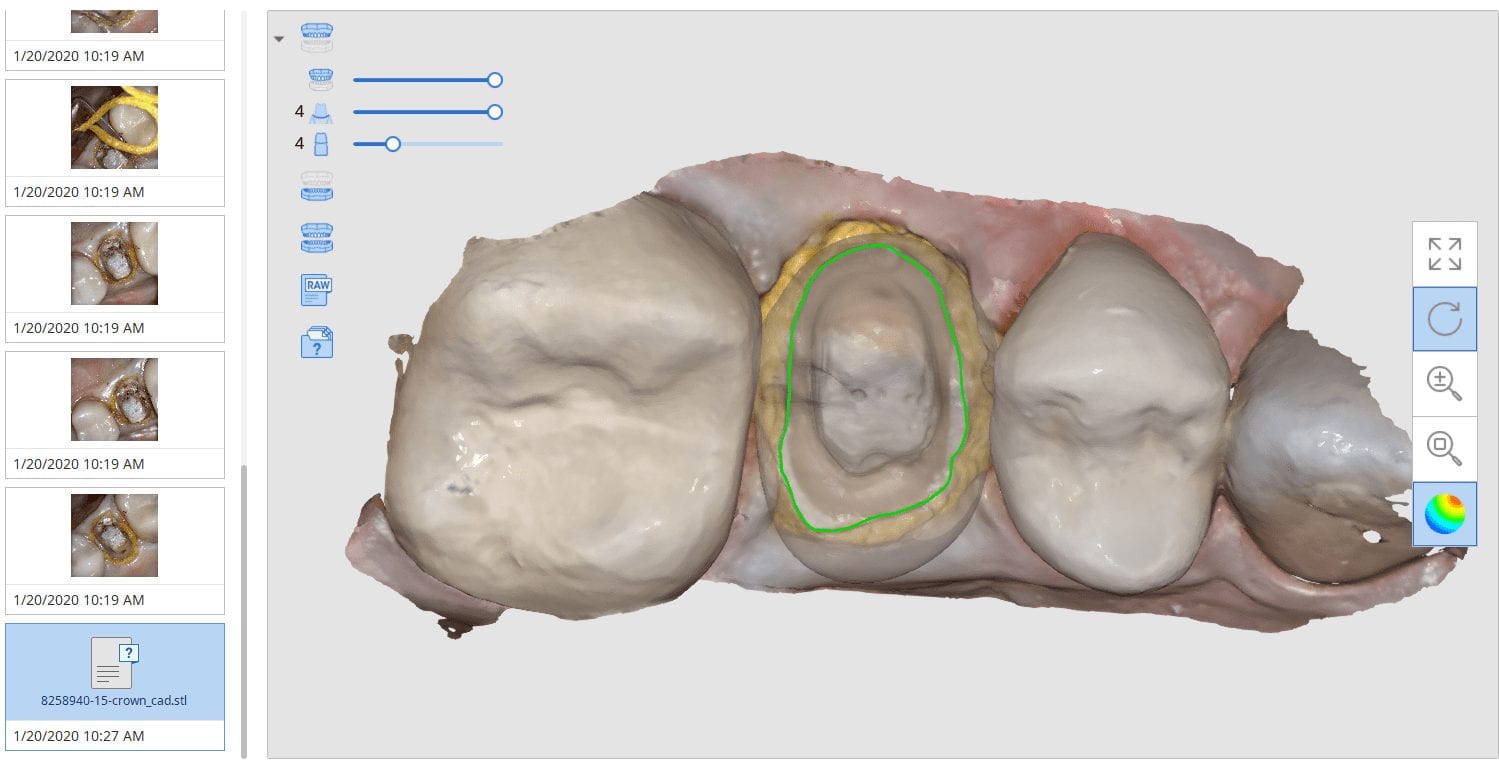
In this clinical presentation, we demonstrate the removal of a crown that has recurrent decay. The bleeding tissue was managed with a double cord technique and expasyl and the margin was captured with the medit i500. The margin was also defined in the native imaging software which allows the user to visualize the detail before designing it or send it off to the lab. Once the case is transferred to cad software, the designed margins carry through and there is an opportunity to modify it
Please Share this:

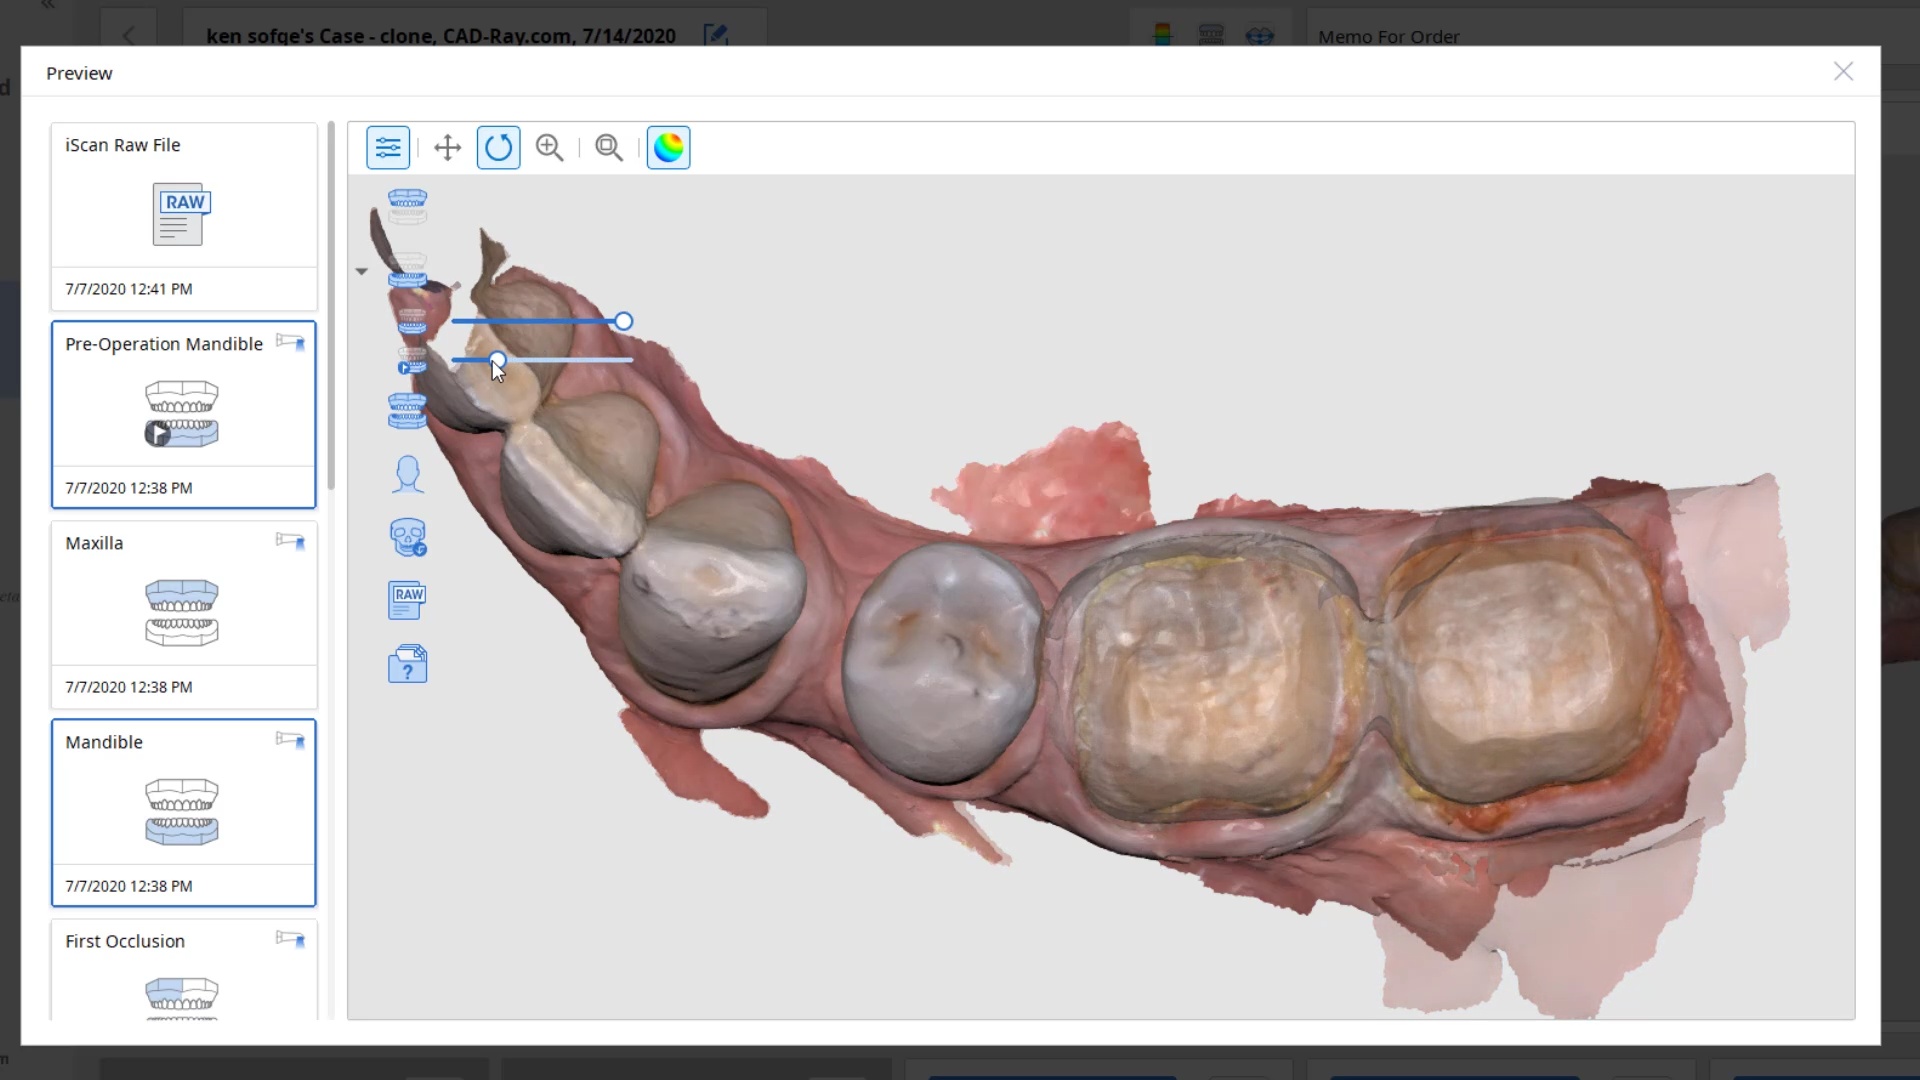
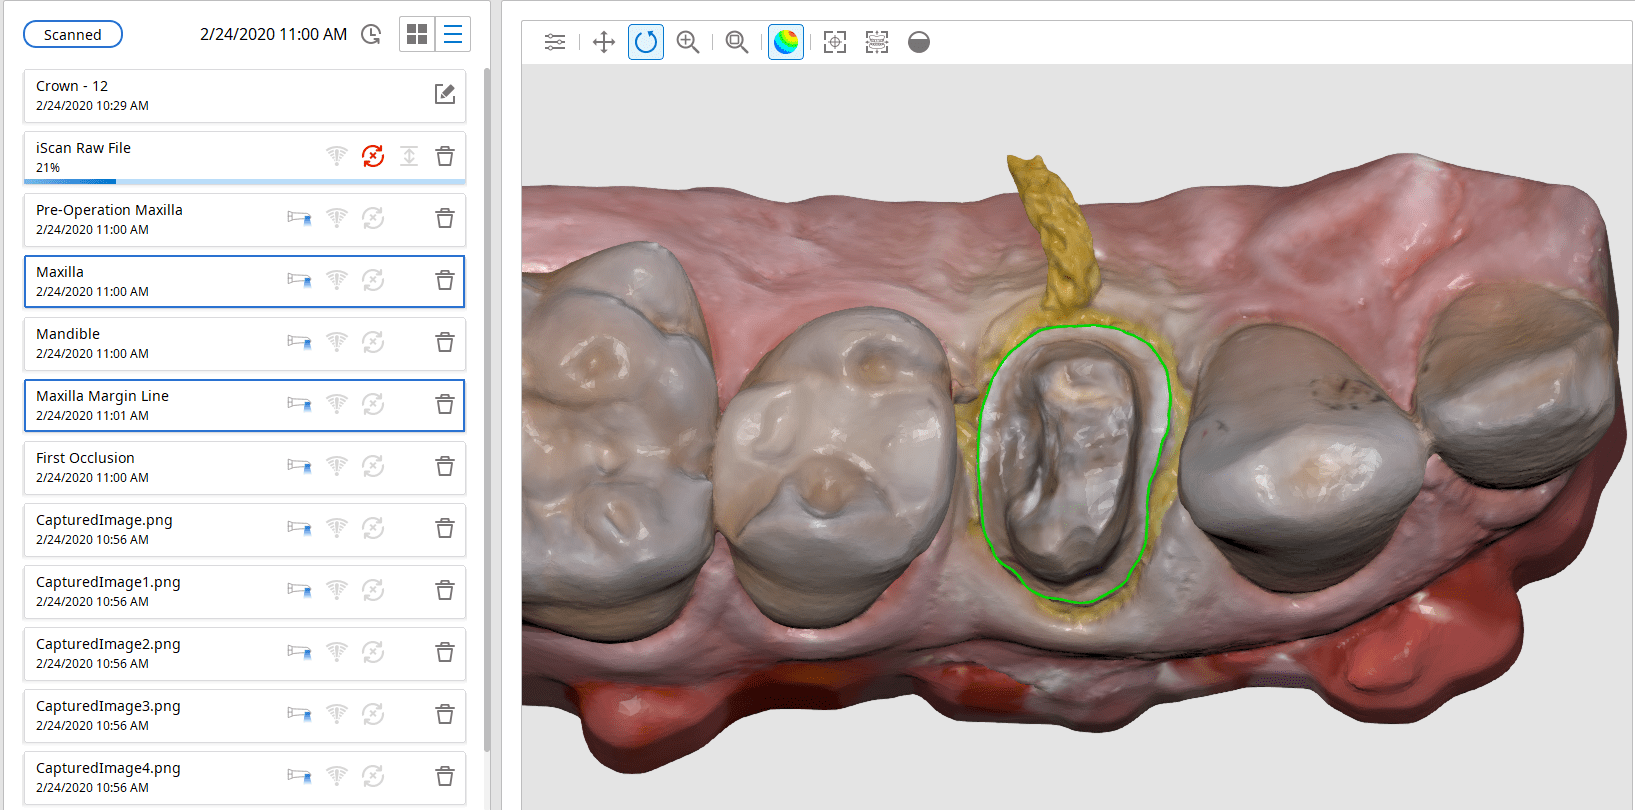
A Simple Crown Copy Case With Medit i500
Replacing a crown with open margins and recurrent decay
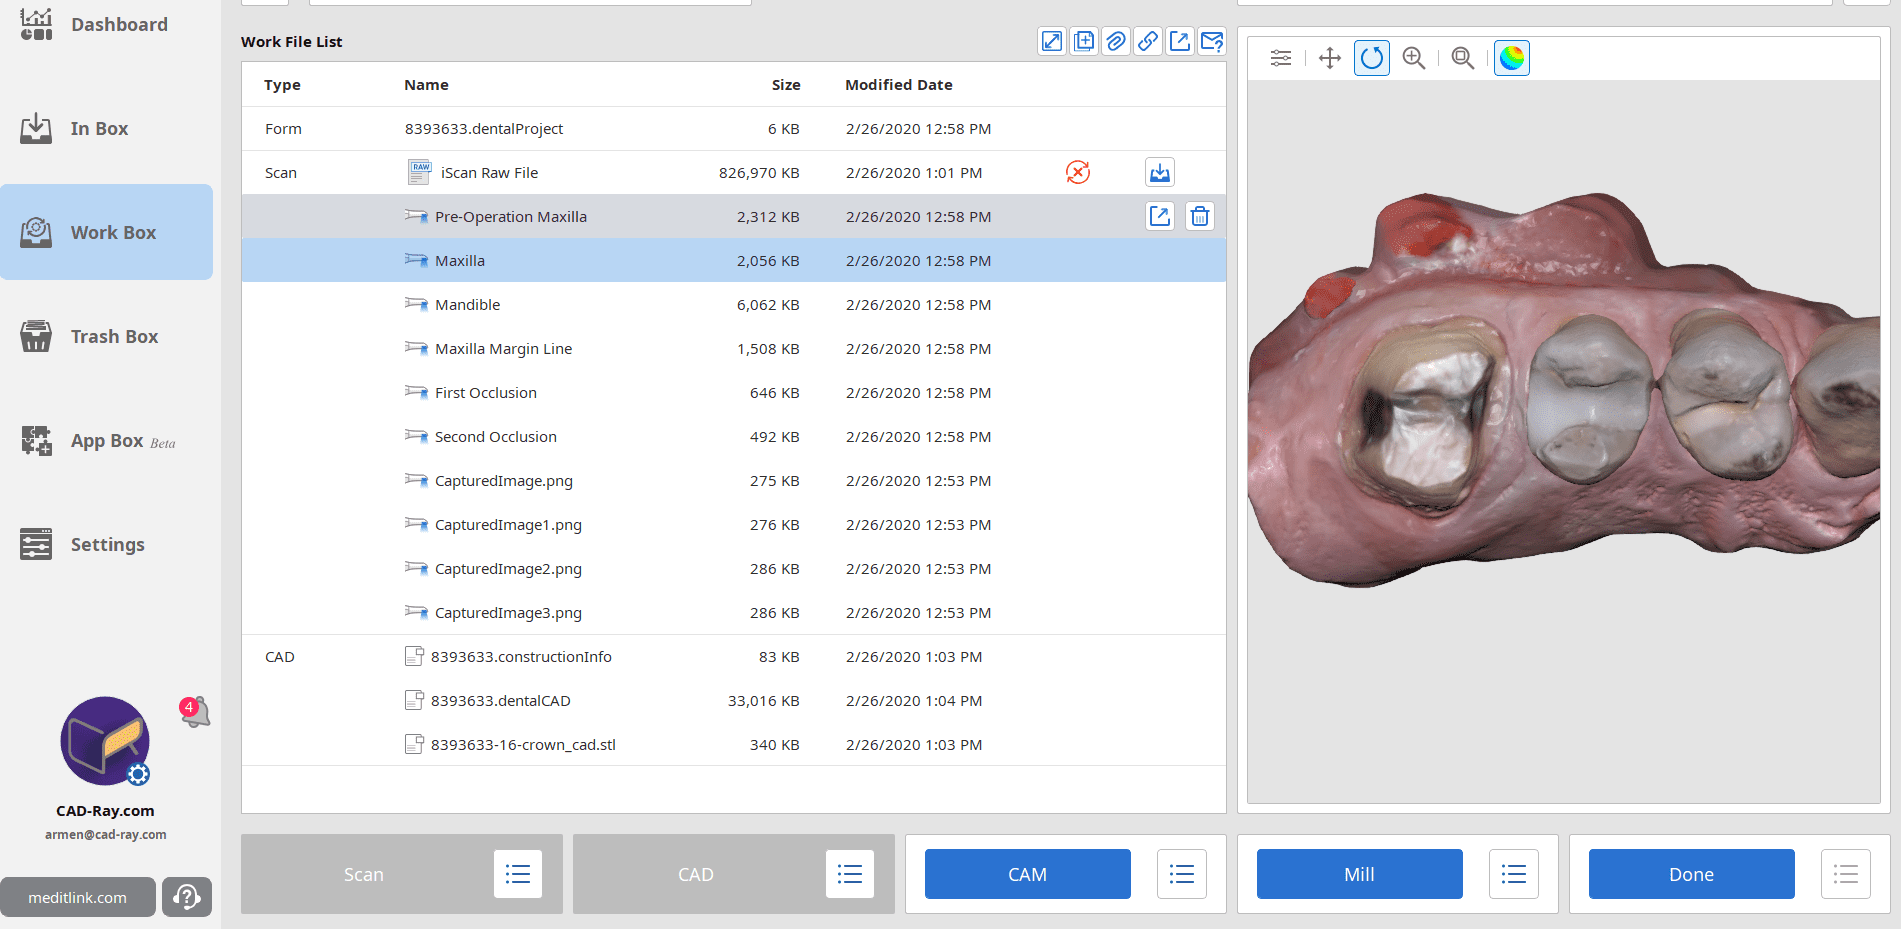
Setting up the case with medit i500’s meditlink software
Imaging the preparation with Medit i500 and segmentally processing the prep area to assess the clinical margins
Case preview and order restoration from the lab
Please Share this:

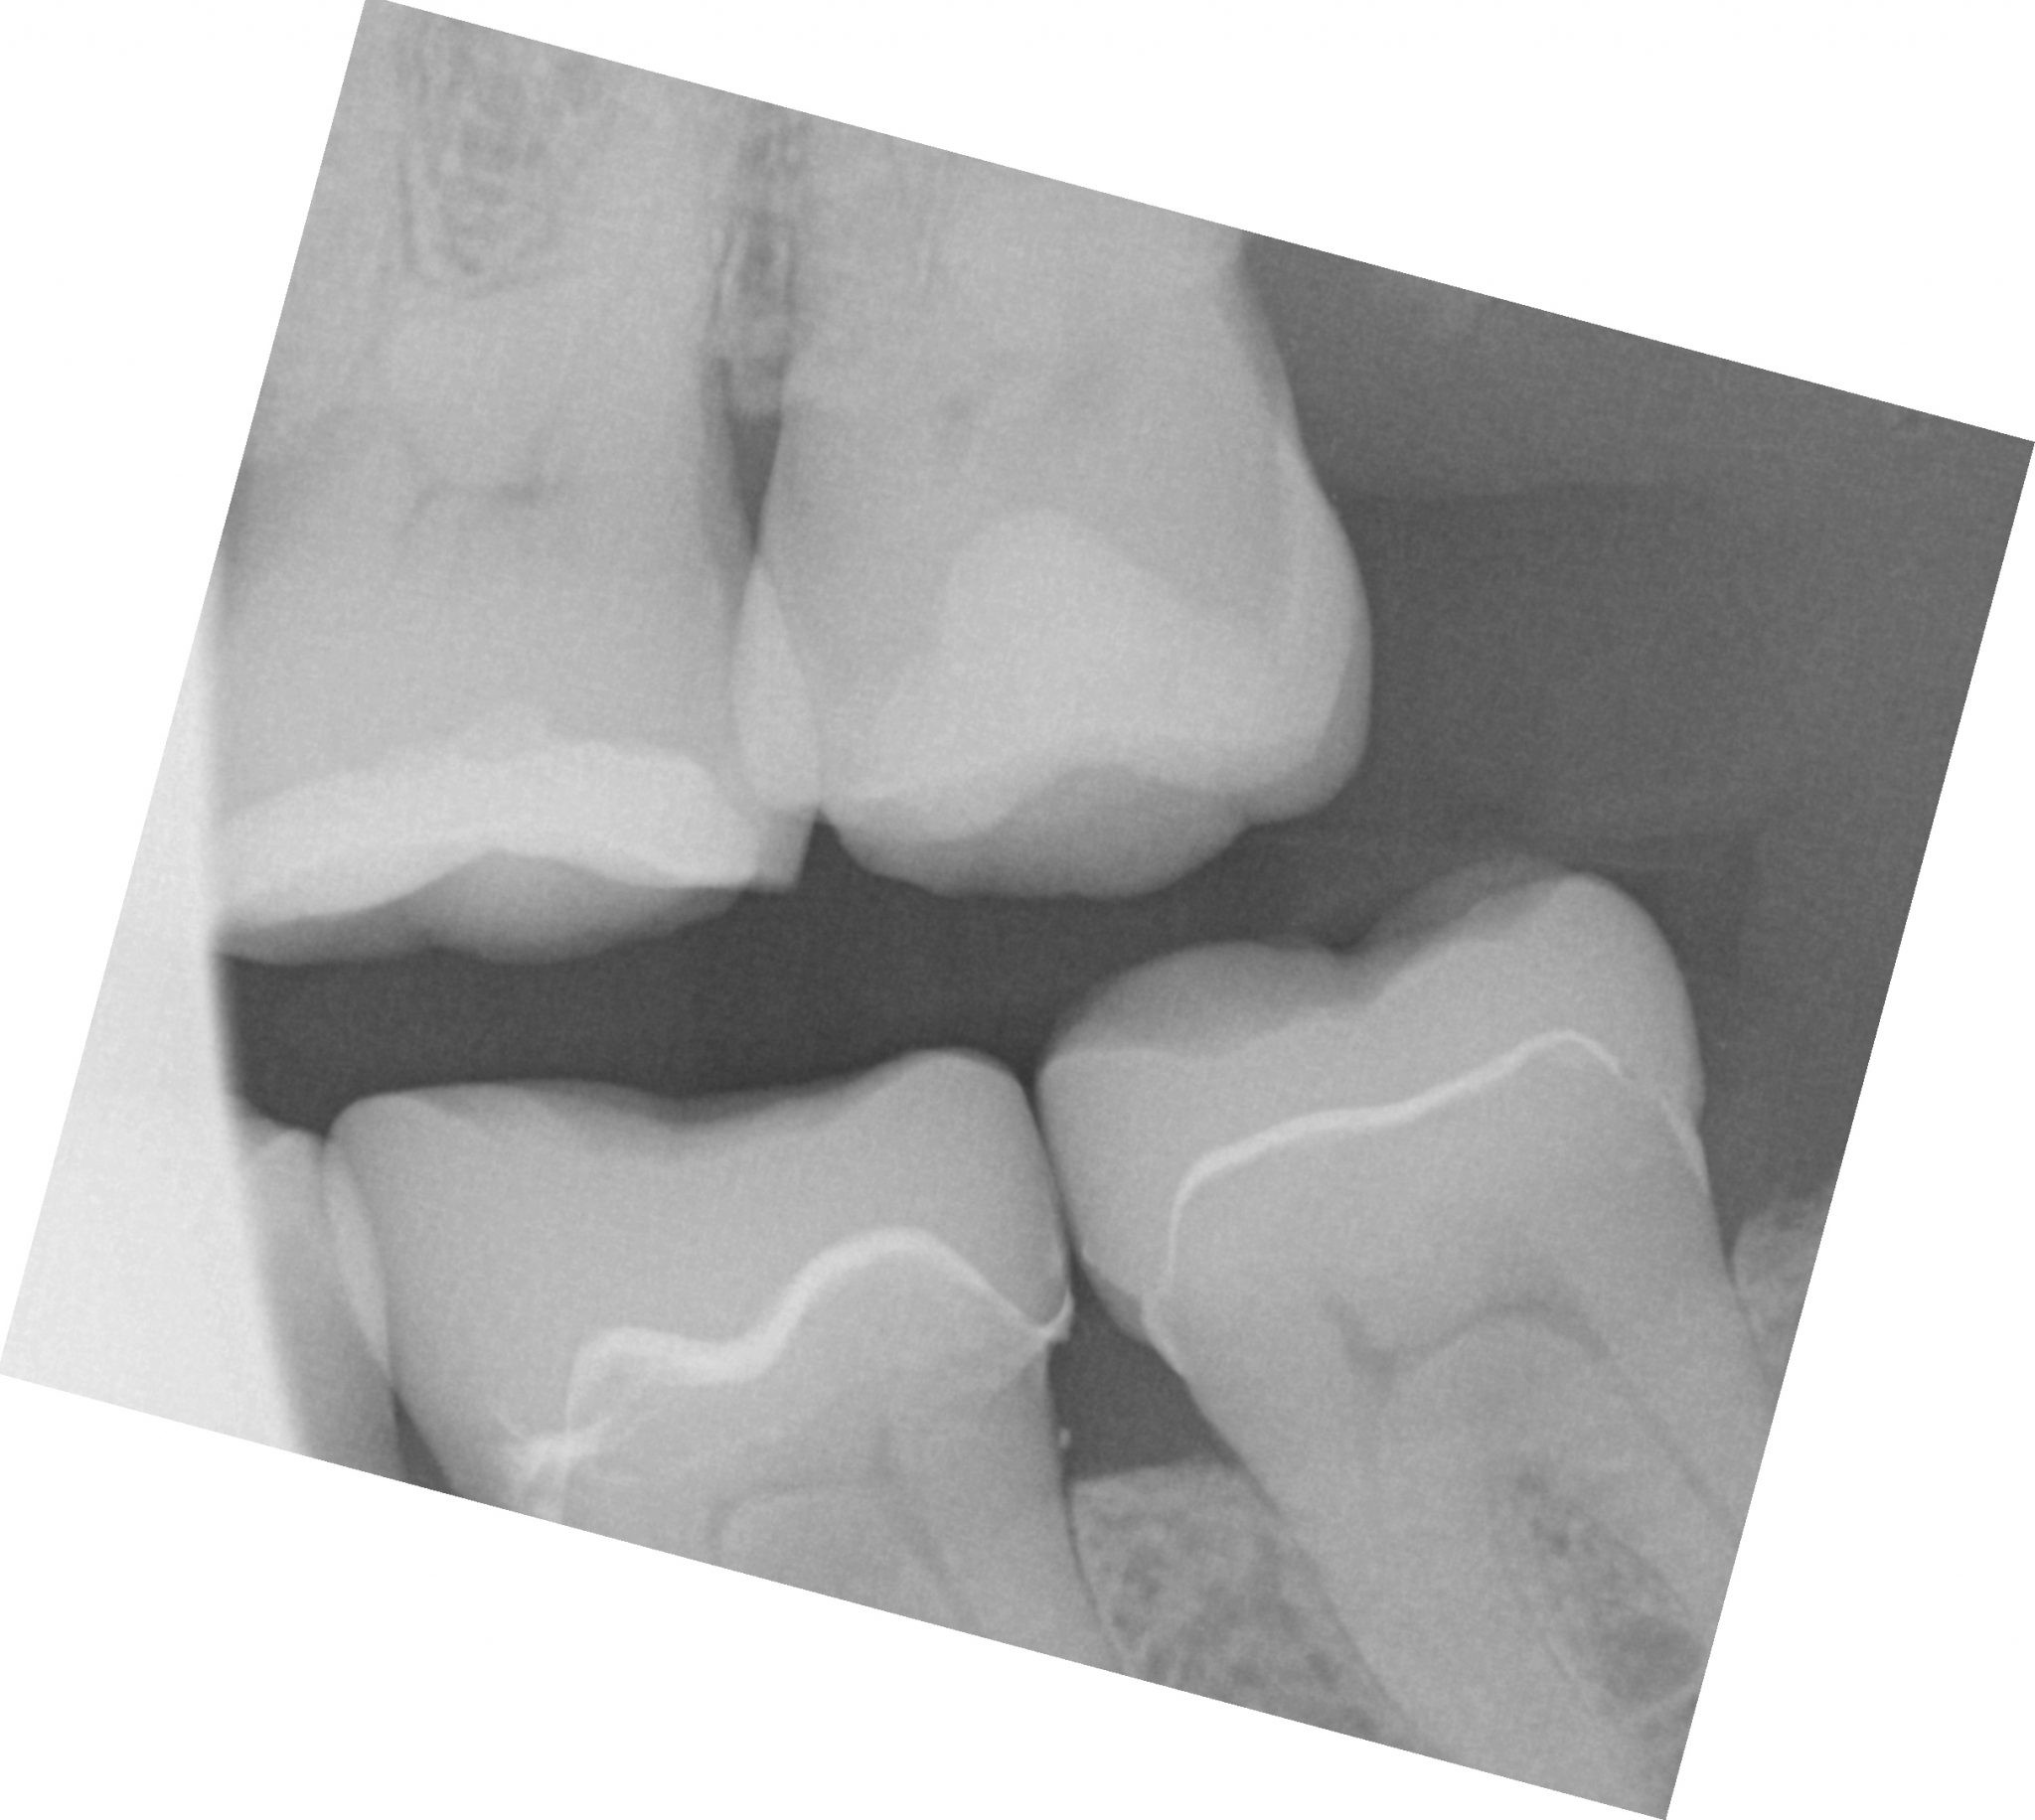
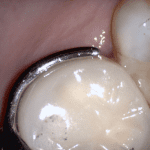
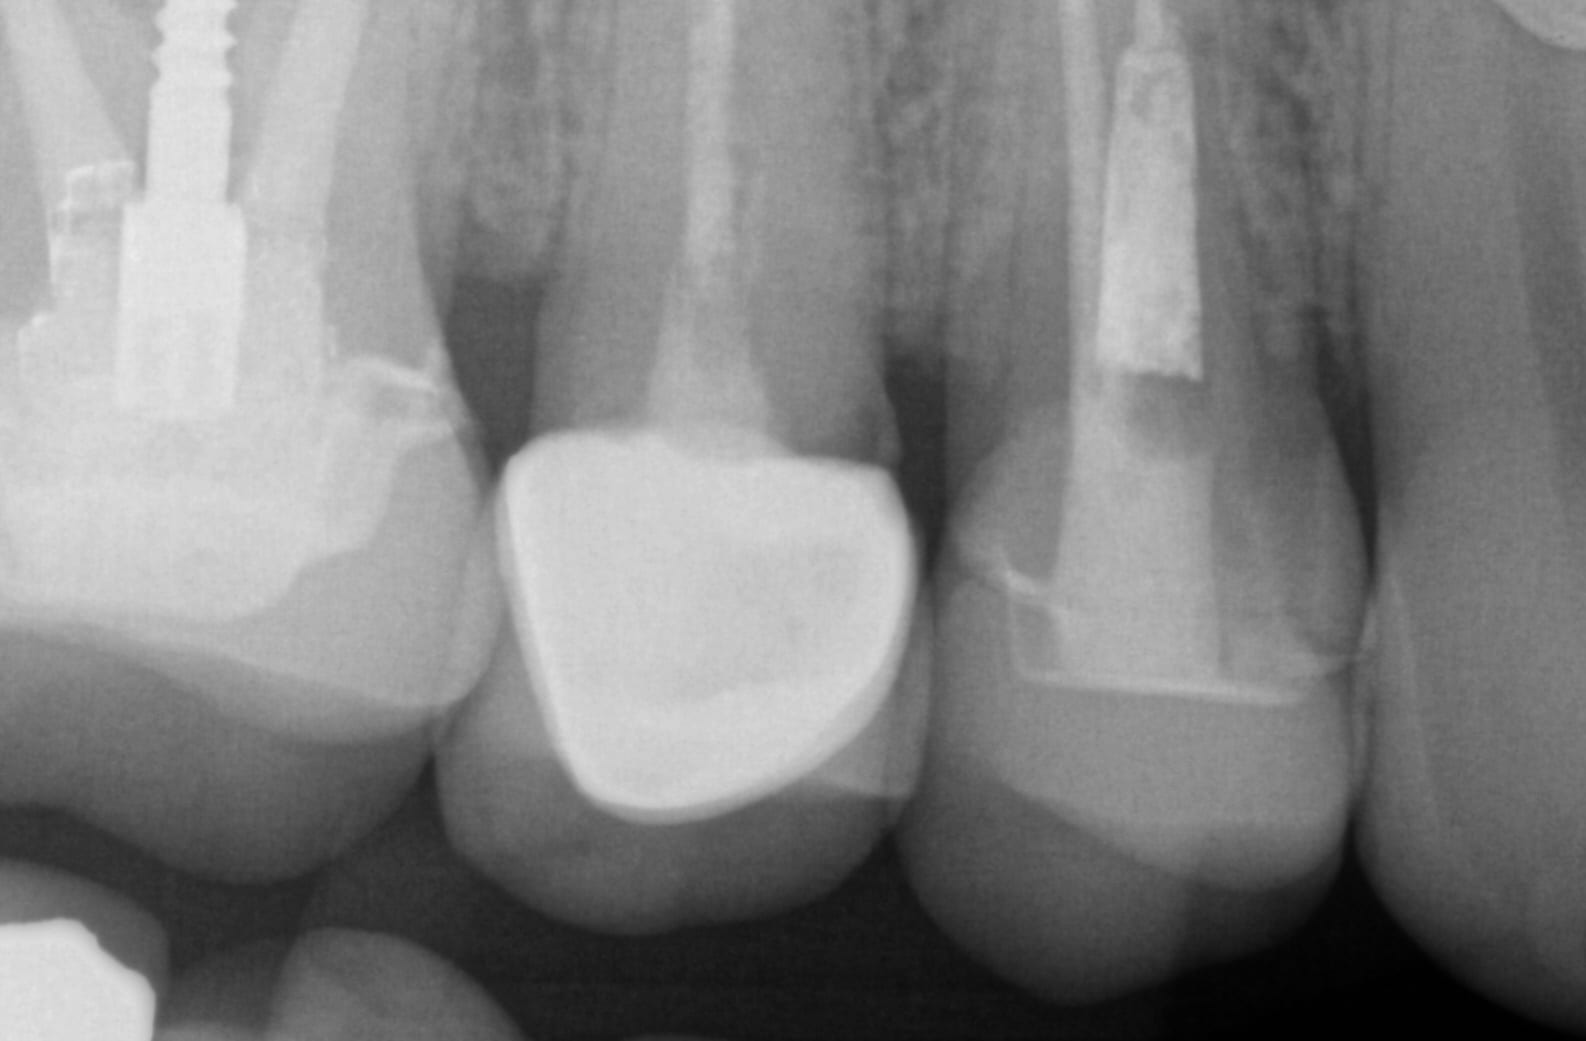
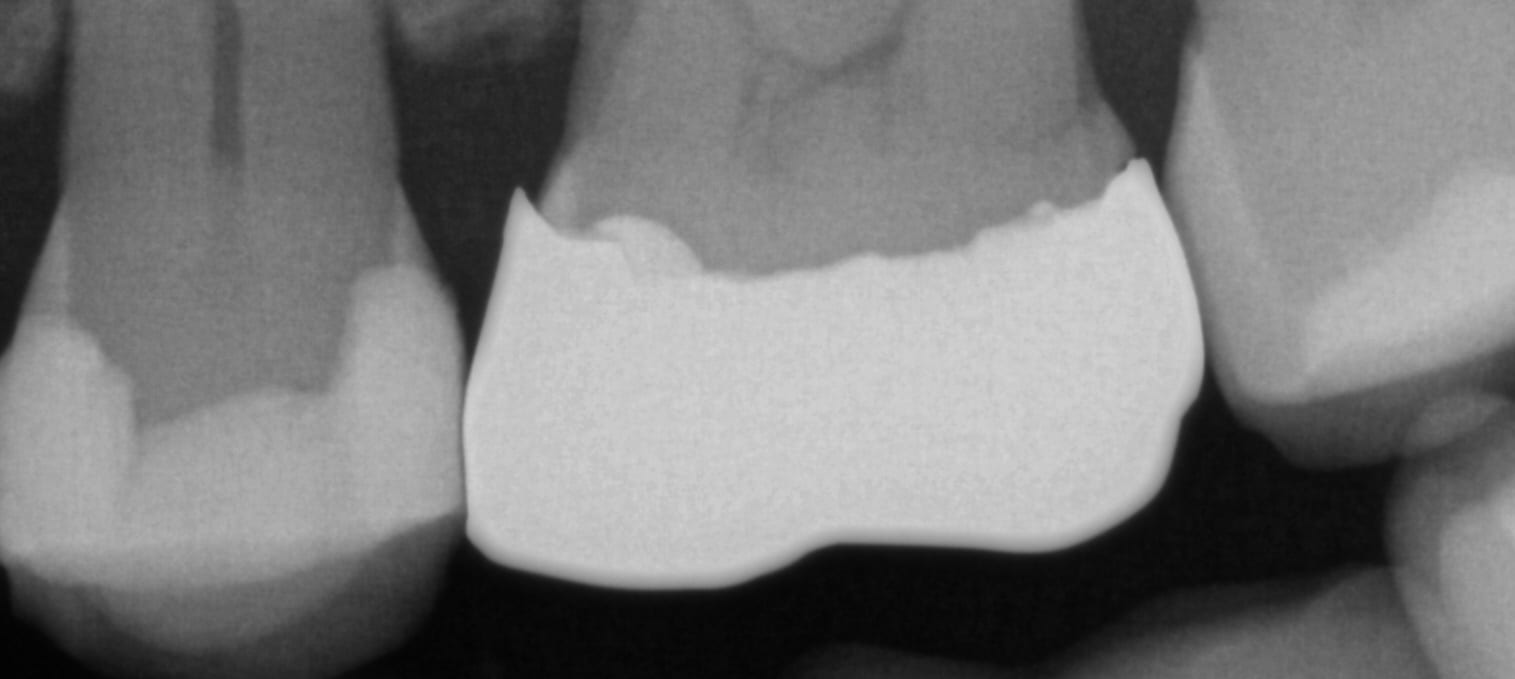
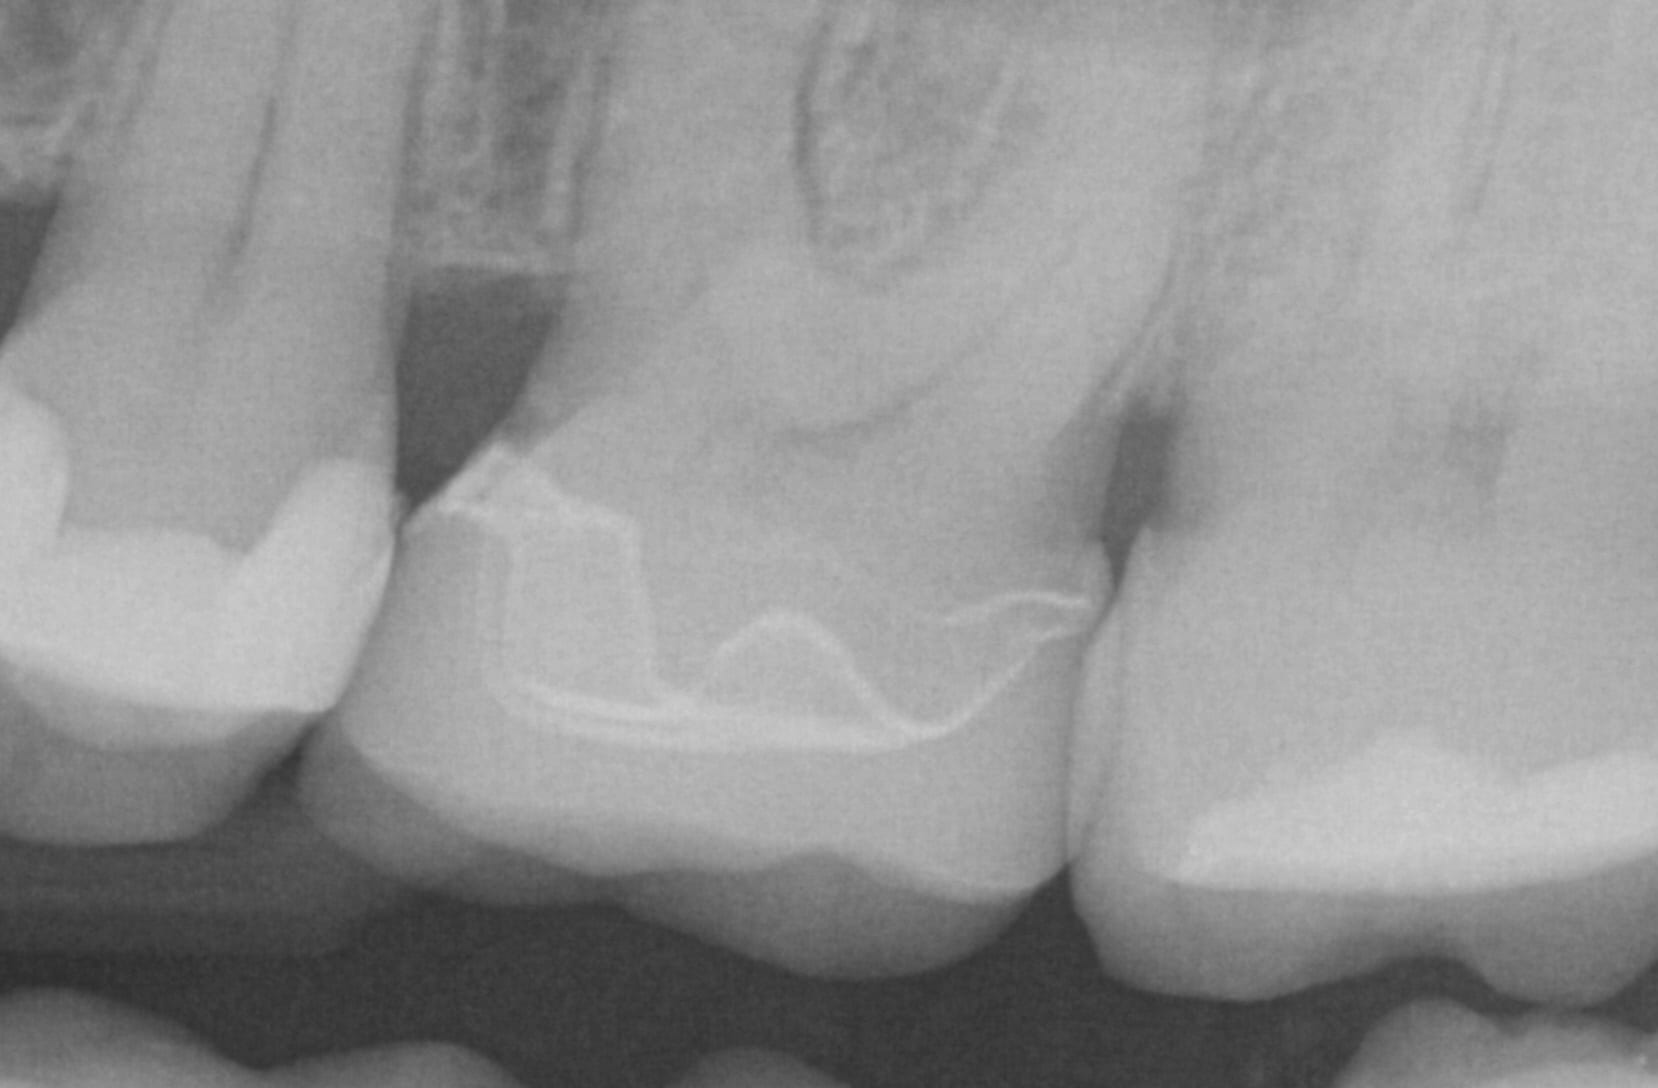
Comparing Milled and Designed Crown Margins
Have you ever compared the milled product with the designed restoration?
We scanned with the medit i500, designed with exocad and milled with coritec. after try-in, we scanned the restoration in the bluephase and then merged it with the design in exocad to see how well our material, or design, and our margins measured up against the proposal. we also documented the fit clinically and with radiographs. you can download the 3d models of the case and compared them yourself

Please Share this:

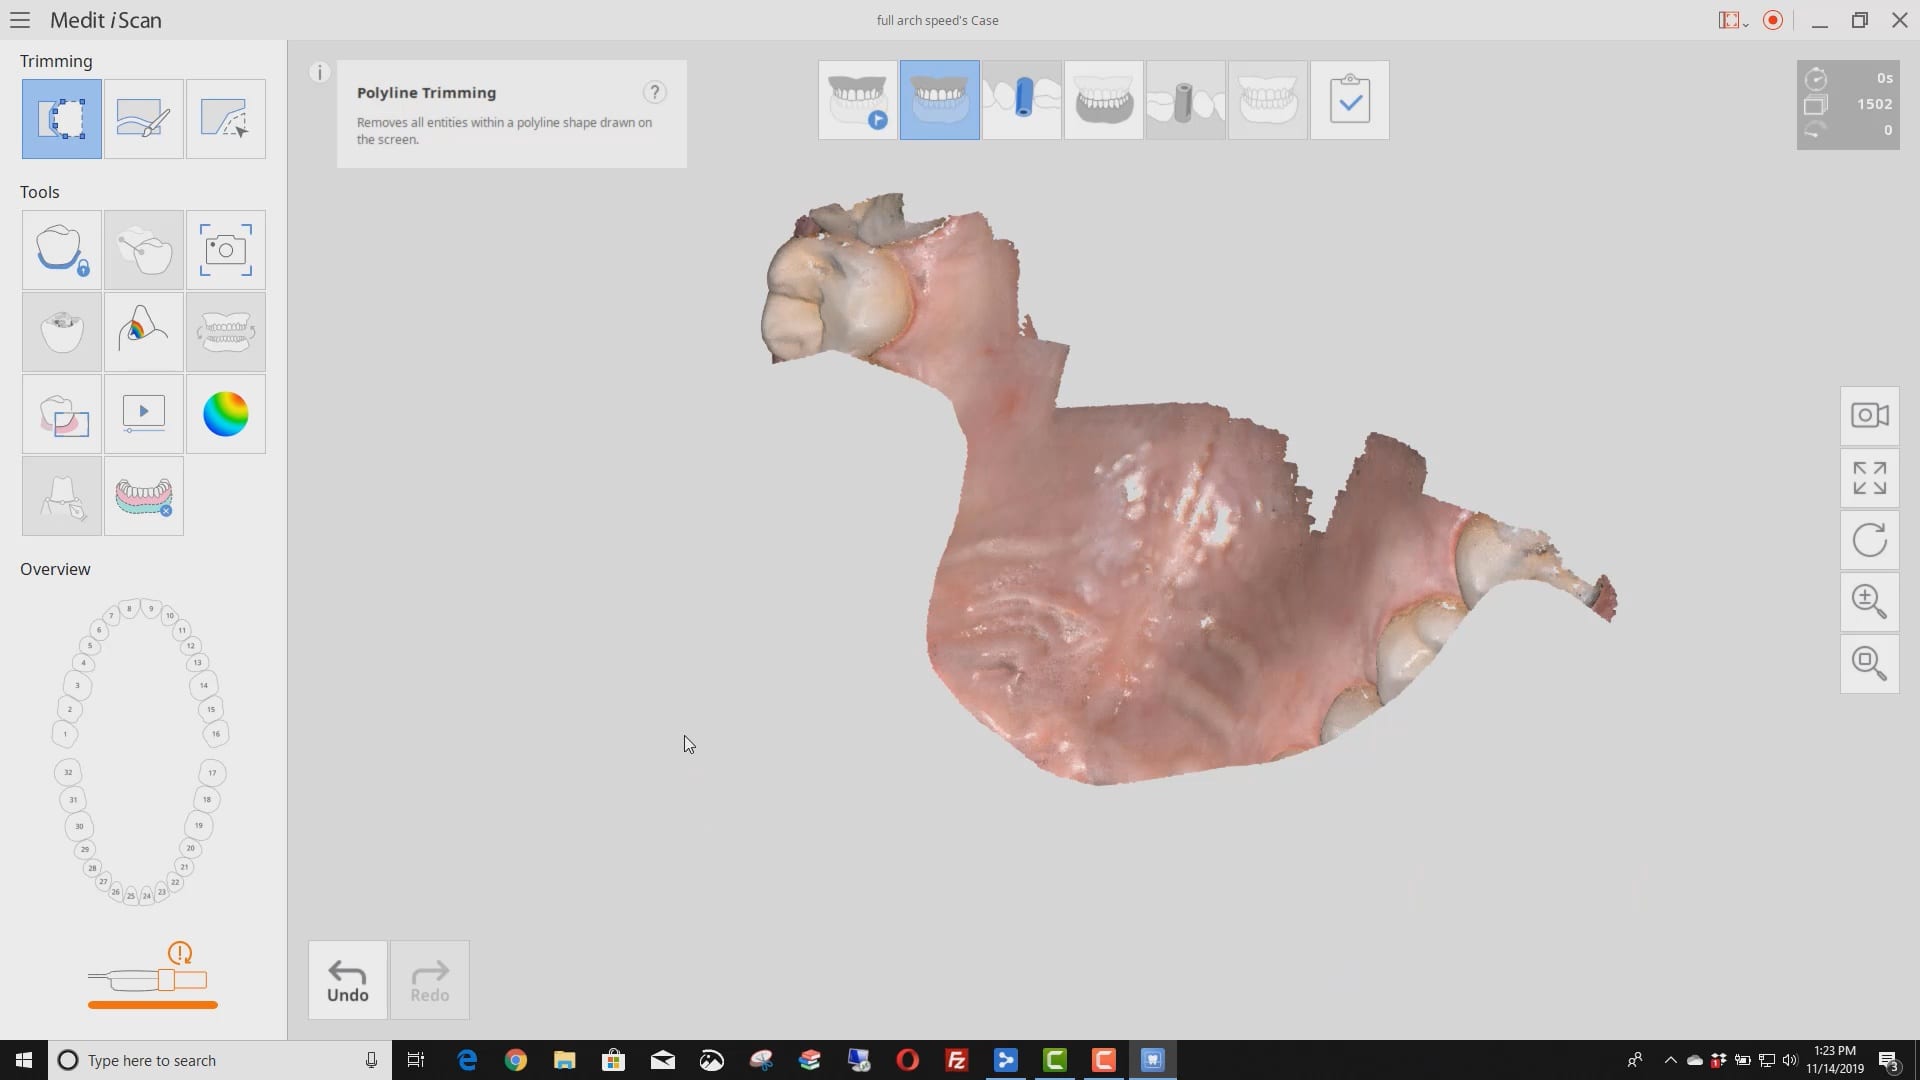
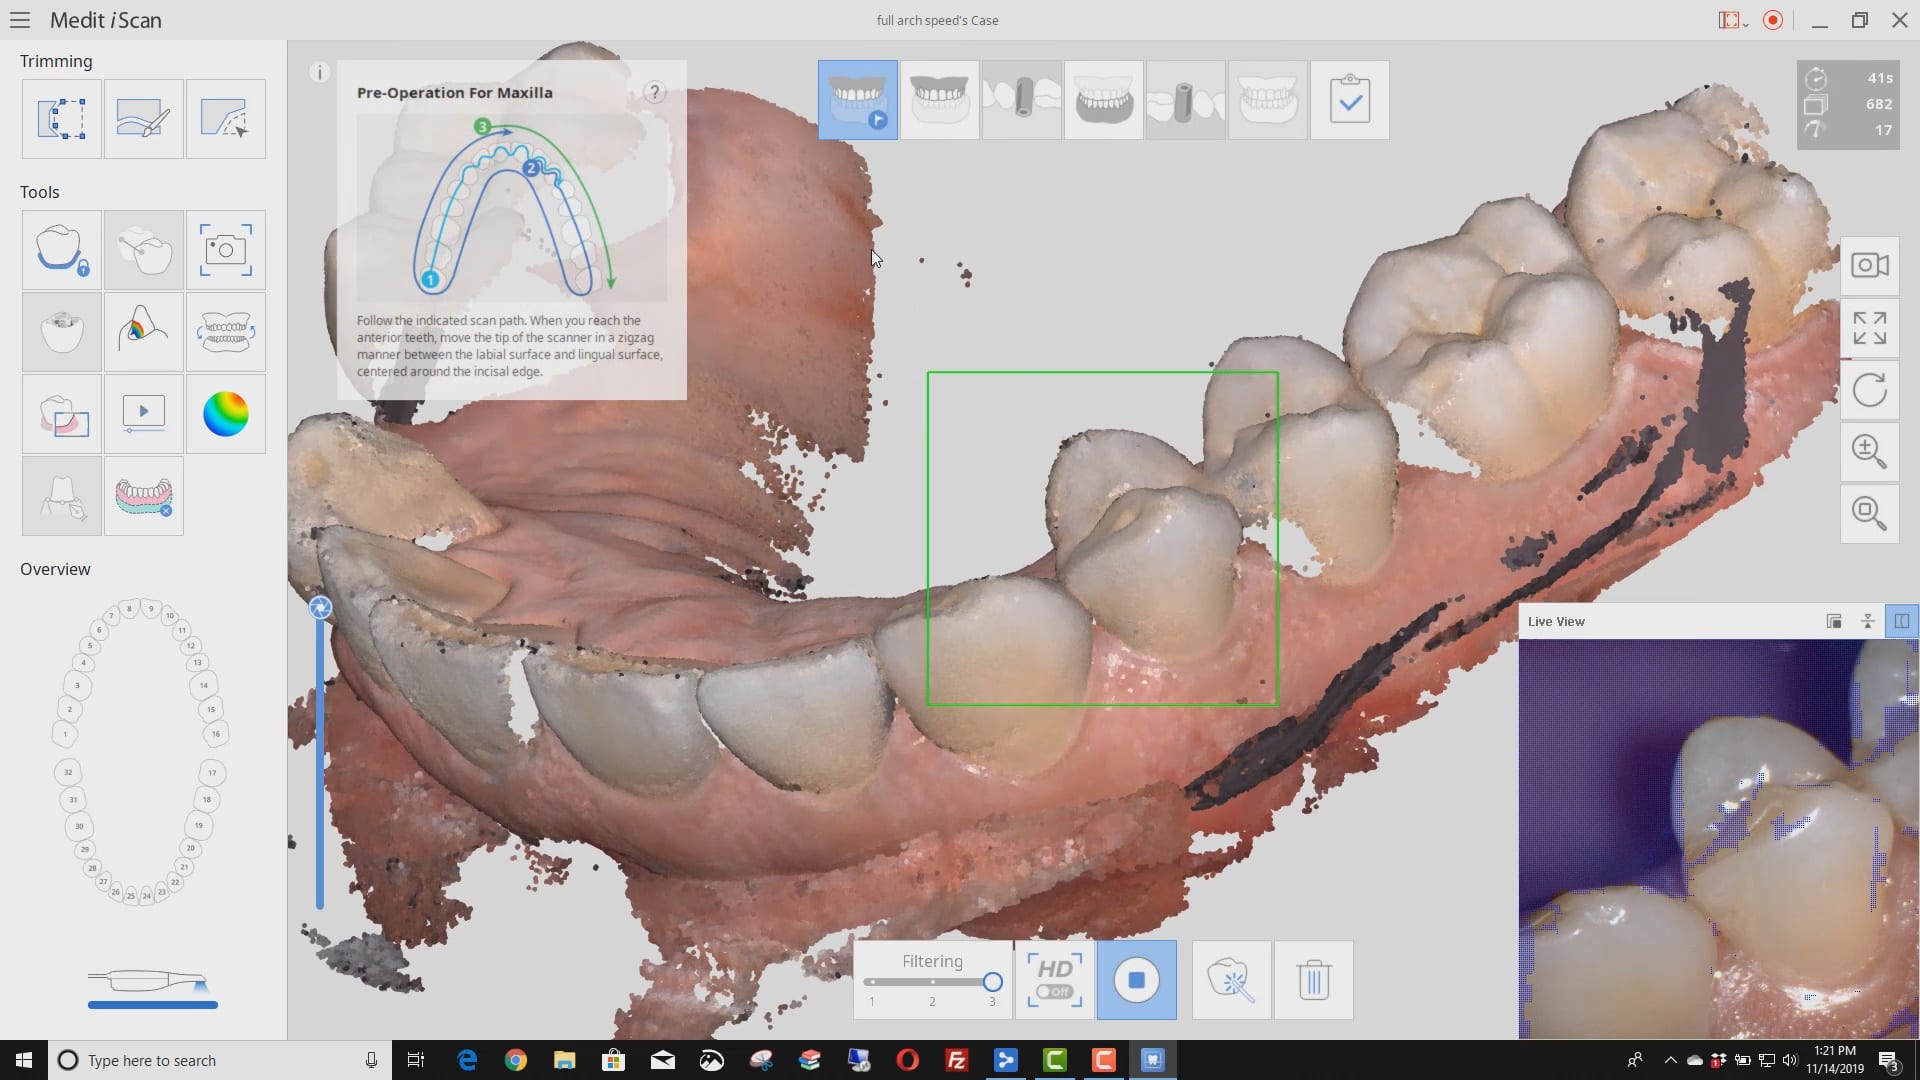
Full Arch Scans With Multiple Variables
We scanned patient 4 different ways. HD and regular D and different filters and focal lengths. HD leaves the glitter free floating that scares new comers but builds nice models. really though if you retract everything well your imaging speed doesn’t change that much at all between filter 1 or 3. you can see how the mirror fogs up and slows me down just when i’m under patients nose. no big deal. just retract the lips and tongue and follow our imaging principles and you can take full arch scans in under a minute no problem
Full arch scan with filter 1 and HD mode
Full arch scan with filter 1 and regular mode
Full arch scan with filter 3 and focal length of 21
Full arch scan with filter 3 and focal length of 18