CAD-Ray keeps knocking it out of the park. Upgraded from i500 to i700. Transition was seamless! Thanks again guys! - 11/15/2022
Maureen Copeland
Our office has been really happy with the i700 scanner so far. It was really easy to set up and use after watching only, 1-2 of the videos Cad-ray has on the website. Training with Andy was a breeze! Looking forward to taking level 2 training soon. - 1/20/2022
Frank DeLuca has been my rep for almost a year and has provided excellent, caring, professional service and with a great attitude. - 1/25/2023
Krystyna
I recently purchased Medit scanner and my assistant and I went through training with Andy. He was great, knowledgeable and patient with us. Customer service is great! - 2/05/2023
Spark Dental
Just had a new i700 scanner.Service so far is great.Andy did our training, he was great in answering all our questions .loving the scanner so far .😊 - 9/01/2022
Jason Ehtessabian
Fantastic! Scanner went down after a few years, and they had a new one in my office the next morning. Highly recommended. - 8/26/2021
Steven Oshins
I've been fortunate to have had the opportunity to work with Frank DeLuca this past year. He is always pleasant, willing to help, responsive to my questions and extremely knowledgeable. I highly recommend Frank!! - 12/16/2021
Dong Lim
I’ve been using Medit for close to 2 years. It’s a must for any practice. No evil monthly subscription and great support from CAD ray - 6/16/2020
Andrea Sleep
Thank you guys so much. You guys have the absolute best customer service! - 5/05/2025
Alexandra Lentz
Cad-Ray has been awesome to work with, very knowledgeable and quick to respond. Nick has been answering all my questions since day 1 and made the entire process of purchasing the Medit i700 a breeze. Can't believe how quick the product shipped and ca...read moreCad-Ray has been awesome to work with, very knowledgeable and quick to respond. Nick has been answering all my questions since day 1 and made the entire process of purchasing the Medit i700 a breeze. Can't believe how quick the product shipped and cannot wait to start scanning with it!read less - 12/15/2021
I have strong feelings about how great CAD-Ray has been. I purchased a medit i500 scanner from my lap, they wanted to use it for courses which aren't happening now so he didn't want to be sitting with this expensive piece of technology sitting aroun...read moreI have strong feelings about how great CAD-Ray has been. I purchased a medit i500 scanner from my lap, they wanted to use it for courses which aren't happening now so he didn't want to be sitting with this expensive piece of technology sitting around. Before purchasing he and I both talked to the Nobel sales rep who assured me that everything would transfer over just fine. I was concerned about the learning curve and wanted to be sure that I would have tech support. I asked the rep directly and he assured me again that everything would be great and he would come do an in-depth training with me. Long story short, the sales rep had no clue what he was doing and put very little effort in to helping me once the purchase was complete. I asked him over the phone how to do a few things and his response was to call CAD-Ray. They explained that this happens, they would love to help me but asked that I purchase the service package. That was a game changer. Now all of my questions getting answered, their response time is amazing and their understanding of the machine is by far better then the Nobel reps. The scanner is great but combine that with their tech support and I feel like I'm set up for success. If I were to do this again, I would skip the headache of trying to save a little bit of money and purchase it through CAD-Ray. But even with making the mistake, I feel like they have programs and support set up to point me in the right direction.read less - 10/15/2020
Anita Madhav
Absolutely love Laura. She was my initial contact and is an amazing resource for any questions even months later. Would highly recommend buying from Cad Ray especially Laura! - 6/28/2022
Aaron S
Great ongoing support and customer assistance. Been working with Frank for years, even before cad ray. Always there for any help i ever need. Cad ray support is like no other. - 1/26/2023
Thanh Huynh
I am beyond impressed with Destaney and Cad-Ray! Despite accidentally throwing away my old scanner, which I was supposed to return, their team went above and beyond to advocate for me. Their exceptional support and understanding turned a stressful si...read moreI am beyond impressed with Destaney and Cad-Ray! Despite accidentally throwing away my old scanner, which I was supposed to return, their team went above and beyond to advocate for me. Their exceptional support and understanding turned a stressful situation into a seamless experience. Highly recommend!read less - 8/02/2024
Jennifer Hastings
Andy was wonderful with setting everything up and explaining everything. The Medit i700 has been great thus far, easy set up! The only "issue" is that it can be occasionally glitchy. - 1/11/2022
Been super happy with service from this company. Very responsive, really passionate about their work. - 7/16/2020
K. Banani
Amazing customer service. I haven’t ever worked with a company where there is an issue, you can immediately get help and assistance and so far have not had an issue that CADRAY wasn’t able to fix. They made the process buy buying and maintaining a sc...read moreAmazing customer service. I haven’t ever worked with a company where there is an issue, you can immediately get help and assistance and so far have not had an issue that CADRAY wasn’t able to fix. They made the process buy buying and maintaining a scanner seamless. Highly recommend!read less - 2/23/2024
John Allen
fantastic support, I always ask random, specific to me, could be found on a training video, questions and they always quickly tell me how to fix my problem. - 6/16/2020
Yordanka Ivanova
I had been on the market for a scanner for a while and the i700 is my first intraoral scanner purchase. We are still new to the scanning world and its capabilities. Frank DeLuca was my main contact from the beginning and the person who did our traini...read moreI had been on the market for a scanner for a while and the i700 is my first intraoral scanner purchase. We are still new to the scanning world and its capabilities. Frank DeLuca was my main contact from the beginning and the person who did our training. The scanner is incredible and has surpassed our expectations even though we haven’t used it to its full potential yet. Frank has been amazing and always there to guide us every step of the way. Having such fabulous customer service and support from CAD-Ray was key for us when making this purchase decision. Thank you!read less - 6/23/2022
Kayla Dobmeier
Customer service is truly the best I've seen. You don't just buy a product from them. There are hundreds of hours of training videos, and they have answered any question we have had in a matter of minutes. We are so glad we purchased our IO scanner t...read moreCustomer service is truly the best I've seen. You don't just buy a product from them. There are hundreds of hours of training videos, and they have answered any question we have had in a matter of minutes. We are so glad we purchased our IO scanner through them!read less - 4/09/2021
JCarlos Mendoza
Had a good experience when purchasing my scanner, it was very easy, and to date after three months of using the scanner no support is a plus, anytime I call me I will answer and troubleshoot - 7/10/2022
Penelope Lee
Frank and his team have always been ready and able to help us with any issue we’ve come across in the last 2 years since we purchased our mill and equipment from them. Today, Griffen went above and beyond to find a solution to our software issue. I w...read moreFrank and his team have always been ready and able to help us with any issue we’ve come across in the last 2 years since we purchased our mill and equipment from them. Today, Griffen went above and beyond to find a solution to our software issue. I was able to finish a project on time for a patient in pain because of his dedication. “We’ve never had a more helpful team for any of our equipment” was a quote from our head Doctor today. Excellent job Griffen and team!read less - 5/14/2025
Lora Wonderly
Thank you Frank DeLuca for being so accessible and making everything right again! Customer service is above and beyond. We also love our Medit Scanner - we would be lost without it! - 1/25/2023
Kip Covington
Customer support! I've had handfuls of scanners over the years and support has always been the biggest variable. We recently had a scanner bought through and implant company and received limited to no support. Through recommendations from several fri...read moreCustomer support! I've had handfuls of scanners over the years and support has always been the biggest variable. We recently had a scanner bought through and implant company and received limited to no support. Through recommendations from several friends, I purchased a second scanner through cad-ray and had them transfer over our support for the first. I wish I would have done this years ago. Destaney, has been incredible helping us troubleshoot a hardware issue that came up. It was on 3-shapes side but not only did she run it up the ladder there and get us back up and running quickly, but she promptly answered all questions and continuously checked in to make sure things were moving along. I won't purchase from anyone else going forward.read less - 8/14/2024
DERYCK PHAM
STOP SEARCHING NOW!
Best bang for your buck scanner on the market. we have been using out medit for 8 months now. love our crowns, margins are fantastic. almost no adjustments needed at all. maybe one in ten crowns might have to adjust mesial or...read moreSTOP SEARCHING NOW!
Best bang for your buck scanner on the market. we have been using out medit for 8 months now. love our crowns, margins are fantastic. almost no adjustments needed at all. maybe one in ten crowns might have to adjust mesial or distal to get crown to drop in. occlusion is always spot on. patients love the technology and WOW factor -"SOOO COOOLLL." customer service is great also! dont waste your money on anythign else. our lab even comments on how easy it is to deal with medit and how good the scans are. they recommend it to their other doctors now as well.read less - 10/09/2019
Very pleased with the EXCELLENT support we have received from Frank DeLuca! Loving our new Medit so far, definitely more user friendly than our previous one. - 6/02/2022
Oleg Eisenstein
Great products and services. Highly recommended - 6/16/2020
It's so nice to enter the digital age for scanning! I've been taking impressions since 1975. Medit i700 is amazing and our #1 supporter, Laura has been with us every step of the way. I truly don't know what I would do without Laura and Nick in tec...read moreIt's so nice to enter the digital age for scanning! I've been taking impressions since 1975. Medit i700 is amazing and our #1 supporter, Laura has been with us every step of the way. I truly don't know what I would do without Laura and Nick in tech support. They definitely need a raise! Yes, we had a couple of glitches (mostly operator error) but they were there with us all the way. The detail that the scan gives, whether it's a crown, bridge, full mouth scan for patient review and now many scans for NTI's is truly amazing! We recommend it highly to all who are interested! I am proof that as a dental assistant who's 64, you CAN teach an old dog new tricks!!!read less - 12/09/2021
Rafael Dimayuga
Have been chatting with the CADRAY group for at least a year now even though I did not buy anything from them. They are very receptive, prompt and helpful. Finally bit the bullet and received my Medit yesterday! Now my Bluecam has a new buddy!! - 7/17/2020
Kurt Adamson
I purchased My first Medit i500 in Sept 2019, fairly easy to set up and learn. I was able to follow the instructions and videos without a problem. I learned tips and trick along the way by following the facebook groups. Anytime help was needed the g...read moreI purchased My first Medit i500 in Sept 2019, fairly easy to set up and learn. I was able to follow the instructions and videos without a problem. I learned tips and trick along the way by following the facebook groups. Anytime help was needed the group at Cad-Ray were quick and sincere finding a solution to problems. I ended up purchasing 2 more i500's in Dec 2019 for my other 2 offices. I didn't think I would enjoy the digital workflow as much as I do. If you on the fence like i was, just do it. get on the facebook groups and post the tips you learn along the way.read less - 1/17/2020
Fantastic class. Amazing scanner.Cad Ray has been helpful not only with my purchase of the Medit i500, but every step of the way.Level 2 seminar with Armen and Damien was extremely informative, useful and practical! ⭐️⭐️⭐️⭐️⭐️ - 8/08/2021
Dr. Howard Lassin
Great 1st lesson with Ryan on the Mediti700. We are ready to scan:) - 12/30/2022
Micah Bickel
Great products, training and support - 11/01/2021
Varghese George
The customer service has been top notch, every single time. I have only good things to say about them. - 4/05/2022
Archstone Weatherford
Medit i700 intraoral scanner is the first scanner that I actually used on my patients. Before I put my hands on it, I had some prejudices against all scanners. They were bulky, laggy in capturing the images, etc. When I finally had the chance to use ...read moreMedit i700 intraoral scanner is the first scanner that I actually used on my patients. Before I put my hands on it, I had some prejudices against all scanners. They were bulky, laggy in capturing the images, etc. When I finally had the chance to use an intraoral scanner and get introductory training with Laura from CAD-RAY a few weeks ago, I totally changed my view of this product. Very soon, I was able to scan crown, bridge, and even denture cases. Of course, I have had some knowledge about the digital scanner from CEs provided in the past, but being able to apply it in the daily practice in such a short time was beyond my expectations. I would highly recommend MEDIT i700 and training from CAD-RAY.
Big thanks to Laura!
-Lei Fu, D.D.S.read less - 9/12/2021
Update to CAD-Ray as this company has morphed into something even better and grander than it was previously. This is the company where you go to when you need a scanner or 3d printer. Their customer service is second to none and their training on sca...read moreUpdate to CAD-Ray as this company has morphed into something even better and grander than it was previously. This is the company where you go to when you need a scanner or 3d printer. Their customer service is second to none and their training on scanners is top level. Don't buy your scanners anywhere else because Cad-Ray is the only company who knows how to solve any of your problems and provides the best technical support. I recently had purchased a software to mill crowns from my medit to my MCXL. No body could get it to work.12 months in and I was resigned to it not working and not being able to mill in house. With Cad-Ray's tremendous hard work, we were able to get the milling unit synchronized to the inlab and inlab synchronized to clinux and clinux meshed to medit. I am now milling scanned crowns for the first time in about 12 months. Yay Cad-Ray, Thank you!!!!!read less - 3/06/2024
Keon Ahghar
Fantastic support and customer service! This is an awesome company. They aren't big box and actually know how to use, trouble shoot and ball out with the products they sell. They only will sell and endorse a good product. They are selective. Whatever...read moreFantastic support and customer service! This is an awesome company. They aren't big box and actually know how to use, trouble shoot and ball out with the products they sell. They only will sell and endorse a good product. They are selective. Whatever they sell they back. And they have your back too. Their support, service and training is industry leading. Also Laura from CadRay is a beast. She's wizardread less - 4/23/2022
Esther Quintana
Se ve muy bien, aunque yo le tengo, pánico, a los Dentistas, Sorry, pero tengo que ir, Ni modo - 2/25/2015
Thomas Lim
Just updating my post to show my cart setup. Hope it can help for someone :) - 10/12/2019
Kaila and Laura were amazing to work with. I would not hesitate to buy again from them. Super helpful/available and one of the best experiences I’ve had making such a big investment in equipment like I had to make for my practice. Way to go Cad Ray f...read moreKaila and Laura were amazing to work with. I would not hesitate to buy again from them. Super helpful/available and one of the best experiences I’ve had making such a big investment in equipment like I had to make for my practice. Way to go Cad Ray for running a solid business!read less - 11/15/2024
Christopher Chin
This was my intro into intraoral scanning and I did research for quite awhile. The i500 and the team at Cad Ray are top notch. The company has done such a great job putting this scanner in the ranks of the premier ones. With constant updates it gets...read moreThis was my intro into intraoral scanning and I did research for quite awhile. The i500 and the team at Cad Ray are top notch. The company has done such a great job putting this scanner in the ranks of the premier ones. With constant updates it gets better and better (though I’m still behind on updates). My crowns have never been better. They drop right in with no models. I didn’t believe it but I’m loving digital dentistry. I can’t wait to go to the class after COVID calms down!read less - 6/16/2020
I just bought the new Medit i700. I placed the order on Friday, it shipped on Monday, and it arrived on Tuesday. So far it has been a great experience. They also provide a lot of quality videos for learning to use the scanner. - 5/05/2021
jeff-J65
You guys are great! I have been a Cerec user for about a decade and wanted to expand my horizons. I bought the I700 and have just loved it. We don't do impressions any more, only scanning, even for the full arch. The customer service has been excelle...read moreYou guys are great! I have been a Cerec user for about a decade and wanted to expand my horizons. I bought the I700 and have just loved it. We don't do impressions any more, only scanning, even for the full arch. The customer service has been excellent, even though I haven't had any problems with the scanner. I really like the online learning modules, they have been awesome getting me up to speed with the scanner quickly. I am looking forward to some of the in person courses to maximize the usefulness of this scanner. -- Jeff Allred, DDS FAGD DABOI FAAIDread less - 9/28/2021
These guys are ALWAYS there to help if you get stuck. I’ve been happy with the mill (coritec one) and scanner (i500) I bought from them 2 years ago. I’d do business with them again. - 7/01/2021
Maggie Sh
I’ve been using Medit 500 since spring of 2021 and really like it. The support system has been very good so far. I just called yesterday and spoke with Frank Deluca, he was very informative and helpful. - 12/07/2021
STAR DENTAL CLINIC
This has changed my way of doing things forever. I can’t live without my Medit scanner. I promote it to all my friends like crazy. Support with Cad ray is awesome. They return calls within seconds. The price for scanner is ridiculously good and the ...read moreThis has changed my way of doing things forever. I can’t live without my Medit scanner. I promote it to all my friends like crazy. Support with Cad ray is awesome. They return calls within seconds. The price for scanner is ridiculously good and the quality of images is amazing. Their website has soo many educational videos. It doesn’t end. I love the ability to mobilize it from one off to another until I buy a second one. I’m can’t wait u til I have the time to learn all the other cool technology cad ray has. It’s amazing.read less - 7/24/2020
Dan Malloy
Extremely good customer service. From start to finish buying my Medit was flawless and they were very helpful in offering me information. When I got my scanner I had questions and my phone calls were returned immediately. They knew my name and guided...read moreExtremely good customer service. From start to finish buying my Medit was flawless and they were very helpful in offering me information. When I got my scanner I had questions and my phone calls were returned immediately. They knew my name and guided me through what I would need. Very impressed. Would recommend!read less - 2/02/2020
Alvin Aquino
I'm a dentist in NJ, and I purchased the Medit i700 from CAD-Ray. Hands down they have the best support team. Laura is awesome with helping us using the Medit and with providing any support we may need. One of my best decisions so far was working wit...read moreI'm a dentist in NJ, and I purchased the Medit i700 from CAD-Ray. Hands down they have the best support team. Laura is awesome with helping us using the Medit and with providing any support we may need. One of my best decisions so far was working with CAD-Ray.read less - 4/15/2022
Kirk Arritt (fldnstrm)
Whatever digital workflow addition you want to add to your dental practice look no further than Cad-Ray. Top notch support and training. - 1/29/2023
With digital dentistry, you can approach complex cases with ease. For example, when you look at these two crowns that need to be replaced, your inclination is to prep them both, get hemostasis and retraction at the same time, and then take the impression.
Whether you only image with your 3Shape scanner or design within Design Studio, you can export the stl file into our milling machine’s native CAM software and start producing restorations in your office.
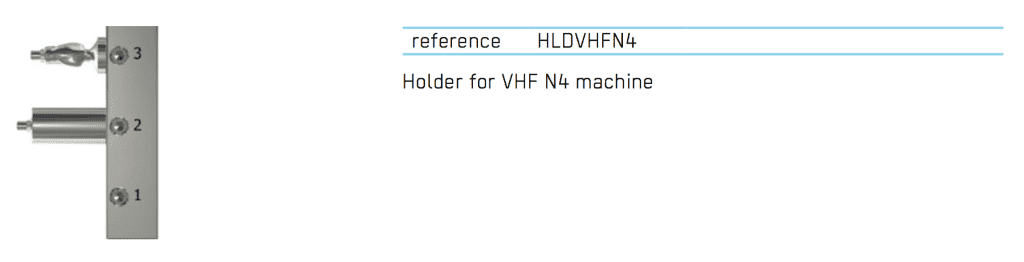
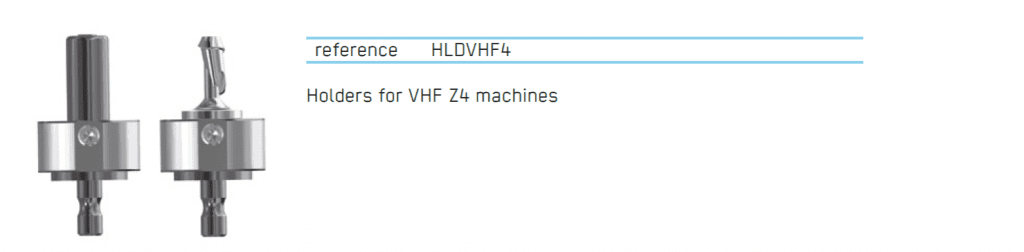
If you don’t have a computer aided design software, we can package our milling machine with our privately labeled CAD-Ray Software (exocad) and you design crowns, inlays/onlays, partial crowns, custom abutments and a lot more! If you already have the design software, all you have to do is export it and take the VHF milling machine
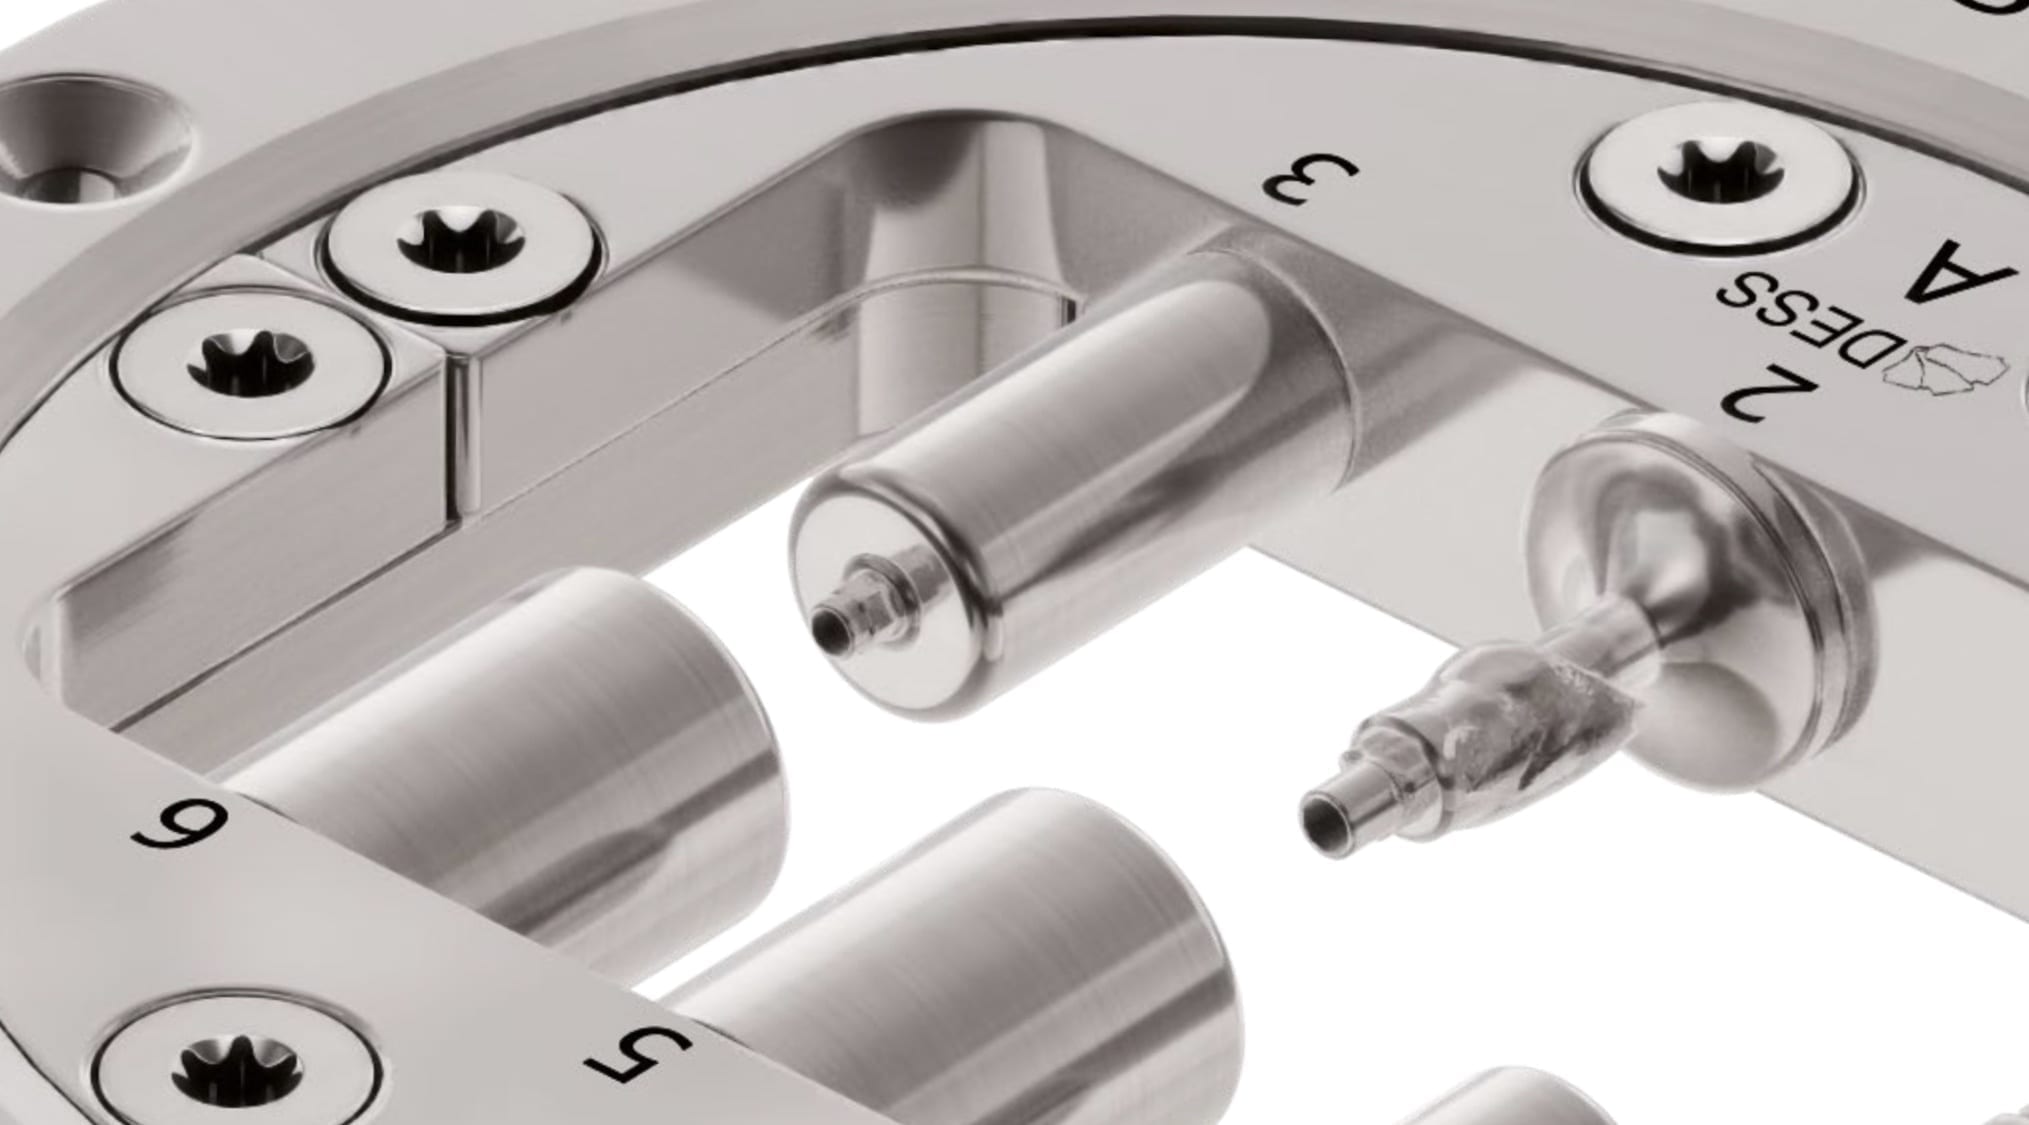
Both the N4 and the Z4 can nest your restoration and mill your desired product.
This recent publication in the Journal or the American Heart Association details the relationship between sleep apnea and cardiovascular disease. It is a comprehensive study evaluating the success rate of possible treatment modalities, including oral appliance therapy.
When imaging a preparation, all you really need for a restoration to “fit’ is the contact area of the adjacent teeth (above the height of contour) and the opposing occlusal surface.
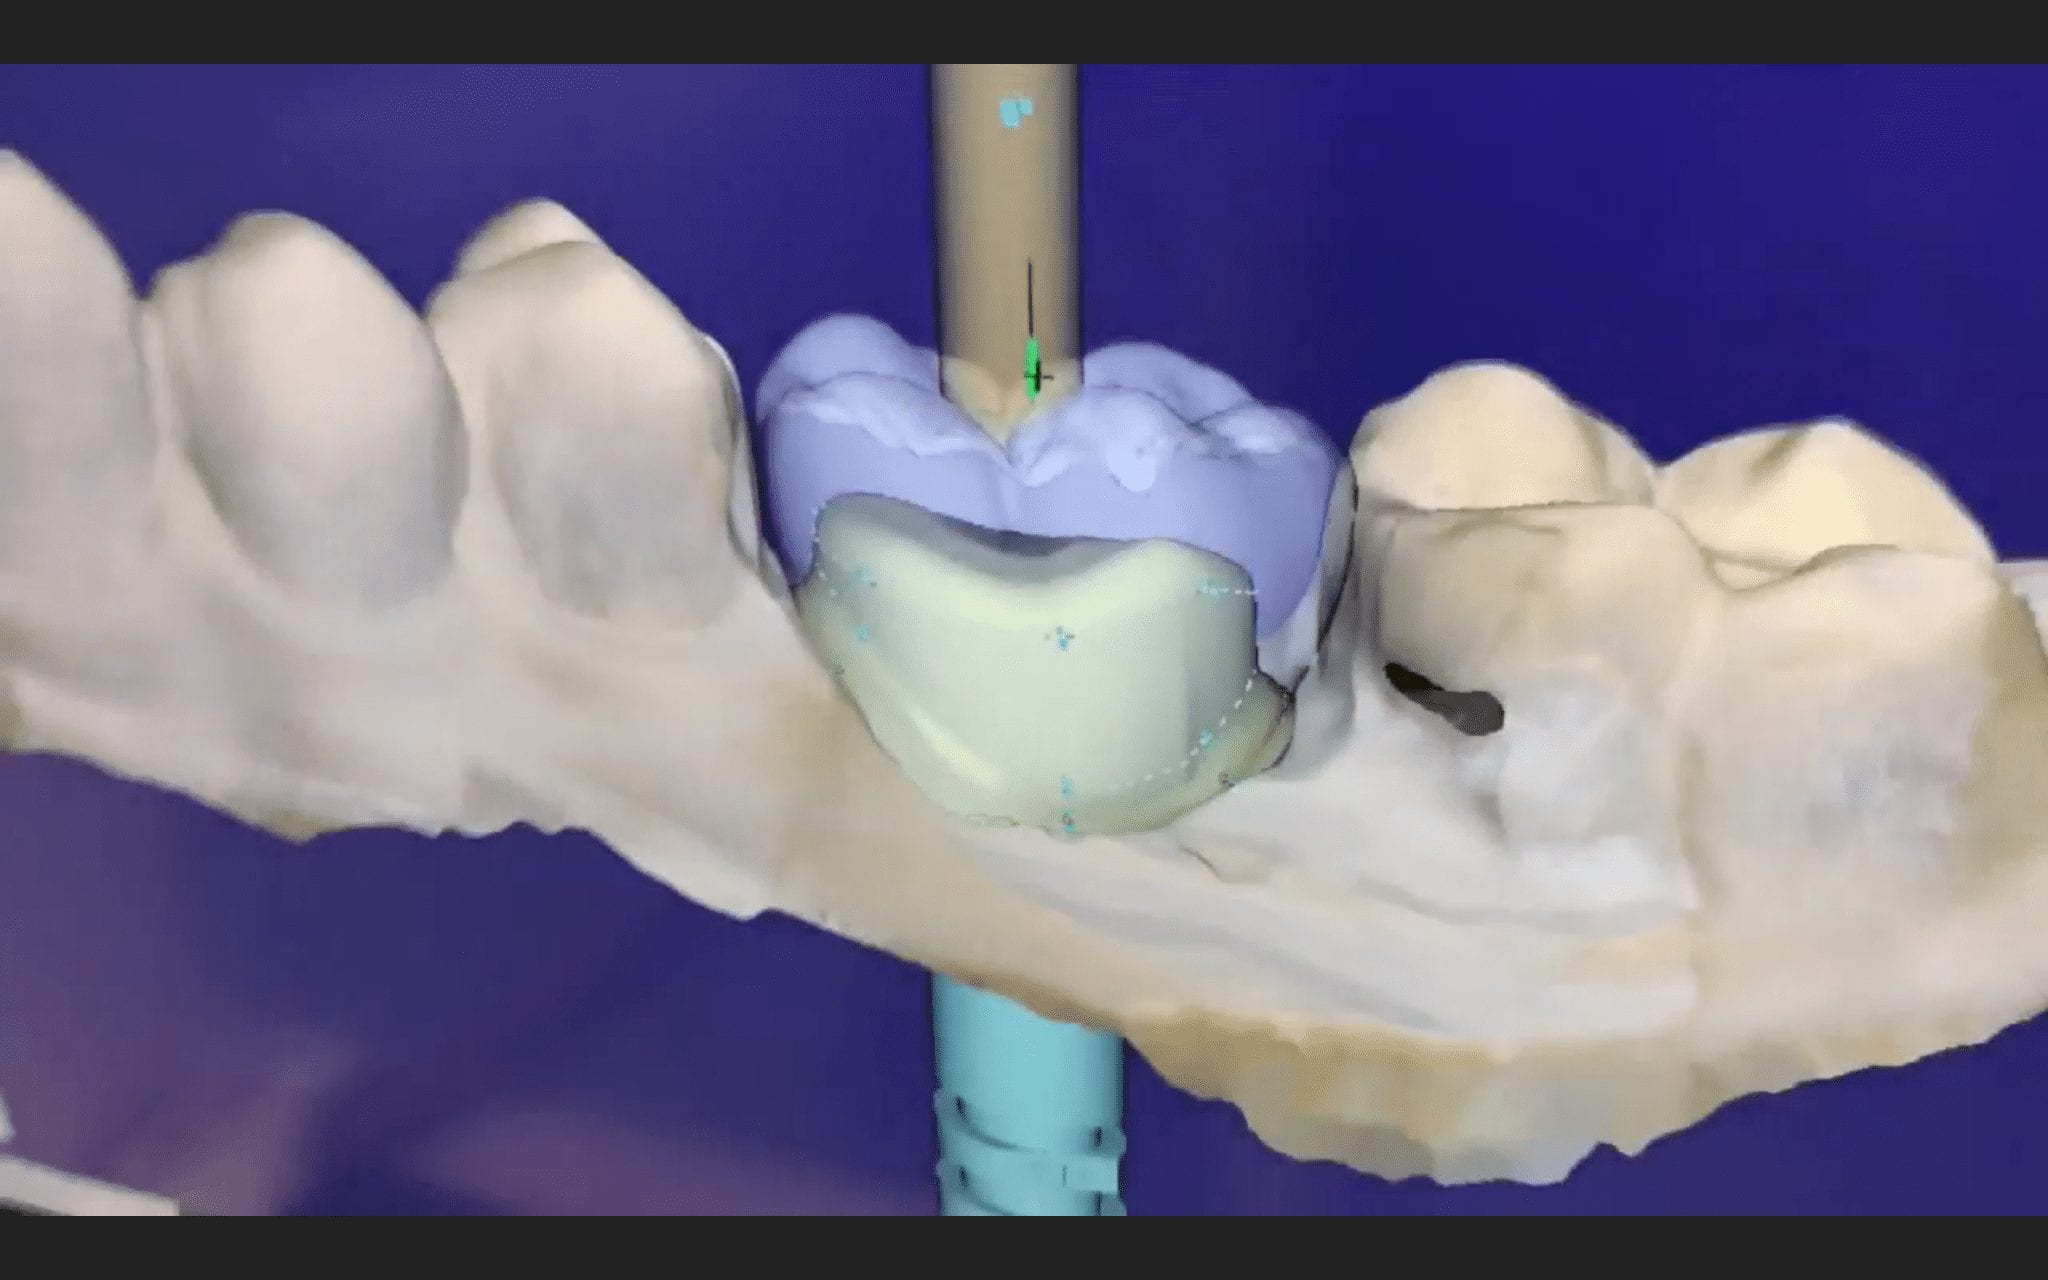
But the more you feed the computer aided design software the less work you have to do in the design of the restoration. For example, in the video below, you can see how the software automatically recognizes the adjacent teeth and a great initial proposal is rendered.
However, if you don’t capture all the data in the adjacent teeth, you will have to manually plot the adjacent teeth and spend more time in the design steps.
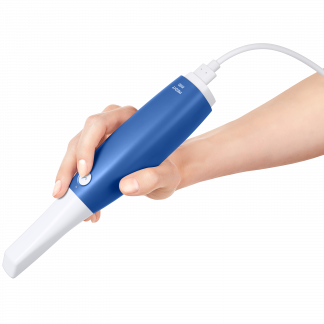
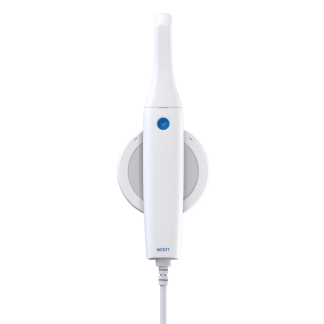
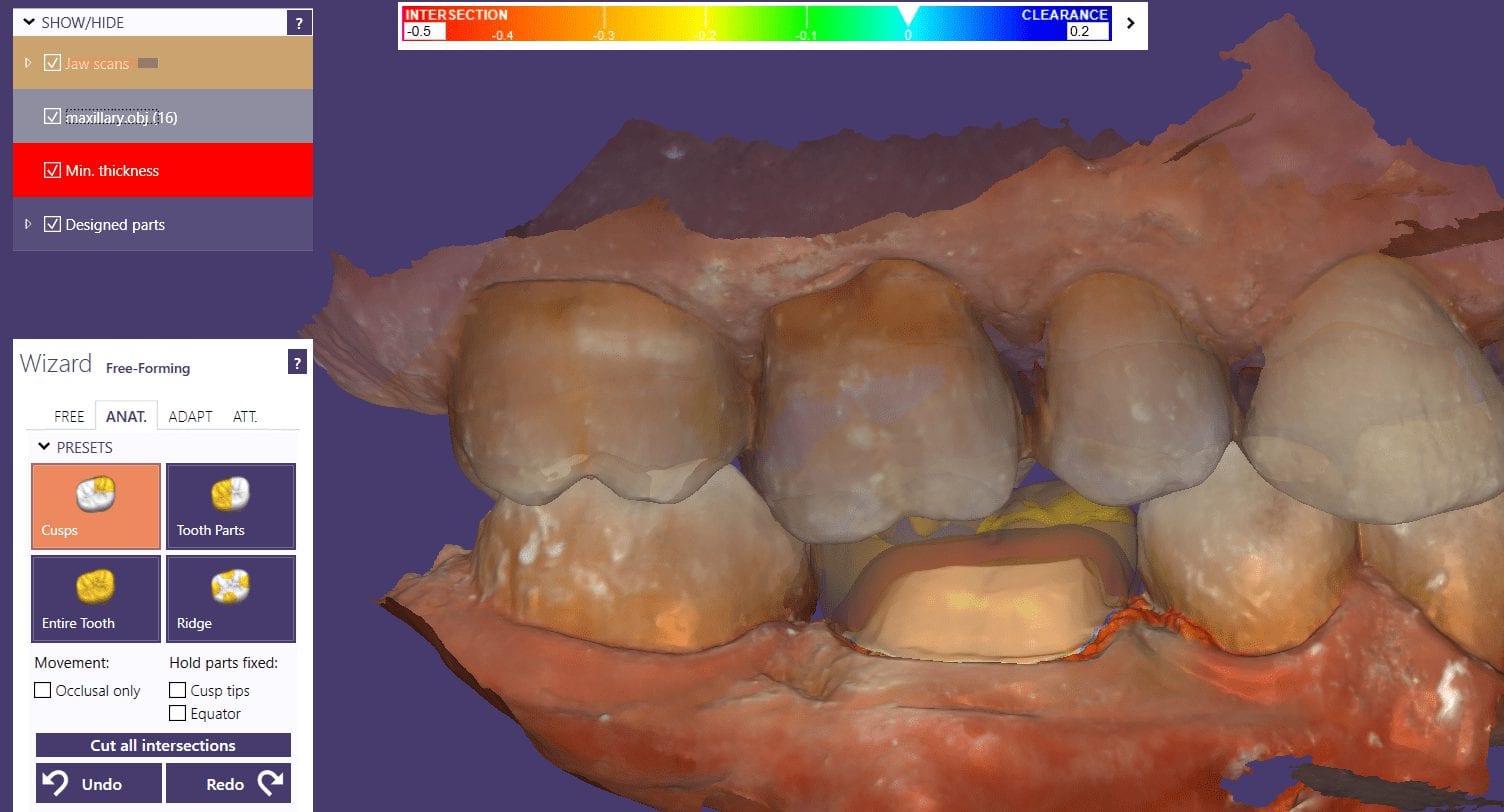
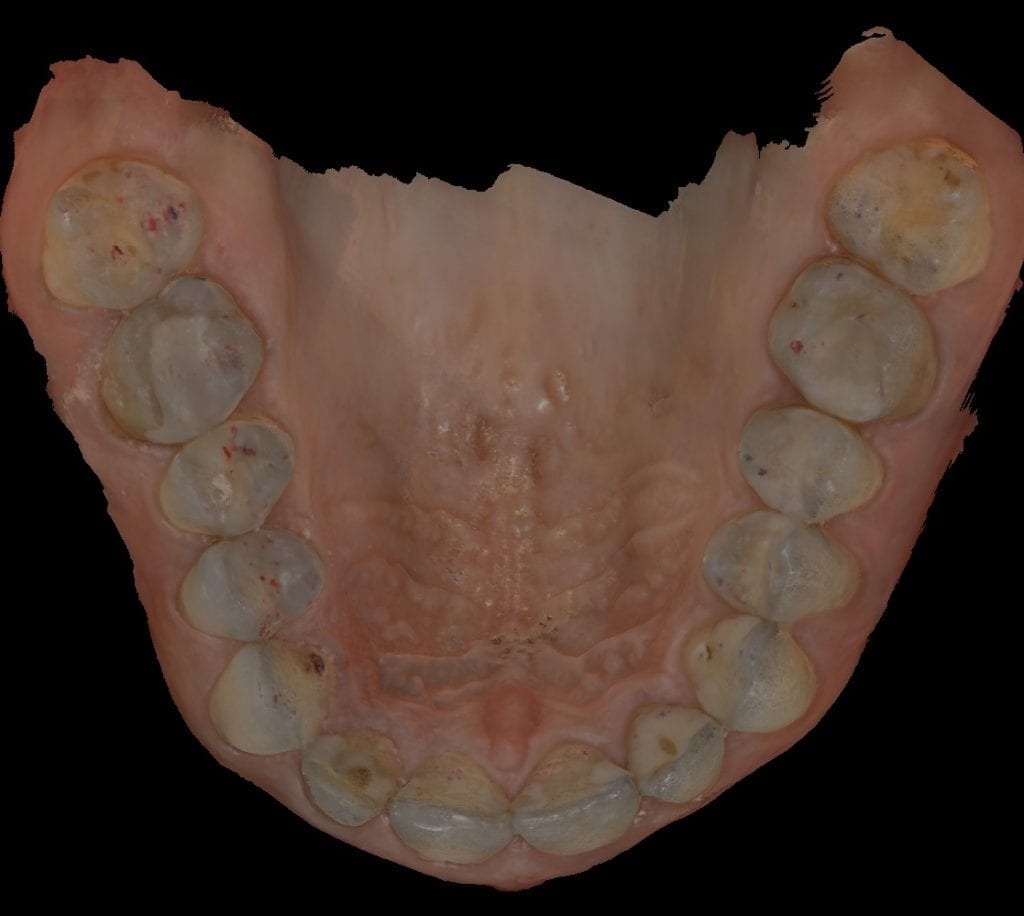
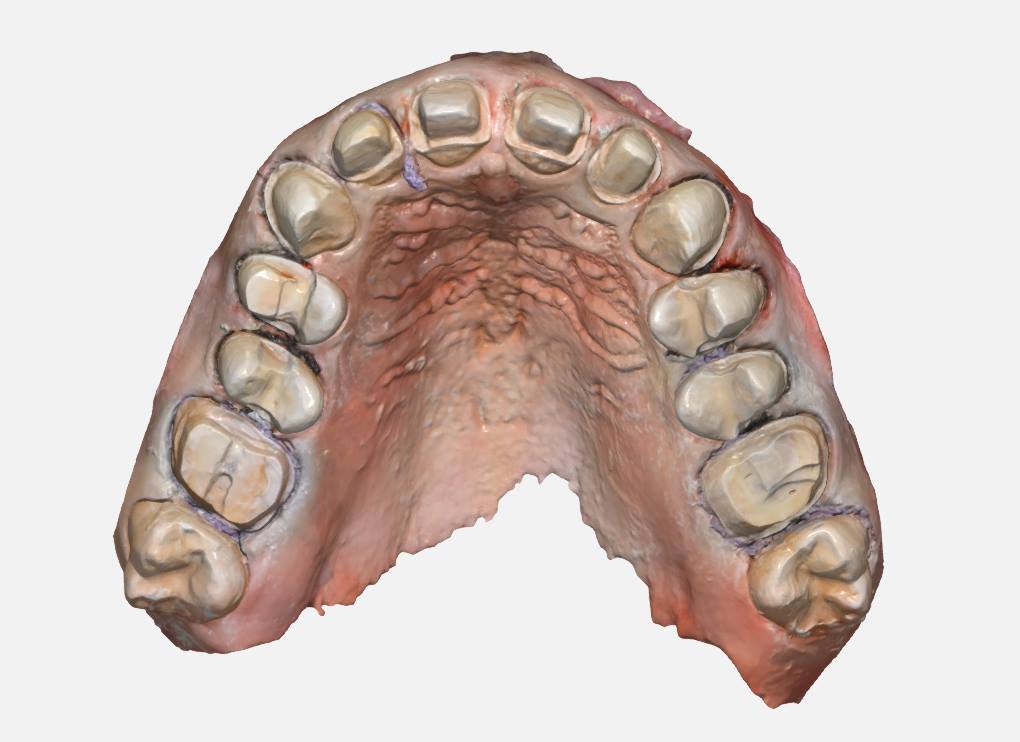
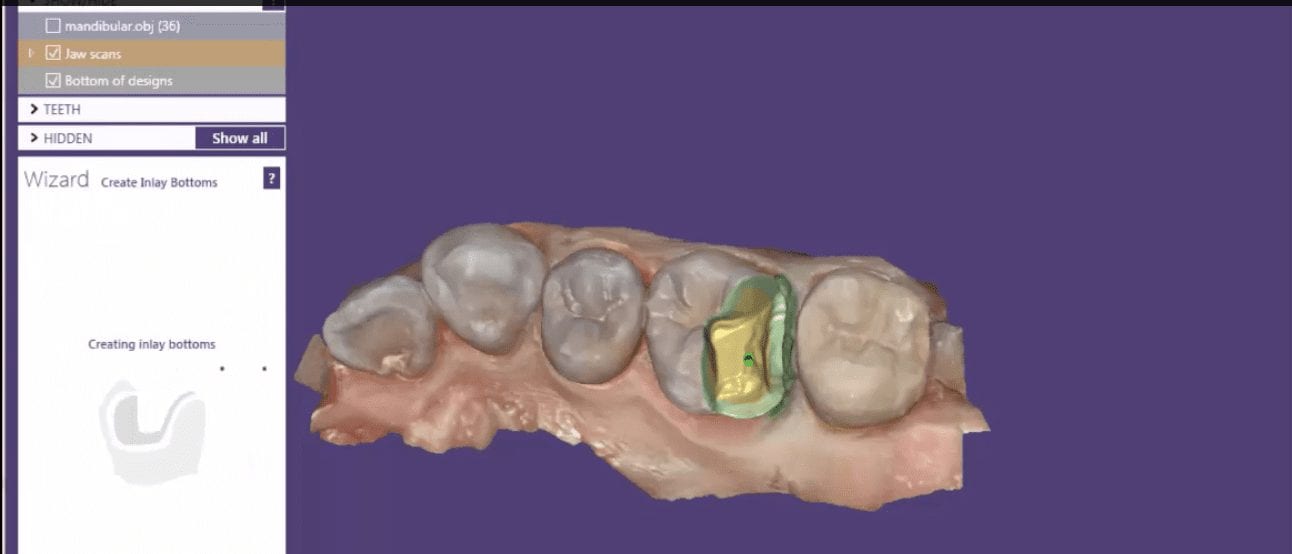
With exocad, the first step is to align the orientation of the arch so that the occlusal surface is directly facing you. Once the prepped arch and the opposing models are imported, then you place the margins.With the color OBJ files from the Medit i500 it is very easy to identify the margin based on color and geometry. Once the margins are placed, the next step in the wizard is to calculate the initial proposal.
This video demonstrates how the CAD software recognizes the adjacent teeth and renders a great initial proposal
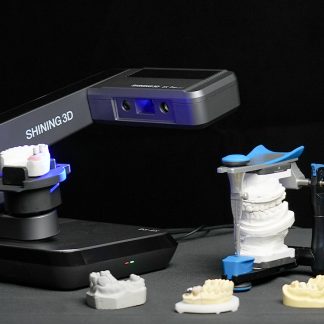
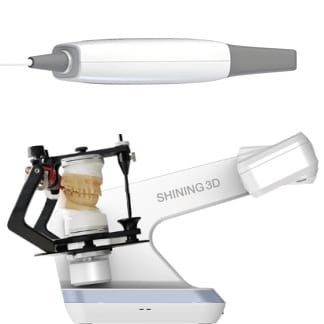
A recent study published in the Journal of Advanced Prosthodotics compared many Intra-oral scanners and used the Medit desktop scanner as the reference frame and benchmark for accuracy. Unfortunately the Medit Intra-Oral Scanner was not commercially available at the time of the study.
Our position at CAD-Ray is that any scanner can be accurate and inaccurate based on how it is utilized. Furthermore, once you capture accurate data, by the time you design a restoration and send it to production, the printing or milling machine has no idea where the scan came from and generally can produce restorations to the level of accuracy the resolution the scanners provide.
Keep in mind, there are dozens of ways an operator can introduce errors in imaging.
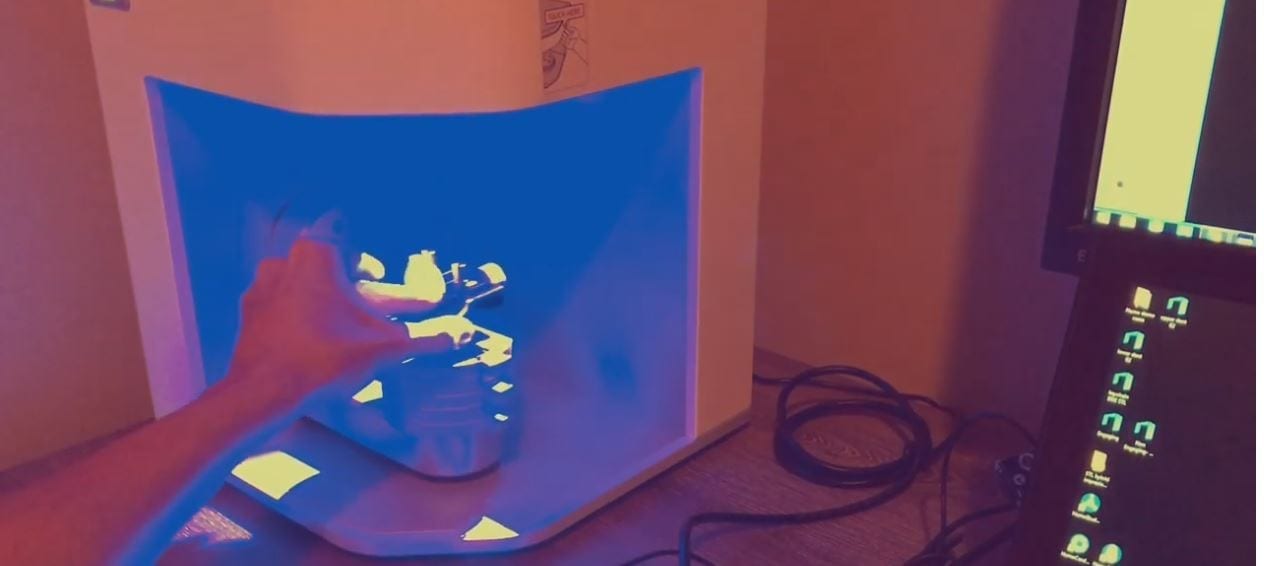
Download the OBJ files and import them into smile design software and do a virtual wax up for a real case
This patient has had crown lengthening procedure performed on all the teeth in her smile line, greatly increased the tooth structure visible in this video. Her chief complaint was a gummy smile and now she is ready to “fill in the buccal corridor”
Here are fundamental principles every dentist should understand about intra-oral scanners, how we can introduce errors, how to manage them, follow proper scan strategies, maintain accuracy across the arch and lots of other nuggets
Every ios hates moving parts (tongue and cheek) Every ios hates dark areas like the oropharynx, black triangles, etc… Every ios hates liquids (blood on the margins) Every ios can “get off track” and form double images Every ios struggles with highly reflective surfaces like emax, zirconia, and shinny metal.
The principles shown in the video address every one of these factors and how you can control them and get accurate arch scans in just a minute with the medit i500
I have tried virtually every ios out there and they all struggle with my mouth full of emax. the focal length of the medit from -1.5 mm to 17 mm is the largest variation on the market, and the way the medit handles highly reflective surfaces also outperforms every other ios.
In January, it will be in turbo boost mode when new software is released.
The following two videos showcase a demonstration by VHF at the Greater New York Meeting in 2018. The software from VHF comes with a DentalCAM part and a DentalCNC app. You can nest your restoration in exocad and integrate with the milling machine, or you can nest and mill directly with the VHF software.
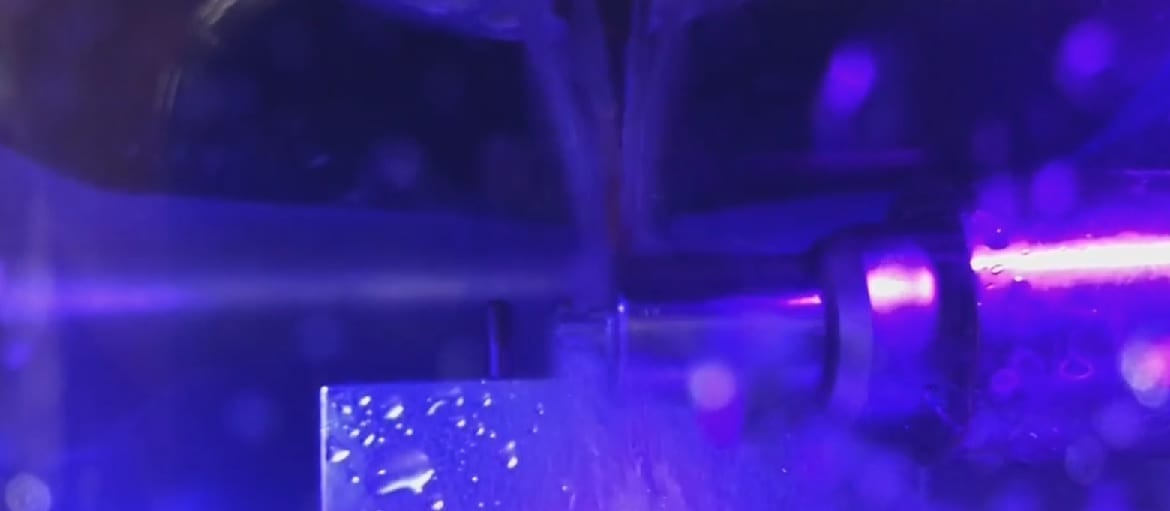
The VHF Z4 milling machine comes with an on-board computer. This video shows how we have remote desktop ed into the Z4 to launch the software for nesting and milling.
The biggest advantage of nesting with VHF and milling is that they happen simultaneously. If you nest in exocad, the math has to be done in that software and then transferred to the milling machine, but if you do it all in VHF, the milling process starts before the nesting algorithm is finished.
Full arch scan, metal abutment, ceramics, lots of reflective surfaces all captured in under 90 seconds with no powder. just have to hit the metal at different angles and focal lengths, retract the lips and tongue and dry and you will fly with your ios
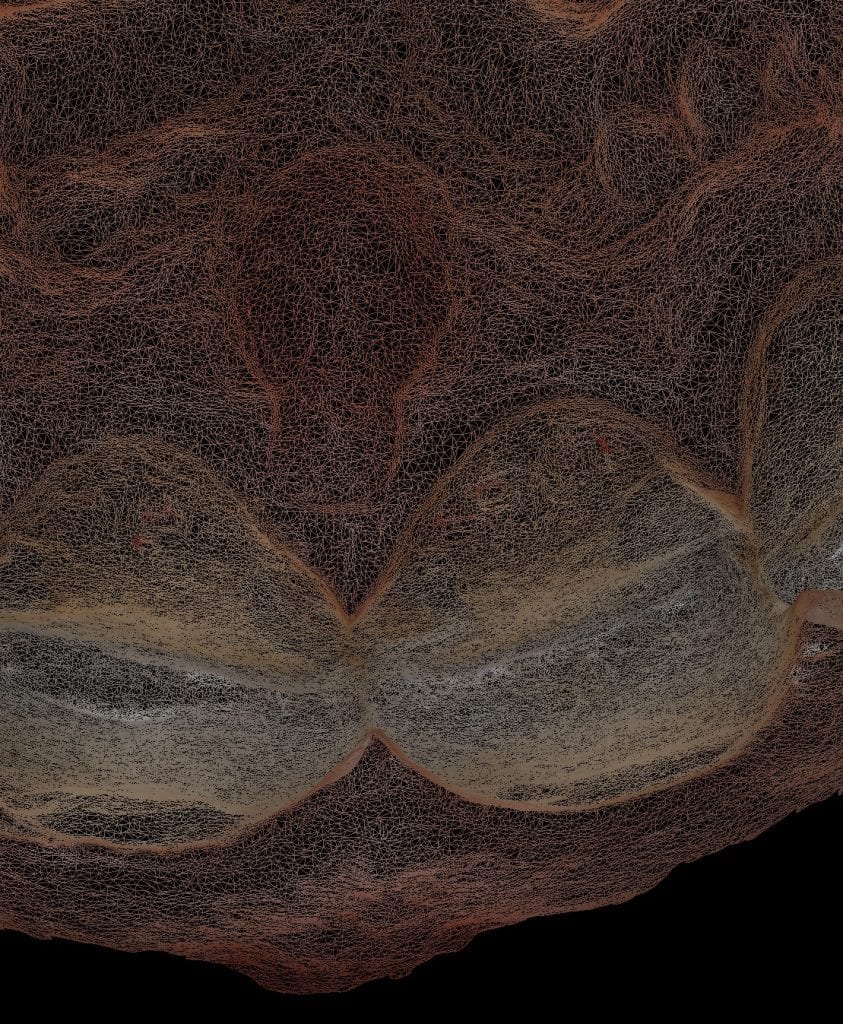
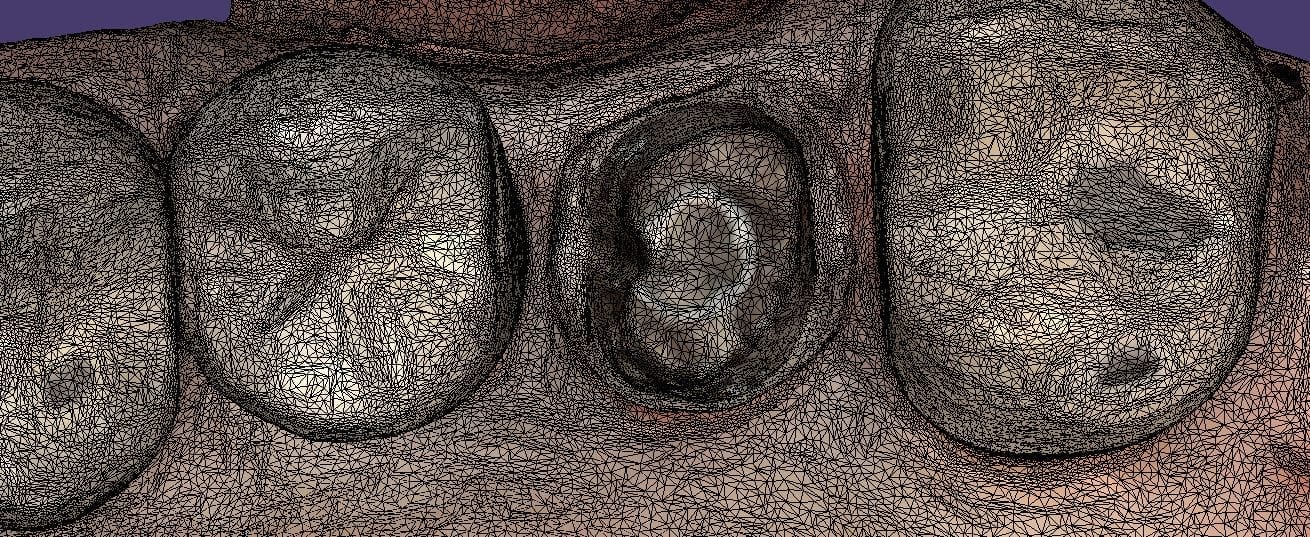
A repetitive theme that is a common issue with all intra-oral scanners is the inadvertant capture of data that does not belong to the model you are building. The software and camera are smart enough to ignore the tongue and the lip, but if they show up repeatedly in an area you are scanning, they ultimately get incorporated in the equation.
In this image, you can see how the tongue is capture on the occlusal surface of the second molar. The trouble is that the ios does not recognize the difference between soft tissue and hard tissue (yet) and once it is part of the model and you go back to the area you want to scan, the software is actually looking for that (now) displaced data. Since it is not present, the camera cannot initiate the capture of new data and the user gets frustrated with the red box instead of the green box.
Retract the lips and the tongue and you can easily capture an arch in 60 seconds.
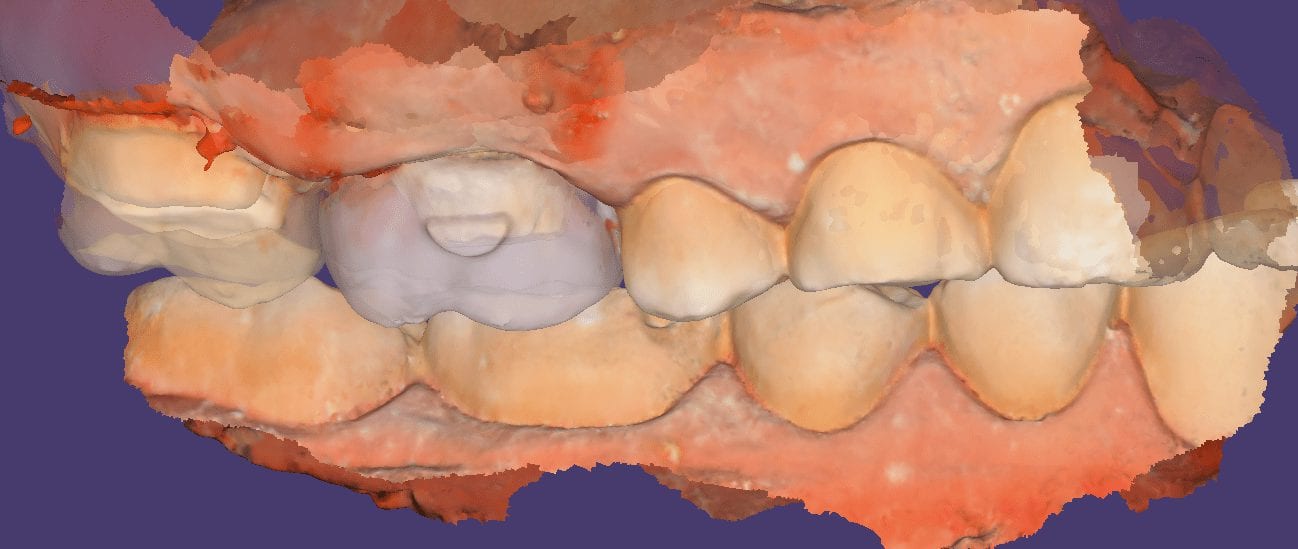
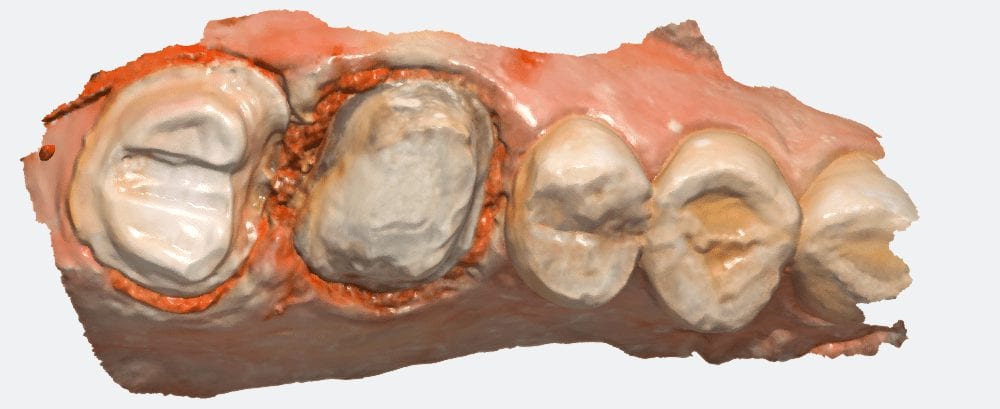
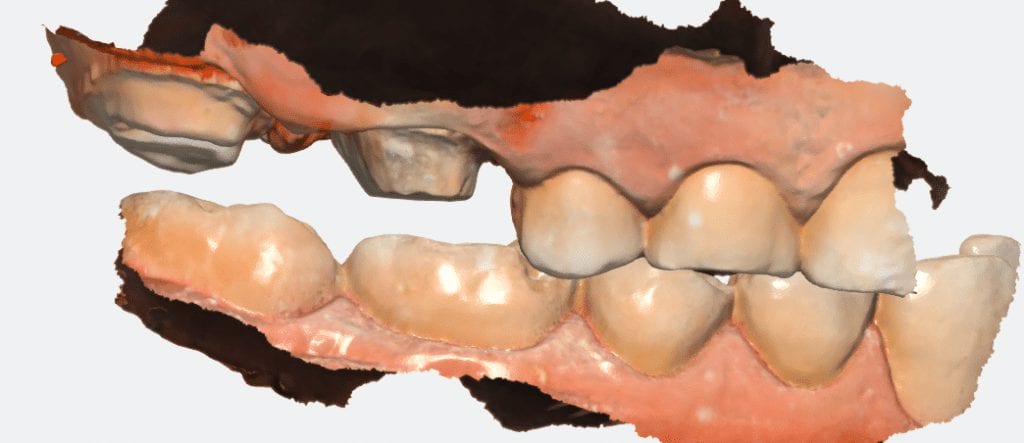
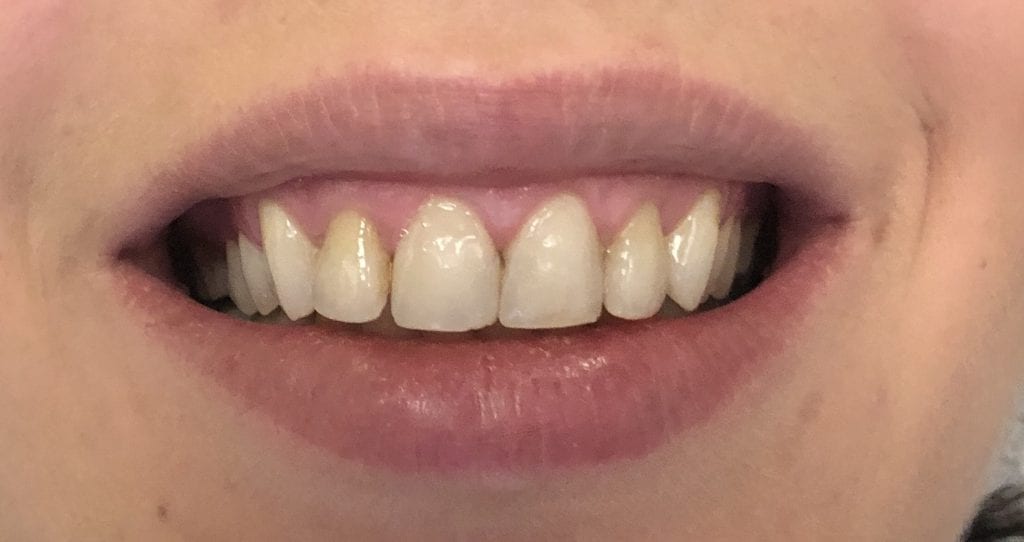
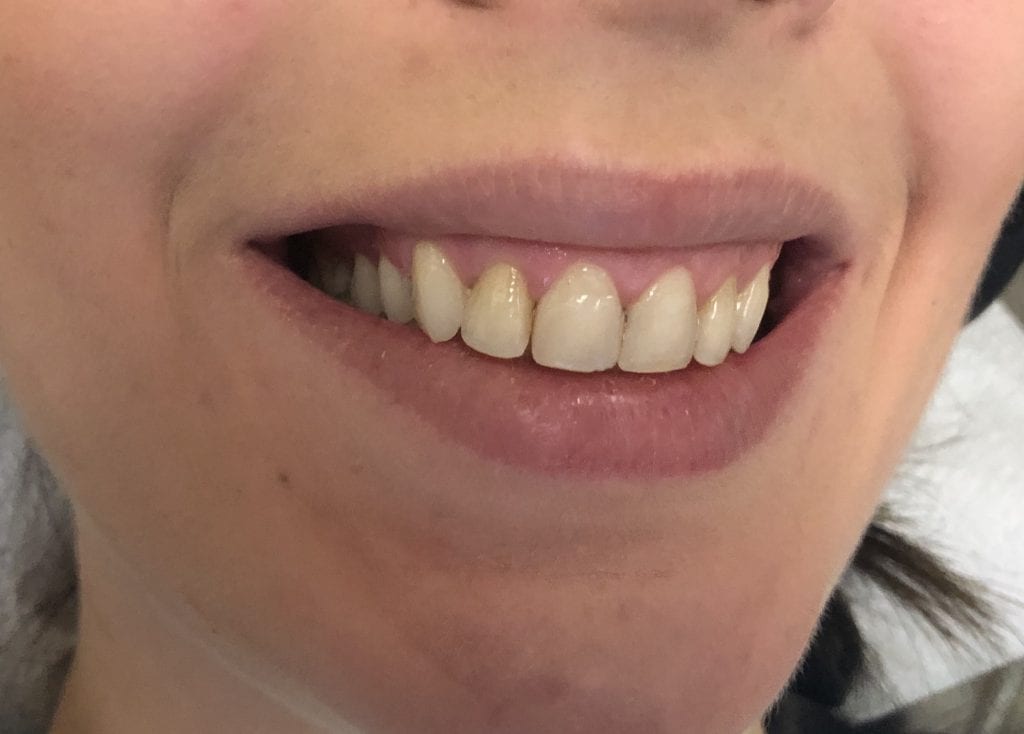
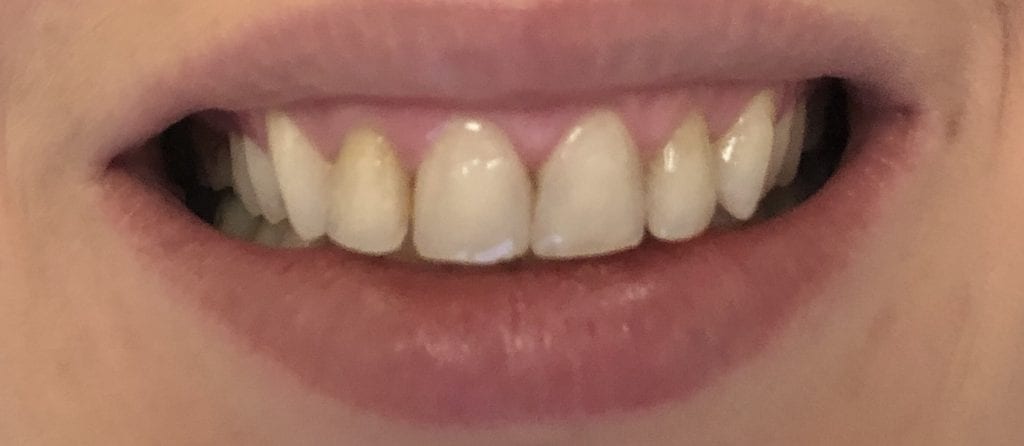
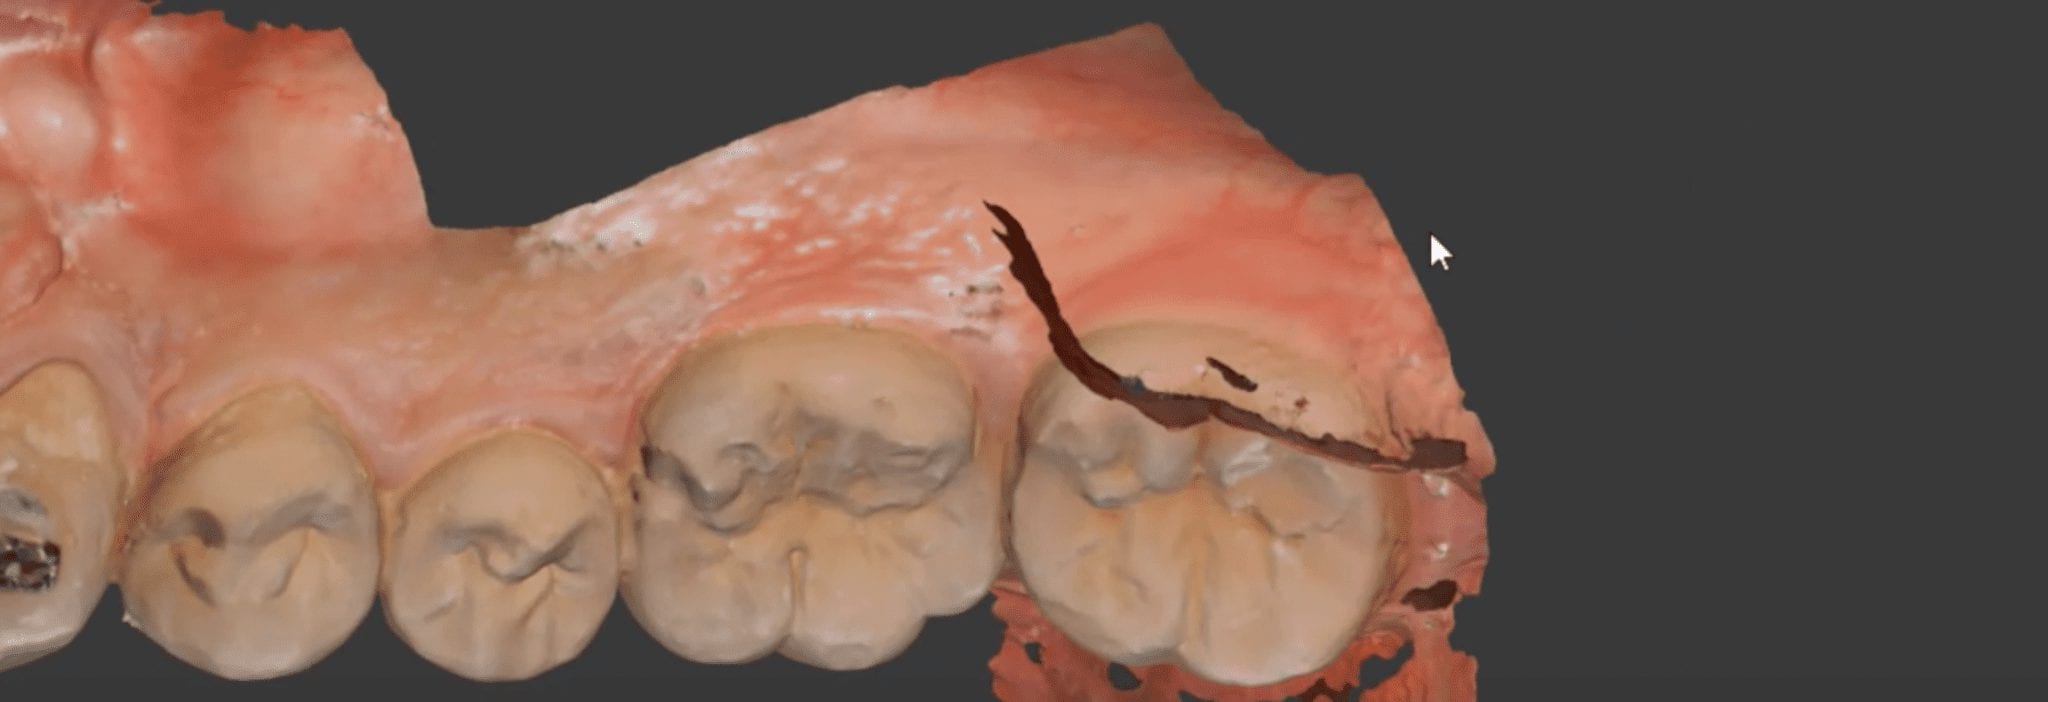
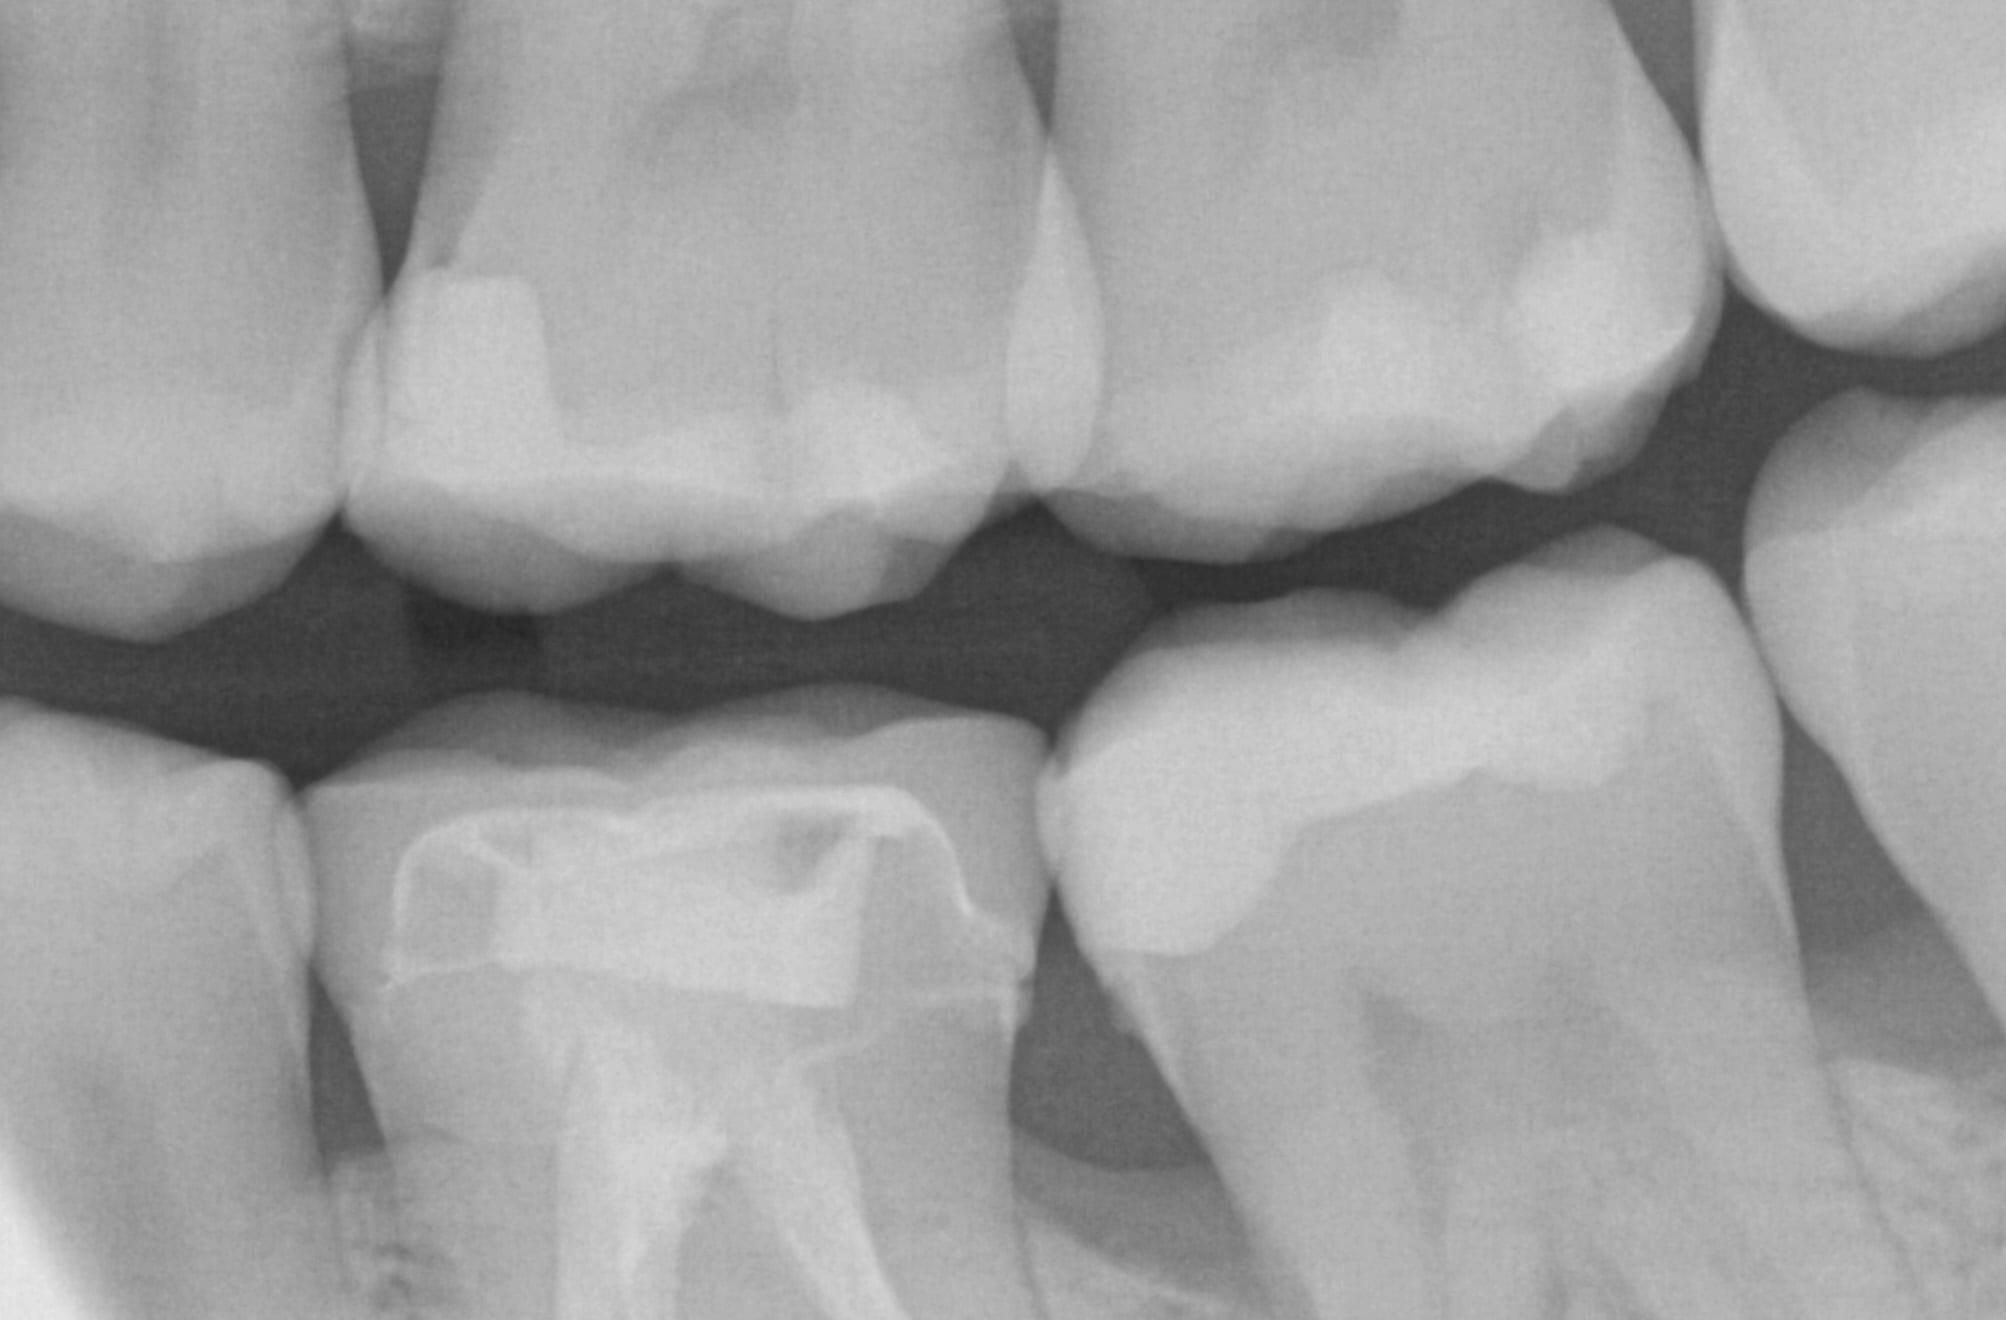
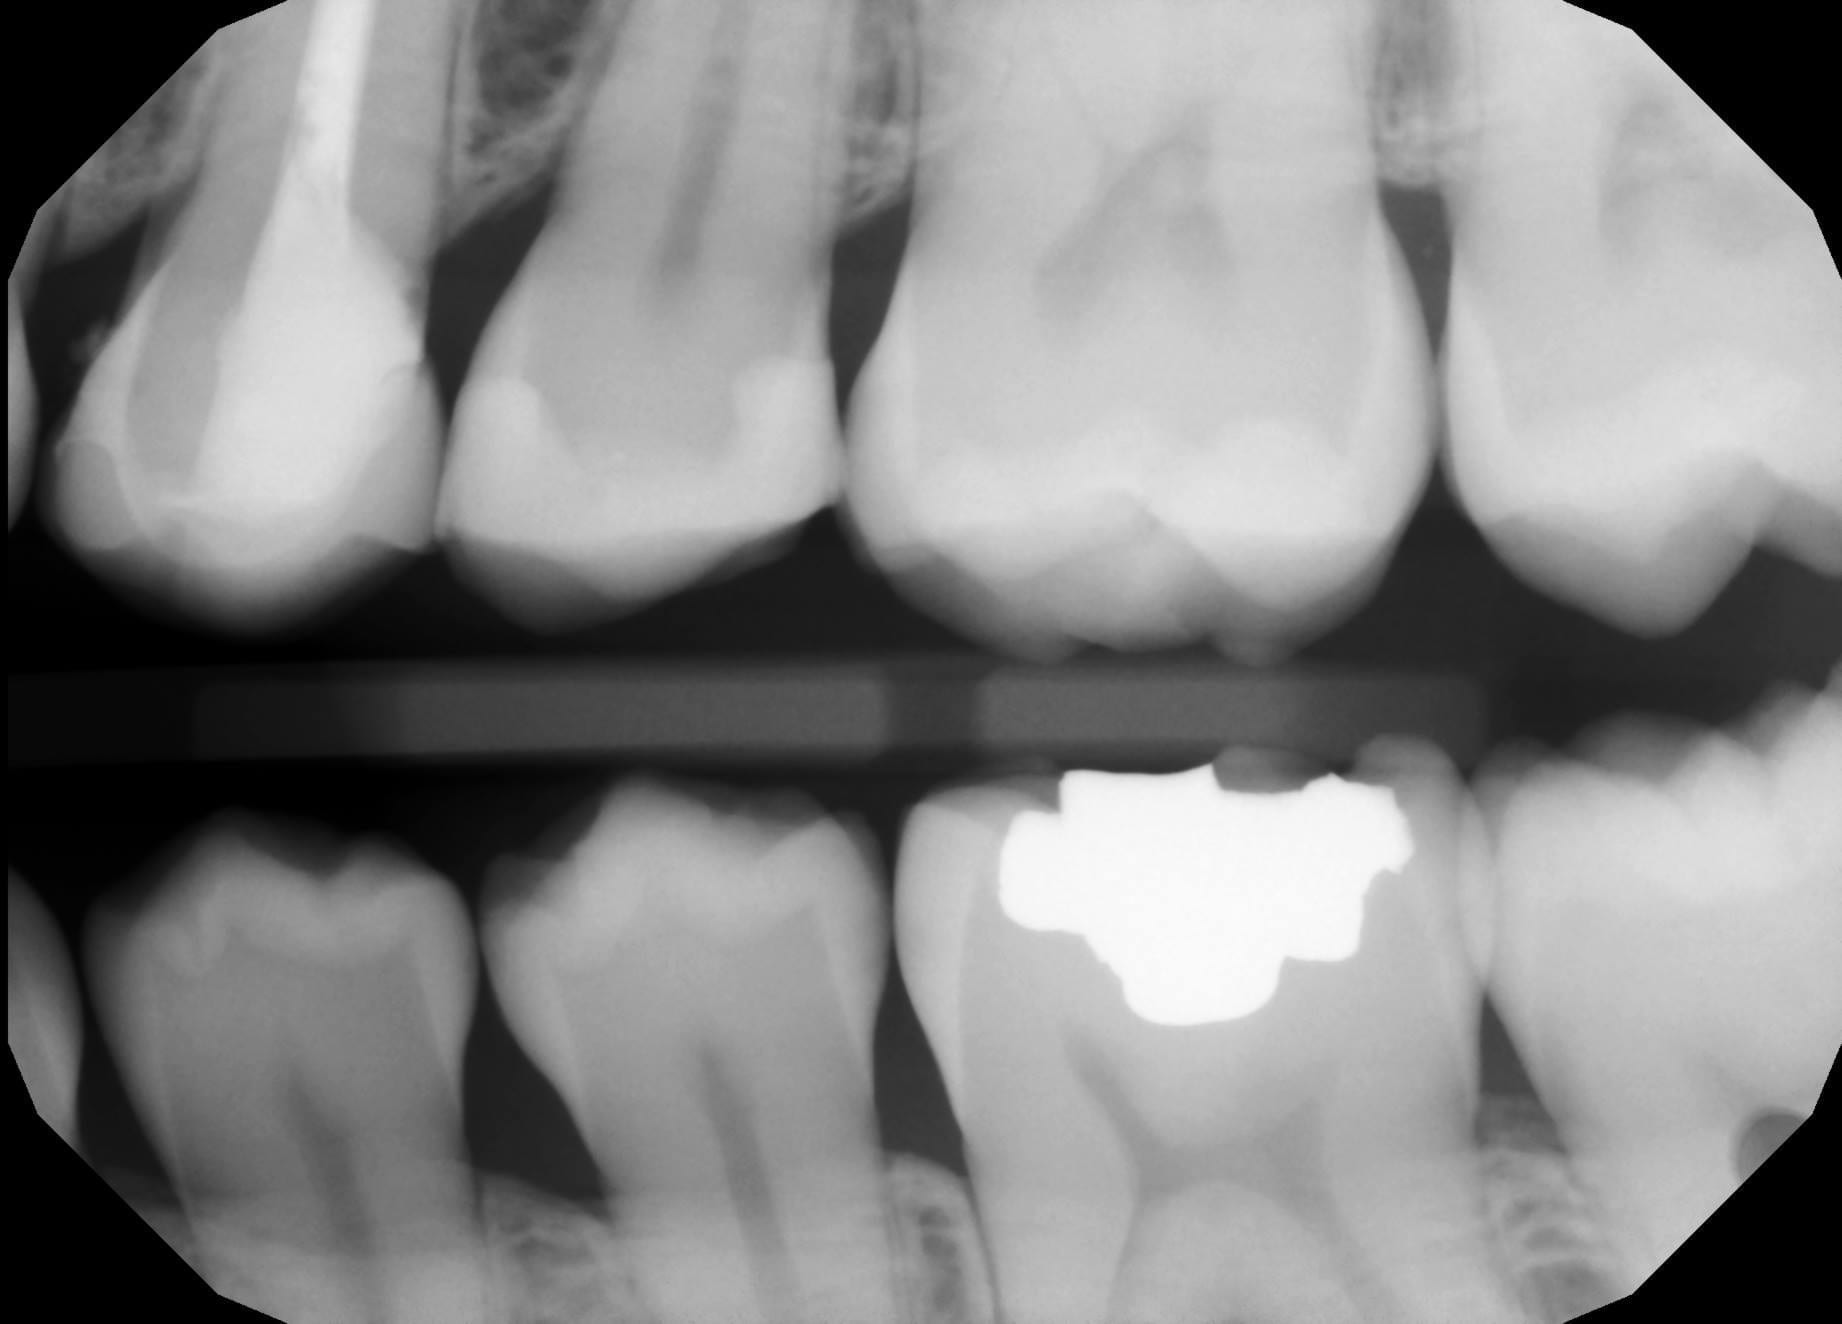
This is a first molar crown that was replaced with an in-office milled eMax restoration. The adjacent second molar had recurrent decay under the existing class 2 restoration. That was removed and replaced and pre-existing crown was also removed.
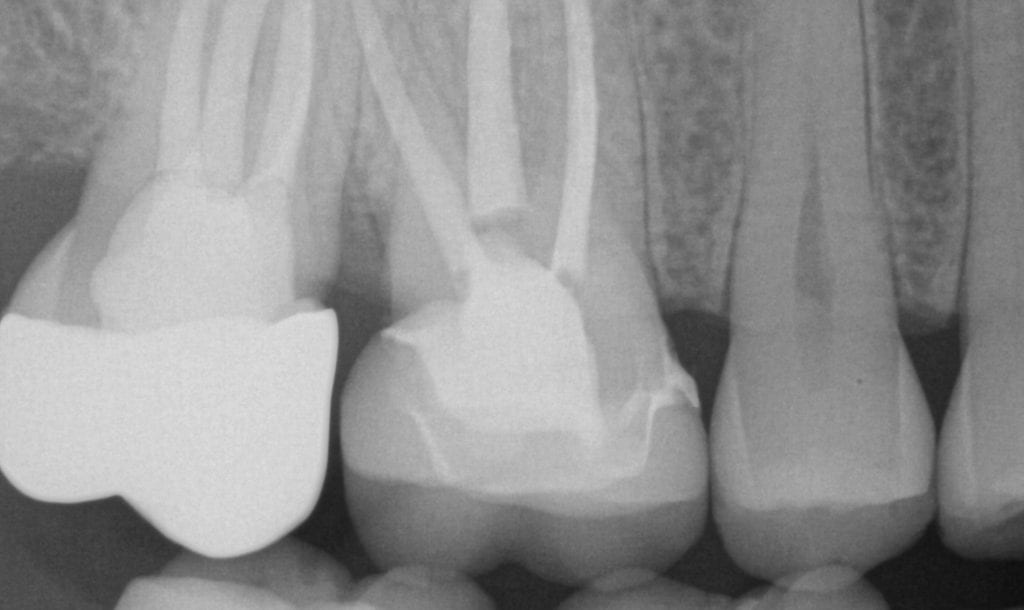
The preparation was refined and the recurrent decay was removed. Once hemostasis was achieved and the tissue was retracted the area was scanned with the medit i500. The crown was designed to full contour and milled chairside. After it was chrystalized, it was bonded into place with Nx3 resin cement. The excess was removed and an immediate post-op bitewing was taken to verify that no excess cement was left behind.
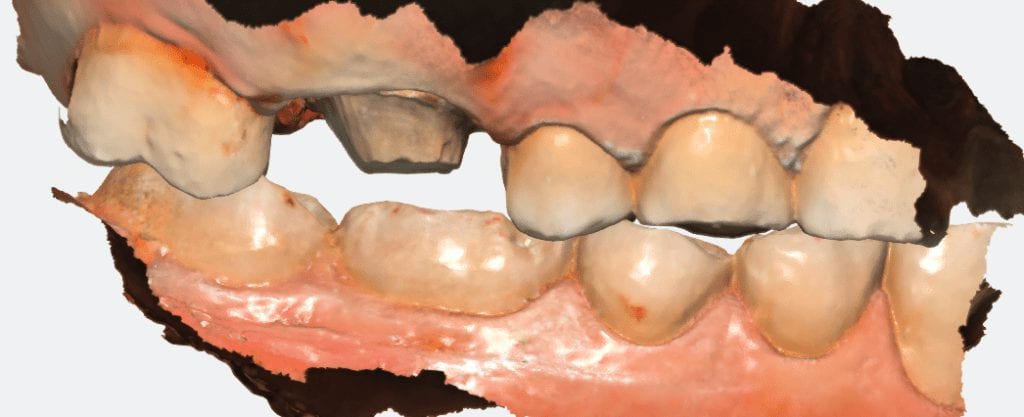
Pre-Op
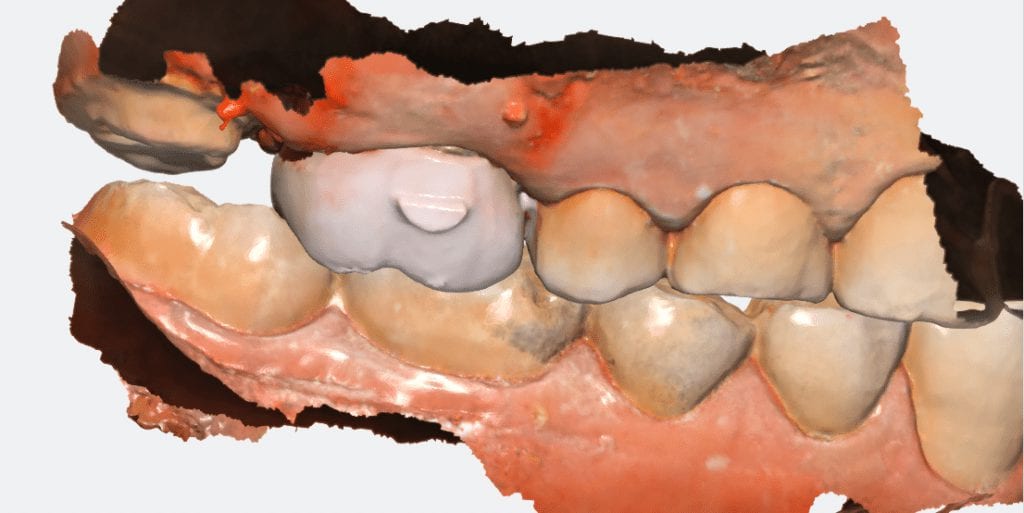
This video shows the design of a crown after the impression was taken where vivid colors of the retraction cord, the sulcus, the preparation, and the details of the adjacent tooth can be visualized.
[videopress 25yUA1tp permalink=”false” hd=”true”]
Immediate Post-Op
Download the case files in OBJ Format
There are so many incredible and robust features to exocad and it is precisely why there are over 35,000 users around the world. There are many distributors to the software, including us, at CAD-Ray.com
We focus mostly on our clients who are generally dentists, and our main goal is to streamline your workflow and make this easy and not intimidating. During our two day hands-on course for new medit i500 owners, we install the software and design four cases in exocad.
Here are some of the top highlights for you to understand. The software is installed and self contained within a folder that you can place anywhere on a computer’s directory. What’s great about this is that your software operates completely independent of the windows operating system. So whenever there is an automatic windoes update, it does not mess with your configurations or settings and you don’t have to deal with firewalls and other technical terms we don’t even comprehend.
Another benefit to this is that you can place this folder on the cloud like dropbox and then you can go to ANY machine- at home, in another operatory, at another office and launch the program there, instead of carrying a laptop around. Since the data can only be accessed by a real license / dongle, there are no concerns about HIPAA violations as it is encrypted and only accessible by the active license. Moreover, one machine can be running Windows 7 and another could be runnng Windows 10, and you wouldn’t know the difference or have to worry about configurations
Also, multiple doctors in multiple locations could be working off the same program on the cloud, as long as they have an active dongle. This really allows for a lot of flexibility in a practice or a group setting.
You can see the basic elements in the folder, which are broken down into a case data storage folder, the CADApp and the DentalDB folders. We’ll explain what these other two folders do below.
As a distributor, we can custom make our own private label version of exocad. Since we are focused on chairside dentistry, or on dentists, generally, we strip the software down to the essentials. Namely, we’ve programmed it for inlays, onlays, crowns, and veneers. We also include bridges that can fit in 40mm blocks. You can choose to add on other modules like implant planning, implant designs, dentures, etc.. if you choose to.
It is important for you to understand that we provide a fully functional version of this software, and if you want to add more features as your confidence grows, all you have to do is swap out these files called WorkParamsDB.xml
Watch the video that shows you how we have multiple versions of the file. We provide you with many versions of this file that you always have access to and they are all configured differently. In seconds, you can change the look and the feel of the software to your liking, and turn on multiple modules that we hide from the version that we provide. Please note that we only provide support and tutorials for the what we call the Dentist Version of exocad, as opposed to the lab version. If you grow to the point where you want to add the other components, it is very to transition, just recognize that we don’t support the heavy duty version. We certainly can refer you to the right people to learn how to use those extended functions.
[videopress d20fACf8 permalink=”false” hd=”true”]
One more thing for you to get excited about is the WorkParamConfigTool.exe
Now, if you are scared of the mouse and can’t press the “Any Key” button on keyboard, stop reading any further.
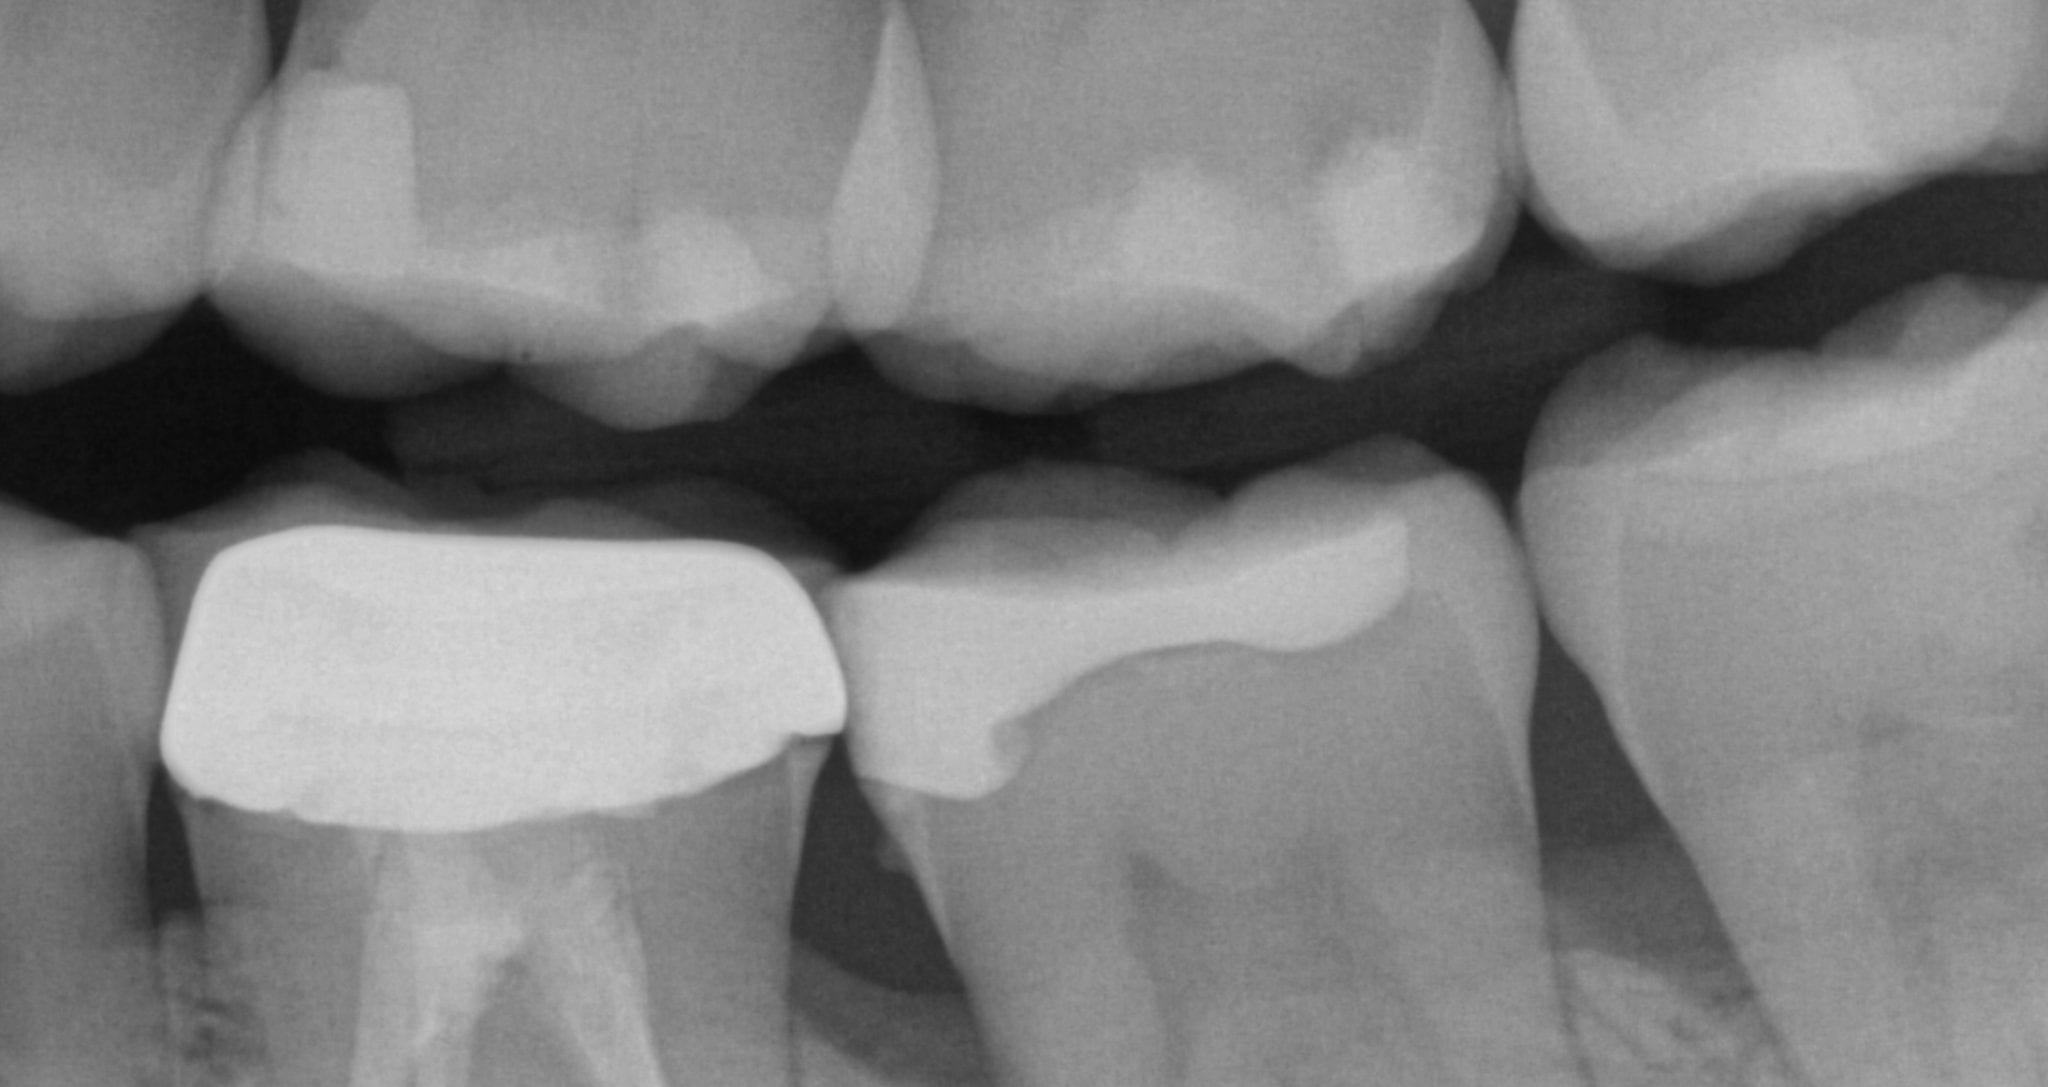
It i sometimes confusing to some doctors when looking at bitewings shot at specific angles that make the margin look like it has filled in with resin, or the the margin is “raised” with composite material. When looking at a sloping margin, where you have a deep chamfer or finish line, instead of a shoulder margin, when you take a bitewing immediate post-op X-ray, the flow of the margin line is superimposed on itself due to the two dimensional image.
Clinically, if you look at the margin design, you will appreciate the anatomy of the prep and how that can lead to this effect.