Posted on Leave a comment

Intraoral Scanning: The Basics & How It Works

Demonstrating the clinic to lab connection using technology. So much faster, so much easier.
You can replicate this workflow in your practice for anything from basic crown and bridge to full arch rehabs and clear aligner therapy.
play-rounded-fill
Posted on 3 Comments

Intra-Oral Scan and Face Scan for Smile Analysis

You will need 3 models to utilize all the features of the Medit Face Scan

  • Medit intra oral scan of upper and lower arches
  • 3D Face Scan (we recommend Bellus3D or other apps that capture to scale)
  • Medit i500 scan of teeth, lips, and nose (this model will be use to connect the two previous models together)


This video demonstrates how the Bellus3D software works. Once the images are captured, a 3D model is rendered and it can then be exported into any CAD software including the Medit iScan Program

face scan with Bellus3D
play-rounded-fill

When you export the model, make sure that all the pertinent files accompany the folder, otherwise texture or color do not accompany the meshwork

The following videos demonstrate how to capture the scan of the teeth, the scan of the teeth and lips, and then the incorporation of the facescan into the equation. Notice how the facescan with the iPhone distorts teeth and can’t be relied upon to find the midline or address other cosmetic issues.

video
play-rounded-fill
imaging with medit i500
Posted on Leave a comment

Open System Technology: What Is It And Why Is It Important?

If you’re experienced with CAD/CAM technologies in dentistry, you probably already know how important file types and system integrations can be for the outcome of a project.

In this video, we briefly preview a workflow that is 100% digital and allows the user to freely select which products and programs they want to use within the phases of production.


play-rounded-fill


Practicing with open system technologies puts the user in the driver seat allowing them to maintain control & freedom.

Furthermore, as time goes on these users can freely replace and upgrade components according to their treatment plans and the rate of innovation.

In conclusion, once doctors decide to upgrade their practice into digital workflows, they should invest in open system technology. When they make this decision they will experience several advantages such as cost savings, flexibility, more product options, and future proof set ups.


Posted on Leave a comment

How To Keep Production Lean With Digital Workflows

Today, clinicians and lab technicians are leveraging technologies to produce better results and run a better business now more than ever.

So how does this work? Why should you care?

First we need to define the differences. What is a digital workflow?

A digital workflow is the process of using advanced technology and 3D precision without analog materials or human error to deliver patient care.

The reason clinicians or technicians should commit to mastering digital workflows is because it will lean out their production helping them avoid slow and costly processes.

play-rounded-fill

Take for example a basic full coverage crown procedure. During the conventional process the clinician will start by taking an impression of the patient using polyvinyl materials. After the materials set and it’s determined there are no errors chairside, they will ship the impression to the lab which can take a few days depending on location. When the impression finally reaches the lab, a technician will pour up the impression in stone to produce a model and determine accuracy. After this time consuming process is completed, the technicians enter the manufacturing phase.

For comparison, if the clinician and lab practiced with a digital workflow, they would have the ability to cut out each of these steps therefore delivering superior accuracy. The clinician could use a device such as an intraoral scanner to digitally capture a 3D model of the patient and instantly deliver the model to the lab using electronic file exchange. The lab would download the file and immediately begin digitally designing the proposal before milling or 3D printing final prosthesis. Practicing with this process eliminates the costs and headaches of analog materials that can introduce errors and delays.

Digital workflows are very simple to learn. They make life so much easier once you understand.

In summary, any practice owner or lab owner can keep their production lean by introducing digital workflows to eliminate costs, time, and errors.

Posted on Leave a comment

The Purpose of Technology For Dentists


play-rounded-fill


Technology is the equalizer and the differentiator.

Once you establish your foundation, what other assets do you focus on to skill up your business and and your patient care?

In this video I briefly summarize the 5 major advantages that technology offers to any dentist, specialist, or lab technician and why they should care about them.

Posted on Leave a comment

Dental Labs to the Rescue with 3D printed parts for first responders

During these uncertain times with the COVID-19 virus, CAD-Ray has been on the front lines in the 3D printing and 3D design movement trying to help print masks and other goods for Healthcare workers on the front lines.

The other day, one of our CAD-Ray team members needed some help of his own

Story by CAD-Ray.com CTO, Jonathan Acker

It gives me great satisfaction to write this blog post. We are living in a strange time, and I’m glad to be able to share a positive story during this COVID-19 outbreak. This story bridges the gap between my worlds, and shows how the dental industry has A LOT to give during the fight against the virus.

Besides getting to work everyday at CAD-Ray with the most innovative team and customers in the dental profession; a life-long passion of mine has been serving my community in the role of firefighter/EMT at the Fallston Volunteer Fire and Ambulance Company in Harford County, Maryland. I’ve been riding ambulances and fire trucks since I was 16 years old – for the last 5 years at this department in the town where I reside. When I’m not working or home with my family, I can be found driving the ambulance, providing patient care as an EMT, or responding to the fire and rescue calls in our community. Holding the rank of captain, one of my roles is to ensure that all of our men and women in the Fire/EMS service have ample PPE to serve the public in a safe manner.

On Tuesday night March 24th at about 9 PM, the assistant chief of the department was inquiring if we knew anyone with access to a 3D Printer. I let him know that in my day job, I have access to many great dental labs who are experts at 3D printing. It turns out, this connection would allow us to solve a big problem.

In the midst of a massive PPE shortage because of the COVID-19 virus, equipment like N95 respirator masks are hard to come by, and are IMPERATIVE to keeping first responders like the members of my department safe as they interact on 911 calls with the public.

One potential solution to the lack of N95 masks is a filter fitting (that are readily available) that could snap into a firefighter’s own personally issued mask. This is the same mask that firefighters and medics would use to connect to their breathing apparatus regulator in the case of a fire. This seemed like a great solution for our department because it would adapt to our already existing equipment and avoid the use of disposables during this shortage –  except there was one problem – there is a specific 40mm circular adapter that is required to fit the mask mounted housing for the filter to the filter itself – and due to the shortage of supplies – this small part as NOT AVAILABLE FOR 10 WEEKS.

Luckily,we were able to get an  OPEN .STL file of the part we needed. So at 9:30 PM, with the .stl file ready to share – I reached out to some friends in the dental lab business via text, email, and of course, facebook.

Within Minutes. Adam from Triple Crown Lab in Maryland, Rachel from Best Dental Studio in Maryland, Dr. Ho representing BARAN Dental Lab in Virginia, Colin from Red Mountain Dental Arts in Washington, and Rob from Patriot Dental Lab in Michigan all had responded saying they would be happy to help. I sent the file out and awaited some news.

By 11 PM Rob at Patriot Dental Lab had told me that one of his Technicians, Chad was already in the lab loading up resin, and getting the first 9 adapters printed. ( We need 20-40 for the department). By 2 PM the next day I had a message from Rob saying our first batch was printed, and on the way, and by 10 AM Thursday, we had our first set of adapters in hand, verified their fit and function, and issued to members of our department. An additional 18 are on the way from Rob as well as some others from the above mentioned labs.

Needless to say, I am so greatful to all of the lab owners who jumped in to help our department in our time of great need, especially Rob from Patriot Dental Lab who jumped out of bed, got to work and had these much needed parts in our hands in less than 30 hours, from 10 states away!

Dentistry, especially our great labs have so much to give during this time, and on behalf of CAD-Ray.com and the Fallston Volunteer Fire and Ambulance Company commend and thank all of you true Patriots who jumped in to help when we needed it most. It will never be forgotten!

When the time comes, please don’t forget to give Rob and all the labs above a shot next time you need some lab work done – they are In it for the RIGHT reasons. .


Mask Mounted n95 filter                    


The Problem – Missing the needed adapter

The solution – 3D printed 40mm adapters          
Adapter in place                                                                                         
Adapter in place with n95 filter                                                                  
ready to serve!
Posted on Leave a comment

The Top 12 Things To Consider When Purchasing Dental Intraoral Scanners

For the last decade the rate of adoption and development in 3D scanning technologies has led to a tremendous amount of change in today’s dental workflows.

Smarter features, easier integration, new findings, and a worldwide understanding of 3D scanning is all leading to a better clinical outcome and an easier process for our patients and clinicians.

But if you’re a dentist or a specialist in 2020 looking for your first camera or even your next camera, pay close attention to this list of the top 12 qualities to evaluate. It could save you a lot of money and a lot of headache.

Here’s the list:


Support

Arguably the most important factor when considering a technology purchase. Do not take this lightly. Support is make or break.

First let’s define support. True support encompasses training, education, and help when you need it. Support is ultimately taking responsibility to help the end user maximize total value from the product to reach the desired end results.

Support should come from the product distributor so be sure to keep that in mind.

Is the team responsive when you need to contact them? Do they follow up? Do they have the knowledge to resolve technical issues? Are they clinically savvy with how you will be using the camera? What is their training platform? Do they offer continued education? Are they motivated to support you?

These are all important questions to consider first.
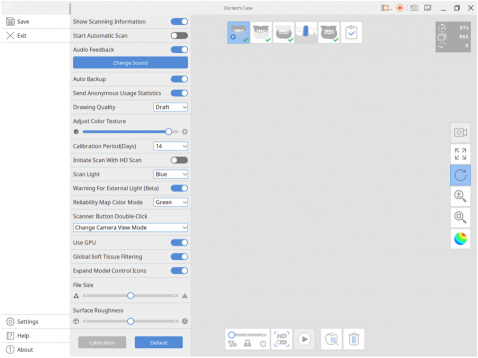
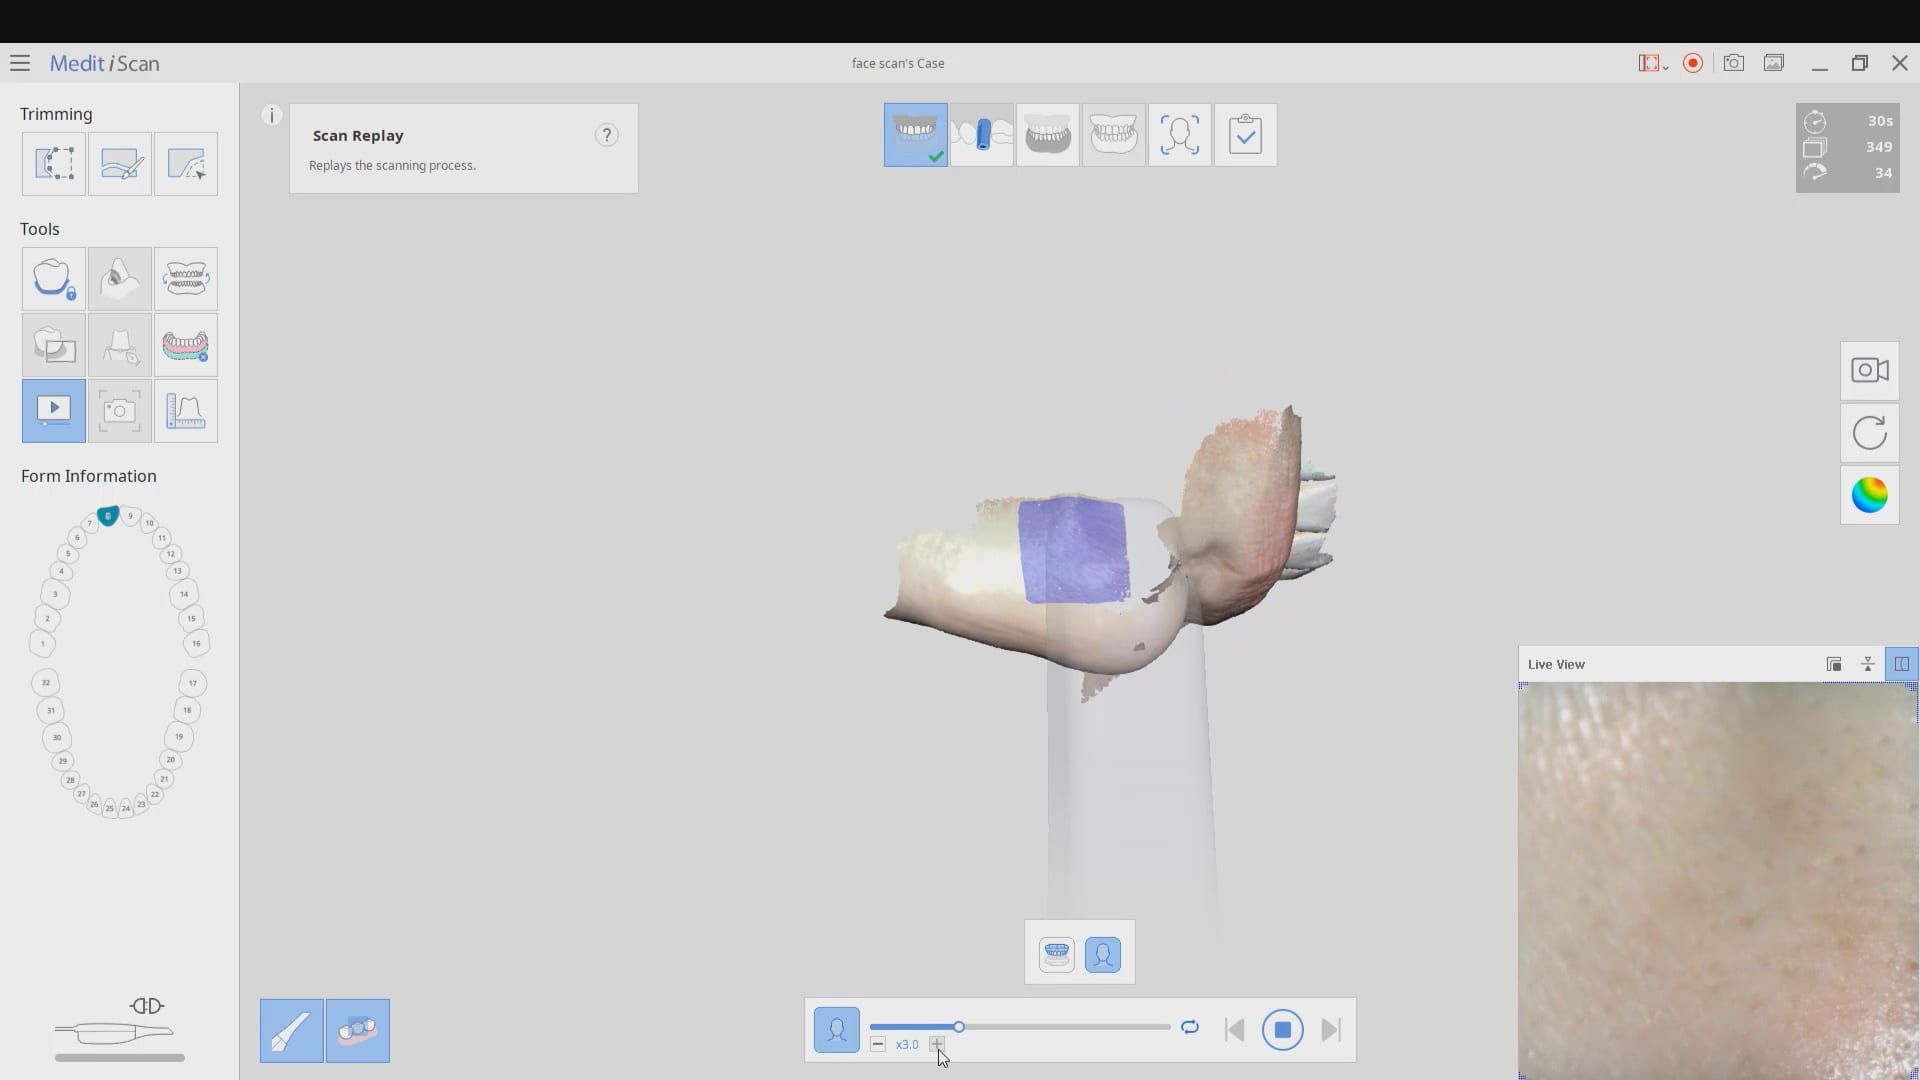
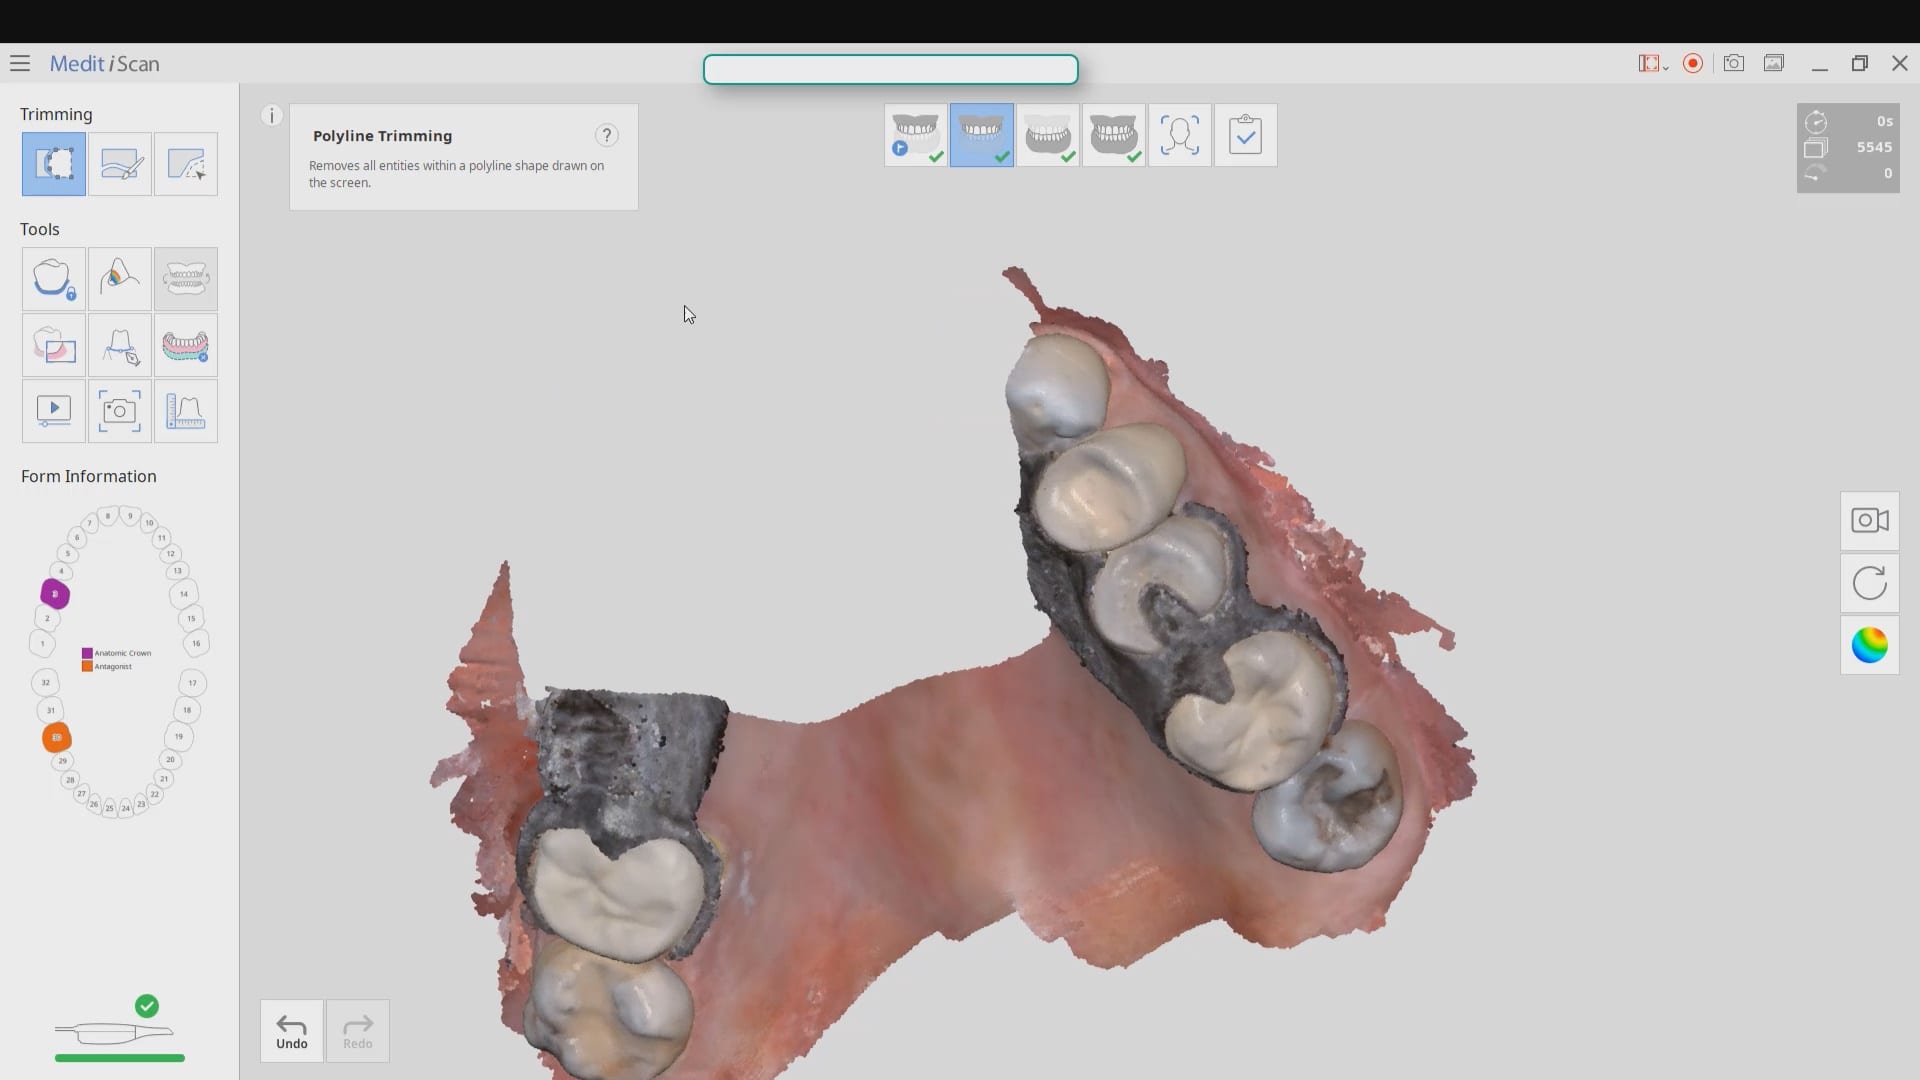
 

Software

Today software is the catalyst leading the way. It is the secret ingredient behind each intraoral scanner and is totally dependent on the engineering team behind the brand.

For intraoral scanners, software should be measured by the user interface, lab connection, third party software accessibility, and software upgrade consistency.

The best way to find this out is to check product websites for videos and descriptions. An even better way to check out the software is to contact the teams for short demonstrations to see it in action.

The software design is responsible for ease of use and will greatly influence the learning curve.
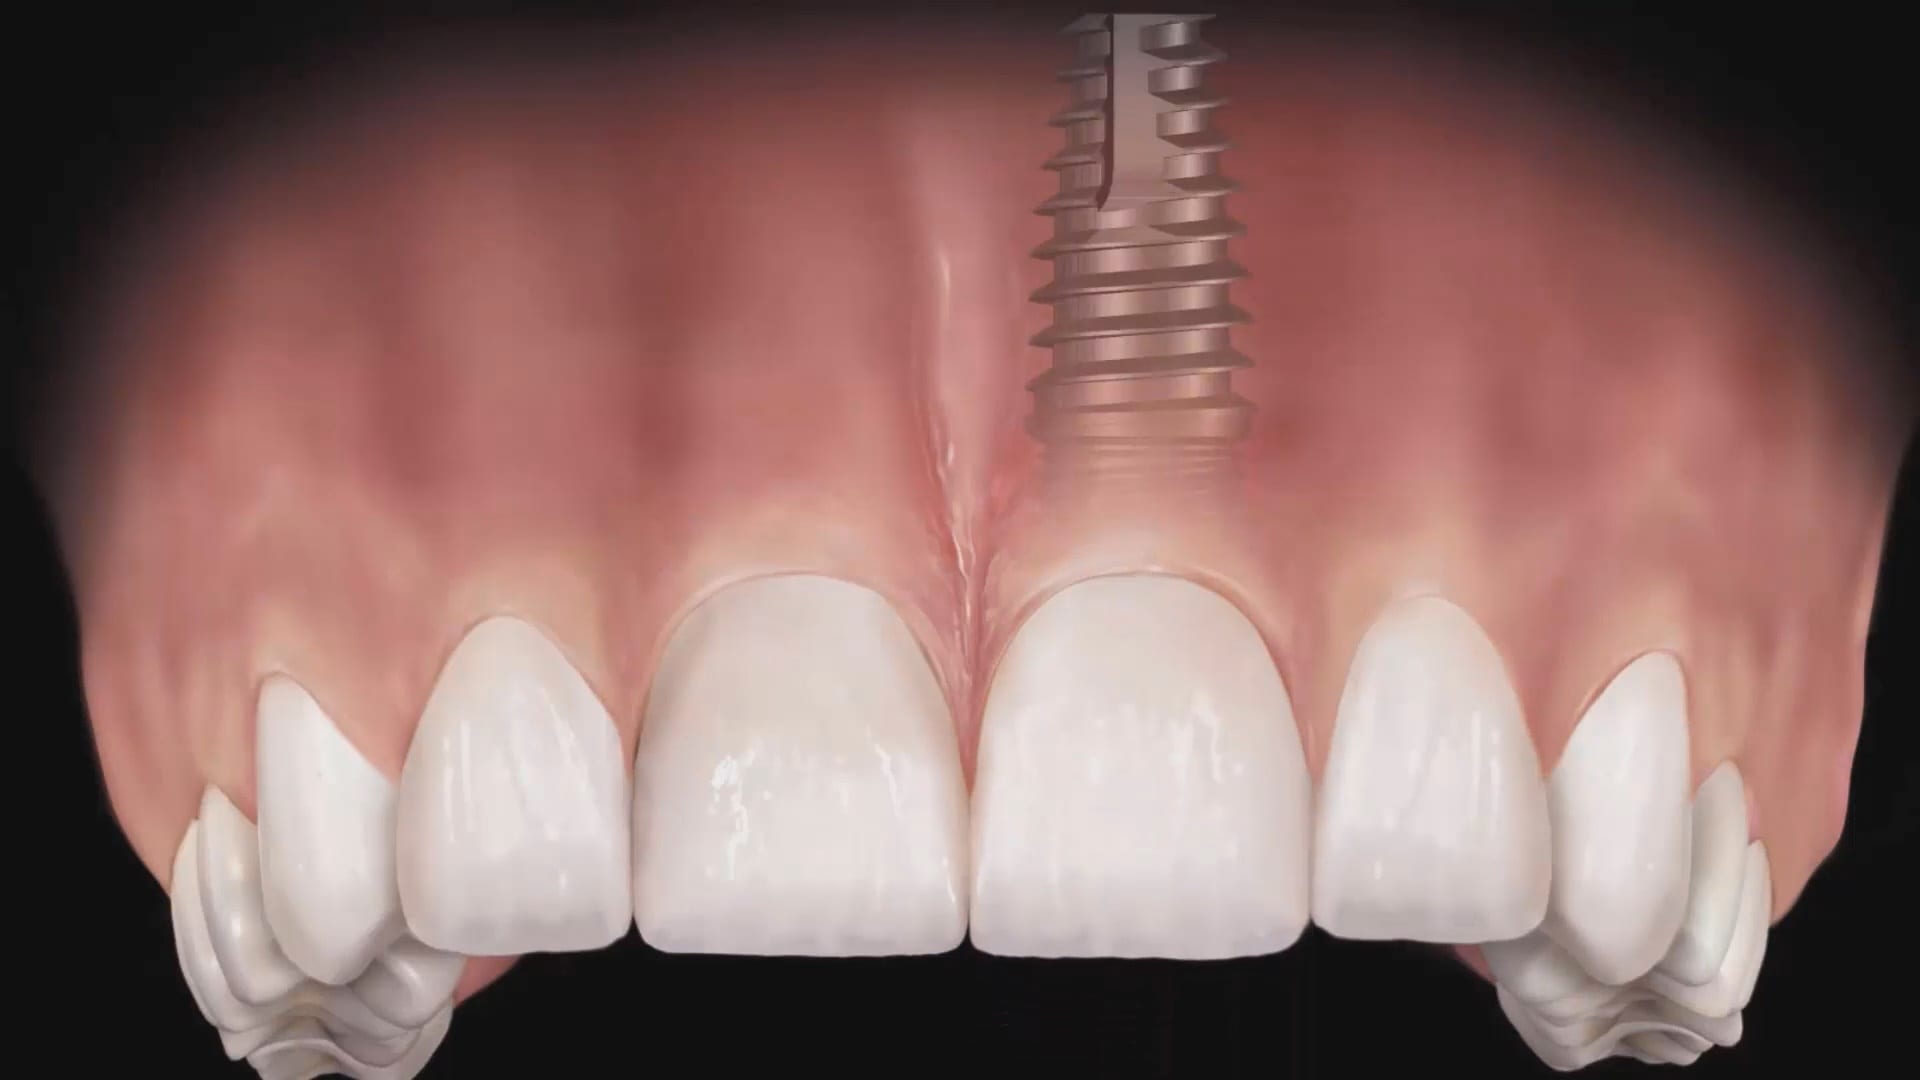
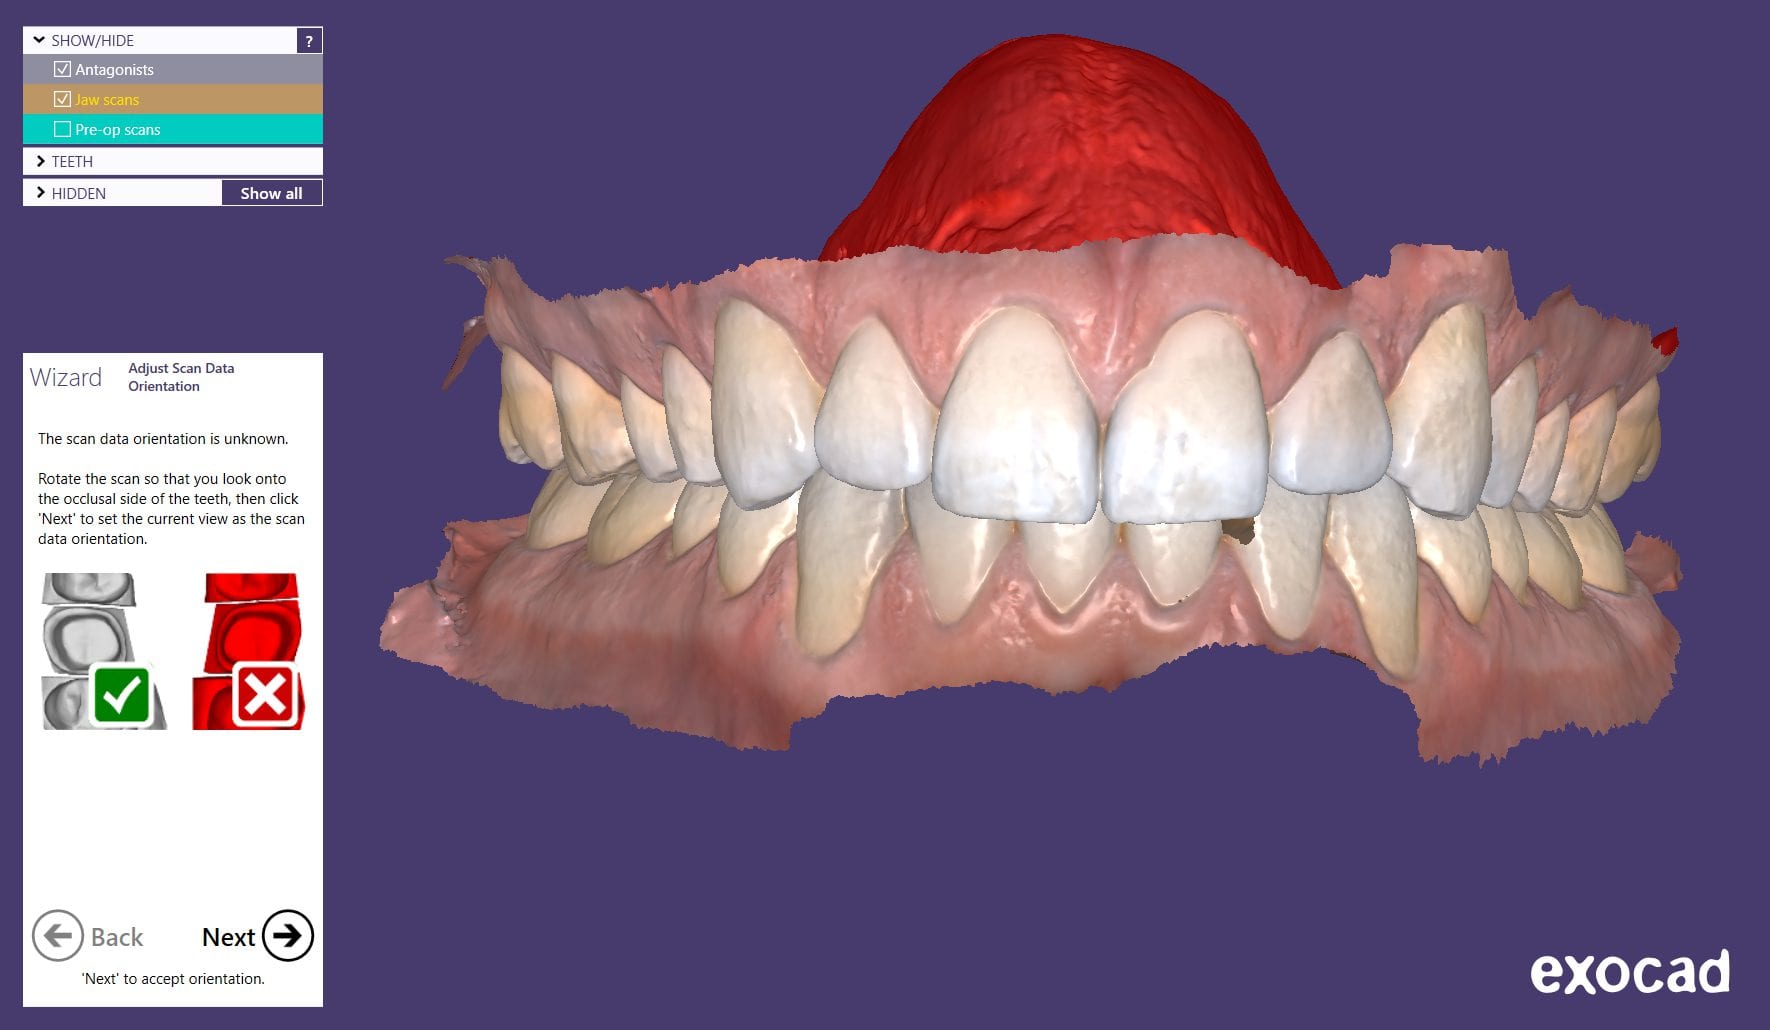
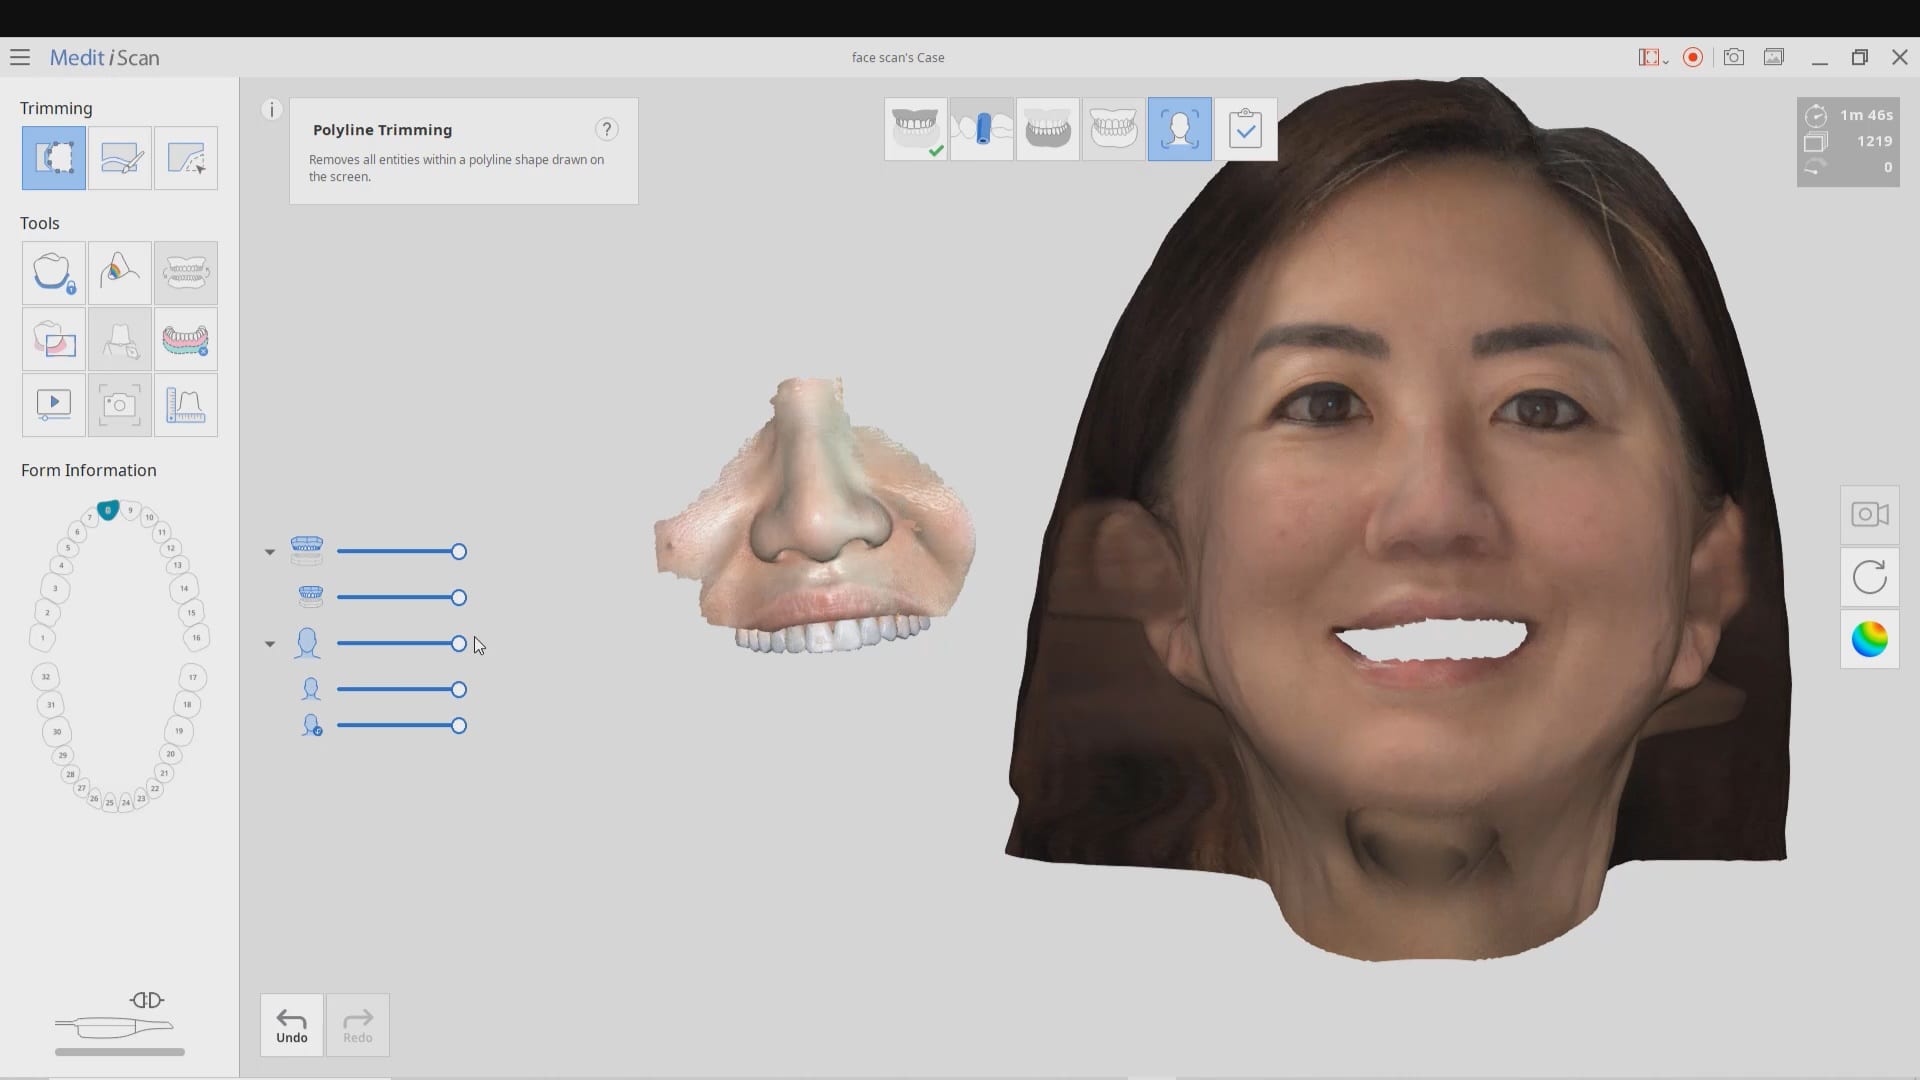
 

Versatility

What can the camera actually scan for? Is it single purpose or can you use it for multiple types of cases?

Some cameras are manufactured for specific indications while others are designed to image just about everything.

Be sure to dig into this. A great way to find out is through private, peer to peer doctor social media groups where you can post this question so all of the intraoral scanner users can respond with their feedback and experience.


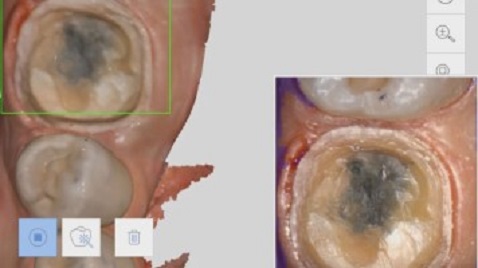
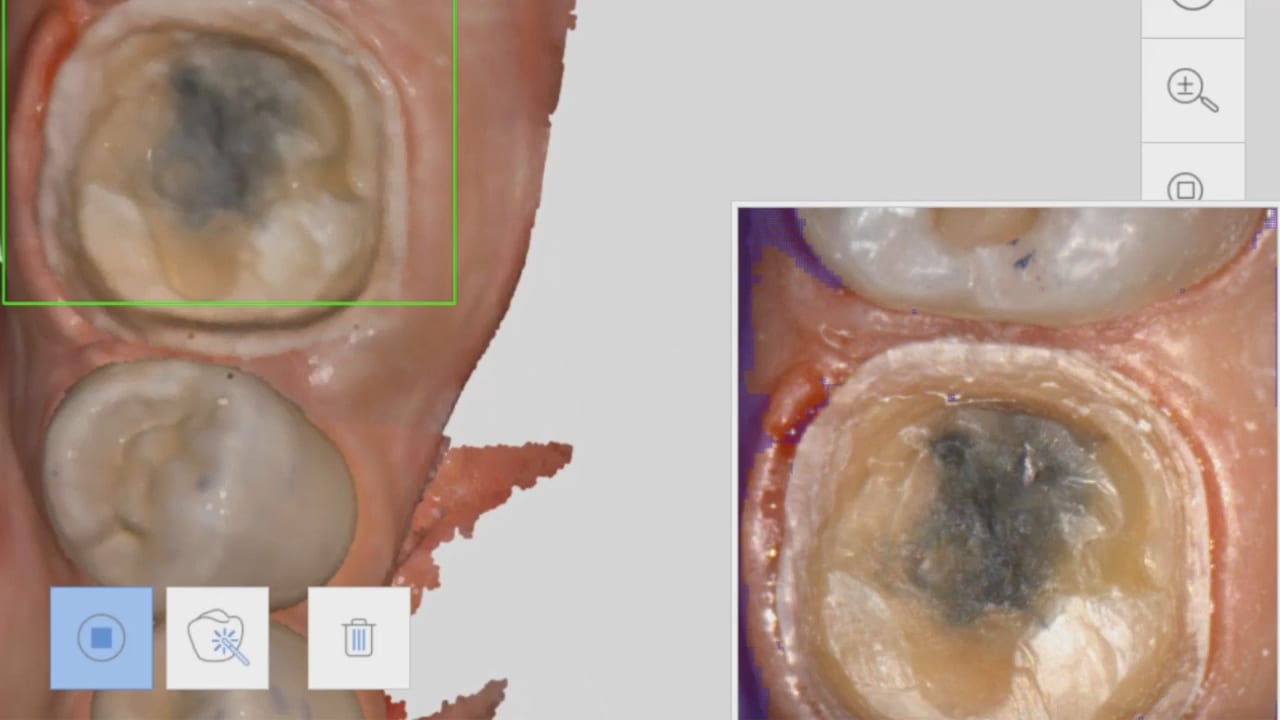
Clinical Documentation

Ever purchase a product where they say it will do one thing but in reality it does another? Yeah, us too.

The distributor or manufacturer should reflect great effort in documenting the products they support in a clinical environment. Bonus points if you can find live footage for multiple cases like crowns, implants, partials, and full arch appliances.

It’s 2020, all cameras can image a stone model very well, that’s old news. But not all cameras can image a live patient as fast or as precise as their in vitro studies suggest they do. It’s important to find this out before you spend the capital.

Clinical documentation is the best way to find out if the camera is the real deal.


Cost

Bottom line price is always important.

We teach doctors to judge products on a price to performance ratio. Does the product value out weigh the price?

One of the main purposes of technology is to make money or to save money and it’s no different when you’re shopping for an intraoral scanner.

We recommend doctors consider cost in a 5 year time frame since you will most likely use the camera for at least 5 years before you replace or upgrade.

Compare the 5 year cost of the camera to your current chairside and labside expenses (do not forget to monetize chair time, retakes, and adjustments for a clear calculation).


Warranty

The industry standard includes a 1 year manufacturer warranty with technology purchases. This means should anything go defective with the product that can’t be solved remotely, the distributor and manufacturer will deploy a process to verify and then issue an RMA to repair or replace.

Key things to consider with warranties: Can you purchase an extended warranty? If so, do you have to purchase at the point of sale with the camera or is there a grace period to add it later? What does the warranty cover? Is the warranty process difficult and time consuming? Do they take the camera back for repair or do they send you a brand new unit? Do they have loaners available when your camera is down?

Be sure to collect all of this info.
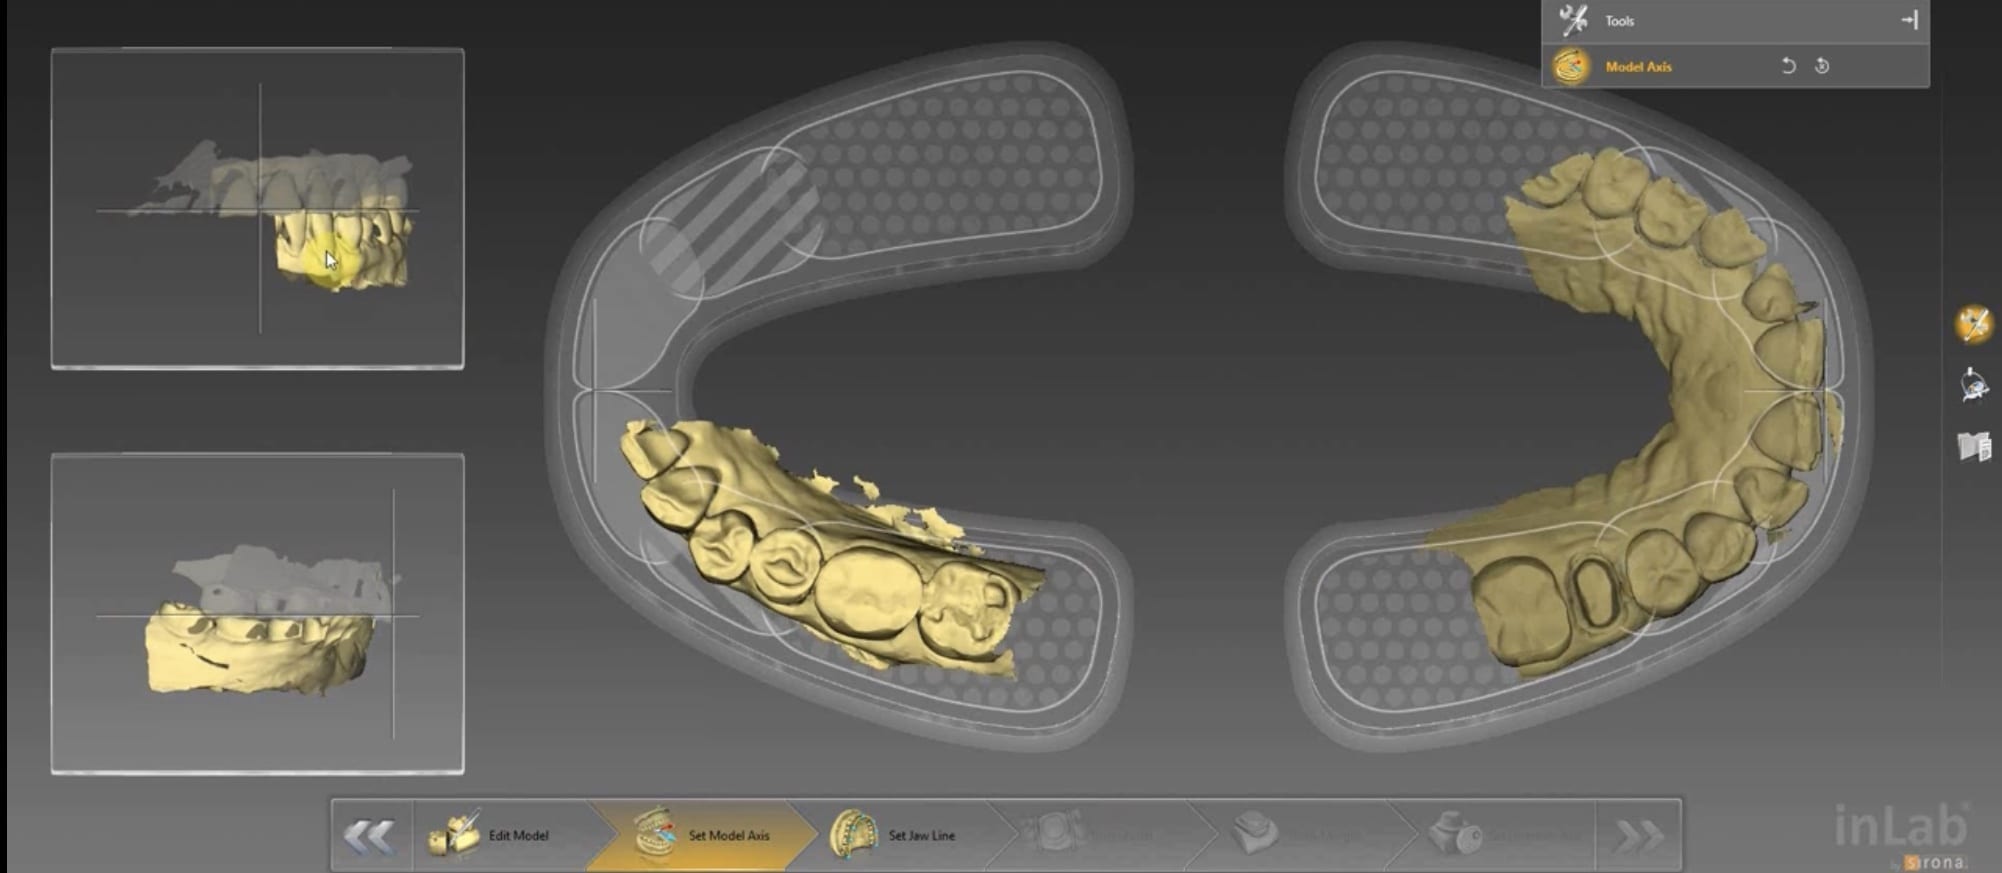
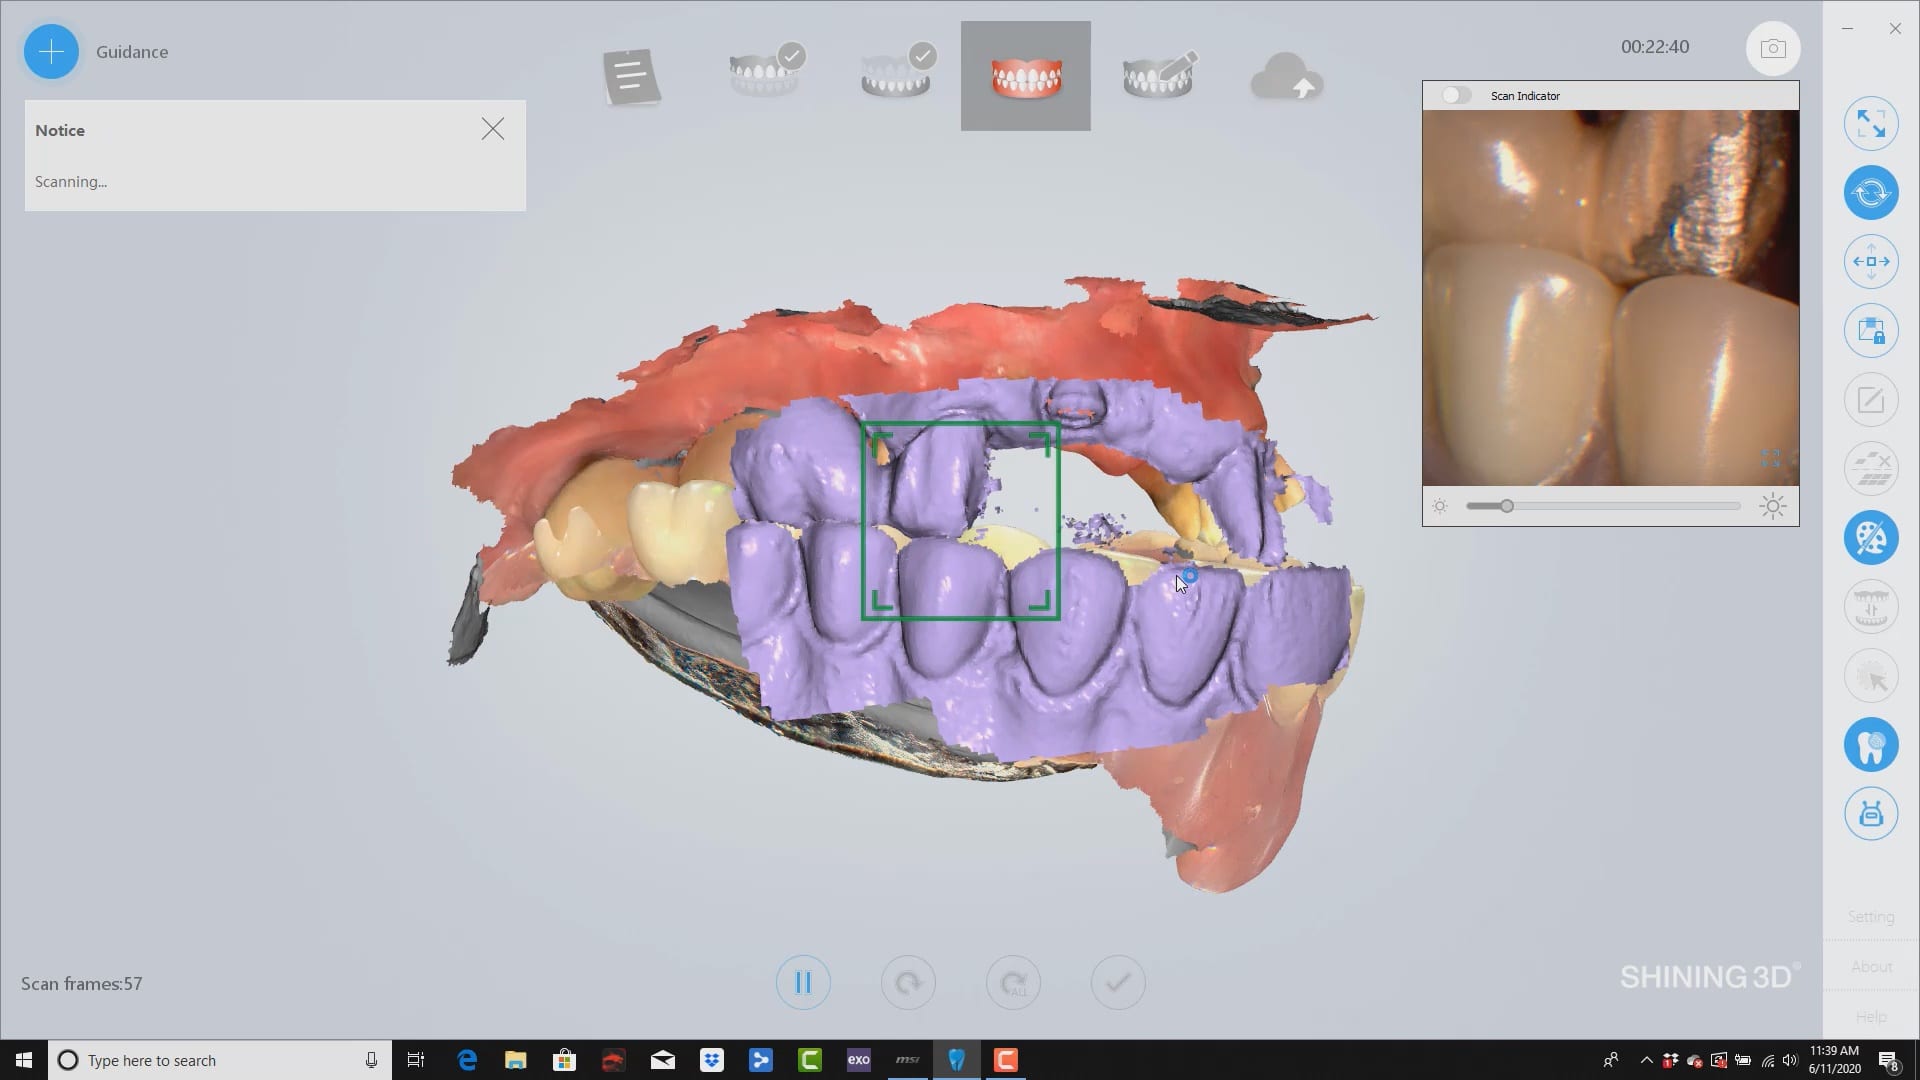
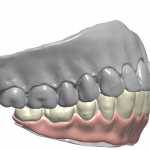
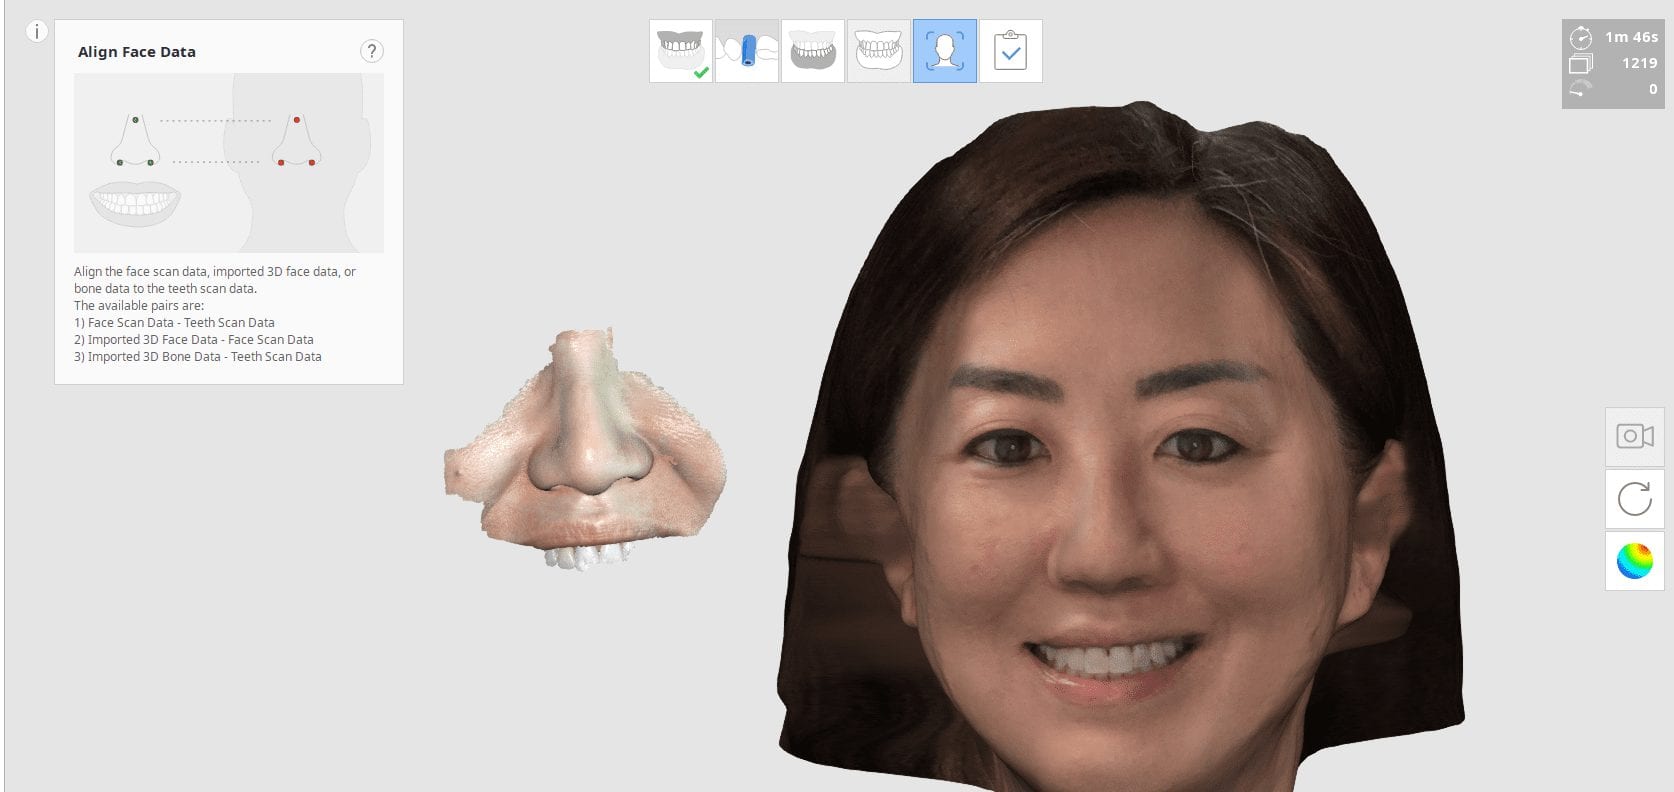
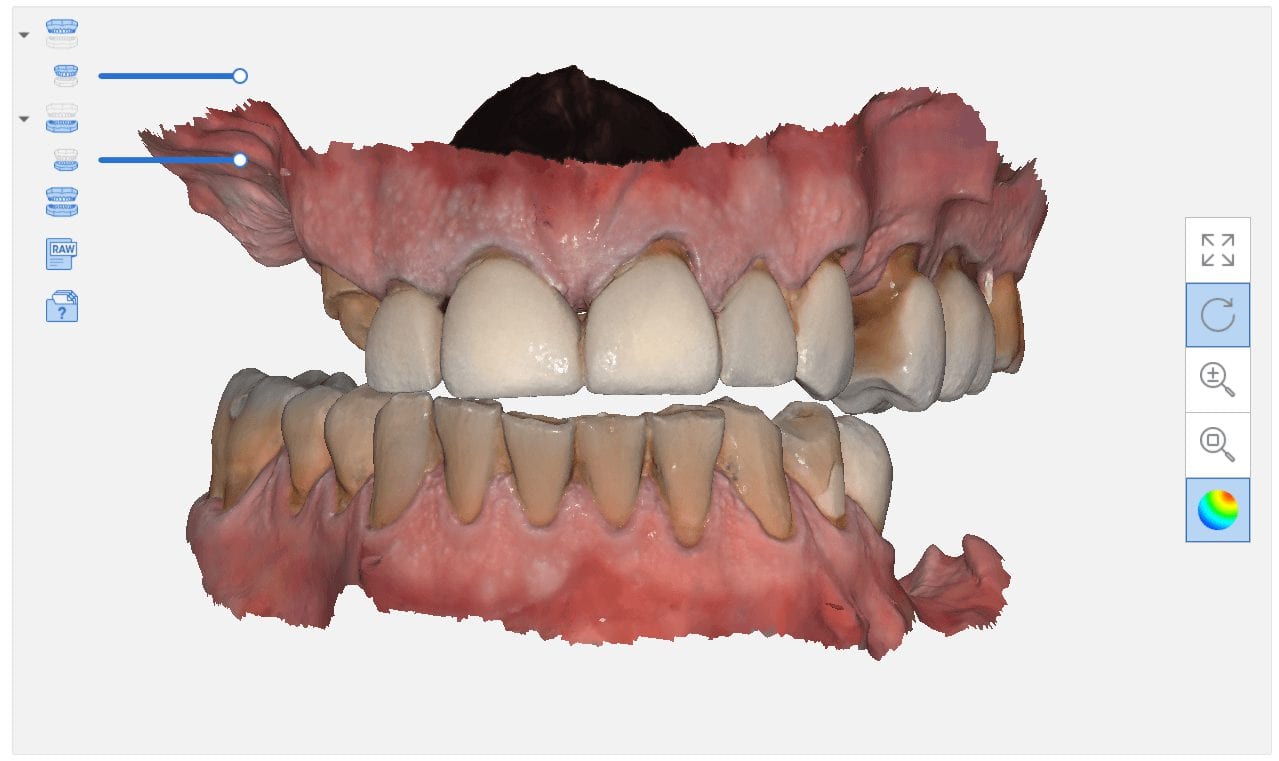
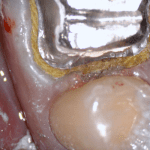
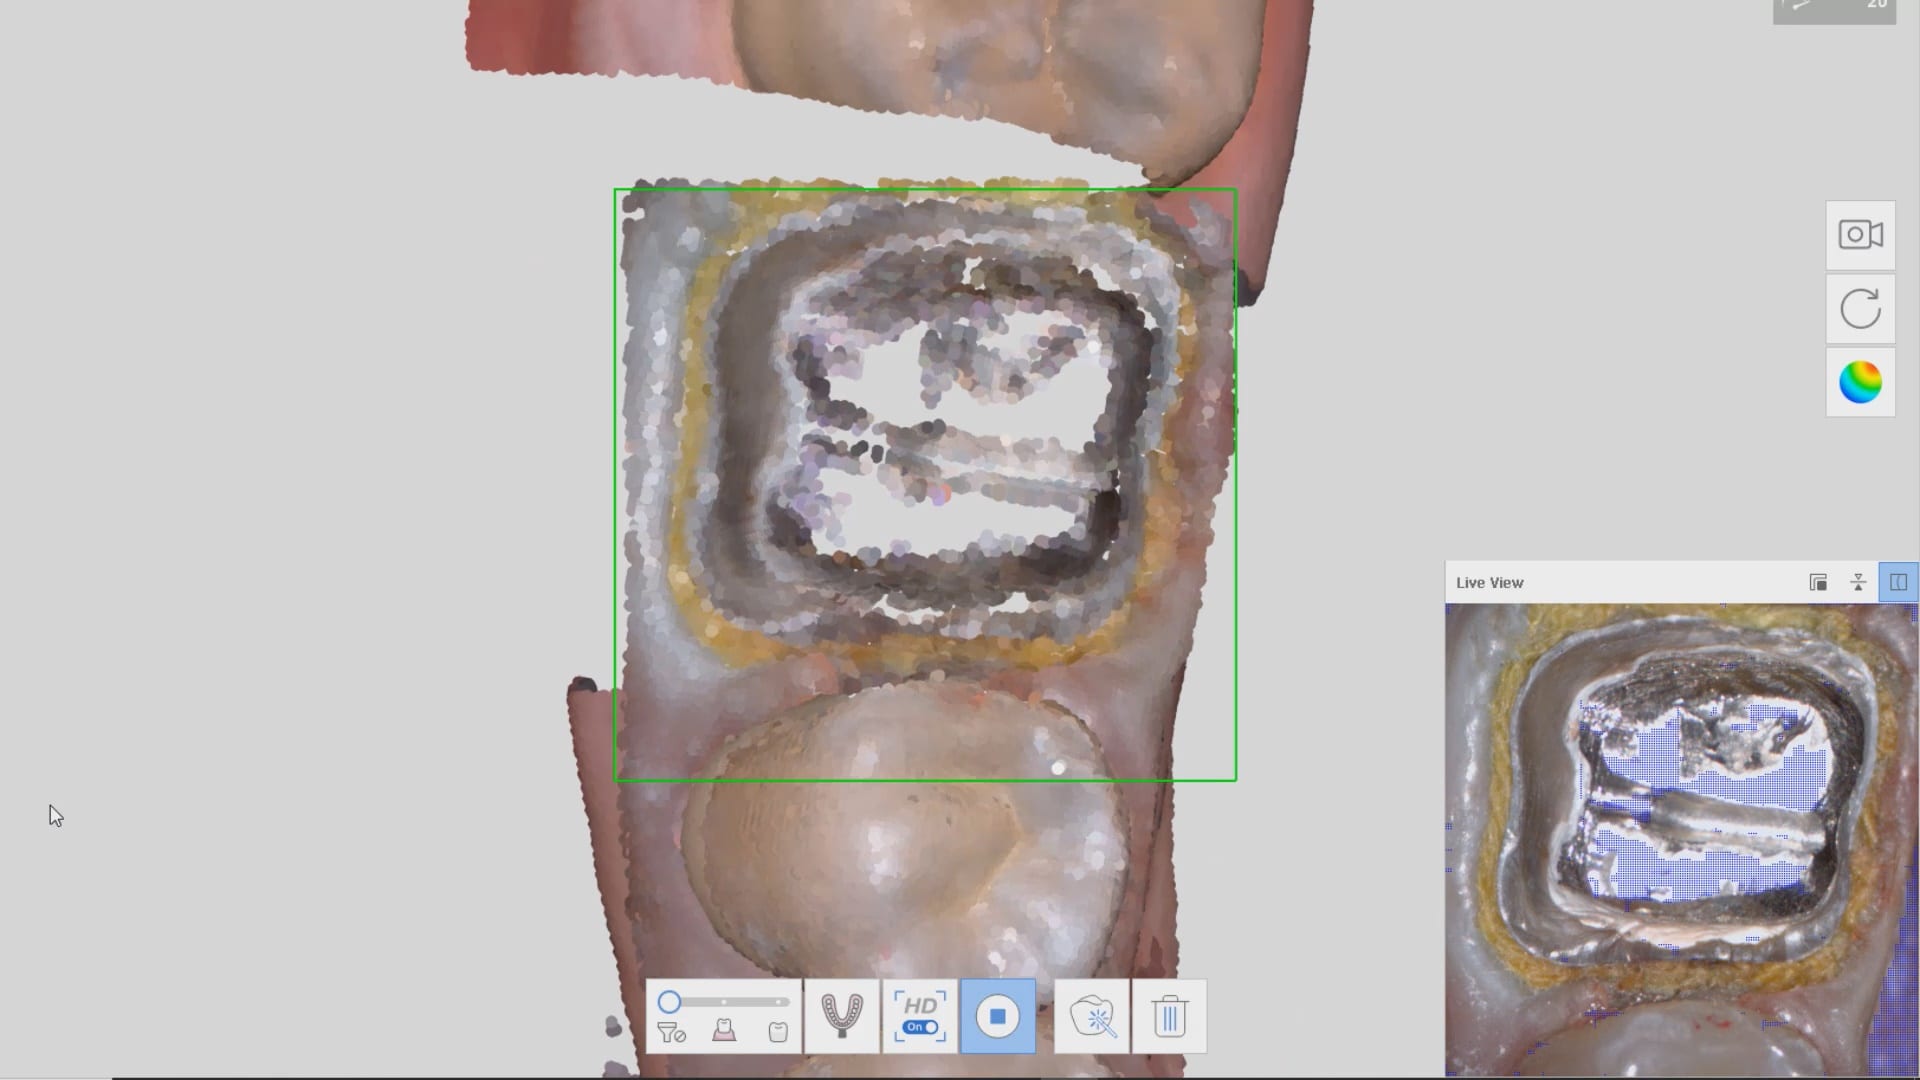
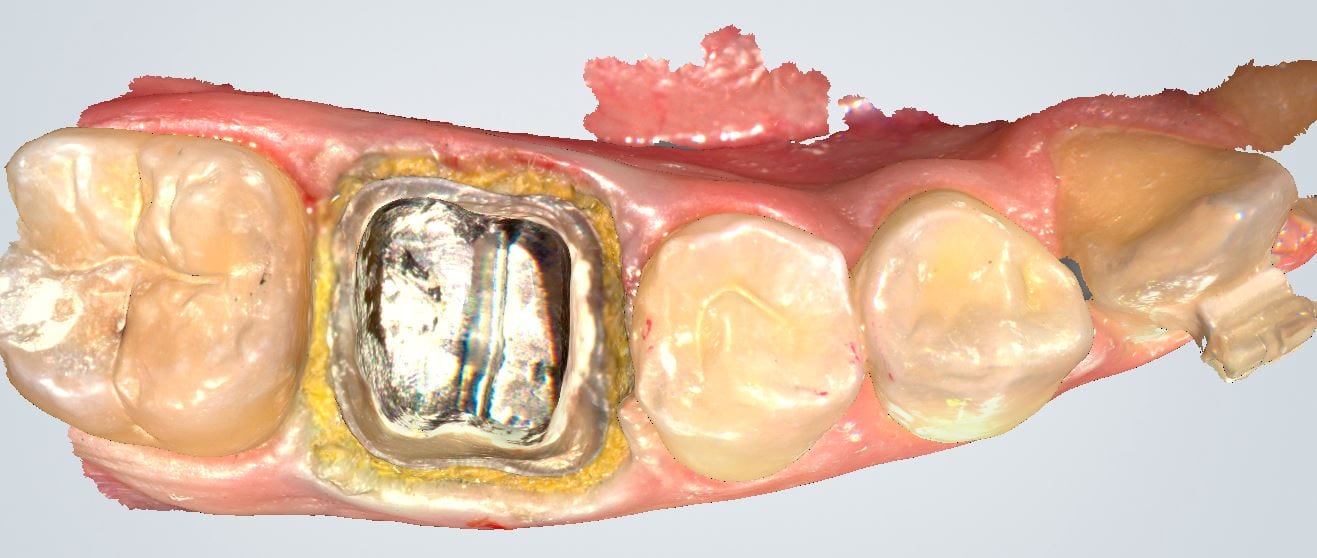
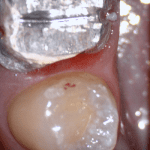
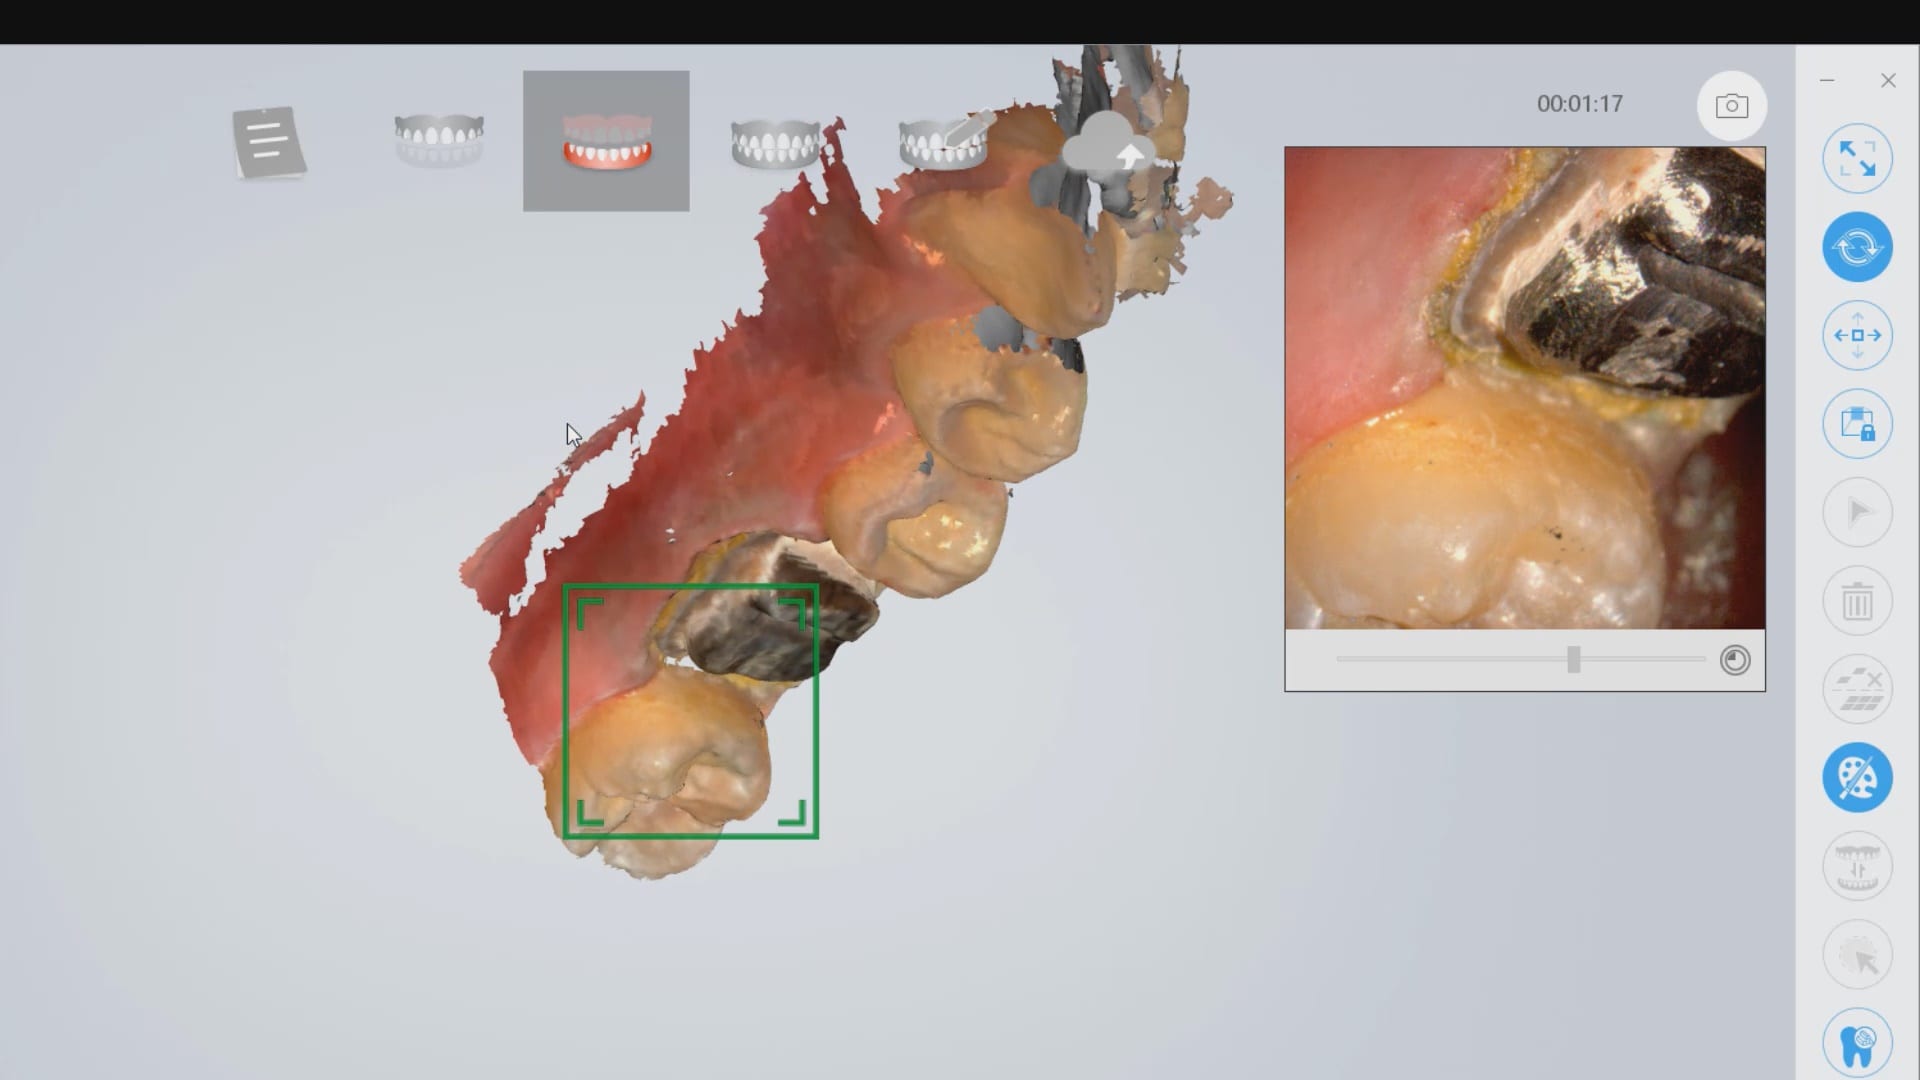
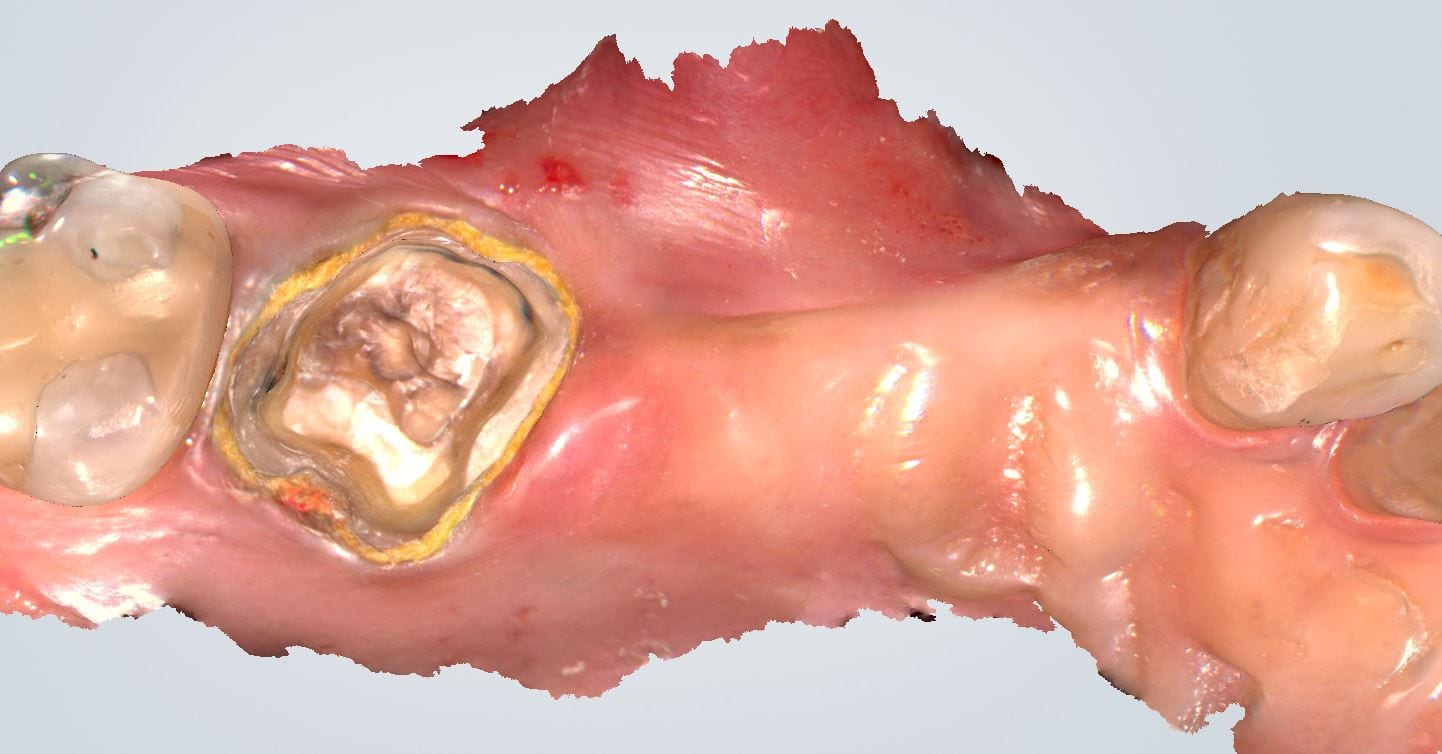
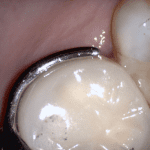
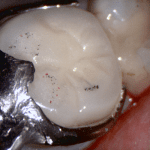
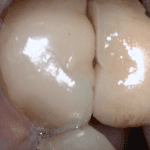
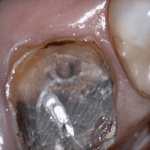
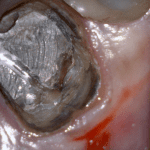
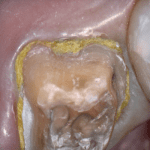
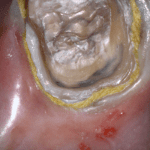
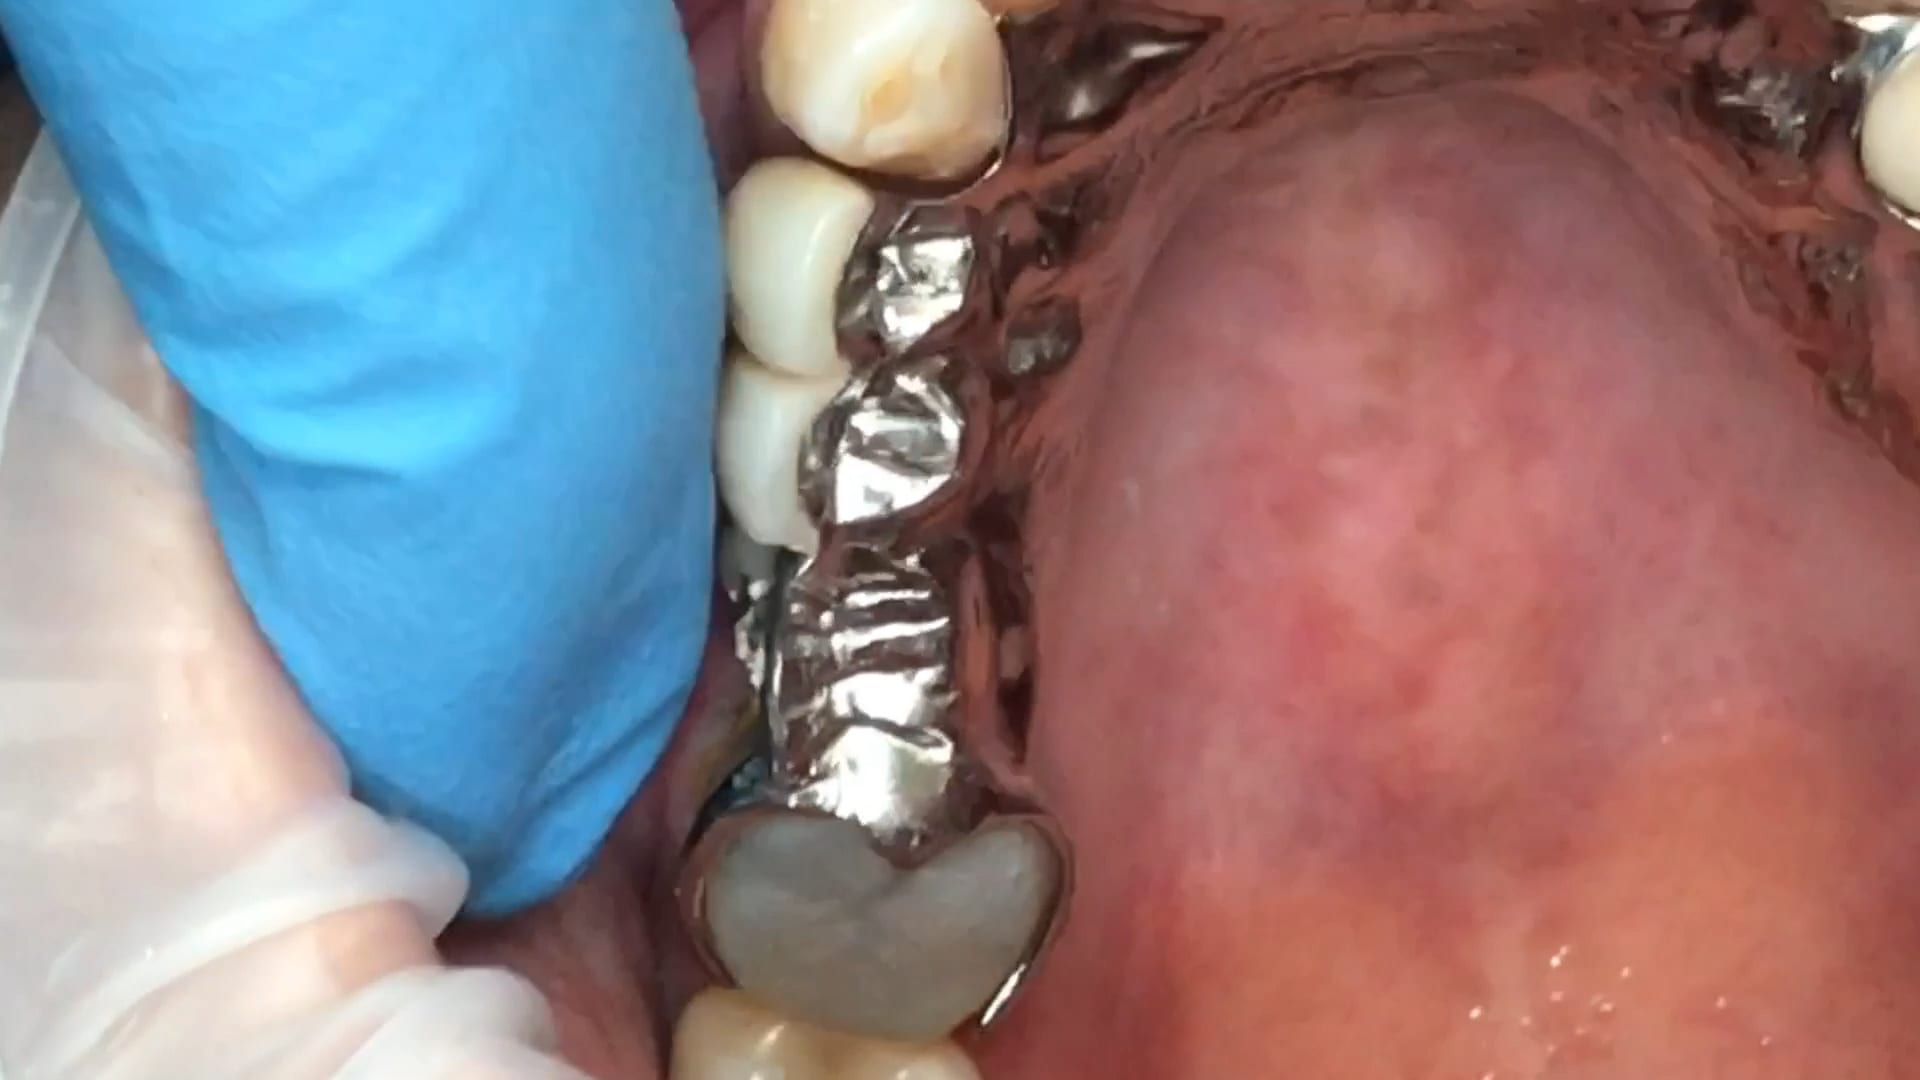
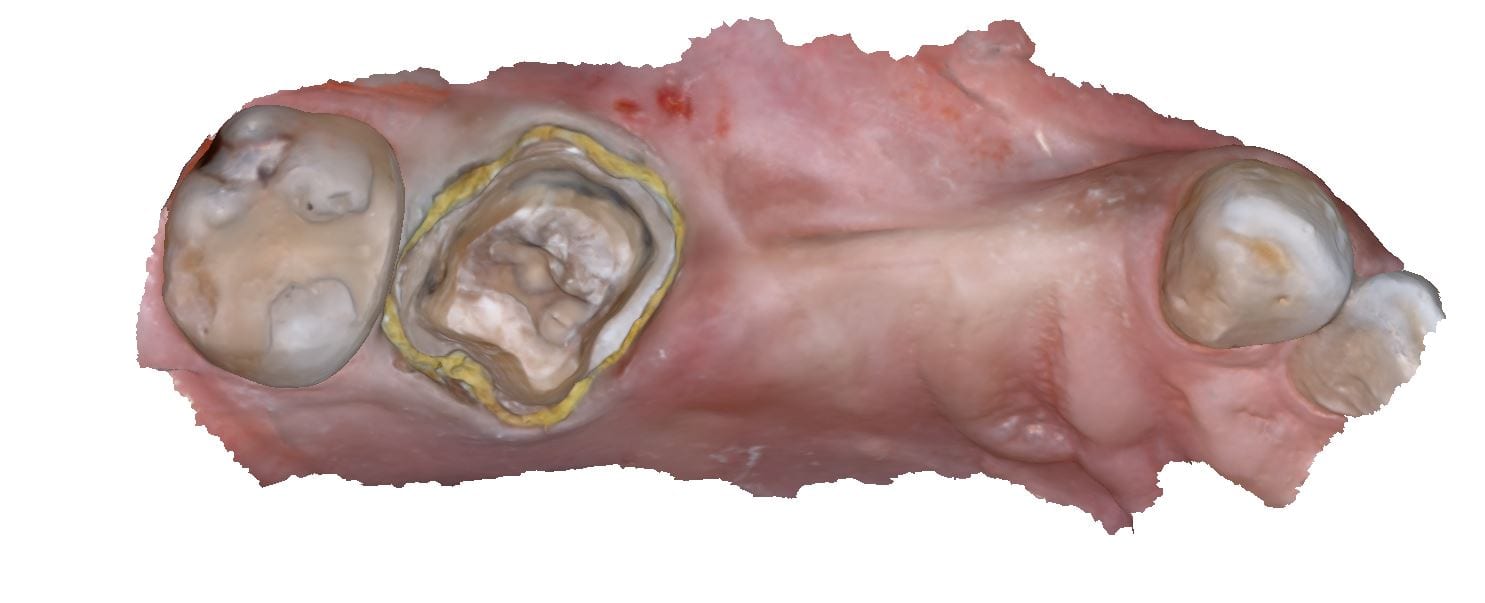
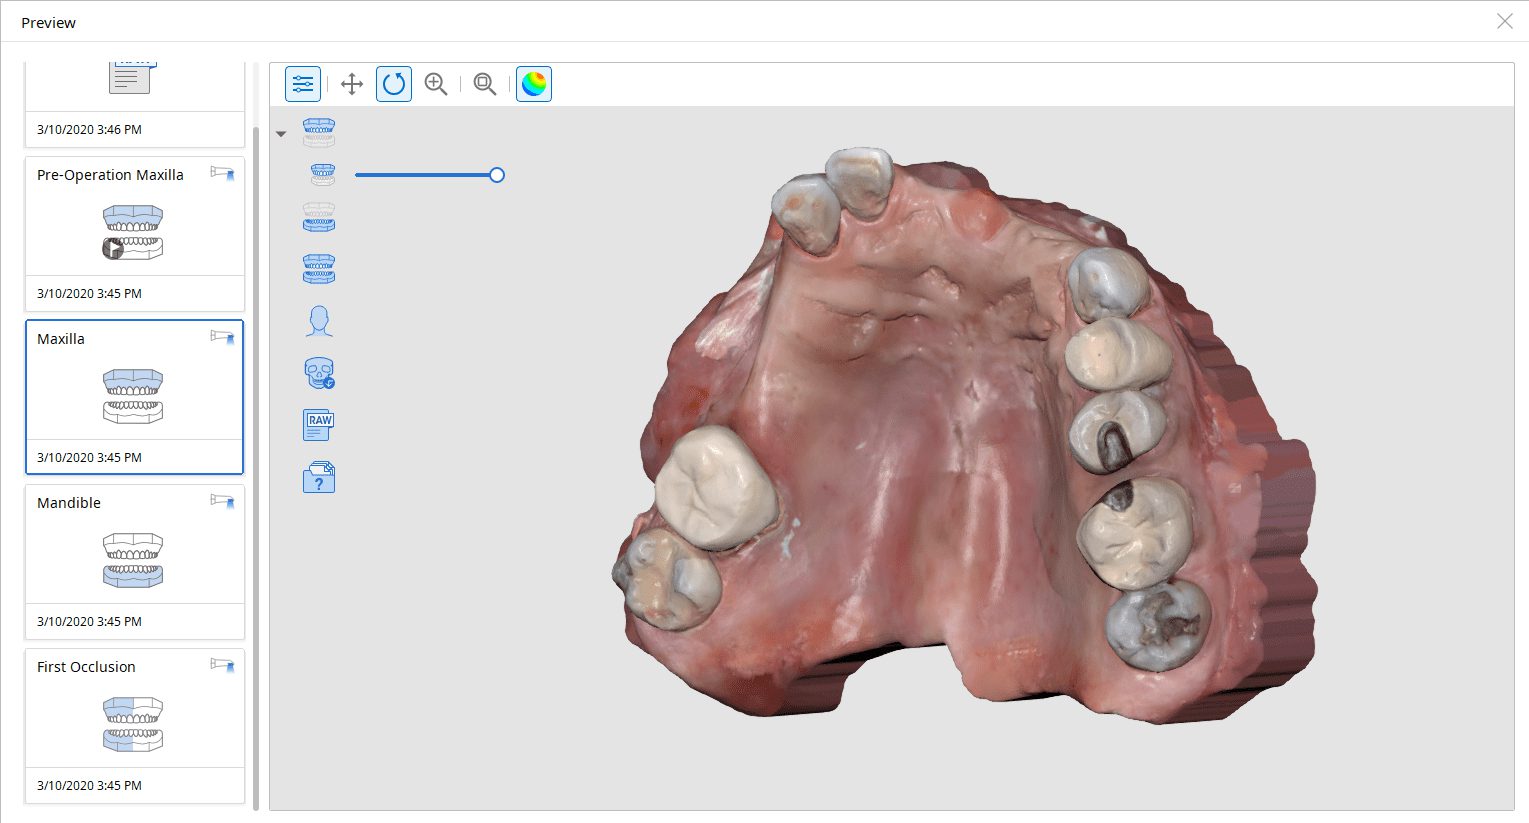
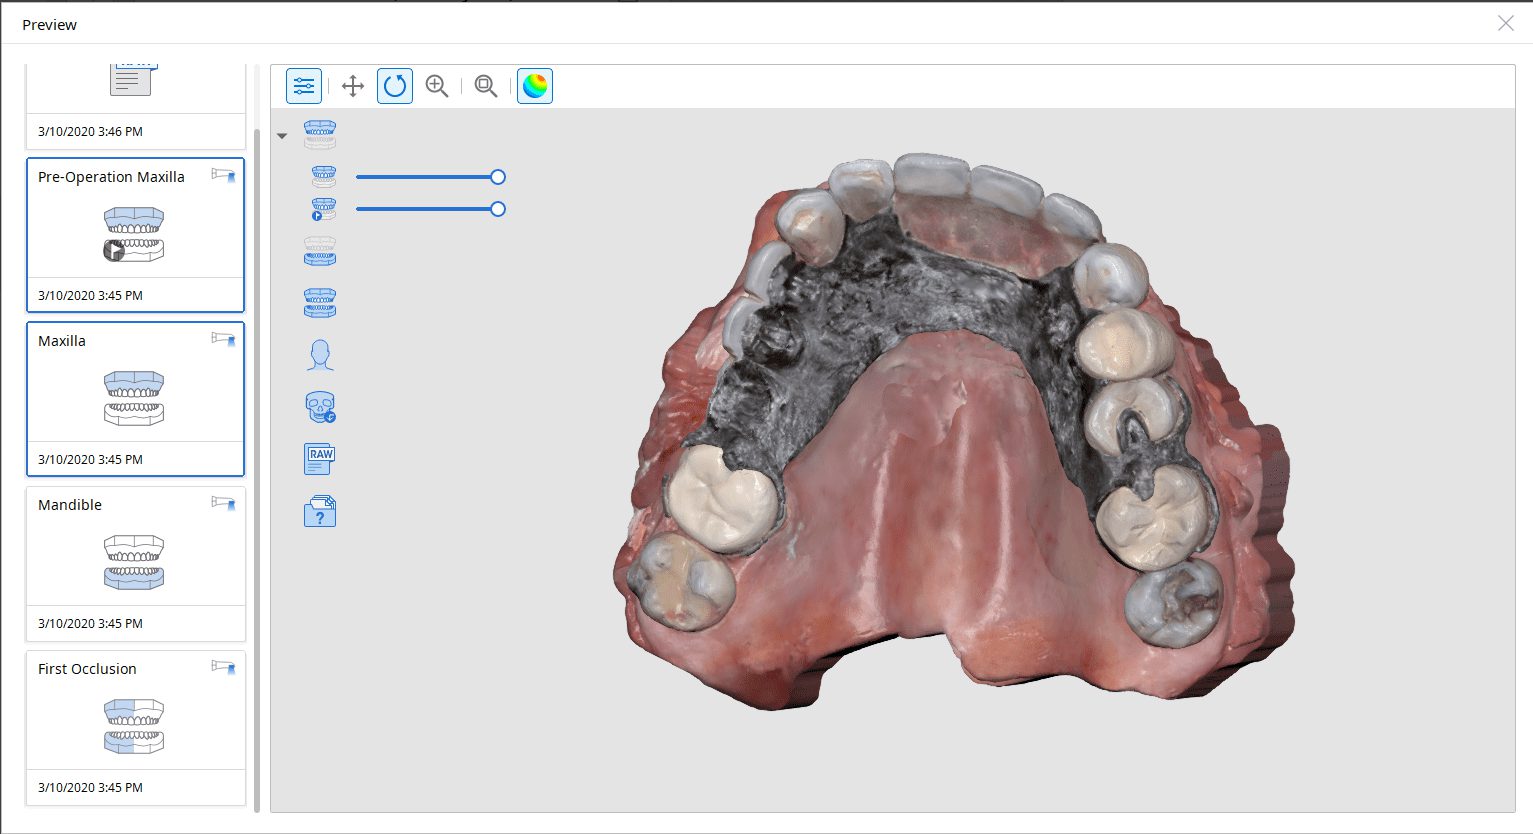
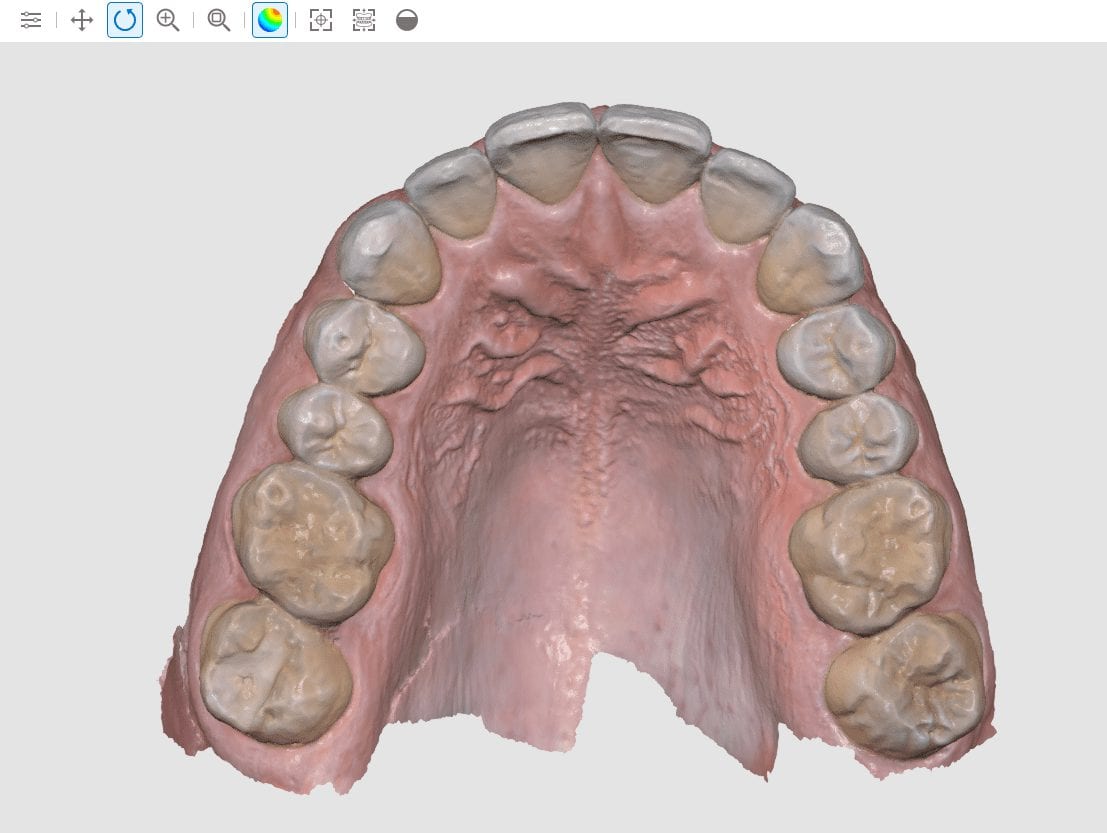
 

Image Quality

Just like when you purchased digital x-rays or CBCT, image quality is everything. If you plan to send your 3D models to a lab this is probably the number one quality your designers care about.

Although scanning is entirely dependent on the user, the image resolution is derived from the projector, number of cameras within the scanner, and the software filters. Each of these play an important role in delivering the final model that is produced on your computer and used for final production.

Fortunately checking image quality is easy. You can usually find plenty of examples online or get digital models from the distributor.
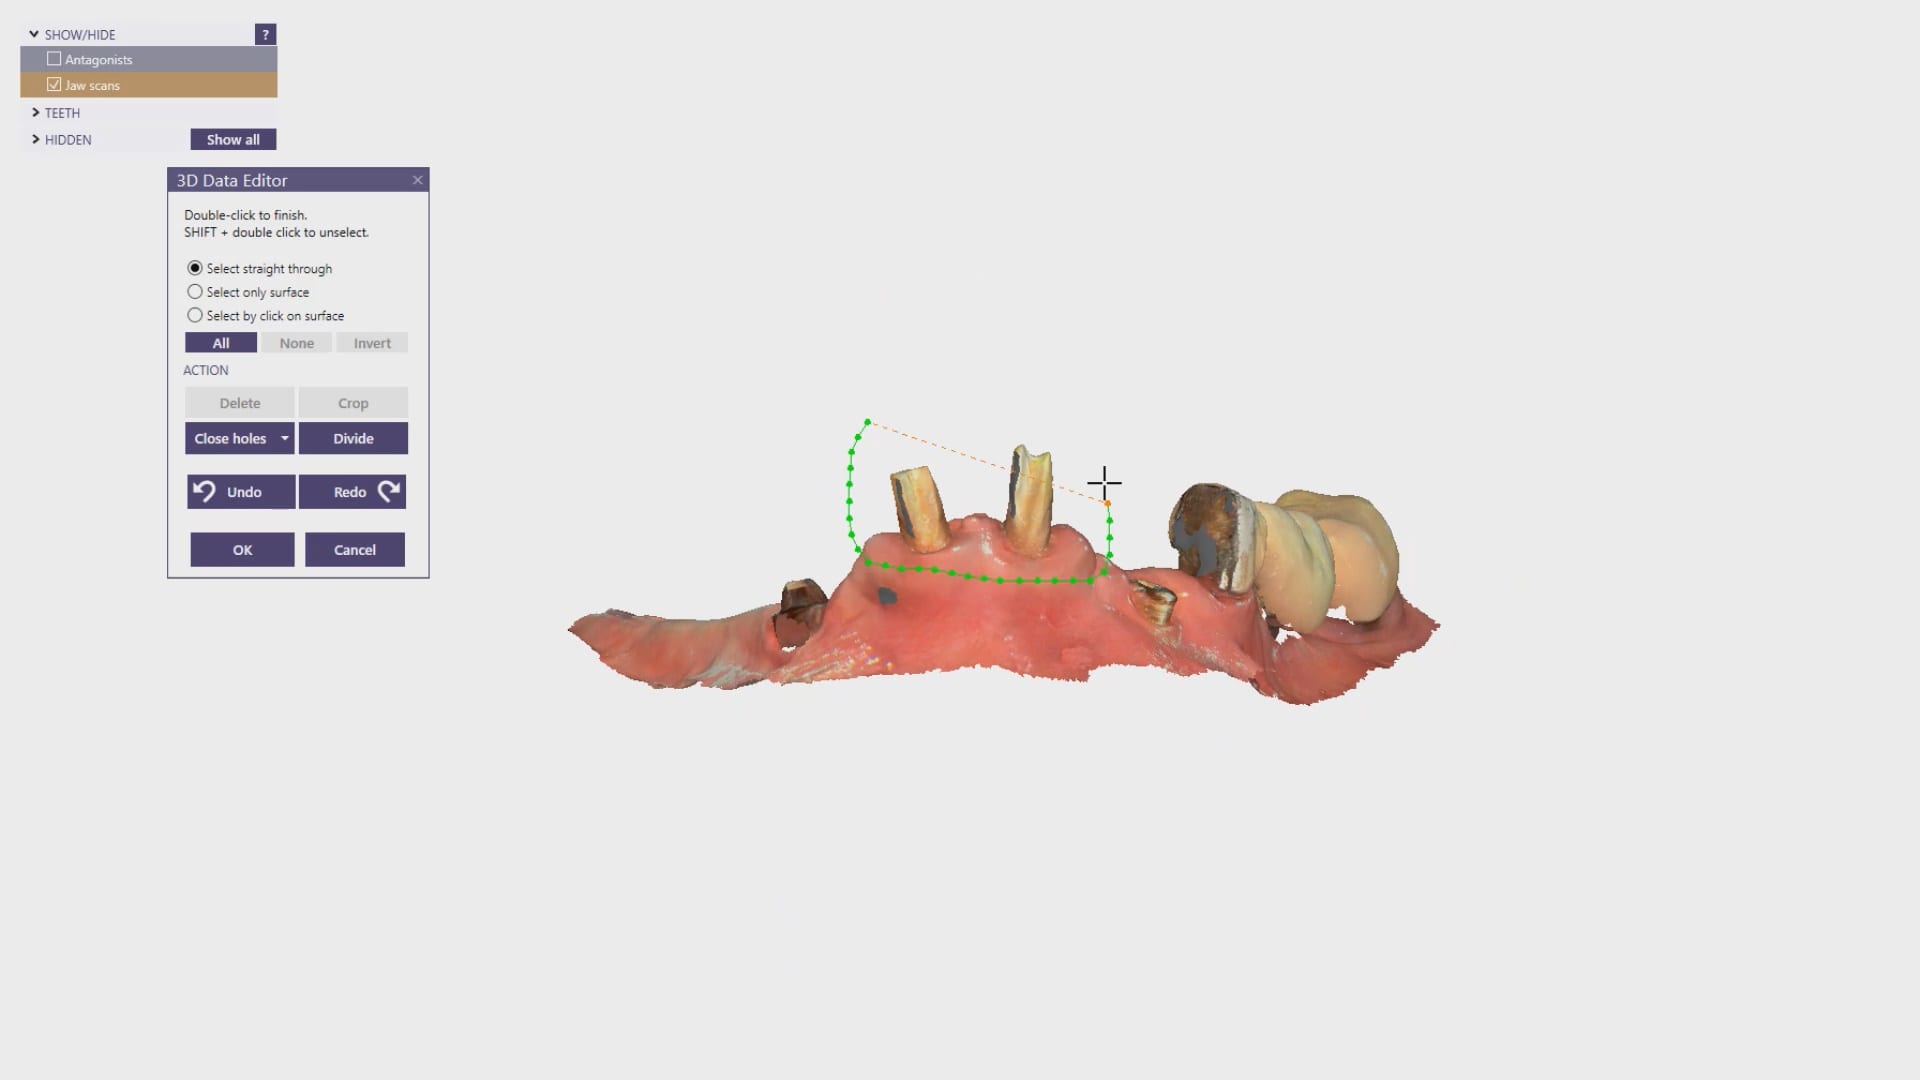
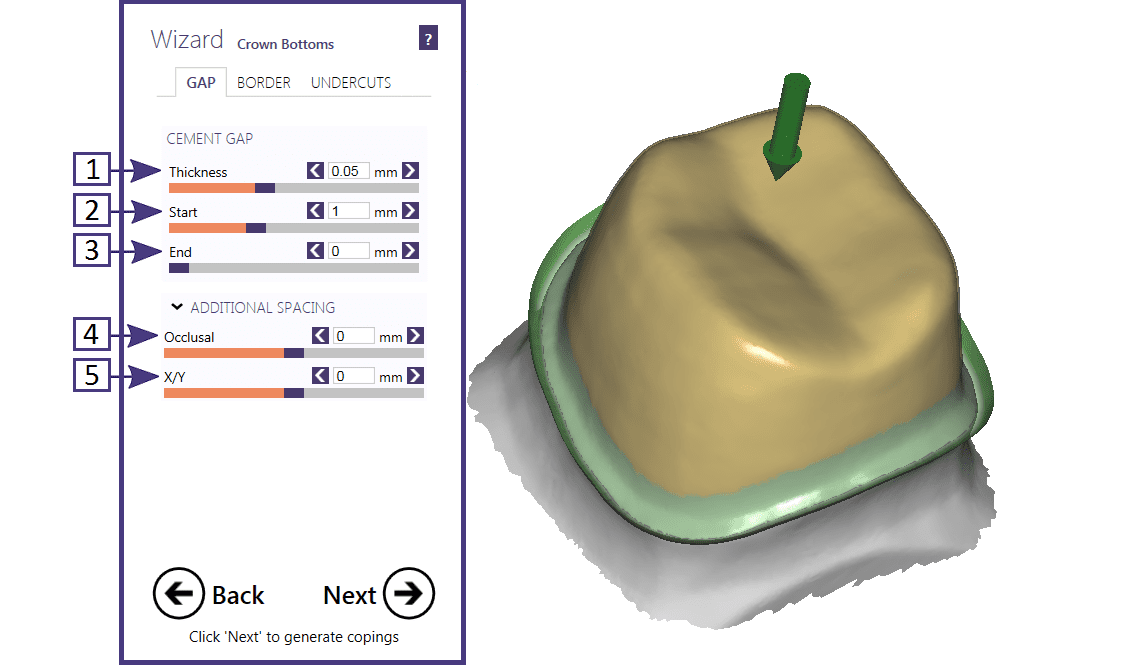
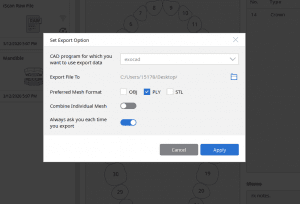
 

Open Source Files

Open system technology is a big discussion in the dental industry and it should be. There are many advantages to playing in the open source world.

STL, OBJ, and PLY files are what you want to look for. These are 3 universal files that can be freely exported and imported to and from the camera without fees or hassles. Ask your production partners what design software they use and what files they prefer to work with.

We recommend only considering open system technology so you can remain flexible both now and in the future. We see several doctors who spent serious money on closed system technology in the past to later find out when they want to add mills, cone beam, 3D printers, or other software that they cannot integrate and connect the pieces together. In the end this introduces a much heavier financial burden.

Be careful of this and you will save yourself a lot of headache.


Size

Fairly simple but do not forget. The size of the camera will greatly influence your user experience.

This is counter intuitive, but you will find that you do not want a camera that is extra small as you will never be able to learn how to use the camera hardware to block the patient’s cheek and tongue from the line of sight as you’re capturing images.

On the other end, purchase a large camera and you will leave your hands sore by the end of the day. We have found that large cameras have a difficult time imaging a full arch due to user fatigue. We have also found that large cameras have an incredibly difficult time reaching the second molar of the patient.

In the end, super small cameras are frustrating to the user while super large cameras are uncomfortable for the patient.

We suggest looking for a colleague nearby who practices with digital impressions so you can shadow a live patient case or test drive the camera in your own hands.


Modular Hardware

All intraoral scanners connect to a computer.

It’s important to stay modular and flexible with the exterior hardware so you can easily replace, repair, and troubleshoot when needed at a low cost.

We recommend staying away from proprietary computers because it can be harder to troubleshoot, run upgrades, download new drivers, or work through a warranty/repair process.

We have found the best ways to handle purchasing computer hardware for the intraoral scanner is to retrieve the manufacturer computer specs and shop for laptops or desktops depending on your setup.


Ongoing Fees

Monthly fees, annual fees, upgrade fees, export fees, subscriptions. Watch out for these.

They will add up especially when you go back to considering the 5 year cost of ownership calculation.

Today, the majority of digital dental manufacturers outsource new software development so as a result they have to pass on those expensive costs to their active users as an ongoing fee to fuel the R&D.

This is not the case with every distributor or manufacturer, but as you shop and research it is important to find out the ongoing costs as well as what happens if you do not pay the fees.

Our recommendation: if the camera has ongoing fees, run.


User Base

Finding a community of dentists and specialists who enjoy the product and consistently see results is good advice.

The user base should be responsive, helpful, and encouraging. Most groups create private discussion boards or pages on social media where they can freely post questions, new ideas, or clinical content. This can go a long way especially if you are new to the digital game.

Definitely run a quick search on facebook, youtube, and google to check into user groups across the web.

In conclusion, intraoral scanning technology is a game changer for the patients and the practice. The advantages are endless and once you start scanning you will never remember how you used to deal with messy impression materials or slow/expensive workflows.

But it’s important to shop smart and select the right camera for your expectations.

Follow the list of top 12 things to consider when purchasing dental intraoral scanners and you will thank yourself later.

If you enjoyed this article, please share it to help your peers or follow us on FaceBook at CAD-Ray.com.

Posted on Leave a comment

DESS 52.044 Straumann Bone Level® Compatible Intraoral Scan Body – 4.1/4.8 (RC)

“Hi doc, I was not able to find this scan body in the automated system match.  I tried to scan conventional but lab said it was not good. I am scanning strumann RC #3,4 implants. Using one scan body switching from one to another but I couldn’t get it right”

Talk to Keith!


Posted on Leave a comment

Full Arch Scan by The Shining 3D Aoralscan

In this video we demonstrate how the Aoralscan can complete a full arch scan utilizing the basic principles of digital impressioning.

Proper retraction, isolation, and scanning technique lead to high quality, error free models.


video
play-rounded-fill
full arch scan by the shining 3D AoralScan by Nick Statly
Posted on Leave a comment

Milling a Bridge with Cerec mcxl (and imes icore coritec and z4 by VHF) from same scan and design

In Digital Dentistry, once you acquire your models accurately, the CAD software doesn’t care where and how you capture them.  Once you are done with the design, the cam and the milling machine have no clue what scanner you used.

here we take an intra-oral scan with the medit i500 and design in exocad and send it to 2 different milling machines. One is the CEREC MCXL and the other is the imes icore coritec one.

video
play-rounded-fill
image with medit i500, desgin in exocad, and mill to cerec mcxl or any other milling machine

we even milled the bridge with the z4 milling machine by vhf just to show the concept works


video
play-rounded-fill
Milling the bridge with the z4 by VHF


video
play-rounded-fill
baked but unglazed amber mill


Please Note: This page is from dentalcadcamshop.com: 13.03.2020

When it comes to single visit dentistry (procedures in under 90 minutes), CEREC is tough to beat. From the integrated camera, CAD software and mill, CEREC is the most streamlined technology to serve patients in one visit.

Nevertheless, increasingly doctors are expanding their range of indications with CAD/CAM technologies and sometimes we simply want to combine CEREC with other equipment and software manufacturers. But wait, isn’t CEREC a closed system? Yes and no. While nobody would accuse CEREC of being a completely open system, it is possible to export .STL files of CEREC scans which gives us some flexibility to bring CEREC scans into other programs.

But today we are not focusing on exporting CEREC scans, but rather:

1) How can we bring scans from other cameras into CEREC?

Example: I own a 3rd Party Camera and I want to import those scans into CEREC for making crowns, etc.

2) How can we use CEREC to mill CAD objects made from 3rd Party Software?

Example: I own a 3rd Party CAD Software and want to import those into CEREC for milling.

But wait, I thought no 3rd Party files (scans or CAD designs) may be imported into CEREC. How, then, can we unlock the system? The missing piece to the puzzle is the inLab Software! With inLab Software, the CEREC system can be opened up for all kinds of interesting workflows. Here are two workflows CEREC owners constantly ask us about:

 1) I own a 3rd Party Camera – How do I mill from my MC XL?

2) I own a 3rd Party CAD Software (e.g. exocad) and I want to mill (e.g. crowns) designed with 3rd Party software and mill them with my MC XL


Please note carefully the Requirements listed above!

–  If you want to import a Scan .STL… You will need the inLab SW Interfaces Module, inLab CAD Software (18.0 and above) andthe inLab CAM Software (18.0 and above).

–  If you want to import CAD .STL designs for milling… You only need inLab CAM Software (18.0 and above).

–  In case you never owned any inLab Software before, or your copy of inLab Software is below 4.X, you will additionally need to order the License Stick (SKU: 6364785) and install the License Stick on the PC or workstation on which you are using the inLab Software (CAD or CAM). Please note this is NOT the same License Stick as you have on your CEREC AC unit!

–  In no case can the inLab Software mill on the CEREC MC!

Still have questions? No problem, we are here with answers: Contact us

Good luck everyone and Happy Milling!

Import Scan .STL

P

V 18.0

Shop inLab SW Interface Module

Shop inLab CAD SW 18.0

Shop inLab CAM SW 18.0

Shop inLab License Stick


(Save 15%)

P

V 19.0

Shop inLab Interface Module

Shop inLab CAD SW 19.0

Shop inLab CAM SW 19.0

Shop inLab License Stick


(Save 15%)


Import CAD .STL

P

V 18.0

Shop inLab CAM SW 18.0

Shop inLab License Stick


(Save 15%)

P

V 19.0

Shop inLab CAM SW 19.0

Shop inLab License Stick


(Save 15%)

Posted on Leave a comment

Imaging a deep margin with the Medit i500

In this clinical video we demonstrate how to scan a molar preparation for the replacement of a crown with recurrent decay and open margins. The molar was root canal treated and the tissue was inflamed. the preparation was imaged and a temporary was fabricated to allow the tissue to heal properly.

The main point of this video is to show how to capture the contacts of the adjacent teeth and the deep marings

video
play-rounded-fill
imaging a deep margin with the Medit i500

Posted on Leave a comment

Lower First Molar Deep Margins Scanned by Shining AoralScan

In this video we demonstrate how the Aoralscan from Shinning 3D captures deep margins.

An old PFM crown warranted replacement due to open margins and recurrent decay. After the crown was removed, the margins were refined and the tissue was displaced with expasyl and retraction cord.

This video is deliberately captured slowly so a new user can appreciate how to hold the camera to capture the margins and the contacts of the adjacent teeth. You also have the opportunity to place your own margins and the path of draw before submit the case to the lab.

video
play-rounded-fill
Shining 3D Aoralscan
Posted on Leave a comment

Shining 3D Aoralscan Sample Meshwork

This case was scanned by two different scanners. Once by the Medit i500 and another time with the Aoralscan. Both the meshes are included so you can compare the two. It was scanned to deliver a case that retrofits a partial denture

video
play-rounded-fill
delivery of crown

Download the Medit Scan

Download the case from Shining


Posted on Leave a comment

Copy a Partial Denture Onto an Edentulous Arch

As a new user, full arches can be intimidating. In this video, we show how to use the medit i500 to scan the pre-existing partial denture with metal clasps and framework onto the edentulous arch. We feature how to scan the edentulous arch in segments to make it easier to manage and to properly relate the preop to the “prep arch”

video
play-rounded-fill
copy partial denture onto edentulous arch
Posted on Leave a comment

Where not to start with imaging with an intra-oral scanner

Most manufacturers recommend that you start your imaging at the second molar area, which is the least practical area to start with.  The tongue and the lip and saliva are a quick distraction as the scanner does not know what you are trying to image.  The incisal edges of lower anterior are also a tough place to start as the incisal translucency lets the light transmit through the enamel instead of reflecting to the cameras.

A good place to start is the second premolar first molar area where you can use the tip of the scanner to displace the tongue.  Reducing the focal length to 12 mm’s allows the user to hide hard and soft tissue that can impede the rate of image capture.  Watch the deliberate movement of the camera that helps the user manage the area to be captured with relative ease

video
play-rounded-fill
new user's guide to capturing second molars with Medit i500
Posted on Leave a comment

A Pair of Amber Mill Restorations

case 1 first molar


play-rounded-fill
virtual seat of first restoration

case 2 second molar


video
play-rounded-fill
amber mill try in
Posted on Leave a comment

Mounting Upper and Lower Jaws for Obstructive Sleep Apnea Devices- Panthera

When scanning for an oral appliance with an intra-oral scanner, you can capture the upper jaw and the lower jaw and the Verical Dimension in protrusive, but if you don’t transfer that information to the lab, there is a good chance they will not properly mount them

video
play-rounded-fill
Panthera Apnea Appliance

There are a lot of software available to you where you can mount and pin the models together so when they are printed, they can use male and female components to align them properly

video
play-rounded-fill
Support Pins for Printing

This video shows how to capture the upper jaw. It is the easier arch to scan as there is no tongue, saliva or a dark oro-pharynx to manage

video
play-rounded-fill
Upper Arch Scan

Every type of user should watch this carefully and appreciate where we recommend you start scanning the lower arch. In our courses we go in to great detail on why you should not start in the anterior or the second molars. you instantly set yourself up for trouble. here’s the easiest place to start and to build and accurate model with
Also, as new user, if you are working alone, you can use the optragate to retract the lip and the tip of the camera to displace the tongue. We recommend that you use a focal setting of 12 mm’s. This may slow advanced users down, but for new users, it helps hide distractions for the camera and software and speed you along. If you look in the bottom right corner, anything in purple is what the camera ignores. There are certain elements you want the camera not to see so it doesn’t slow you down

video
play-rounded-fill
lower arch scan with medit medit

quick little pointer for a new user that shows how to protect areas so that you don’t introduce errors like the tongue getting in your way. the blue models areas that are protected so any future data that lands on it is automatically deleted

video
play-rounded-fill
Manage Arch Scan with Protect Feature

Capturing the bite in open and protrusive position

video
play-rounded-fill
Bilateral bite capture

With every 3D software, there are times where the data sets are too large for the software to recognize and merge models to.  Once in a while, you may have to help in manual mode.  In this case, you can see how the open bite prohibited the models from being articulated properly and we had to use the manual mode to pin the left and right bites

video
play-rounded-fill
Manual Bite Merge With Medit i500 for Apnea Device

Posted on Leave a comment

Digital Denture Duplication

Medit i500 was used to scan and duplicated a fractured denture. It was originally scanned in the patient’s mouth to capture the opposing and the bite and then submitted to the lab for fabrication

video
play-rounded-fill
digital denture set up

In this video we review with the instant replay feature of the medit i500 on how to scan a denture and not introduce double images or errors in the model.  We first scan the occlusale surfaces of the denture intra-orally (this does not really matter as the software doesn’t know any differently), we then image the opposing, and then bite.  We then remove the relined upper broken denture and continue the imaging to capture the intaglio

video
play-rounded-fill
digital denture duplication
The final denture was hard relined and delivered to patient with minimal adjustments.

video
play-rounded-fill
Denture delivery
Posted on Leave a comment

Same Visit Workflow With Meditlink

video
play-rounded-fill
upper first molar with medit i500
video
play-rounded-fill
tryin of amber mill by HASS


Posted on Leave a comment

Upper Right First Molar Scanned with the Shining 3D Intra-Oral Scanner for Beginners

In this case presentation, we introduce the Shining Aoralscan for beginner doctors who want to get into digital impressions.  Proper isolation and retraction is a key element of scanning. In this demonstration we showcase how a new user can easily control the operating field to deliver high quality restorations

video
play-rounded-fill
imaging with shining 3D AOralscan