Cad-Ray customer service is great! Super responsive and efficient. - 3/26/2024
Brent Hale
I bought a scanner from Nick Statly at Cad-ray a few months back and have nothing but good things to say about them. They were very helpful with setting up my computer that's linked to the scanner and since then have been very eager to help with ques...read moreI bought a scanner from Nick Statly at Cad-ray a few months back and have nothing but good things to say about them. They were very helpful with setting up my computer that's linked to the scanner and since then have been very eager to help with questions that I had regarding the system.read less - 12/08/2021
David Blanco
Cad-Ray is great! Great customer service and they are consistent with their followthrough . Always helpful when you need questions answered and helping to lower the learning curve with newly purchased equipment. I’m very satisfied with my medit i-...read moreCad-Ray is great! Great customer service and they are consistent with their followthrough . Always helpful when you need questions answered and helping to lower the learning curve with newly purchased equipment. I’m very satisfied with my medit i-500 intraoral scanner. Armen and Frank are solid!read less - 6/16/2020
Lora Wonderly
Thank you Frank DeLuca for being so accessible and making everything right again! Customer service is above and beyond. We also love our Medit Scanner - we would be lost without it! - 1/25/2023
Jay Arnold DMD
Loving my Medit i700. My crowns have never fit better, and scanning is SOO easy. I started with cad-ray with the i500. The training and support have been second to none. I upgraded to the i700 shortly after it came out, and recently had a warranty is...read moreLoving my Medit i700. My crowns have never fit better, and scanning is SOO easy. I started with cad-ray with the i500. The training and support have been second to none. I upgraded to the i700 shortly after it came out, and recently had a warranty issue with the new scanner. immediately after calling them with my problem. A new scanner was overnighted to my office, I was very pleased, and had minimal down time.read less - 4/05/2022
Ashley Guarisco
Cad-Ray's customer service has been amazing since day one! From getting a quote to setting everything up and doing my first scan. Everyone has been super helpful! Heather Gramley has been awesome, it's like having a tech in my back pocket! They offer...read moreCad-Ray's customer service has been amazing since day one! From getting a quote to setting everything up and doing my first scan. Everyone has been super helpful! Heather Gramley has been awesome, it's like having a tech in my back pocket! They offer tons of training videos and offer one on one training. I would 10/10 recommend them for all of your scanning needs!read less - 11/21/2022
Iseoluwa Adedeji
Just got this scanner a few weeks ago. Has changed my workflow. Easy scanner to use. What's truly great is the support behind the product. Whether by call or fb messenger, I have never not been able to reach someone who solved the issue! Very pleas...read moreJust got this scanner a few weeks ago. Has changed my workflow. Easy scanner to use. What's truly great is the support behind the product. Whether by call or fb messenger, I have never not been able to reach someone who solved the issue! Very pleased so far.read less - 6/19/2020
Jorge Gonzalez
Armen is a dentist and knows what a dentist need, on other words cad ray sells technology that works for dentists! - 6/16/2020
Chase Benson
New technology can be intimidating, but this i700 is user friendly and is everything you could ask for in regards to a great scanner. Cad-ray also made the transition easy and smooth. Customer support here is unreal. Telling all my dental buddies abo...read moreNew technology can be intimidating, but this i700 is user friendly and is everything you could ask for in regards to a great scanner. Cad-ray also made the transition easy and smooth. Customer support here is unreal. Telling all my dental buddies about these guys, and plan to make more purchases in the future.read less - 4/18/2022
I recently made a purchase from Cad-Ray and the experience was truly outstanding. From my initial enquiry, Nick was incredibly supportive and knowledgeable, answering all of my questions thoroughly and guiding me to the product that would best meet m...read moreI recently made a purchase from Cad-Ray and the experience was truly outstanding. From my initial enquiry, Nick was incredibly supportive and knowledgeable, answering all of my questions thoroughly and guiding me to the product that would best meet my needs. What really set this experience apart was his non-pushy approach. Nick showed genuine interest in understanding my specific requirements, ensuring that I would be fully satisfied with my choice. This type of customer service is rare and it made the whole process much more enjoyable. I can confidently recommend Cad-Ray to others not just for their high-quality products, but for their exceptional customer service. A big thank you to Nick and the entire Cad-Ray team for their professionalism and dedication.read less - 5/17/2023
AMISH DESAI
Awesome! Great support. If you are planning on getting a scanner, make sure you have Cad-Ray on your side ! - 4/20/2022
Alvin Aquino
I'm a dentist in NJ, and I purchased the Medit i700 from CAD-Ray. Hands down they have the best support team. Laura is awesome with helping us using the Medit and with providing any support we may need. One of my best decisions so far was working wit...read moreI'm a dentist in NJ, and I purchased the Medit i700 from CAD-Ray. Hands down they have the best support team. Laura is awesome with helping us using the Medit and with providing any support we may need. One of my best decisions so far was working with CAD-Ray.read less - 4/15/2022
Eric Bailey
Couldn't be happier with the support I've gotten from these guys. Trouble-shooting a problem real time so you can call a patient and get them right back in with a solution is extremely hard customer service to match. Thanks a ton and no question wher...read moreCouldn't be happier with the support I've gotten from these guys. Trouble-shooting a problem real time so you can call a patient and get them right back in with a solution is extremely hard customer service to match. Thanks a ton and no question where I'll be going for any more purchases!read less - 10/06/2021
Great company. Pioneer in digital dentistry. Armen knows his stuff. Hands down the go to scanner reseller in the US. Support and training courses are incredible. - 10/02/2022
Brenden Rogers
This company is excellent. Their knowledge, support, and sincerity is unmatched.Thank you, Frank, Damien, and Jonathan. You guys rock! - 5/08/2025
Dwayne Bodie
Very happy with my Sprint Ray 3D printer. Frank D. went above and beyond with training my team on how to use it. He offered remote training as a courtesy and followed up to make sure we were ok. Highly recommend! - 1/25/2023
Shefali Pilar
Our office has been using the Medit scanner for a few months now and are loving it! CAD-Ray was super easy to work with in purchasing the scanner and providing support as needed. Their Facebook forum with the updates and video tutorials are incredibl...read moreOur office has been using the Medit scanner for a few months now and are loving it! CAD-Ray was super easy to work with in purchasing the scanner and providing support as needed. Their Facebook forum with the updates and video tutorials are incredibly helpful.read less - 6/16/2020
Shilpa Jobanputra
New user and absolutely love my Medit i500 scanner. Easy to use, fast, affordable and so quick for a first timer IOS user like myself. Customer service is fantastic, as are the sales people. It’s good to know you have strong knowledgeable people beh...read moreNew user and absolutely love my Medit i500 scanner. Easy to use, fast, affordable and so quick for a first timer IOS user like myself. Customer service is fantastic, as are the sales people. It’s good to know you have strong knowledgeable people behind the scenes ready to help at every turn. I would recommend this product highly. Happy in PAread less - 9/09/2020
Alec Keon
I was on the fence on getting a scanner for years and finally pulled the trigger. CAD-Ray's support and knowledge has made this one of the best investments in my practice to date. When I spoke with Damien on the phone about my options he literally sa...read moreI was on the fence on getting a scanner for years and finally pulled the trigger. CAD-Ray's support and knowledge has made this one of the best investments in my practice to date. When I spoke with Damien on the phone about my options he literally saved me thousands after figuring out what my exact needs were. I went with the Medit i600, MSI laptop and 3D dental systems cart. The final product looks and feels as premium as it gets.read less - 2/21/2024
Rosemary Toczydlowski
I had a phone call with Frank from support today, and he was awesome! Very helpful and knowledgeable. He sorted out all our issues no problem. Thank you Frank!! - 6/09/2021
Ramin Goshtasbi
Great service even if you own a Primescan. Company is built on customer service. Thanks for the help guys…. - 1/05/2022
jeff-J65
You guys are great! I have been a Cerec user for about a decade and wanted to expand my horizons. I bought the I700 and have just loved it. We don't do impressions any more, only scanning, even for the full arch. The customer service has been excelle...read moreYou guys are great! I have been a Cerec user for about a decade and wanted to expand my horizons. I bought the I700 and have just loved it. We don't do impressions any more, only scanning, even for the full arch. The customer service has been excellent, even though I haven't had any problems with the scanner. I really like the online learning modules, they have been awesome getting me up to speed with the scanner quickly. I am looking forward to some of the in person courses to maximize the usefulness of this scanner. -- Jeff Allred, DDS FAGD DABOI FAAIDread less - 9/28/2021
Dentist here. Bought a scanner, mill and 3d printer with Cad-Ray. I don't know what I'd do if I bought these items without their support. They've helped me so much and are awesome. I felt I had to repay by writing them this nice review. You won't reg...read moreDentist here. Bought a scanner, mill and 3d printer with Cad-Ray. I don't know what I'd do if I bought these items without their support. They've helped me so much and are awesome. I felt I had to repay by writing them this nice review. You won't regret getting whatever you need through Cad Ray.read less - 3/15/2024
Levy Do
I'm a repeat customer because Cad-Ray's customer service is fast, efficient, and no nonsense. The classes offered for training for particularly for the Medit is awesome and it comes included which is phenomenal. All the classes that I've gotten to at...read moreI'm a repeat customer because Cad-Ray's customer service is fast, efficient, and no nonsense. The classes offered for training for particularly for the Medit is awesome and it comes included which is phenomenal. All the classes that I've gotten to attend so far has been well organized and I left learning very practical things. Remote support team solves my problem right then and there. Recently I had an issue, and instead of me talking to a sales rep who doesn't know what to do, Kaila remoted in and got it fixed just like that. Thank you and great job guys!read less - 4/19/2022
Kyle Coffin
Bought a medit 6 months ago and customer service has been nothing short of amazing. Always very responsive and helpful. Great scanner, too! - 6/16/2020
jeremiah choi
Never had customer care like Cad-Ray, you can't go wrong purchasing through them. Trios is a great scanner. All the reps at Cad-Ray are very knowledgeable and helpful and will make sure you are up and running smoothly. Above and beyond customer serv...read moreNever had customer care like Cad-Ray, you can't go wrong purchasing through them. Trios is a great scanner. All the reps at Cad-Ray are very knowledgeable and helpful and will make sure you are up and running smoothly. Above and beyond customer service.read less - 8/27/2022
Danielle was super helpful and kind trouble shooting to get us back up and going very quickly this morning. We appreciate it! - 4/15/2025
Ponciano Melo
If your planning to buy dental oral scanner look for Jon. He will give you a great deal. He is very friendly and knowledgeable about the advantage of Medit I500. AGAIN, Don't forget to look for Jon for your next oral scanner. I highly recommend this ...read moreIf your planning to buy dental oral scanner look for Jon. He will give you a great deal. He is very friendly and knowledgeable about the advantage of Medit I500. AGAIN, Don't forget to look for Jon for your next oral scanner. I highly recommend this guy.read less - 1/09/2021
Steven Cisternas
The future of digital dentistry is here now. Cad-ray provides all the tools needed to make it possible for us to provide digital care to our patients. Thanks Damien and Armen for a great course. - 8/07/2021
Mark Evans
I’d like to tell you a story about CAD-Ray.com.
I ordered a VHF N4+ from CadRay. About two weeks after the order was placed, they called me up and said, “VHF just got an exclusive with “The Big Boys” so they are cutting ties with all the little ind...read moreI’d like to tell you a story about CAD-Ray.com.
I ordered a VHF N4+ from CadRay. About two weeks after the order was placed, they called me up and said, “VHF just got an exclusive with “The Big Boys” so they are cutting ties with all the little independent distributors. They just called us, and we just found out. What this means is that we won’t be able to provide you service after purchasing the VHF mill that you just bought.”
Now, they could have just left it at that. They could have said, “Sorry, it’s out of our hands.” They could have said, “We appreciate your business, but it’s not our fault.” They could have said, “That’s the way the cookie crumbles.”
But they didn’t.
Frank Weinstein calls me up and tells me that they want to make this right, so they are going to hook me up with a brand new Imes Coritec One+ for the same price as the VHF. The Coritec One+ is like the Mercedes of mills for in-office. This is the new model that just barely came out. It is a 5 axis mill. It does wet and dry milling. It does blocks and pucks. It mills all materials know to man, including Vibranium. It can also fly the space shuttle, and make all your wishes and dreams come true. It’s that good. It came with the laptop, Exocad, all the tools, and all the bells and whistles. It came fully loaded. It came white glove delivered to my office. It came with in office training. It came with the extra bur package. It came with everything and the kitchen sink.
So, I paid 36k for a mill, and because of something that was not Cad-Rays fault, they ended up giving me a 60k mill for the same price.
In the words of the great Tony Stark: “That’s how Dad did it. That’s how Cad-Ray does it. And it’s worked out pretty well so far.”
Thank you Frank Weinstein and Armen Mirzayan for having outstanding customer service and going the extra mile every time.read less - 4/02/2021
Samuel Schmidt
I purchased a SprintRay through them. I'm new to the 3D printer realm and they've been great with answering my questions and getting me set up. I've just really have been impressed with the quick responses, its much appreciated, thank you! - 4/20/2022
Dr Grace Simco
I bought I500 scanner two years ago. The scanner is great and the service is excellent. I have contacted Heather Gramley and Andy Nova about the updates of my scanner recently. They are absolutely amazing people. They go above and beyond. They repres...read moreI bought I500 scanner two years ago. The scanner is great and the service is excellent. I have contacted Heather Gramley and Andy Nova about the updates of my scanner recently. They are absolutely amazing people. They go above and beyond. They represent the company very well.read less - 7/05/2022
These guys are 1st in class service every time! - 7/08/2022
Jared Gustafson
We started our journey with CAD-Ray 3 years ago them helping us find a digital scanner that fits our practice needs and have relied on them for our 3D printing needs. They are an excellent company and I highly recommend them for their knowledge and s...read moreWe started our journey with CAD-Ray 3 years ago them helping us find a digital scanner that fits our practice needs and have relied on them for our 3D printing needs. They are an excellent company and I highly recommend them for their knowledge and service they provide. I would buy and dental tech needs from them!read less - 9/07/2022
Mary Oliverie
Last year when I started looking into the Medit i500 I had my front desk call 3 sellers to get preliminary information. She told me hands down call CAD-RAY and don’t bother with the others. Boy was she right! Frank got us going with all our hardware ...read moreLast year when I started looking into the Medit i500 I had my front desk call 3 sellers to get preliminary information. She told me hands down call CAD-RAY and don’t bother with the others. Boy was she right! Frank got us going with all our hardware needs and trained us until all our questions were answered. Then Jonathon and Armen jumped in at our 2 day live training in Baltimore. I still review my notes to implement all the great ideas. When I get myself in a jam time to time CAD-RAY responds immediately and fixes my problem. Best decision I have made in the practice in a long time - Thank you everyone at CAD-RAY!read less - 10/09/2019
Instant support, nice people at Cad-Ray but LOTS of trouble getting CIT 12m same-as-cash approval as offered. CIT fumbled around for 7d in finding credit report. Eventually fed up with inactivity or support after lifting Equifax credit freeze and d...read moreInstant support, nice people at Cad-Ray but LOTS of trouble getting CIT 12m same-as-cash approval as offered. CIT fumbled around for 7d in finding credit report. Eventually fed up with inactivity or support after lifting Equifax credit freeze and directed to Experian quagmire of automated phone calling tree.read less - 1/09/2021
Brent Hale
Been using my i700 for a month now and it's been great. The tutorials that Cad-ray provides have been very helpful. This scanner with a fast computer turns out great results. - 11/01/2021
The i500 has been a game-changer for our orthodontic practice. Patients love not having to do alginate impressions. Records appointments and debands take much less time plus there's significantly less clean-up. And it's fast/easy enough to use tha...read moreThe i500 has been a game-changer for our orthodontic practice. Patients love not having to do alginate impressions. Records appointments and debands take much less time plus there's significantly less clean-up. And it's fast/easy enough to use that we've even been able to train summer interns to scans with zero prior dental experience. Our retainers, nightguards, and sleep apnea appliances all showed improved fit with less chair-side delivery time due to accuracy of the scans. Customer support is top-notch. Whenever we've had issues, we get someone immediately and they either talk us through a fix or login via screenshare to help us directly. They have a great loyalty program which gives significant discounts to upgrade to newer units. We recently took advantage and are excited to try out the new i700, especially since they're now Mac-compatible. Simple version: Great intra-oral scanner, easy to use/operate, intuitive software interface, fantastic support.read less - 8/16/2023
Jeff Muszynski
Fantastic customer service - 6/19/2020
Ernesto Carmona
When I decided to purchase a digital scanner I decided on user experience. They have provided the best experience I could have asked for, from online support, Facebook support, and in person courses. There is no better team to buy Medit from period...read moreWhen I decided to purchase a digital scanner I decided on user experience. They have provided the best experience I could have asked for, from online support, Facebook support, and in person courses. There is no better team to buy Medit from period. Do yourself a favor and buy from them if you are in the market for an intraoral scanner.read less - 6/16/2020
Jonathan Mason
I bought a Medit 3 years ago and have had amazing success with both the scanner and the support from Cad-Ray. My scanner recently broke and They were on the phone with my assistant trying to fix the problem, and when it was unfixable, they overnight...read moreI bought a Medit 3 years ago and have had amazing success with both the scanner and the support from Cad-Ray. My scanner recently broke and They were on the phone with my assistant trying to fix the problem, and when it was unfixable, they overnighted a new scanner and helped us set it up. Medit is now available through many dealers, but I would only buy next one from Cad-Ray.read less - 11/03/2022
Michael Pagano (CPT Pagano)
I bought a Medit i500 from Cad-Ray. The service was fantastic. This group also does ongoing training to keep you up to date on how to use the technology.I had a minor issue with hardware and Cad-Ray resolved the issues no questions asked!They have a ...read moreI bought a Medit i500 from Cad-Ray. The service was fantastic. This group also does ongoing training to keep you up to date on how to use the technology.I had a minor issue with hardware and Cad-Ray resolved the issues no questions asked!They have a very active online forum that is supportive. I wouldn’t hesitate to purchase more equipment from them!read less - 10/23/2020
P. Andrew Benson
For me, getting this scanner was not a choice between Medit vs Itero or Medit vs Trios. Those companies have already eliminated themselves from consideration based on ridiculous cost, ridiculous ongoing fees, and greater concern for petty proprieta...read moreFor me, getting this scanner was not a choice between Medit vs Itero or Medit vs Trios. Those companies have already eliminated themselves from consideration based on ridiculous cost, ridiculous ongoing fees, and greater concern for petty proprietary posturing than for ensuring full functionality of their products to their usership. Typical dental tech company stuff.
The real decision was between Medit vs continuing life in analog dentistry. Medit through Cad-ray was really the only choice. Awesome packages , awesome access to free training videos, awesome software updates, awesome access to live support, awesome support staff.
There's just nothing better in dentistry than to get a great product AND a chance to stick it to the man.read less - 6/16/2020
I have been a customer of CAD-Ray for about a year now. We have purchased multiple items from Laura, including exocad software, a milling machine, and the Imetric4d. I can’t express enough how happy we are that we made those purchases through them. T...read moreI have been a customer of CAD-Ray for about a year now. We have purchased multiple items from Laura, including exocad software, a milling machine, and the Imetric4d. I can’t express enough how happy we are that we made those purchases through them. The customer service and the fast responses, (especially Laura) has been top notch! At the beginning, just like anything else in dentistry, we needed support and reassurance of the items acquired and all I have to say is a big thank you for an amazing customer service and support!!!! And did I mention that they offer really good financial options? Again, thank you! Looking forward for the next purchase. - The Inspired Dental team in Las Vegas:)read less - 8/31/2021
Michelle Duong
Our office is new to using the Meditscan so far we love it. Our rep andy was so detailed and great with the training. Everything has been good so far and easy. Defenitely recommend. - 9/23/2022
Outstanding customer service! Laura helped me purchase my first Trios scanner and she took the time to go over all the specs, models, and details with me. Their on going tech support is what sets this company a part from others. - 3/05/2024
Ma. Teresa Santana
Best support and customer service ever! My scanner is long past warranty and they still answer all my questions. When it's time to upgrade I'll be buying from them again. A friend bought same scanner from another vendor and got zero support. I had to...read moreBest support and customer service ever! My scanner is long past warranty and they still answer all my questions. When it's time to upgrade I'll be buying from them again. A friend bought same scanner from another vendor and got zero support. I had to help them. Told her next time buy from Cad Rayread less - 5/10/2024
Jeff Johnston
Very Helpful, good company to work with. Always been there for me - 3/10/2017
Jonathan Van Dyke
Cadray is excellent and their medit scanner is amazing! - 6/16/2020
Russell Schafer
Overall great company to work with. They sell wondeful products and give stellar service for a much lower price than any of the supply houses. I can't recommend them enough. - 8/19/2022
This recent publication in the Journal or the American Heart Association details the relationship between sleep apnea and cardiovascular disease. It is a comprehensive study evaluating the success rate of possible treatment modalities, including oral appliance therapy.
A recent study published in the Journal of Advanced Prosthodotics compared many Intra-oral scanners and used the Medit desktop scanner as the reference frame and benchmark for accuracy. Unfortunately the Medit Intra-Oral Scanner was not commercially available at the time of the study.
Our position at CAD-Ray is that any scanner can be accurate and inaccurate based on how it is utilized. Furthermore, once you capture accurate data, by the time you design a restoration and send it to production, the printing or milling machine has no idea where the scan came from and generally can produce restorations to the level of accuracy the resolution the scanners provide.
Keep in mind, there are dozens of ways an operator can introduce errors in imaging.
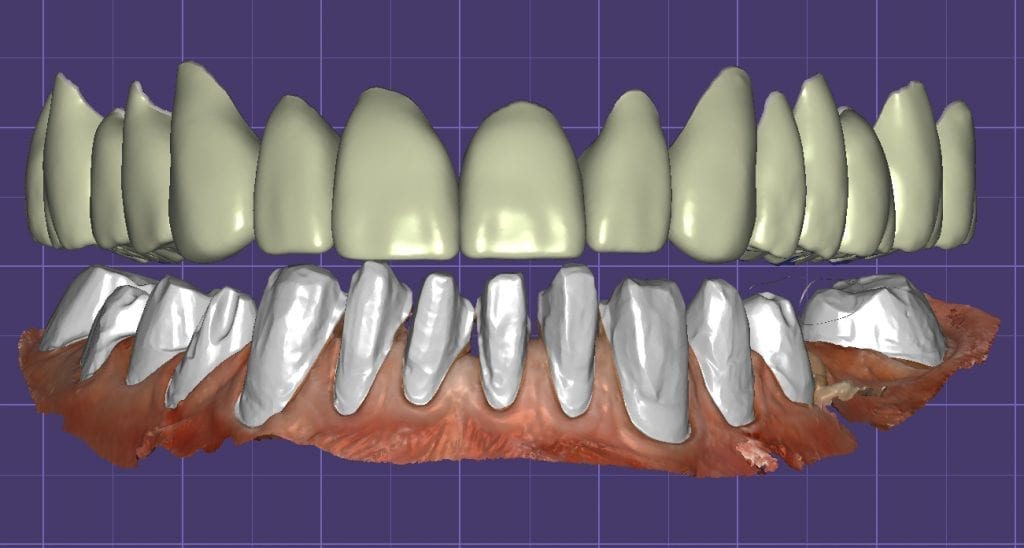
Download the OBJ files and import them into smile design software and do a virtual wax up for a real case
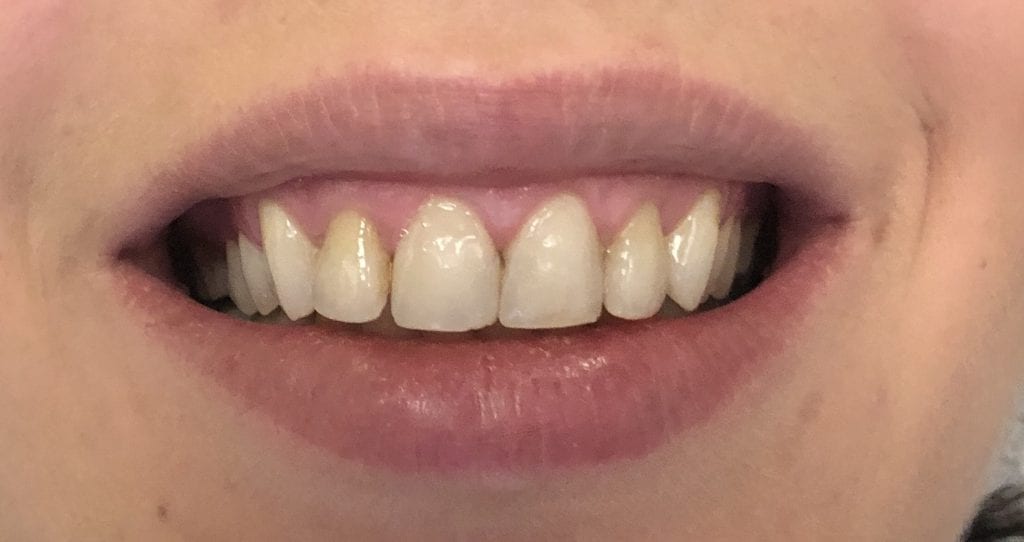
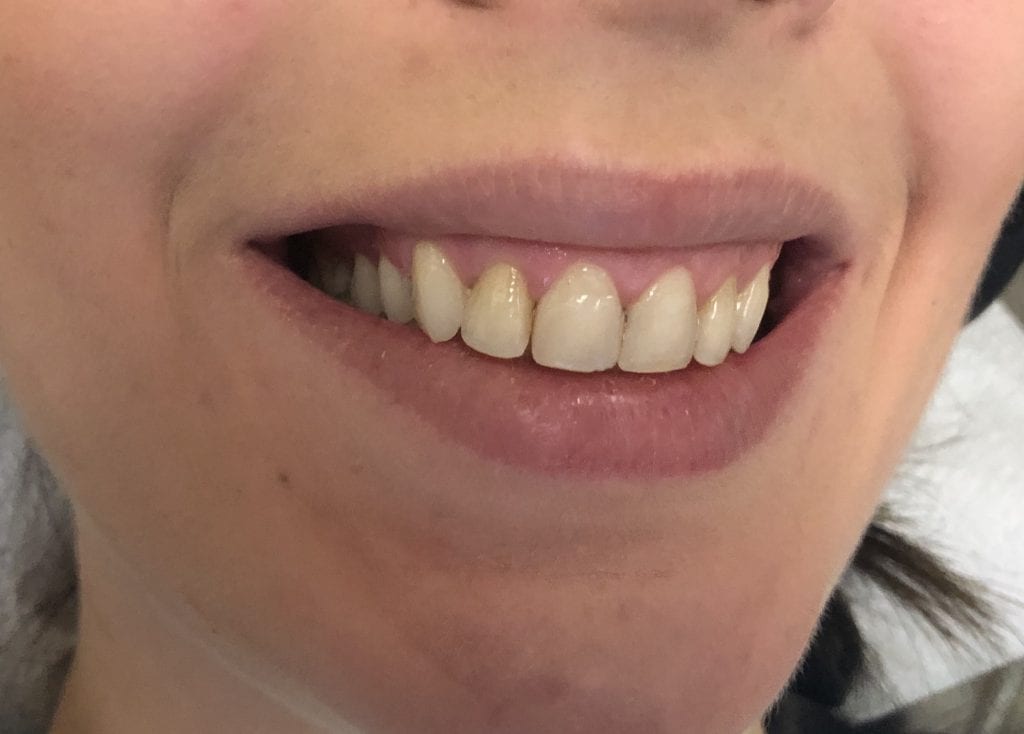
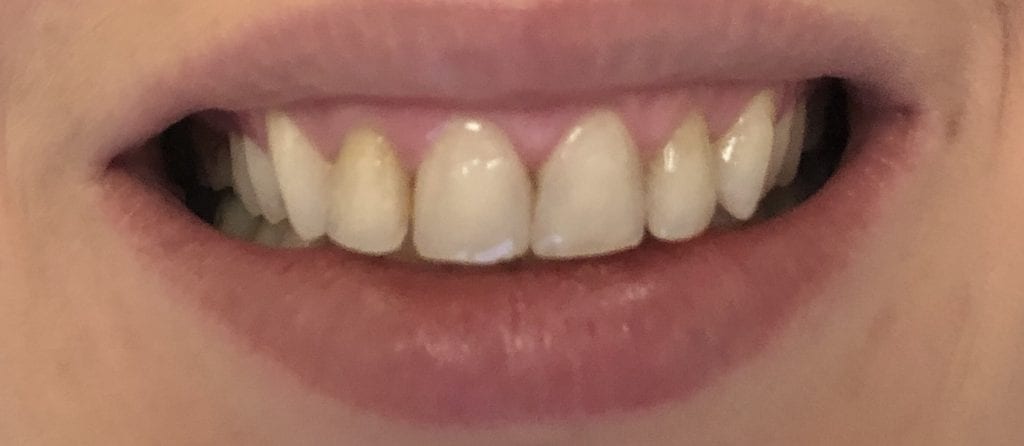
This patient has had crown lengthening procedure performed on all the teeth in her smile line, greatly increased the tooth structure visible in this video. Her chief complaint was a gummy smile and now she is ready to “fill in the buccal corridor”
Here are fundamental principles every dentist should understand about intra-oral scanners, how we can introduce errors, how to manage them, follow proper scan strategies, maintain accuracy across the arch and lots of other nuggets
Every ios hates moving parts (tongue and cheek) Every ios hates dark areas like the oropharynx, black triangles, etc… Every ios hates liquids (blood on the margins) Every ios can “get off track” and form double images Every ios struggles with highly reflective surfaces like emax, zirconia, and shinny metal.
The principles shown in the video address every one of these factors and how you can control them and get accurate arch scans in just a minute with the medit i500
I have tried virtually every ios out there and they all struggle with my mouth full of emax. the focal length of the medit from -1.5 mm to 17 mm is the largest variation on the market, and the way the medit handles highly reflective surfaces also outperforms every other ios.
In January, it will be in turbo boost mode when new software is released.
Full arch scan, metal abutment, ceramics, lots of reflective surfaces all captured in under 90 seconds with no powder. just have to hit the metal at different angles and focal lengths, retract the lips and tongue and dry and you will fly with your ios
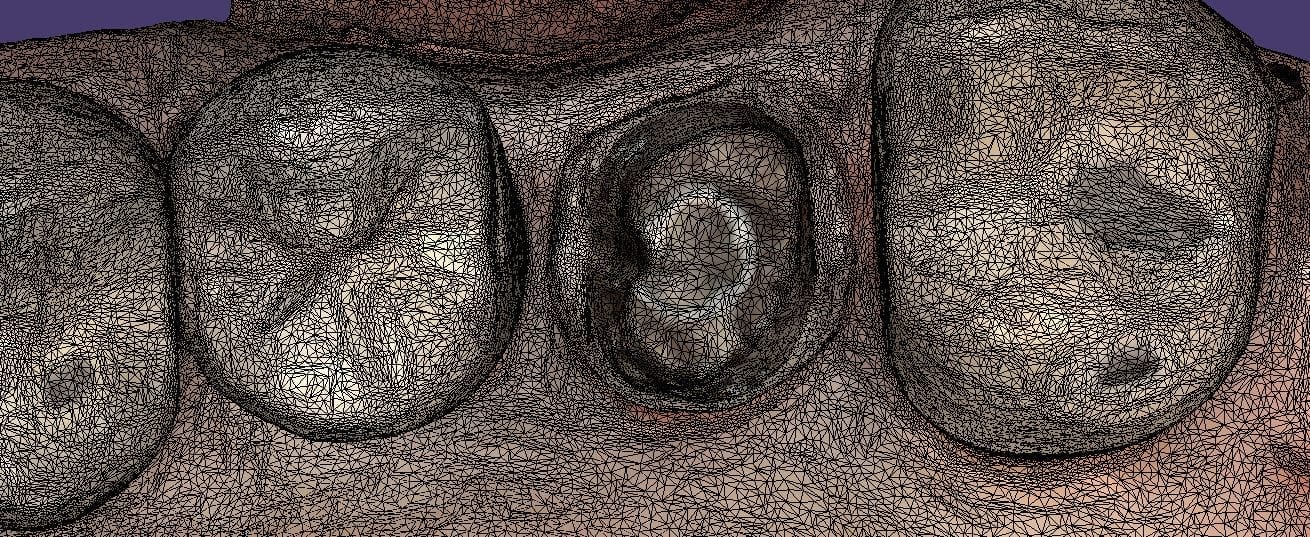
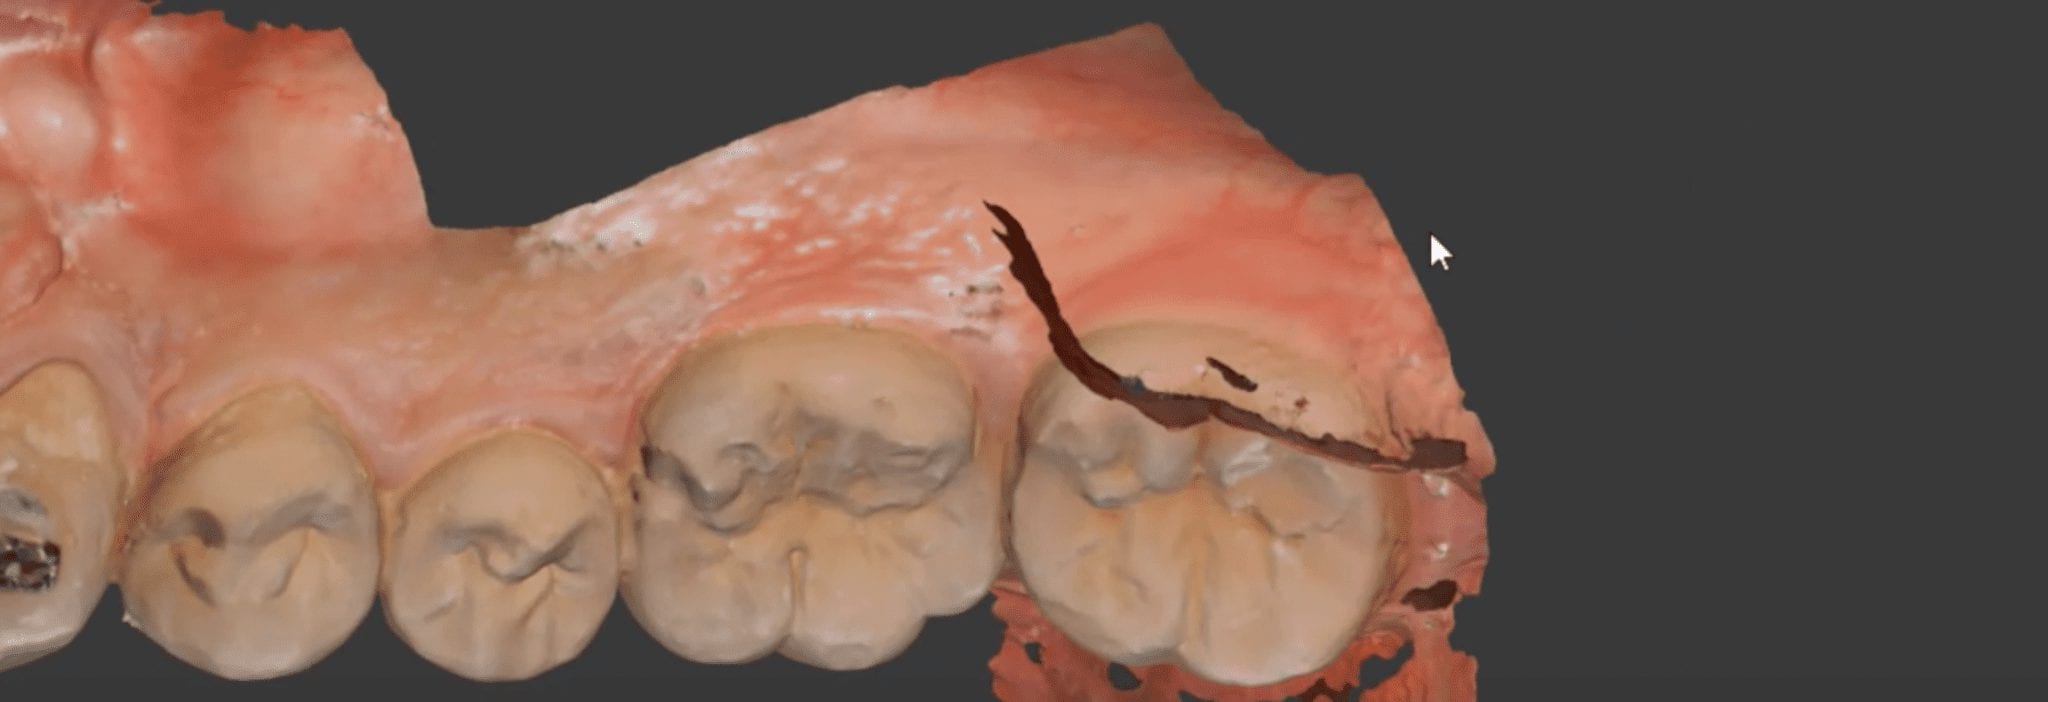
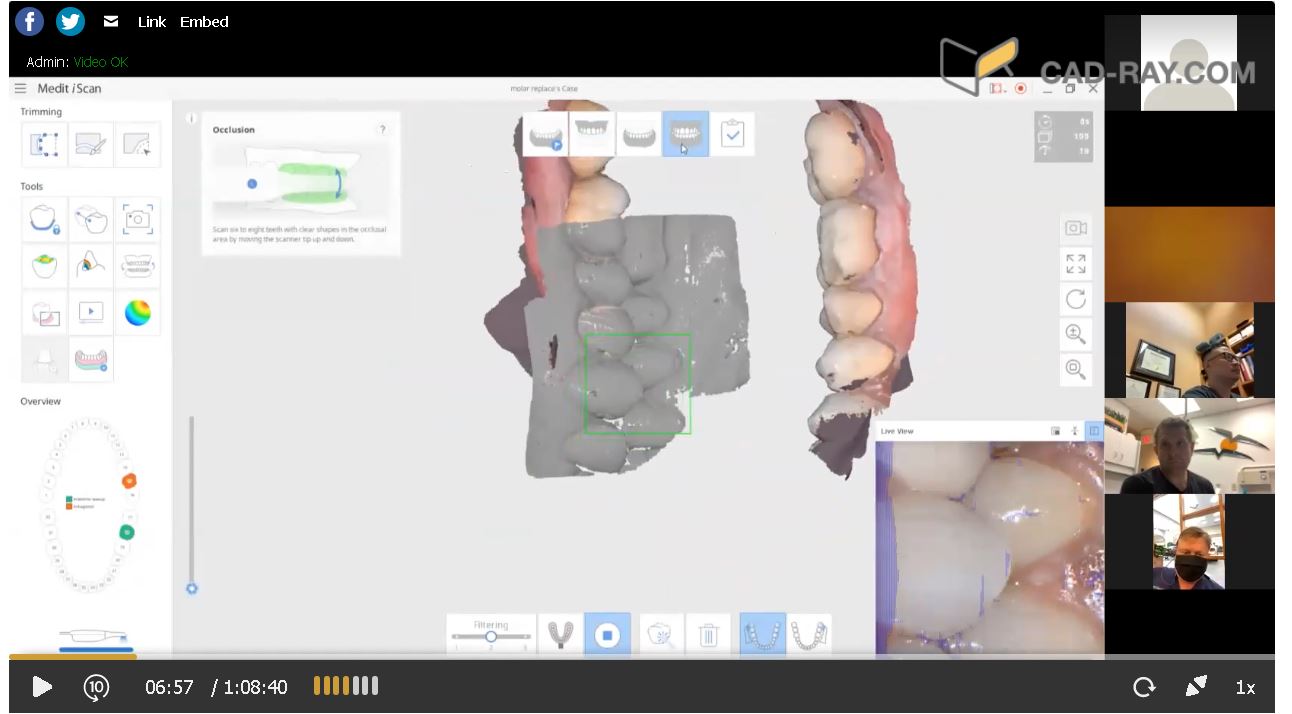
A repetitive theme that is a common issue with all intra-oral scanners is the inadvertant capture of data that does not belong to the model you are building. The software and camera are smart enough to ignore the tongue and the lip, but if they show up repeatedly in an area you are scanning, they ultimately get incorporated in the equation.
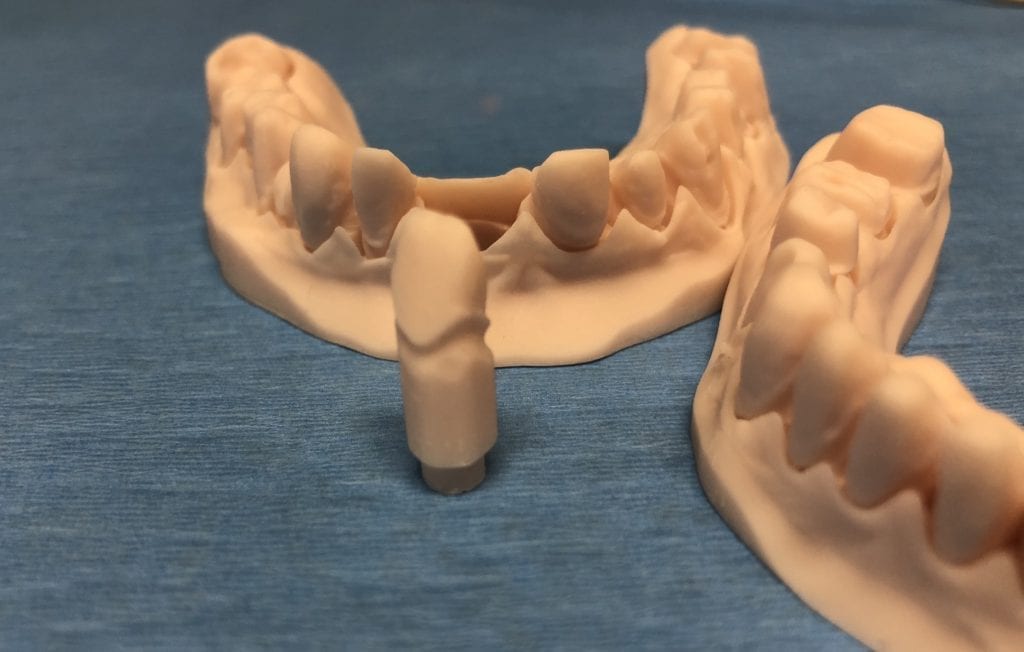
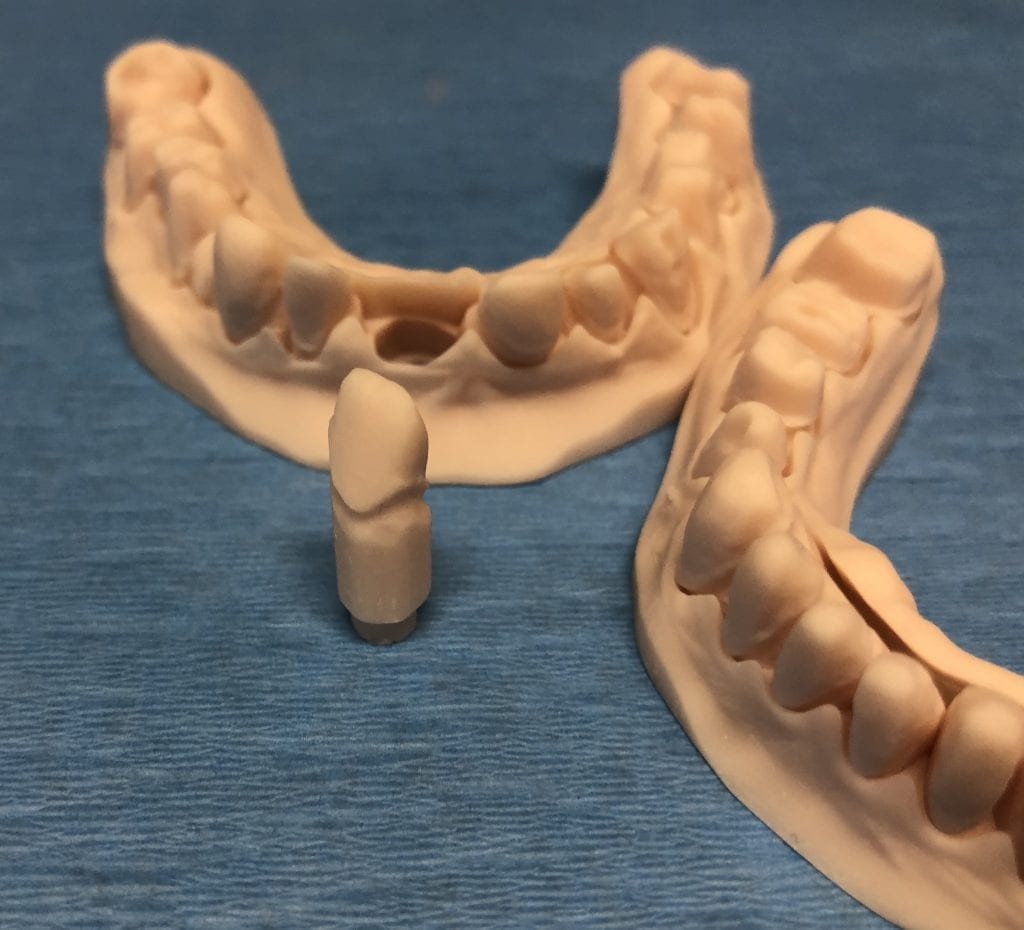
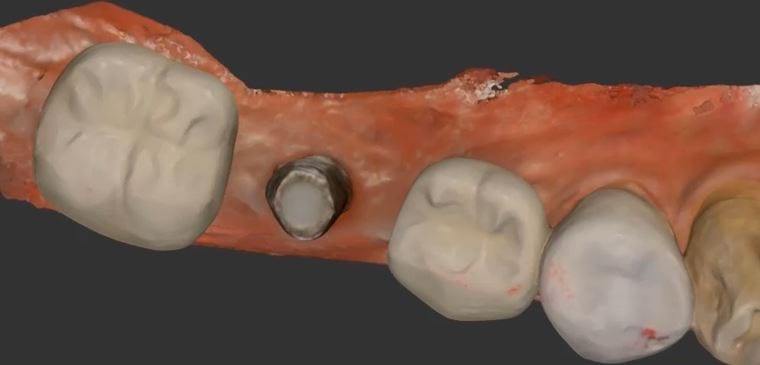
In this image, you can see how the tongue is capture on the occlusal surface of the second molar. The trouble is that the ios does not recognize the difference between soft tissue and hard tissue (yet) and once it is part of the model and you go back to the area you want to scan, the software is actually looking for that (now) displaced data. Since it is not present, the camera cannot initiate the capture of new data and the user gets frustrated with the red box instead of the green box.
Retract the lips and the tongue and you can easily capture an arch in 60 seconds.
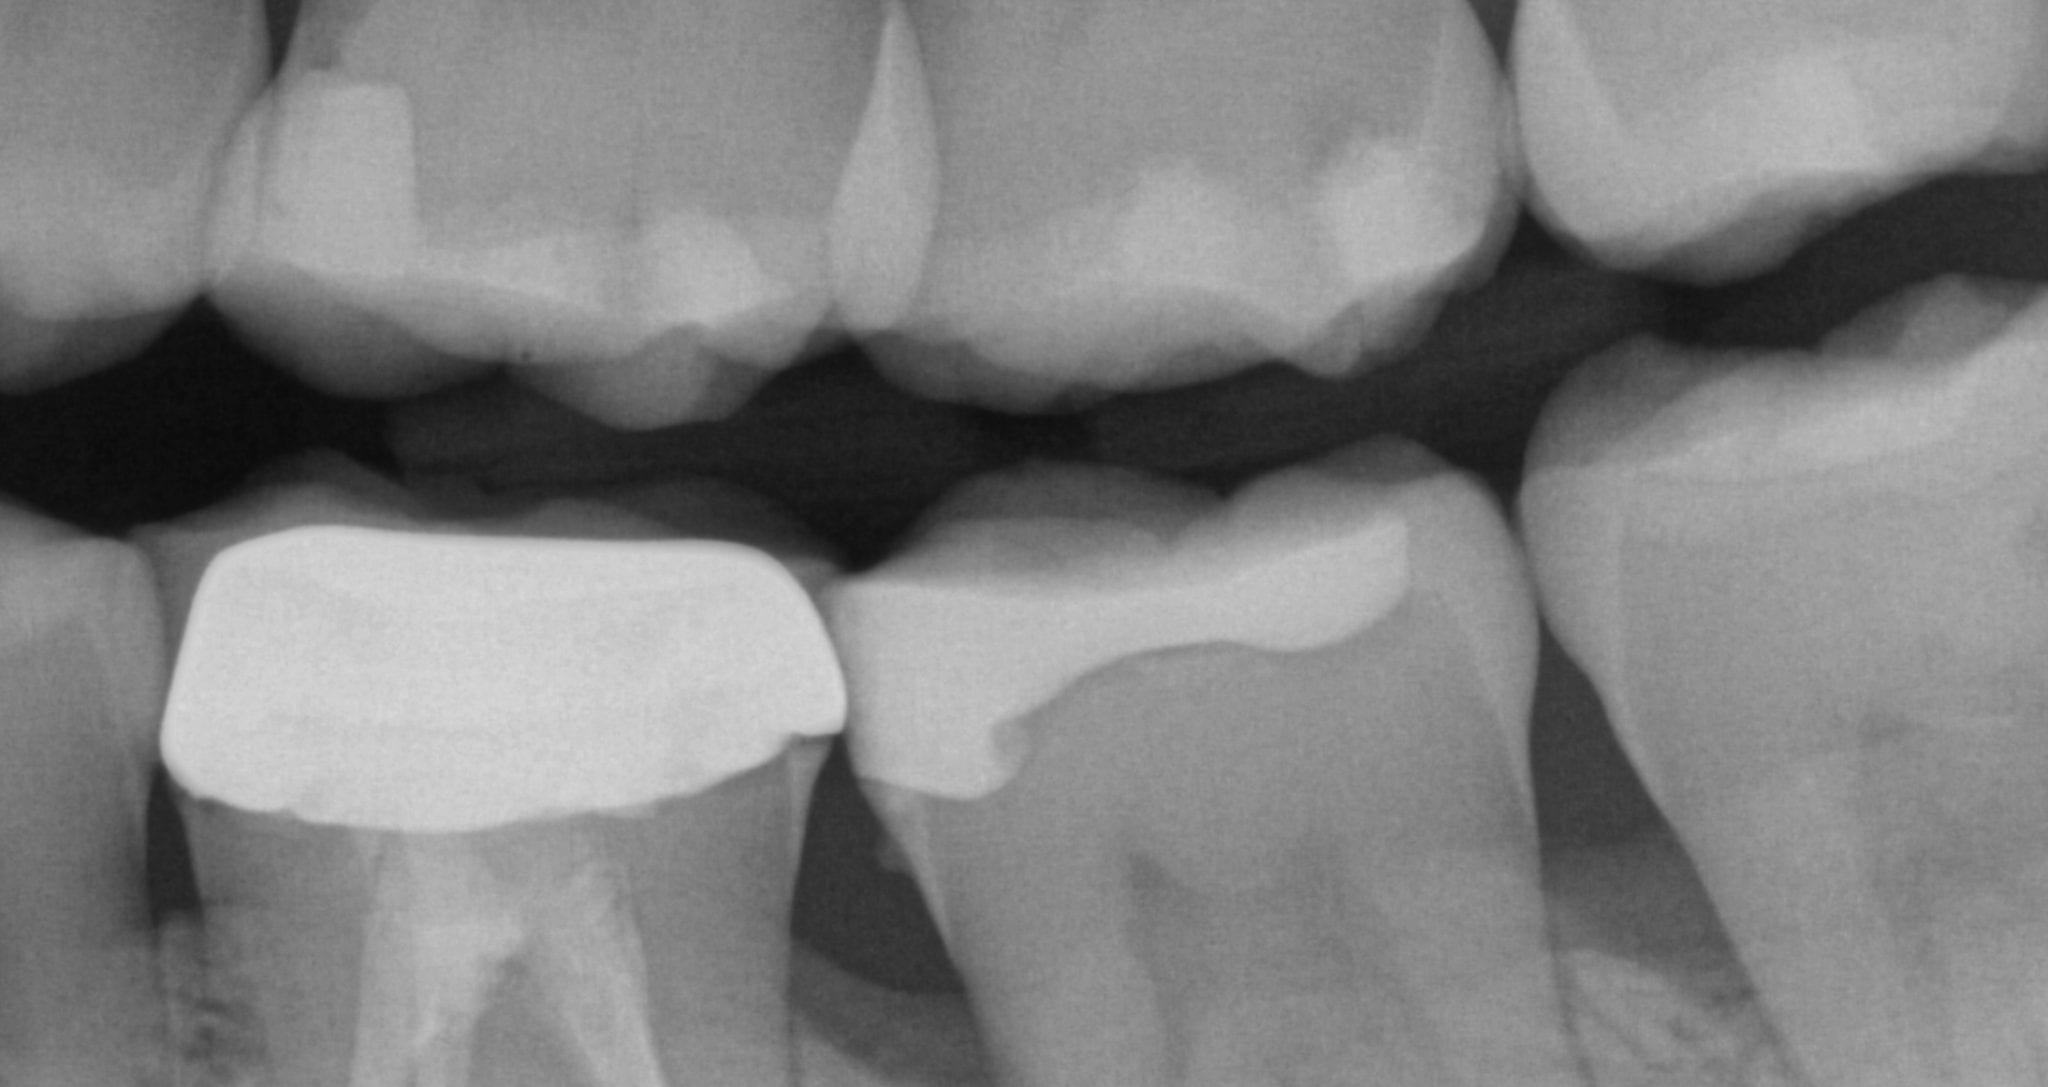
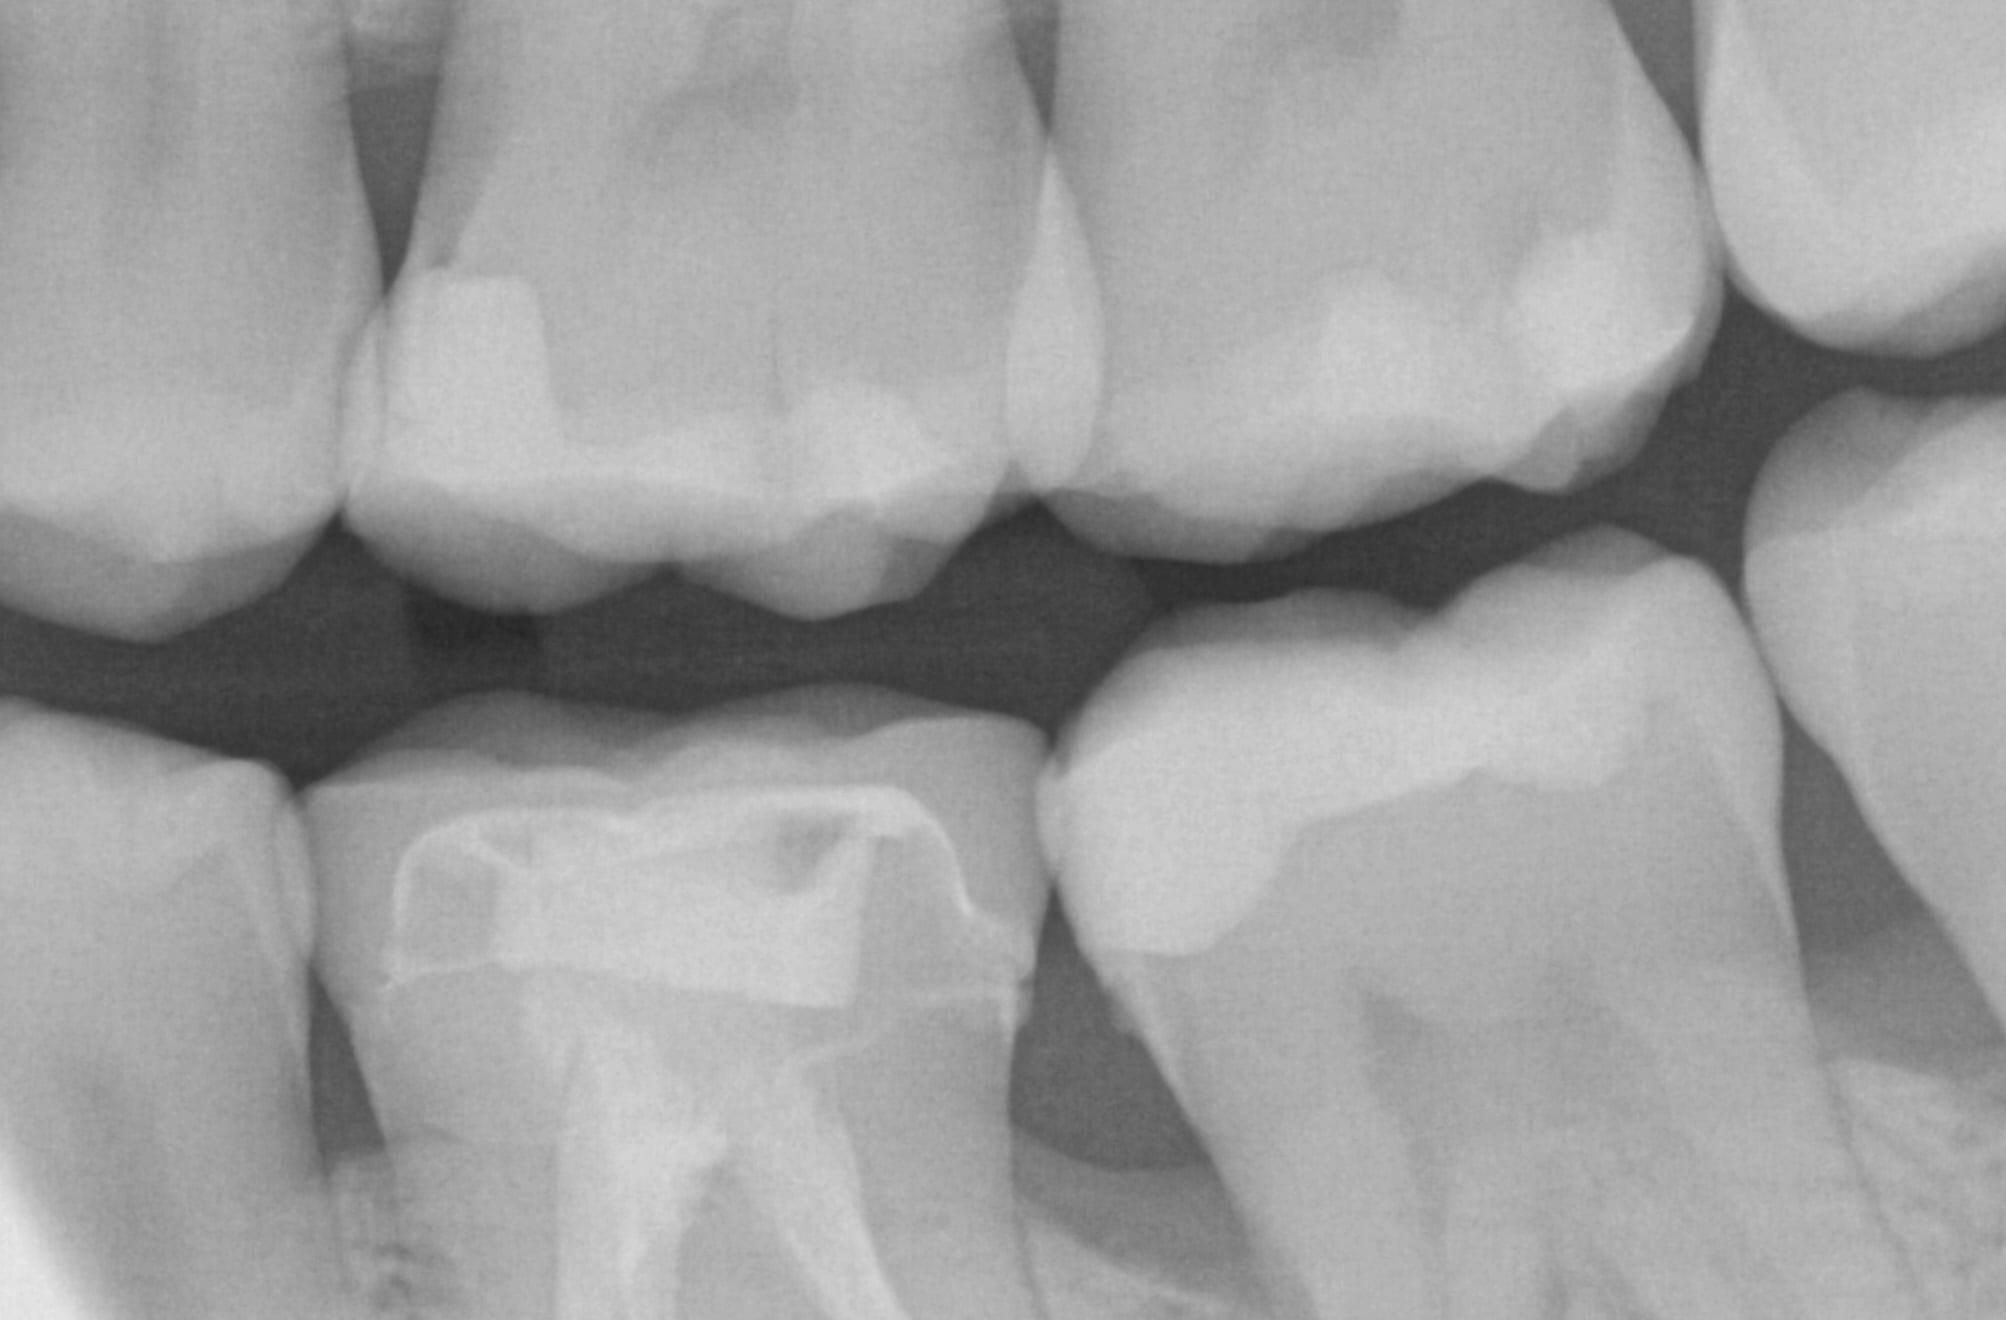
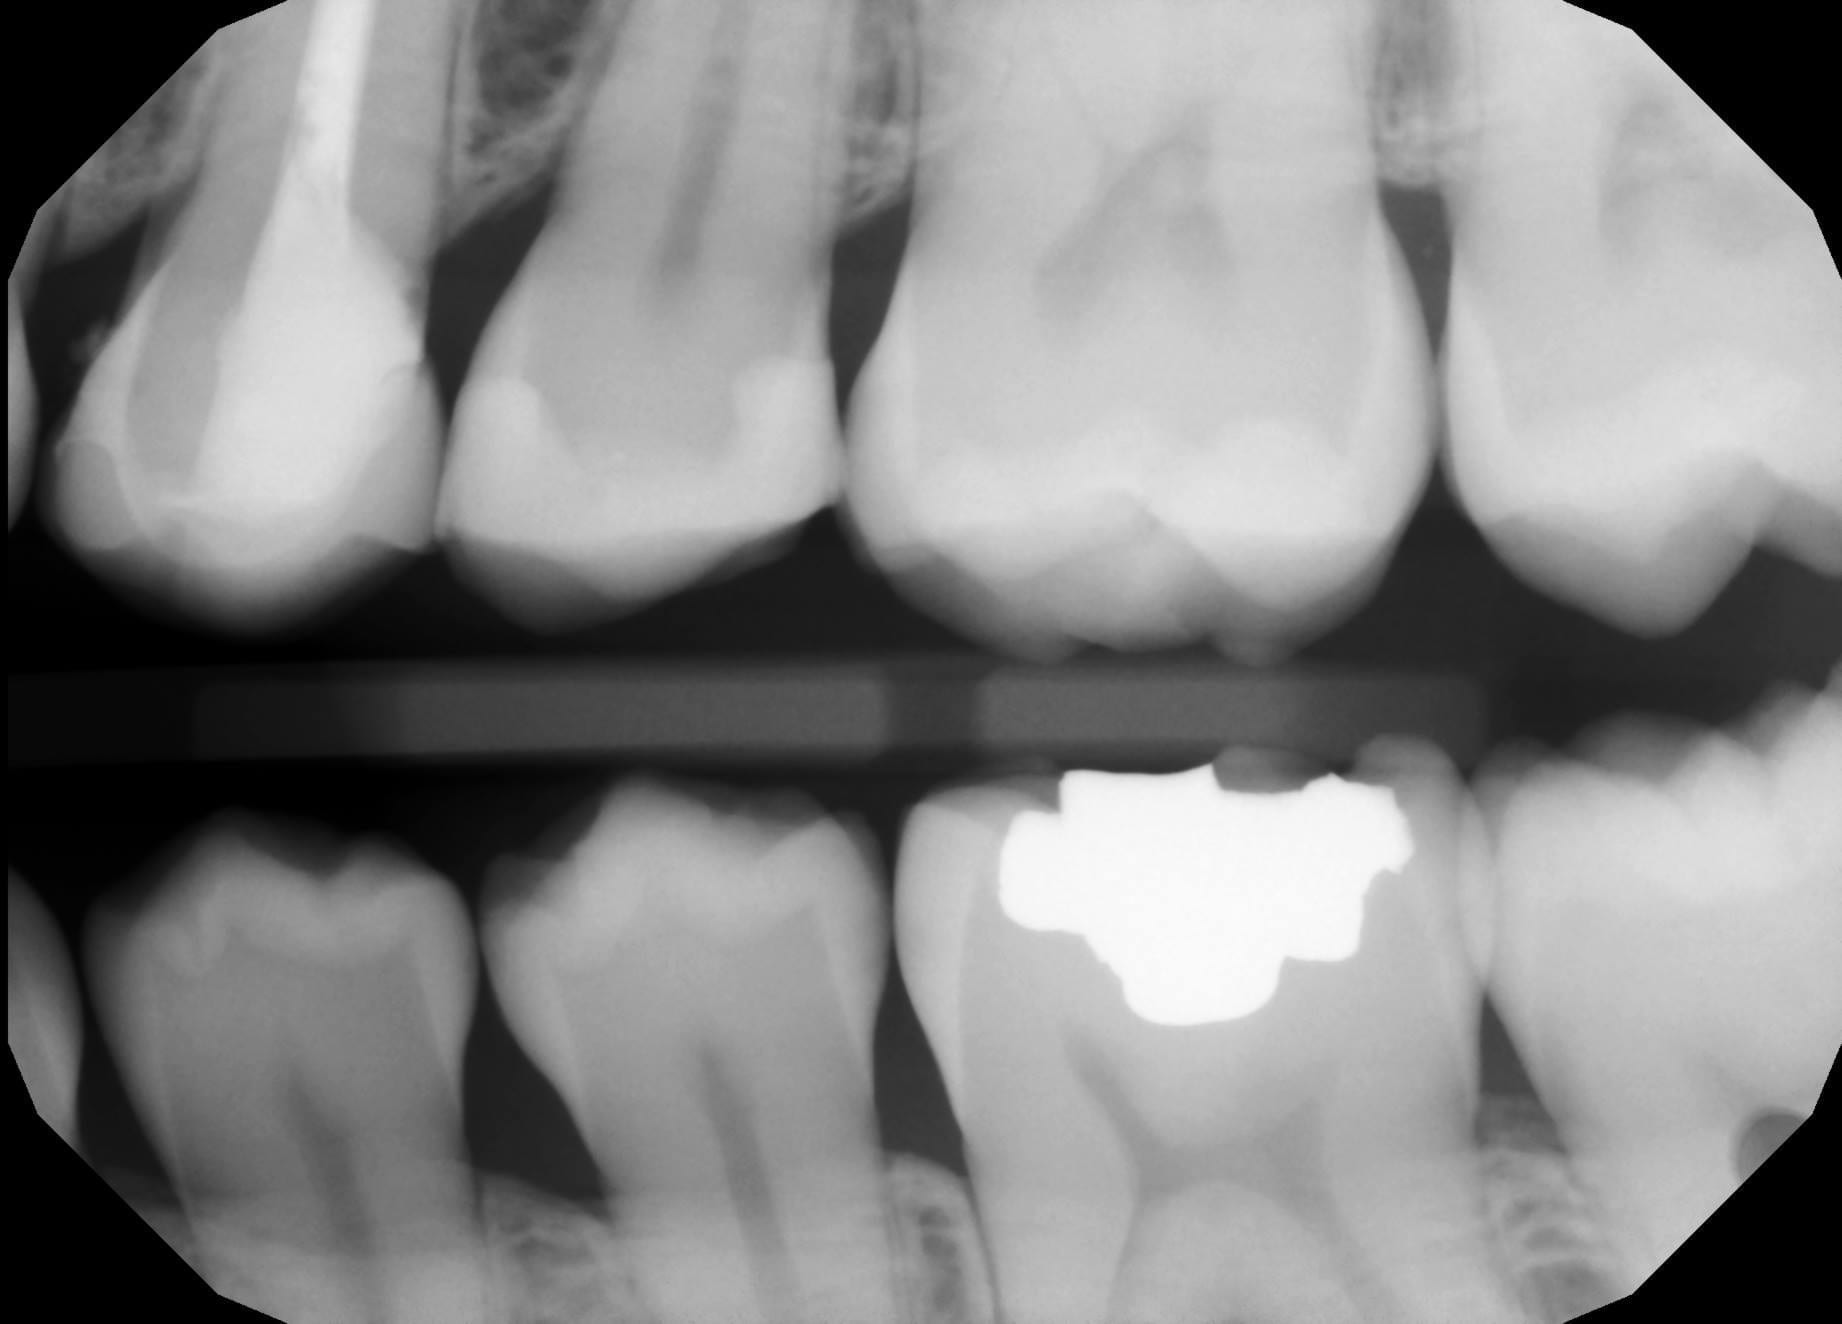
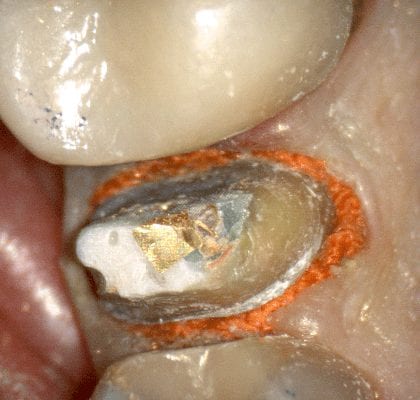
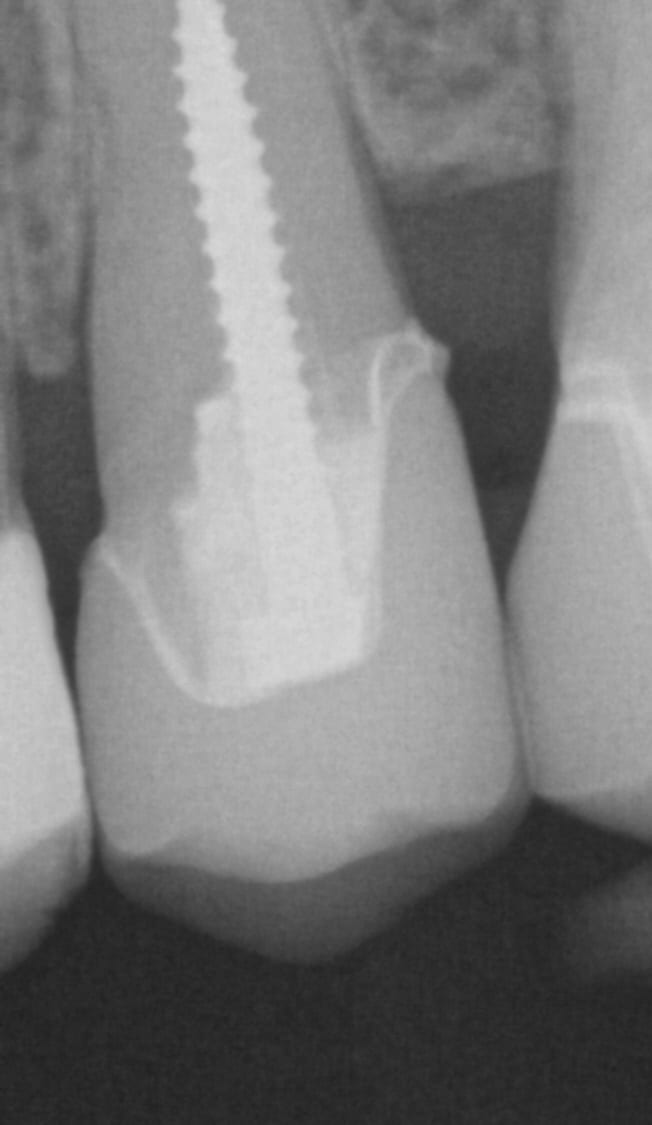
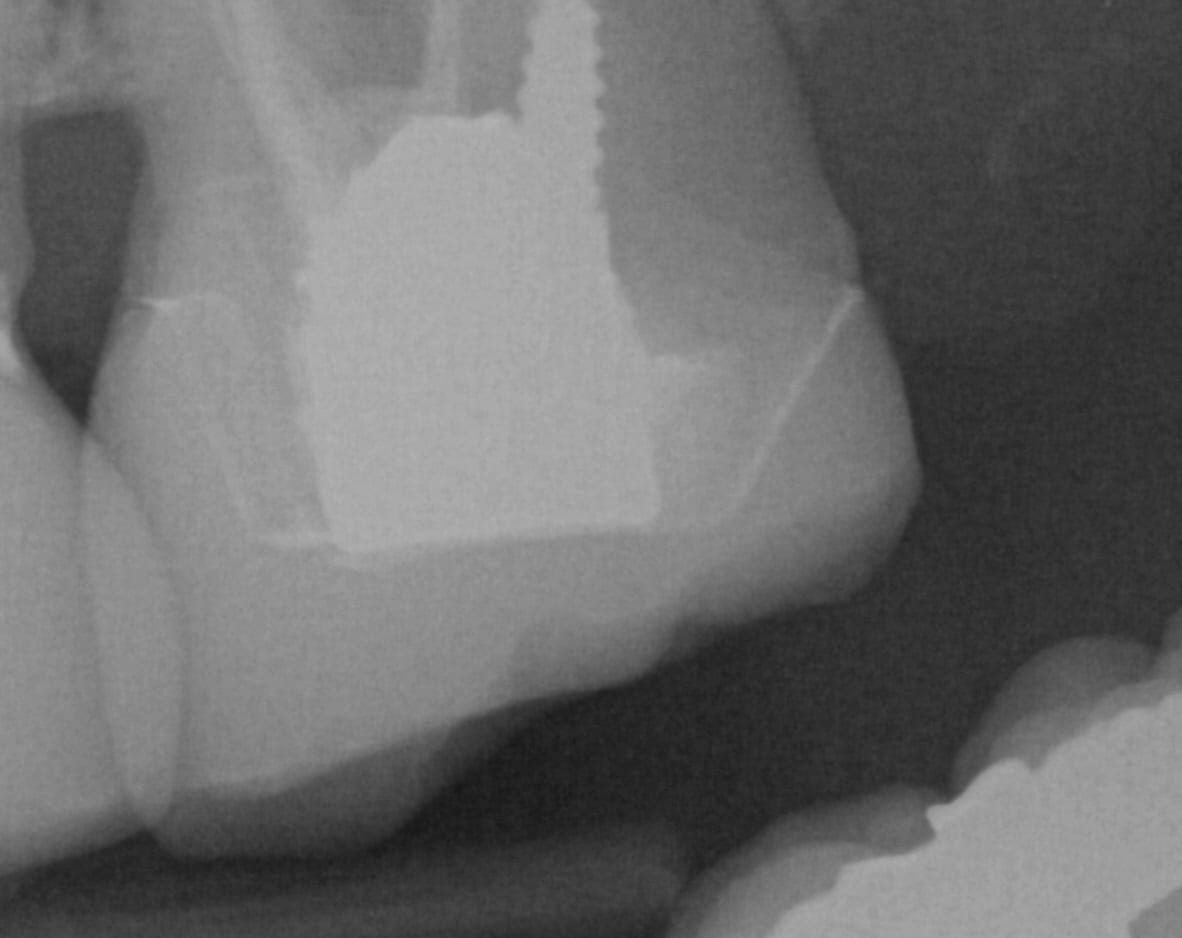
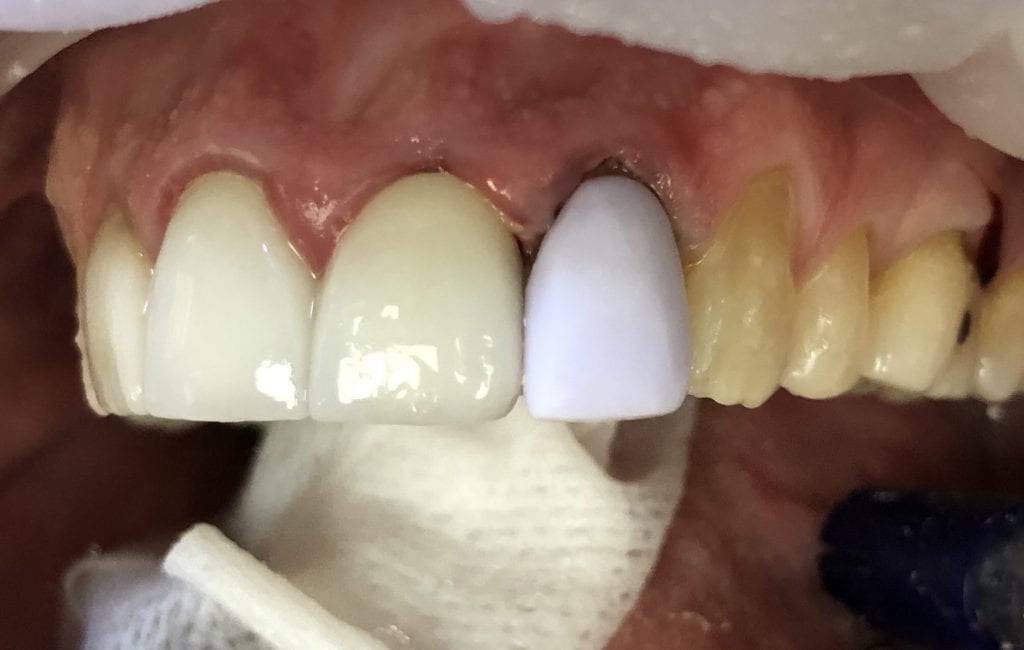
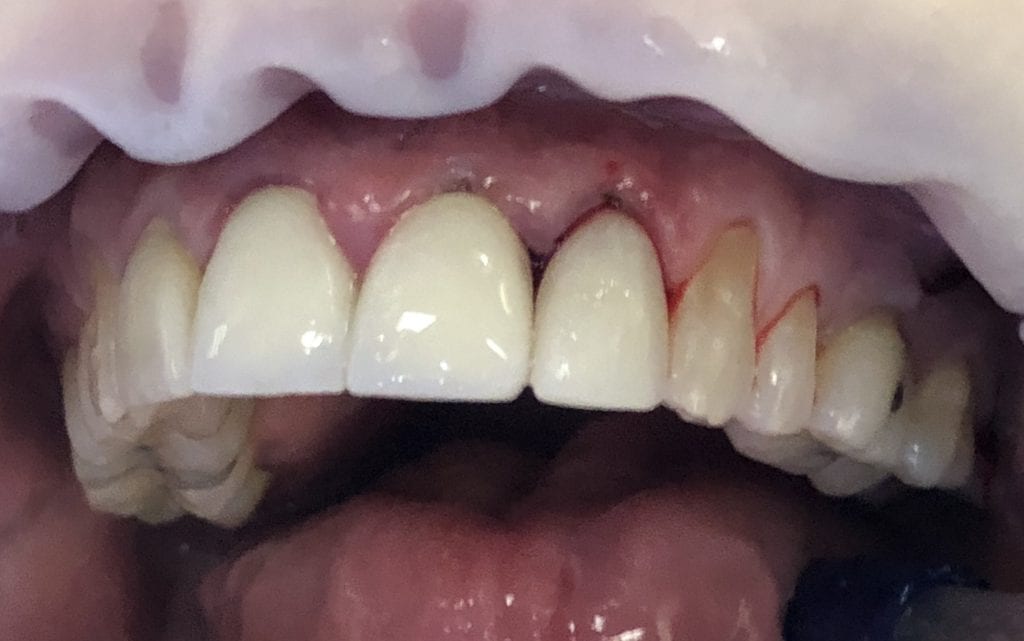
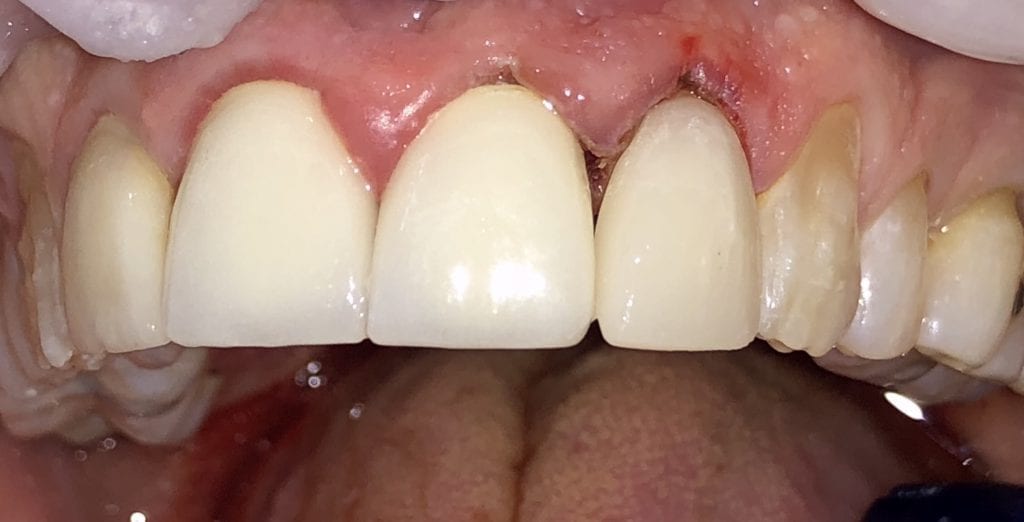
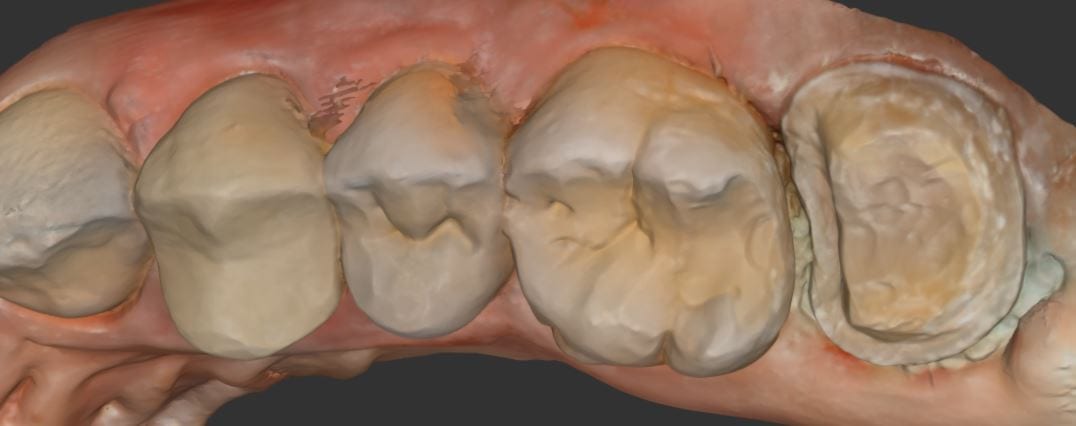
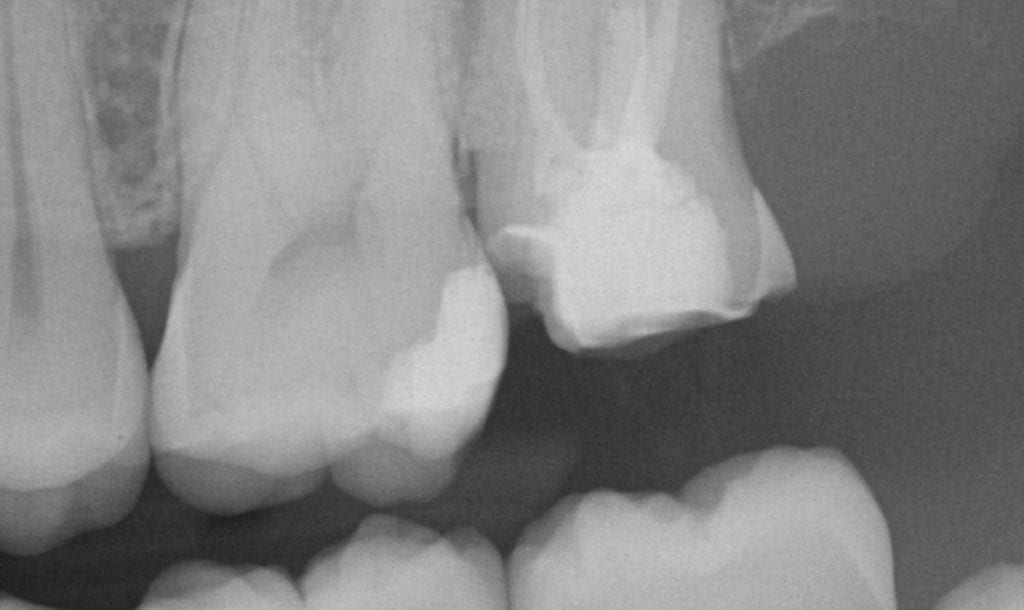
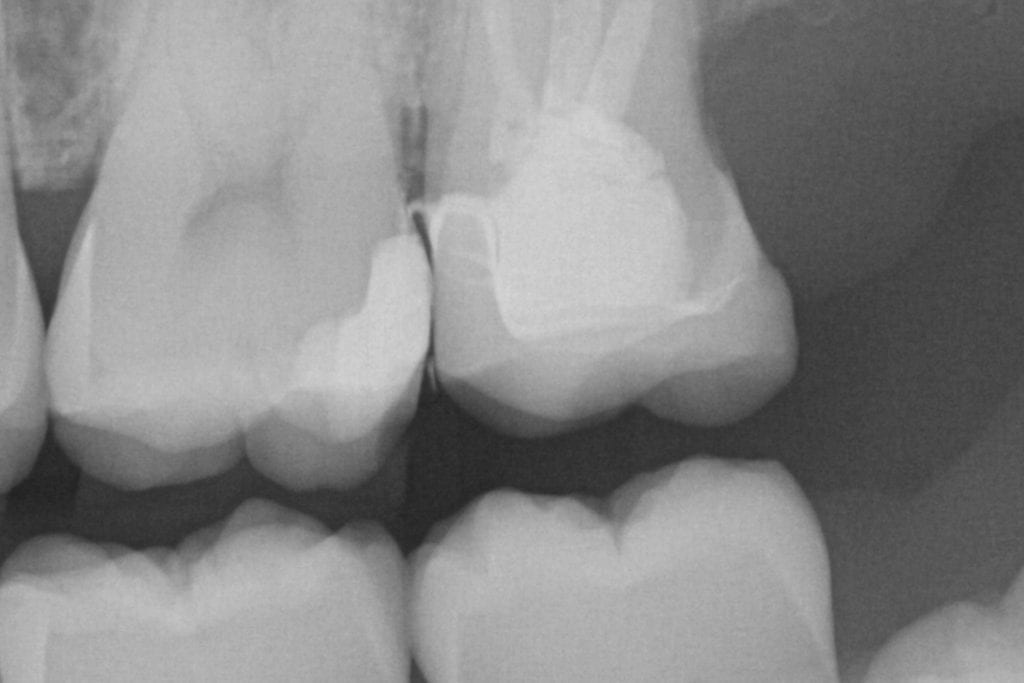
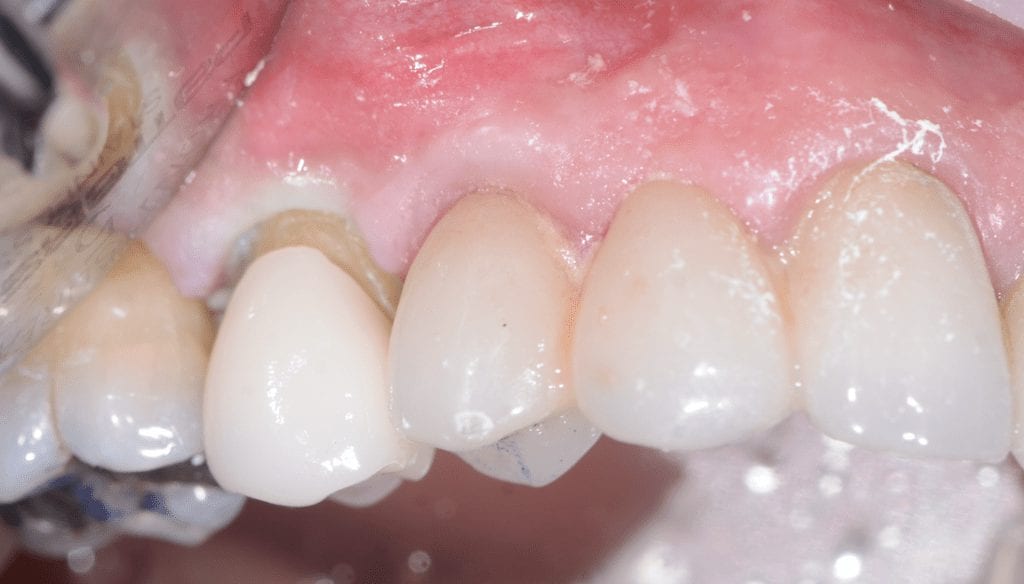
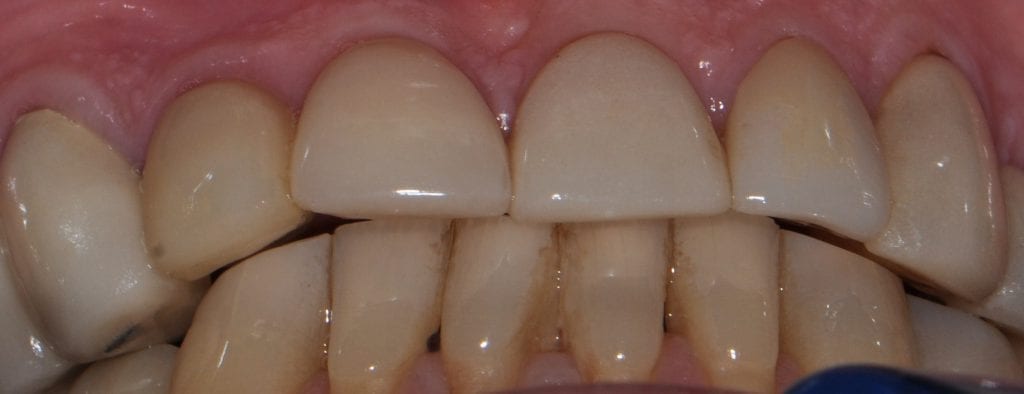
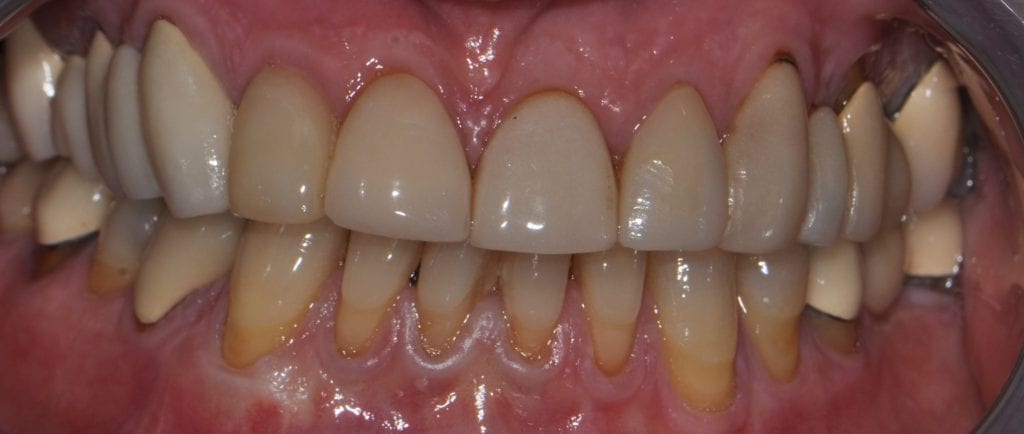
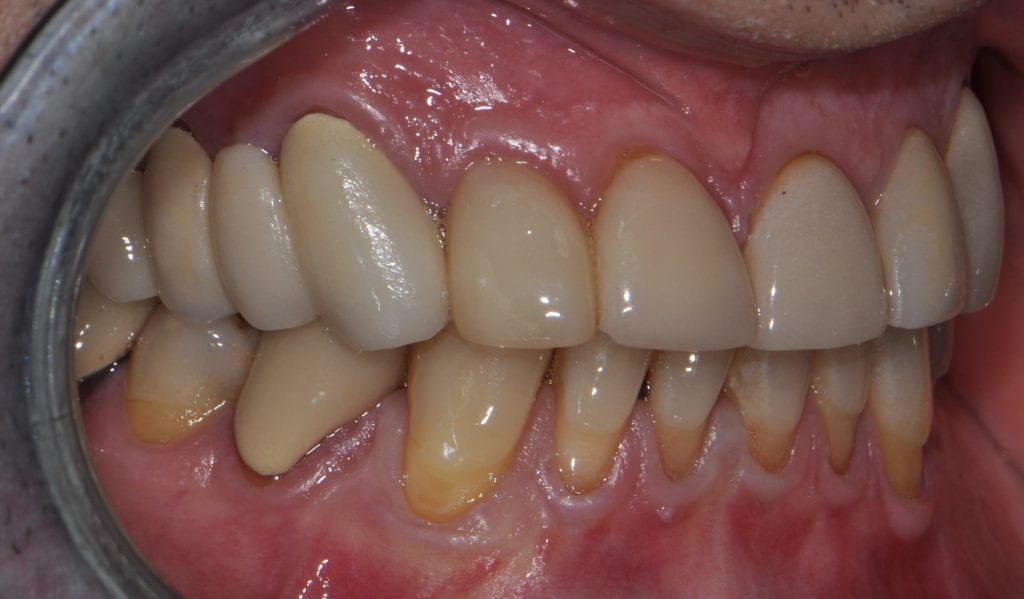
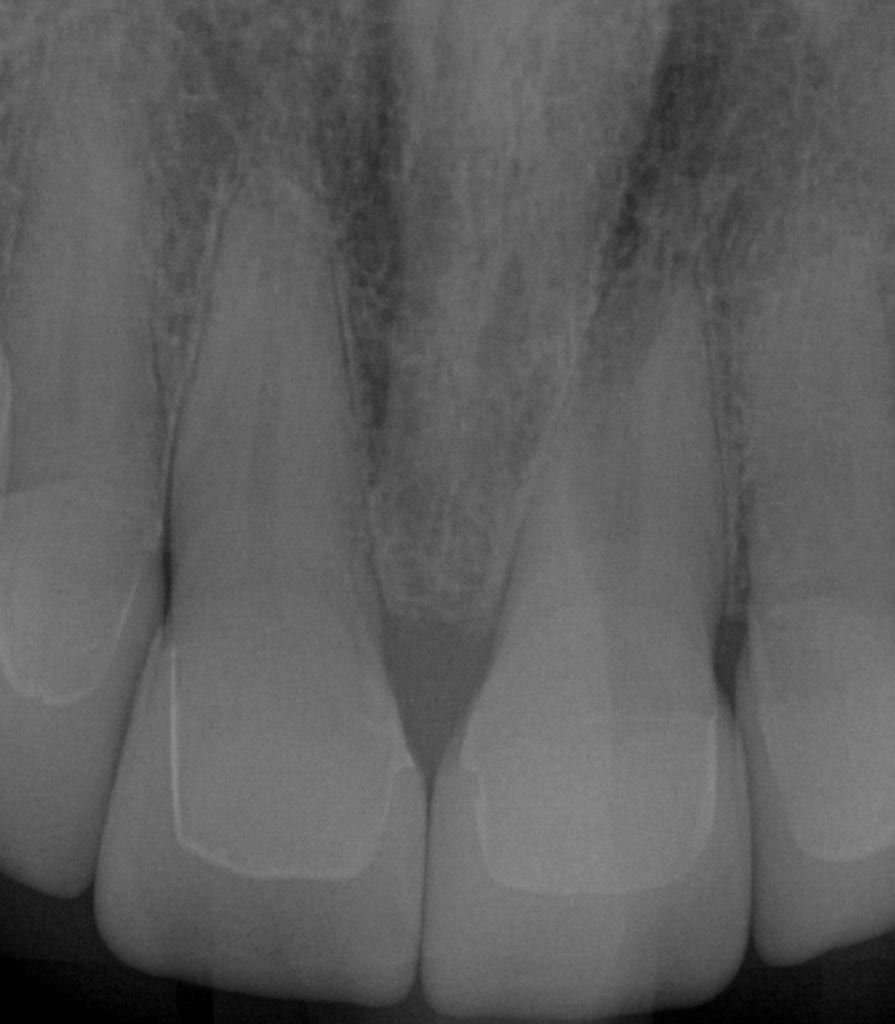
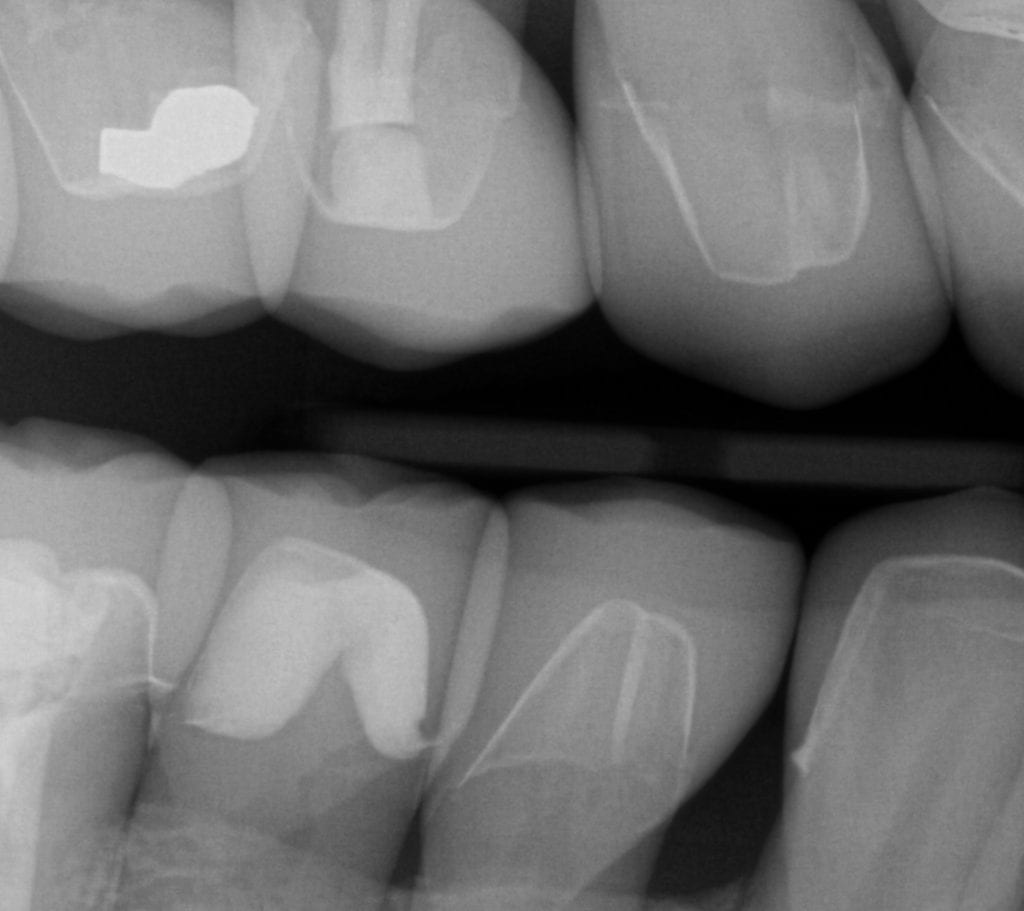
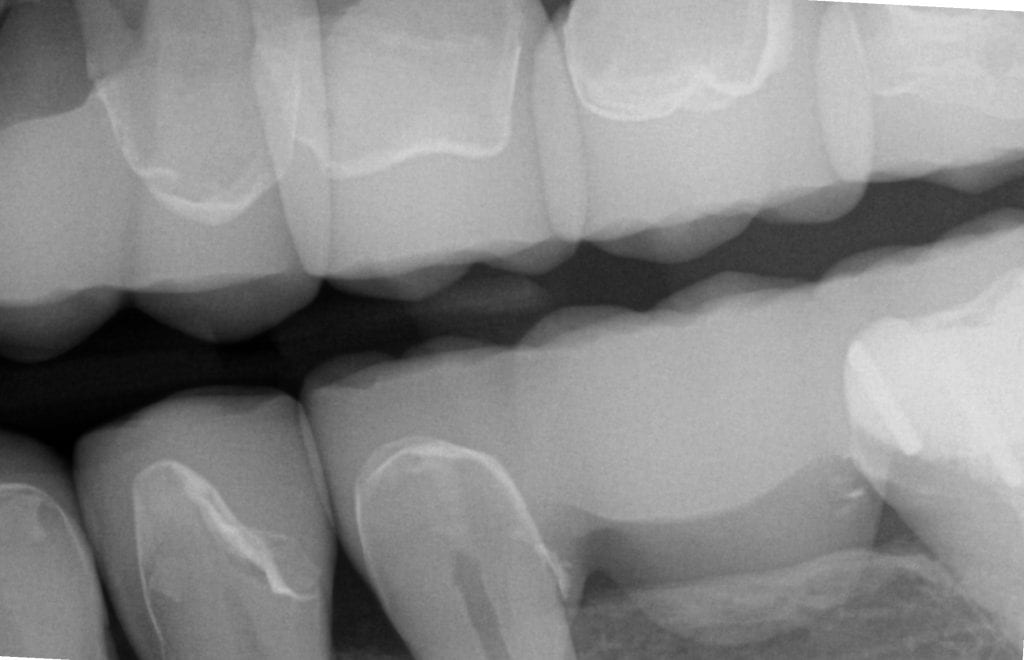
This is a first molar crown that was replaced with an in-office milled eMax restoration. The adjacent second molar had recurrent decay under the existing class 2 restoration. That was removed and replaced and pre-existing crown was also removed.
The preparation was refined and the recurrent decay was removed. Once hemostasis was achieved and the tissue was retracted the area was scanned with the medit i500. The crown was designed to full contour and milled chairside. After it was chrystalized, it was bonded into place with Nx3 resin cement. The excess was removed and an immediate post-op bitewing was taken to verify that no excess cement was left behind.
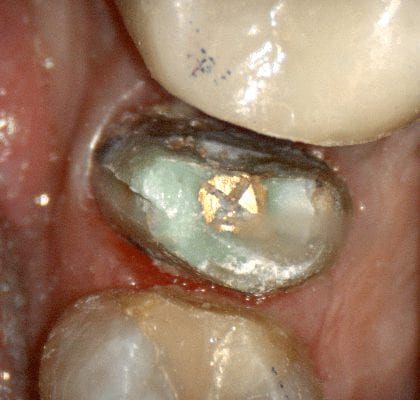
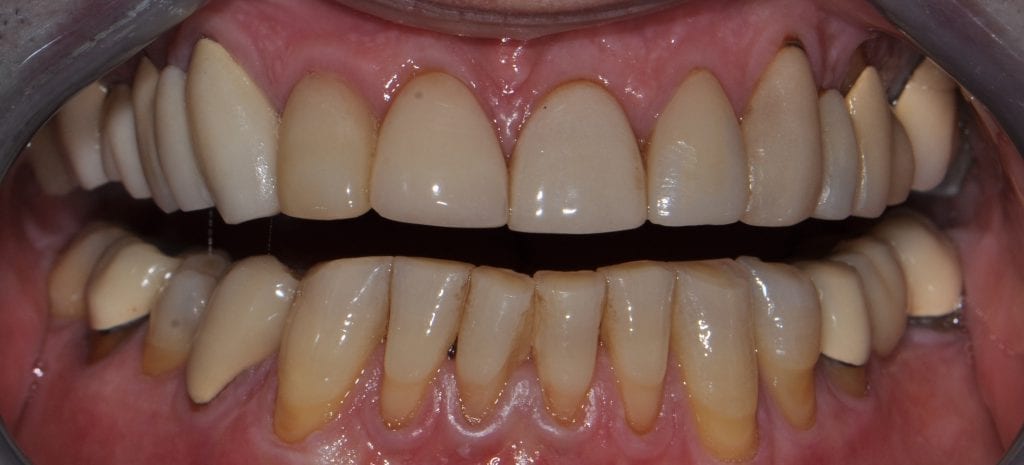
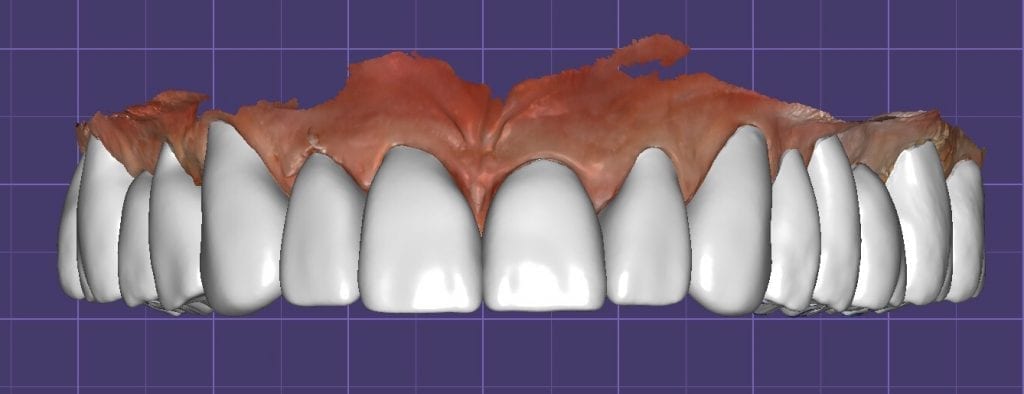
Pre-Op
This video shows the design of a crown after the impression was taken where vivid colors of the retraction cord, the sulcus, the preparation, and the details of the adjacent tooth can be visualized.
[videopress 25yUA1tp permalink=”false” hd=”true”]
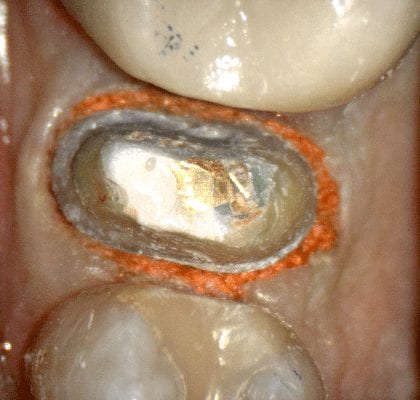
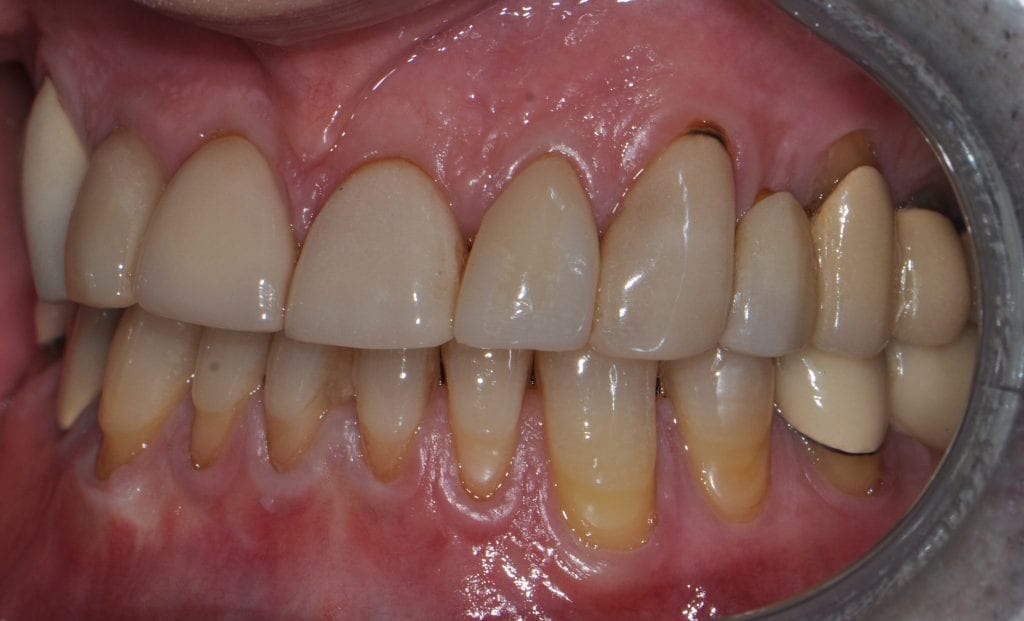
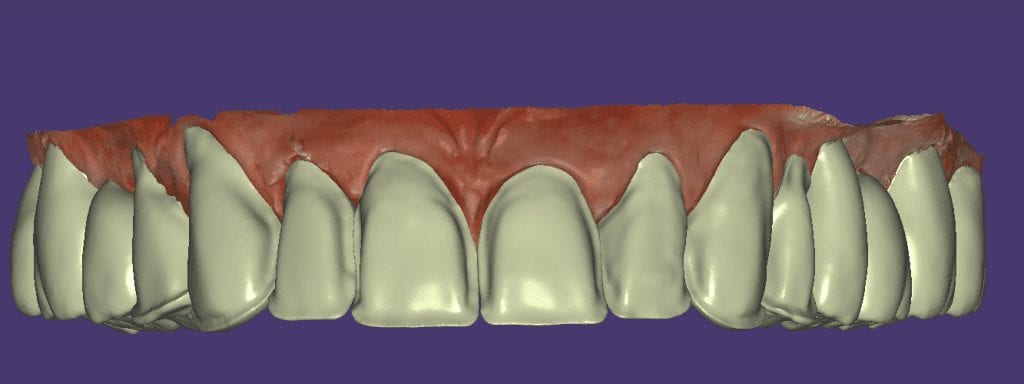
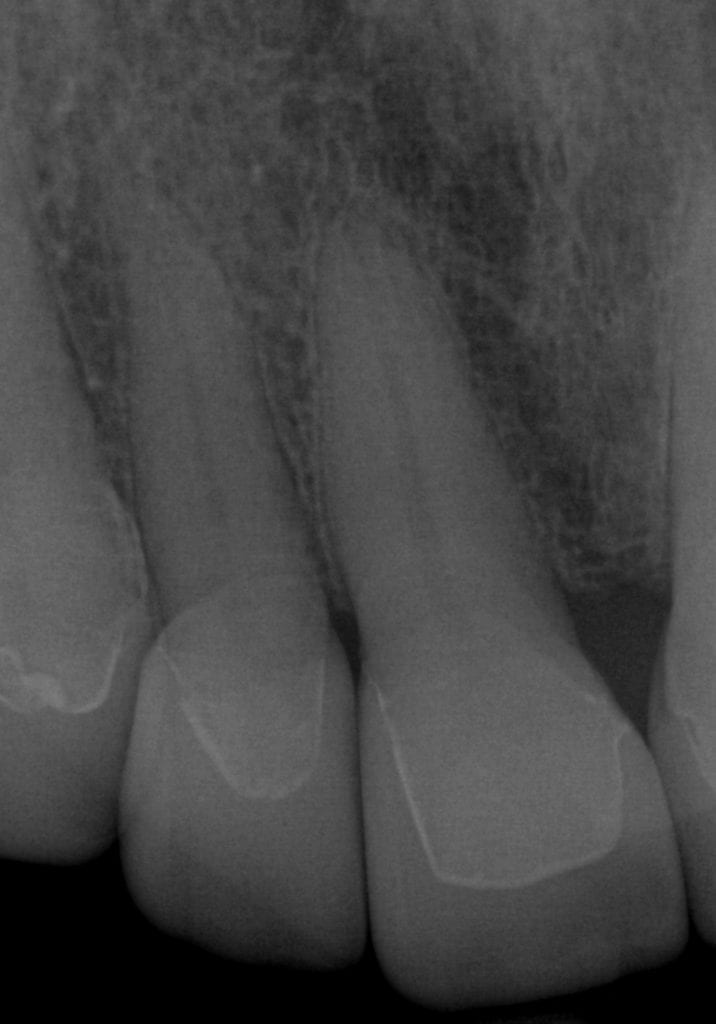
Immediate Post-Op
Download the case files in OBJ Format
It i sometimes confusing to some doctors when looking at bitewings shot at specific angles that make the margin look like it has filled in with resin, or the the margin is “raised” with composite material. When looking at a sloping margin, where you have a deep chamfer or finish line, instead of a shoulder margin, when you take a bitewing immediate post-op X-ray, the flow of the margin line is superimposed on itself due to the two dimensional image.
Clinically, if you look at the margin design, you will appreciate the anatomy of the prep and how that can lead to this effect.
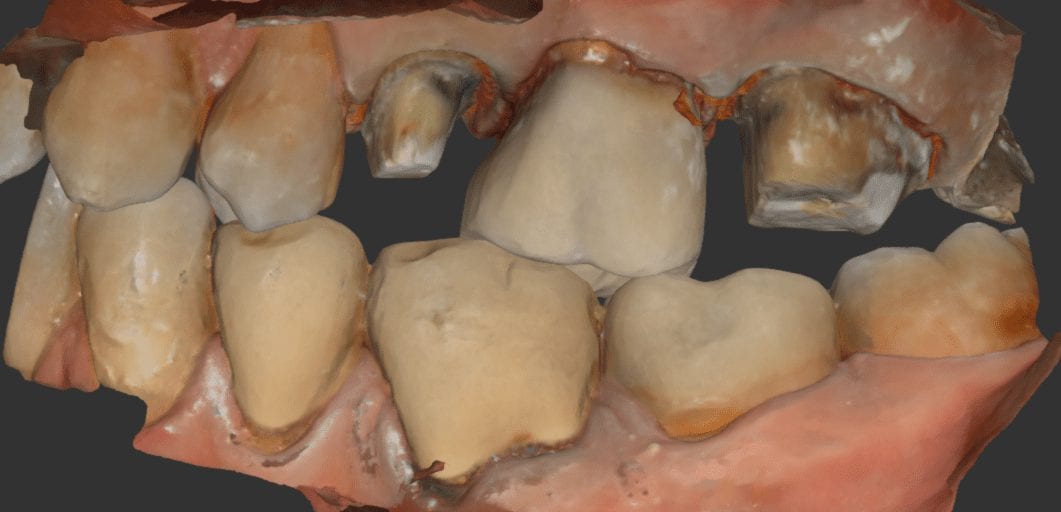
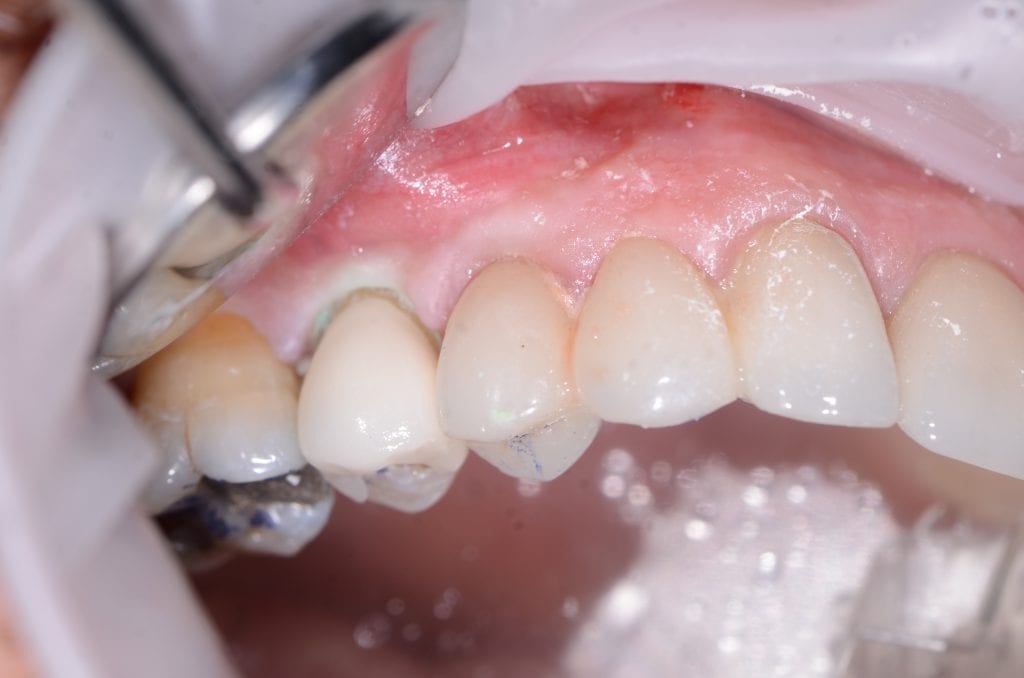
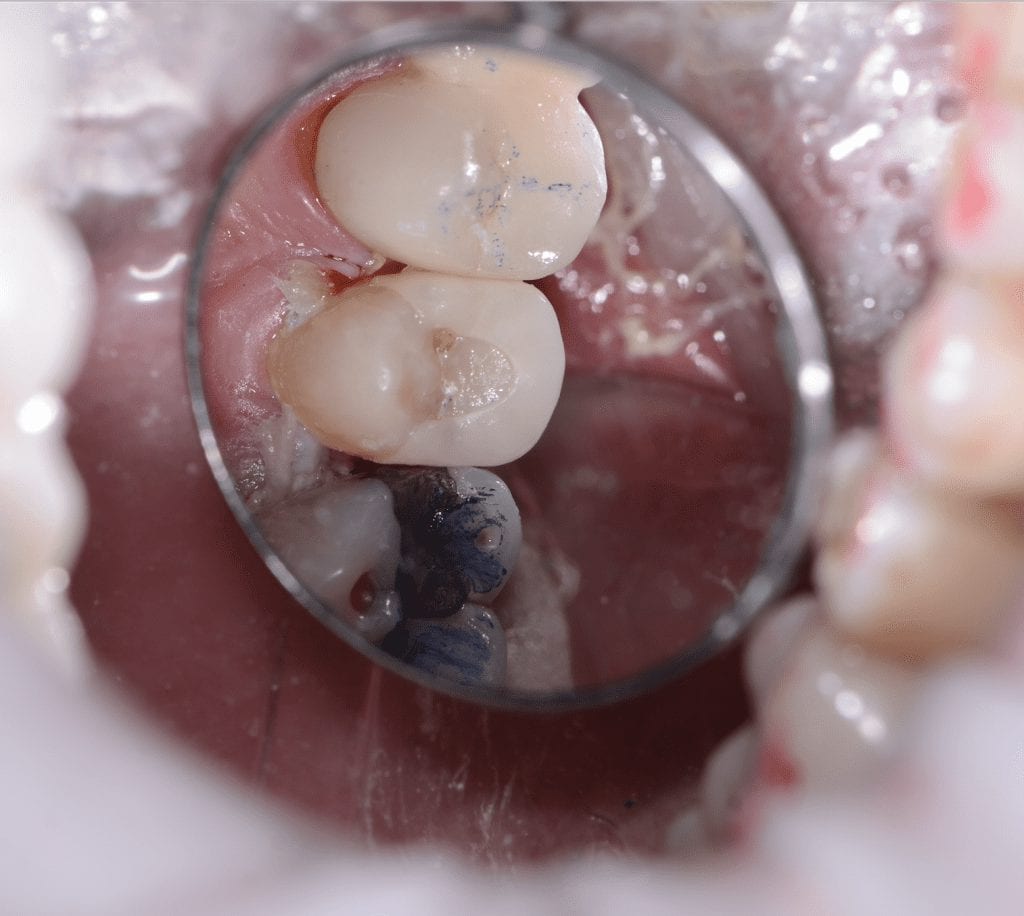
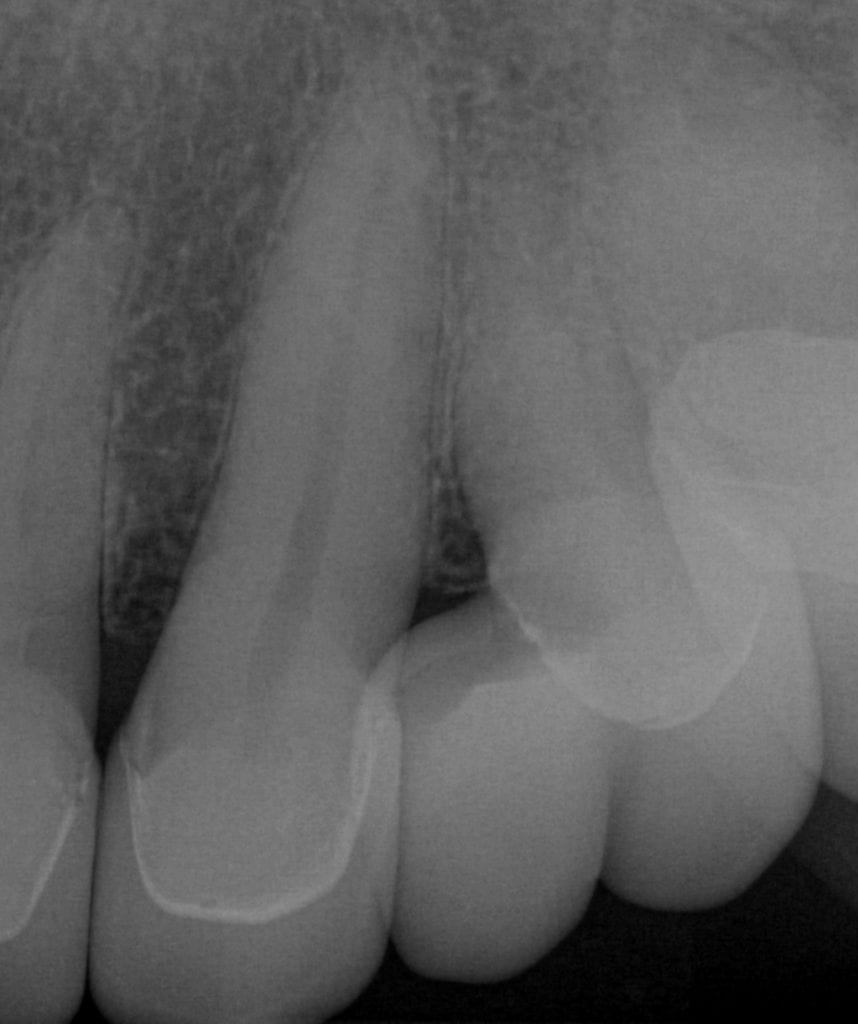
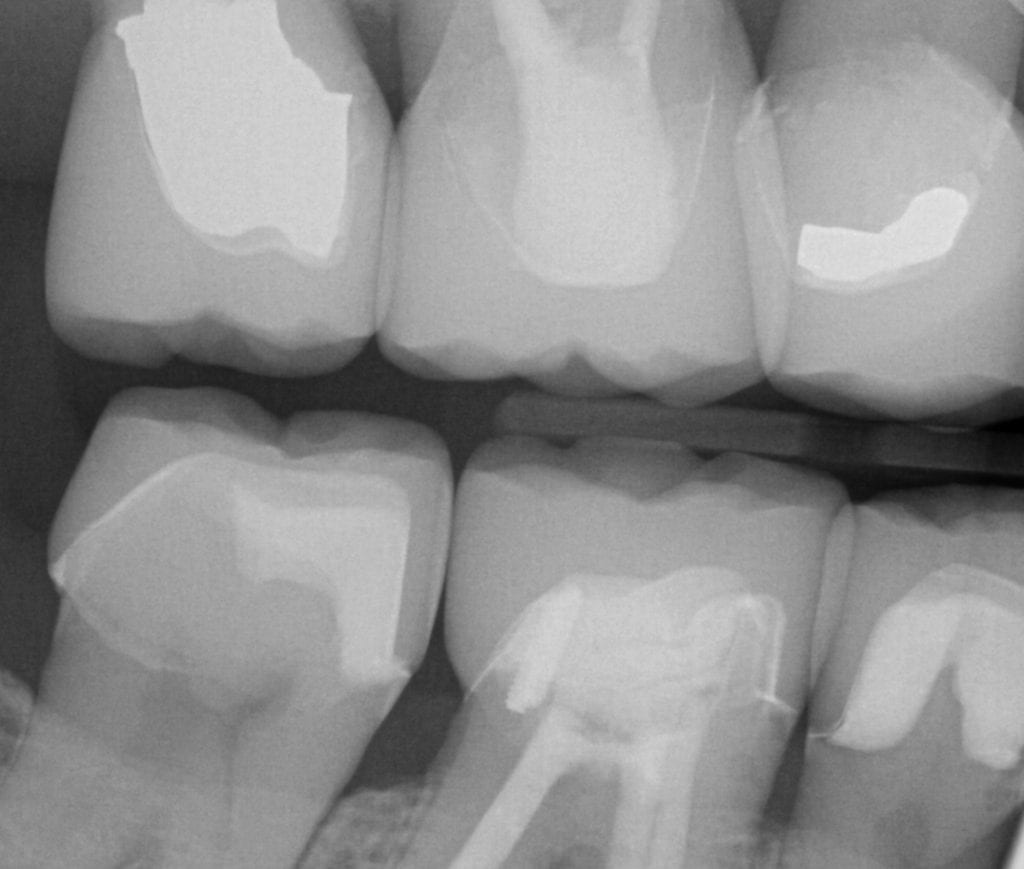
This is a lesson in chairside efficiency for all CAD/CAM users. Traditionally, you would be forced to prep two teeth and impress them both at same time, but with digital dentistry, you can break the case up and do it in segments, as if they are two separate patients involved.
In this particular case, the restorations were designed, milled, and seated in a single appointment. To speed things along, only the second premolar was addressed; it was prepared, imaged, designed and milled. While milling, the second molar was prepared.
After the tryin, they were chrystalized and seated at the same time. Leveraging preparation time with mill time of multiple units can greatly increase efficiency at chairside. See the following videos to pick up on all the details of the case.
One of the greatest advantages of digital impressions is the ability to copy a pre-existing condition. This has a lot of benefits, one of which is that the patient will not notice a difference in the new restoration vs. the old one. For this to happen with the medit i500, you need an extra image catalog box. Rumor is that this will be available in the near future. Since we only have the upper and lower jaws, and the buccal bite to imagine into (and scanbody catalog boxes), what you can simply do is treat the case as if they are two separate patients.
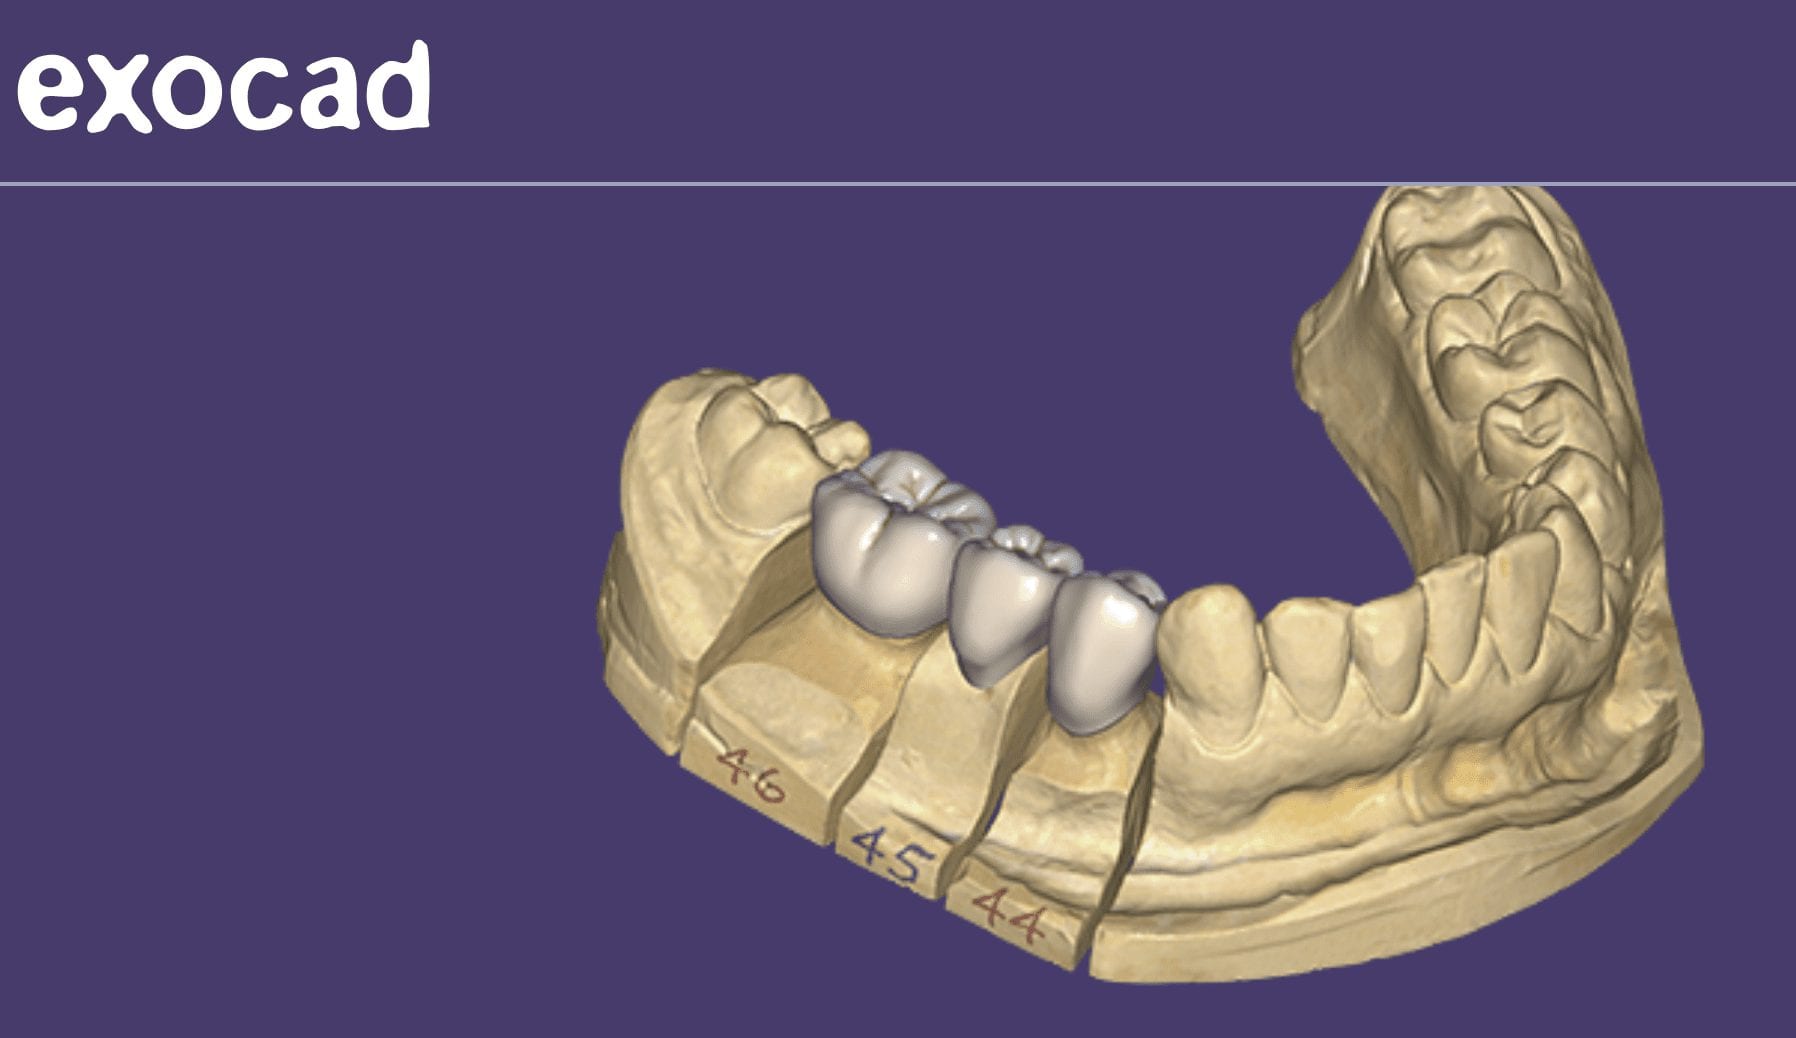
Create a new patient, and scan the preop condition and save the case. Once processed, you can export the case file in OBJ, PLY, or STL format.
You can then launch a second case, where you take the opposing, the prepared arch, and the buccal bite images. You can download the Korolation OBJ case files and design along. Just remember, in exocad, the upper and lower arches from “patient #2″ will automatically articulate with each other, but you will have to manual import the preop scan and merge the prepped model and the pre-op models.
[videopress RkqfM9CJ permalink=”false” hd=”true”]
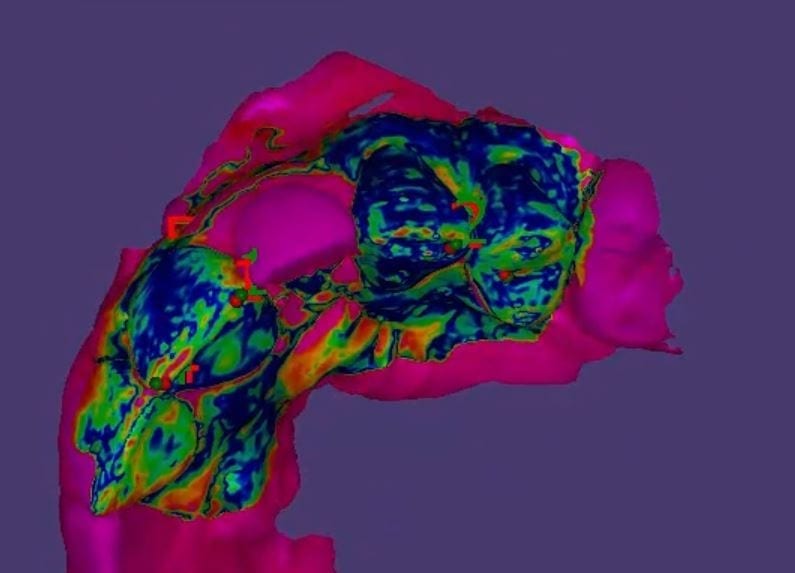
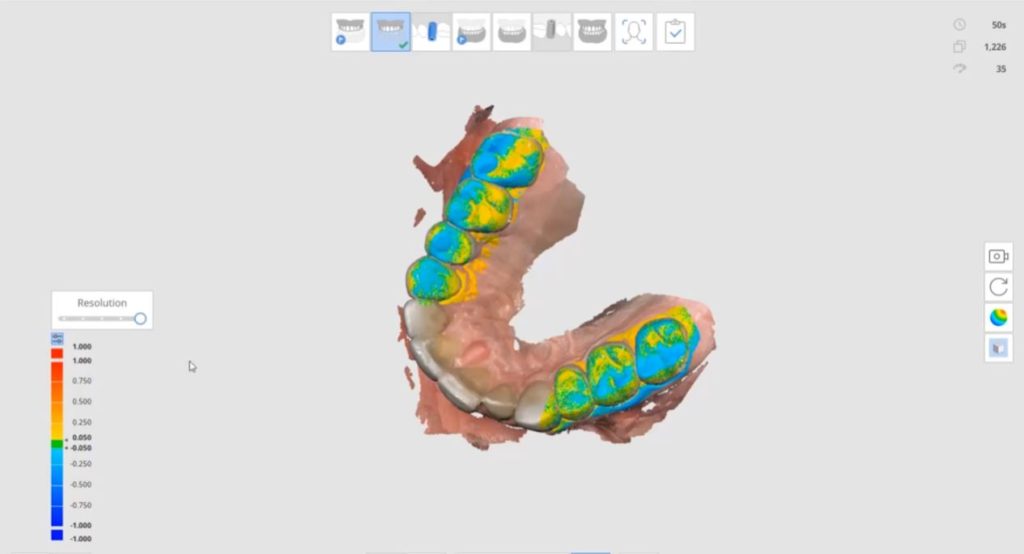
Once you import in the pre-op condition, you can manually relate the models to each other by identifying common landmarks between the two models. After you perform alignment, you can then click on “Best fit matching”. The color scheme in exocad is a great guide in letting you know how well you have articulated the models together.
[videopress U5aJCxQ3]
The more blue you see in the Korolated models, the more reliable your stitch is and you can be assured of greater accuracy in your final restoration.
Happy Hump Day! We might be in your area! It’s going to be a crazy month! Here’s the 411! WE ARE SHOWING THE WORLD HOW MUCH WE LOVE DIGITAL DENTISTRY! C2 will be traveling to Utah this weekend for a show on Saturday….
North Carolina & South Carolina Sunday & Monday!
Send us a PM if would like a demo! #mediti500 #c2style #welovedigitaldentistry
Grady Dix Armen Mirzayan Frank Weinstein Carol BarberLamb
This a very common question we get at CAD-Ray.com and it reflects on how little dentists understand about digital impressions and CAD/CAM in general.
“Digital Ready”
It reminds me of a dental conference I want to, fresh out of school, placing orders for our start-up practice. As we went to the X-Ray equipment section, one of the first things the representative said to us was that their machines are “Digital Ready”! We all had good laugh explaining to the rep that the machine had nothing to do with digital X-Rays, the sensors did!
We feel the same way with digital impressions and CAD/CAM platforms when people talk about integration and making sure one “product talks to the another ” and how it all needs to be developed by the same single manufacturer. It’s loaded with a lot of inaccuracies and misrepresentations.
The reality is that every system has its flaws and can have just as much trouble talking to a machine manufactured by the same company! As dentists, we are much smarter with our decision processes now, but it is still a buyer-be-ware landscape.
Here are some basics you should appreciate before committing to a high ticket item. It’s imperative to understand that imaging has little to no impact on milling. These are completely independent processes- let us explain:
You can image (take an intra-oral scan) with system A. Then you can take the data from system A and take it to CAD software of system B. A lot can go wrong here at this step alone. Simple examples include;
The patient name doesn’t come along with the data.
Incorrect data may come across with incorrect information- you can have the occlusal relationship look perfect in system A but when it goes to CAD, the bite can be off.
You mark your margins in A, but they are distorted in cad software. So you have to make sure this works.
Keep in mind that this can even happen if you stay within a “System A” or “complete system”. Luckily a lot of this is ironed out already with legacy and legitimate products and competent practitioners. Now comes the design step. You have a few choices; exocad and 3shape being the leaders. If exocad does the margin placement and the final restoration from start to finish, a lot of errors are eliminated.
After the design process, comes the nesting and manufacturing. At this step, the milling machine has NO idea what iOS you have used. It’s just data for a restoration that it needs to process. Ar this most vulnerable step, we need to make sure the CAM software for a particular machine can interpret the design software that did the nesting. A lot happens here;
Then comes the consideration for your milling needs.
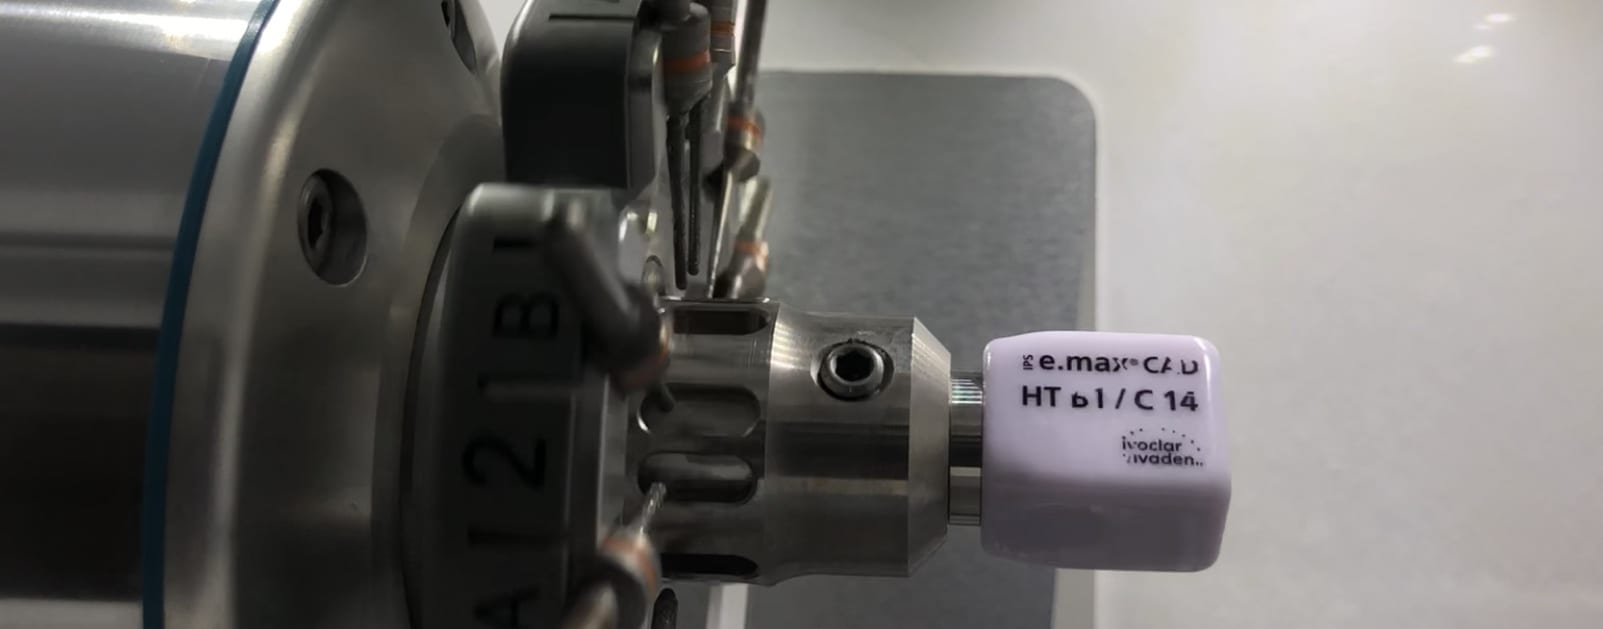
You can mill soft ceramics for 15,000$
For a little more, you can wet mill emax
Cross the 30k barrier with and you can cut zirconia (we do NOT recommend in office zirconia- dumbest thing you can do)
Closer to 40k and you can do in house metal custom abutments.
Over 40k you can mill roundhouse bridges and you are as much a labtech as a dentist.
The trickiest part of all this is the last step. Making sure the mill has the right cam to talk to design software. This can be a nightmare if you don’t do your homework.
So, with the Medit iOS you can mill to any machine. You can even take it to cerec inlab software and Jump through a lot of hoops to mill with CEREC chair side milling machine. Not worth the headache!
The CEREC chairside mill remains the fastest carver of emax restorations, but it can come at a cost – you need to bulk out the margins so they don’t break off at mill.
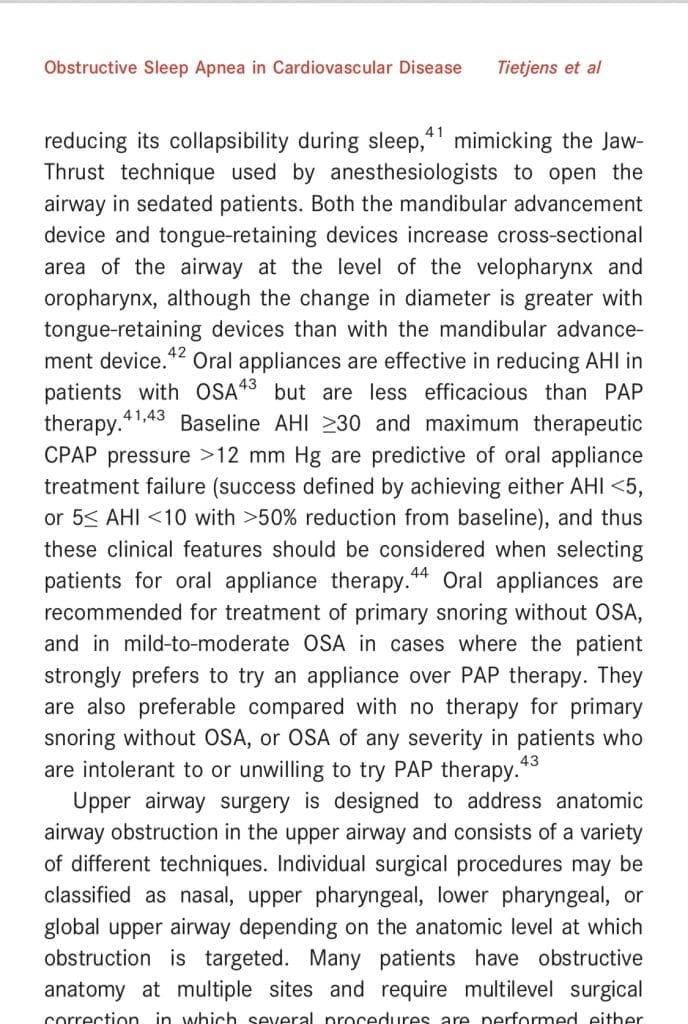
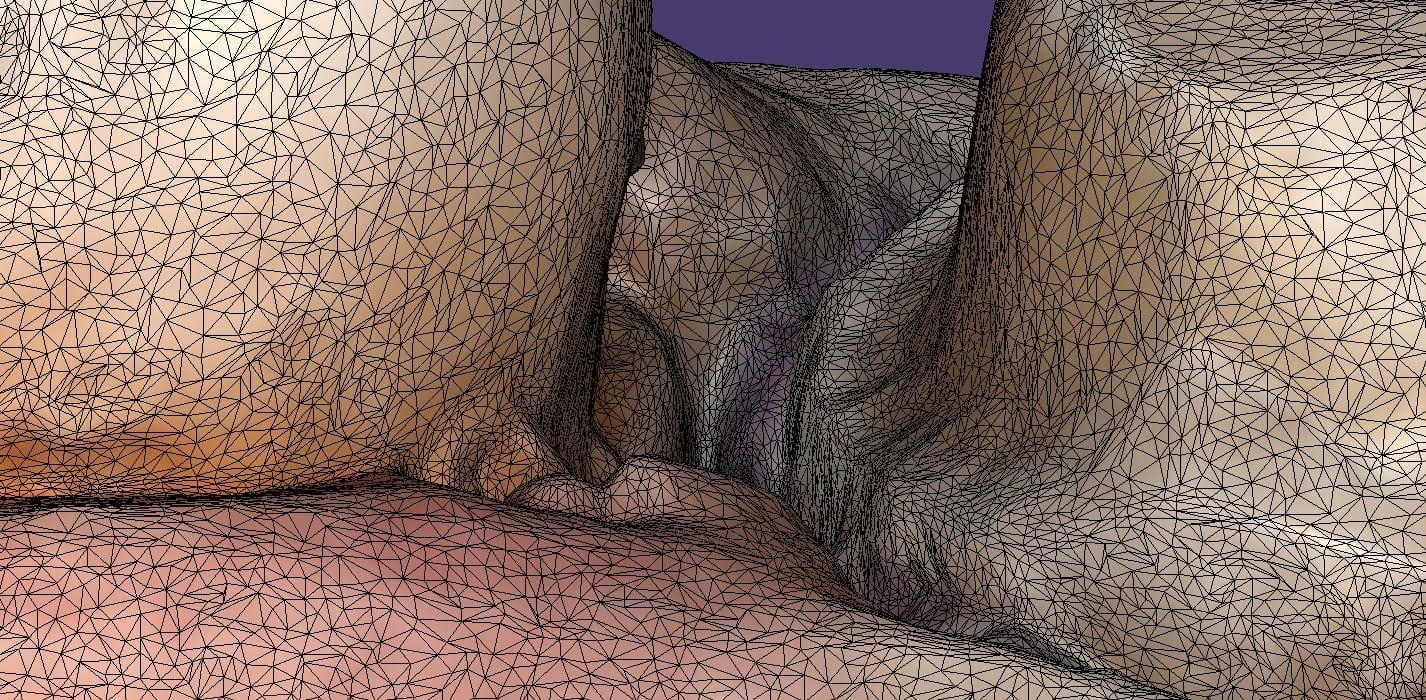
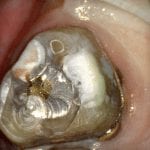
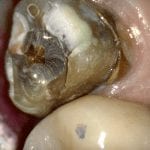
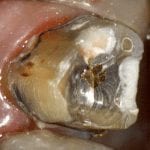
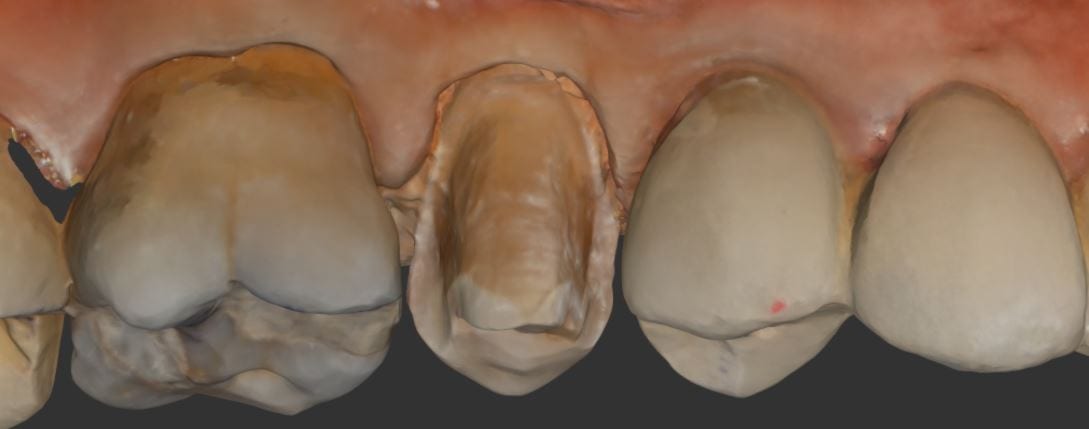
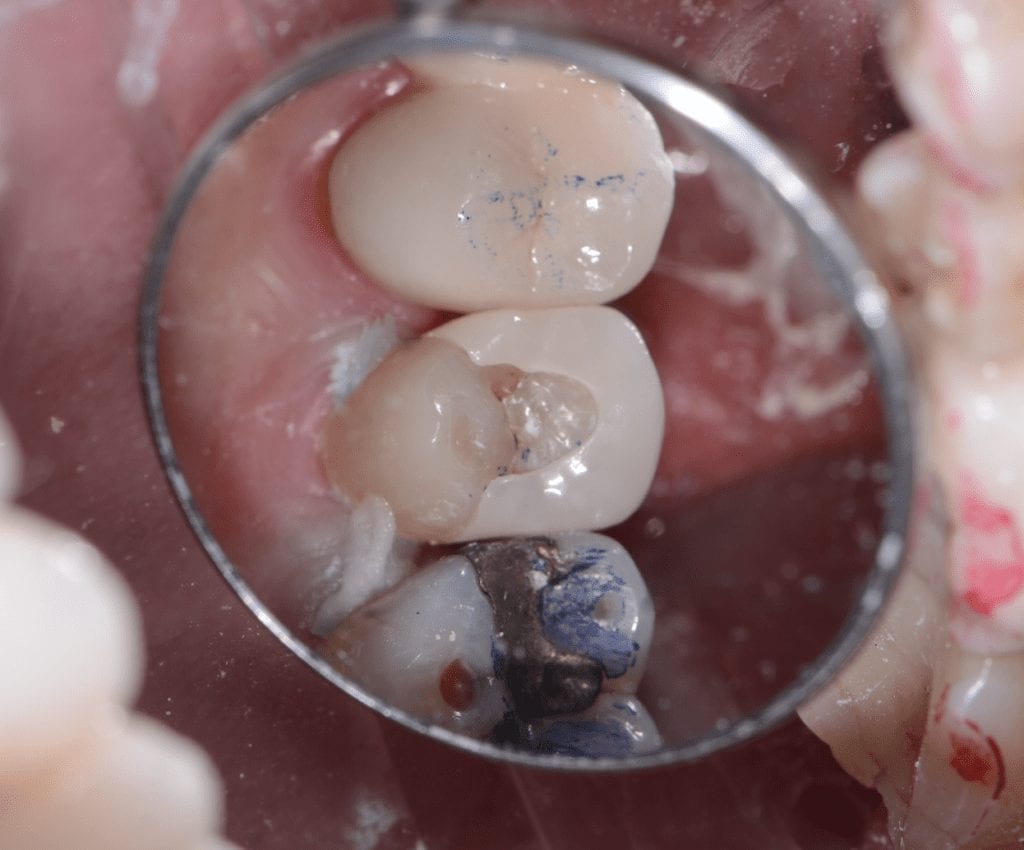
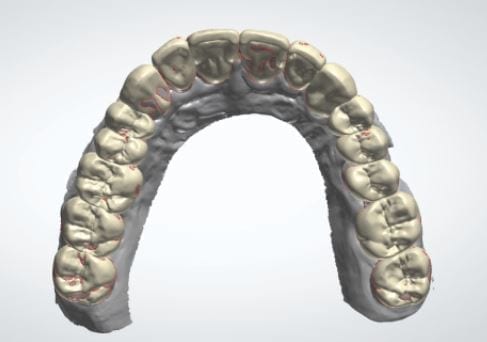
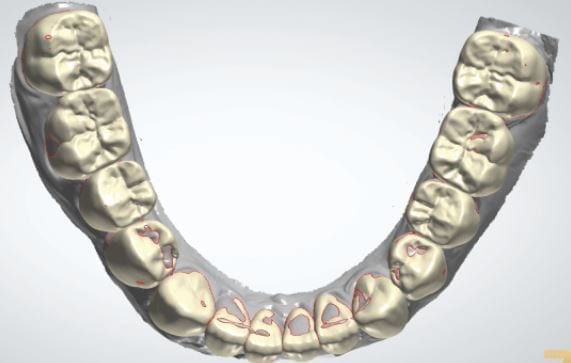
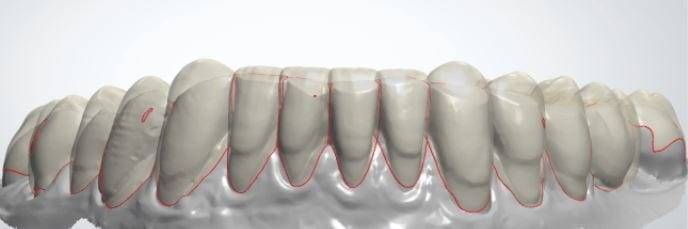
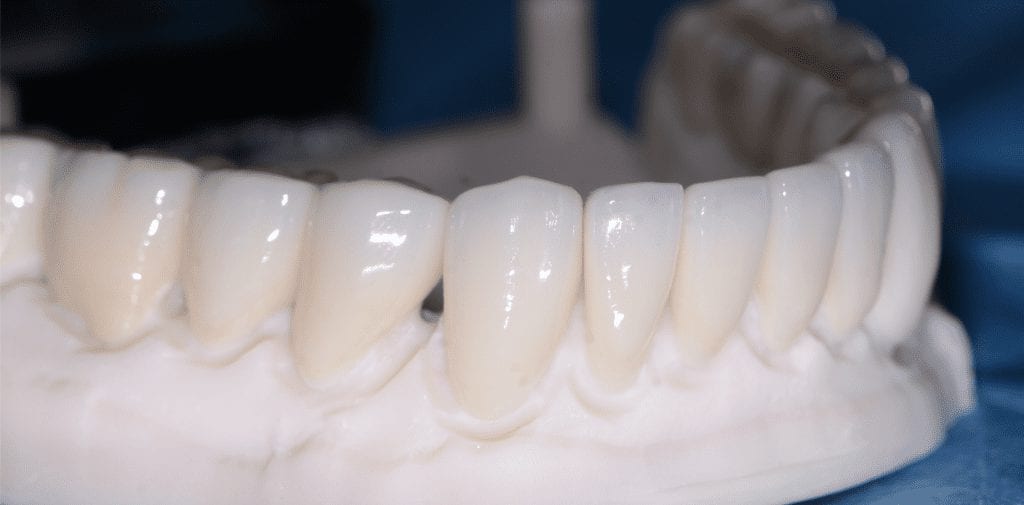
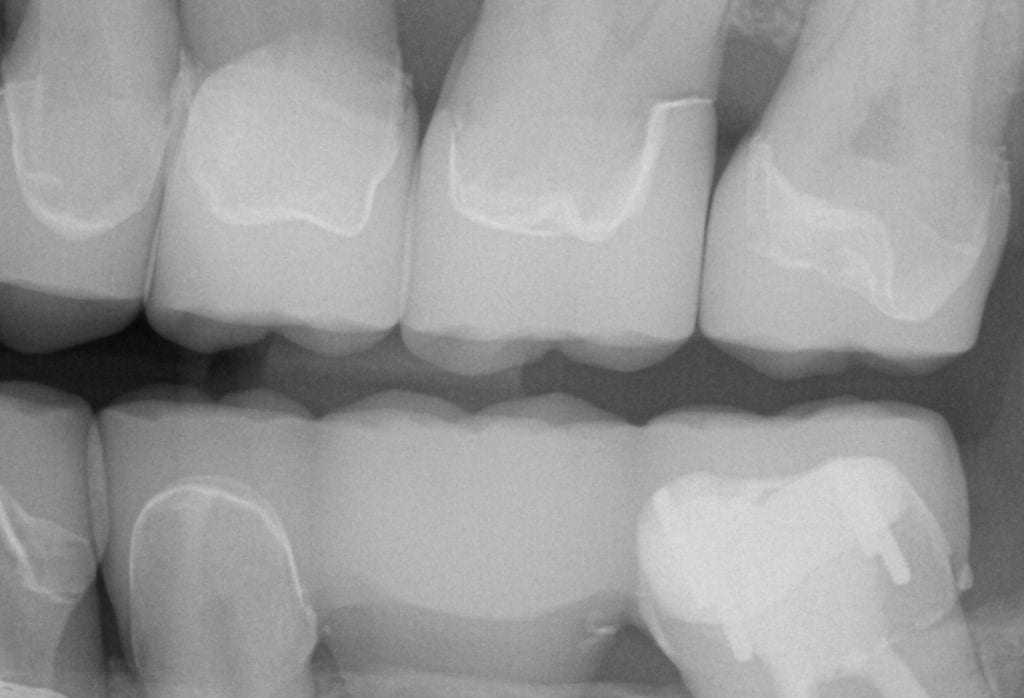
It was a long struggle to find margins with the Omnicam and after 4 years it was sold. The margin definition and resolution never reached an acceptable level. After seeing margins from high resolution scans by the Medit and defining them in exocad, it completely validated that we shouldn’t settle for anything less than the highest standard. This is an scan performed on a upper second molar with tough access, replacing a failing crown.
This article demonstrate how a case be set up while the patient is being anesthetized. While waiting for it to take effect, your team can scan the opposing arch, the arch to be prepared, and even the buccal bite. You can see how that is set up in first video. Notice how we crop out the tooth to be prepared so that the software doesn’t get confused between the preop and prep stages.
[videopress ZvGLVAM6 permalink=”false” hd=”true”]
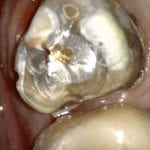
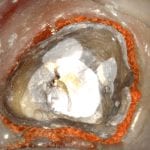
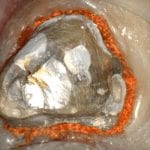
Once the tooth is prepared, the premolar is imaged back into the arch form in high resolution mode. This mode comes in handy for picking up the enamel that is exposed at the cavosurface margins. Some intra-oral imaging systems struggle with picking up the detail in these situations.
You can see how clearly discernible the margins are in this preview. Feel free to download the case data at the end of the article. Please note that areas that are not critical for the restoration design were essentially ignore as they play no significant role in the desired outcome.
To see this case presented in webinar fashion click on the image and enter the members area for much greater detail and information
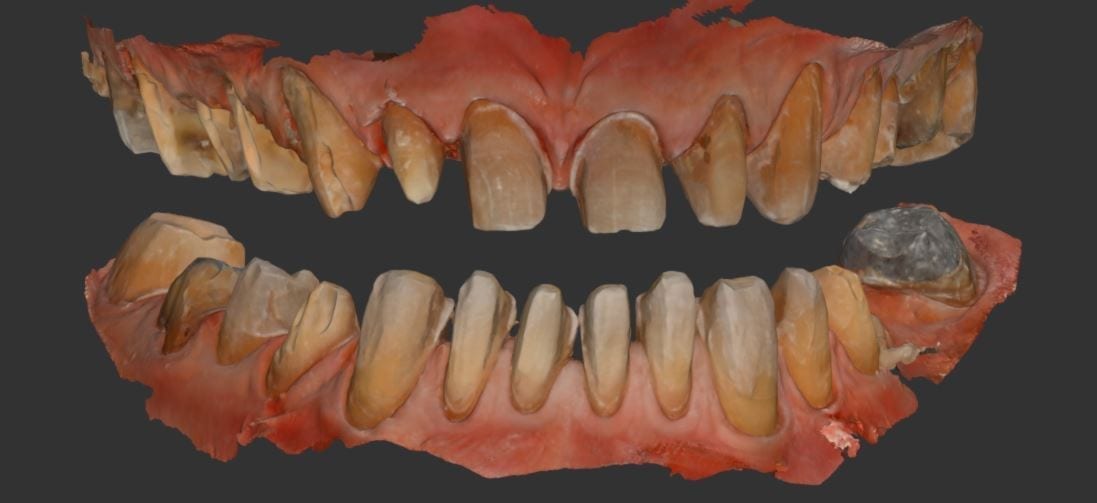
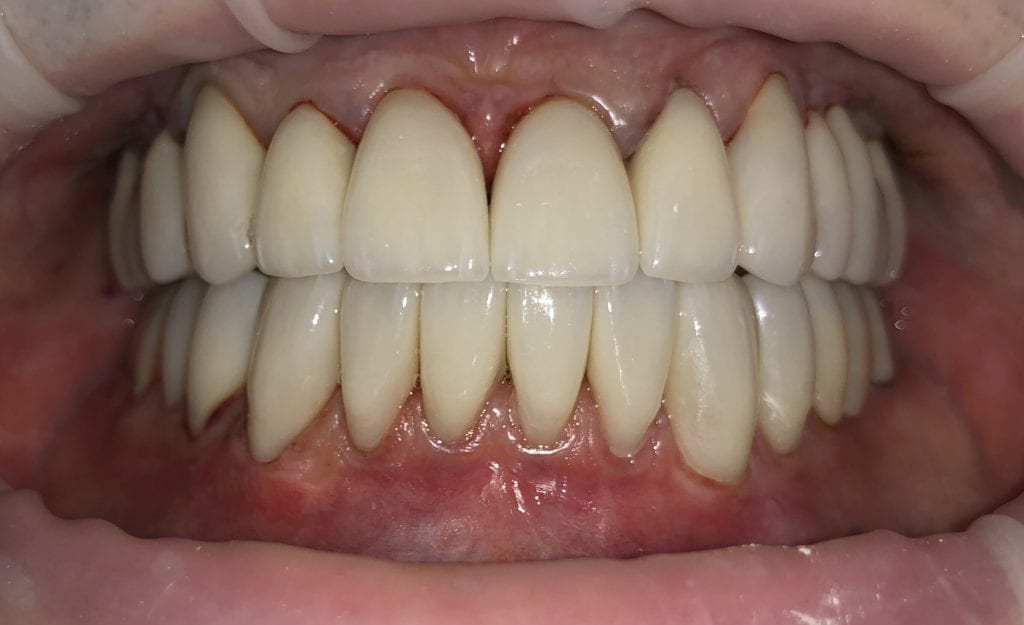
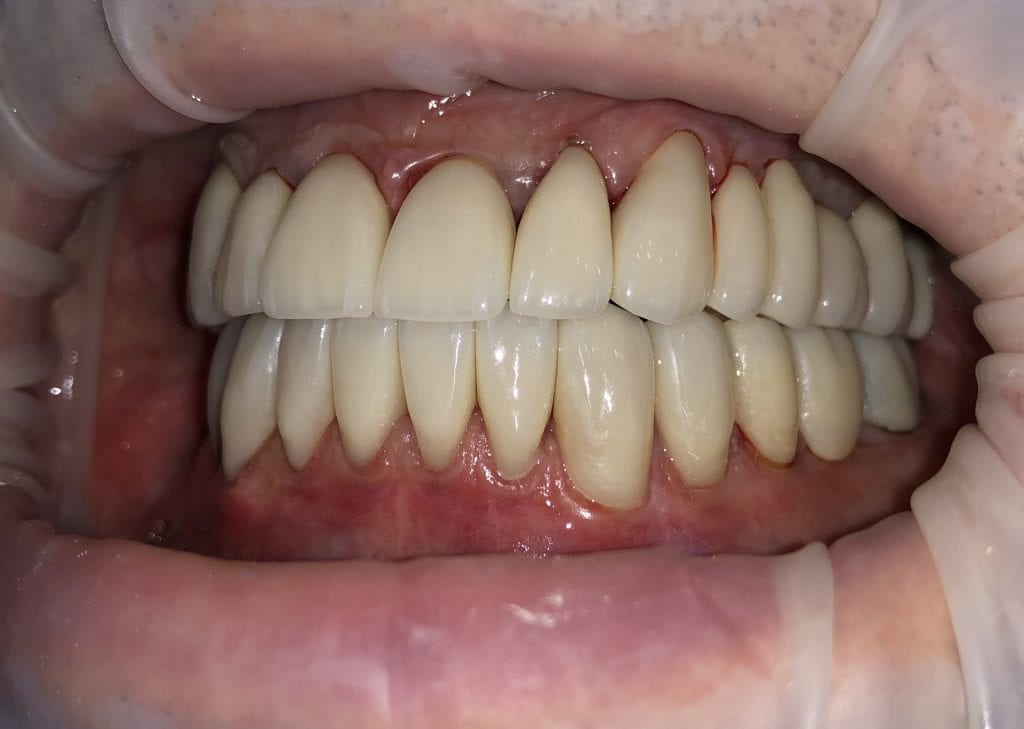
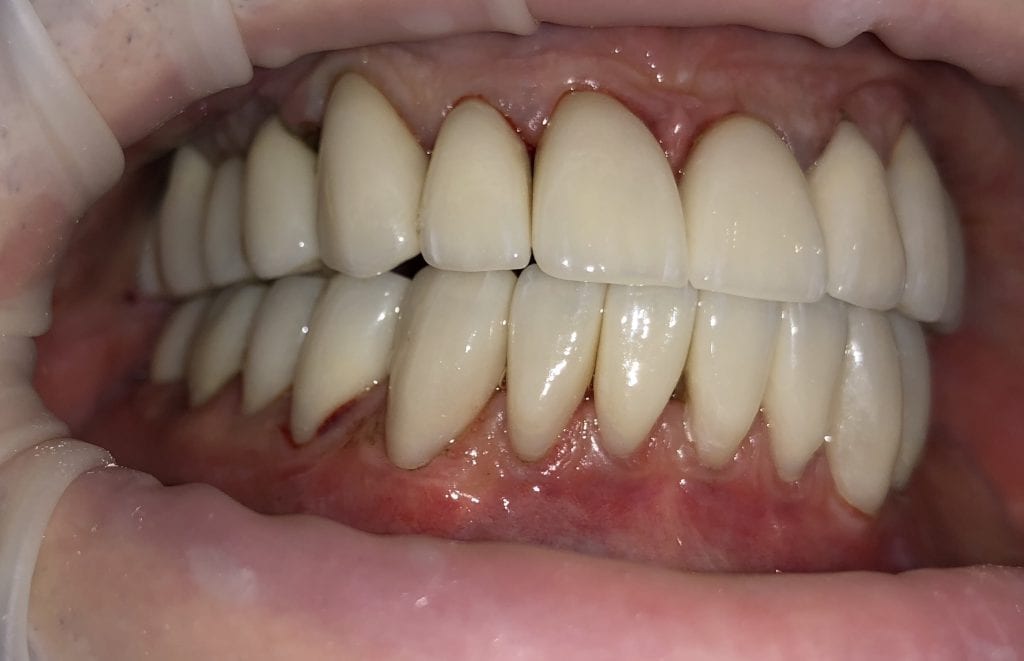
Pre-existing restorations that warranted replacement with an increase in vertical dimension.
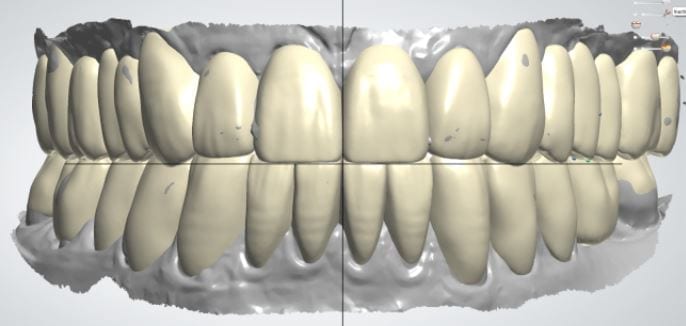
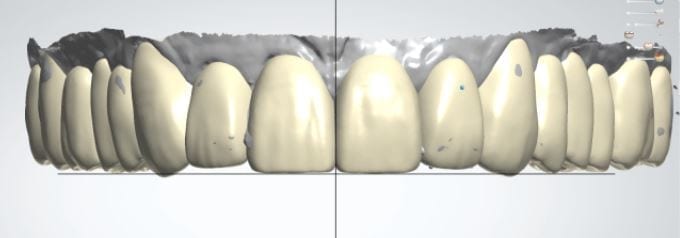
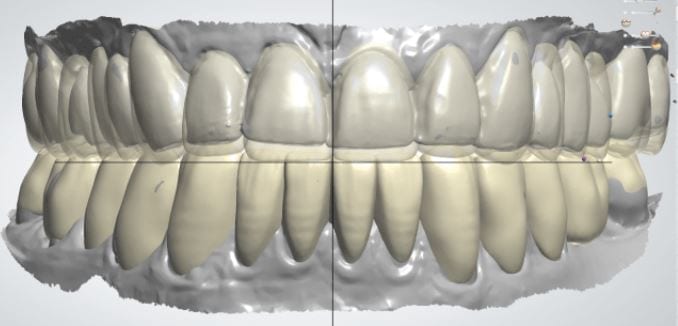
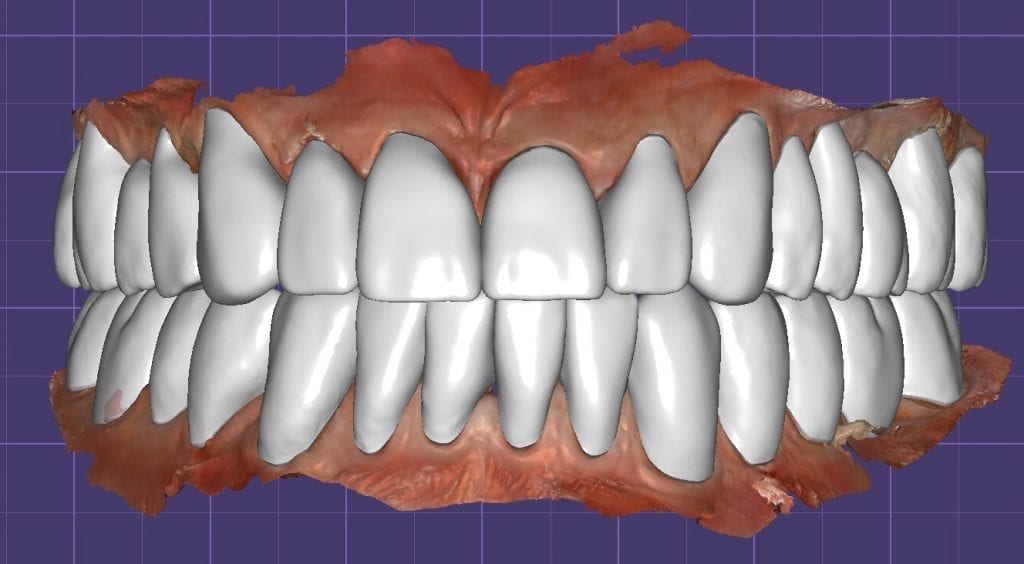
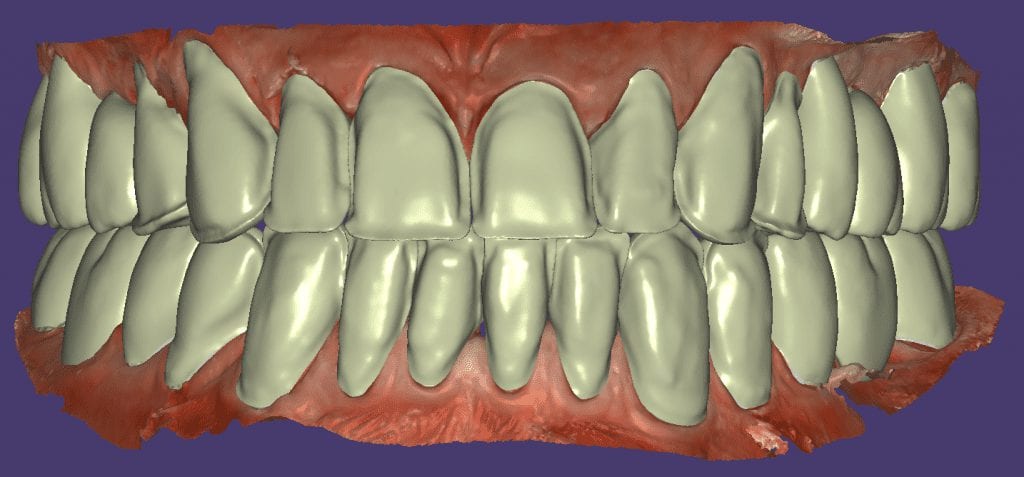
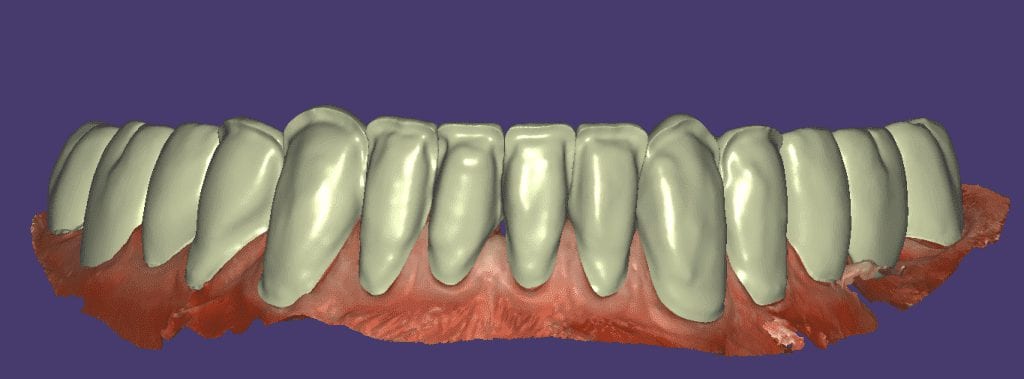
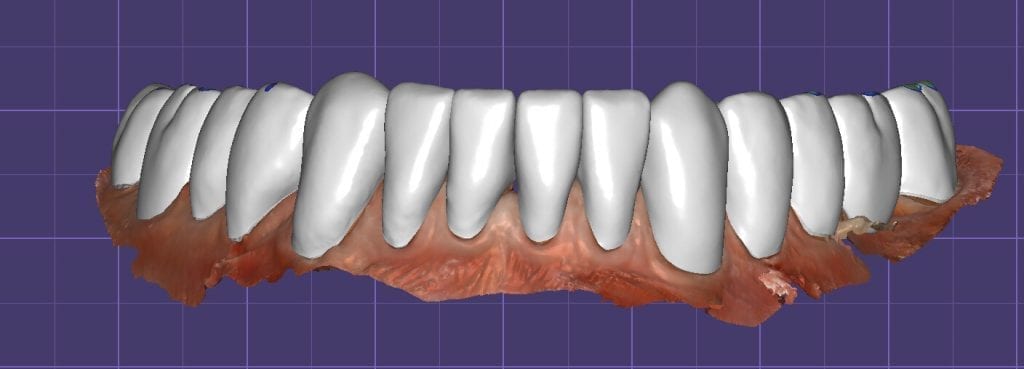
Pre-existing restorations that warranted replacement with an increase in vertical dimension. The upper and lower arch were captured with the medit I500 and articulated together with enough clearance to accommodate new restorations and to restore the patient to an ideal tooth position.
This video shows how the vertical dimension was captured with cotton rolls blocking out the tongue and the dark oro-pharynx, which usually spell trouble for an IOS
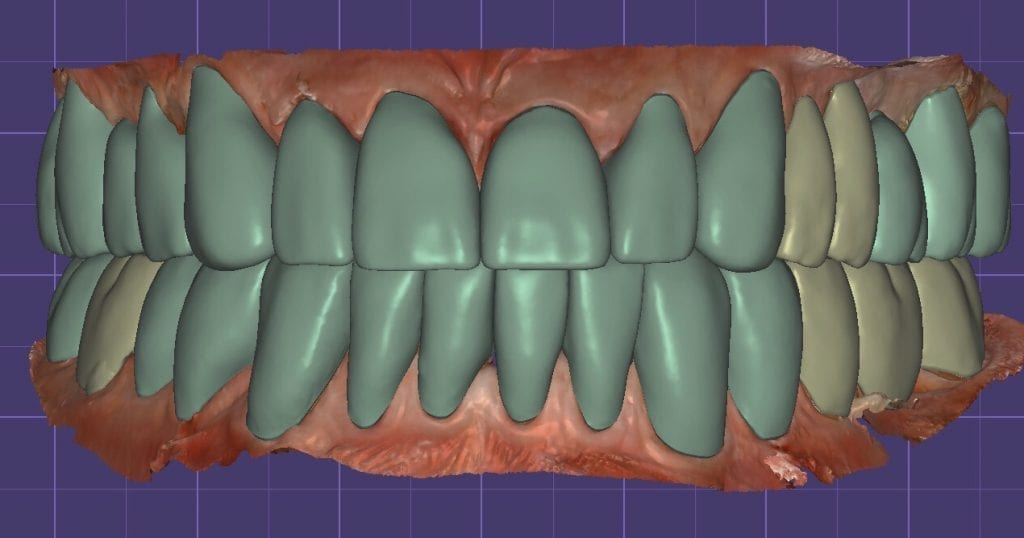
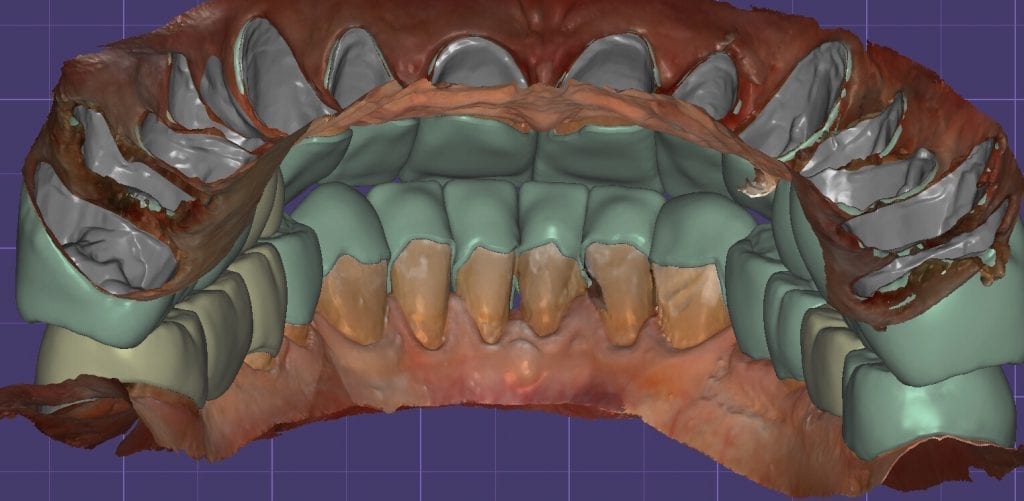
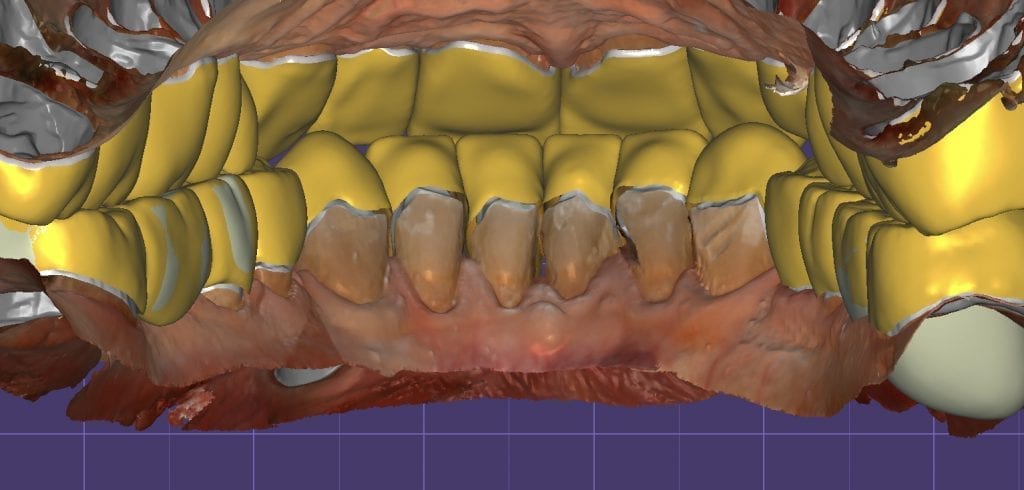
The digital models were then imported into a third party software where a library of tooth morphologies are available for the clinician to choose from.
Once the appropriate library is chosen, the digital wax ups are performed. In the subsequent photos you can see the transparent overlay of the wax-ups to the original position of the existing dentition
Once the case is designed to the ideal vertical dimension then multiple shells can be fabricated for treatment. The wax up model can be uniformly reduced by .5mmm’s circumferentially and a temporary shell can be designed. Once the teeth are prepared, these shells can be relined and seated onto the preps.
FIRST VERTICAL DIMENSION
The initial vertical dimension was greater than desired and the tooth shape was too bulky in appearance.
[videopress C0MfqBiS]
ADJUSTED TEMPORARIES AND NEW VERTICAL DIMENSION
Over the course of a few appointments, the vertical dimension was reduced and the temporaries were adjusted to the patient’s desires. The new upper and lower arch were captured with the Medit i500 and the jaws were related to each other.
This was then imported into exocad where the prepped arches from a few weeks prior were force matched to the new bite
[videopress Zj7XsYG4]
After the upper jaw was related to the temps, the same was done with the lower arch. Great care was taken to make sure the arches were properly related to each other throughout the process
[videopress ObPk1CAK]
CASE DESIGNS
The case was designed by CADENT BESSA, and the models were printed by Burbank Dental Lab with Carbon Printers. There restorations were milled and cut back and layered by Burbank Dental Lab
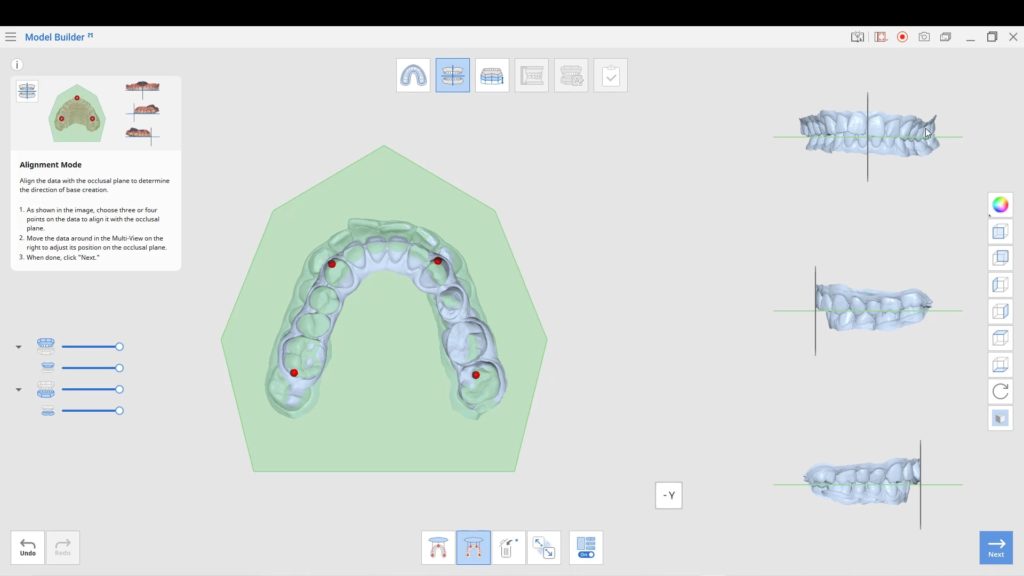
Medit Orthodontic Simulation application allows you to segment out individual teeth from patient scans into an stl format that you can use as a template for smile design wax-ups. You...
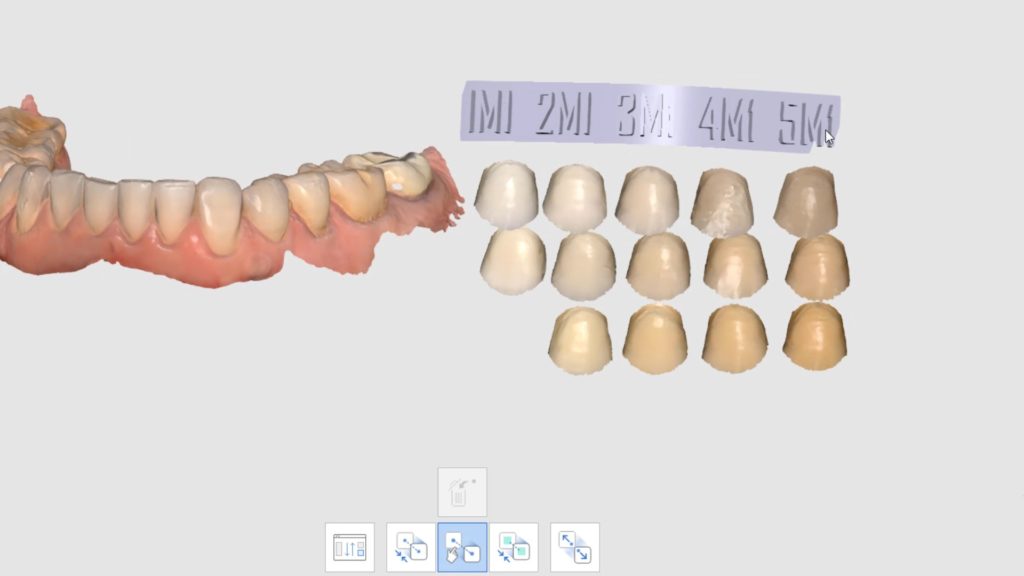
We’ve digitized the Vita 3D shade guide to help with color identification. The same Medit scanner was used to scan the tabs and then this digital file was created. the...
The following information is from the The American Board of Orthodontics. We preview how the Medit Ortho Simulation and Model Builder can satisfy their criteria...
Medit has many free applications, including Smile Analysis, Orthodontic Simulation, and now, Medit Model Builder Adding bases has been a feature for a while but as usual, Medit was quick...


You must be logged in to post a comment.