


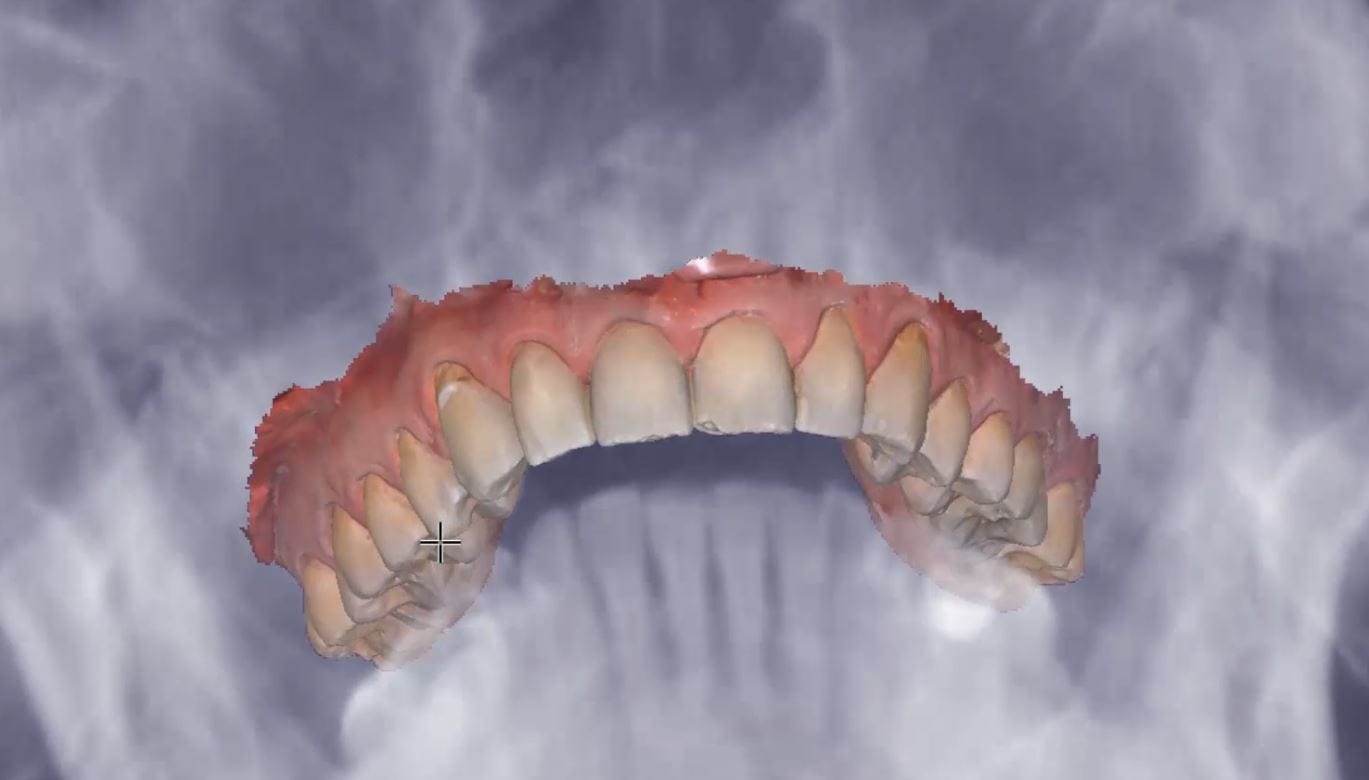
This is the occlusal appliance that was milled and delivered from this patient’s scan approximately 7 days ago. The appliance did not need a single adjustment neither on the occlusal surface, nor in the intaglio.
This is the occlusal appliance that was milled and delivered from this patient’s scan approximately 7 days ago. The appliance did not need a single adjustment neither on the occlusal surface, nor in the intaglio.

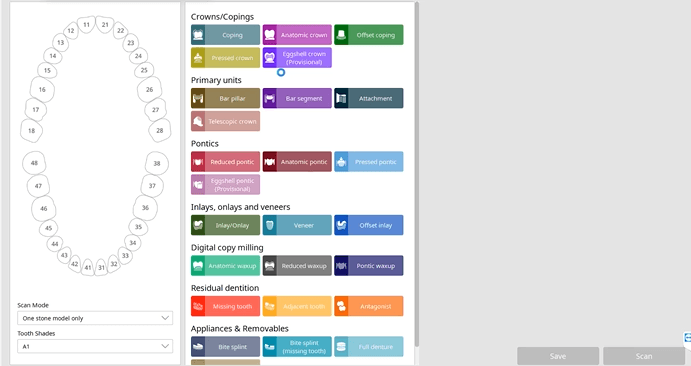
Case Set Up
In this video we showcase the set up page of the Medit i500 Lab Version for software version 2.1, where you define the job description, enter parameters, designate the opposing and proceed to the next step where you launch the imaging software.
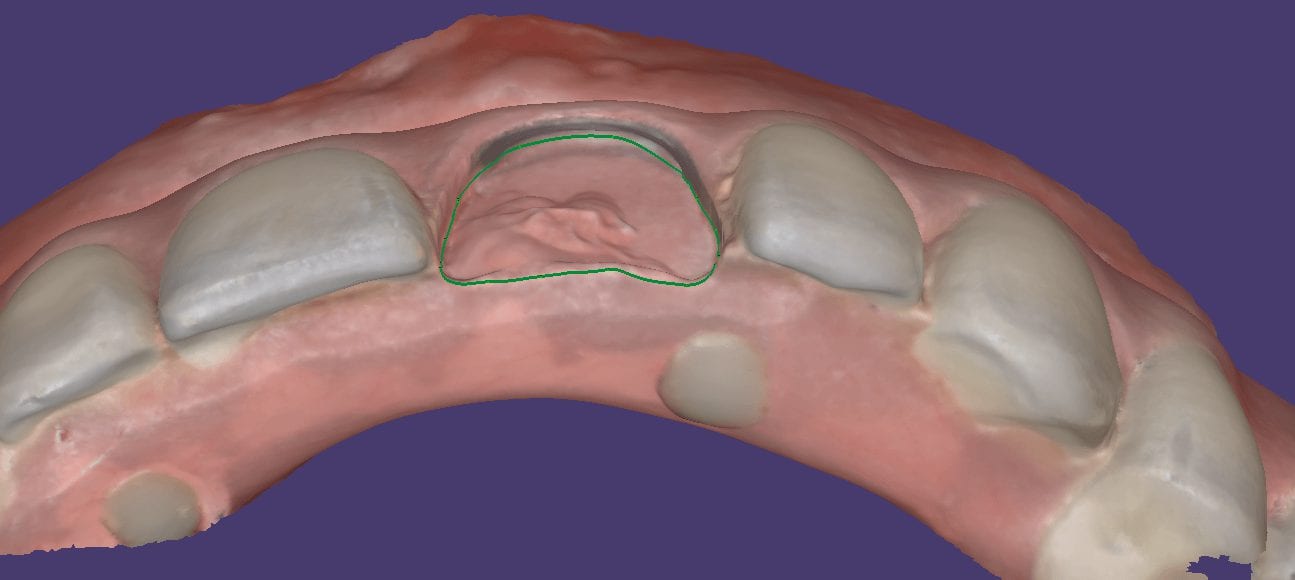
Pre-Op Documentation for Full Cuspal Coverage
This footage was taken to document the undermined cusps and the justification for full cuspal coverage
Captured Impressions While Patient Was Reaching Anesthesia
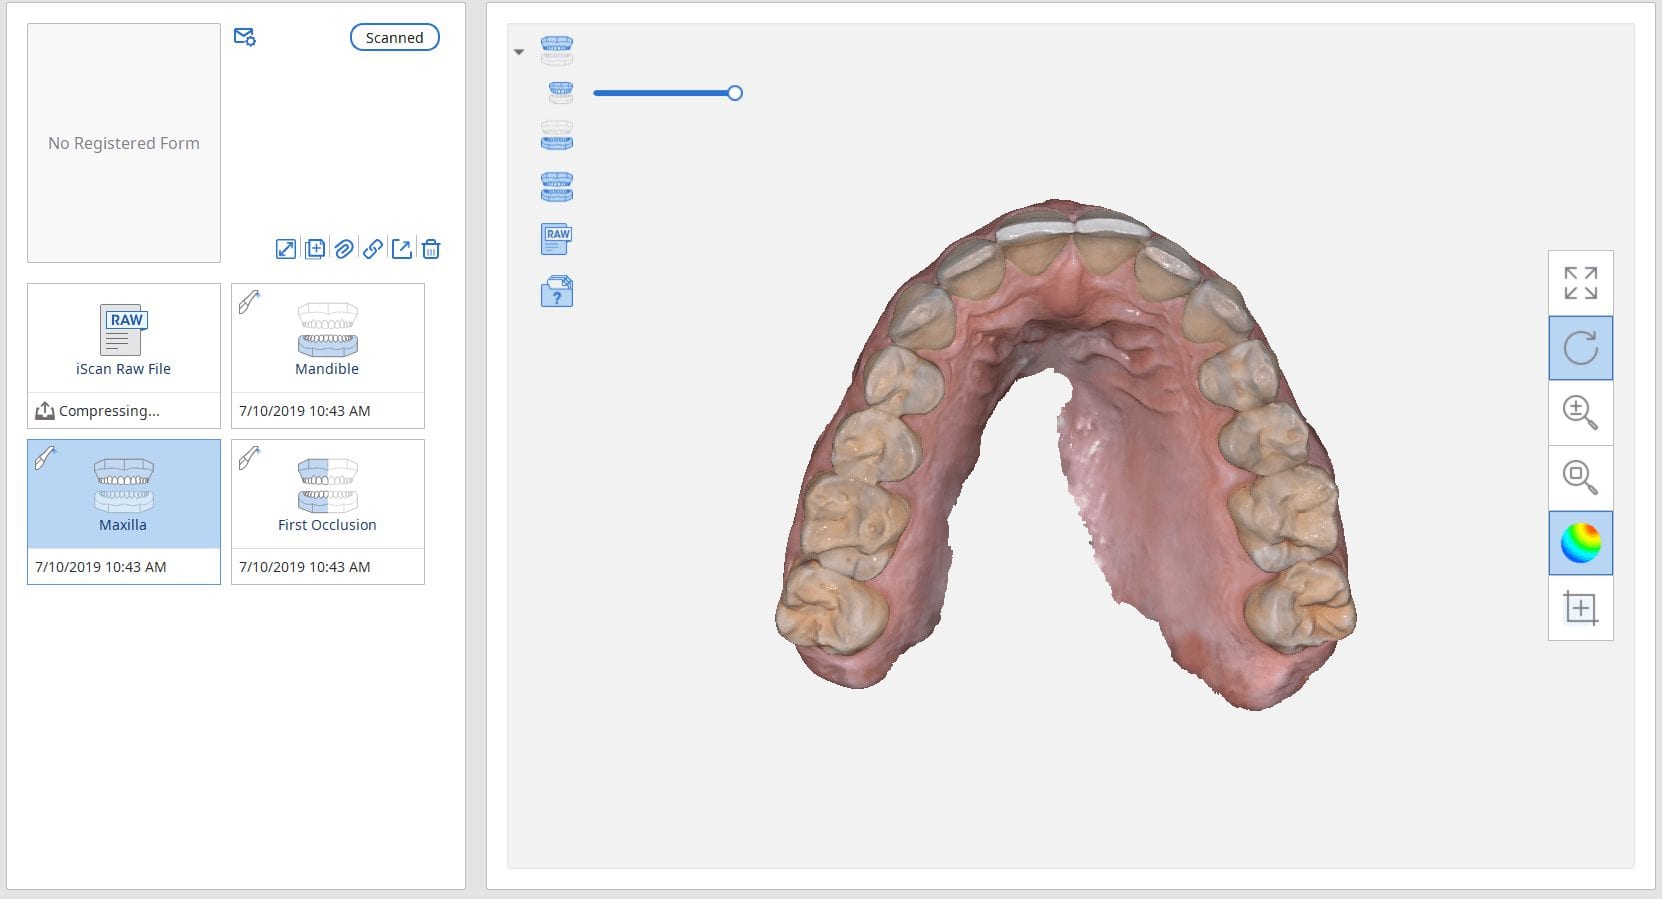
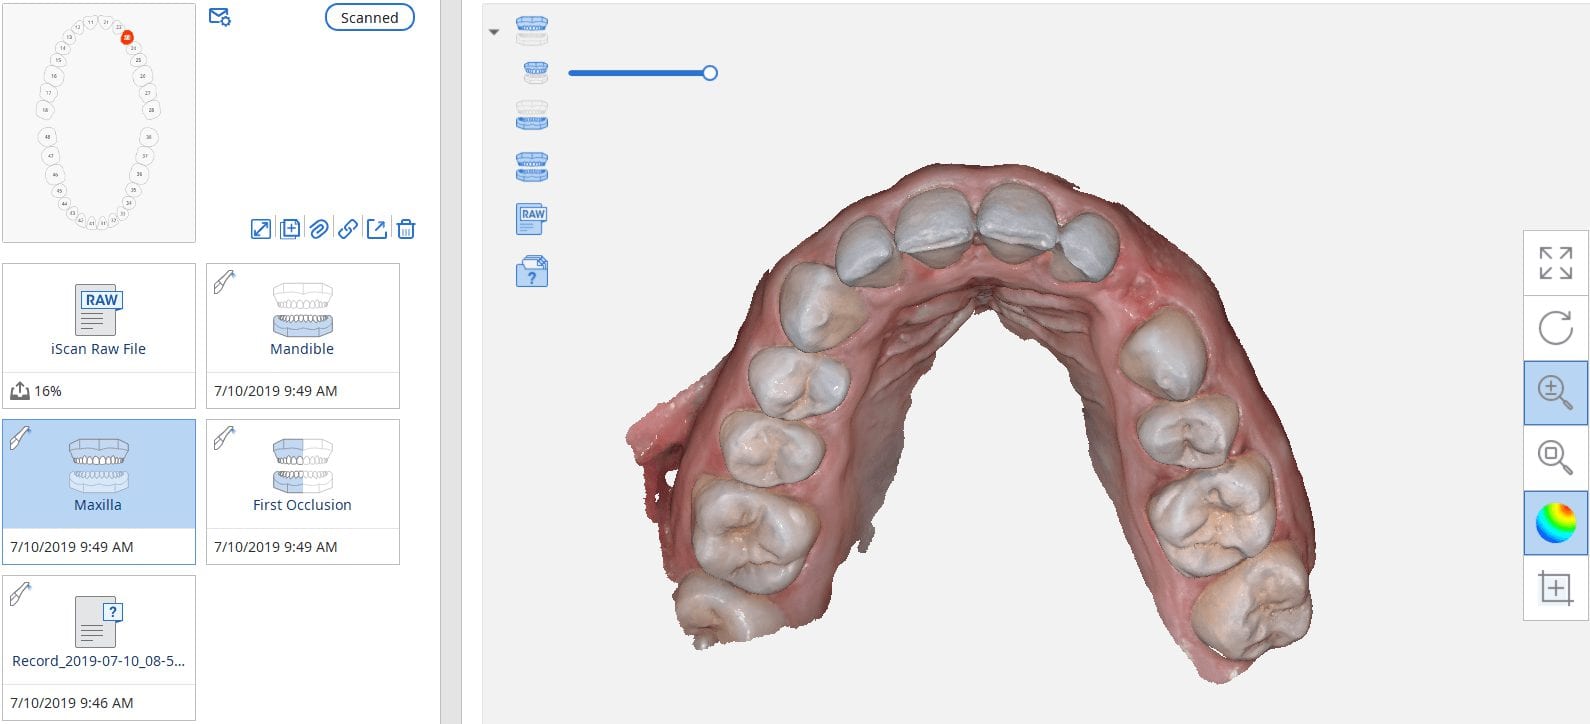
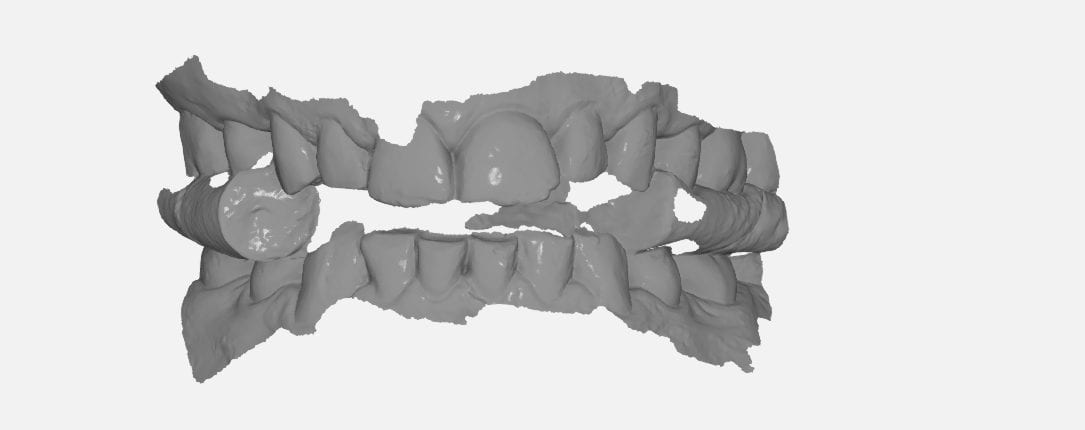
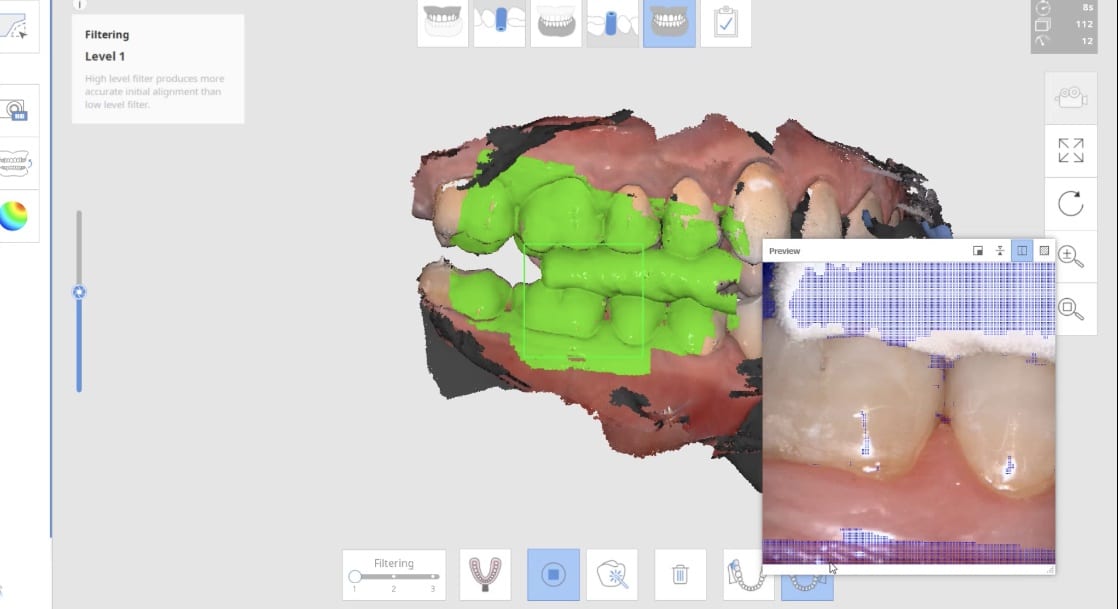
While the patient was reaching anesthesia, the opposing arch was captured along with the preparation model. The area to be prepared was cropped out and once enough reduction was achieved the bite was captured. We highly recommend that you verify reduction and adequate clearance before you capture the final preparation. This way, you have one last ditched effort to verified you will have adequate thickness to your restorative material.
Impression of Preparation after Reduction was Verified
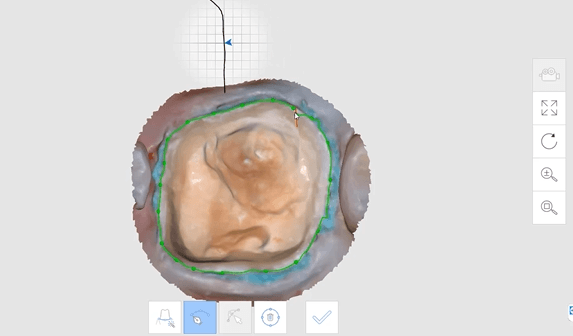
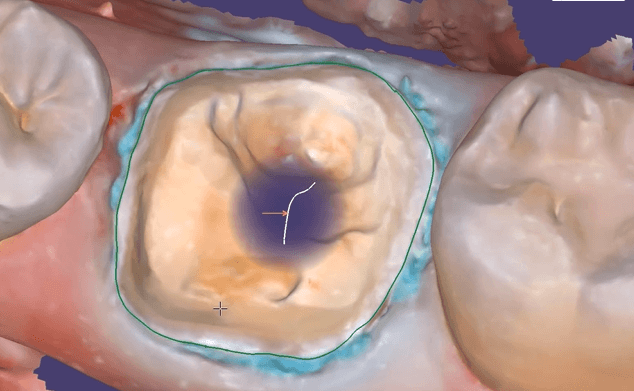
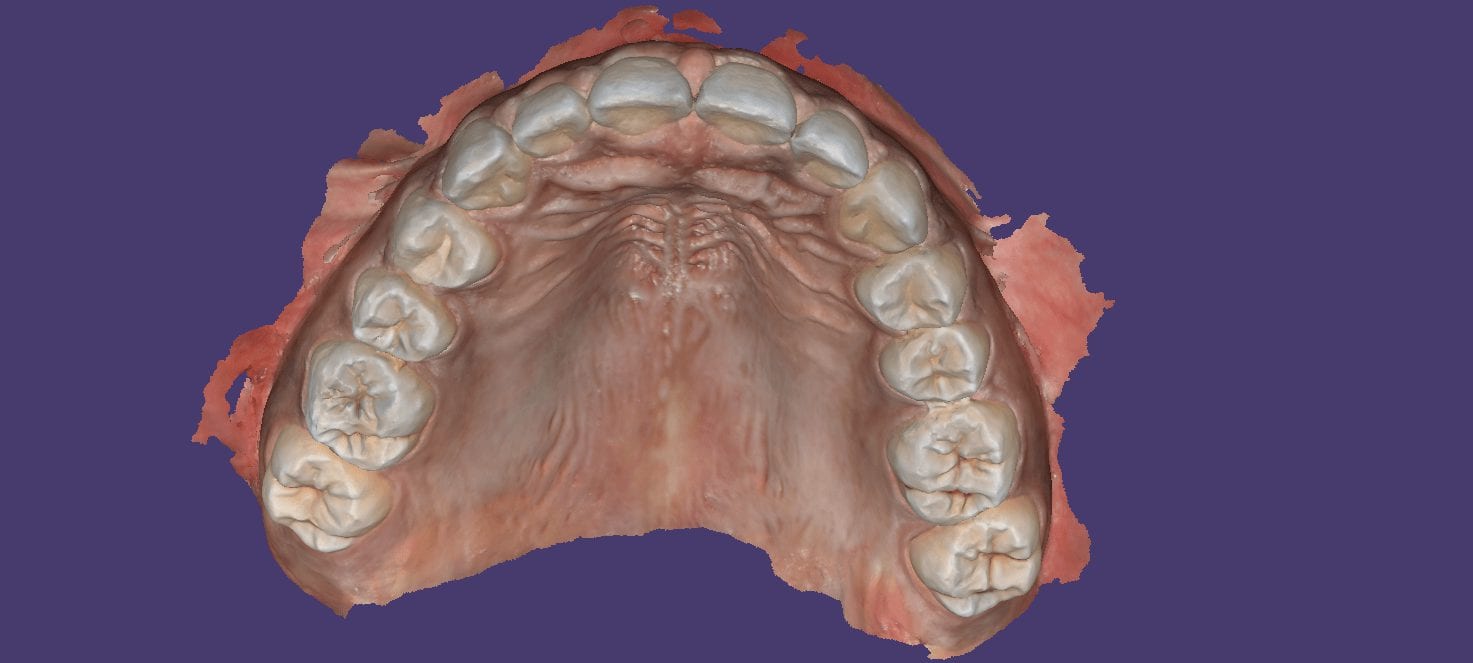
Margins Placed in Native Imaging Software
Separate Design in exocad
Post Op

One of the biggest challenges of capturing a bite for an occlusal appliance is to properly tripod the upper arch to the lower arch. With PVS impressions we just send the impressions along with the patient’s bite registration in maximum intercuspation.
A unique advantage we have with digital impressions is that we can capture someone with an open bite while using their own mouth as the articulator. Moreover, with the following technique, you can rest assured you have little adjustments to make to the occlusal guard after it has been fabricated.

Now as we continue to image in the same catalog box, we can gauge if we are on track as the bite model turns green. Notice how when we move from the upper arch to the lower arch, across an open bite, and we maintain a green active box and green model formation, we can rest assured that our case is mounted correctly.

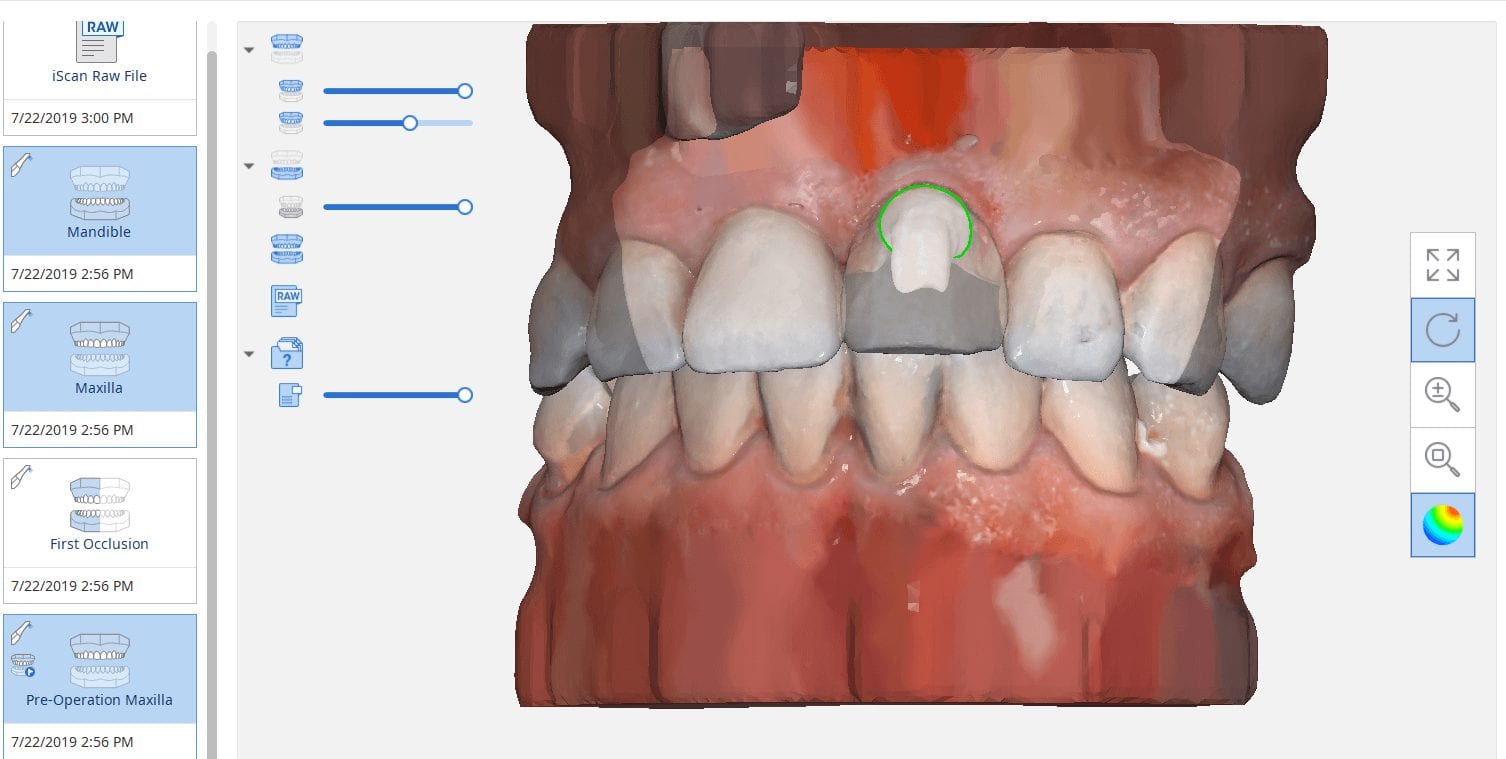
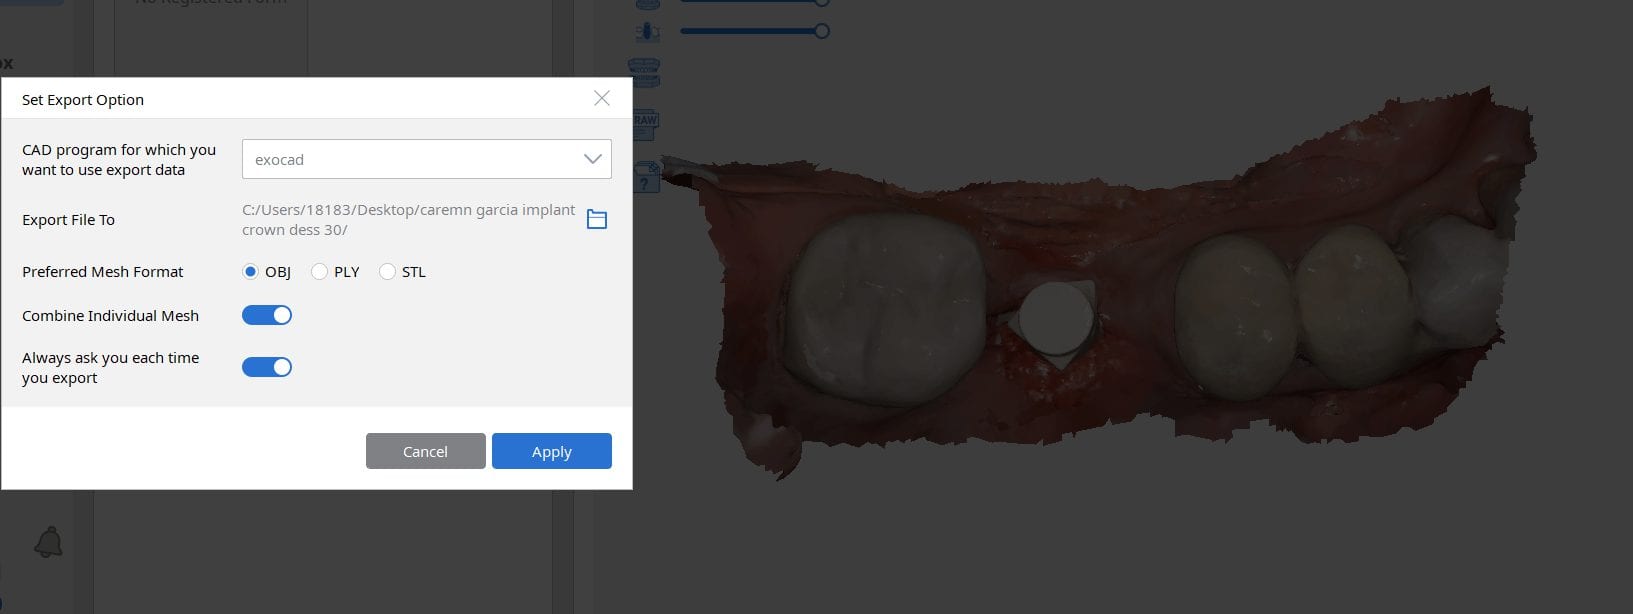
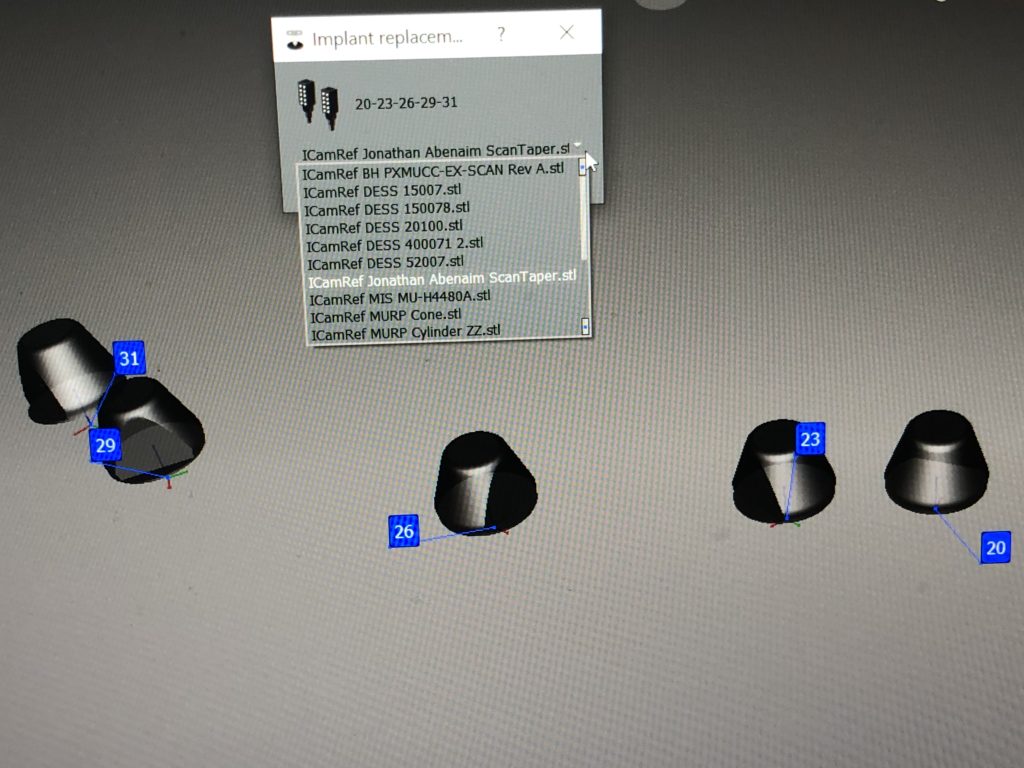
The new Medit i500 software will feature the ability to mark margins in the imaging step before you import the case into a CAD software or send it to the lab. In this article we showcase a case where a 12 year old implant crown needed replacement. The pre-op images were captured, along with the opposing and the bite.

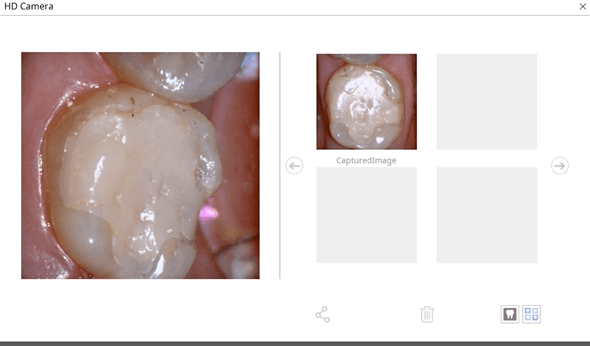
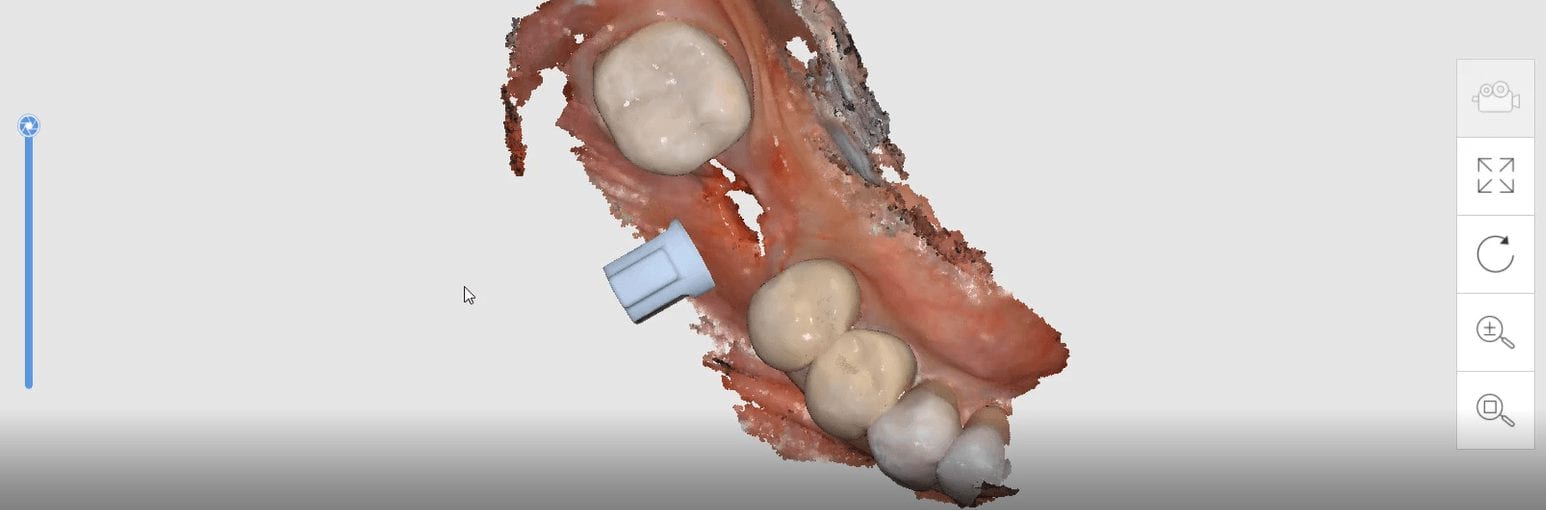
After the area was anesthetized and the crown was removed, expasyl was used to achieve hemostasis and tissue retraction. The margins of the abutment were imaged. Note how we used a feature in the Medit scanner to change the scan light from blue to white, which allows you to pick up red (blood and tissue) that is normally difficult to capture.
Once the margins were captured, we activated the margination tool. You highlight the area you want to address and the meshwork is calculated and processed locally, where you can then designate your margins that are exported to CAD software along with the jaw model, the opposing, the pre-op and the bite.
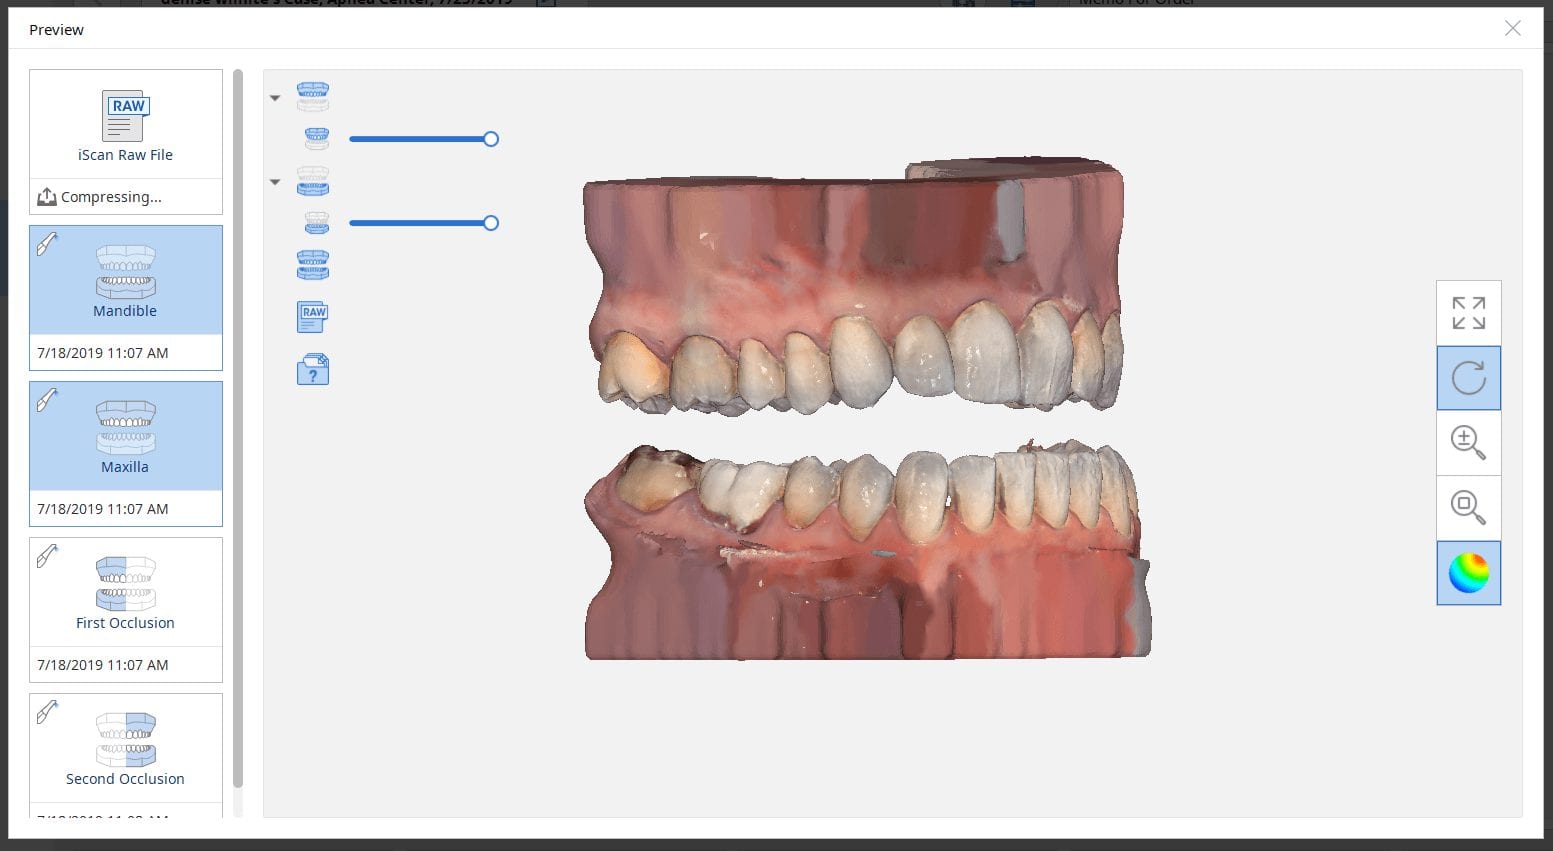
This is a preview of the models that you can export and send to a lab or take directly to design software for chairside milling.
Alternatively, the traditional way would be to not place the margins in the native Medit software and to place it in the CAD software itself. As you can see both options are very viable and you do not lose any resolution of the scanned data between the imaging program or the design software.


There are multiple ways one can capture the bite for a patient. In this clinical case, we focus on the easiest way to capture two bites (one in maximum intercuspation and the other in an opened vertical dimension and in protrusive for a sleep apnea oral appliance).
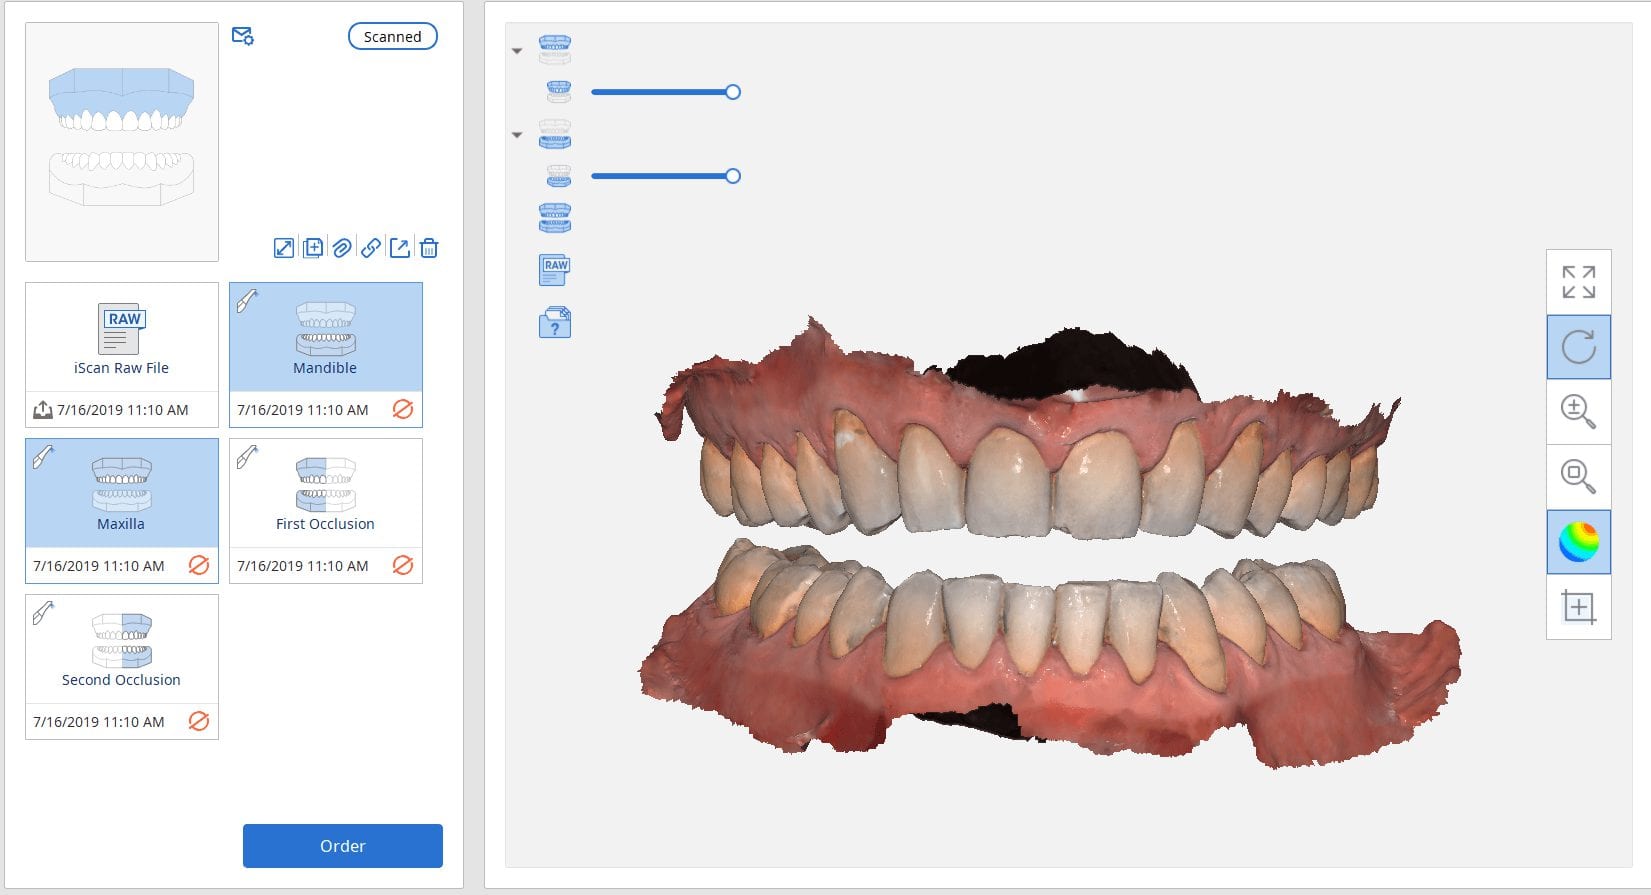
The Medit iScan software allows you to capture two bites. Most people treat them as “Left Bite” and “Right Bite”, but the software doesn’t care if you follow this guideline. You can capture full arch bites in maximum intercuspation in one catalog box and then capture a full arch bite in the open / protrusive position in the second bite.
The next step is to clone or duplicate the case, where you set the first desired bite and process the case manually in maximum intercuspation and then in the second cloned case, you manually set the bite to the different occlusal scheme. As our users advance in their experience and knowledge level, they clone the same case multiple times so that they don’t have to re-image the upper and lower jaws multiple times and just capture different bites in all the different case files.
Our super advanced users image multiple bites in any folder they want, process it, and use that digital model to related the jaws together to any position they want in a CAD software like exocad.


The Medit i500 intra-oral scanner has two different software programs to operate, one is of which is geared towards clinical dentistry and the other is geared towards laboratories. Our advanced users are encouraged to use the lab version as it has a lot more functionality. One of them is to directly link to exocad software.
In this particular preview we show you the interface where you can launch the iScan program and define the work order and set all the parameters for your restorations.
Once all the settings are chosen, you launch the Medit scanner and image the case. Here, we defined the custom abutment for the crown and the opposing, which activated the catalog box for the antagonist, the arch, the scanbody, and the buccal bite. All respective images were captured.
The models were then processed and exocad was launched for the design of the custom abutment and crown.
Once the implant type is identified then you can design the abutment and crown with great control, where you can contour the underbelly of the abutment to help provide tissue support.
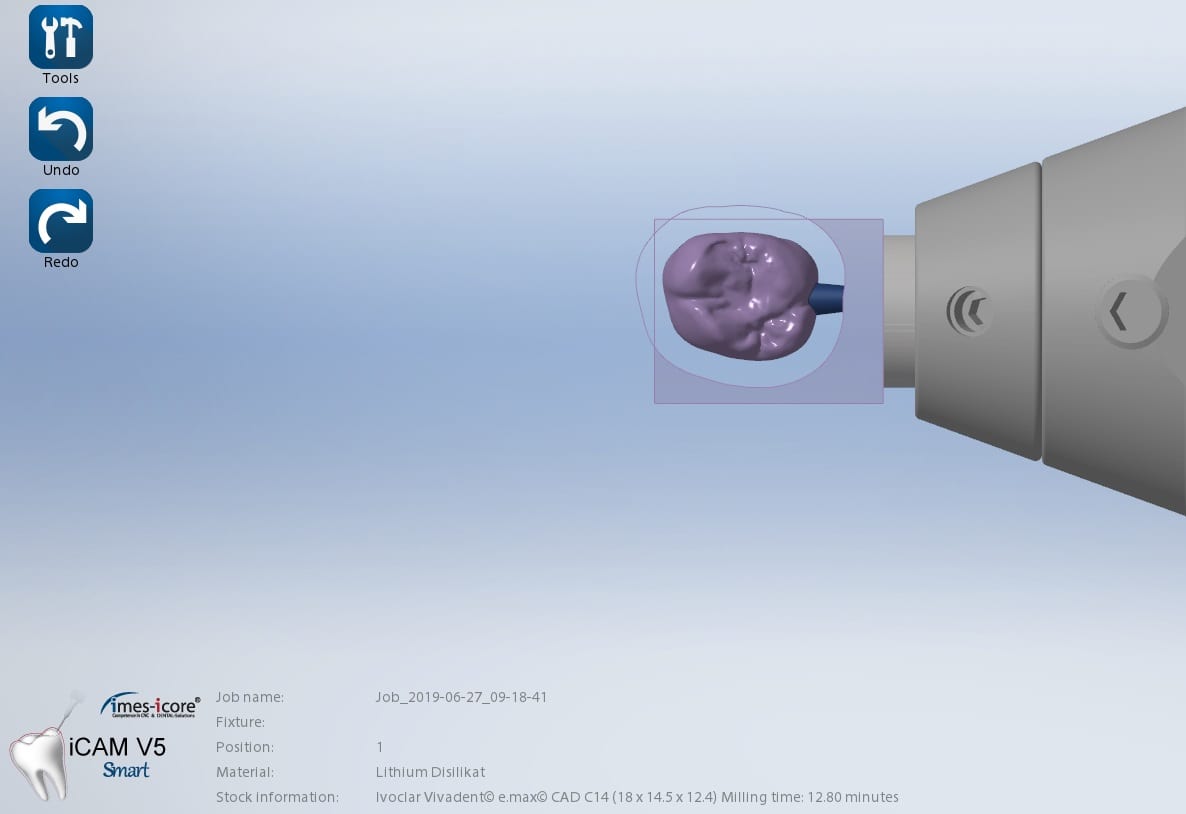
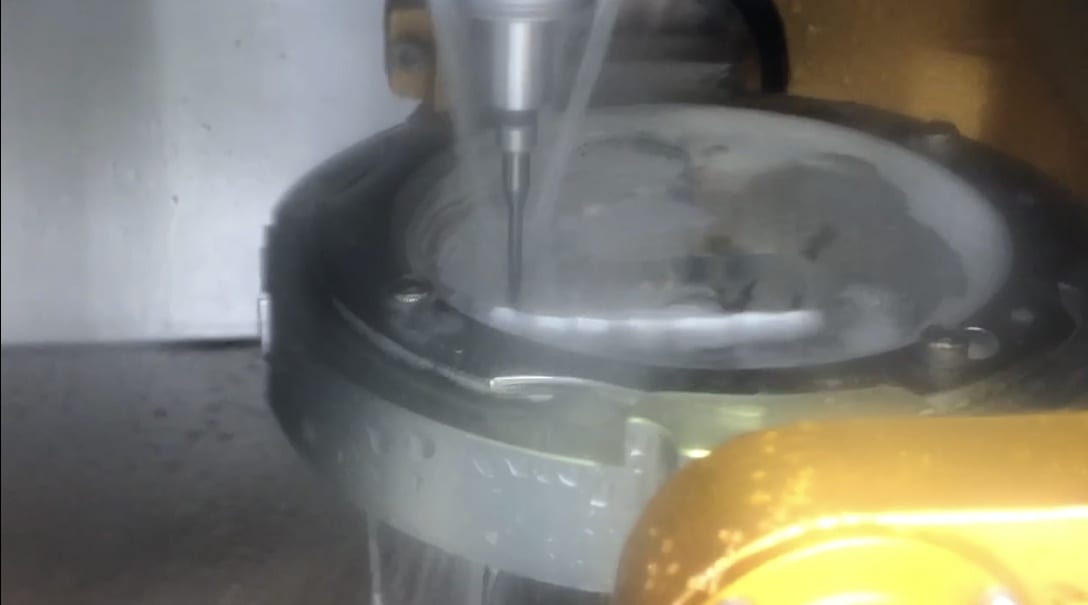
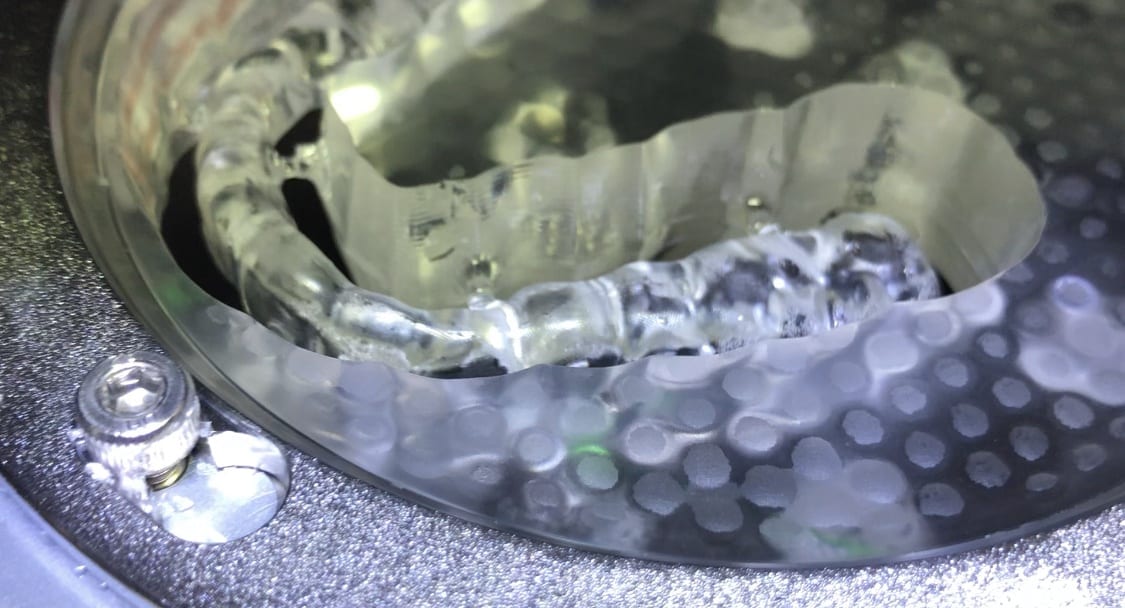
The design and the construction file is taken to the milling machine. Here, we used the CORiTEC ONE to mill the titanium abutment and then the Lithium Disilicate crown. You can see the great internal adaptation when the crown and the abutment are flipped around completely and the abutment does not fall out.

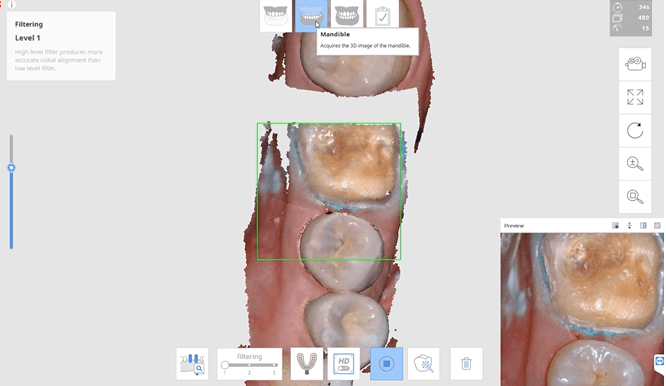
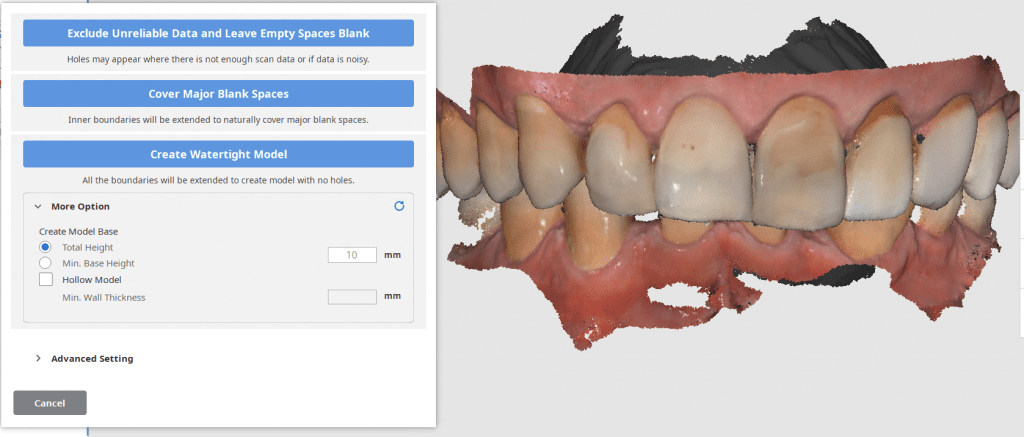
An exciting new feature in the Medit i500 v 2.1 is the ability to close holes in the model AND to create a base. For advanced users, this is not of great significance but for most new users, and particularly for labs new to digital, the option allows us to immediately send the case to a printer.
Most users like to fabricate the models and then restoration and verify the fit and the contacts after all the polishing and glazing is processed. There are lots choices for the height of the base and to make it hollow to save on the amount of resin it takes to fabricate the case.
Requests for adding support pins have already been submitted and are forthcoming.
Once the current dentition is digitized you can take it to any CAD software and design the case to your liking and fabricate temporary shells or even print/mill the model to make suck down stents or siltech matrix putties to adapt the new smile to the current dentition.

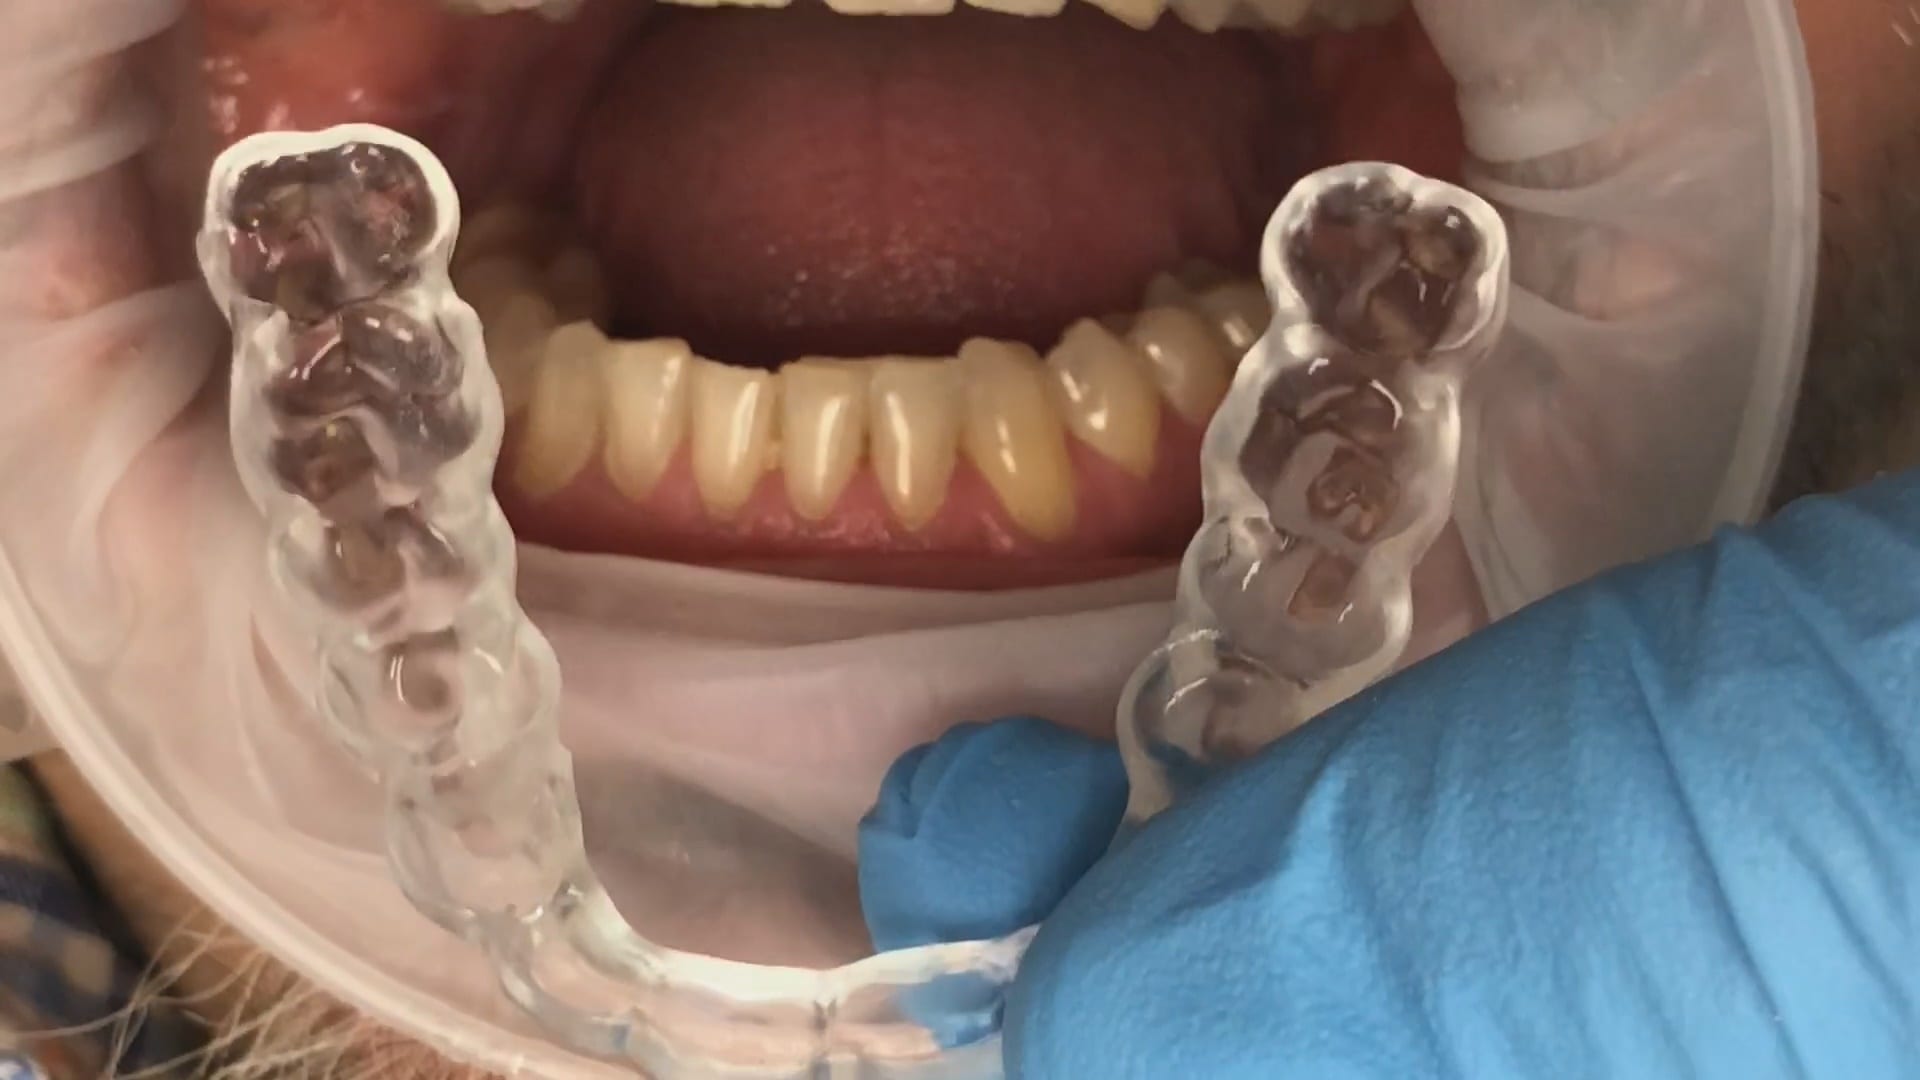
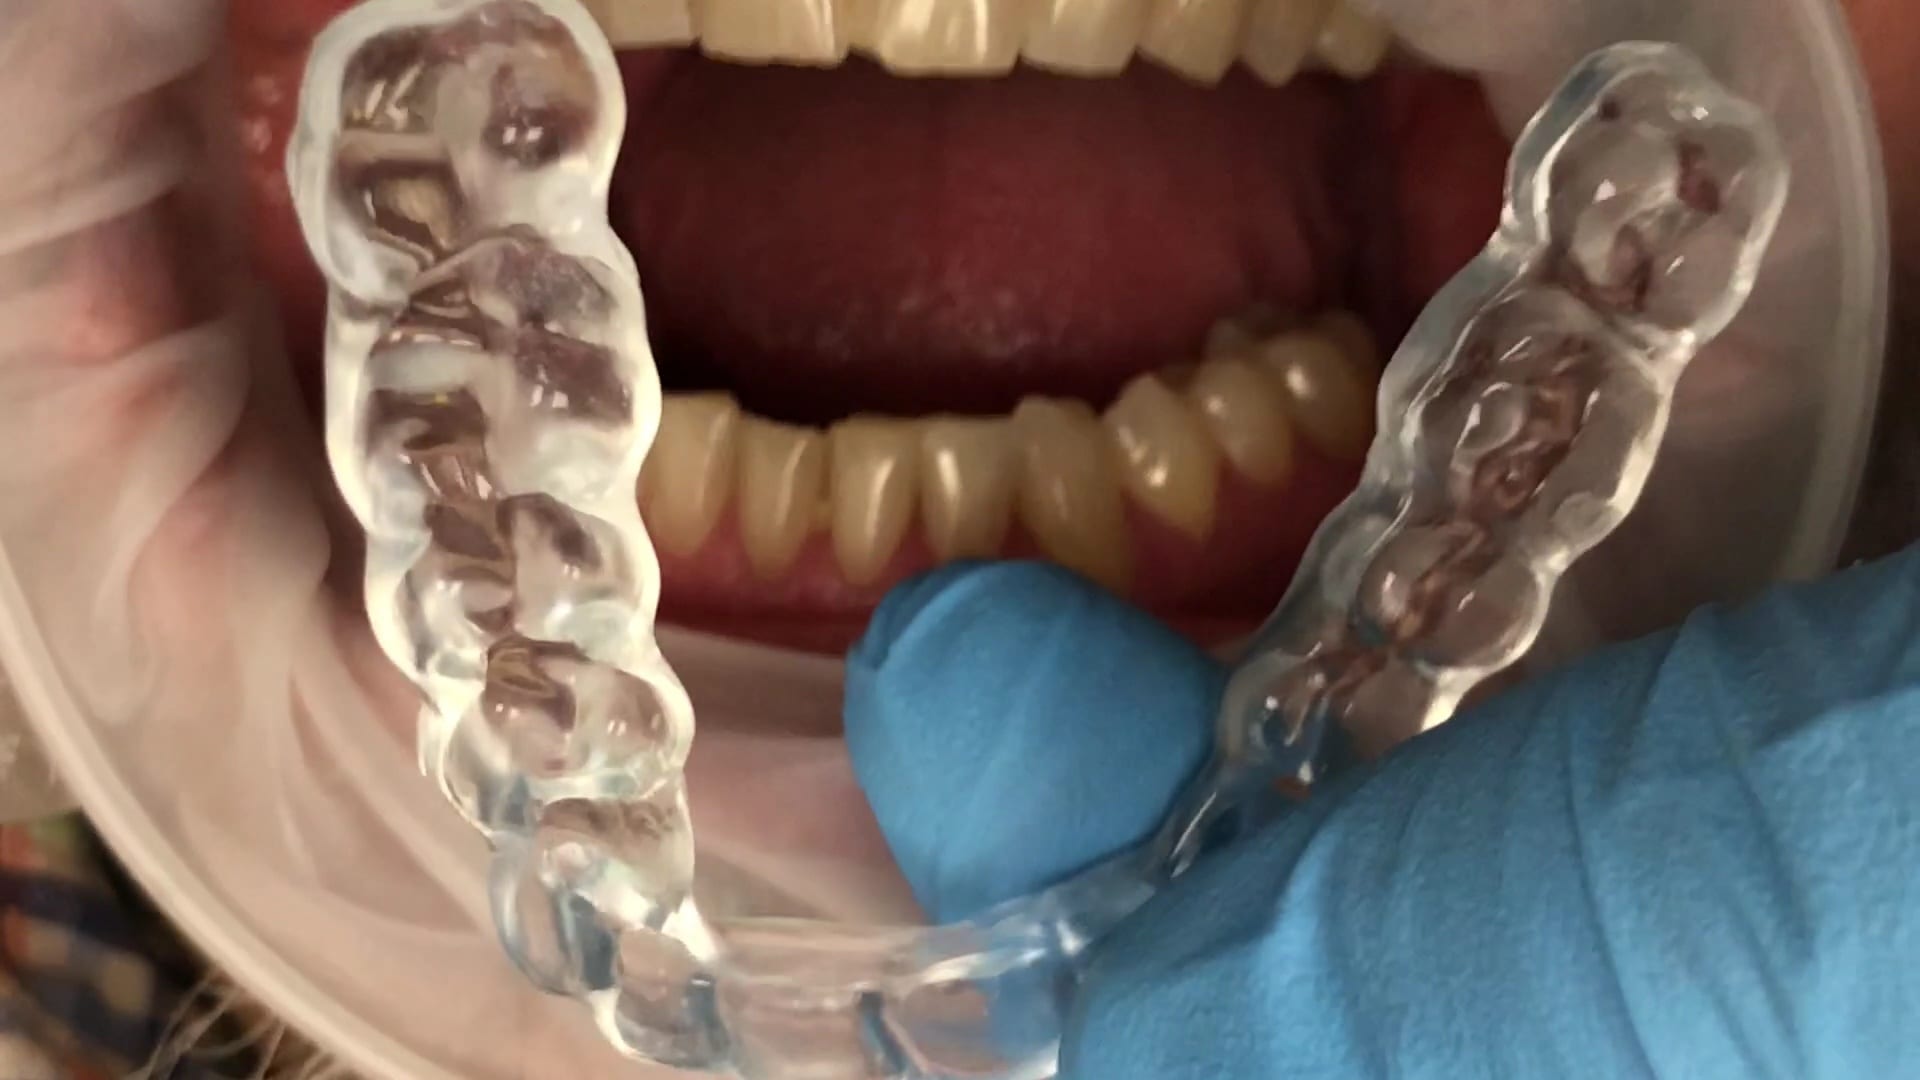
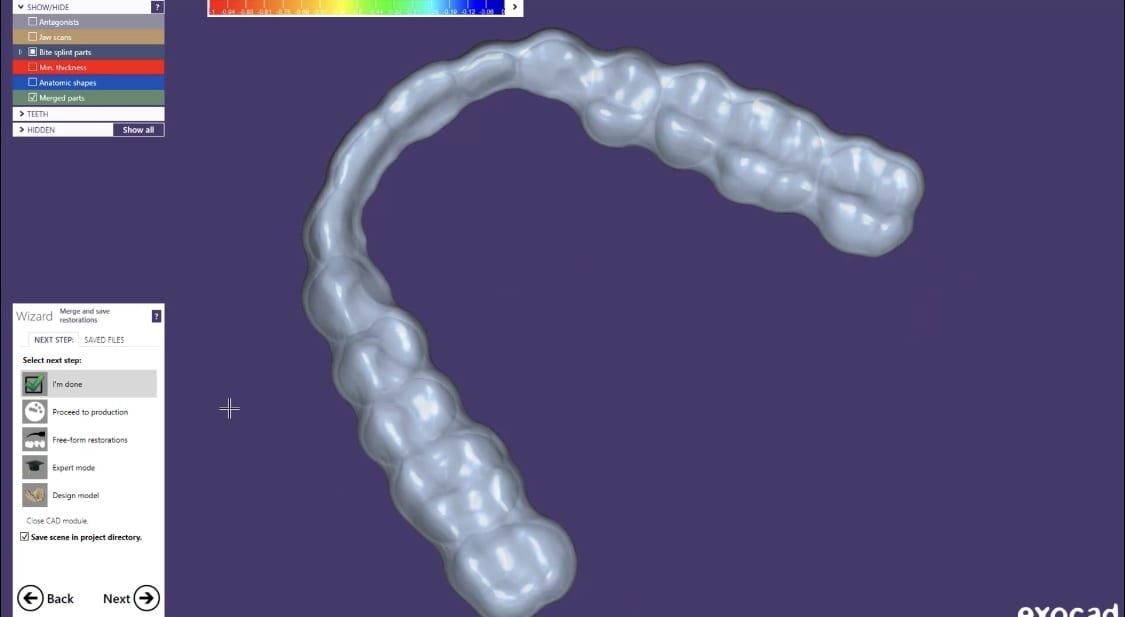
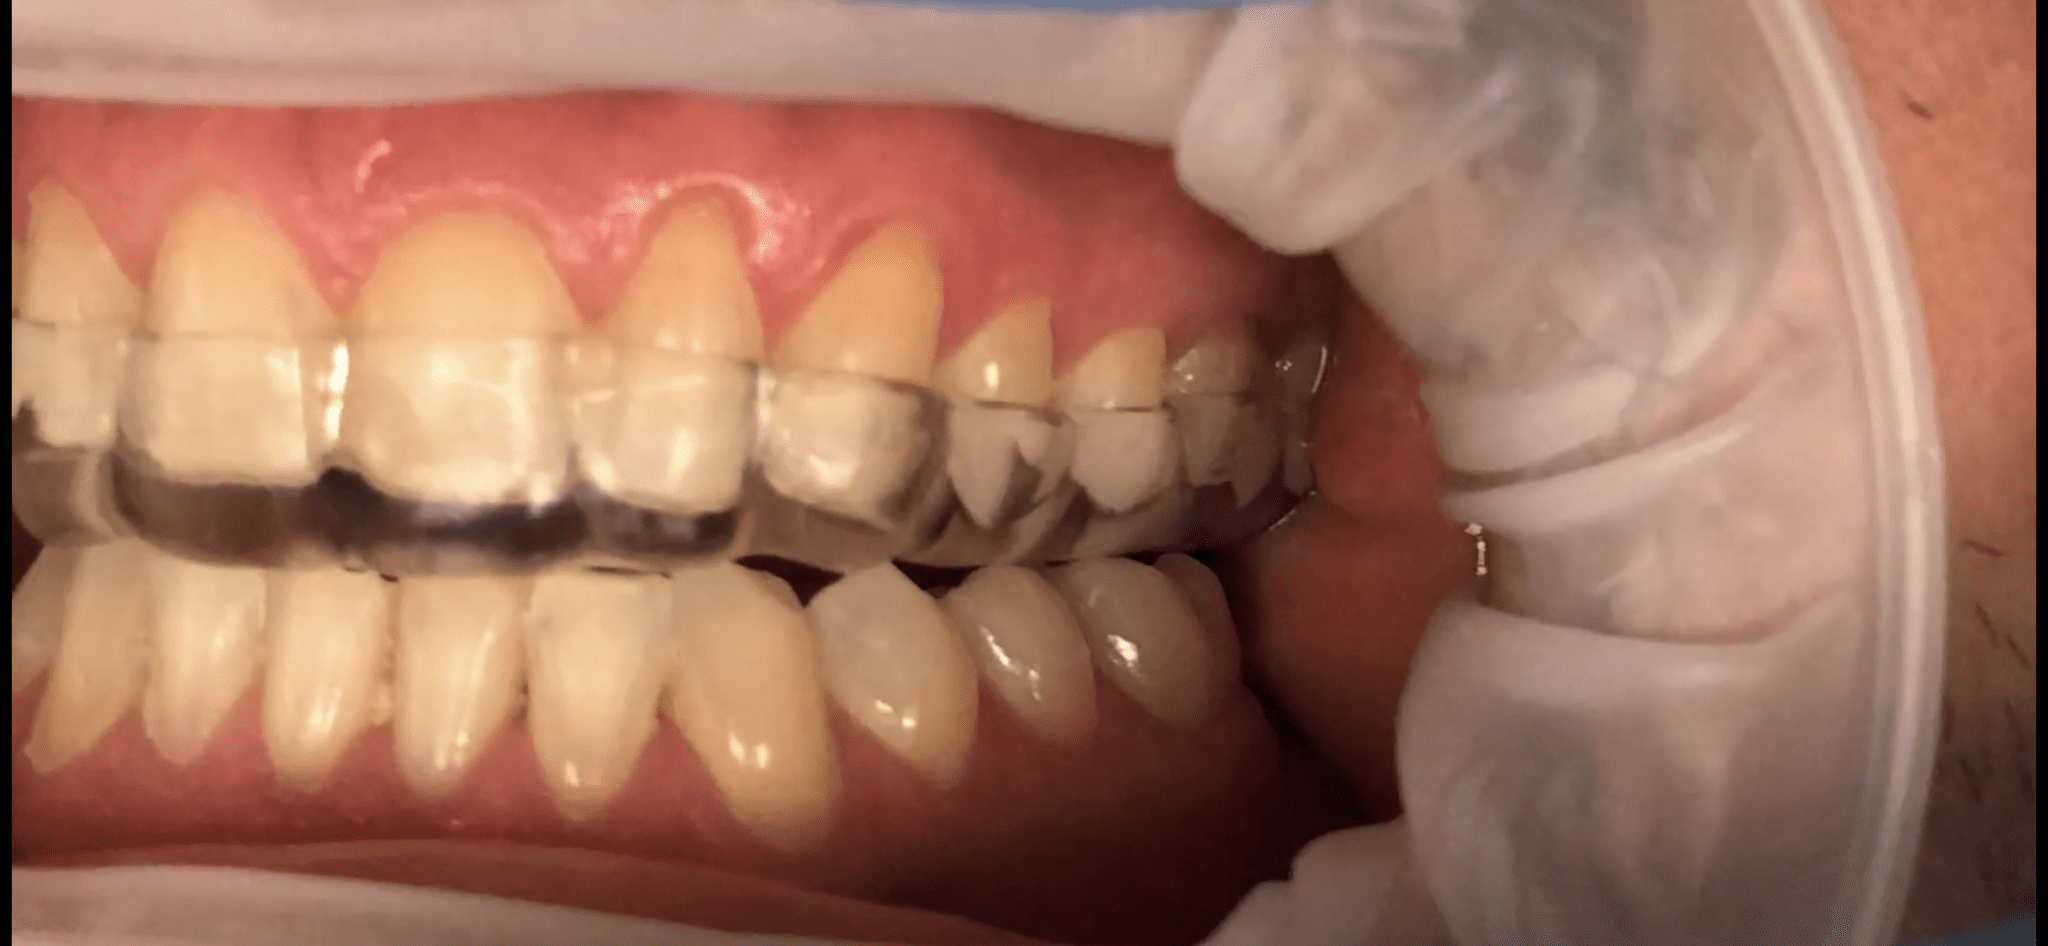
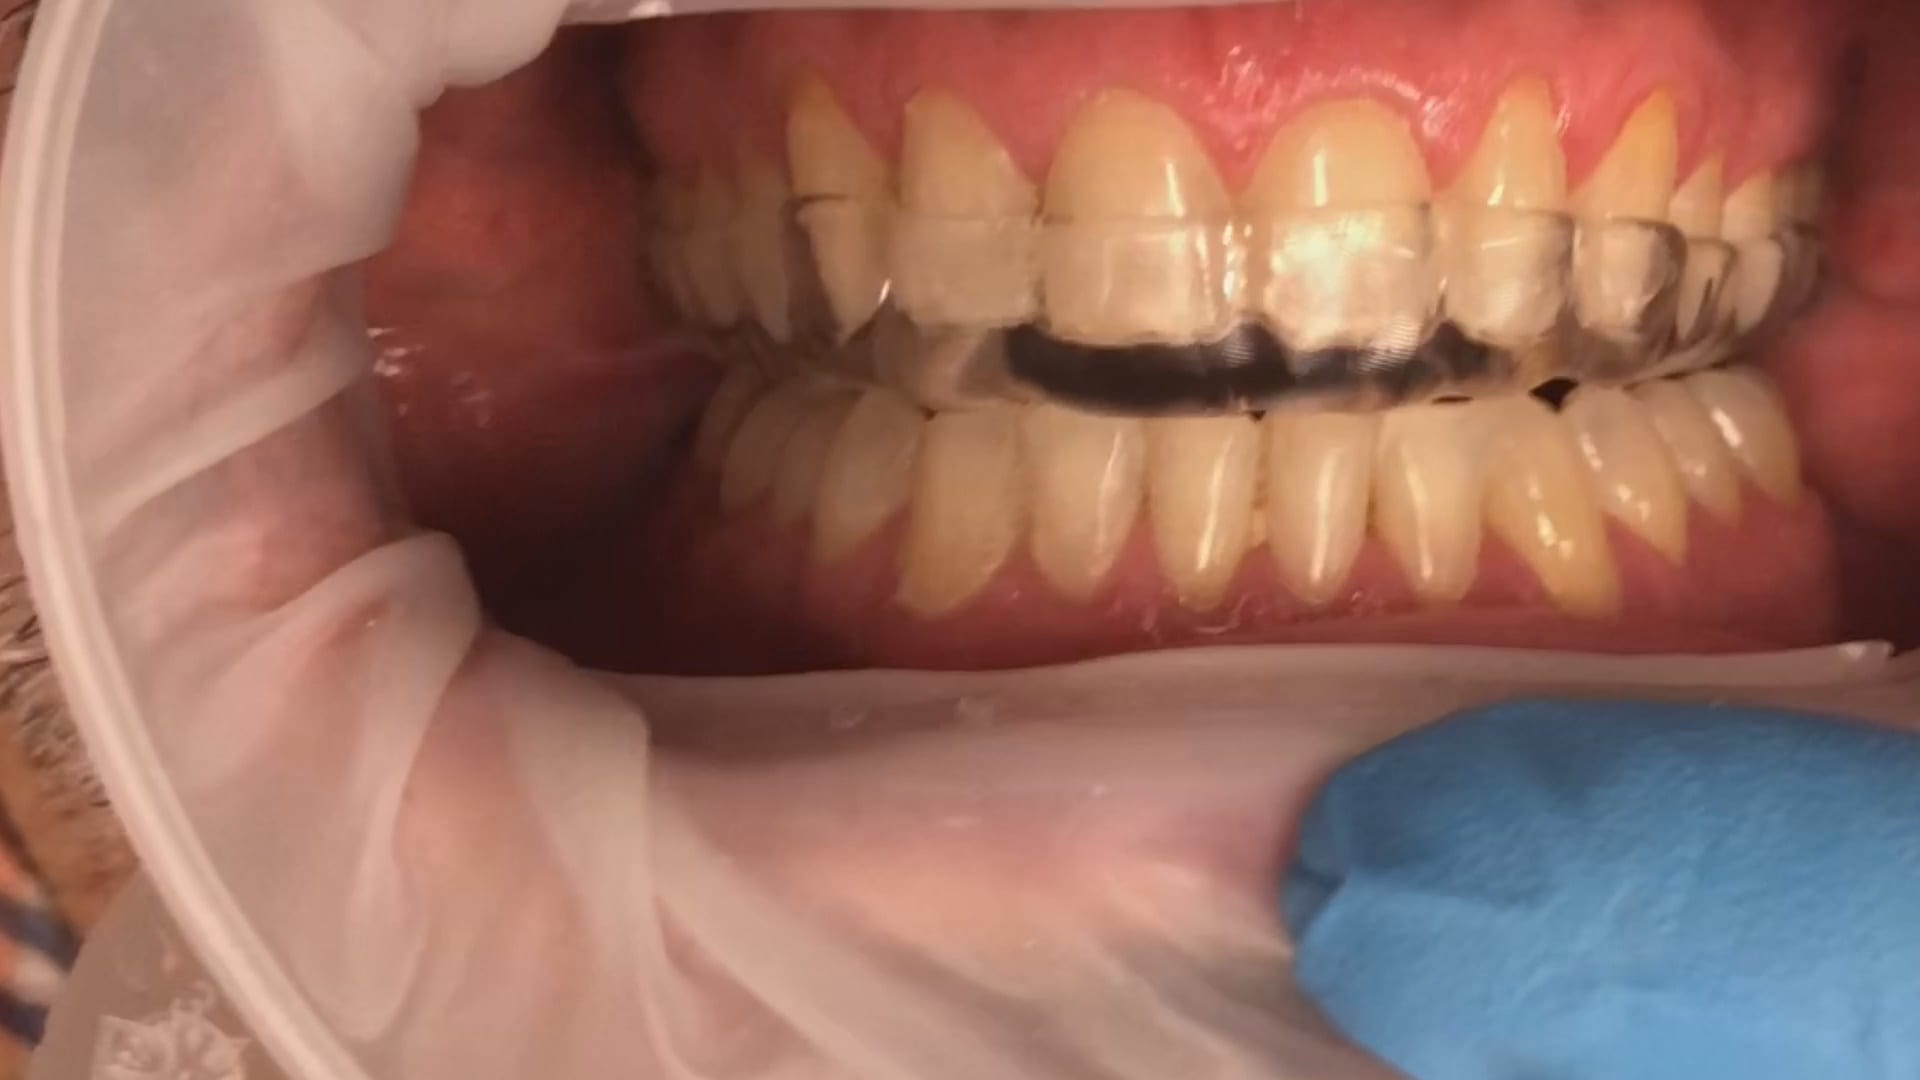
One of our favorite procedures to perform with digital dentistry are occlusal appliances where you open the vertical (for an occlusal guard for bruxism) or when you open the vertical and advance the jaw forward to create an airway passage for snoring and/or sleep appliances.
A method that is very simple that we use is to capture two buccal bites while the patient is biting on two cotton rolls on both sides. You place the cotton roll in such a manner so that the second molars and their clearance are clearly visible.
This allows you to asses the thickness you can achieve in the appliance and to assess the open bite in the anterior. It is very important to tell the patient you will be capturing the bite on both sides and that they should hold that position until you instruct them to otherwise. The cotton rolls give them the perfect tactile sensation to keep them in place without opening or closing their jaws. The best part of this is when the appliance is delivered, there is little to no adjustment to perform.
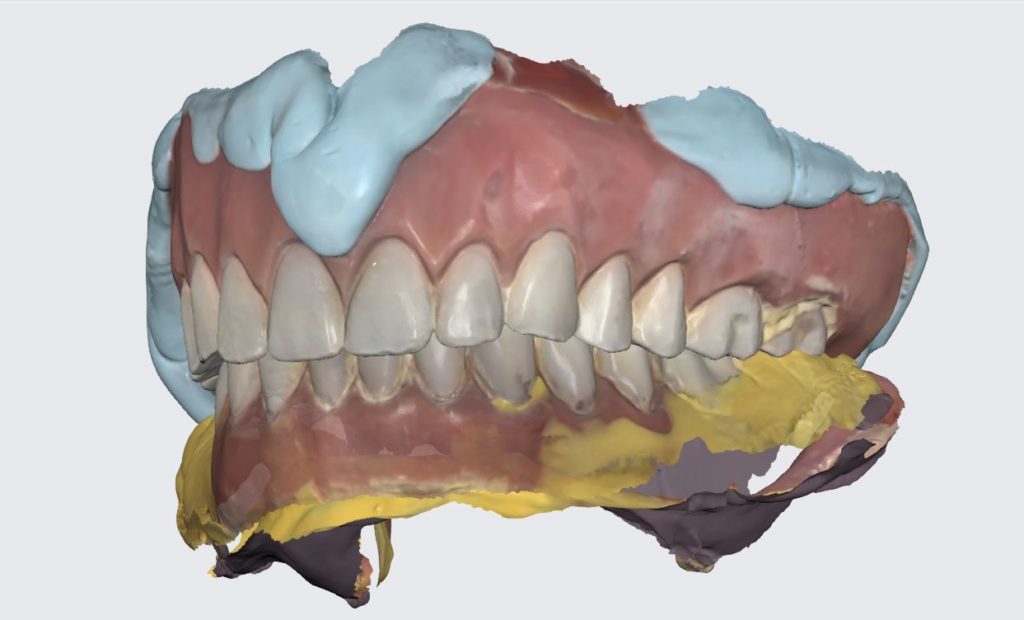
Once the upper jaw and the lower jaw are imaged, the data is then transferred to CAD software, in this case exocad. You can see how we first edit the mesial contact of the first molar in anticipation of future dental work. We bulked out the area to accommodate any future dental work. The occlusal scheme is taken into consideration when designing the prosthesis which is then milled and delivered to the patient
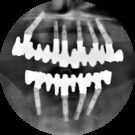
We take a CT scan on all new patient exams and there are quite a lot of diagnostic information you can gather from that data set by itself, or for orthodontic measurements. Here, we merged the data sets and reveal how you can pick up on matters like a deviated septum and a mucous retention cyst. You can also utilize these data sets to view the head of the condyle at maximum intercuspation or with the appliance in place. The appliance did not need a single adjustment neither on the occlusal surface, nor in the intaglio

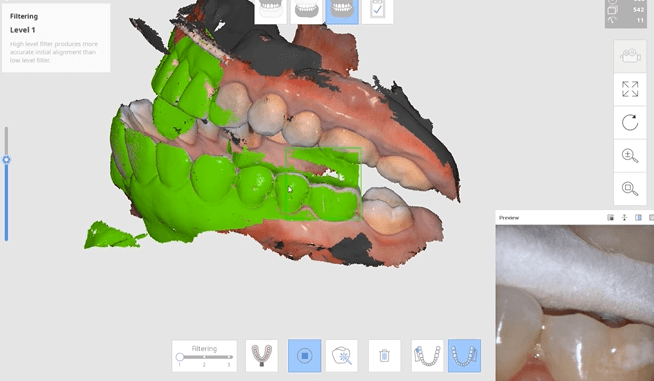
A lot of our users are migrating to SSD Drives which greatly speeds up processing and graphics rendering in intense software applications. When you are capturing scans with the Medit i500 you can quickly fill up your hard drive with law videos (which is technically a series of thousands of images) and when you process the case, the data is converted into small 30-50 MB size digital models
In previous versions of the software that data was only stored on your local machine, which meant you could not log into another computer to add or edit your live video images. You now can sync the data through the cloud so you can access it anywhere, or you can delete the raw footage from the preview screen. In previous versions you would have to search hidden folders to find this data, but now it is readily available and you can dump the data with one click. You do not delete your models in this situation.


Titanium blanks are the hottest topic in digital dentistry in 2019. A lot of new milling machines can mill emax, zirconia, and custom metal abutments.
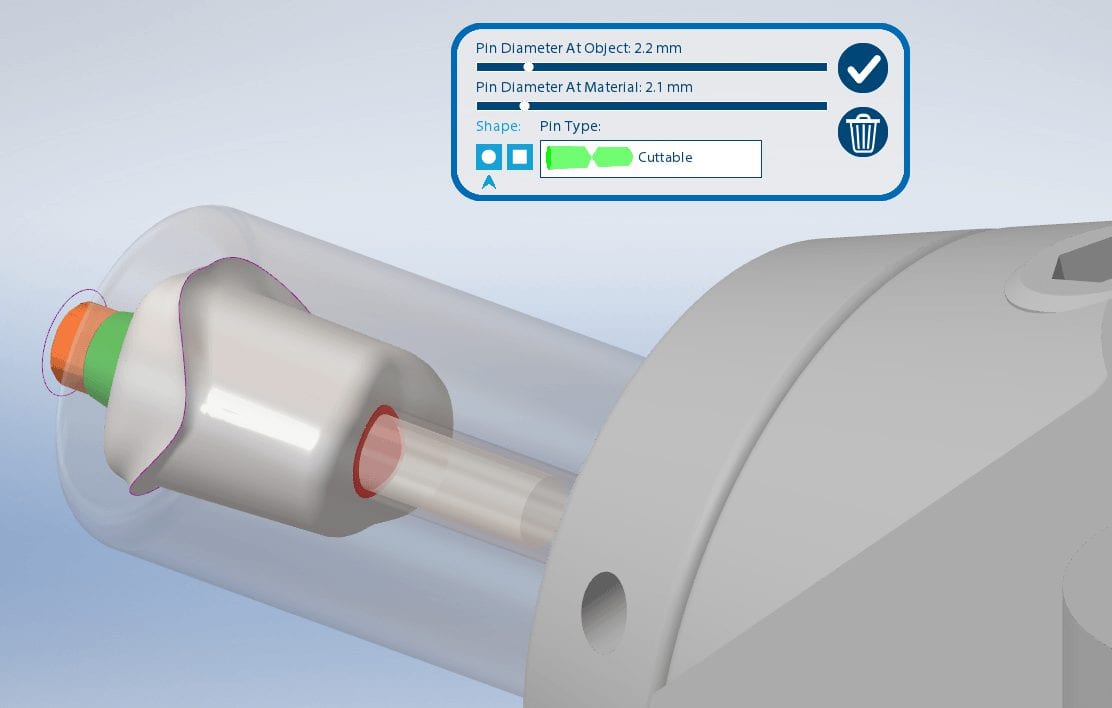
One of the parameters to keep in mind when milling them is the diameter of the screw access channel. Most CAM will carve them out but leave a lot of finishing processes remaining.

We’ve tested quite a lot of mills with the imes icore coritec one and the milbox cam software. If you set the settings to 2.5 mm’s , you can pee off the excess sprue material with just finger pressure, dramatically reducing the free hand work that you would have to do.
The pin diameter at object and at material under 2.5 mm’s will give you inconsistent results.


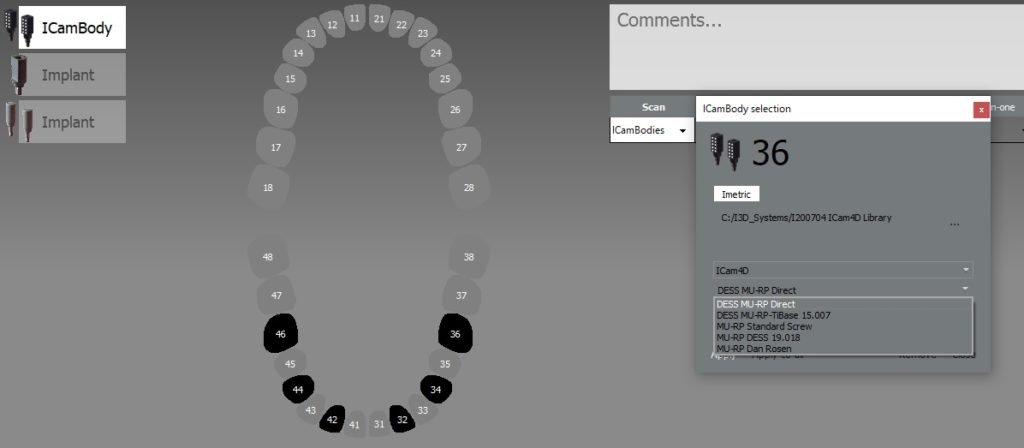
Most scanners will export the jaw model and the scanbody model separately but a new feature on the Medit upcoming software will let you export them as individual models or as a single merged model.
There are design advantages to both scenarios based on the practitioners skill level!


There are numerous ways to quickly check a model before taking it to a design software. Windows comes with at least 3 such free software. Another one to have handy is called 3dviewer.net to let you verify models really quickly


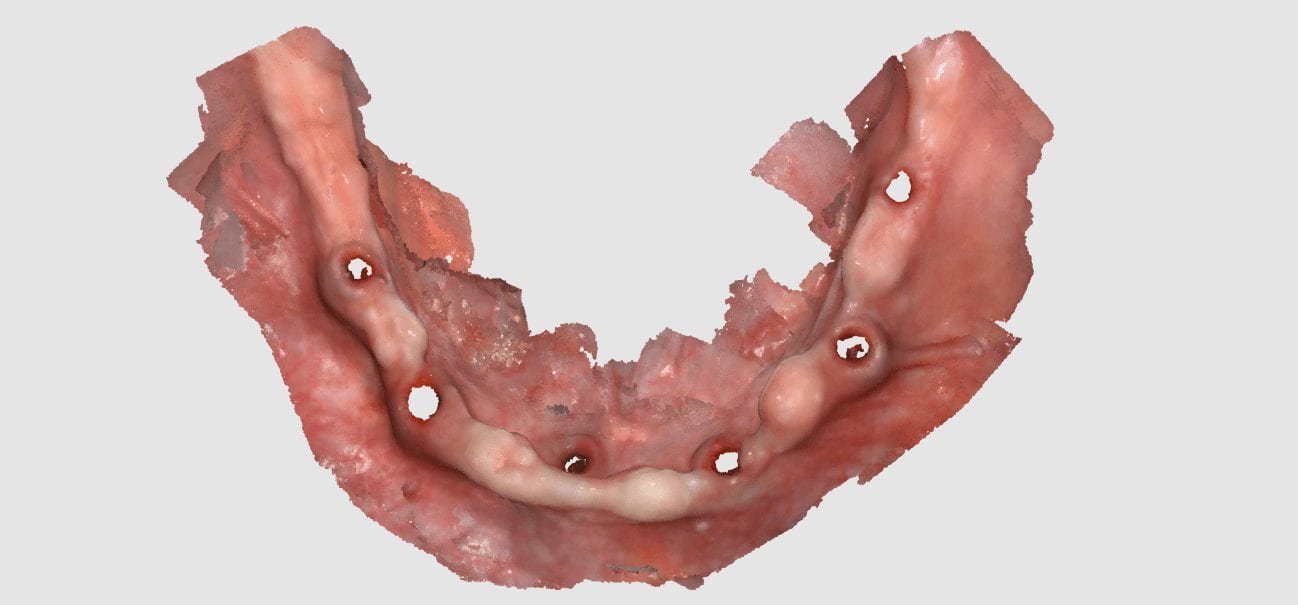
In this case presentation, we scan a patient with the medit i500 for implant planning and restorations in the upper left quadrant. At first, you will notice how the camera was slow to capture the arch due to water spots on the mirror of the camera tip. Once these water spots were removed, the imaging was rapid and the whole upper arch was imaged in just a minute.


Once the upper arch was digitize it was automatically merged with the dicom data from a ct scan in the blueskybio software. This automated step saves quite a lot of time and is rapidly becoming a reliable solution. It is imperative that you do NOT form a base or close holes in your intra-oral scans so that the software has an easier time to stitch the models together.
The implant case was designed and a surgical stent was fabricated for fully guided surgery. The lip line and the tooth position will be a challenge and the angulation will have to be corrected with an angled abutment


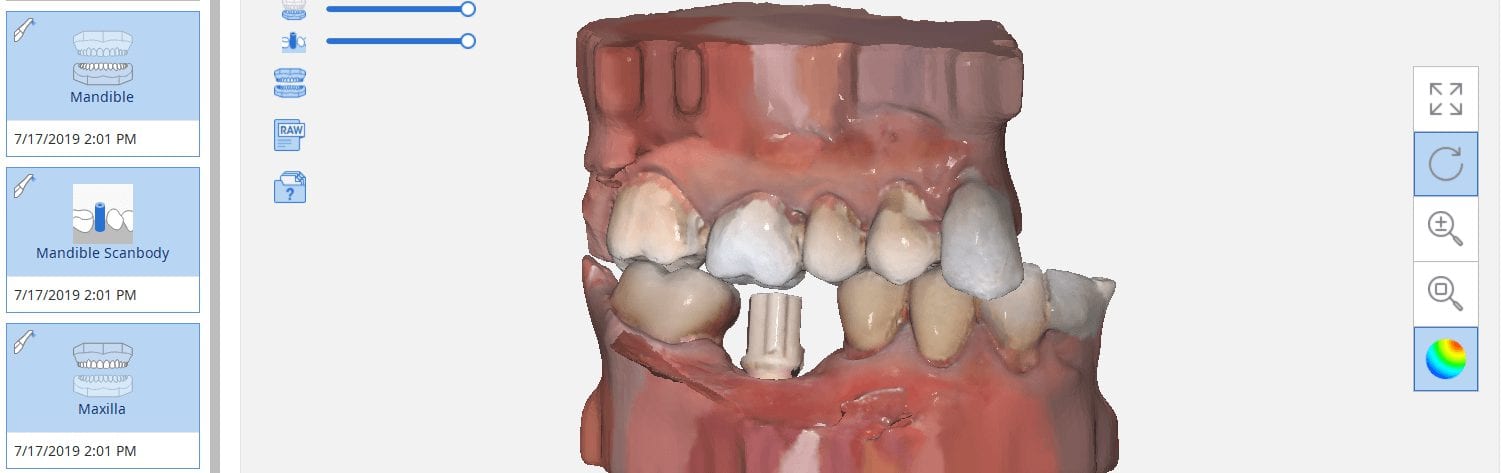
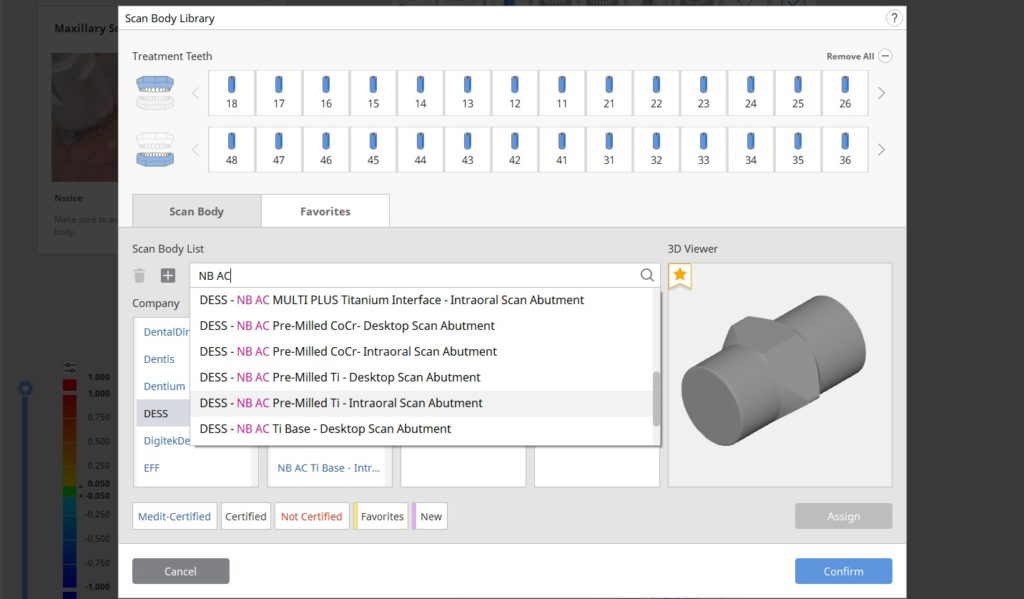
The Medit i500 software can now identify a scanbody and digitally place a virtual one in its location. This has a lot of ramifications. For starters, this great opportunity affords a dentist the ability to image multiple implants in long span edentulous areas, where you would have a clear indication of distortion or artifact introduced during challenging scans.
In this single unit case in the video below, we preview this feature. Once the patient is anesthetized, the isolite was placed to protect the airway and the edentulous area was scanned.

After uncovery of the fixture, the type of scanbody was identified in the menu and the location of the scanbody was identified on the digital model.
Once scanning was resumed, the digital scanbody was placed on top of the intra-oral one. As more data was captured you can appreciate how steadily the software tries to adapt the physical fixture to the digital one.


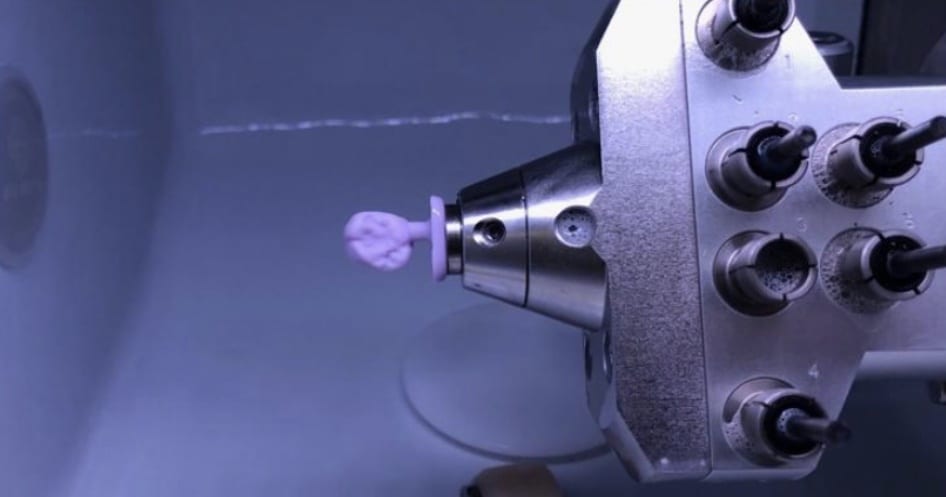
Here is the same crown milled in detail in 30 minutes with the additional 0.6 mm drill finishing the intaglio and the occlusal anatomy


In this particular case, we designed an occlusal splint for a patient that is a heavy bruxer. We captured the bite by having the patient gently bite down on cotton rolls on both sides. The first purpose of this is to block out the tongue and the orophayrynx when imaging the buccal bite. But it can also help you find the proper vertical dimension and dramatically reduces the time it takes to deliver an appliance.
Ideally, you place the cotton rolls in such a manner so that you don’t obstruct your view of the second molars. This allows you to see and verify the proper clearance in the most critical area! If you take it one step further and design the guard to the opposing, your seat appointments are just a few minutes long.
Once the upper jaw and the lower jaw are related to each other in the medit scan, and the clearance is verified, the models are brought into exocad’s Bite Splint Module. The case is designed in the CAD software and then milled with a 5 axis milling machine. This step should ideally be delegated to a lab as it is not practical to fabricate these in the office.
The delivery of the appliance is very predictable when you capture the bite with digital impression and you don’t have to grind away to get the jaws to close in the anterior, as the distance was taken into consideration during the design process.

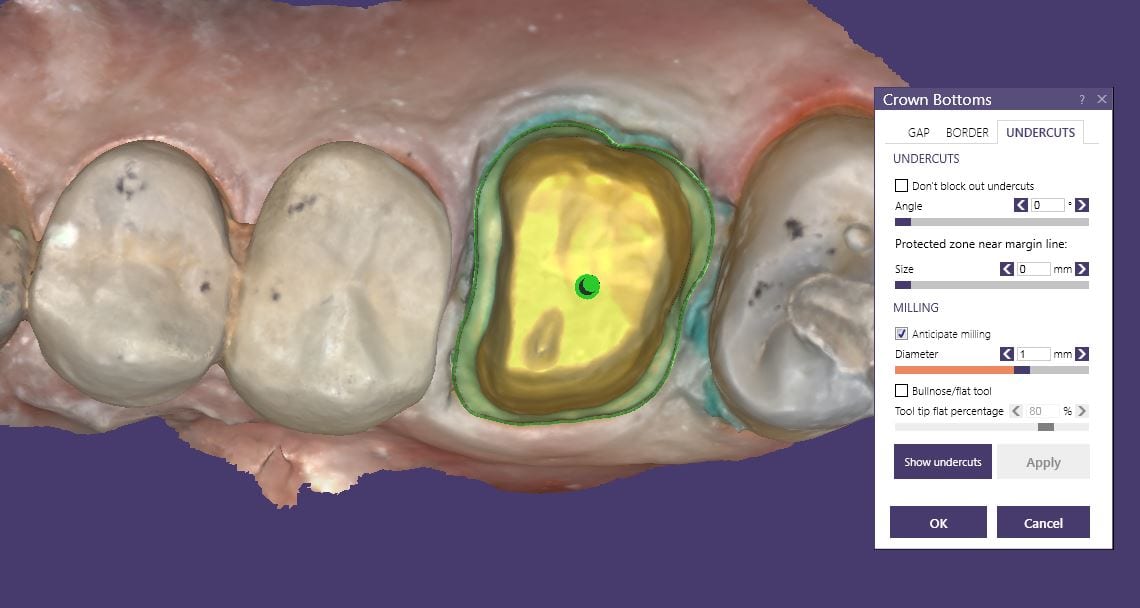
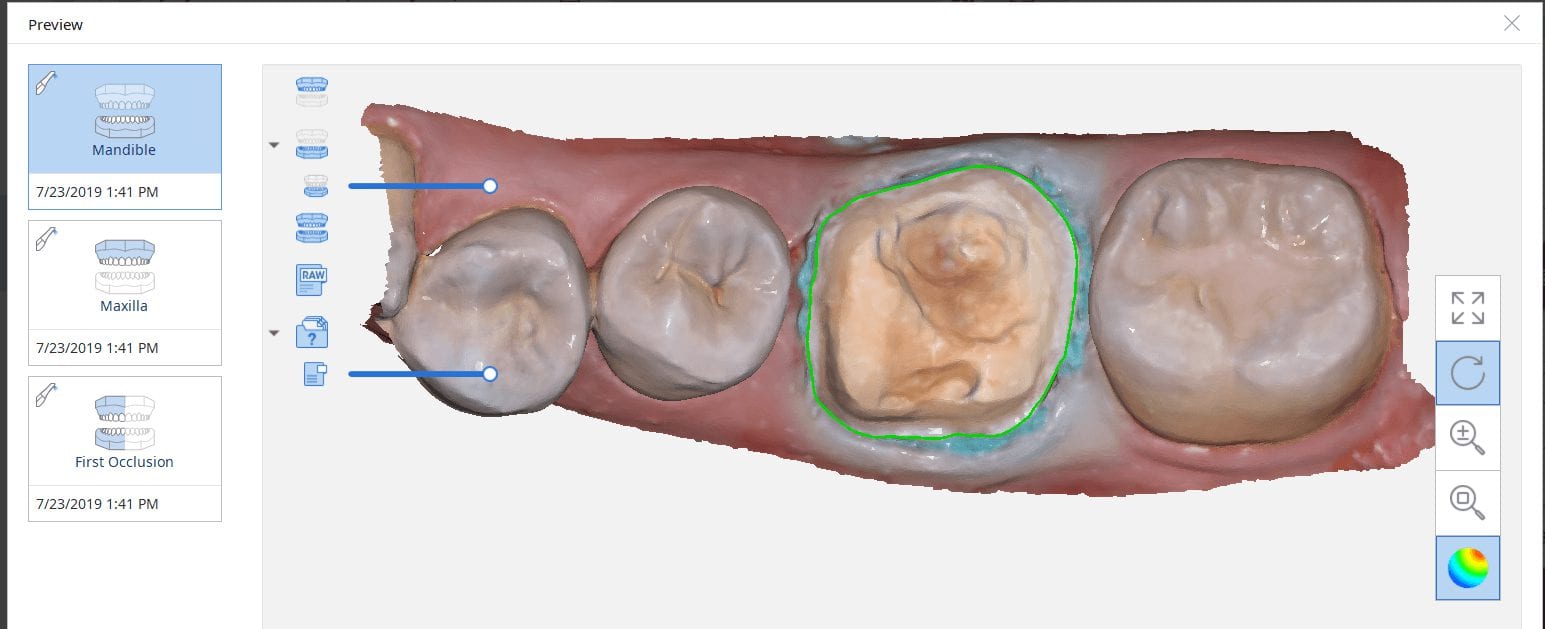
This case shows the amount of control one can have over the fit of a restoration. The upper right first molar was imaged with the Medit i500 and then imported into exocad design software. Once the margins are marked, the user can then define parameters that affect the fit of the restoration.
The diameter of the drill can be taken into consideration; in the design, 1.0 mm was chosen, but ultimately, we used the 0.6 mm bur to mill the intaglio of the emax restoration. The cement gap can be controlled as can the distance from the margin where it takes effect. The minimum thickness parameter also reinforces the material at the margins which will reduce the chances of chipping and ditching at deep chamfer margins. All of this translates into well fitting restorations with little space needed for the resin. That ultimately translates to easier clean up.
The case was milled using a few different materials and at varying speeds to see how thin the margins could be handled and how much detail the 0.6 mm burr can carve into emax and the glass ceramic material


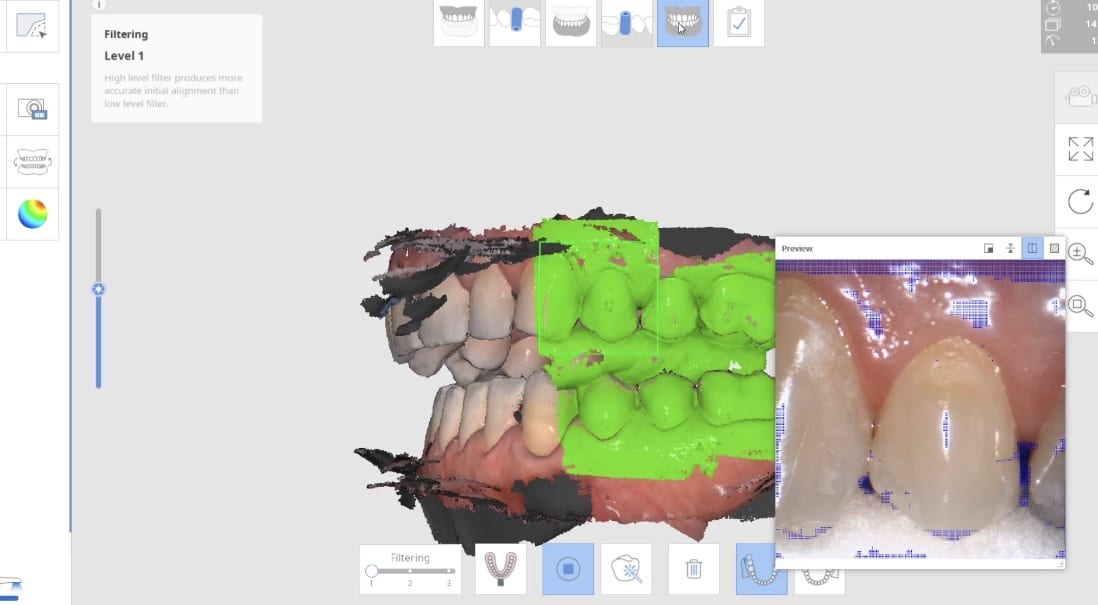
Imaging the edentulous arch is one of the hardest procedures to capture in digital dentistry. In this first video of the Medit i500 we replay the video capture in live color mode to show you how the model is developed. We then change the view to the reliability map that shows you how we use the conversion of the red data to green reliable data and advance the camera forward with the appropriate pace.
Here is how the arch was captured; as advanced users we deliberately image in the reliability mode and watch the images being formed to verify that the data is accurate before advancing the camera forward.
If you wanted to capture the relationship of the one edentulous arch to another, there is a very simple technique you can use with your Medit i500.
WHAT ABOUT THE BITE?
WHAT IF YOU WANT TO DO THIS OUTSIDE THE MOUTH?


There are two advanced techniques that can help you manage the relationship of the jaws to each other and to image the edentulous arch outside the mouth, which is always easier!
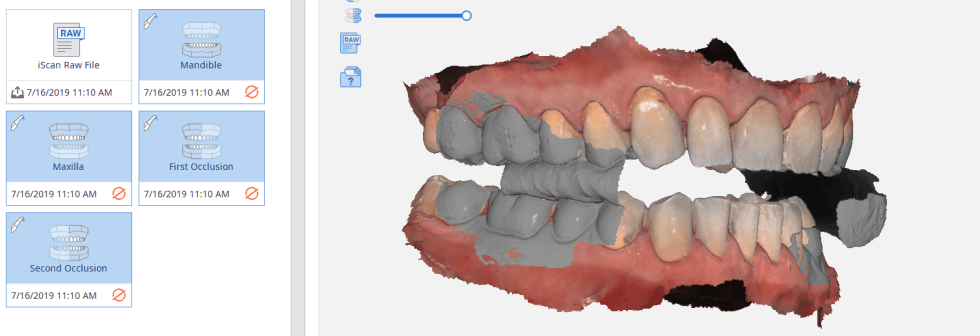
You can scam the opposing (here the upper hybrid was being repaired as the left central incisor had fallen off), scan the denture in place of the appropriate arch, and then you can take the buccal bite.
You can then take the prosthesis out of the mouth and continue imaging it and roll over to the intaglio and capture that information.
You can even reline the prosthesis to get the best adaptation possible, scan that, clone the case, and then use the edit tool to crop out everything but the intaglio. What remains is the edentulous ridge that is properly mounted to the opposing arch where you can start designing the desired final restoration.

Intra-oral scanning for immediate extractions and immediate denture fabrication. Upper and Lower dentition were digitally extracted. The Vertical Dimension and tooth position was preserved for the lab to design the prosthesis.
So easy to manage this situation for immediates as opposed to taking a physical impression and hoping not to inadvertently extract mobile teeth. Plus, the lab knows how to mount the case properly.

Repairing hybrids can be a nightmare. At CAD-Ray, we recommend that you fabricate two sets of the prosthesis so you can swap them out at recall for repair work, or so do you don’t have to ask a patient to part ways with it when a part breaks off from long term function.
Here, we repaired it by milling a restoration that is a mirror of the Right Central Incisor.


You must be logged in to post a comment.